


Plantation Grange
Project Details
About This Project
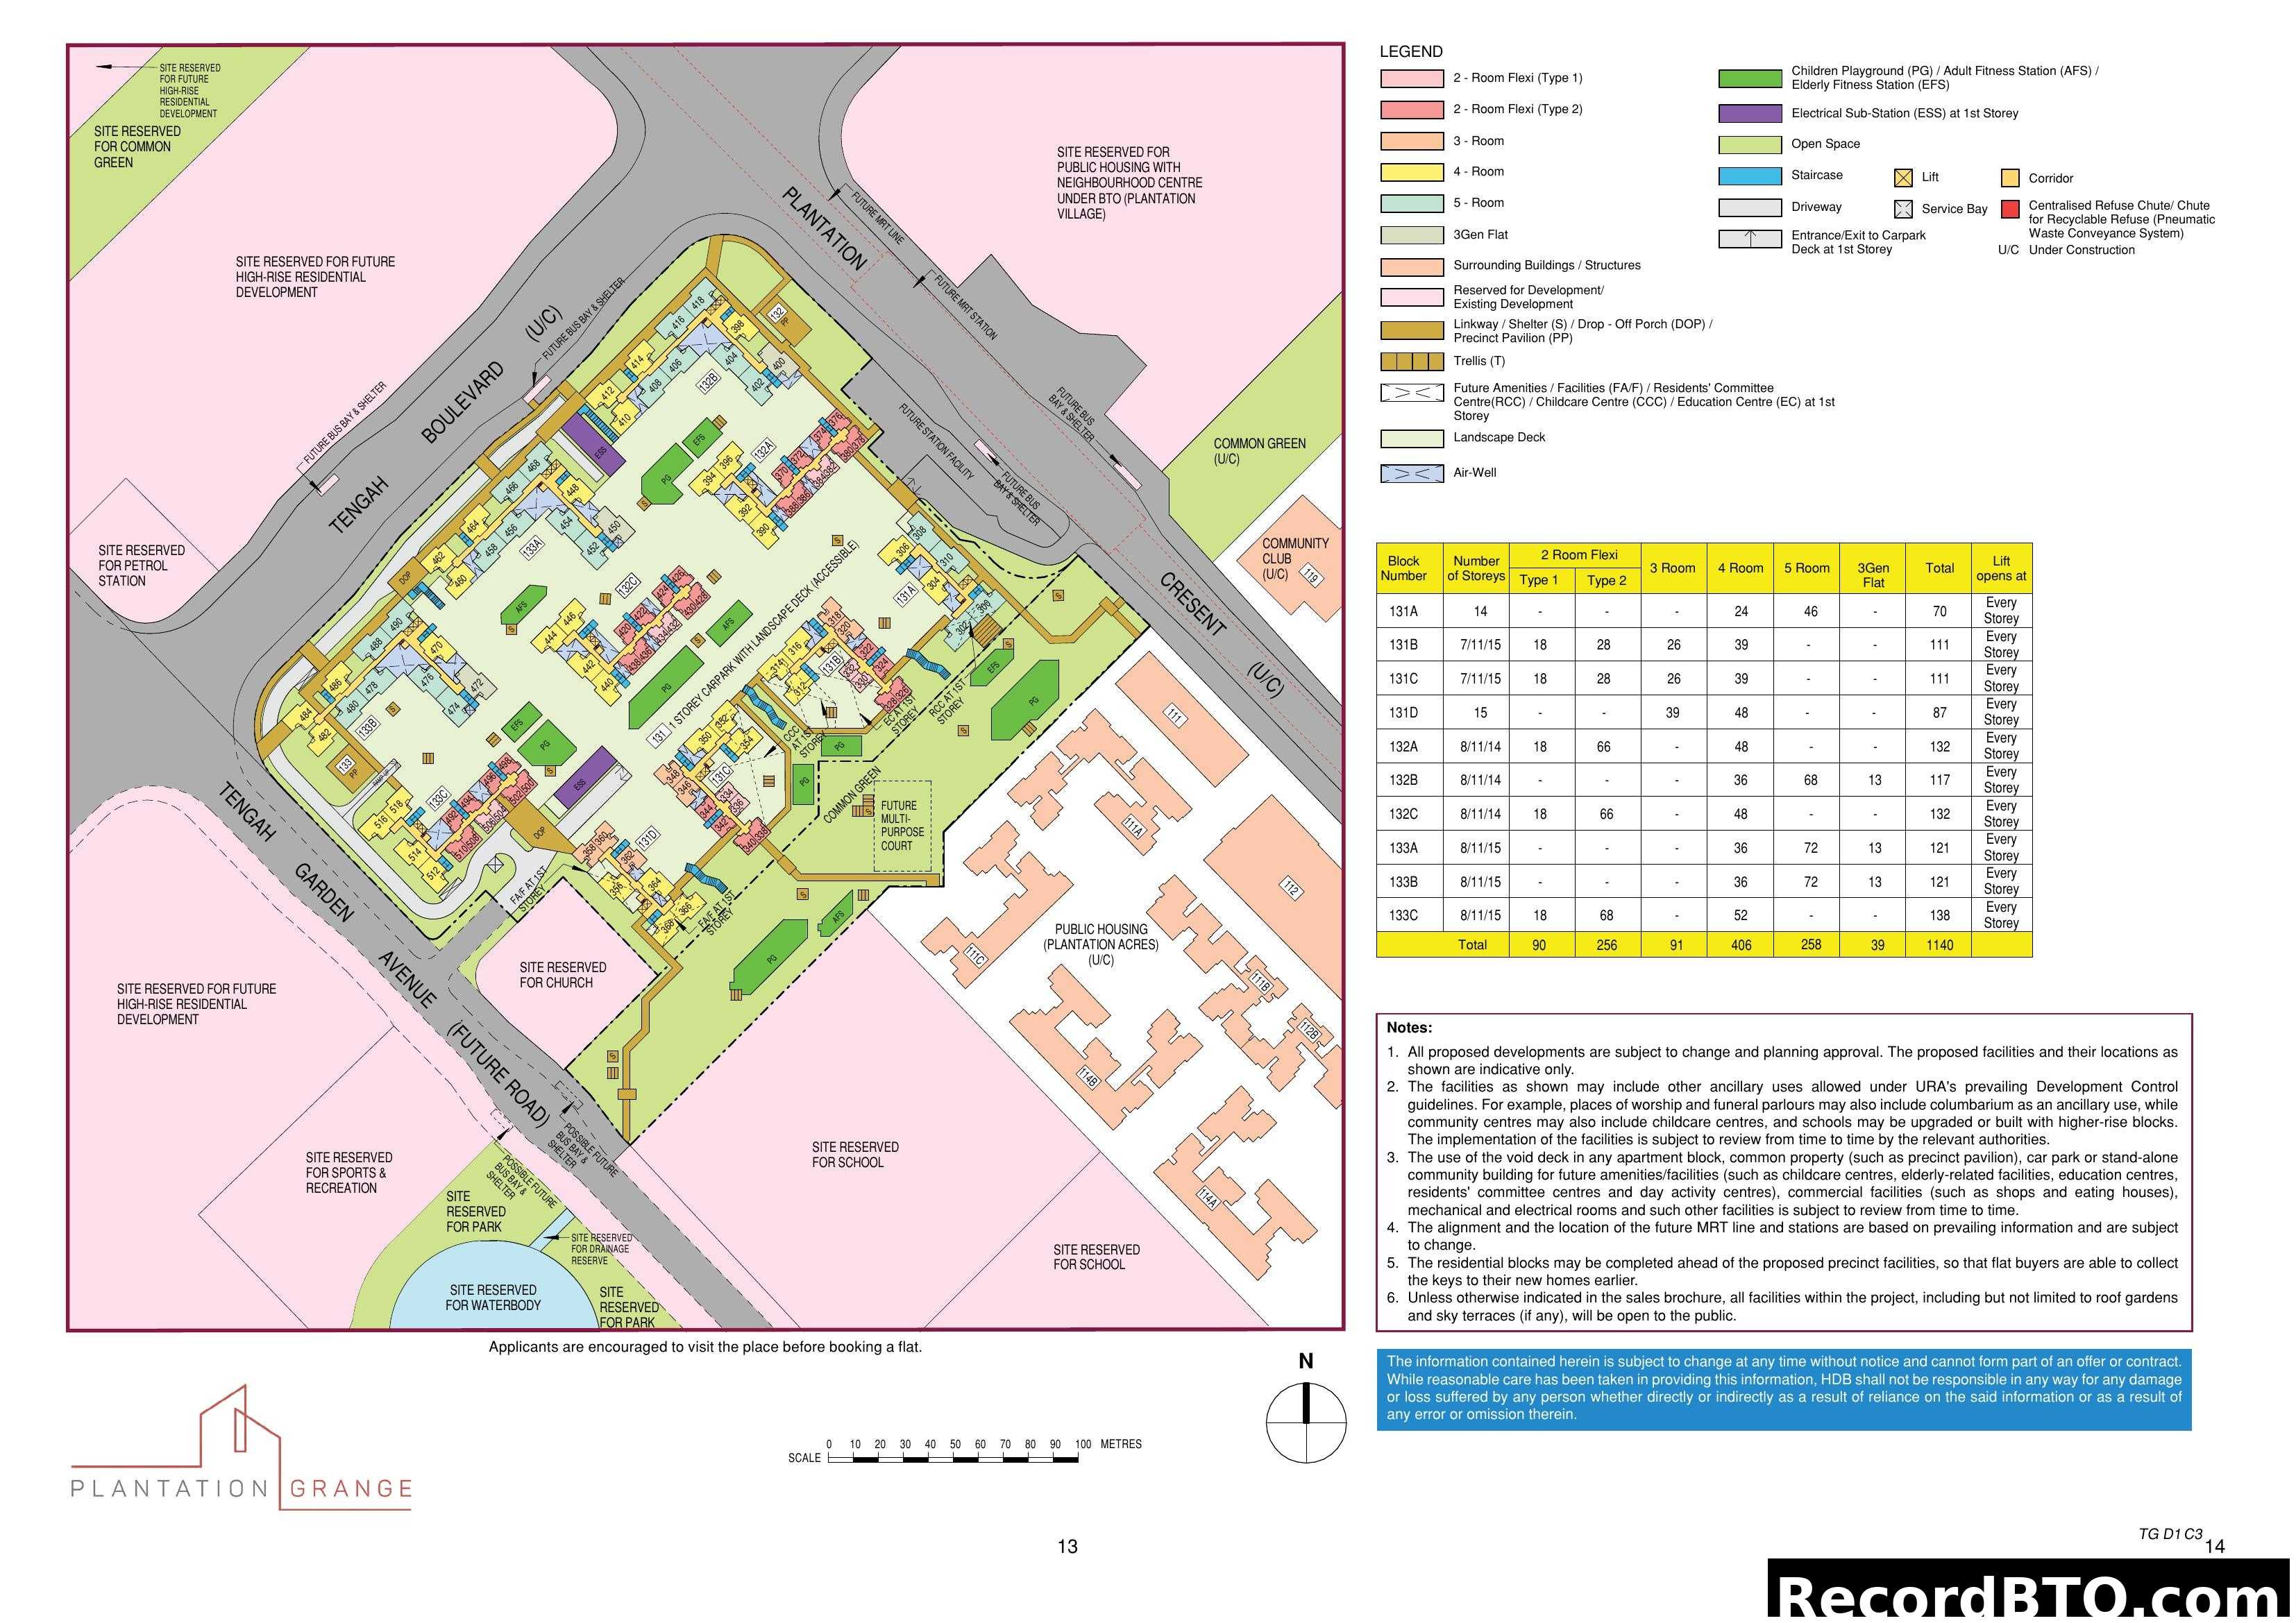
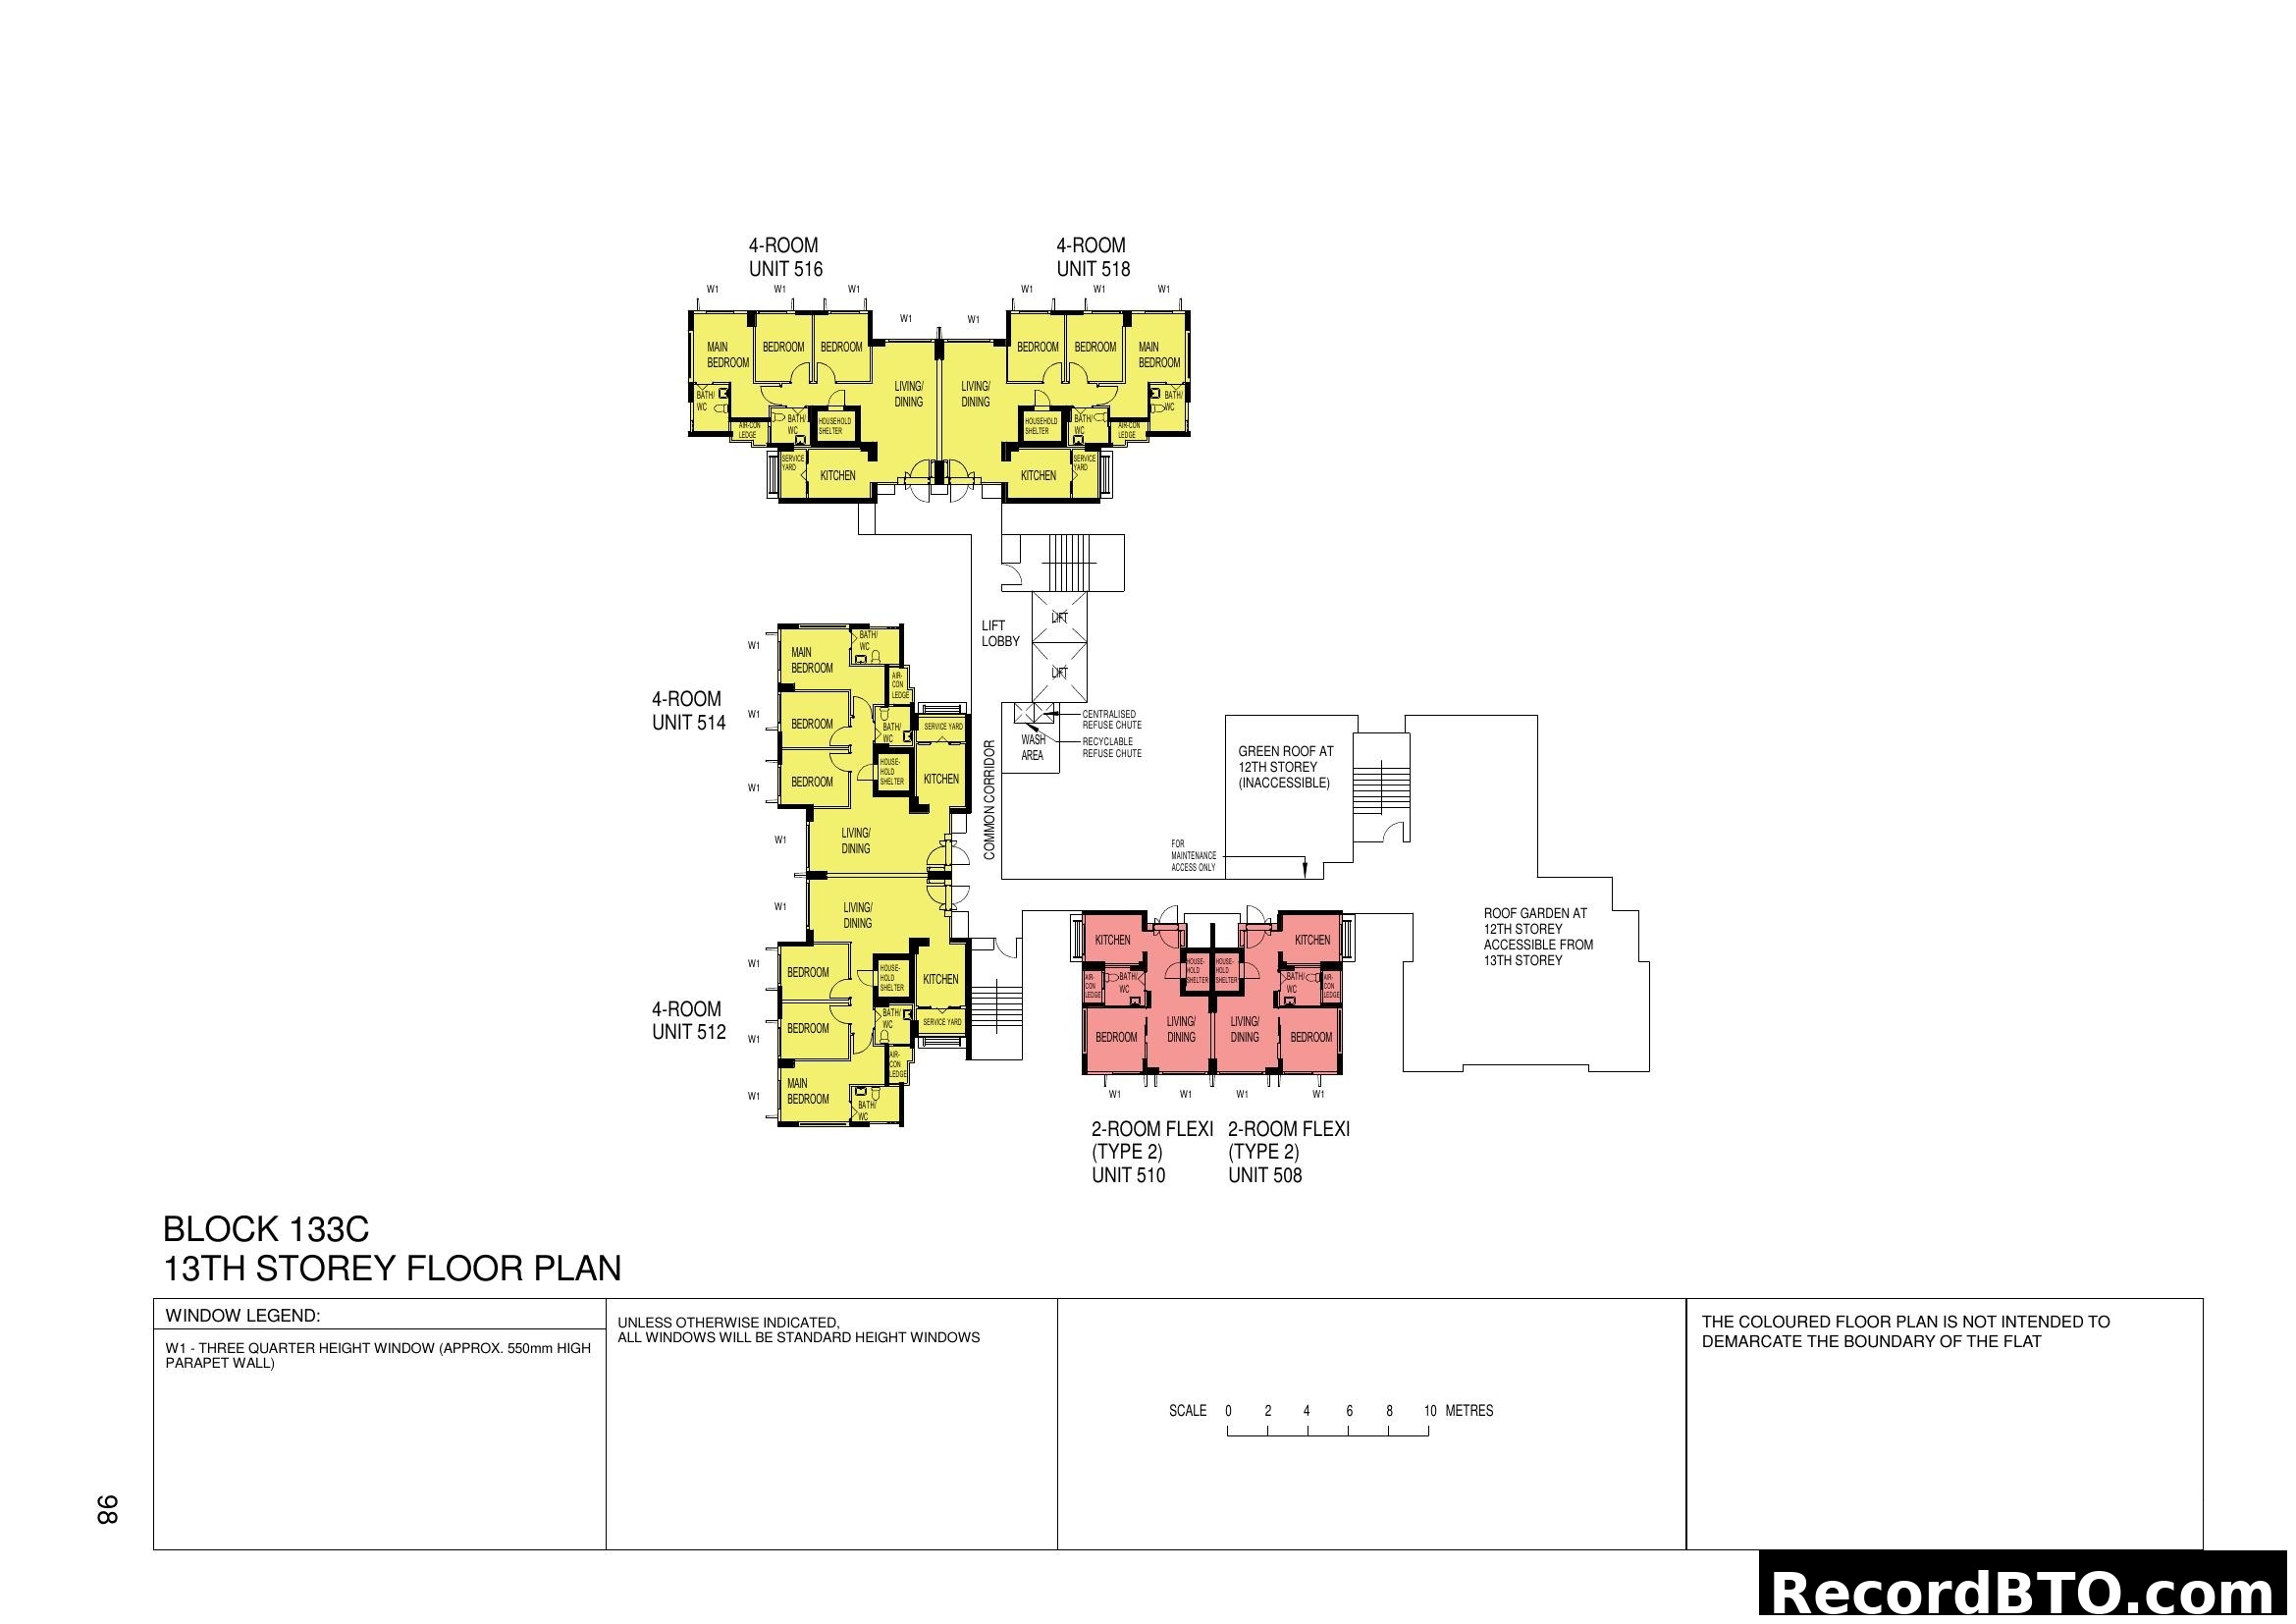
Site Plan
Detailed layout and block arrangement
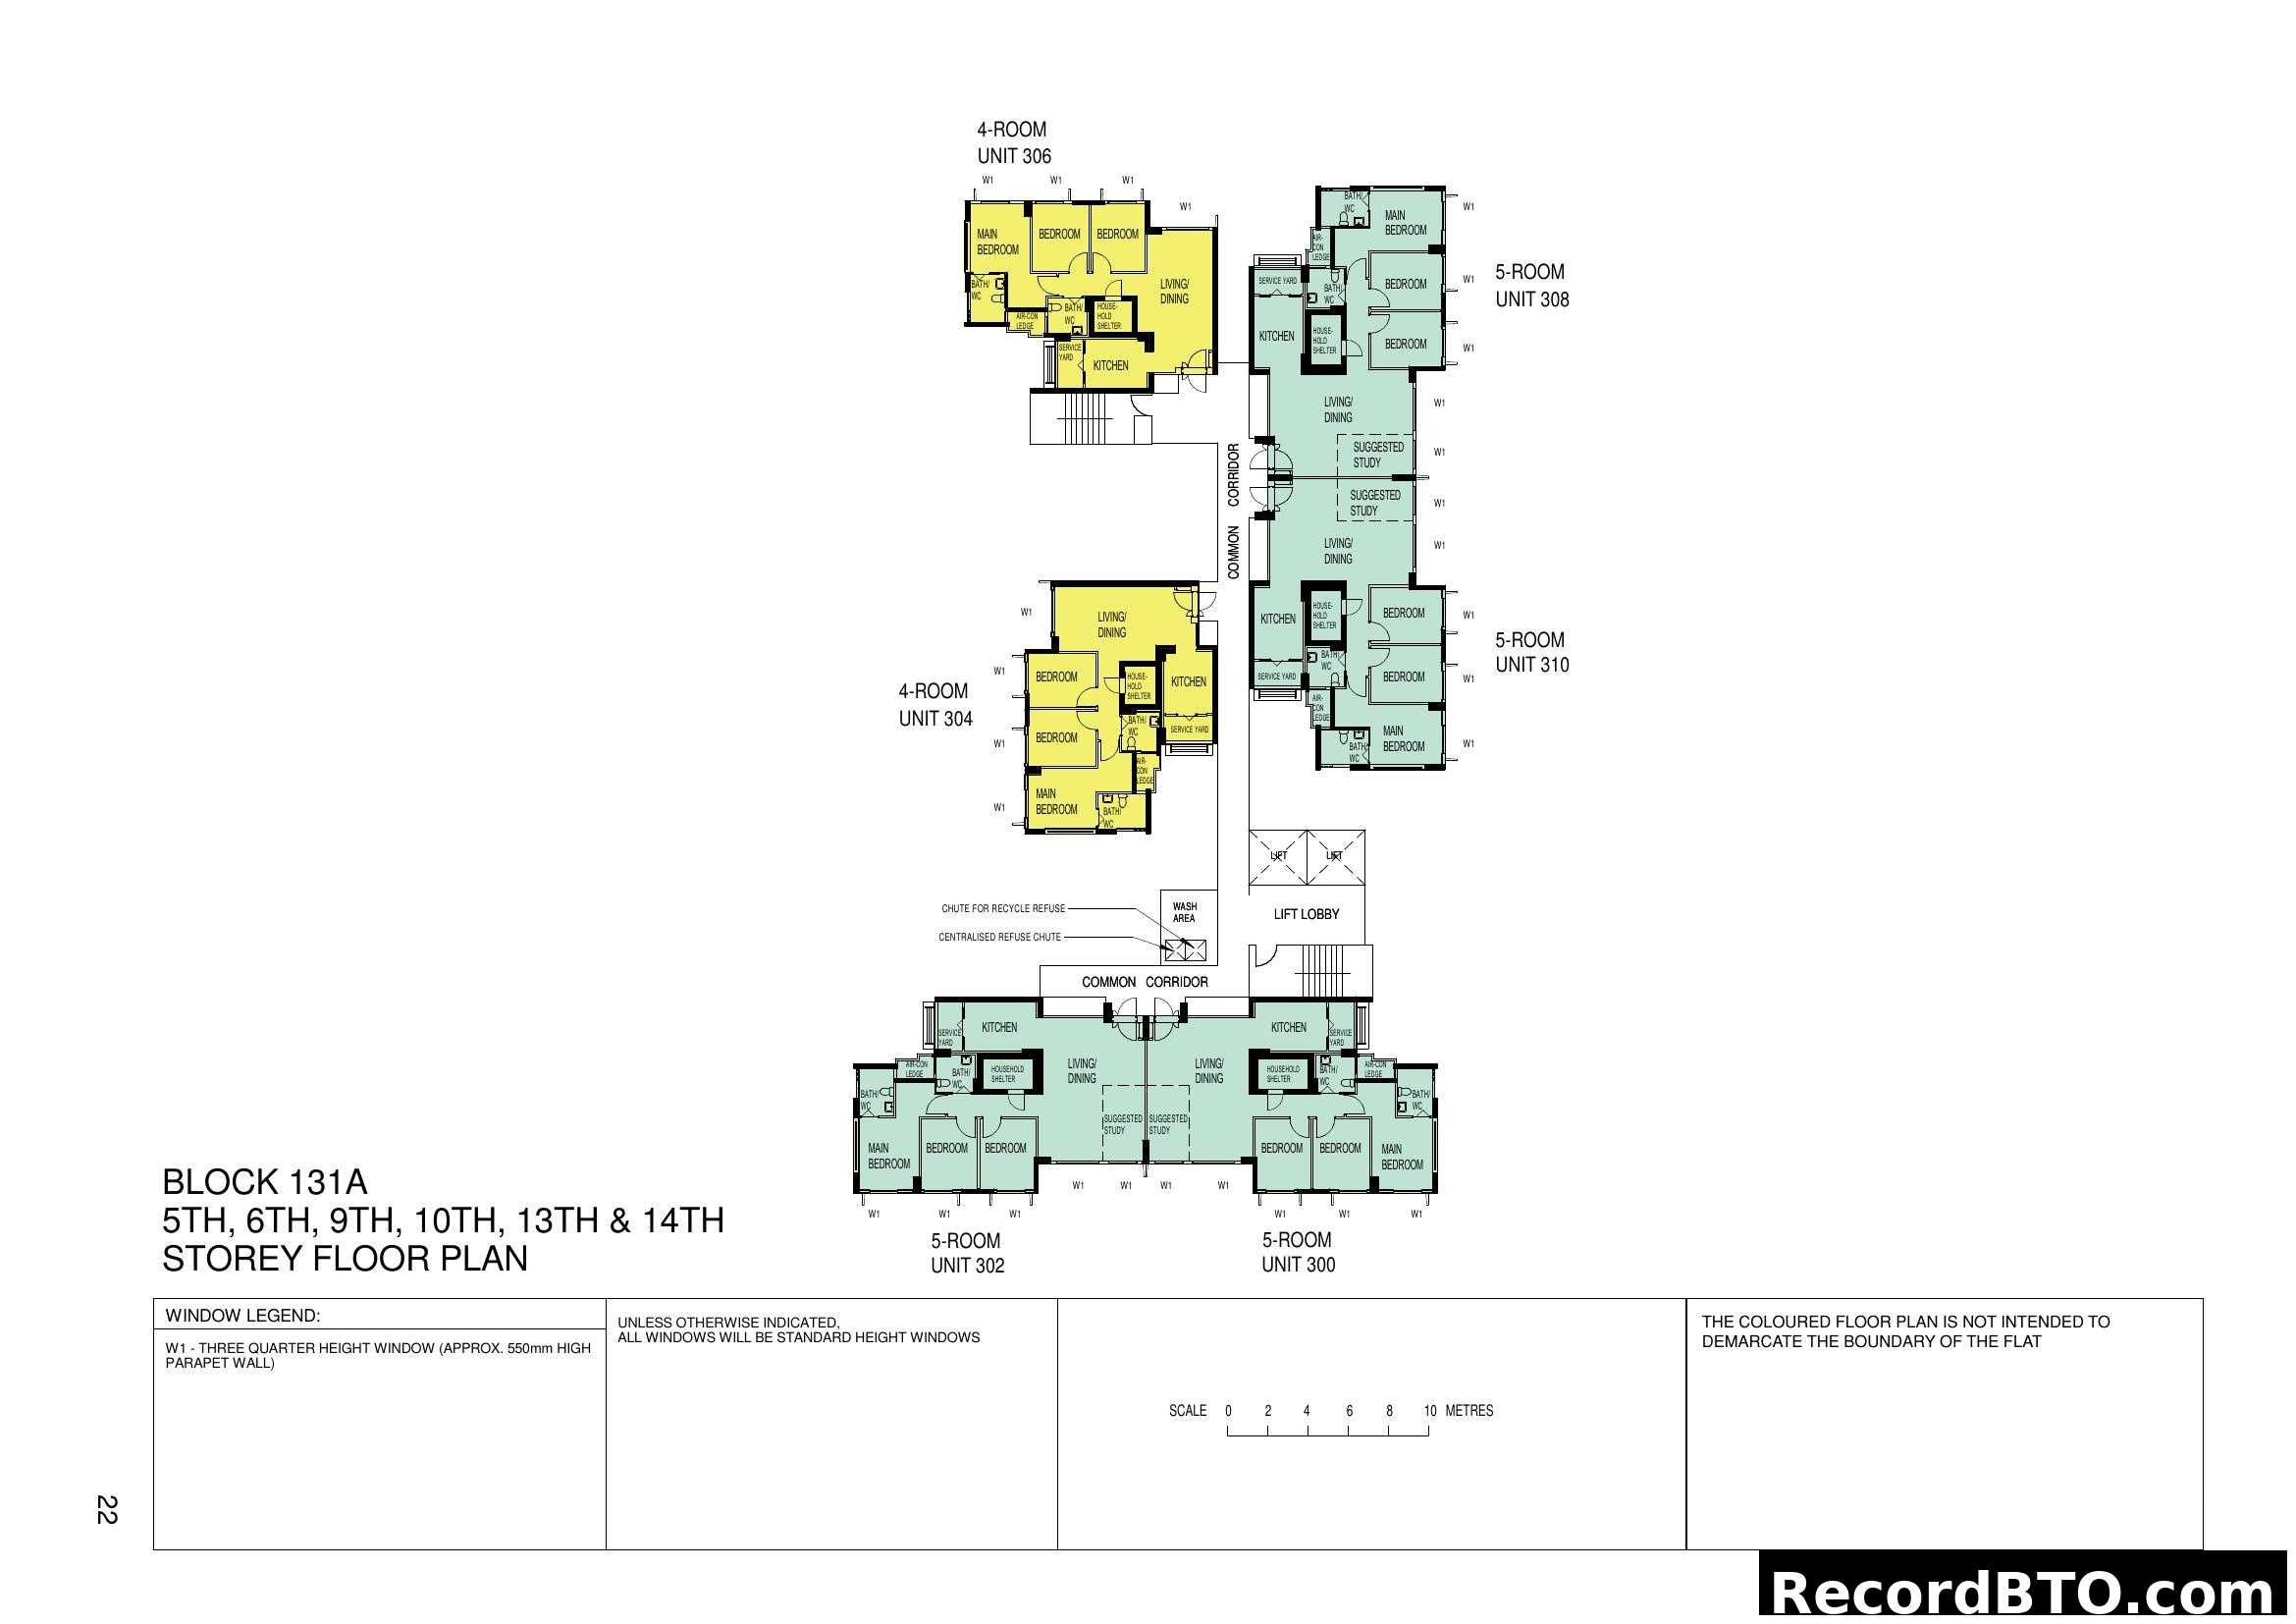
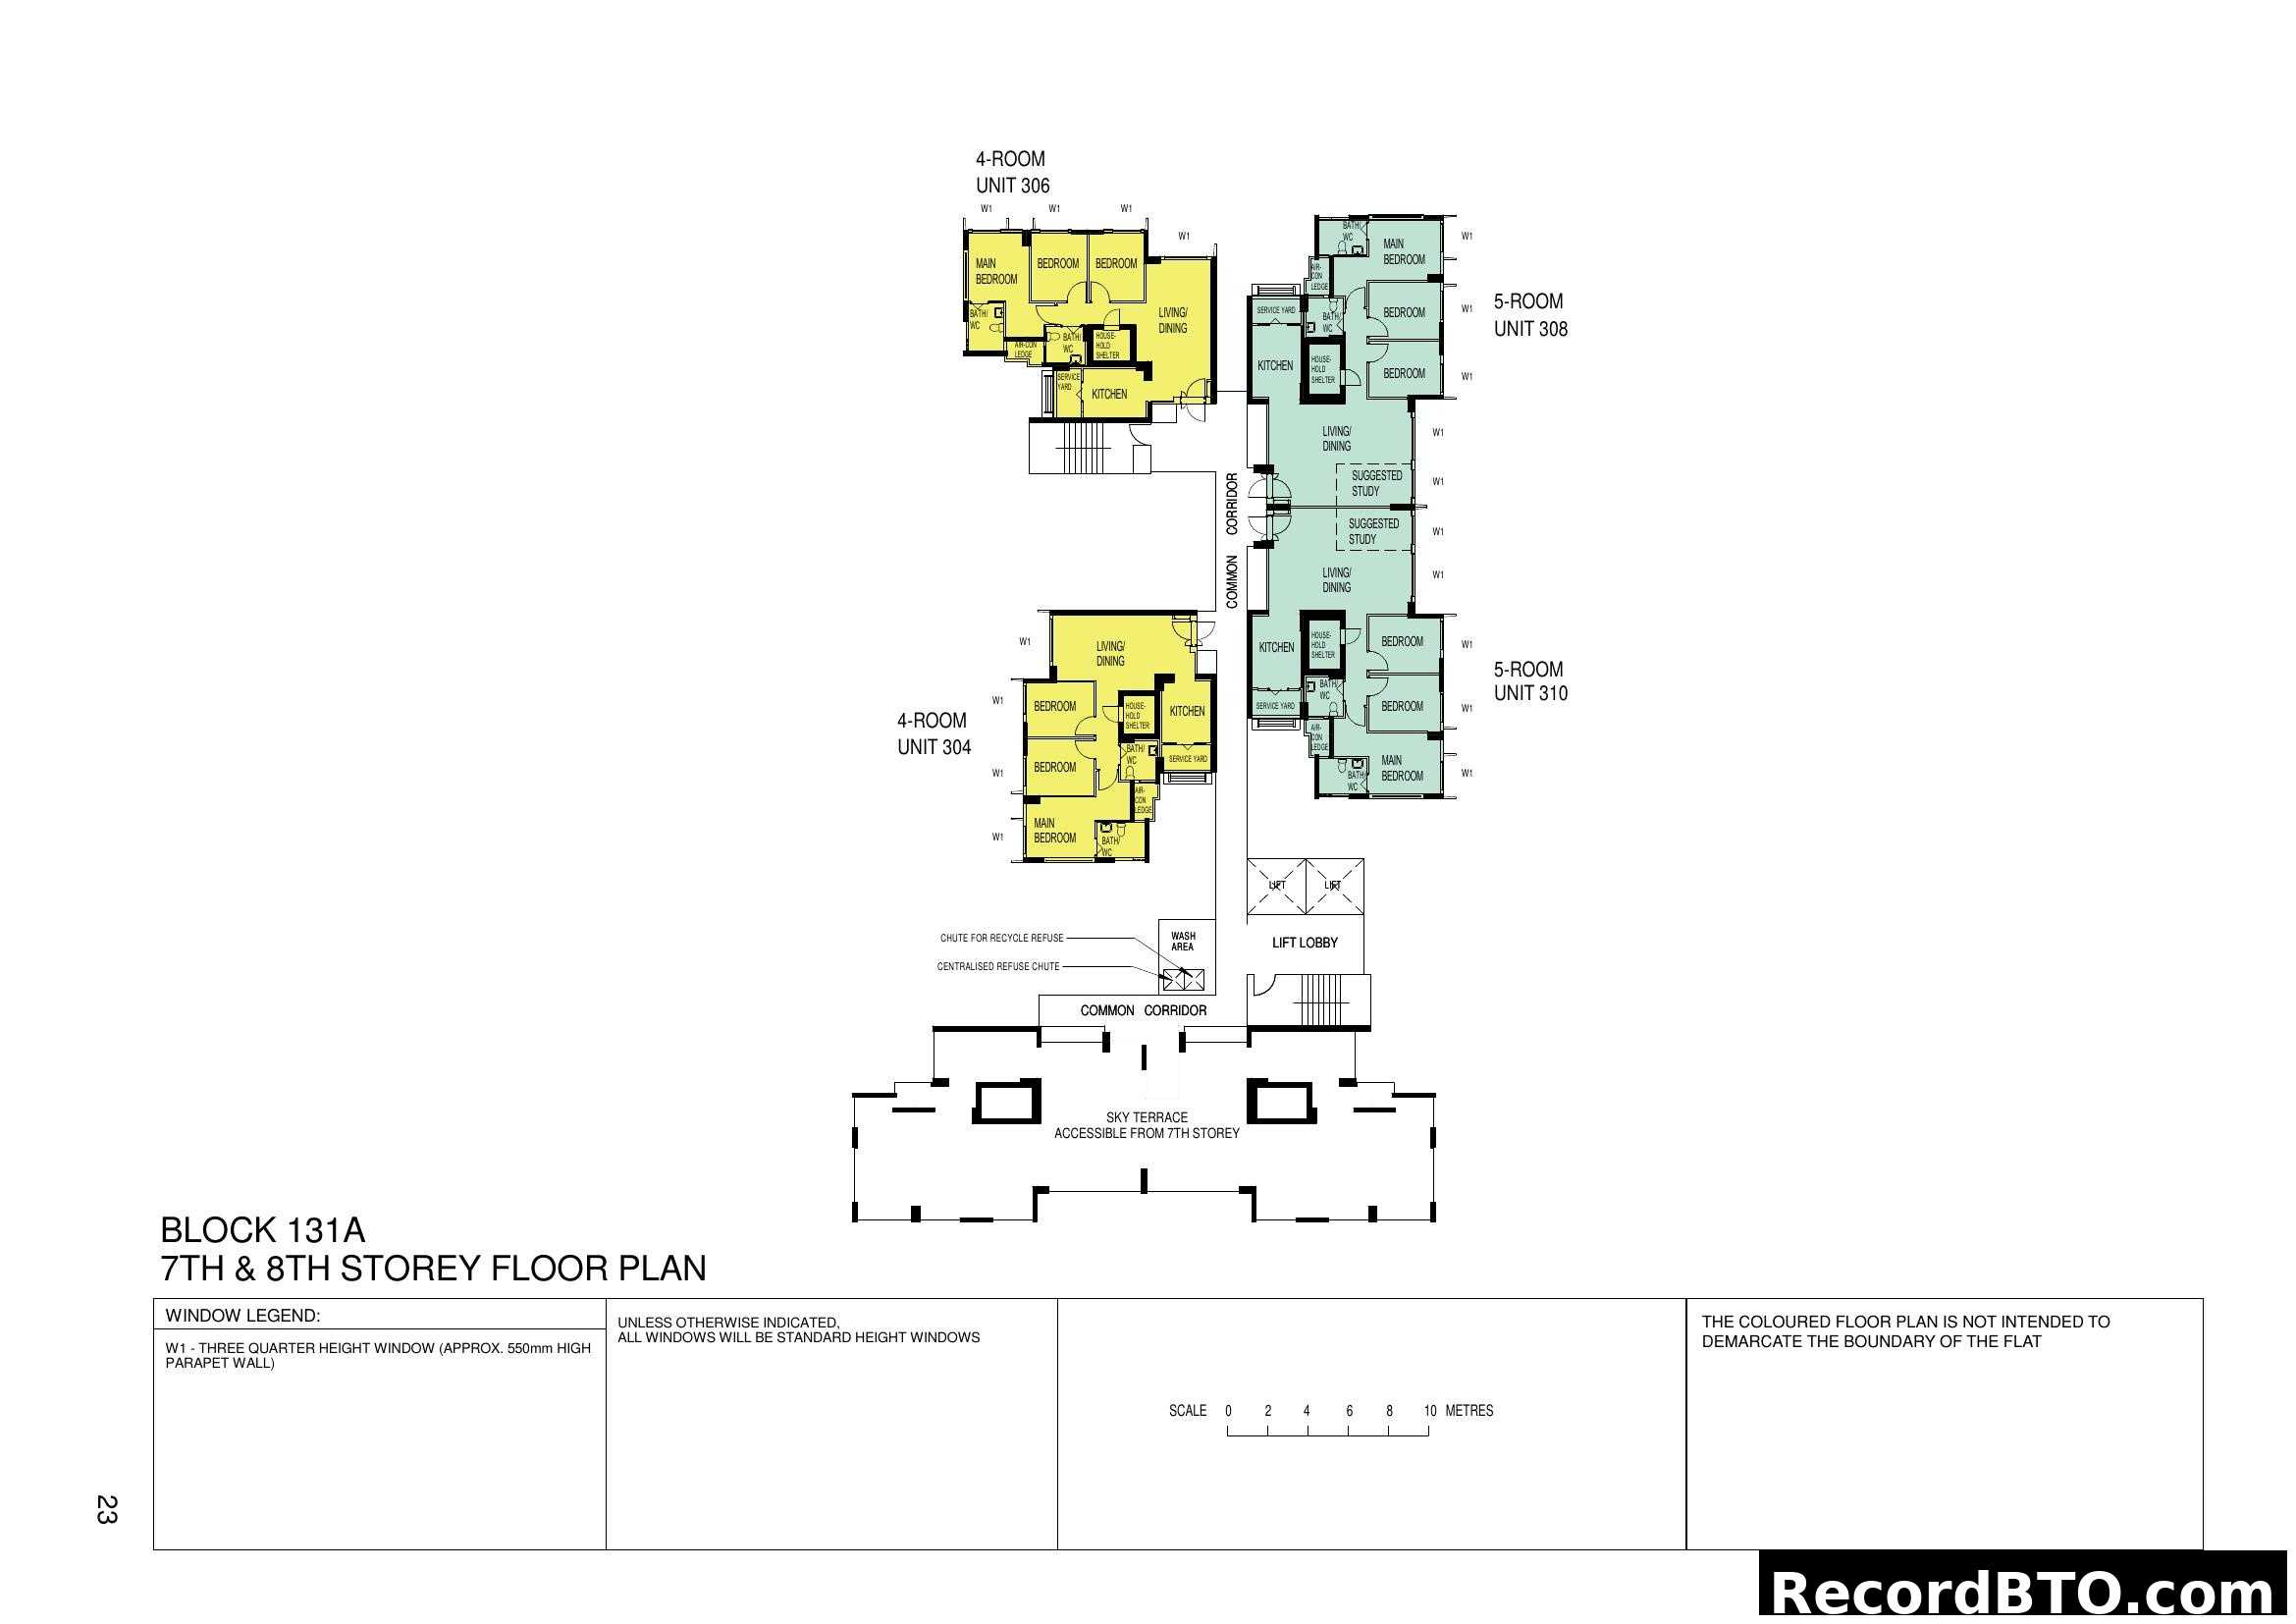
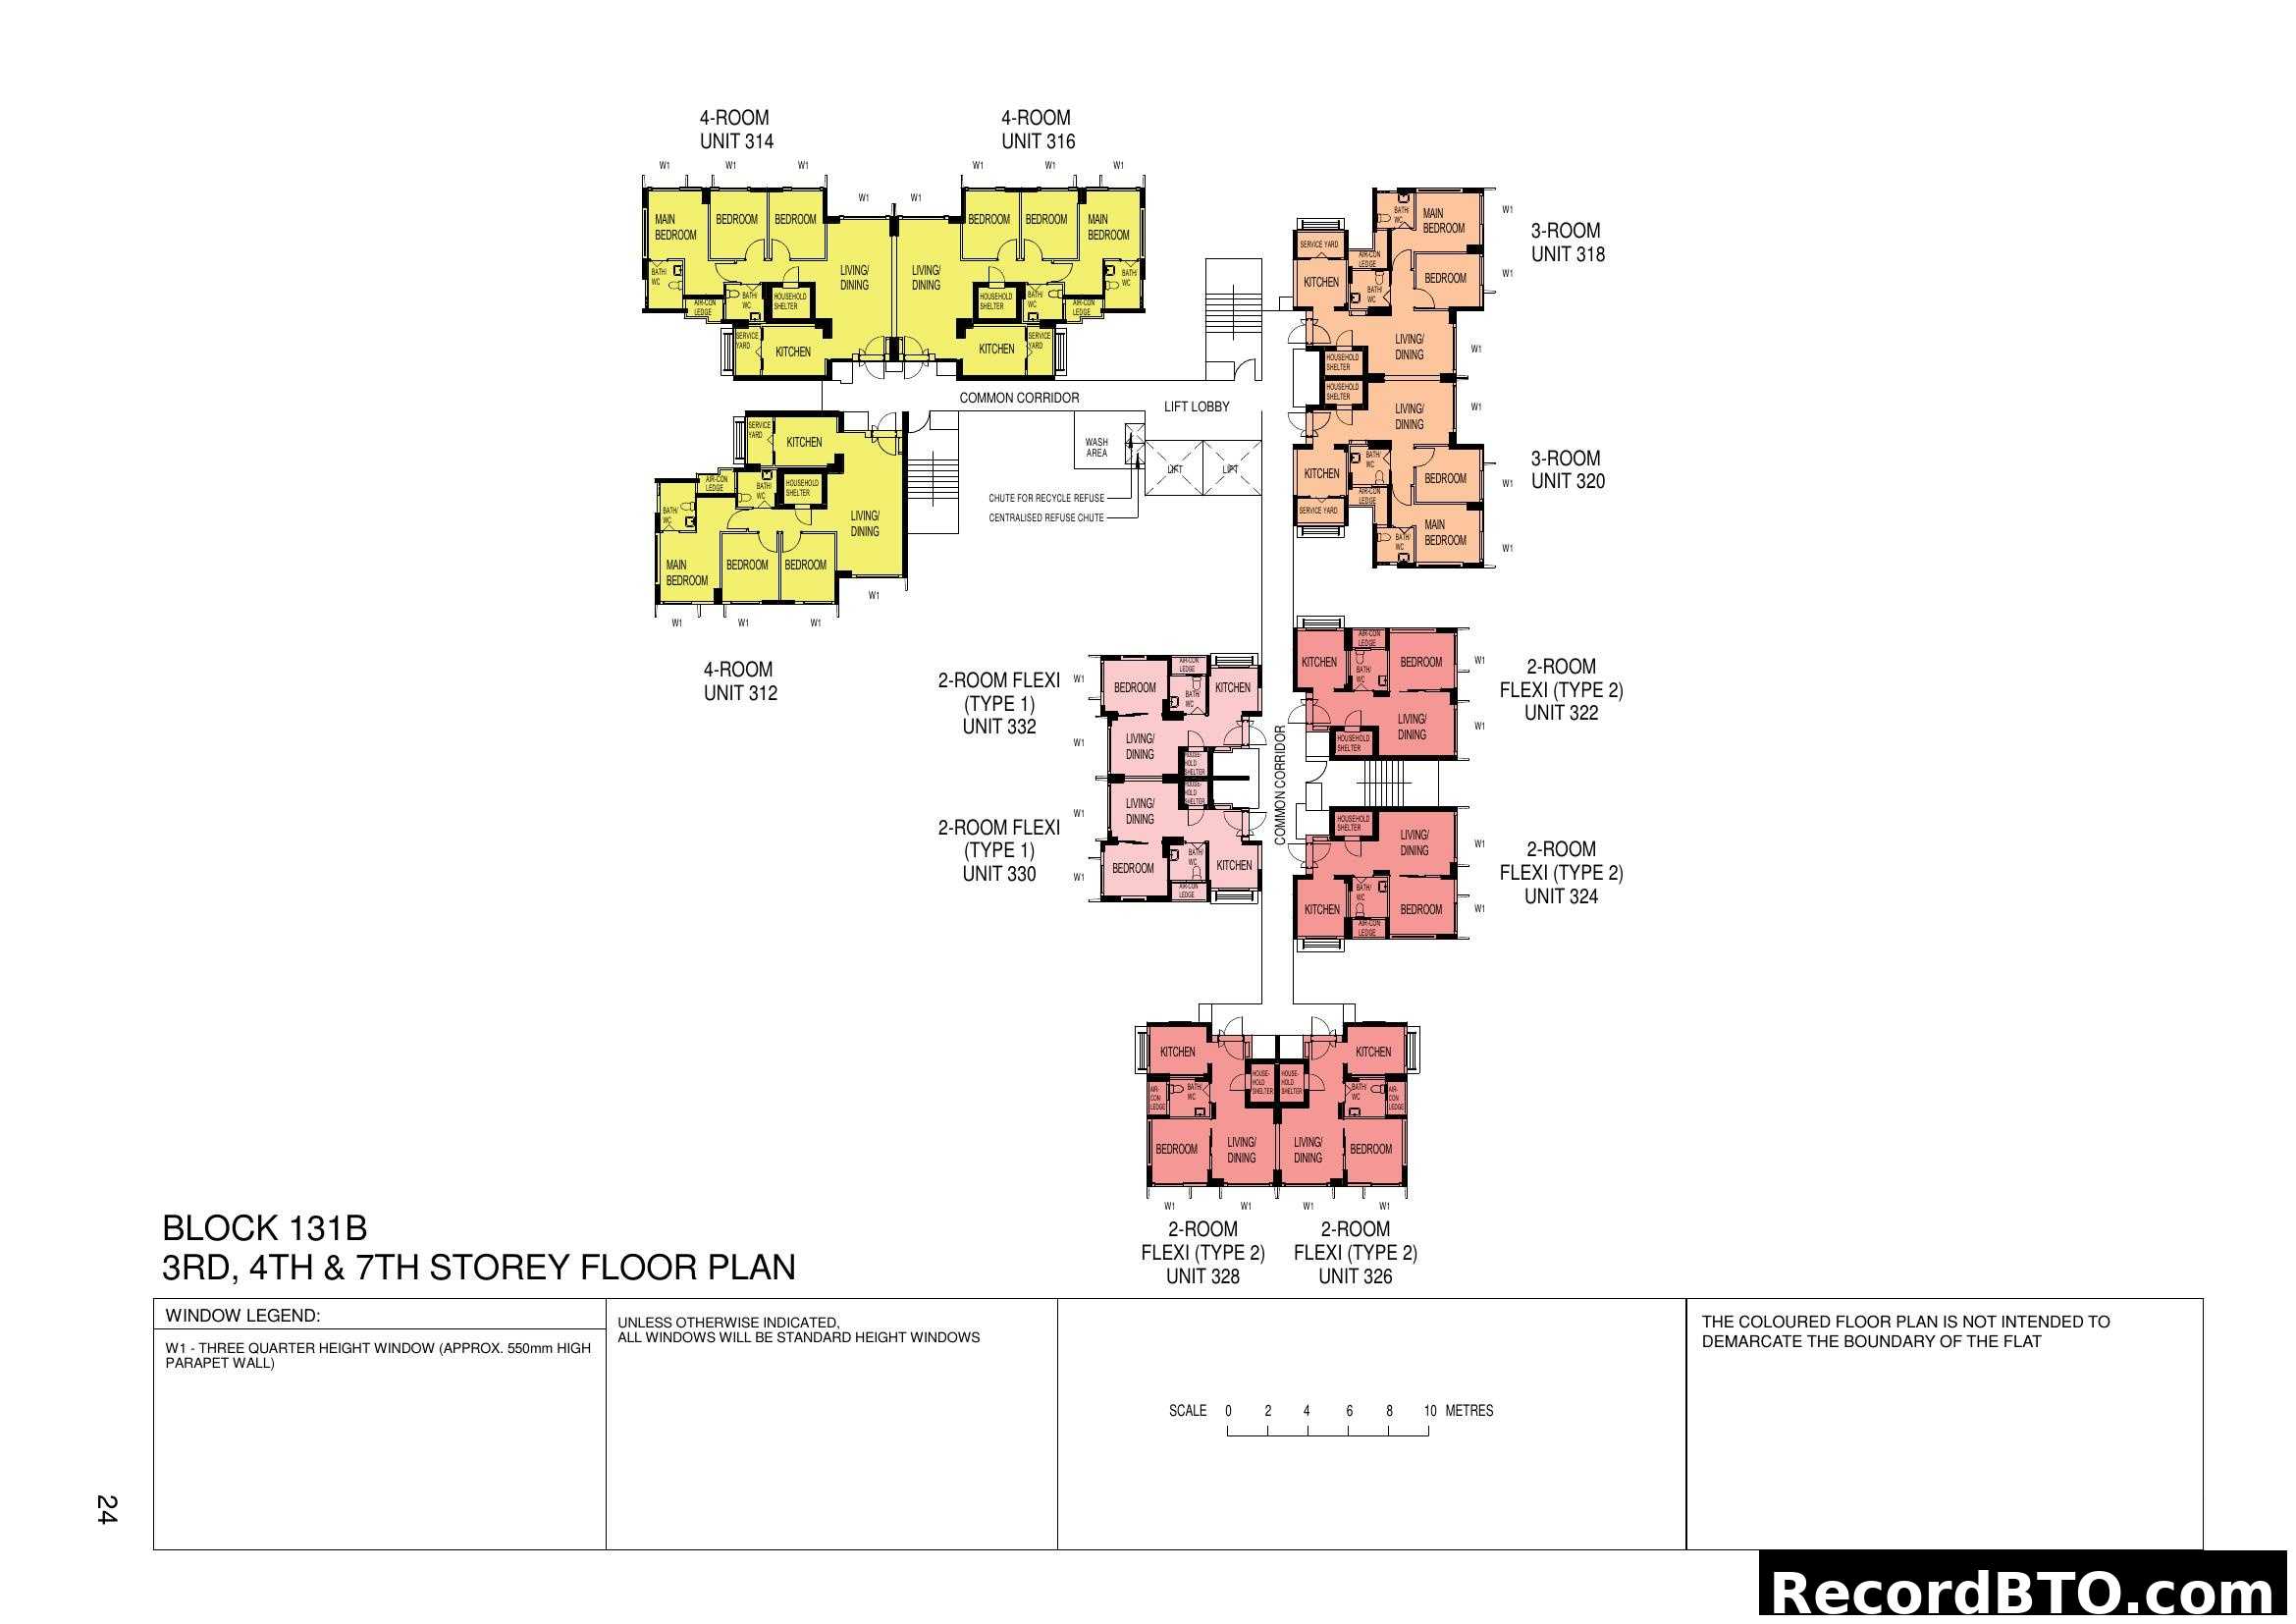
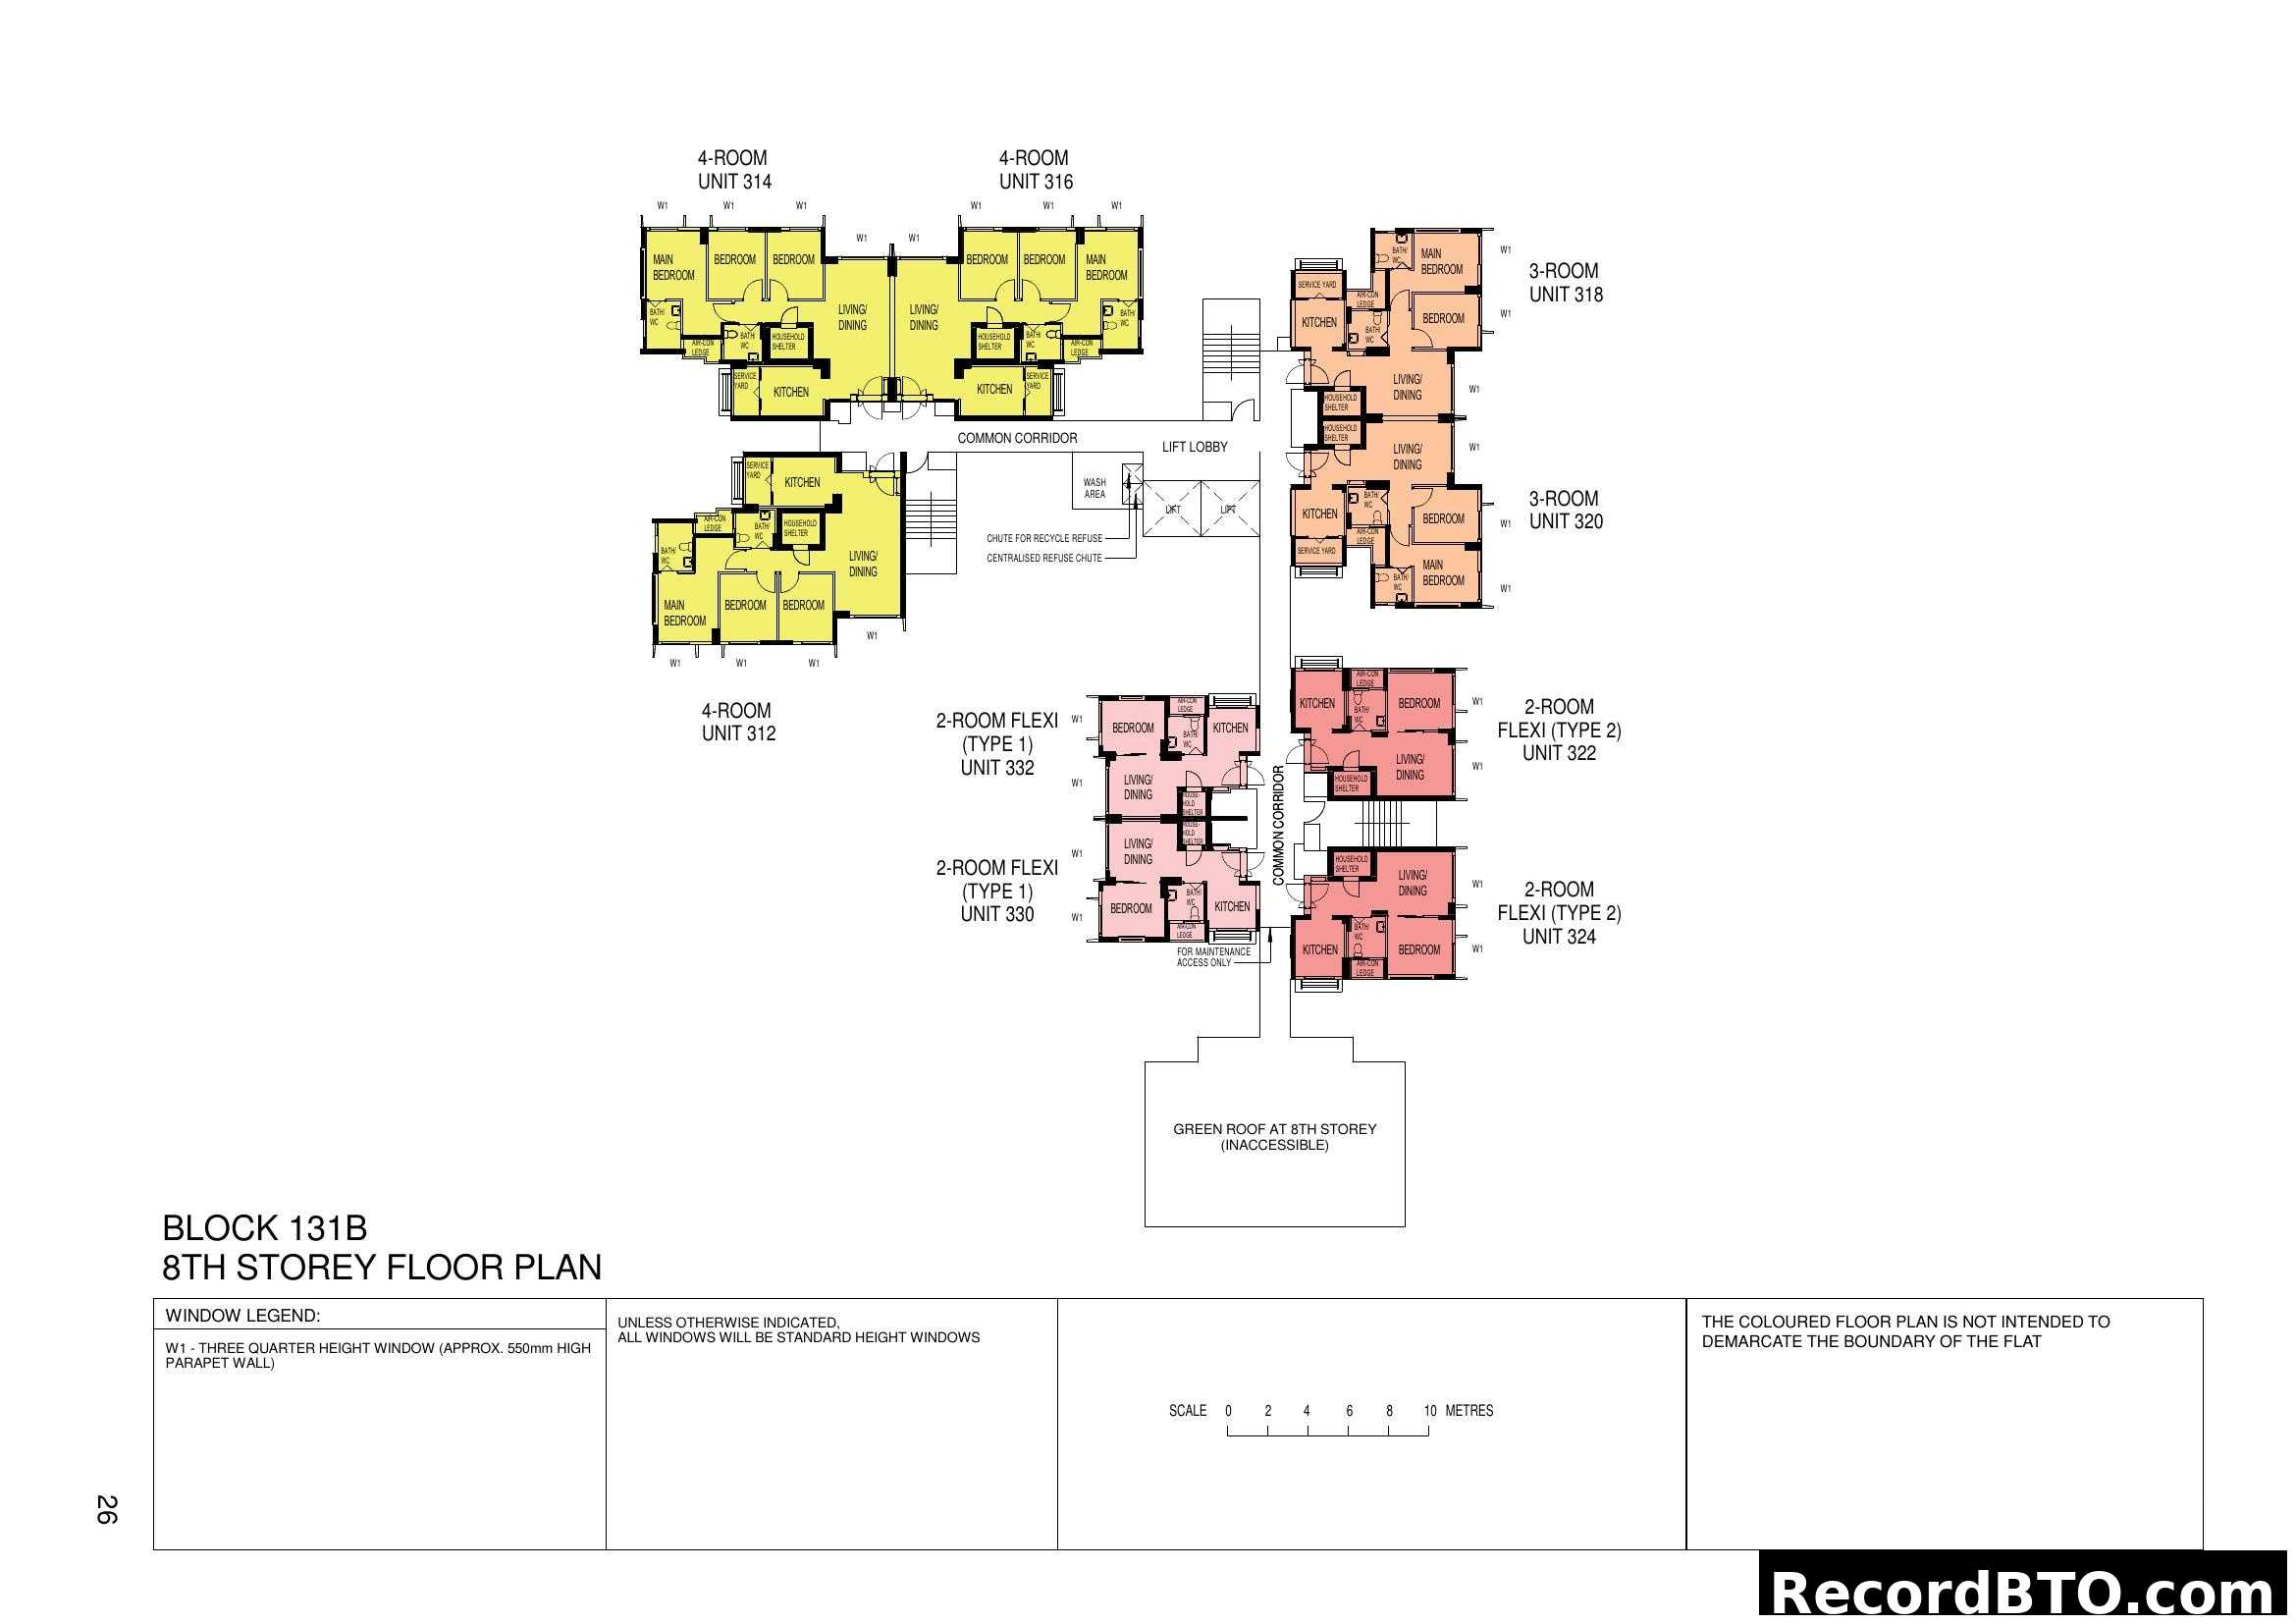
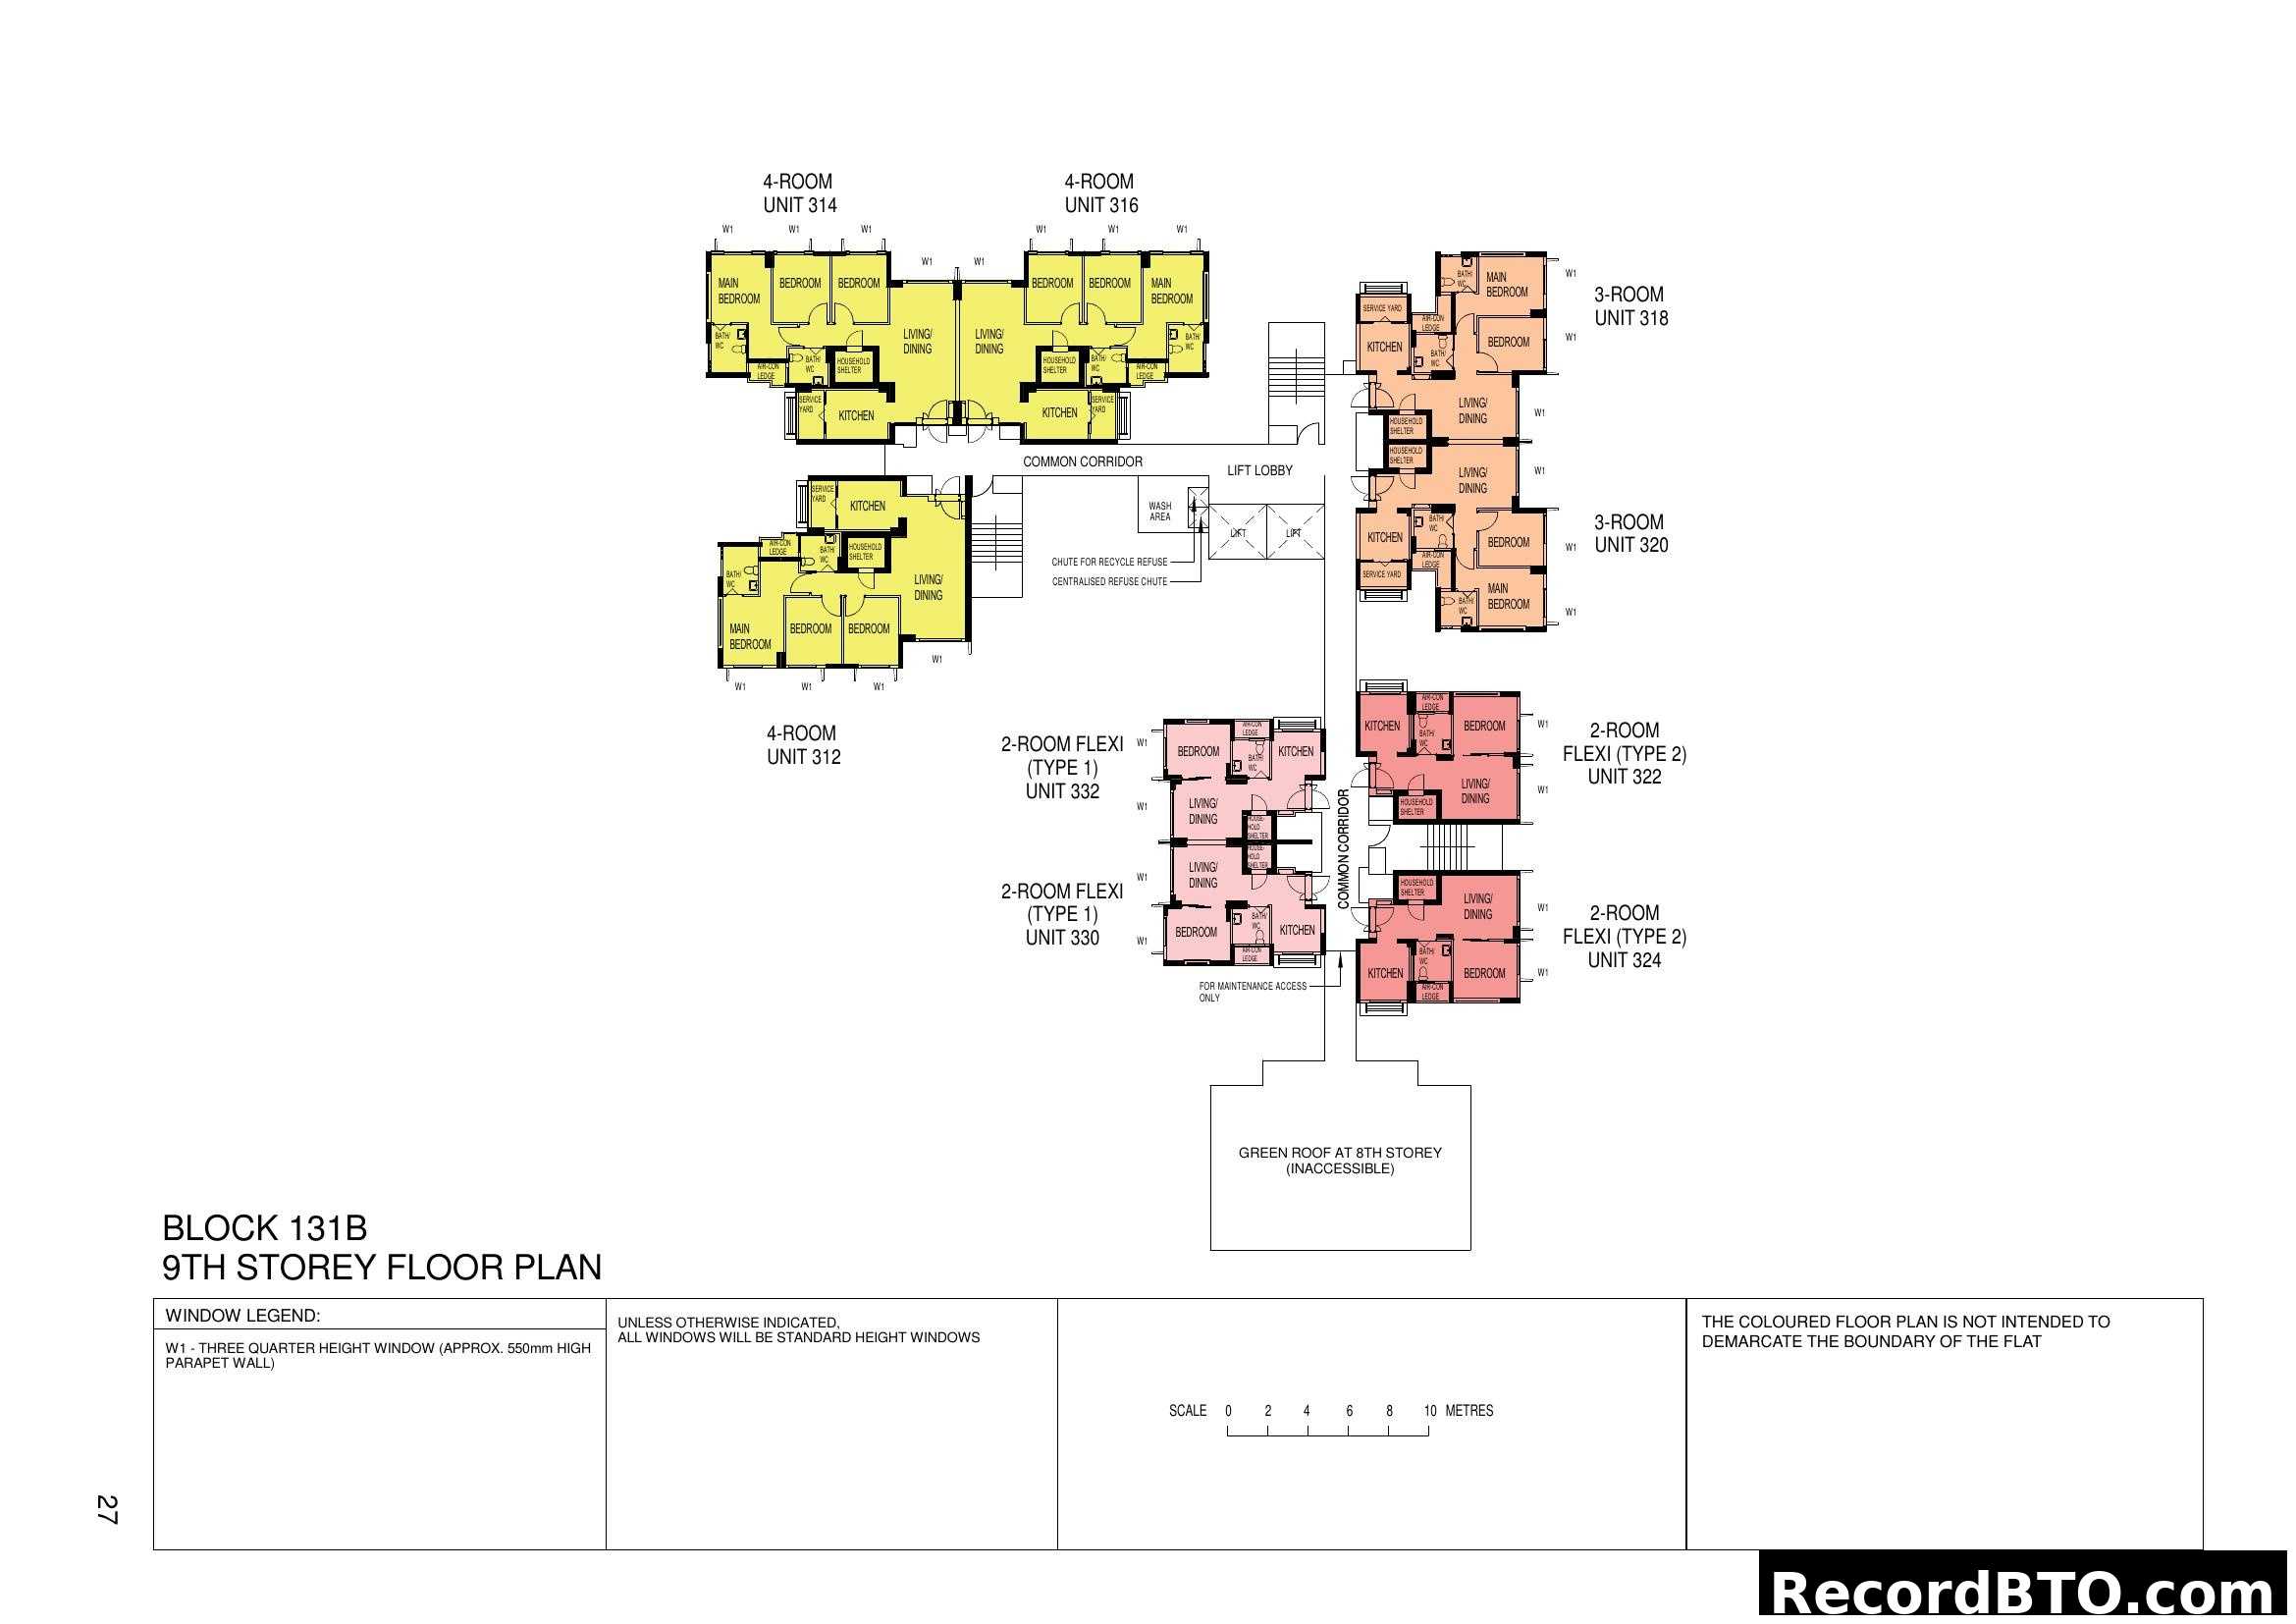
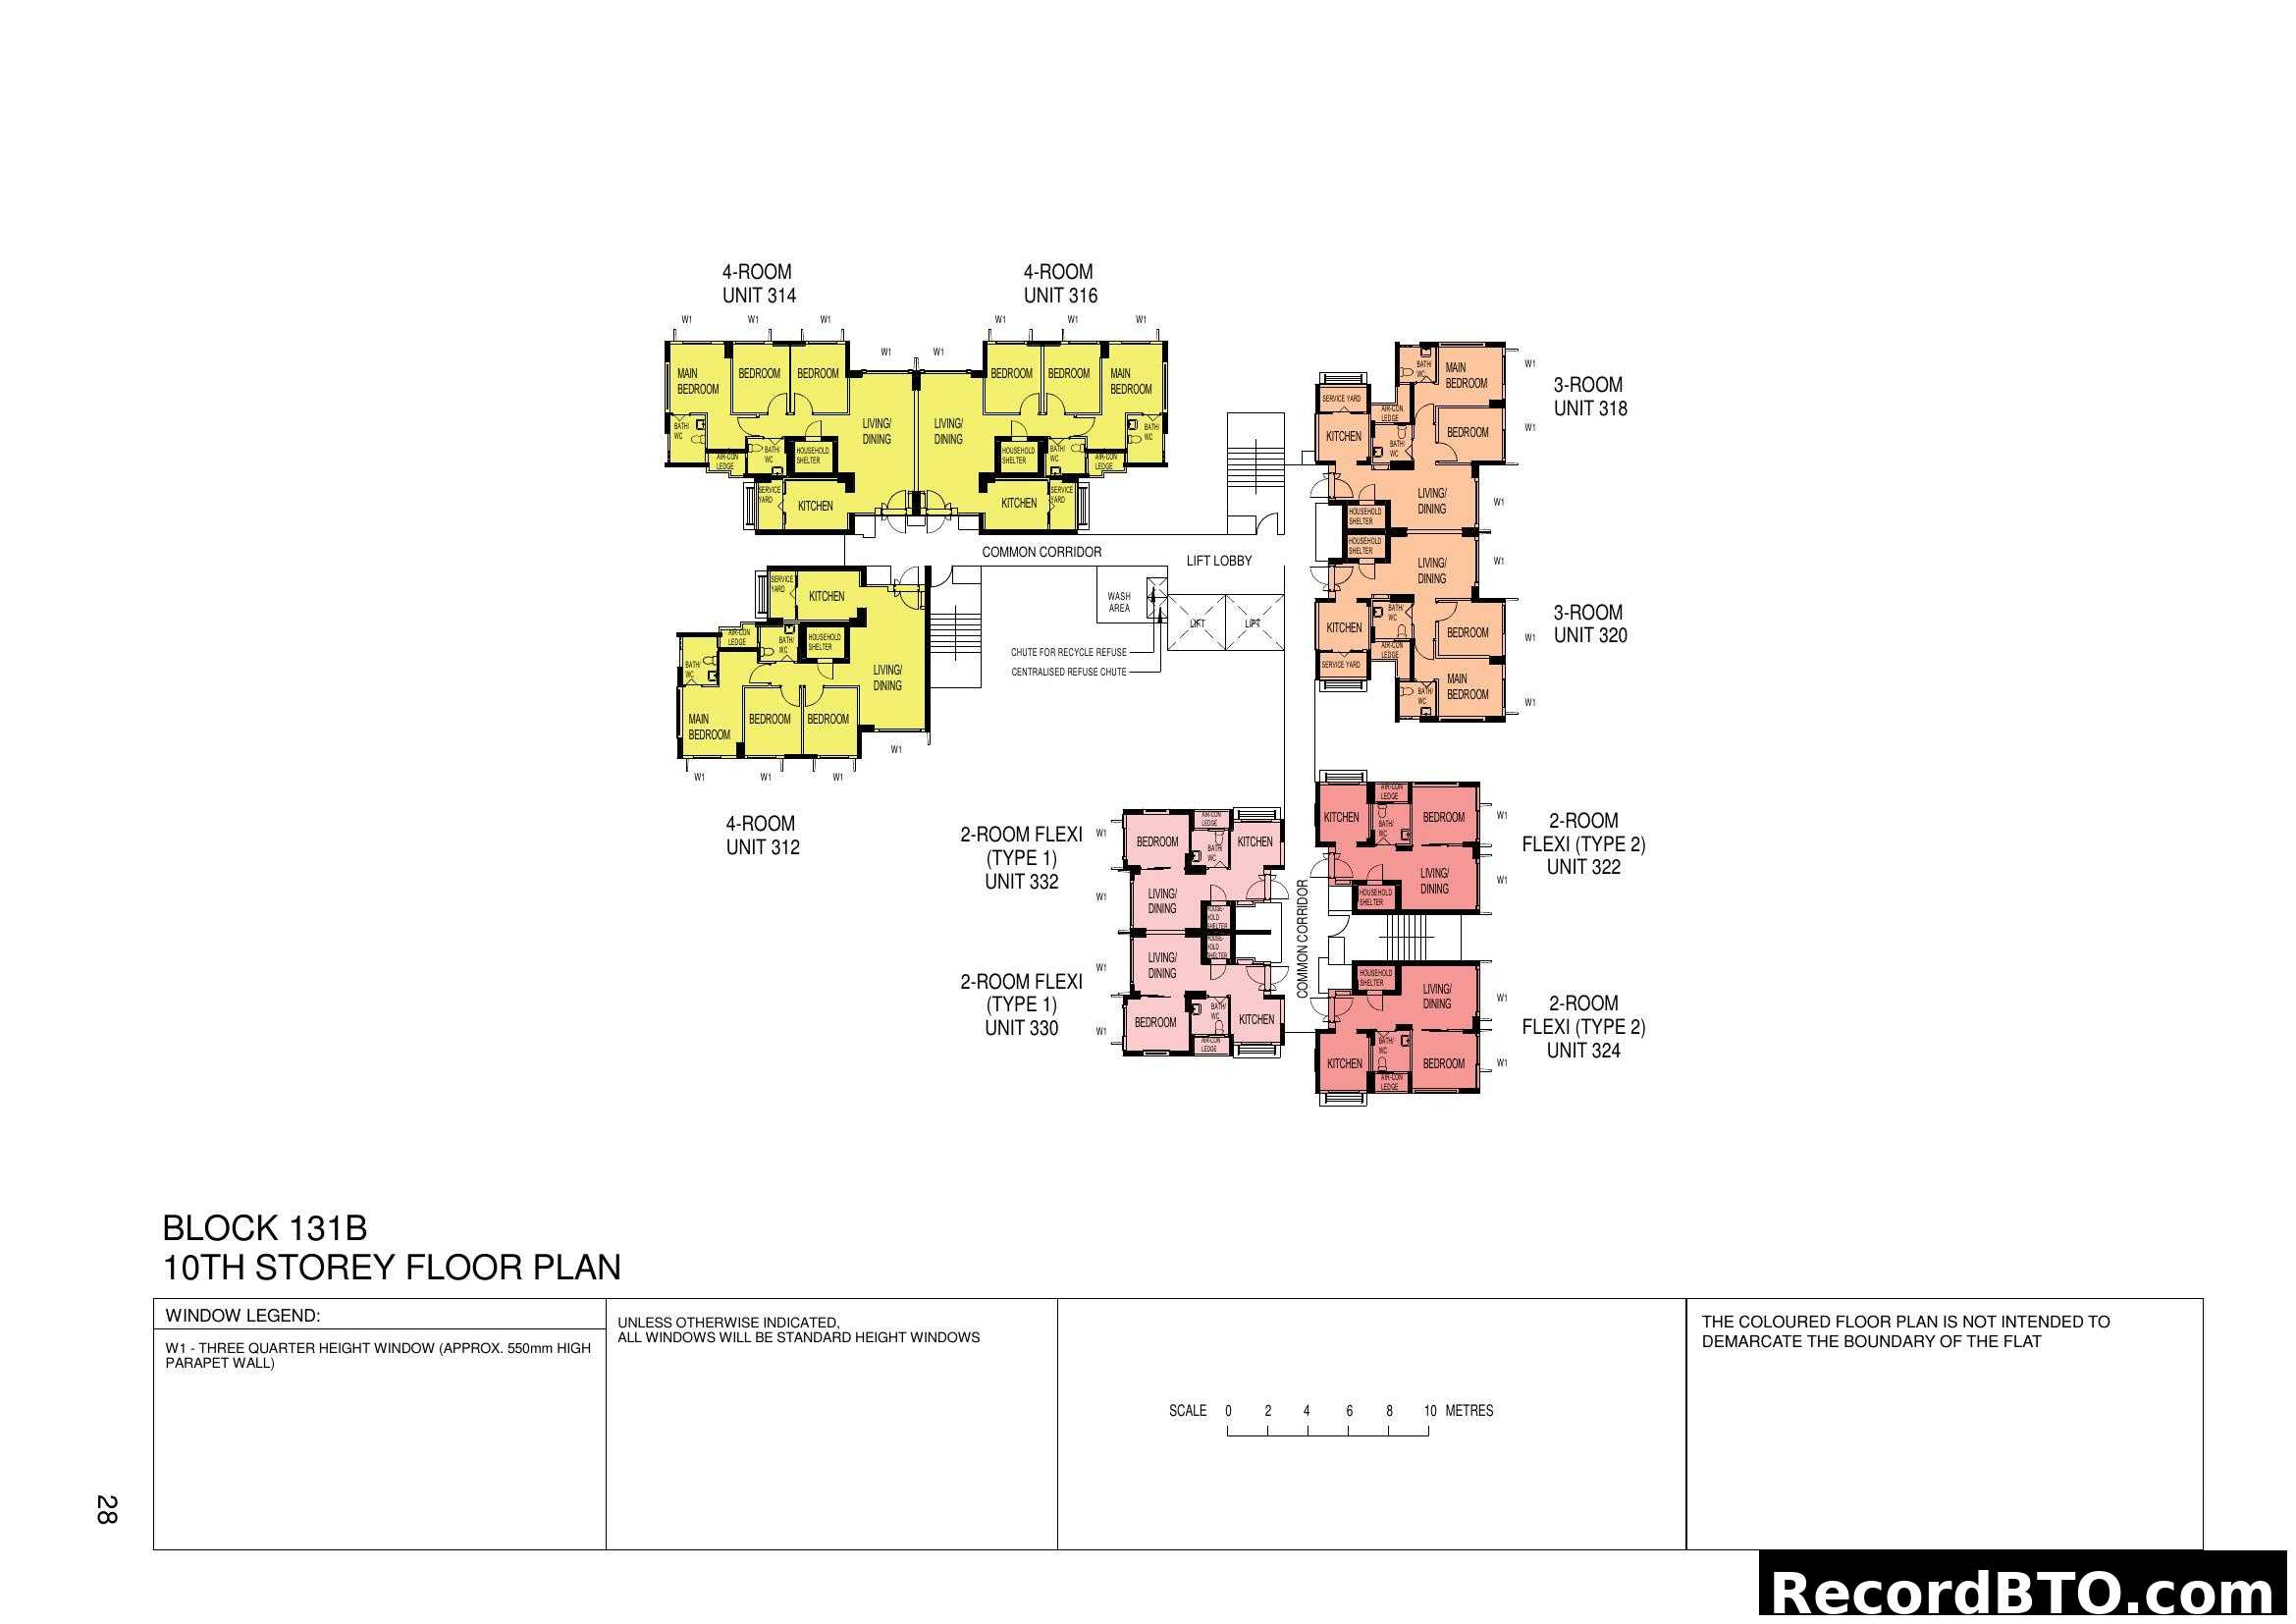
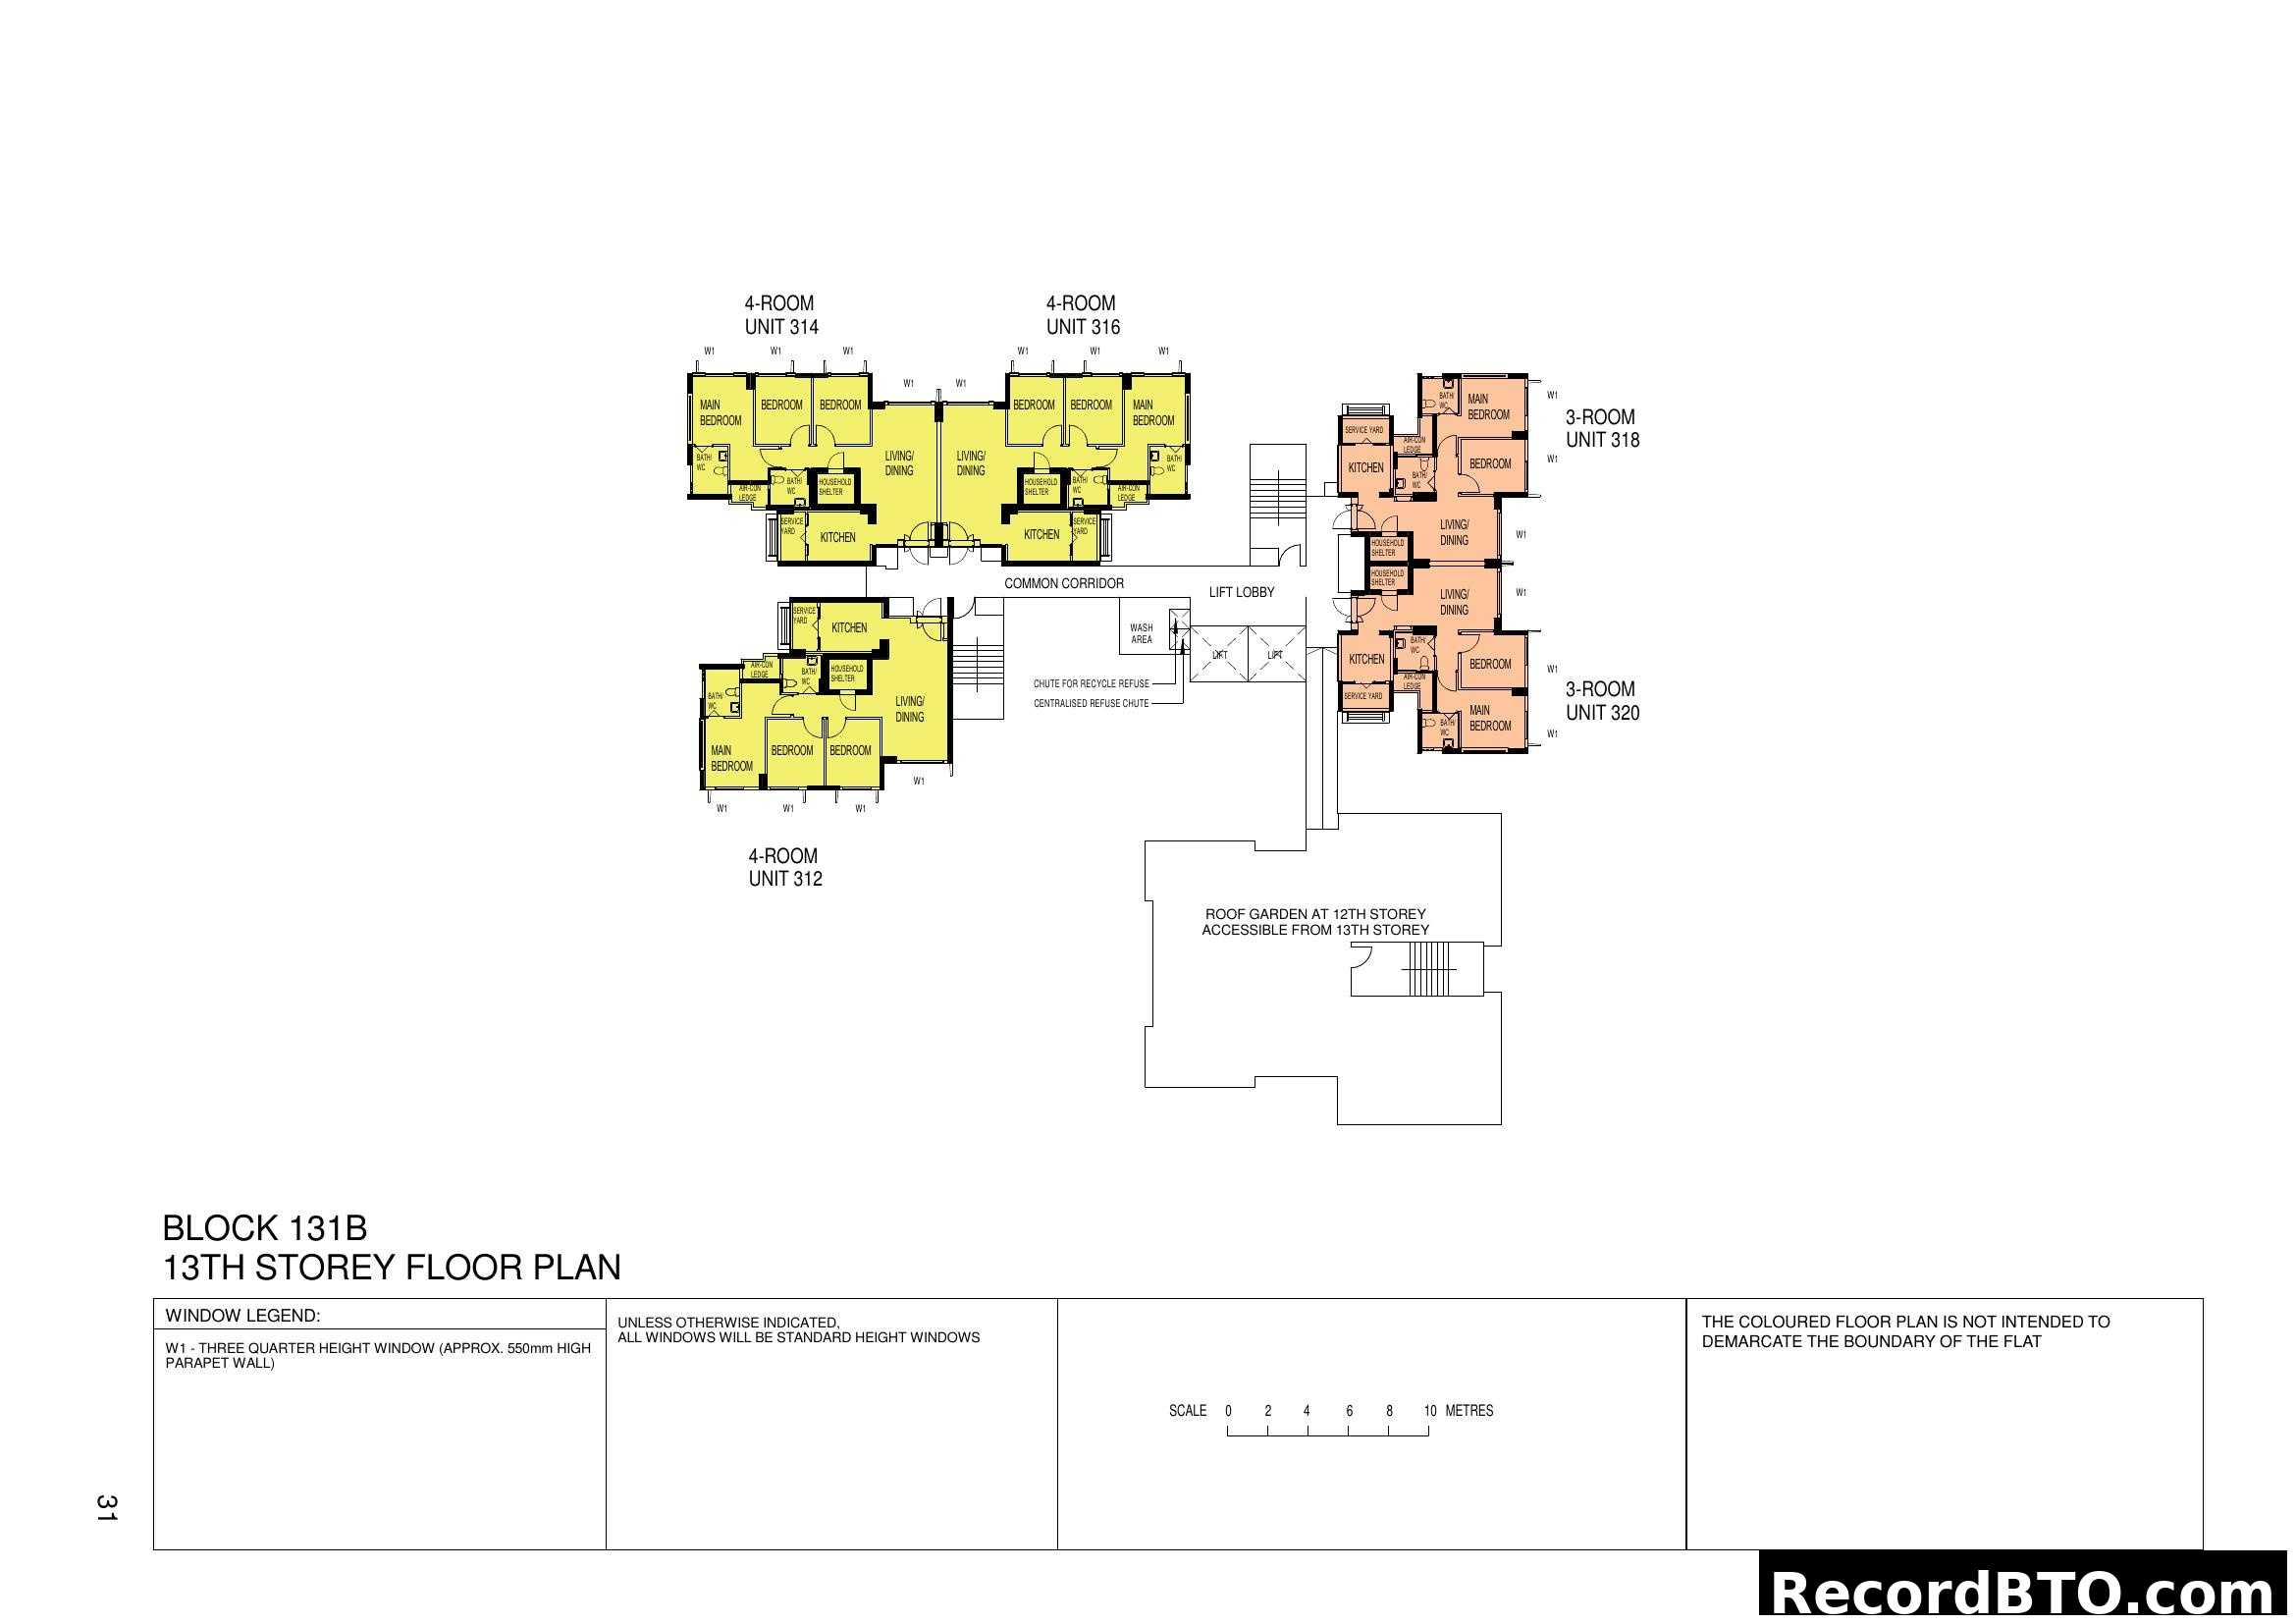
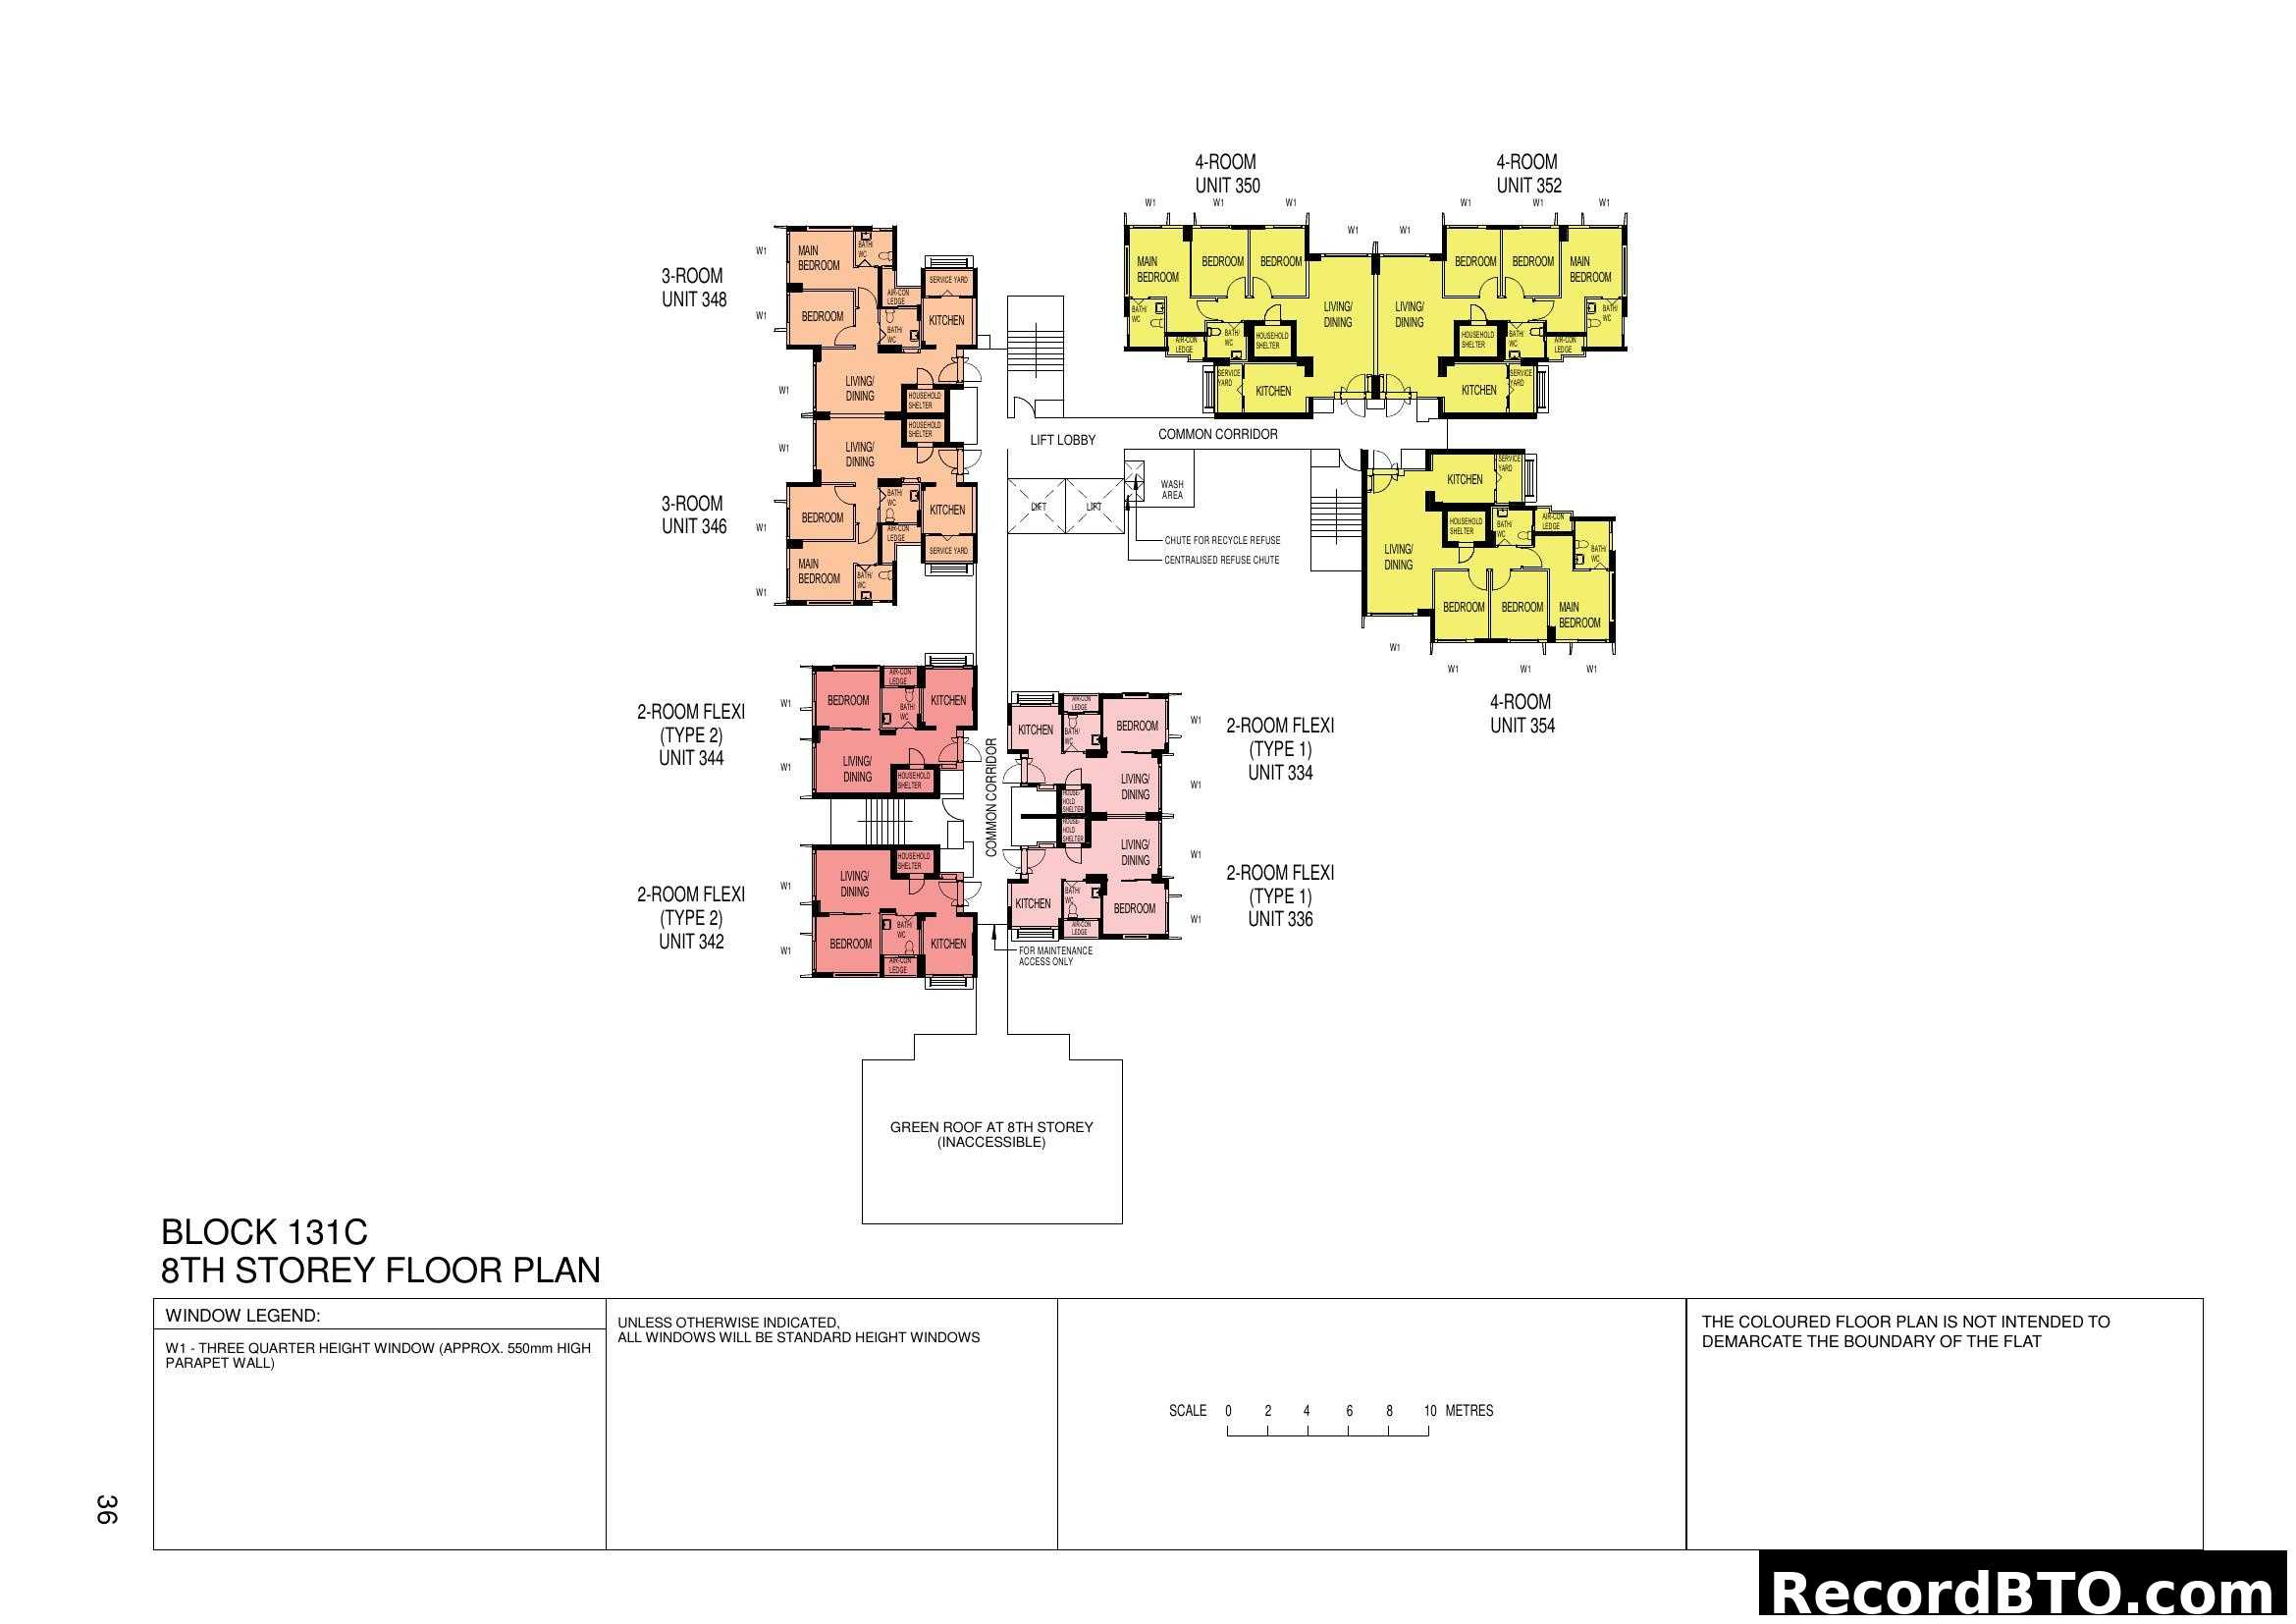
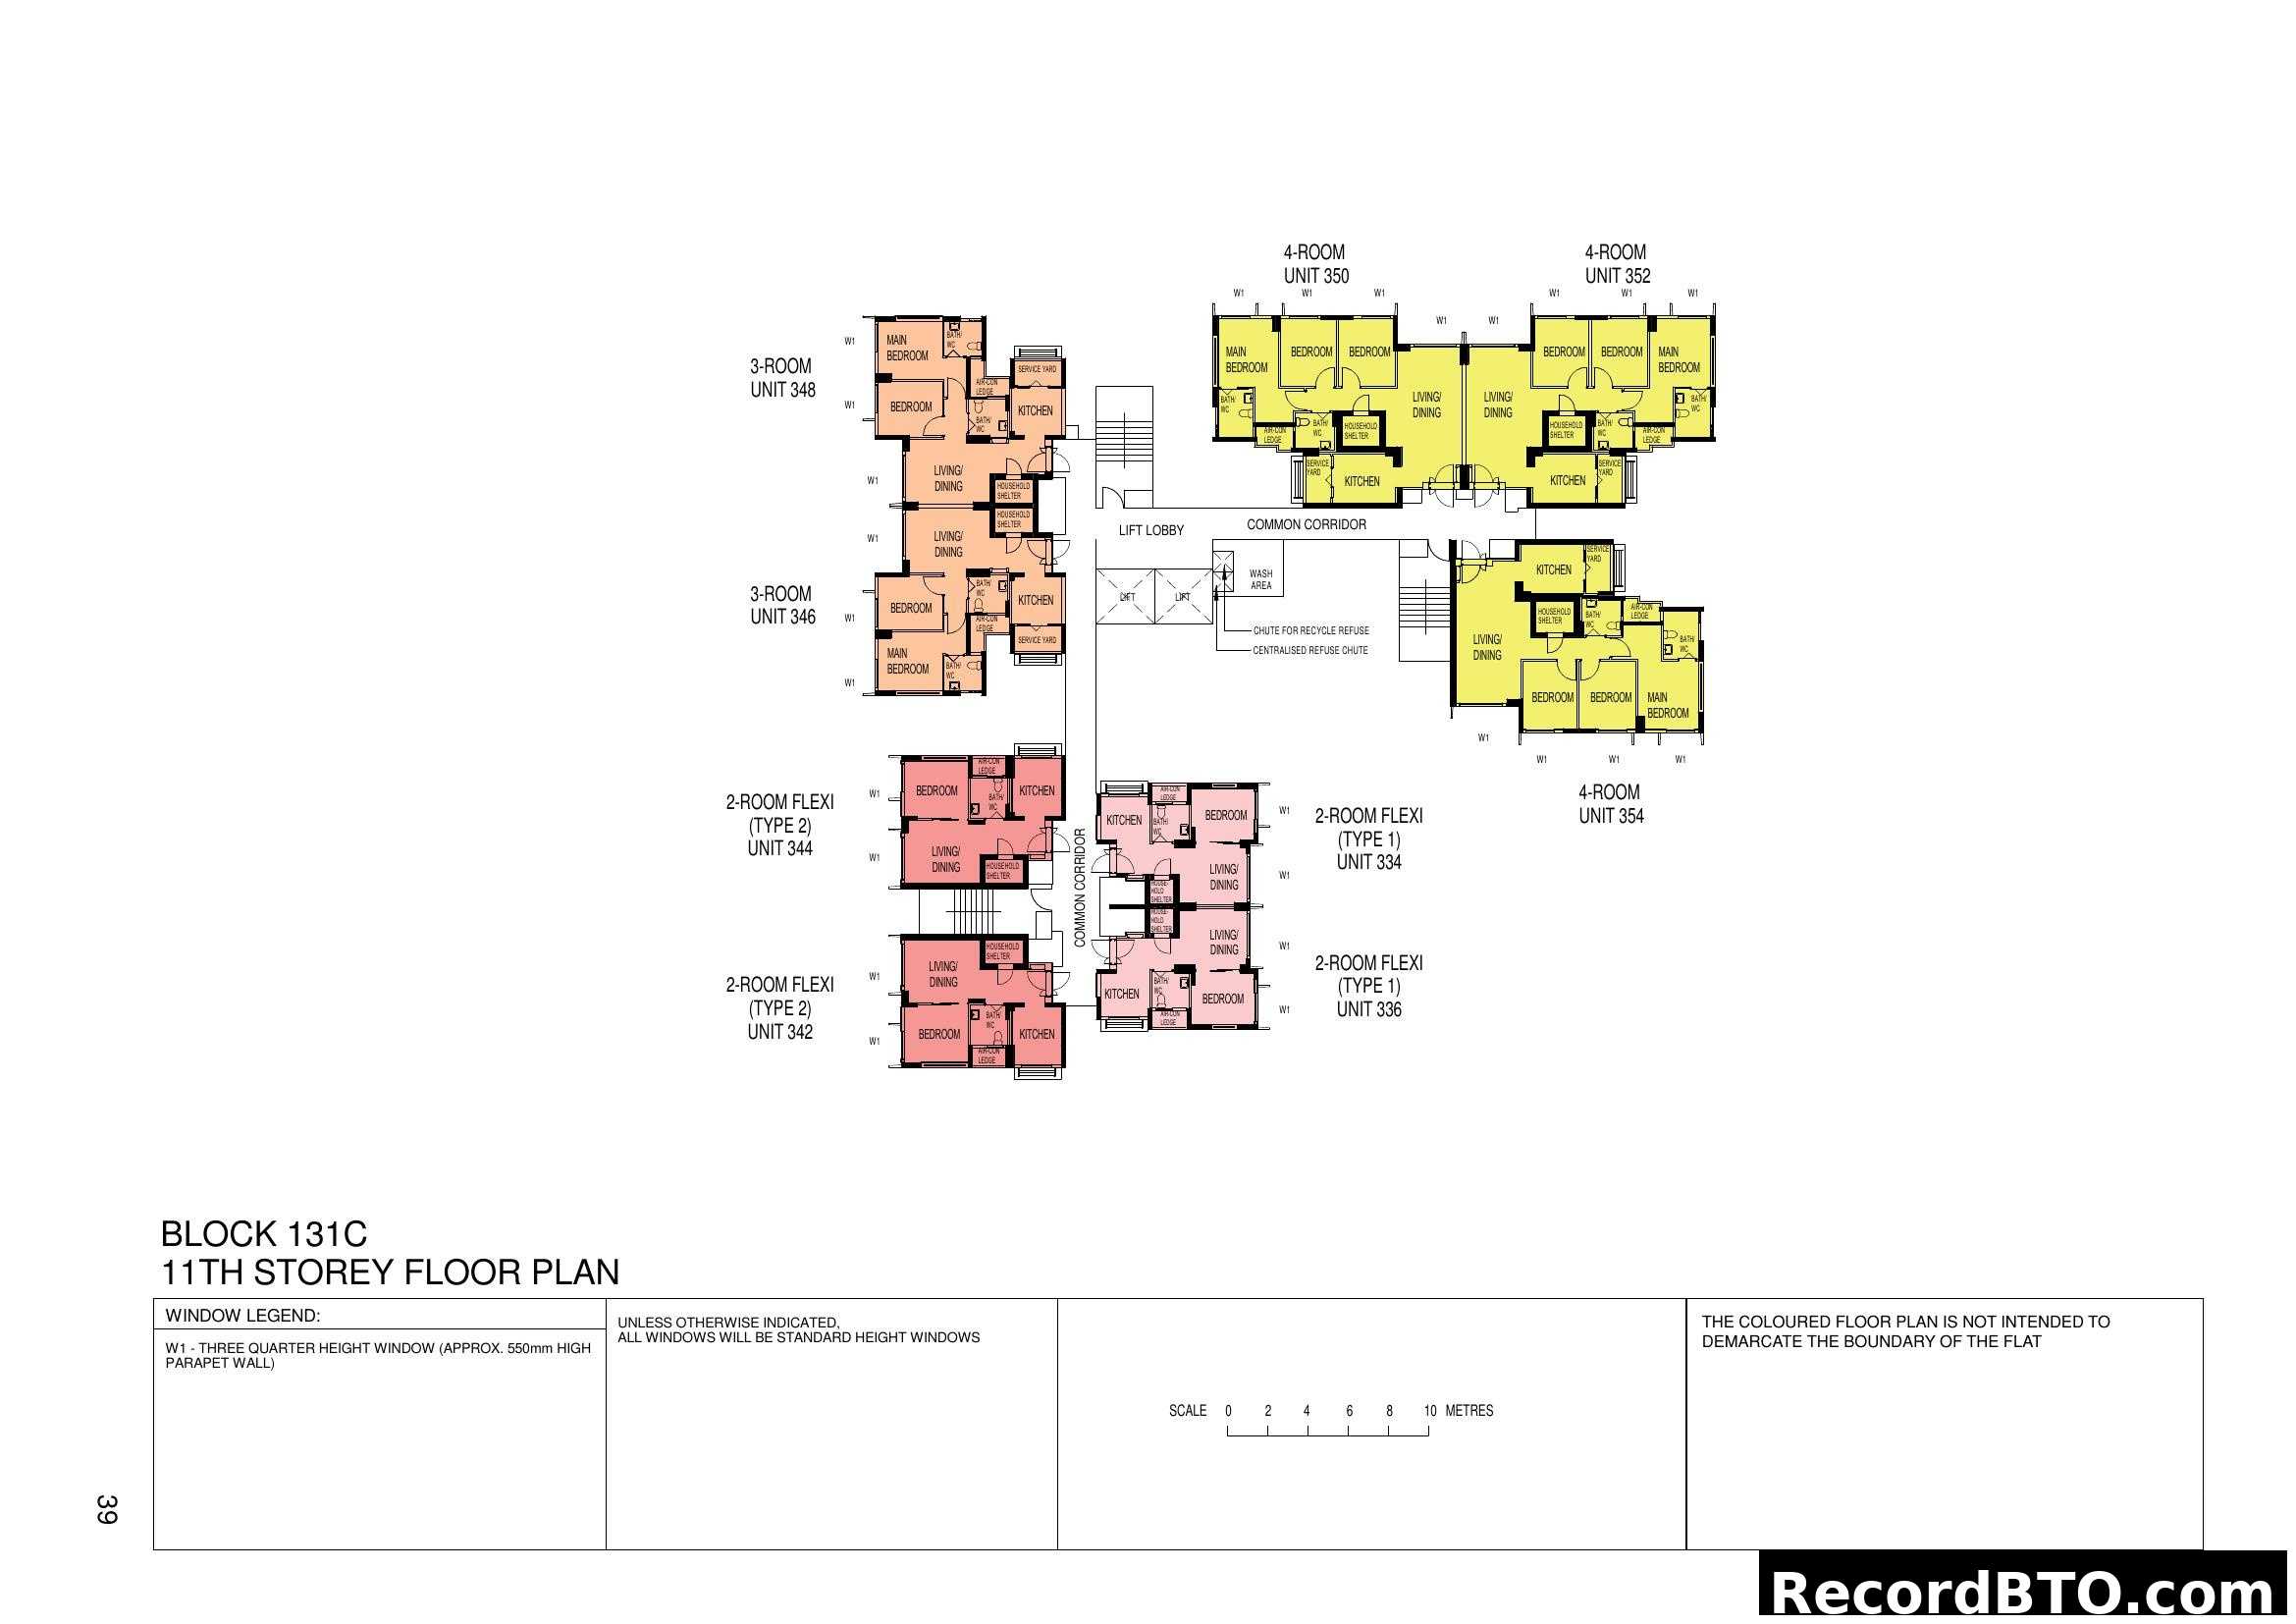
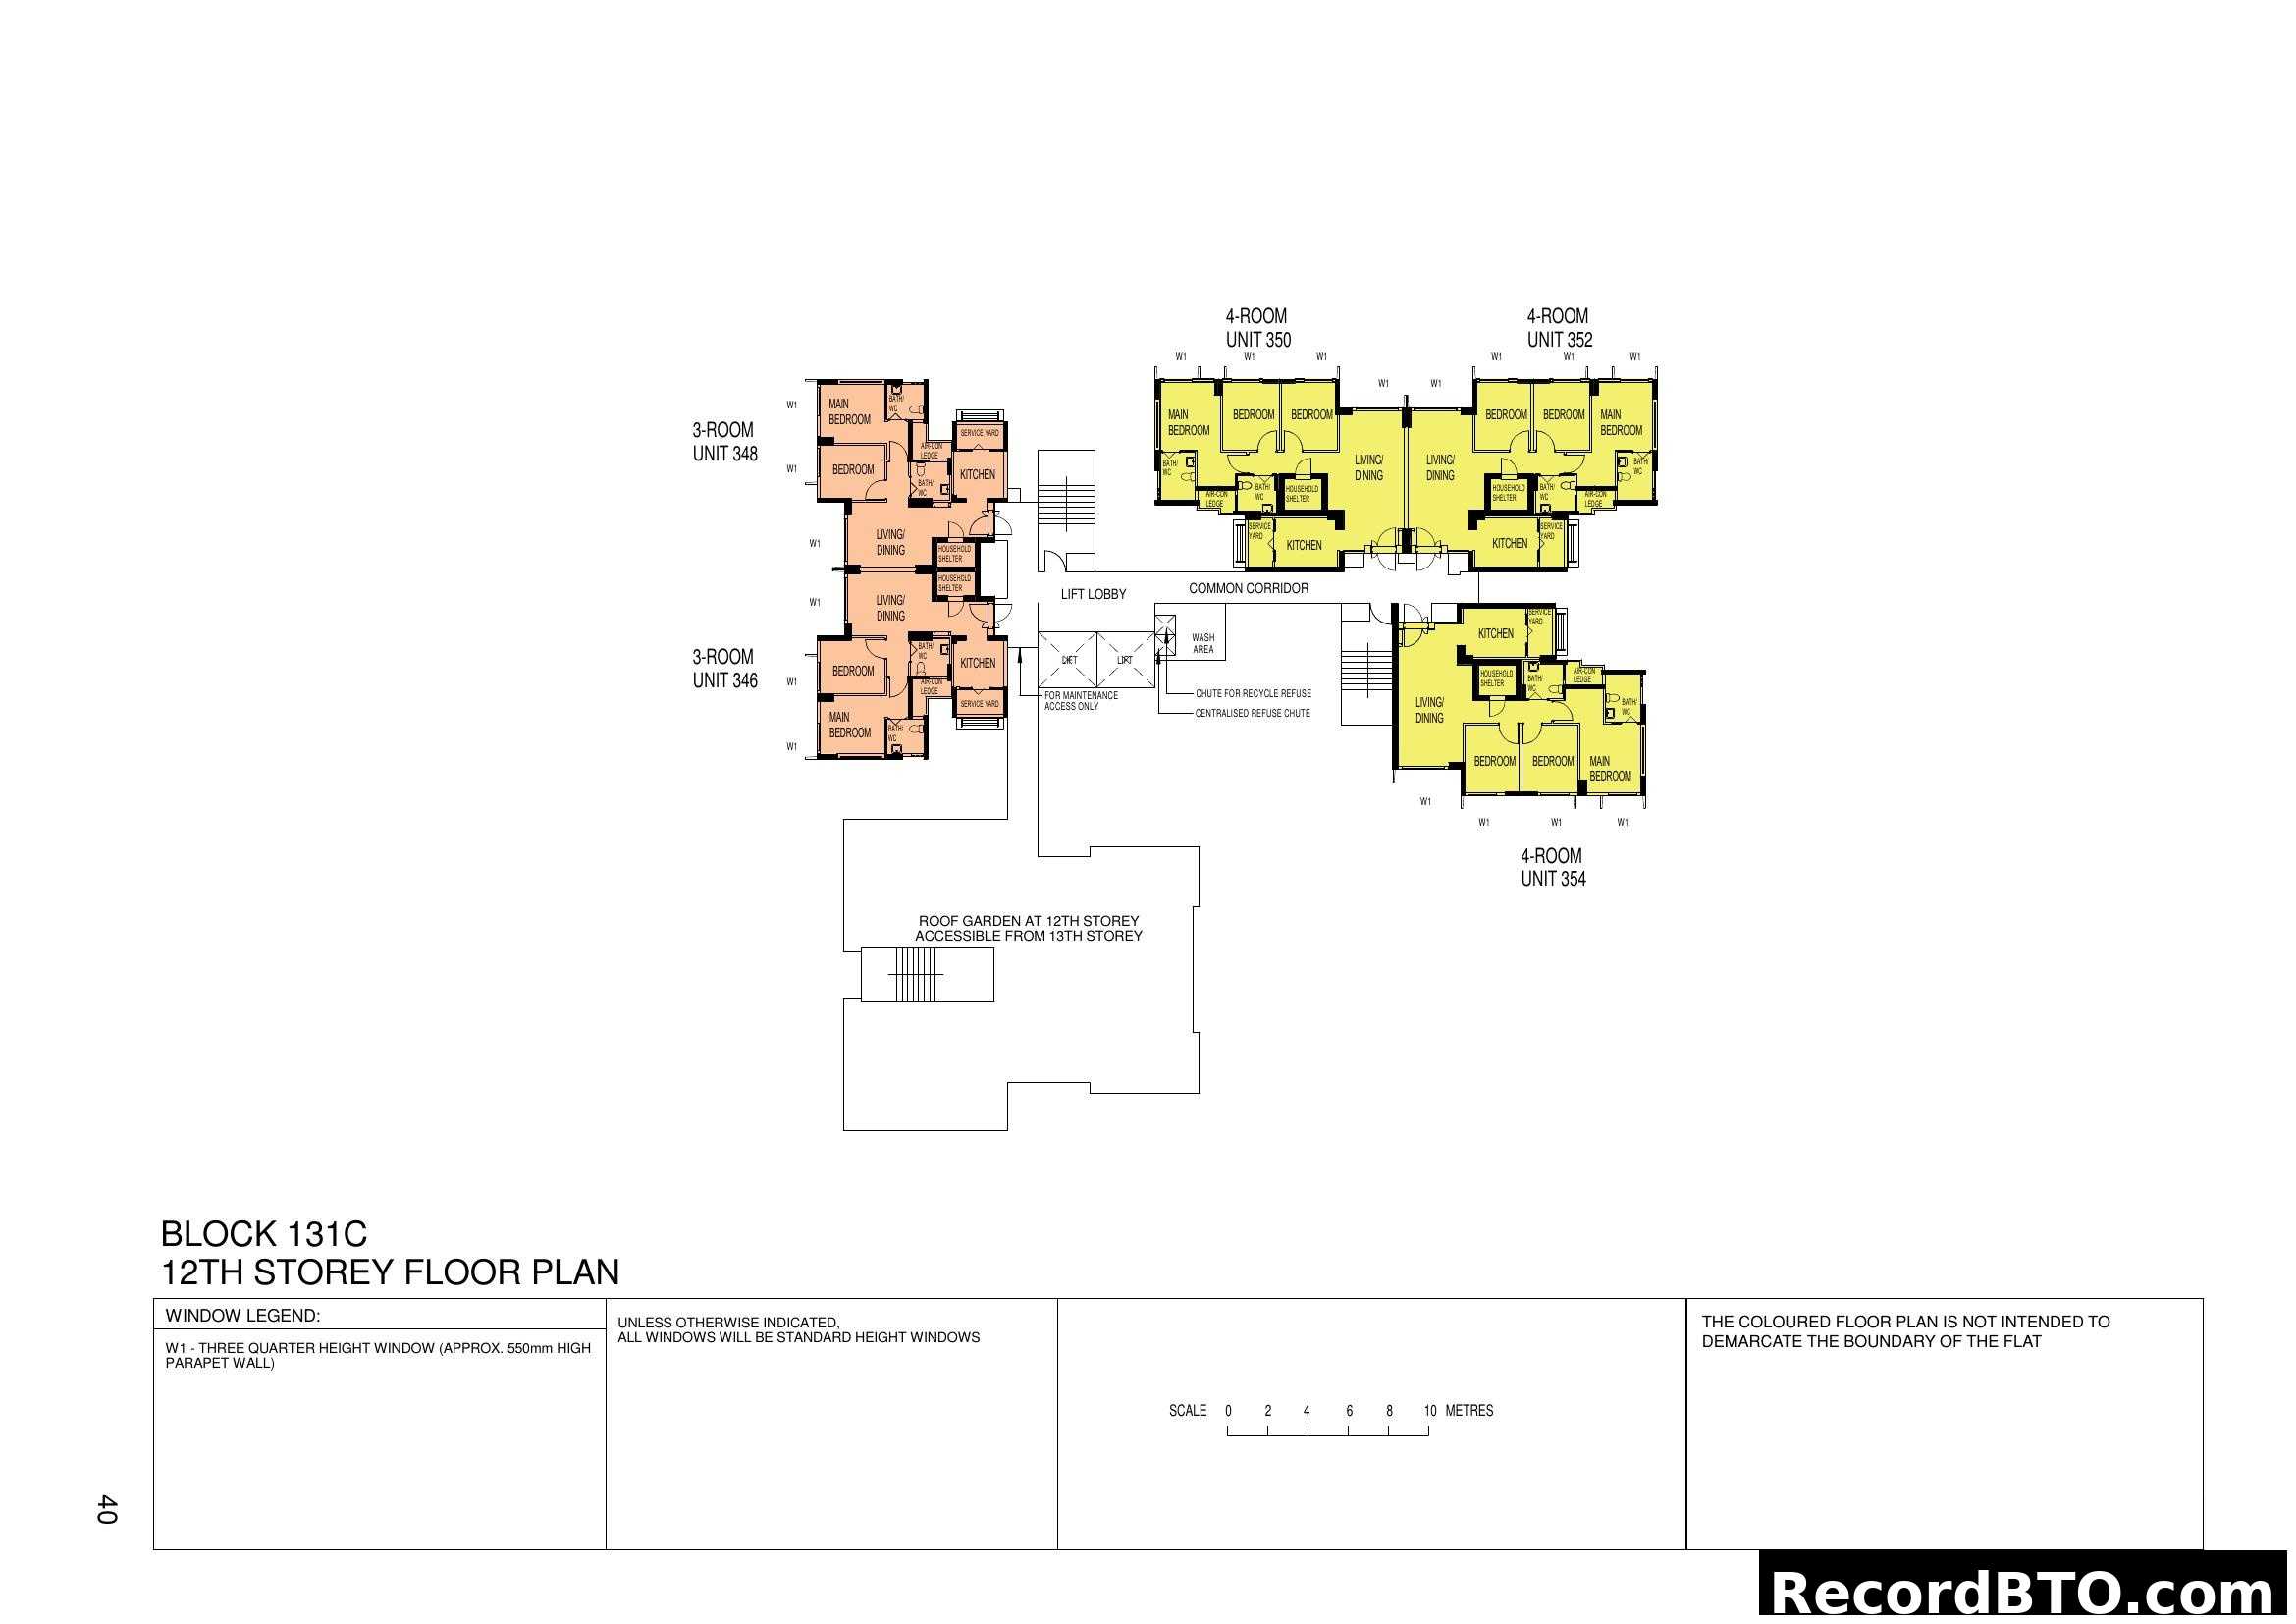
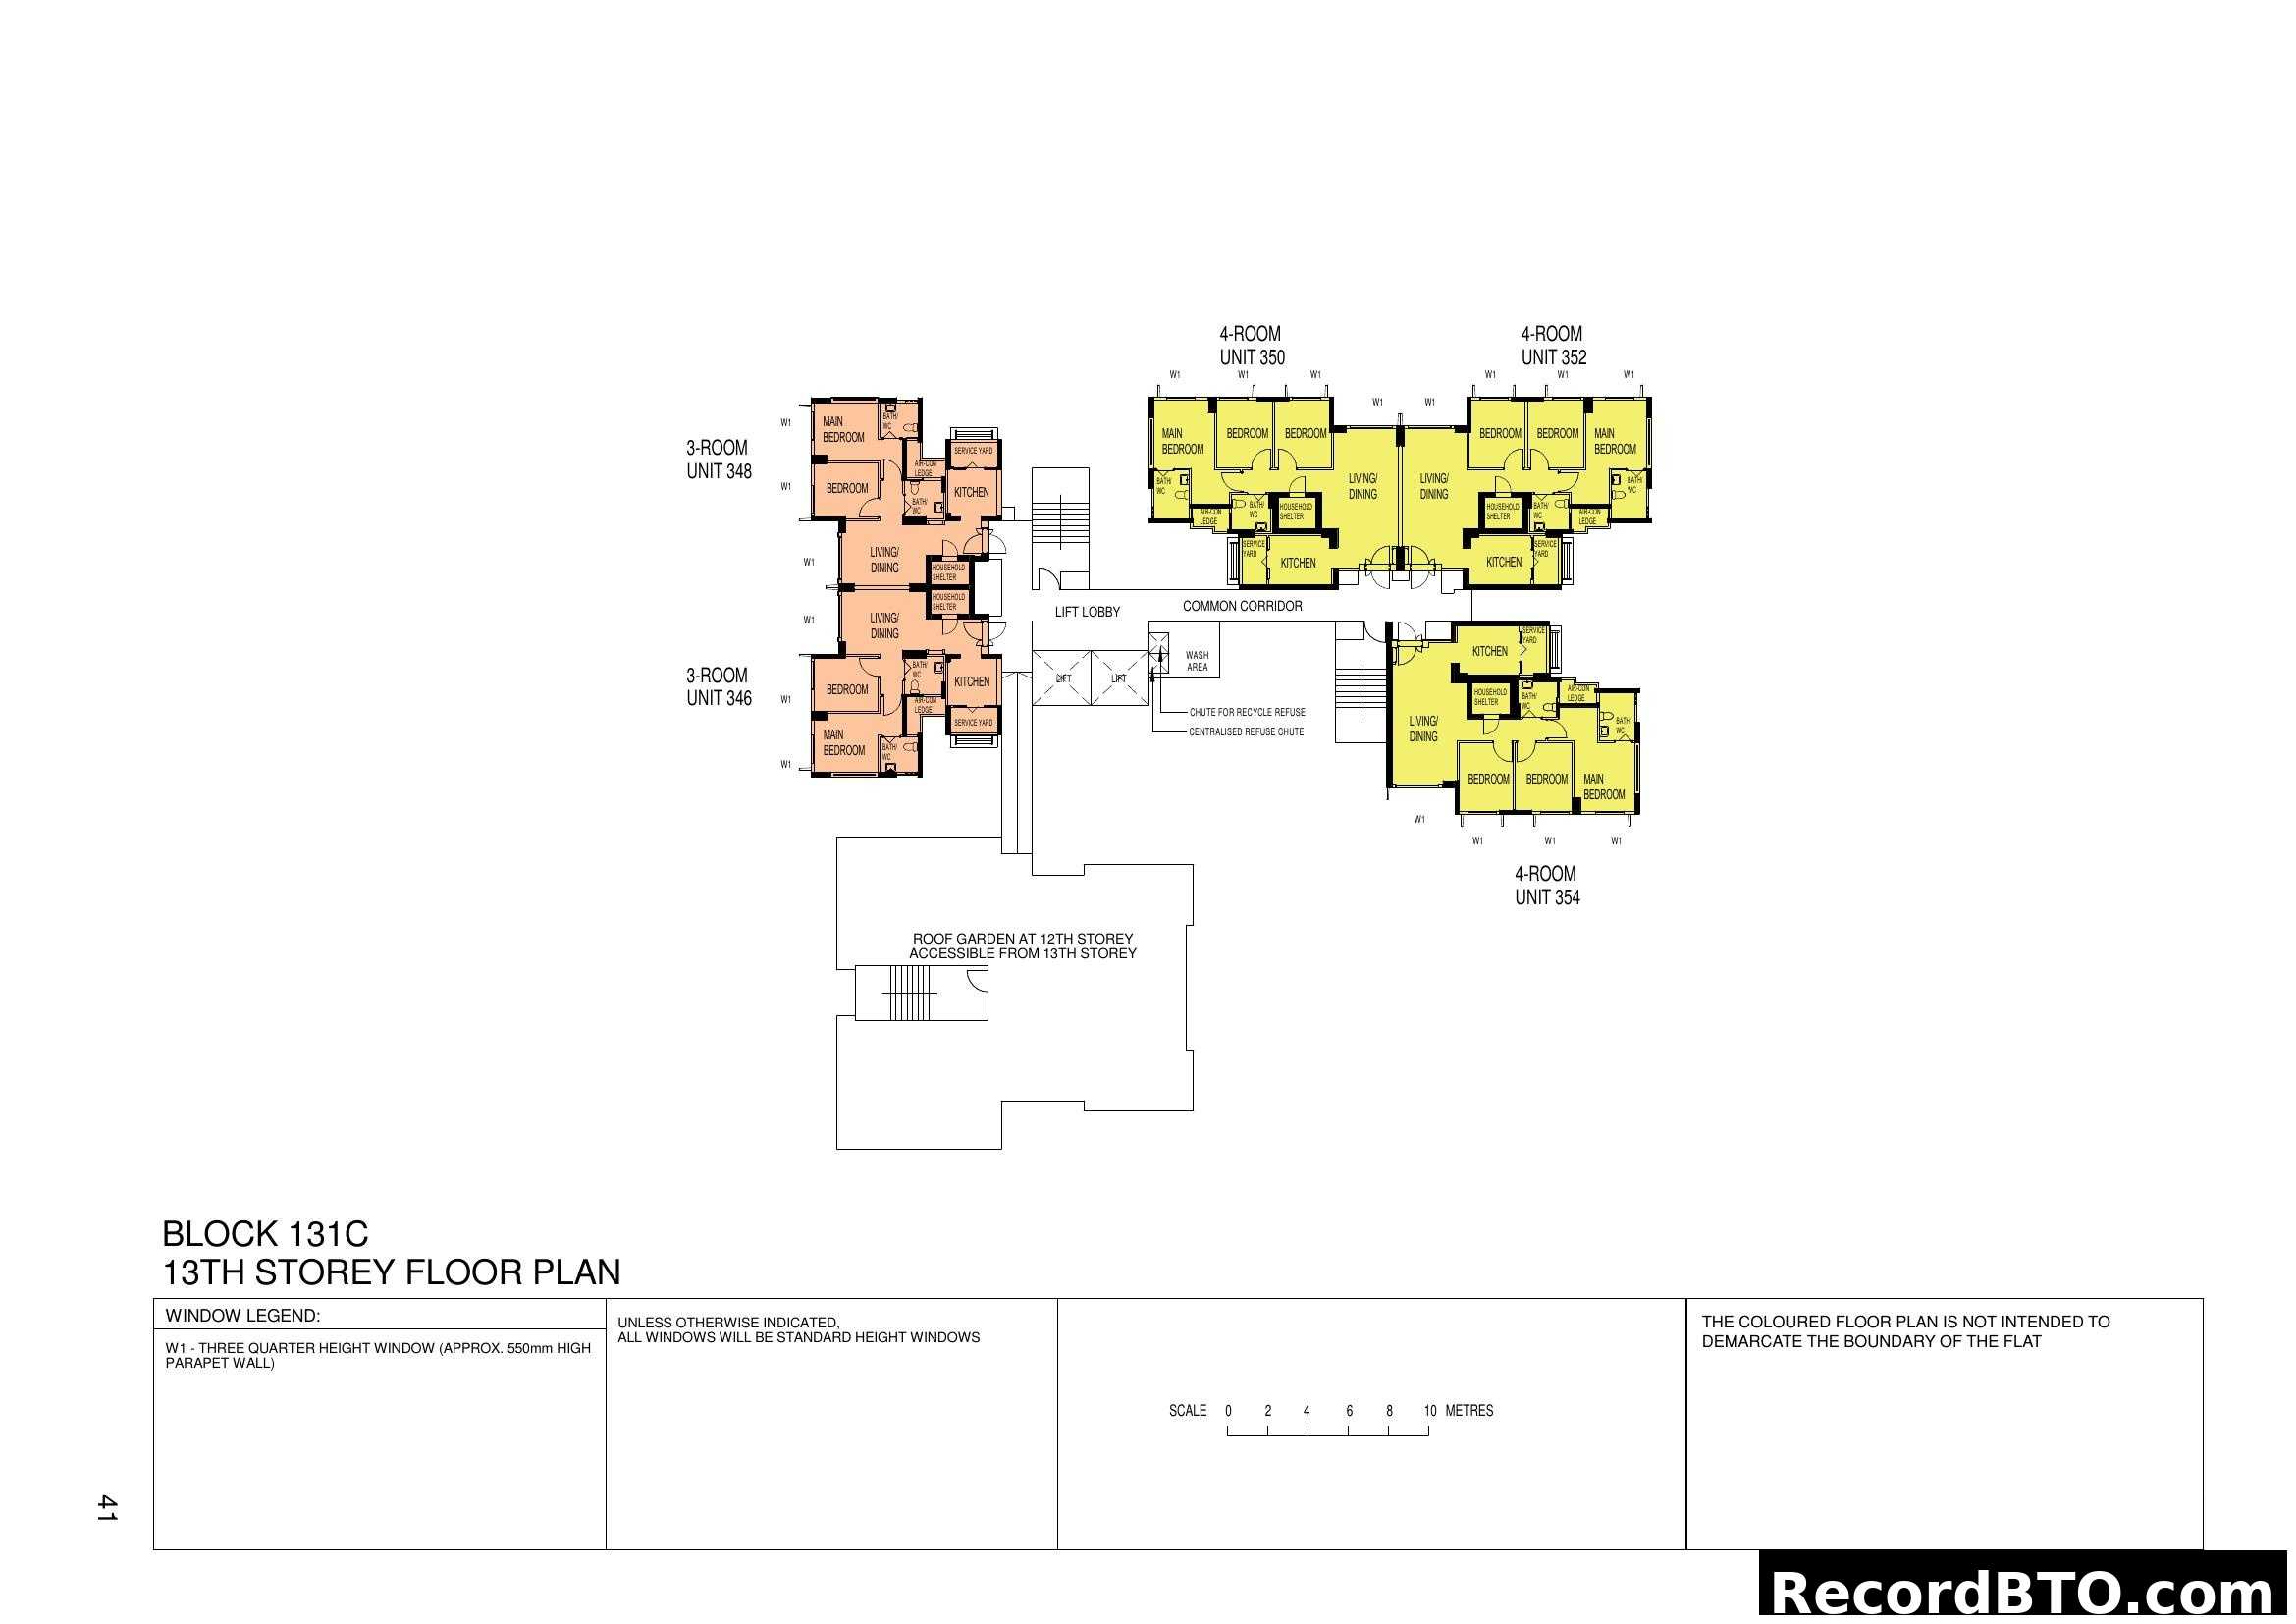
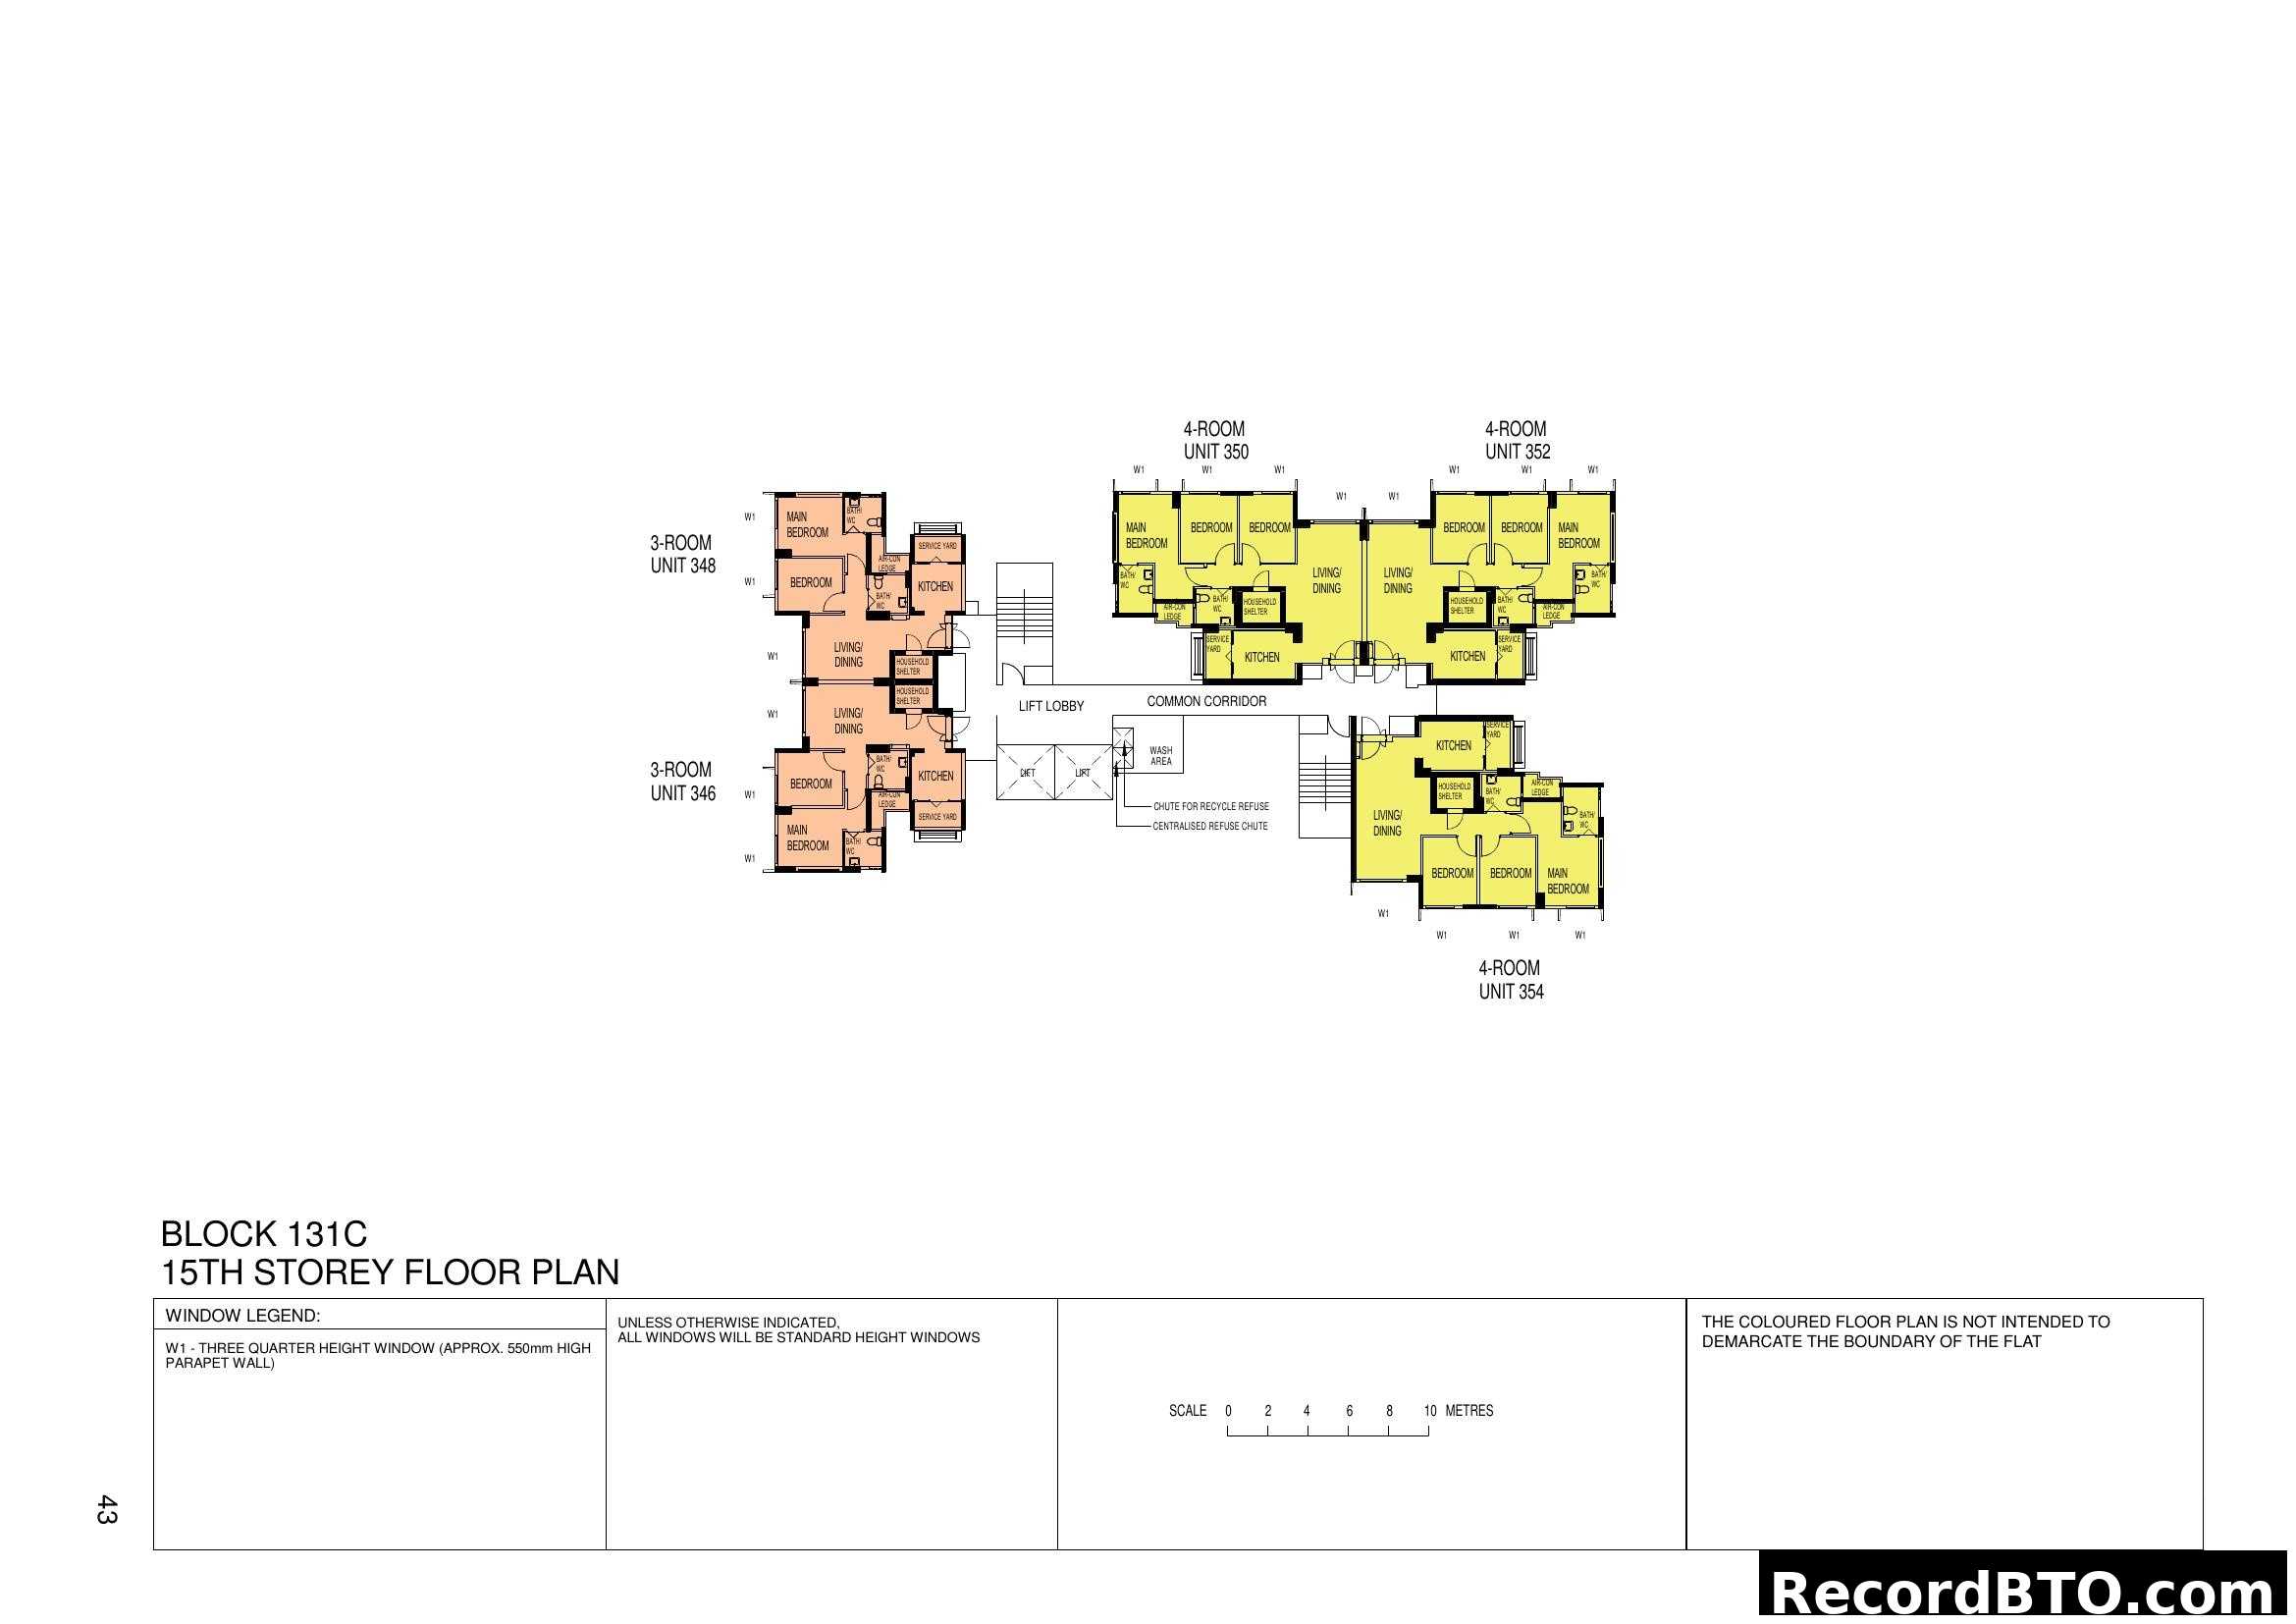
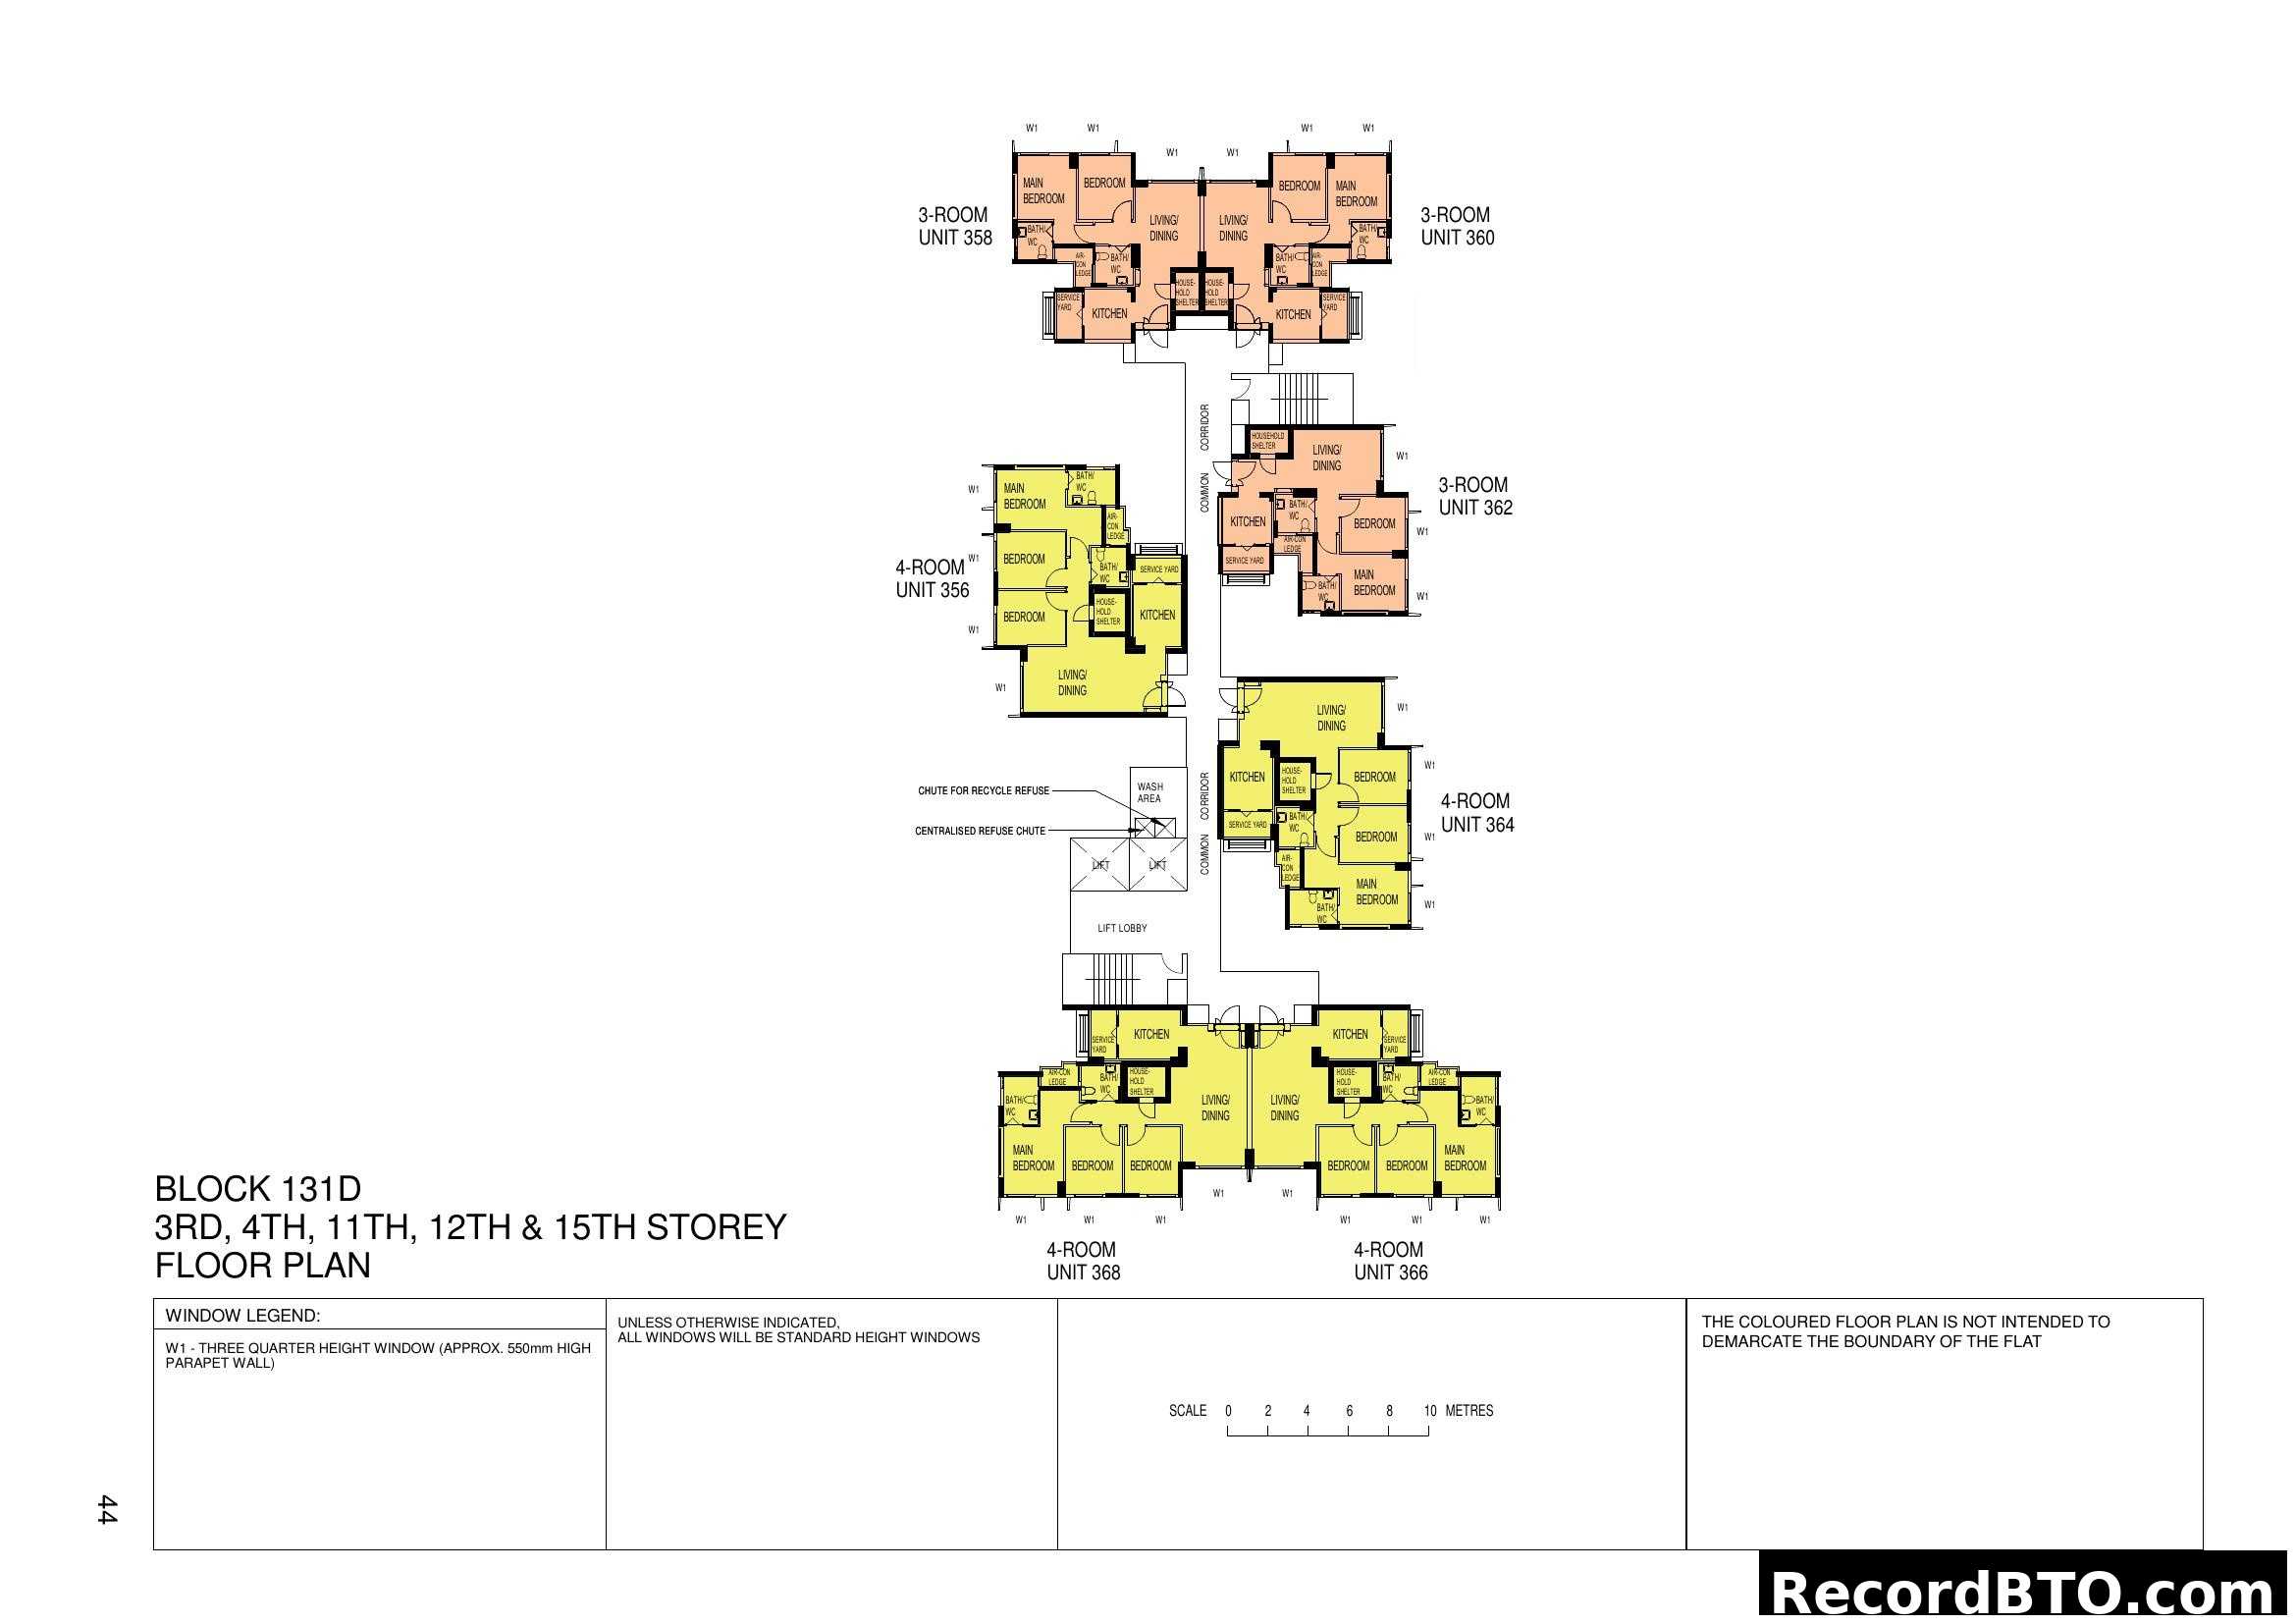
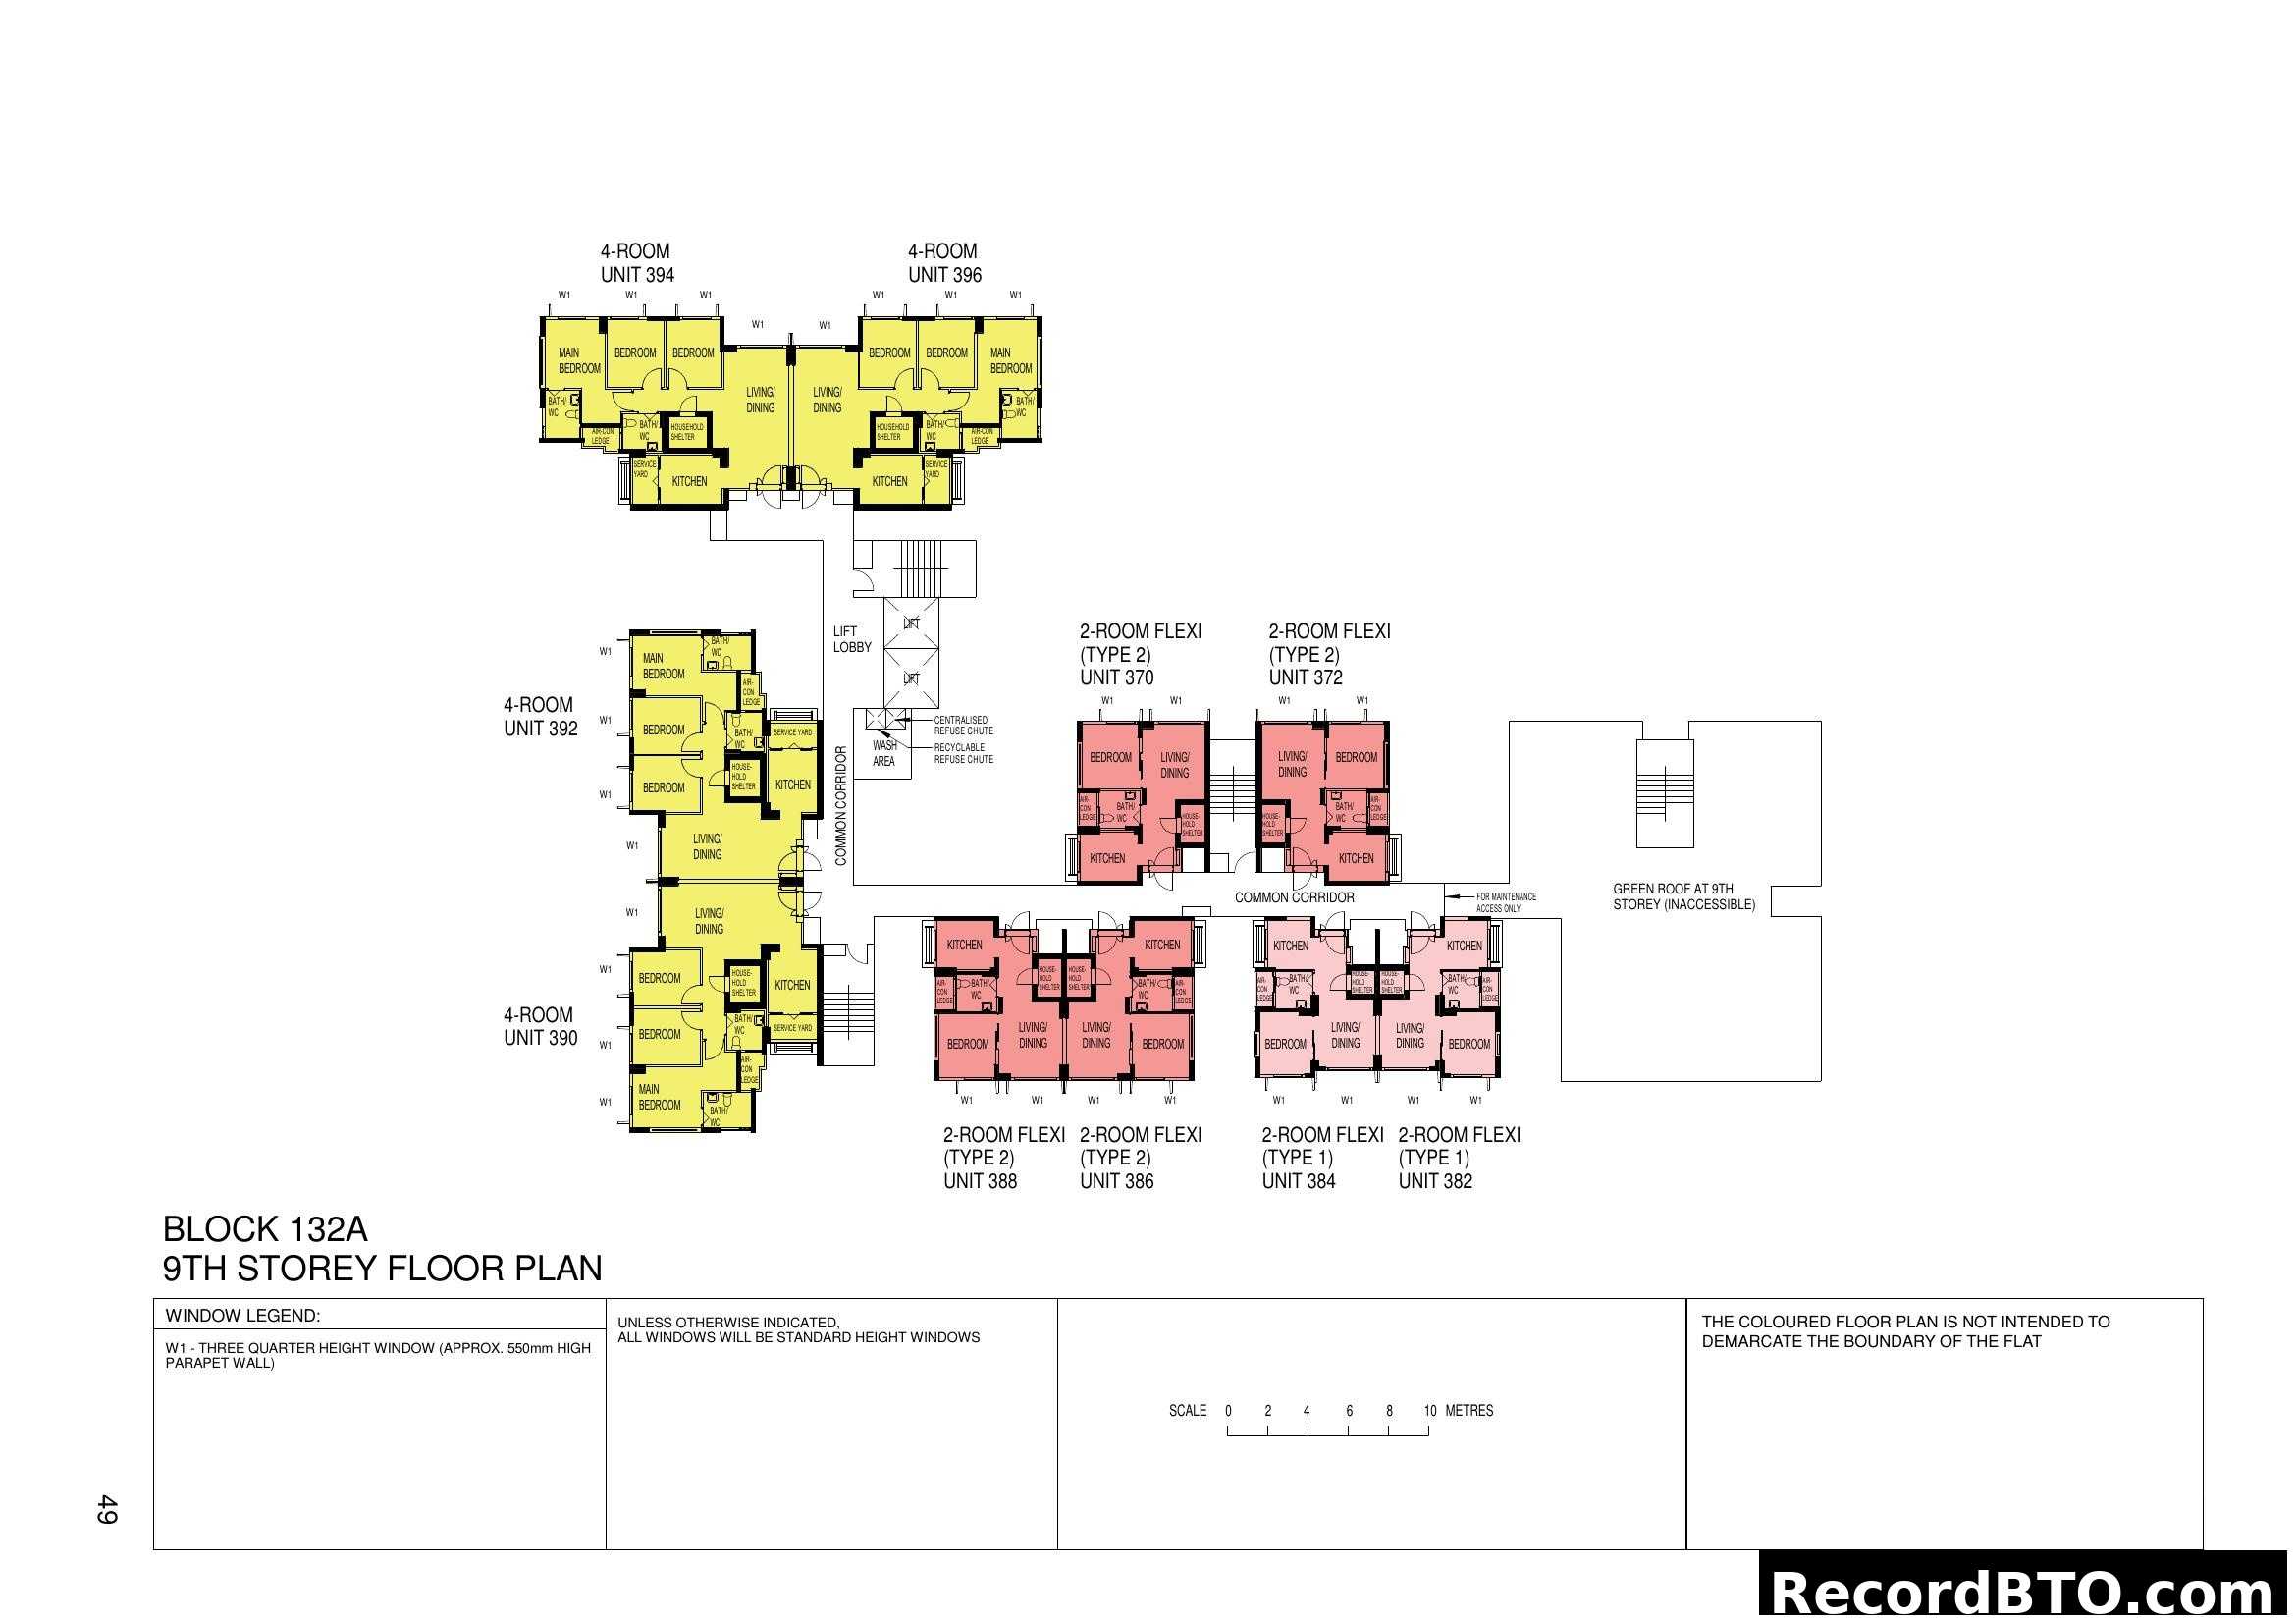
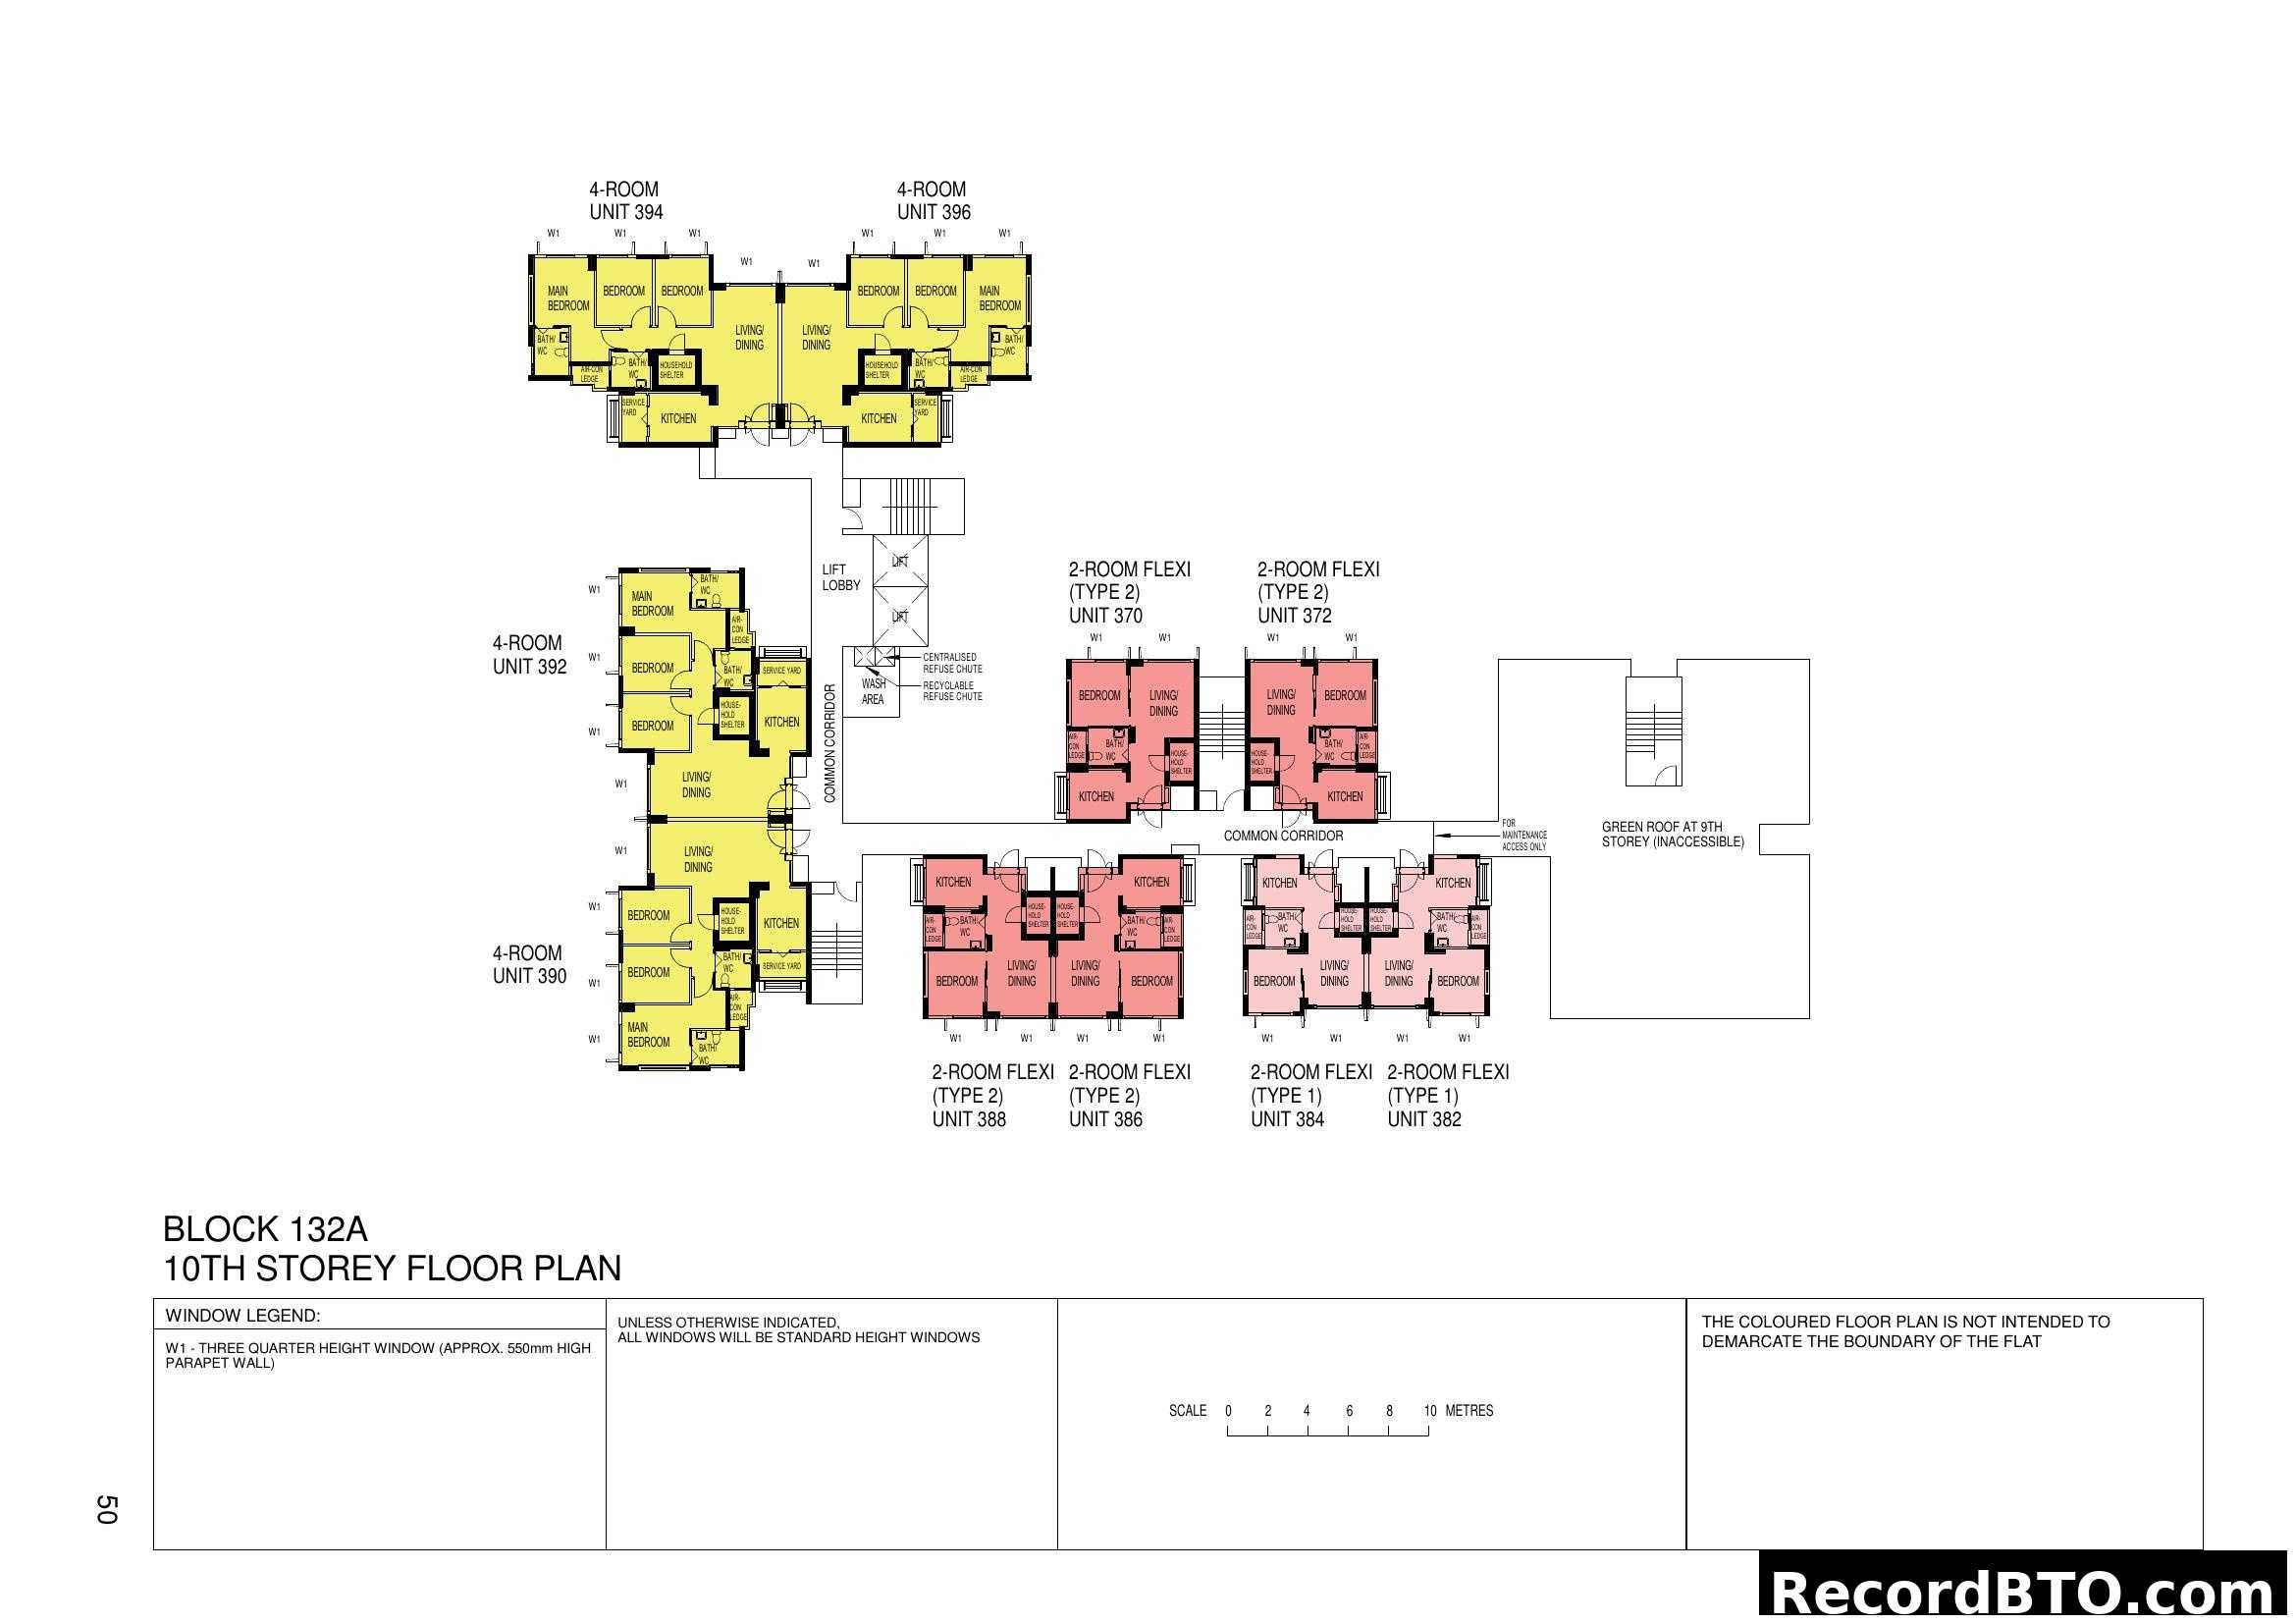
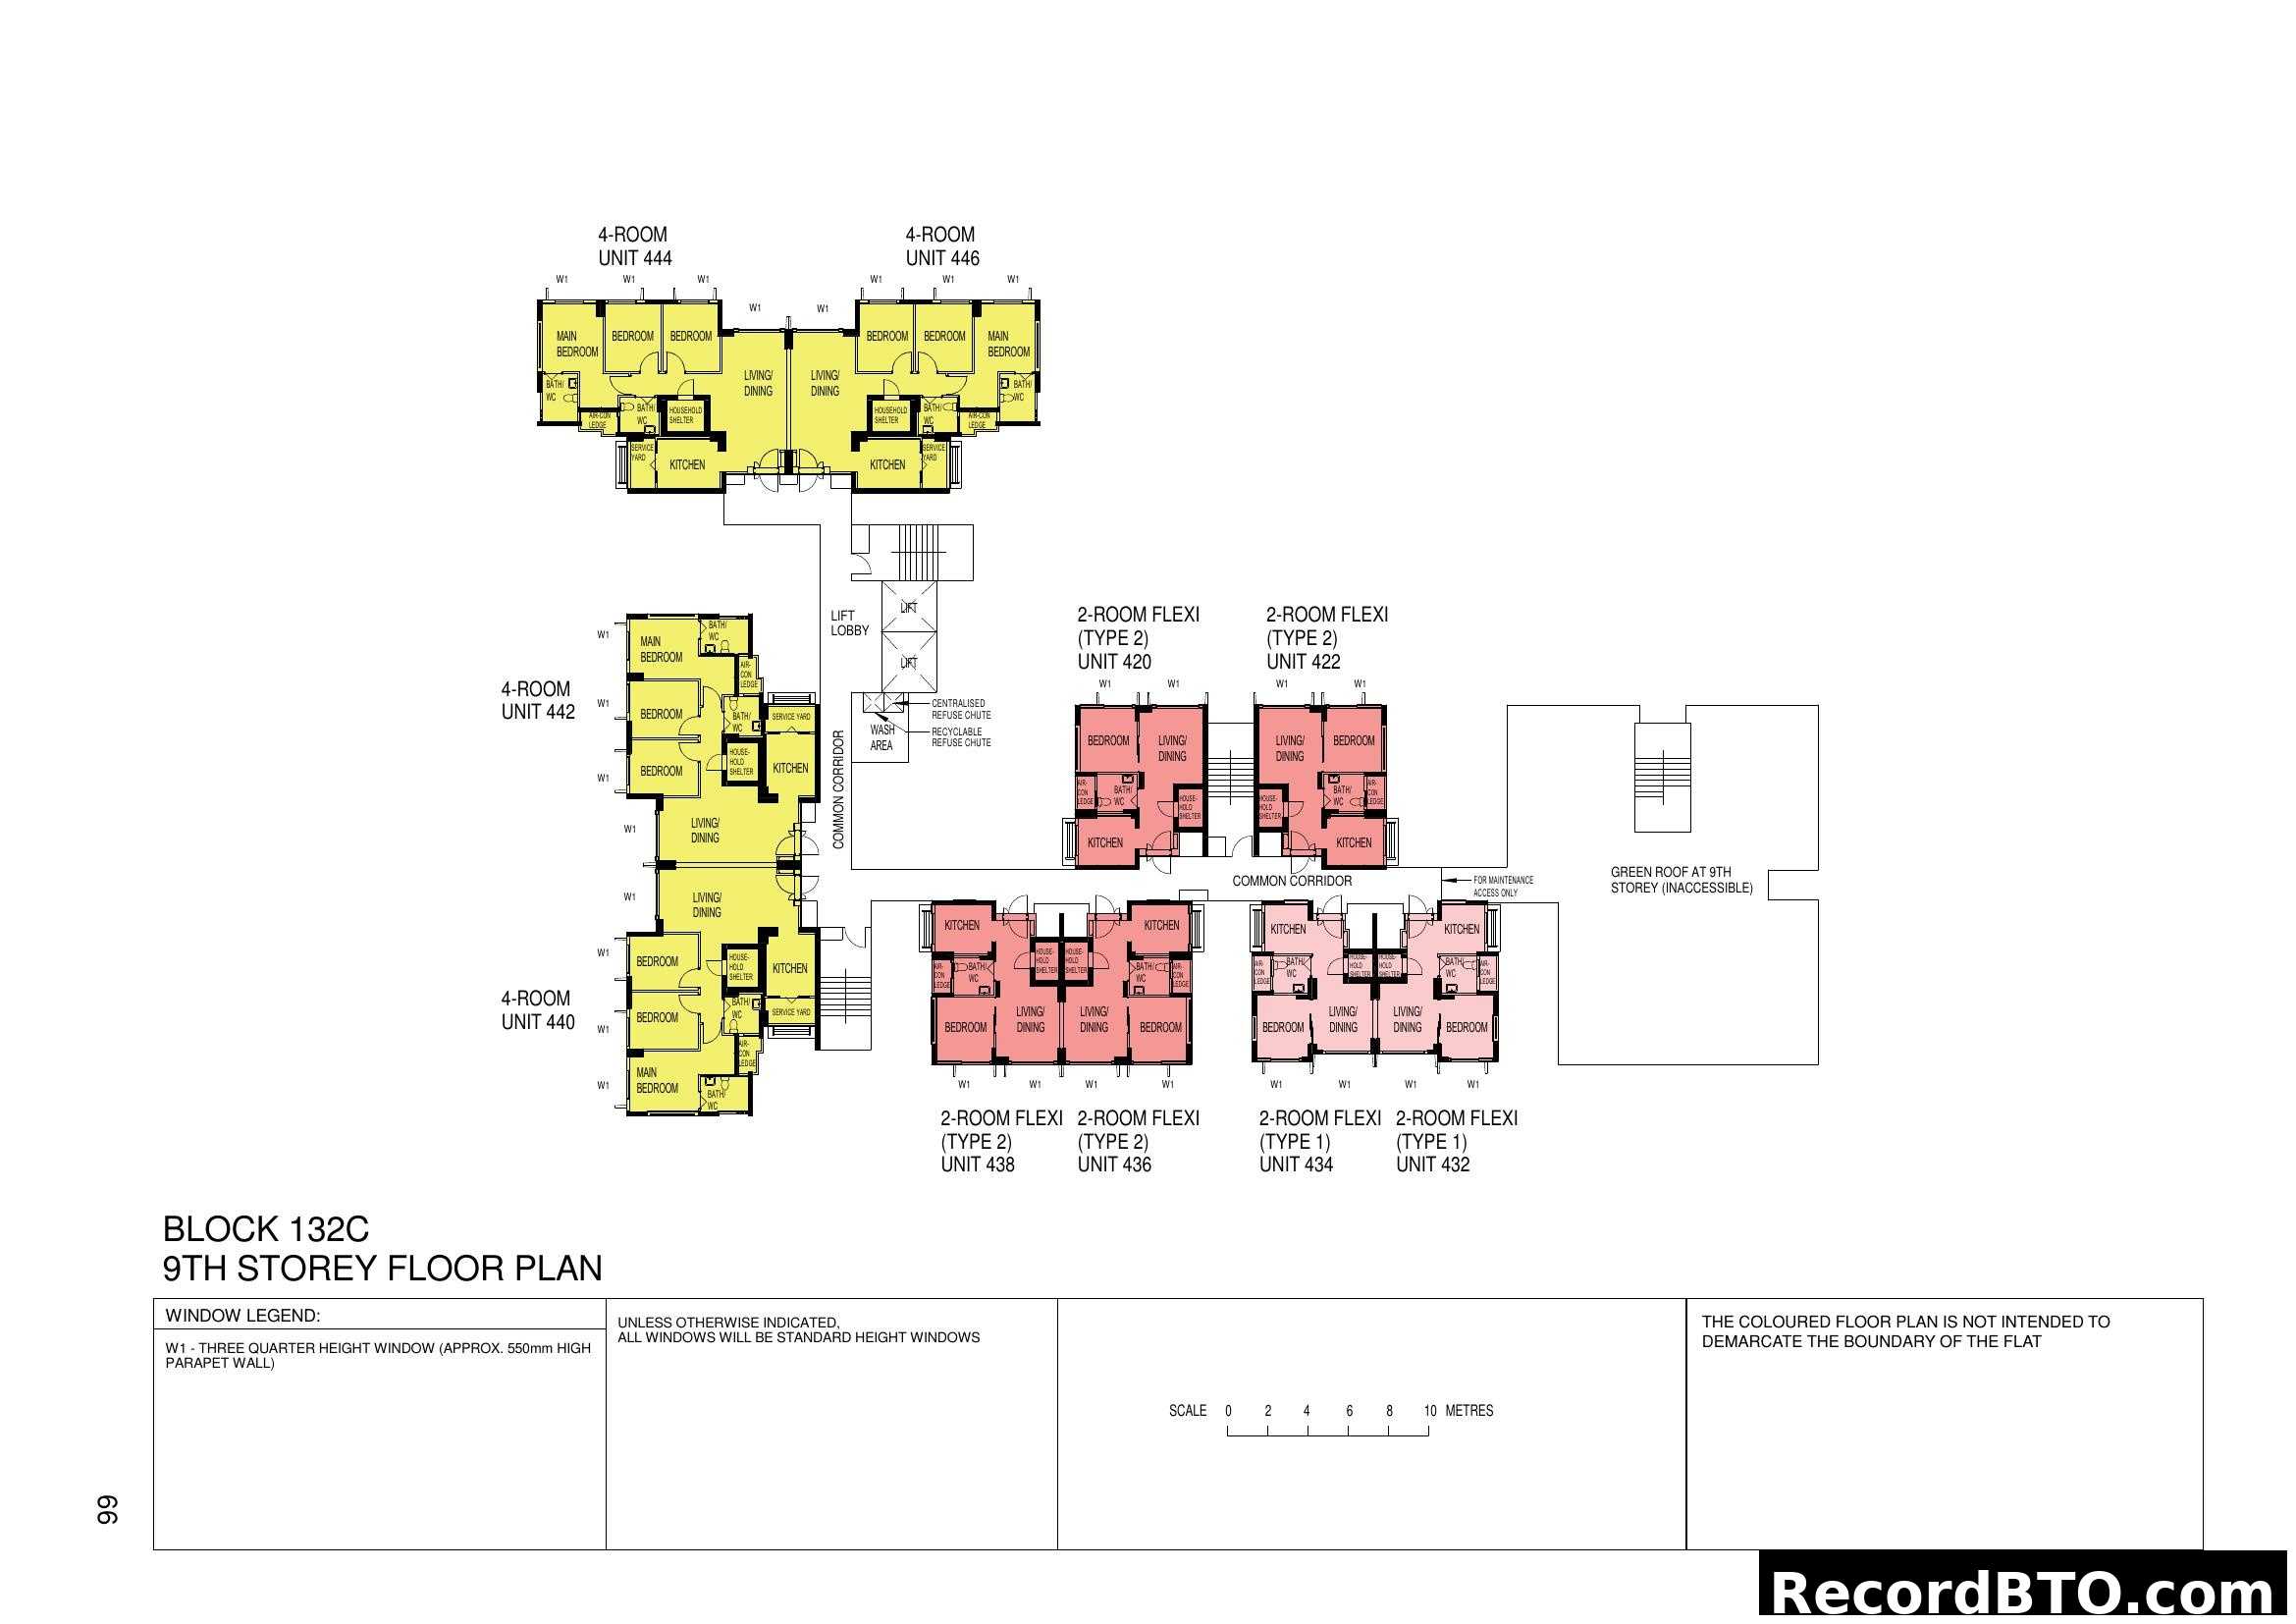
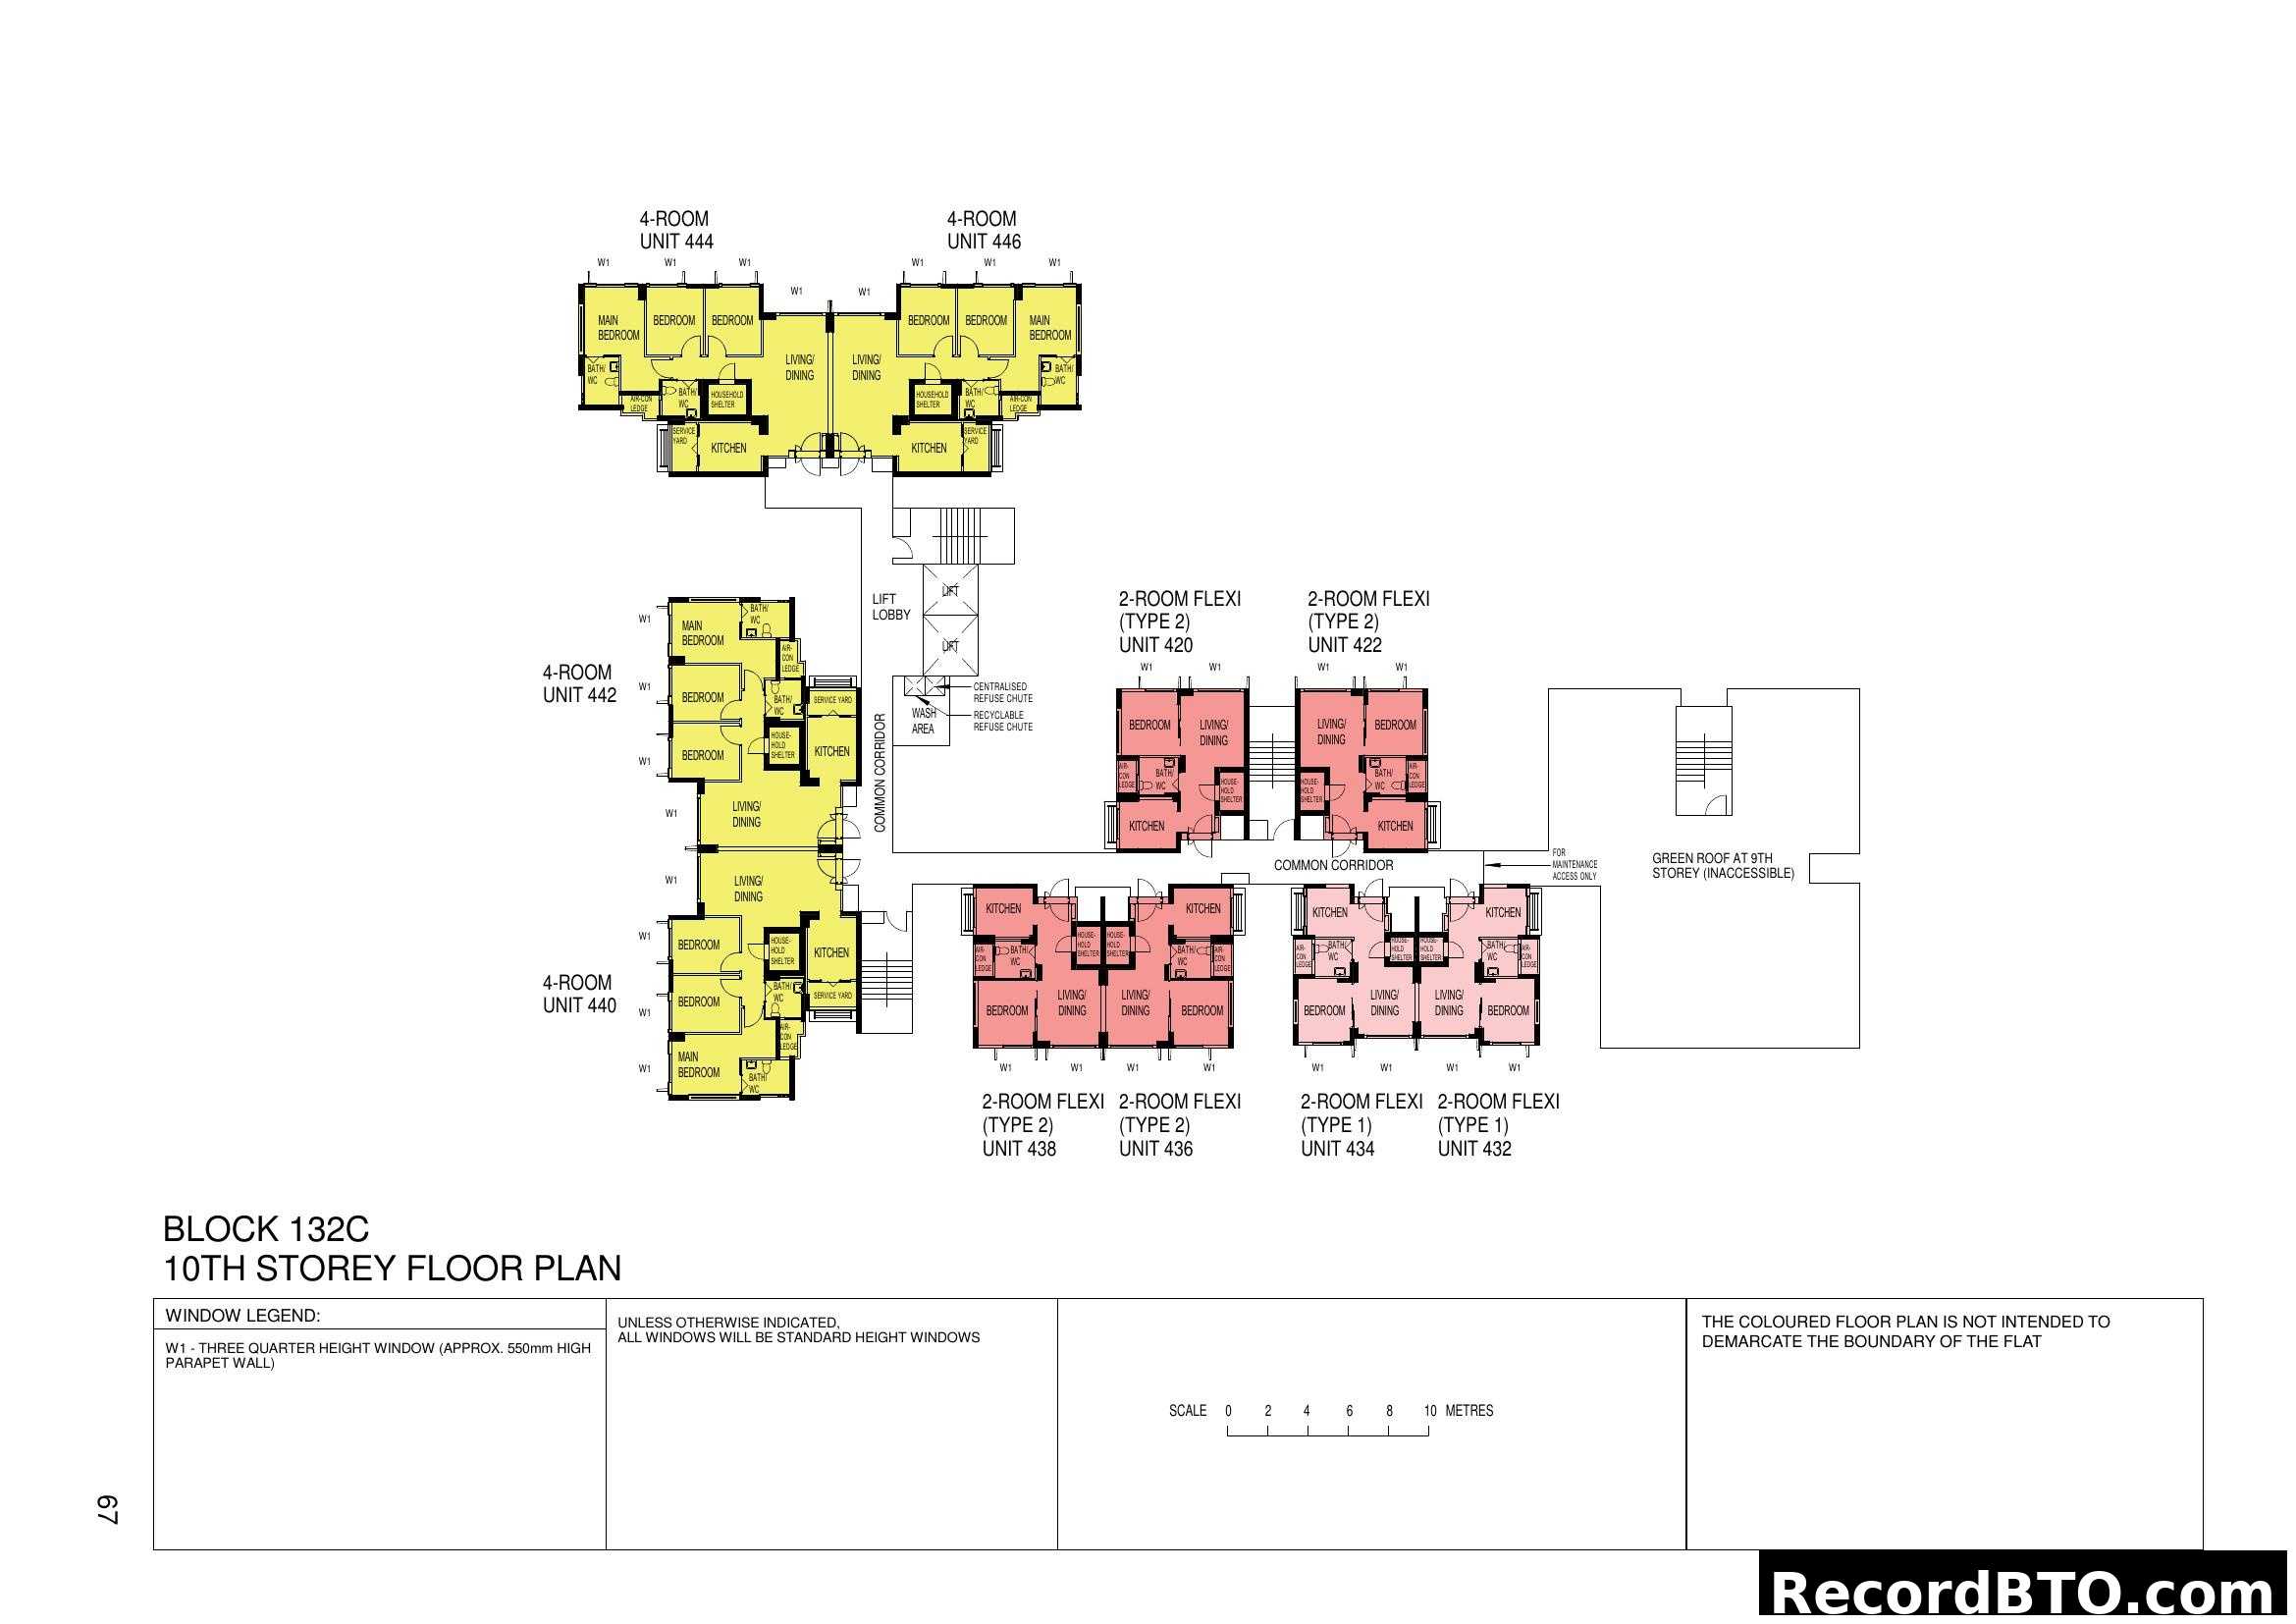
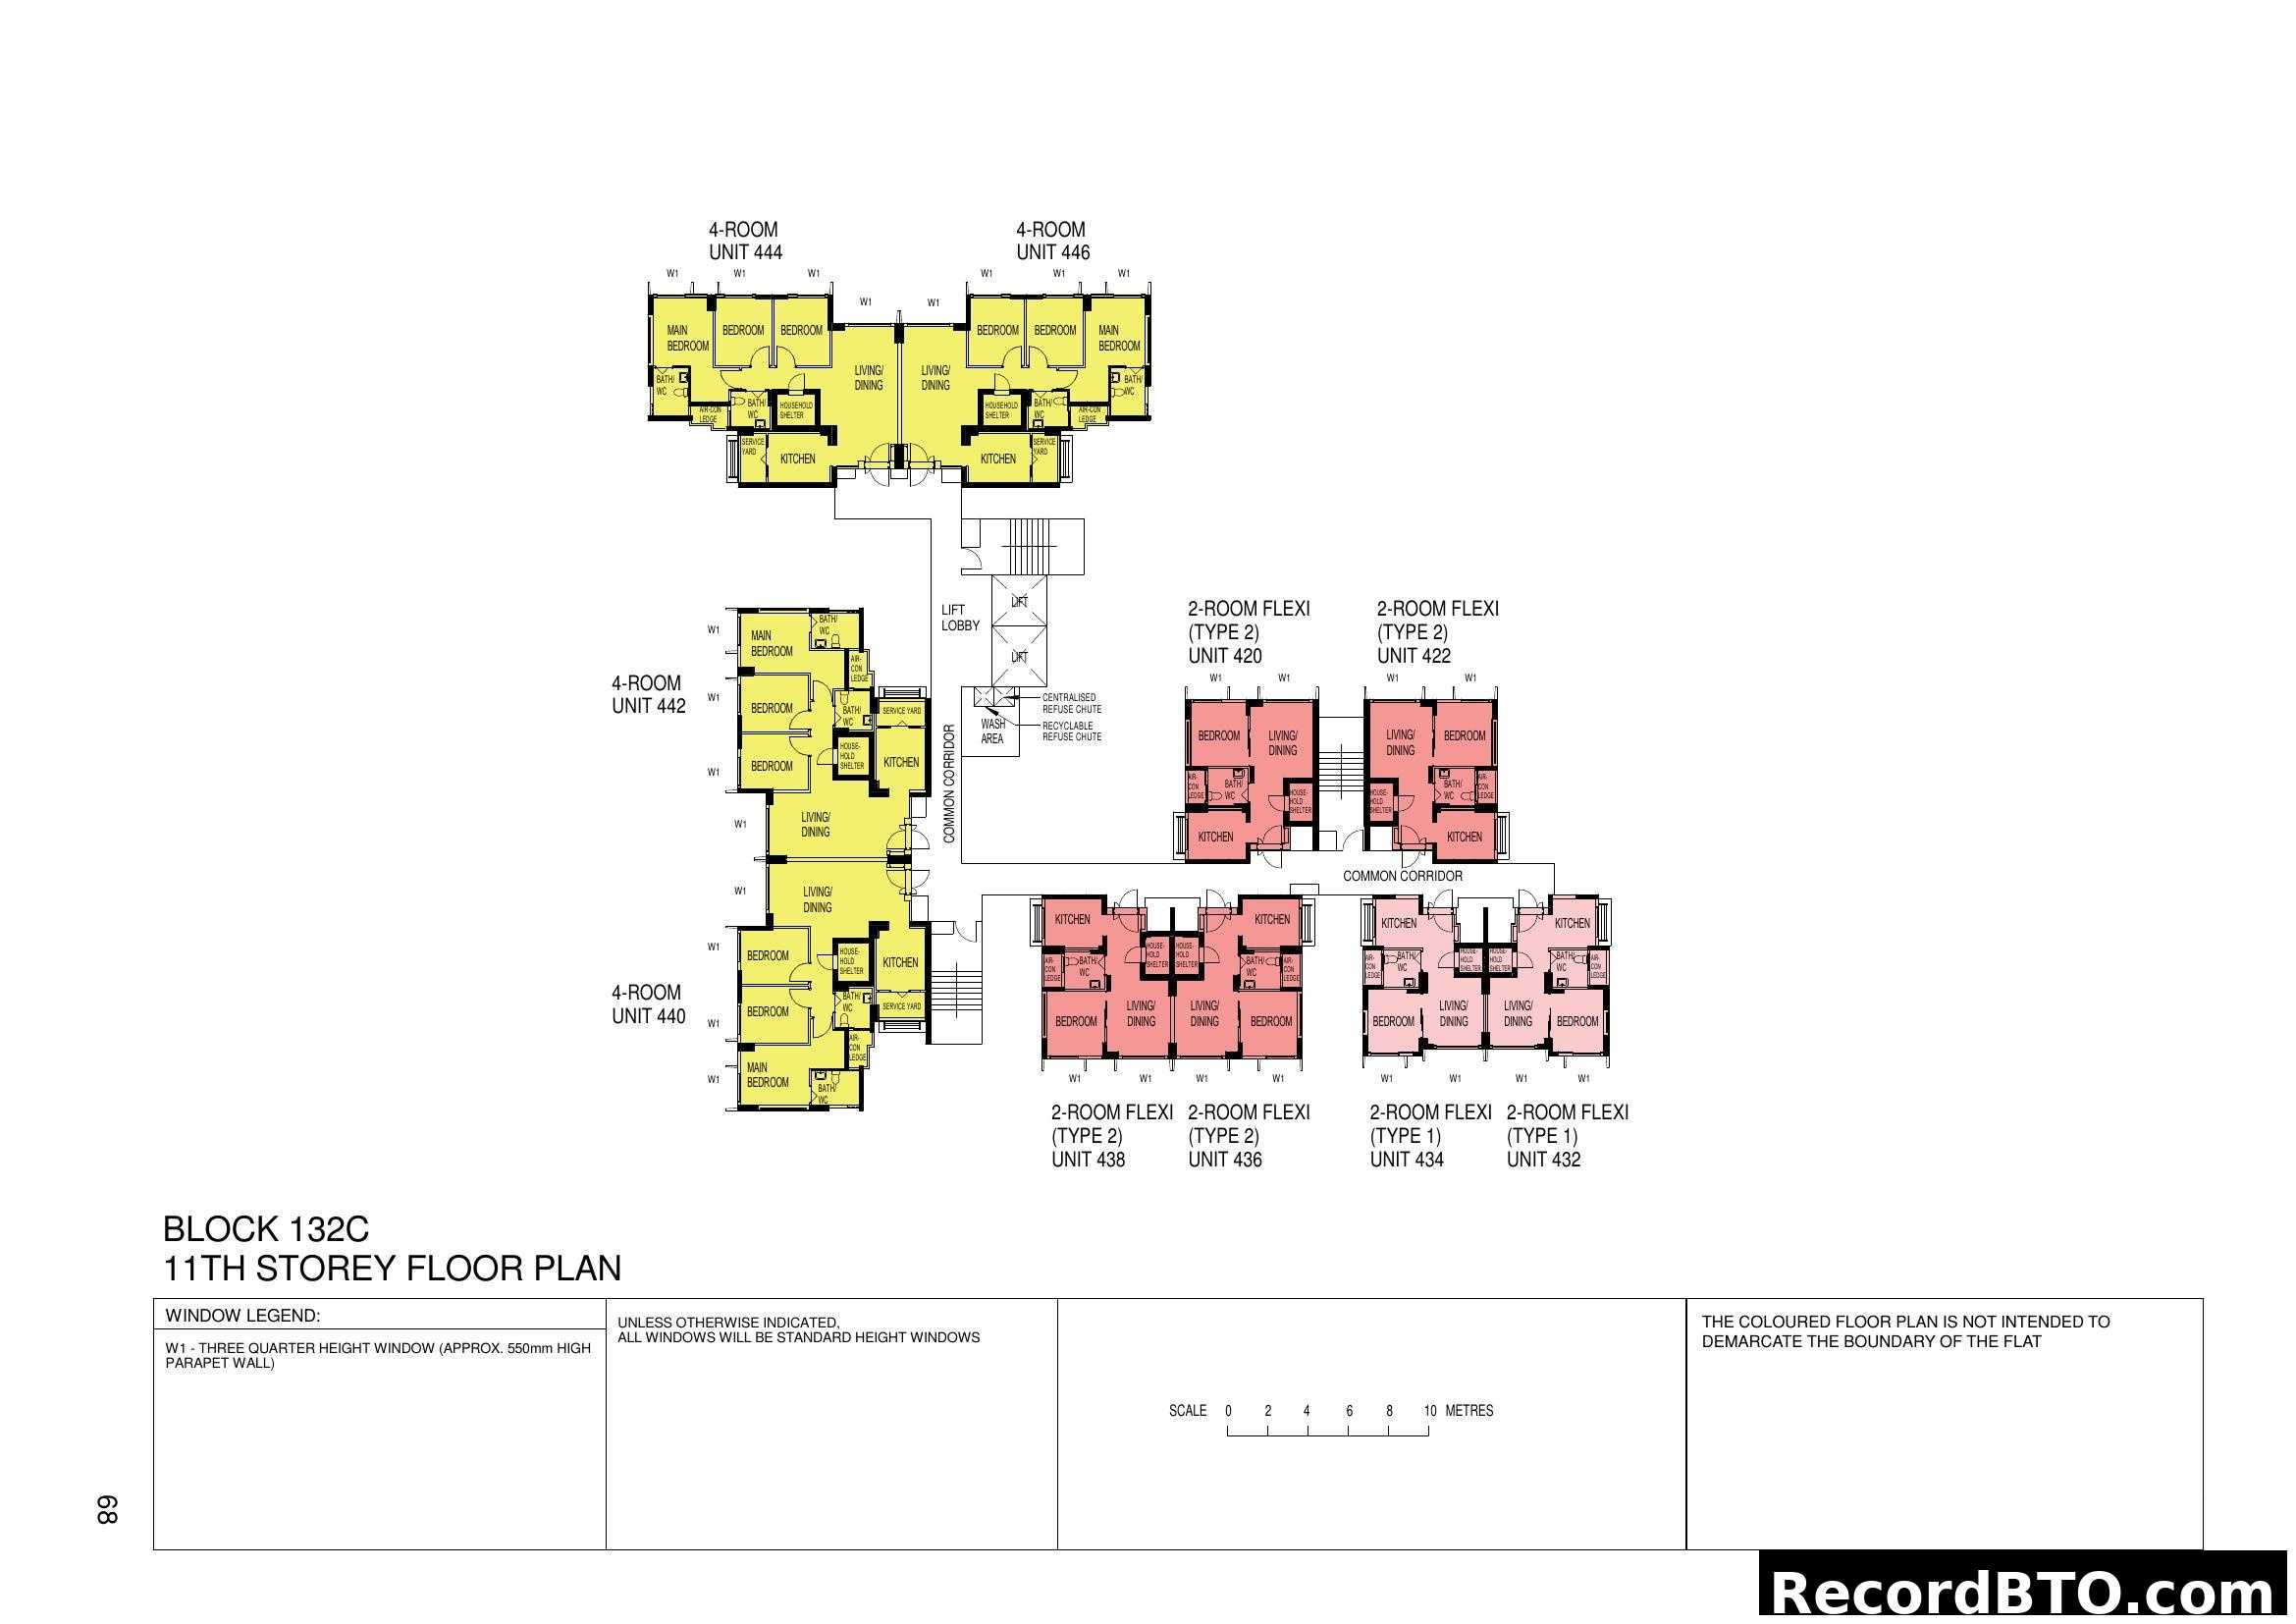
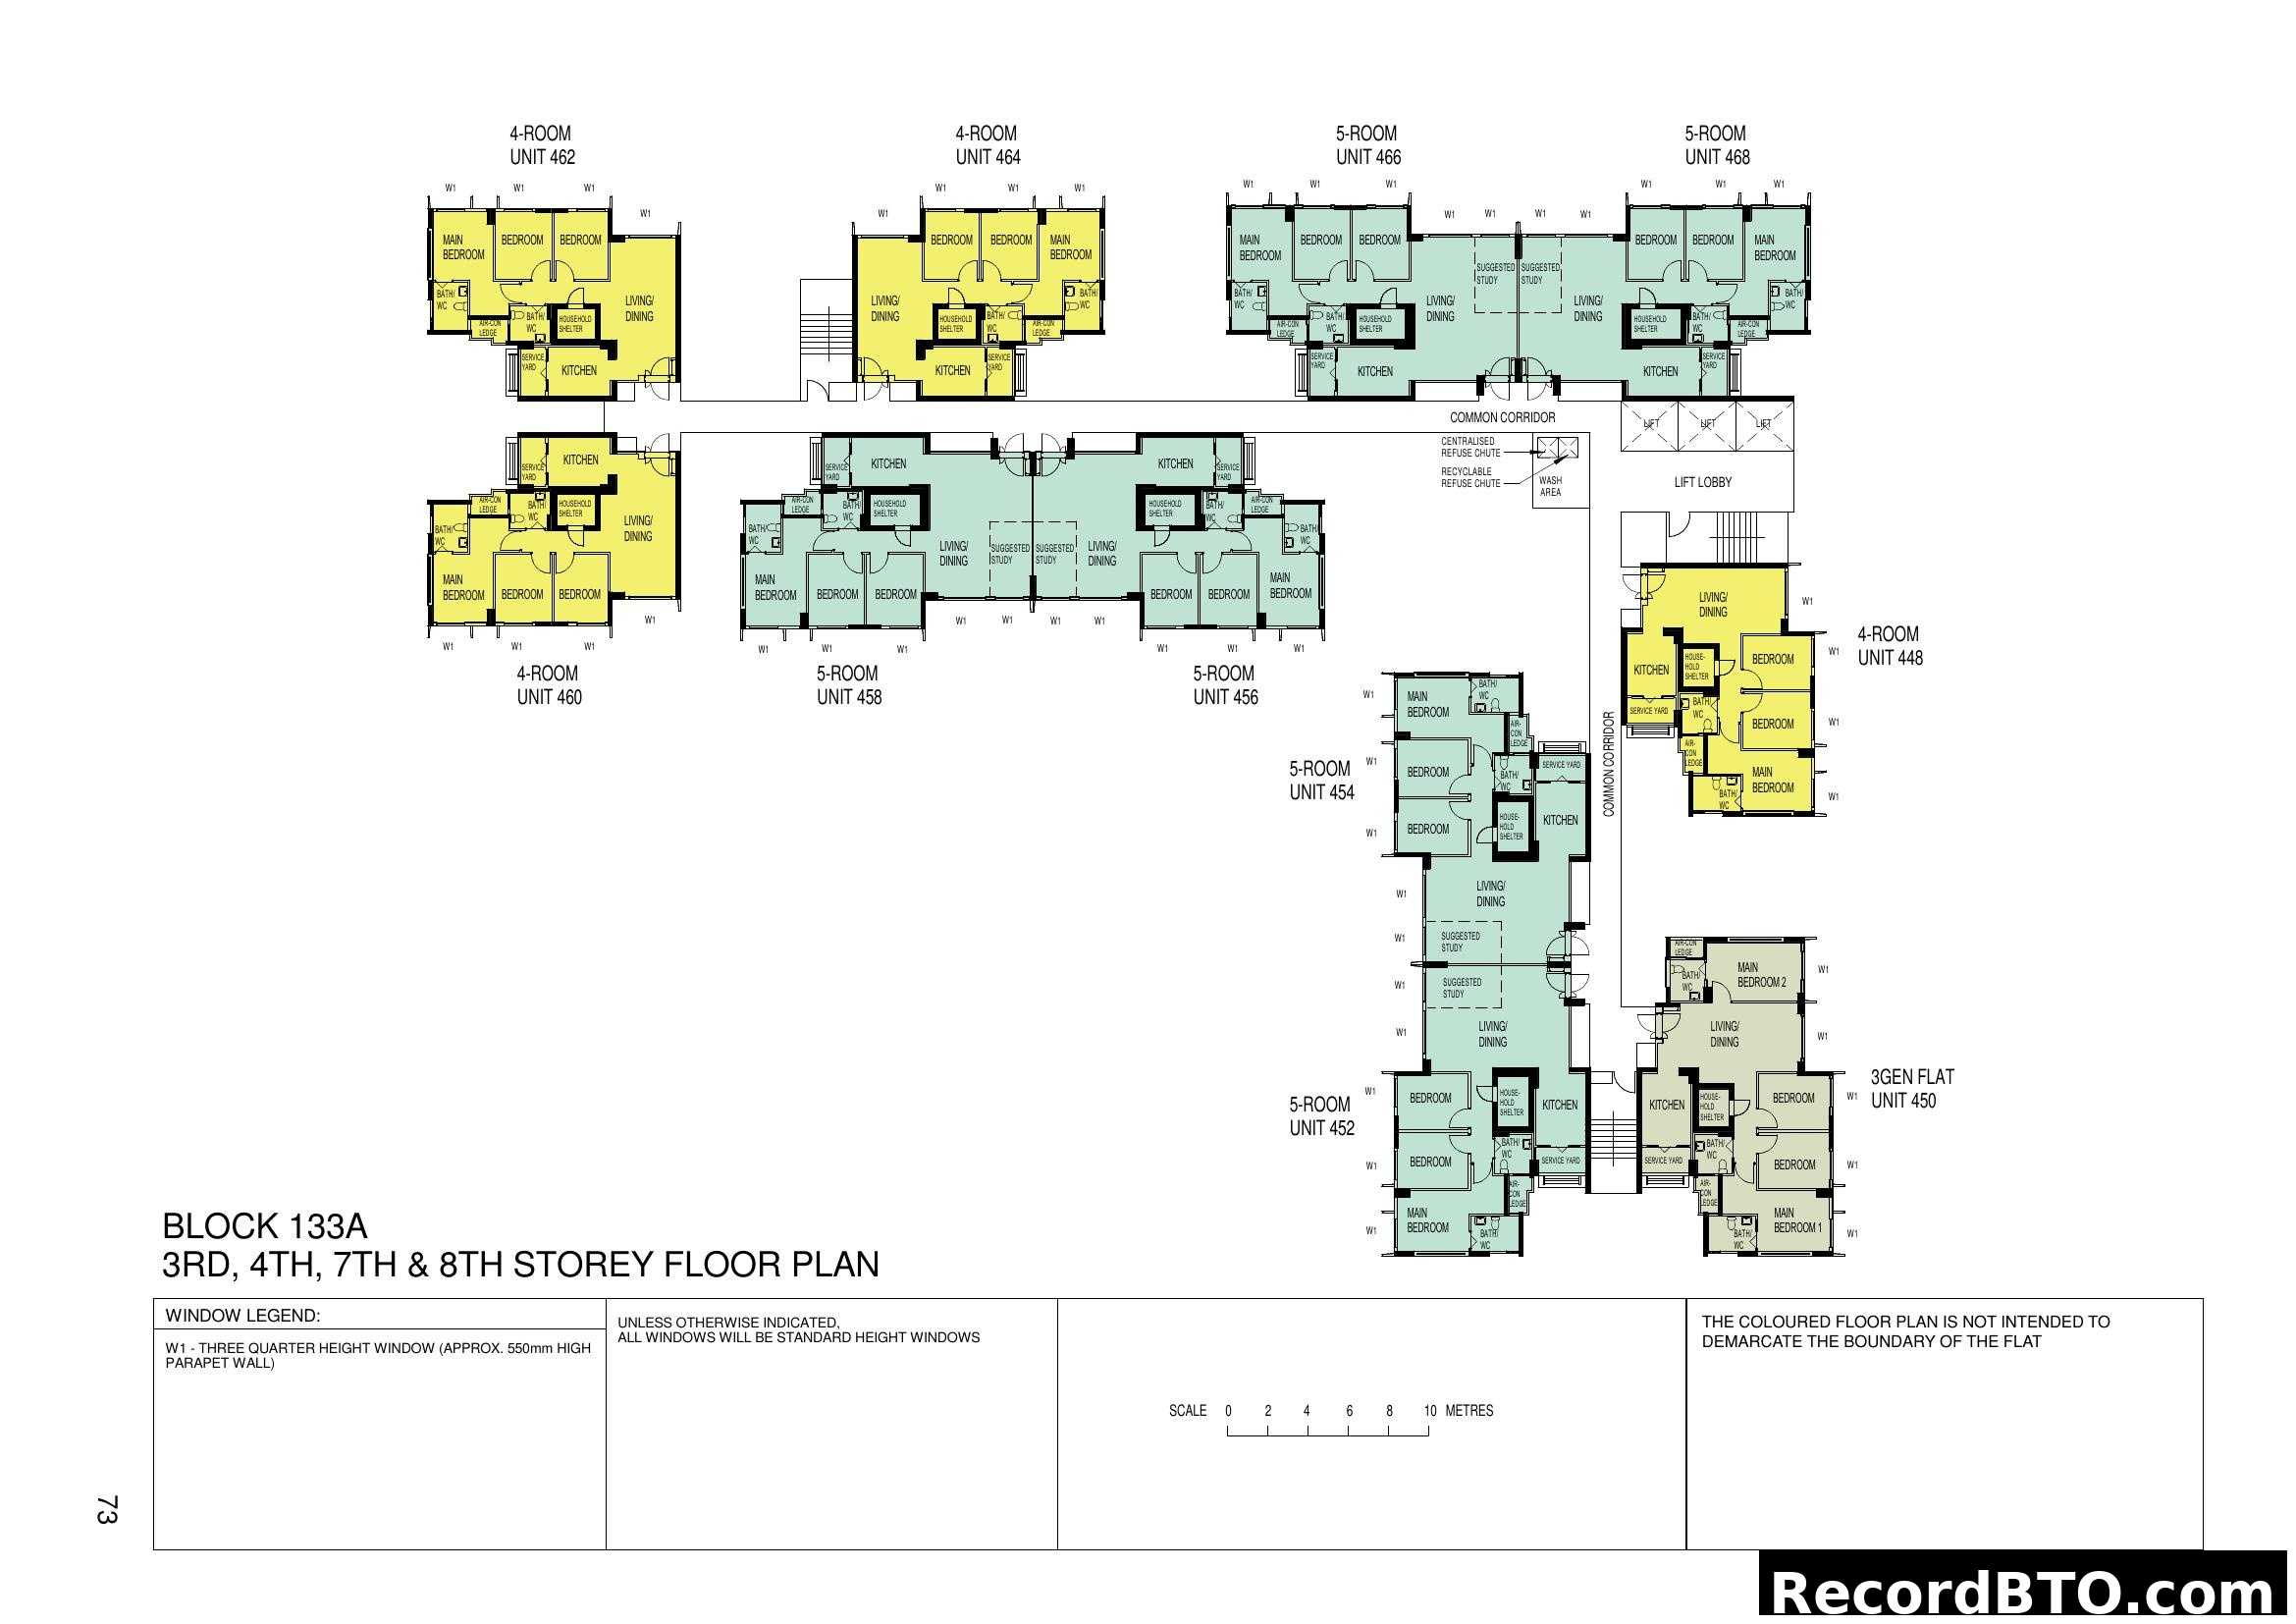
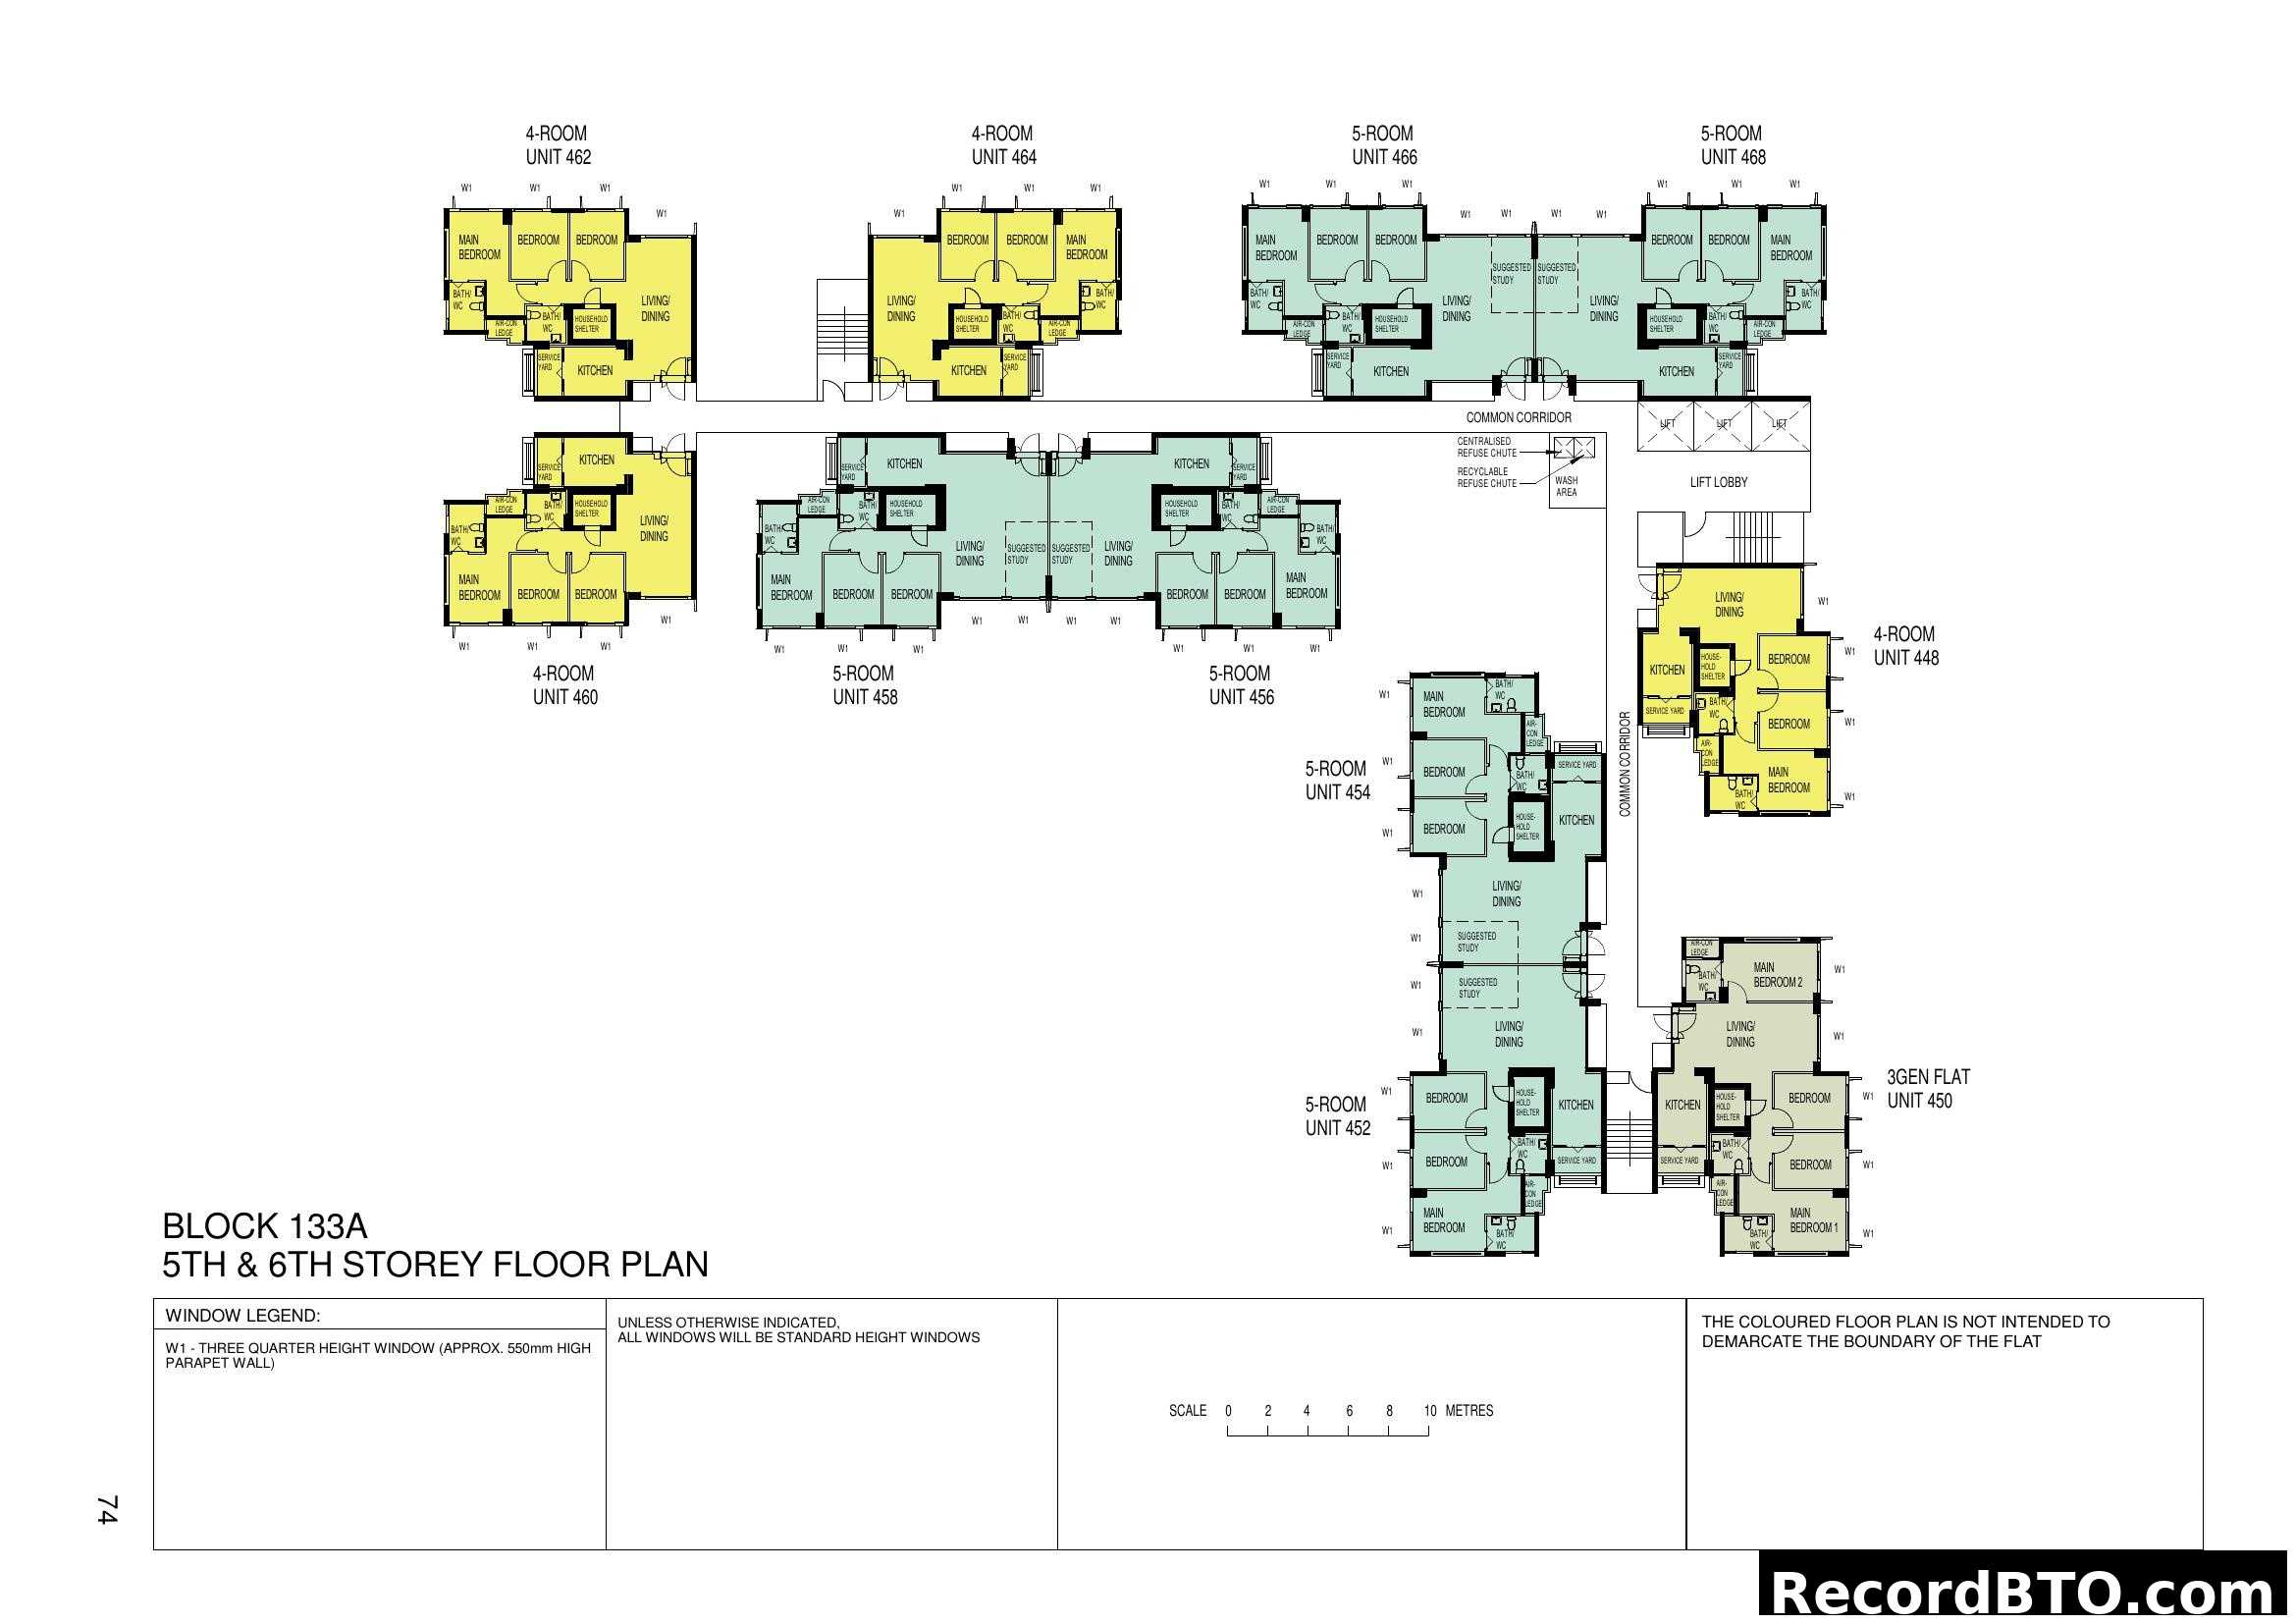
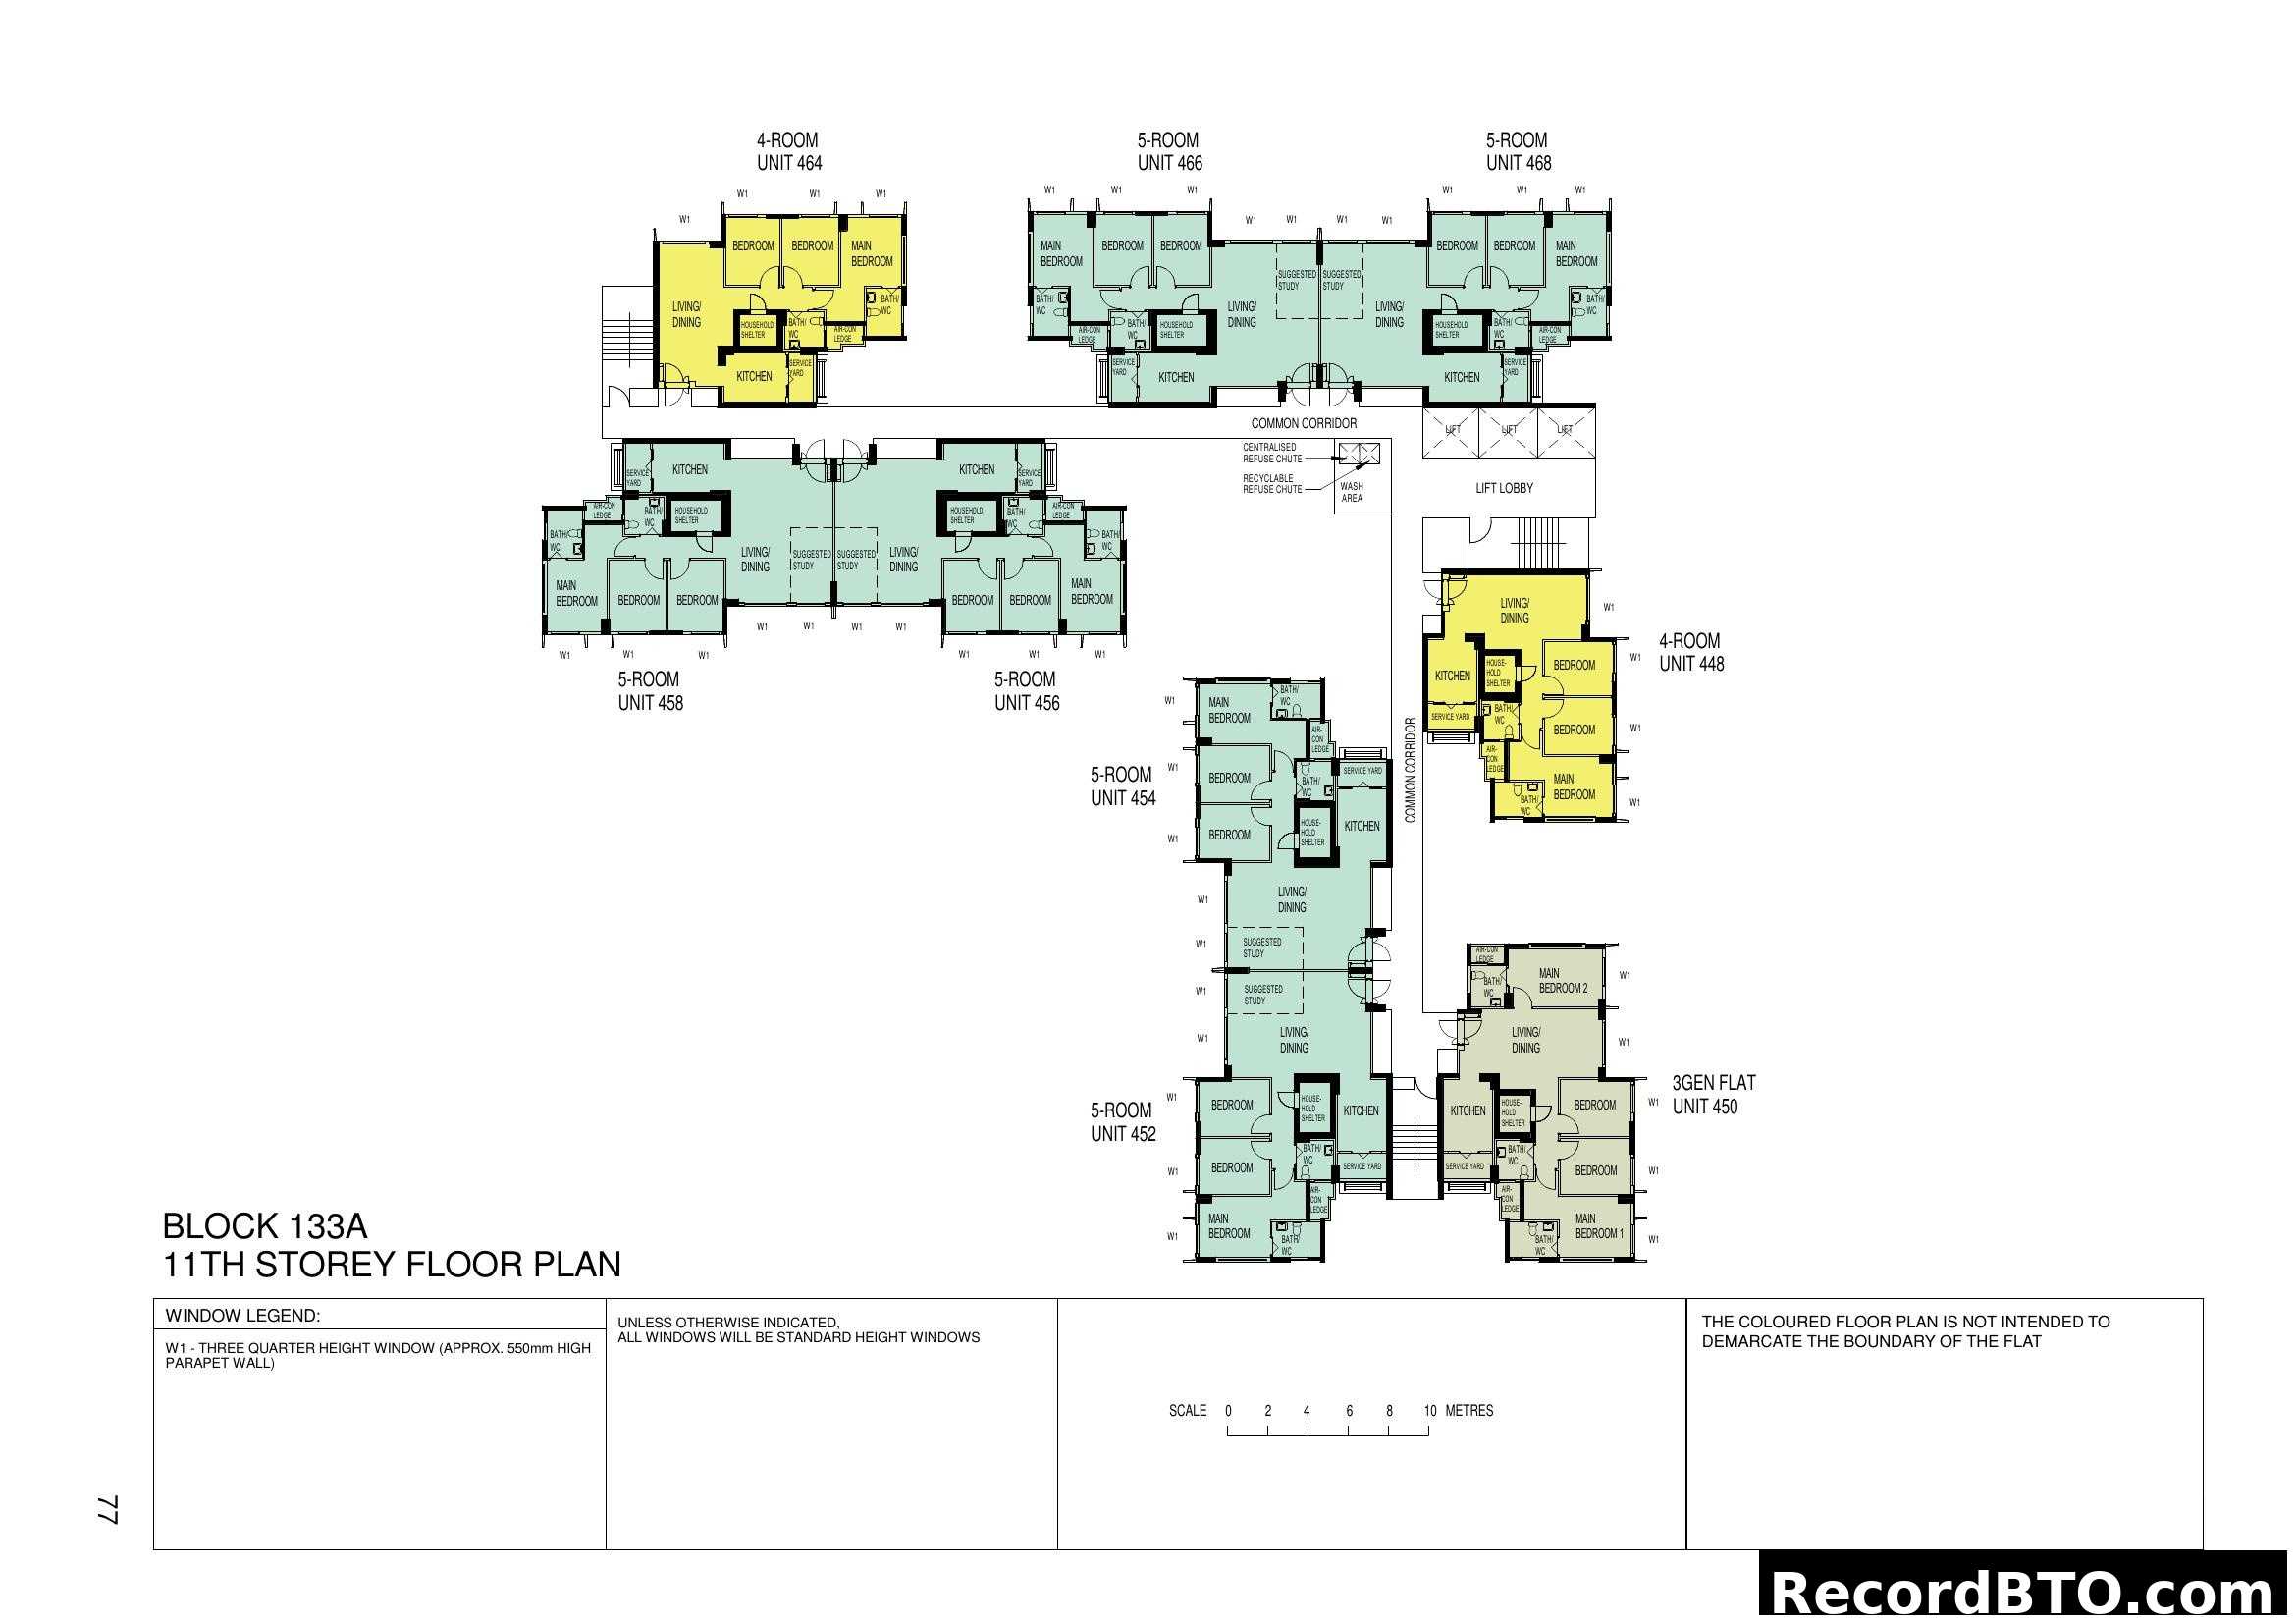
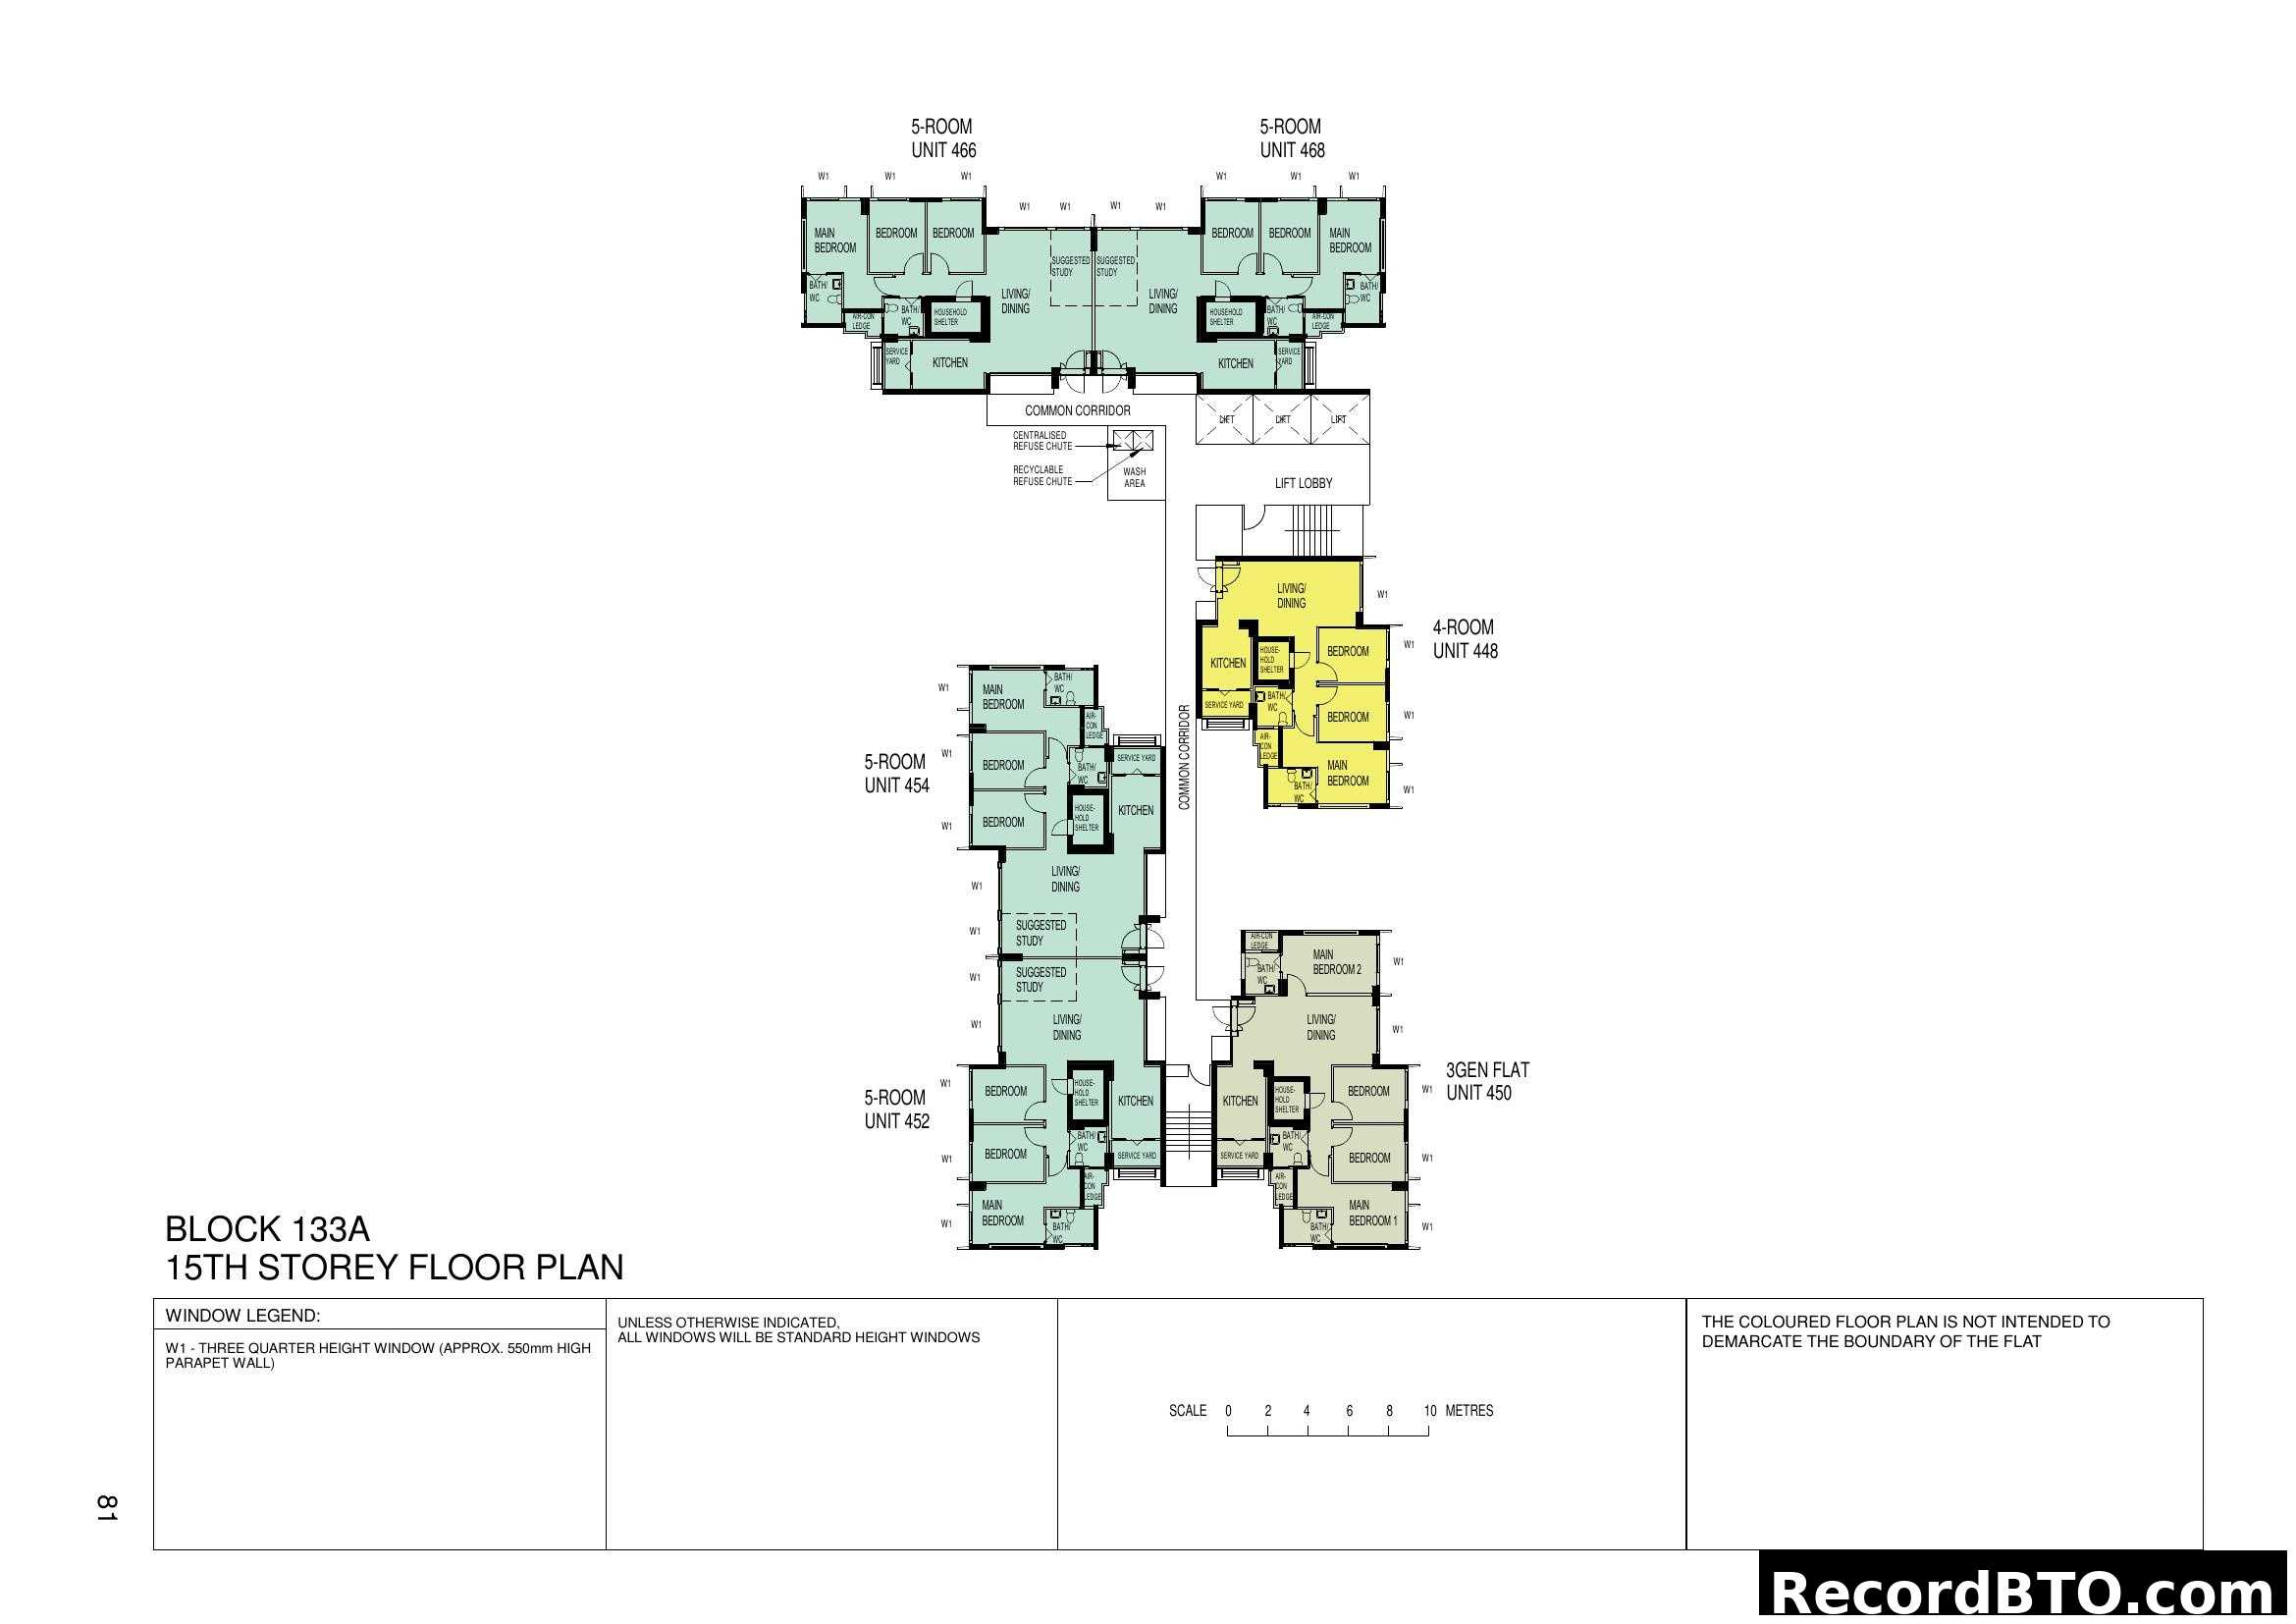
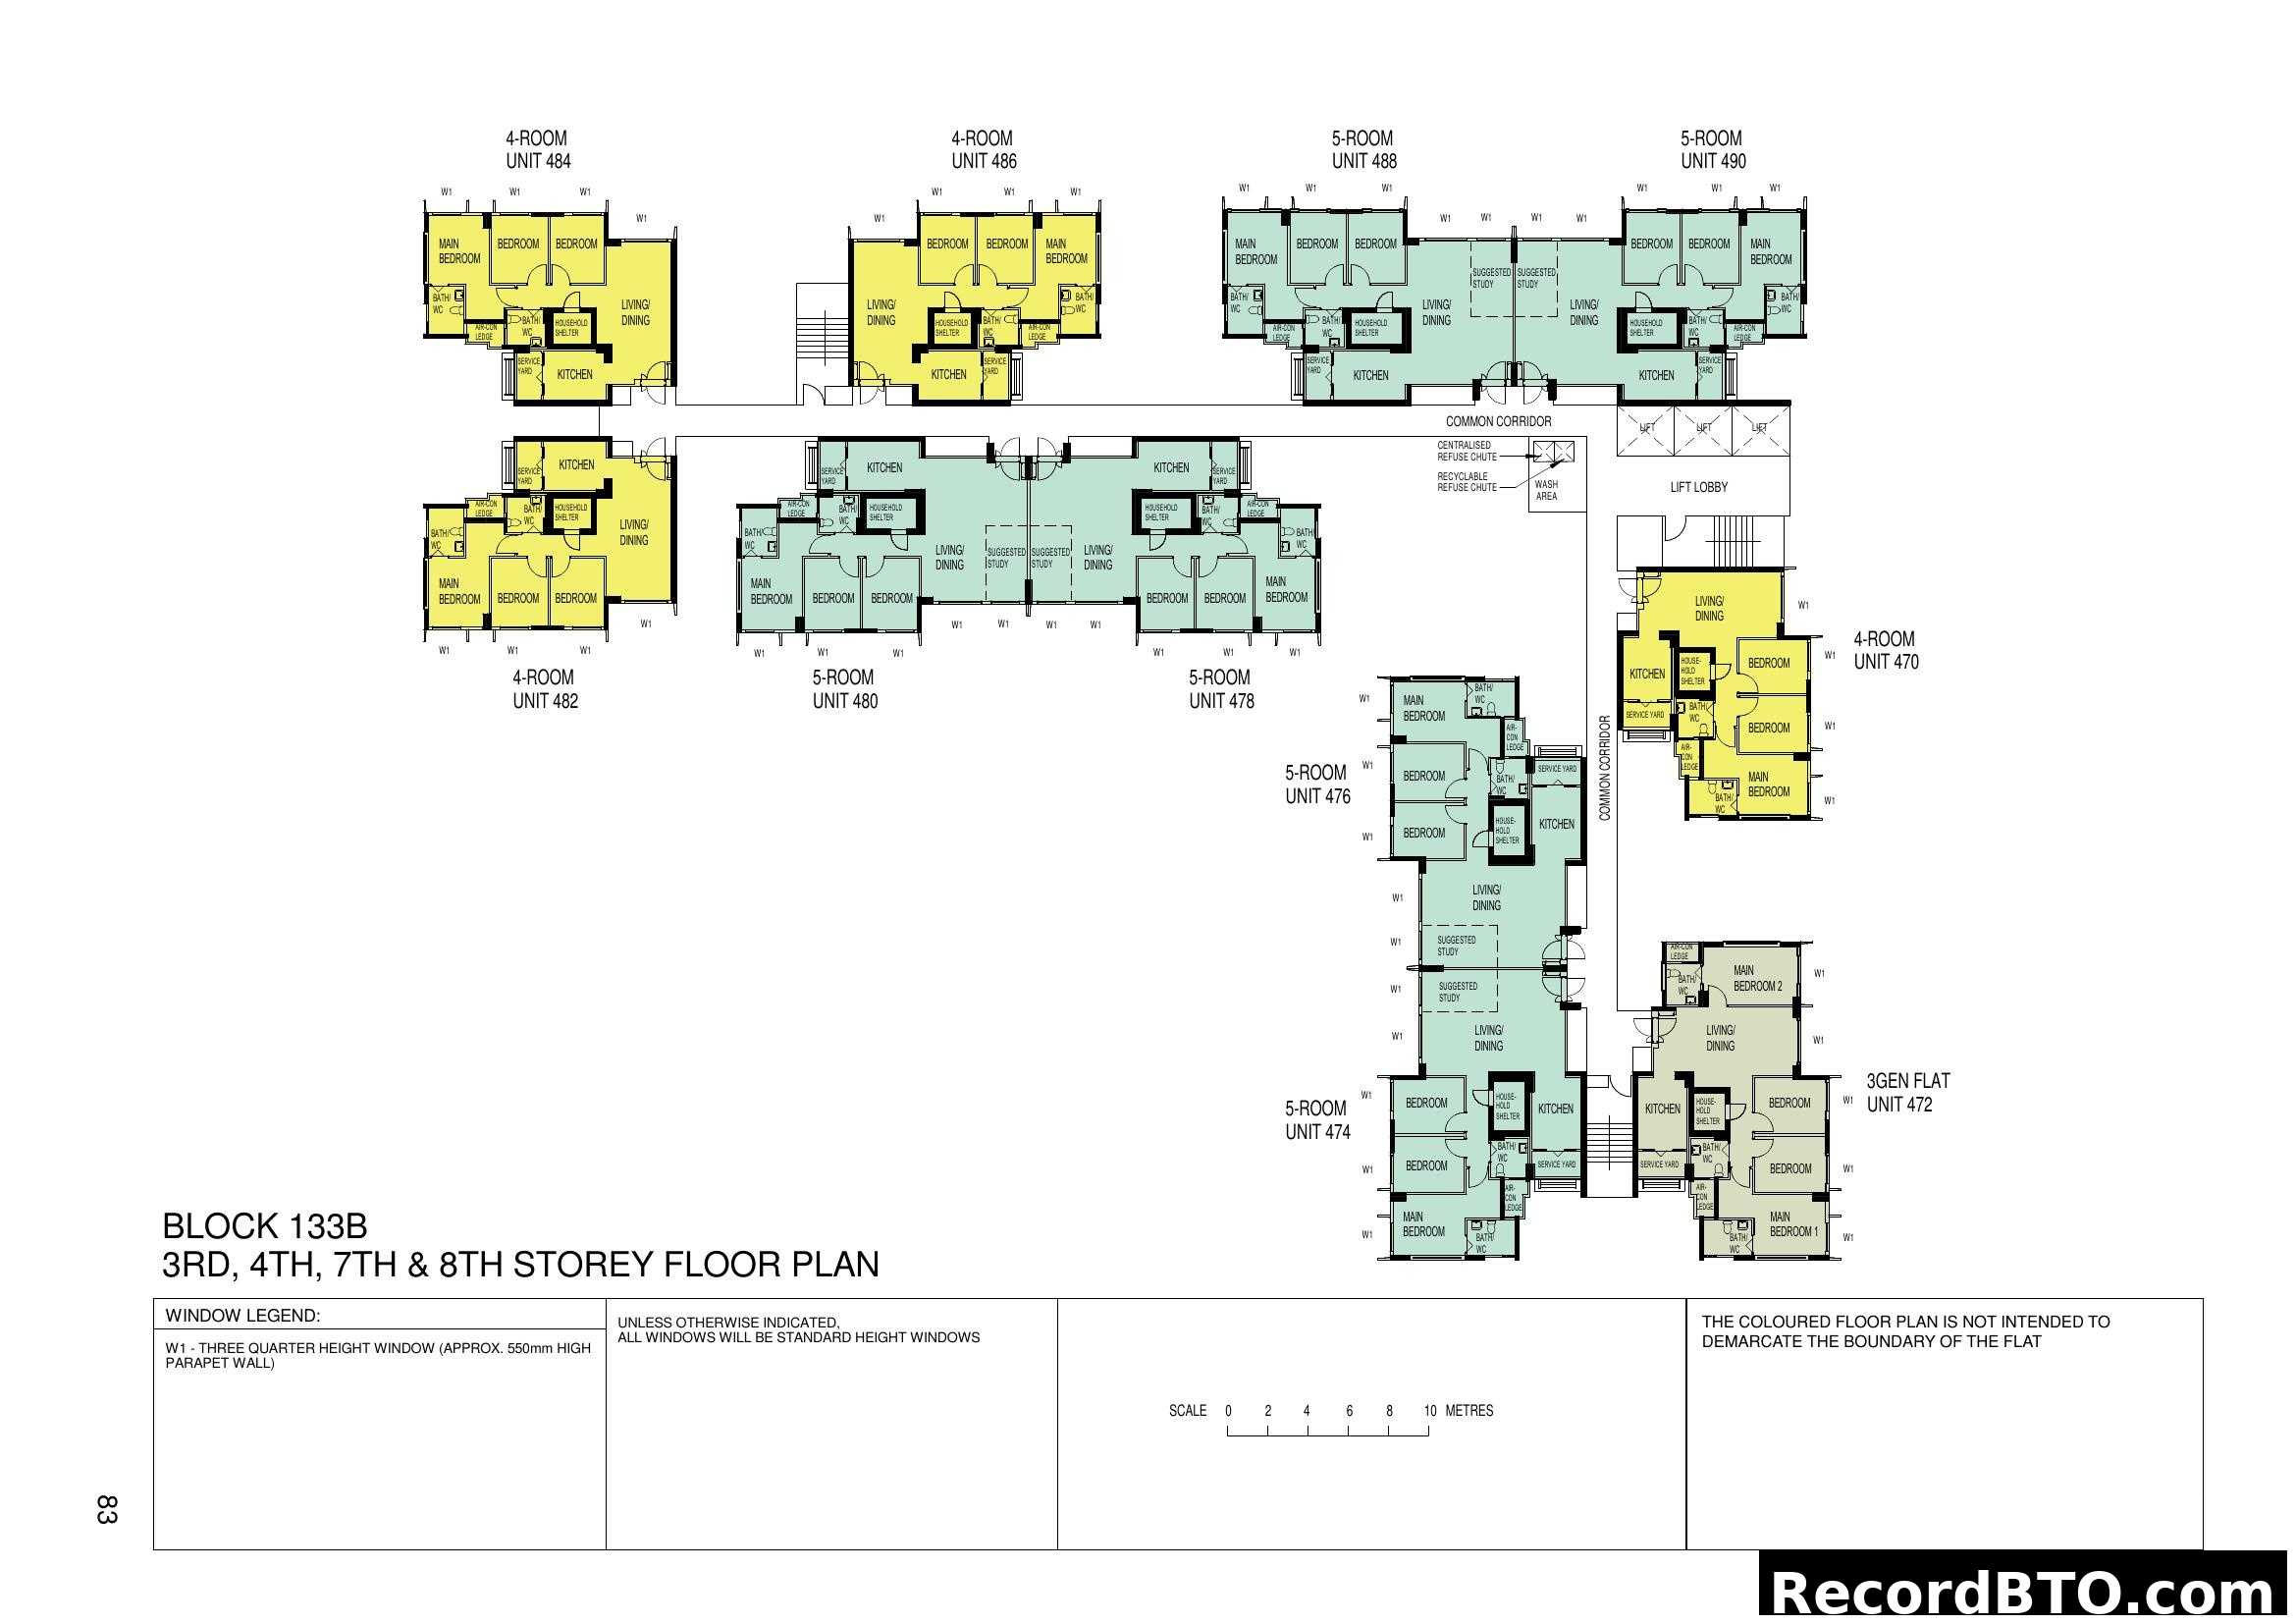
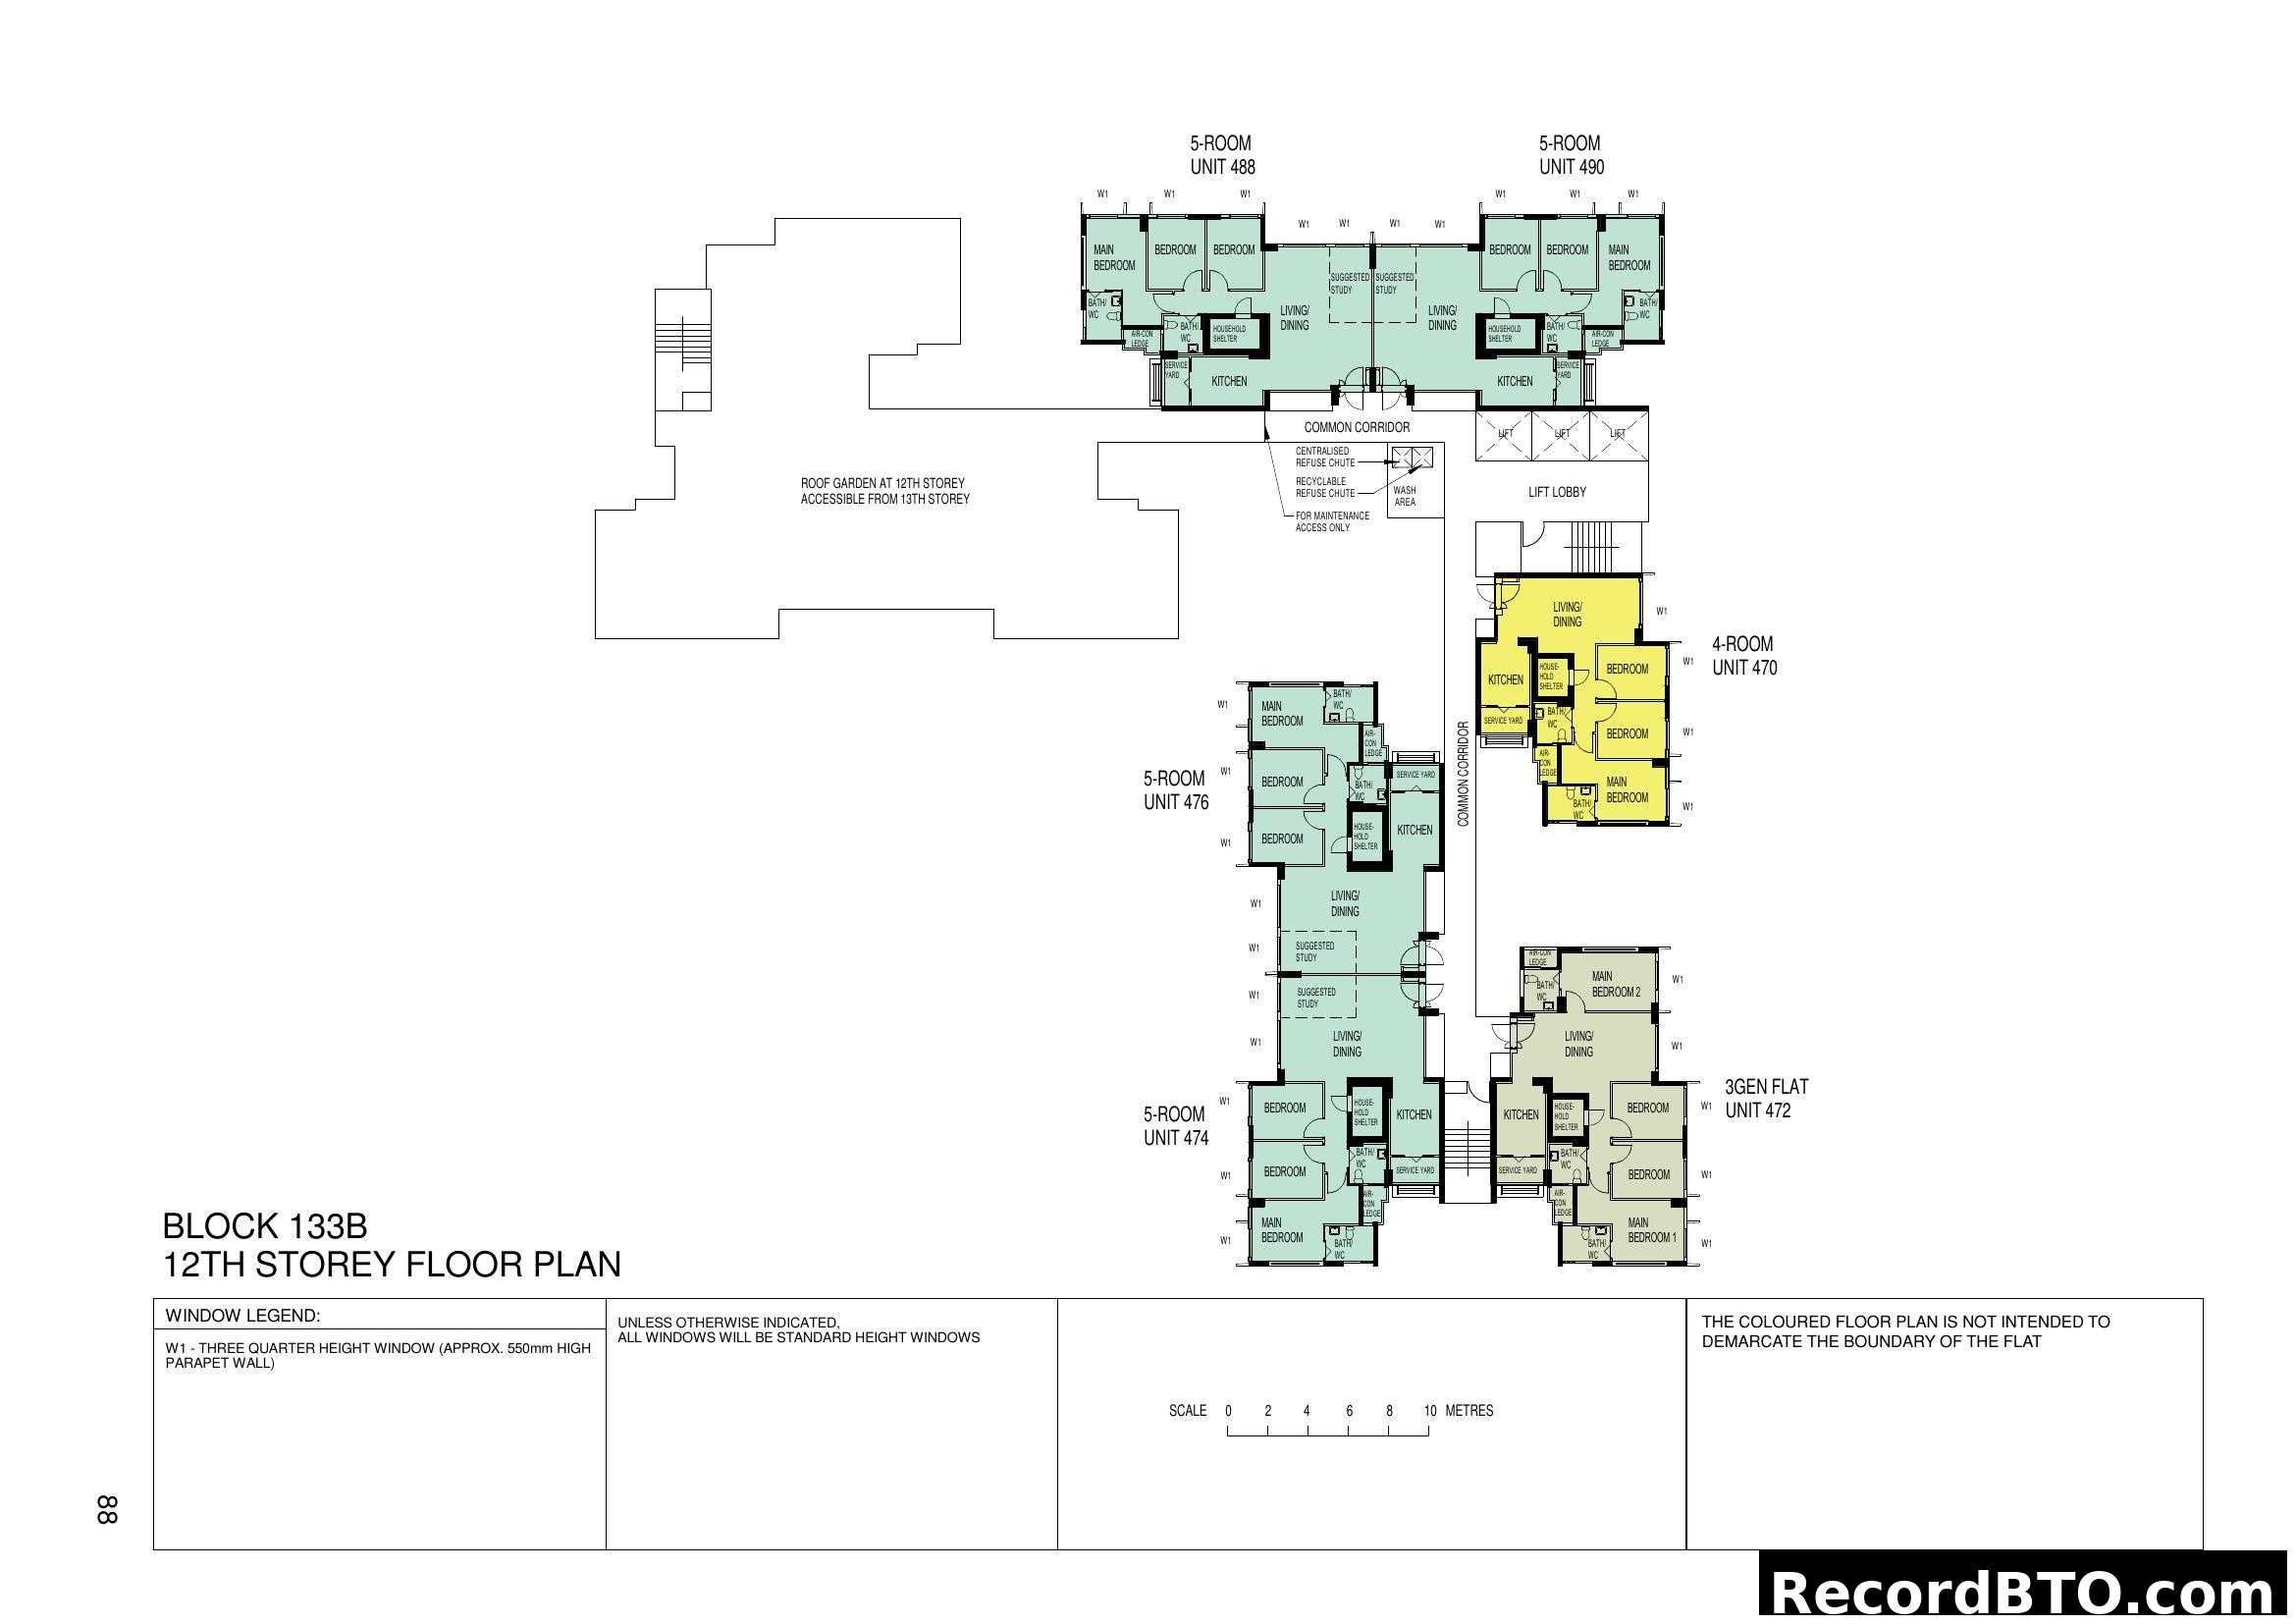
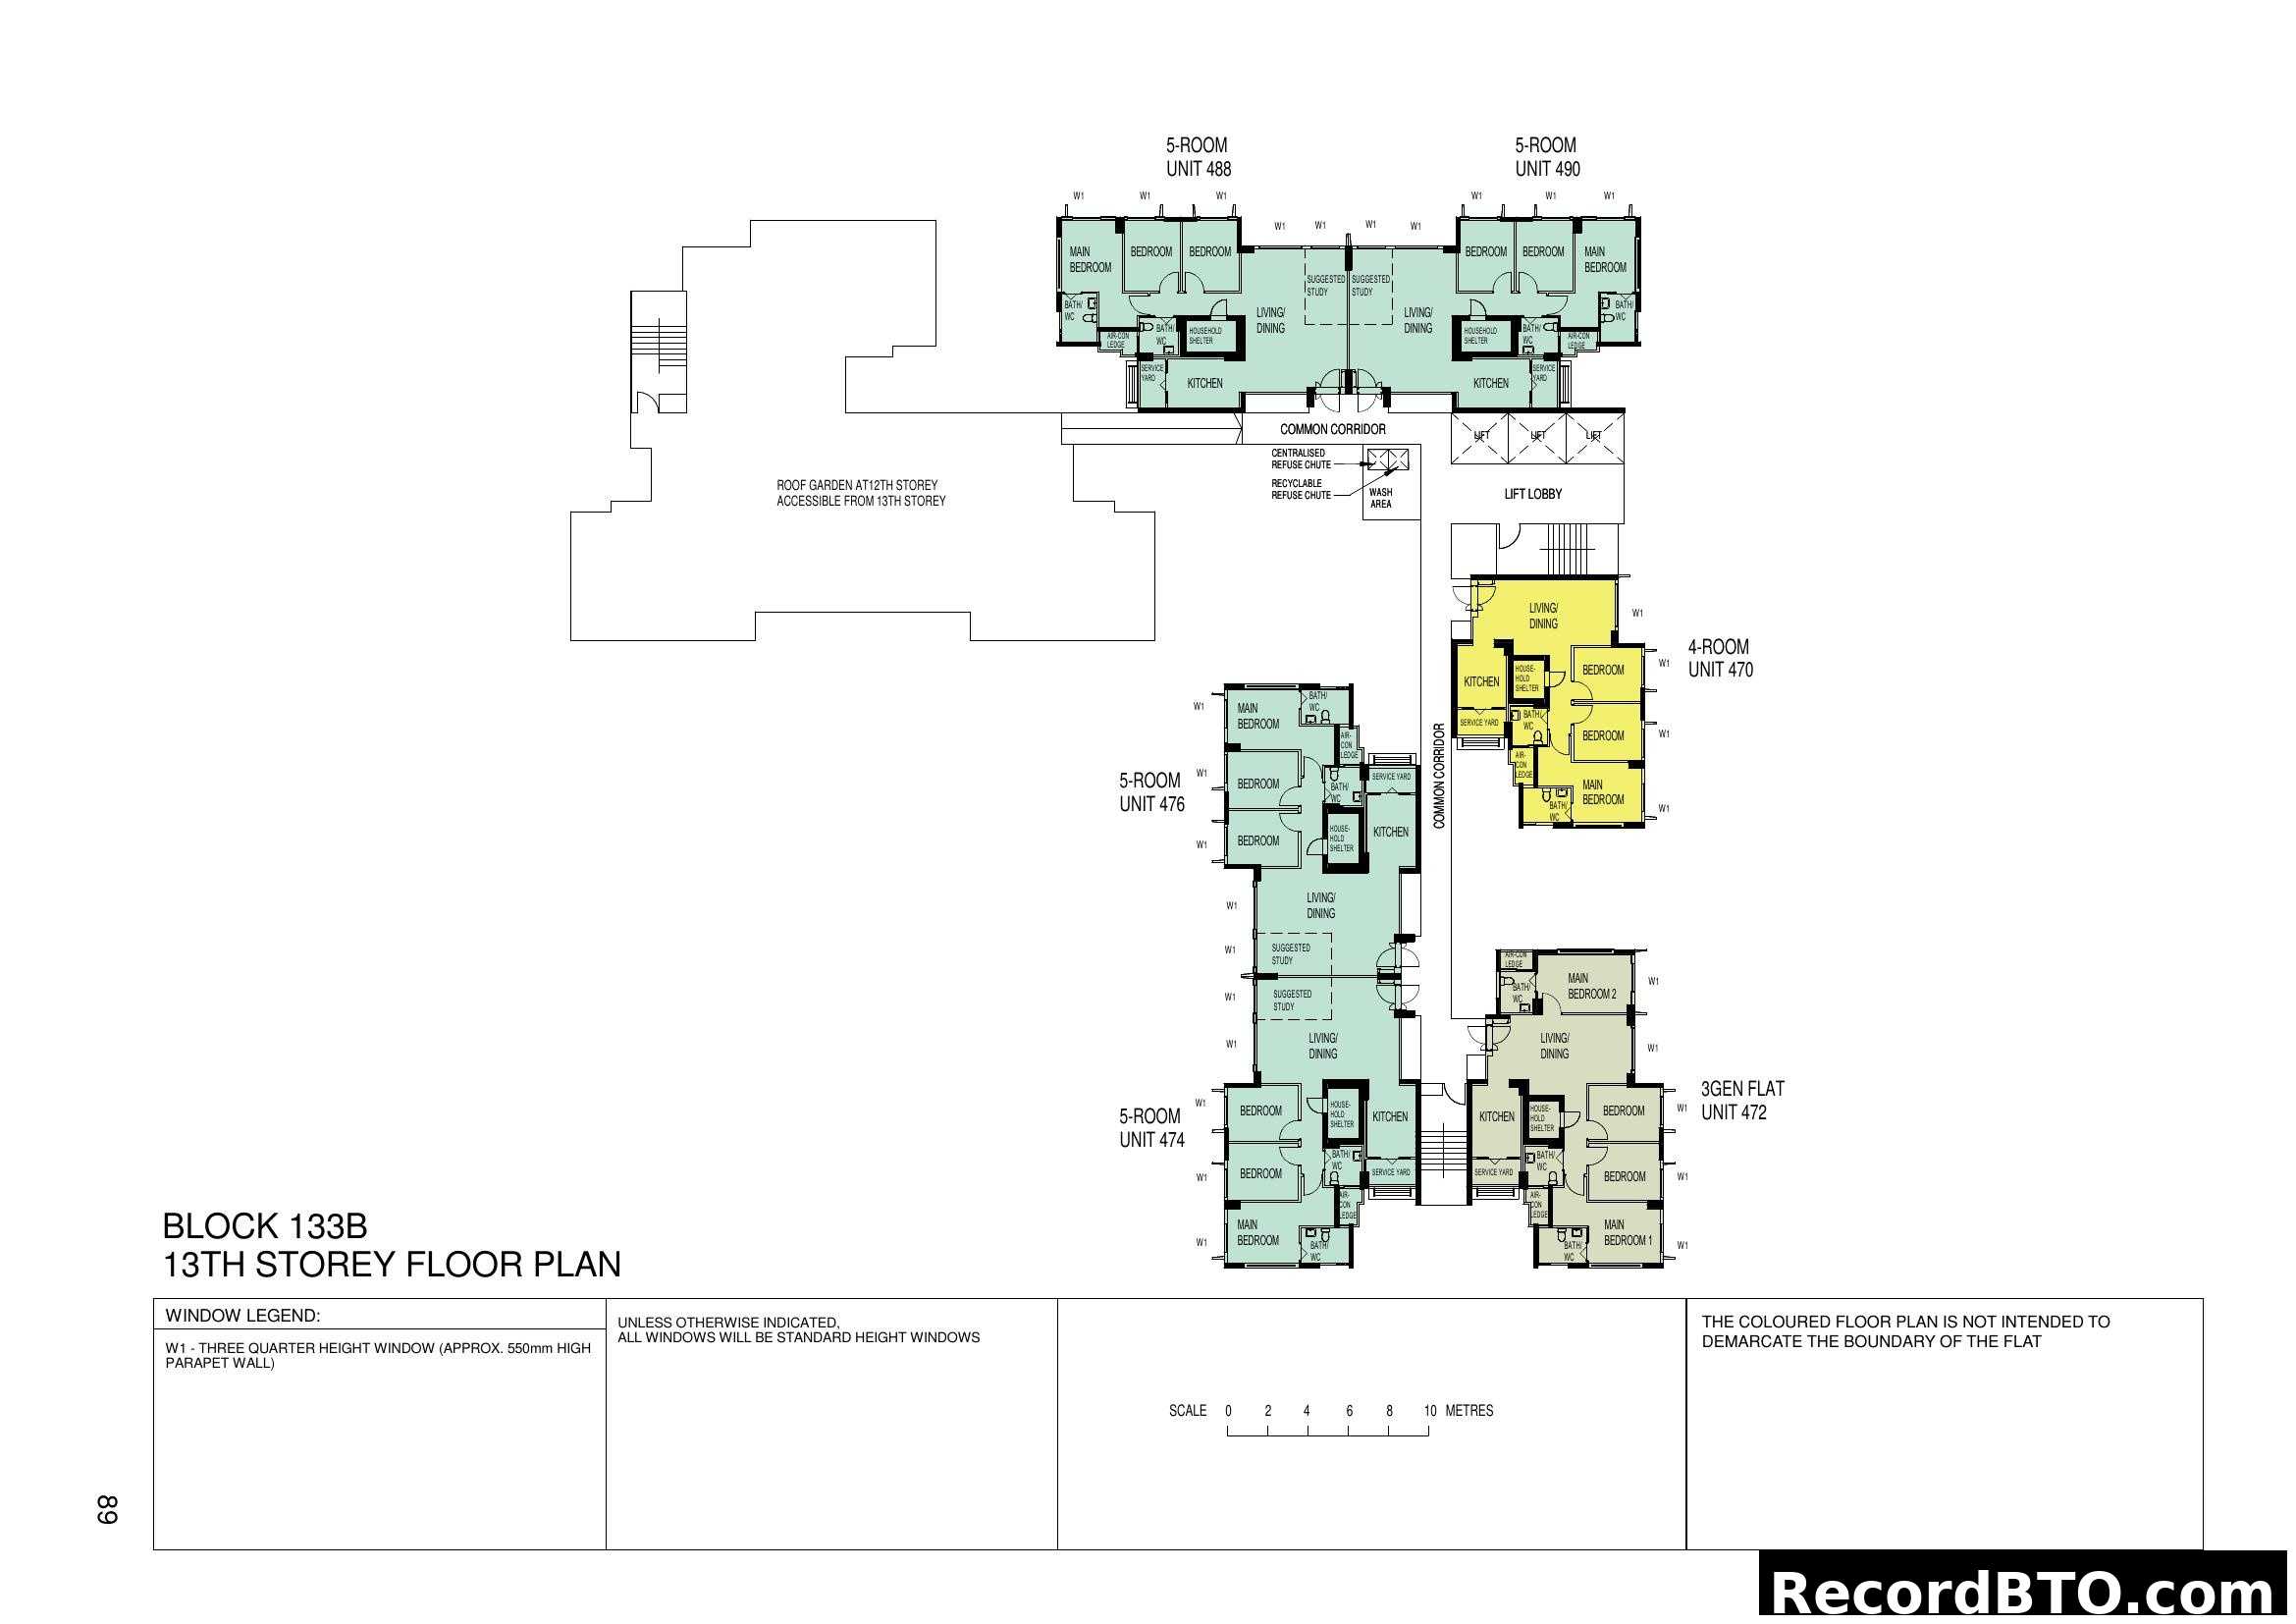
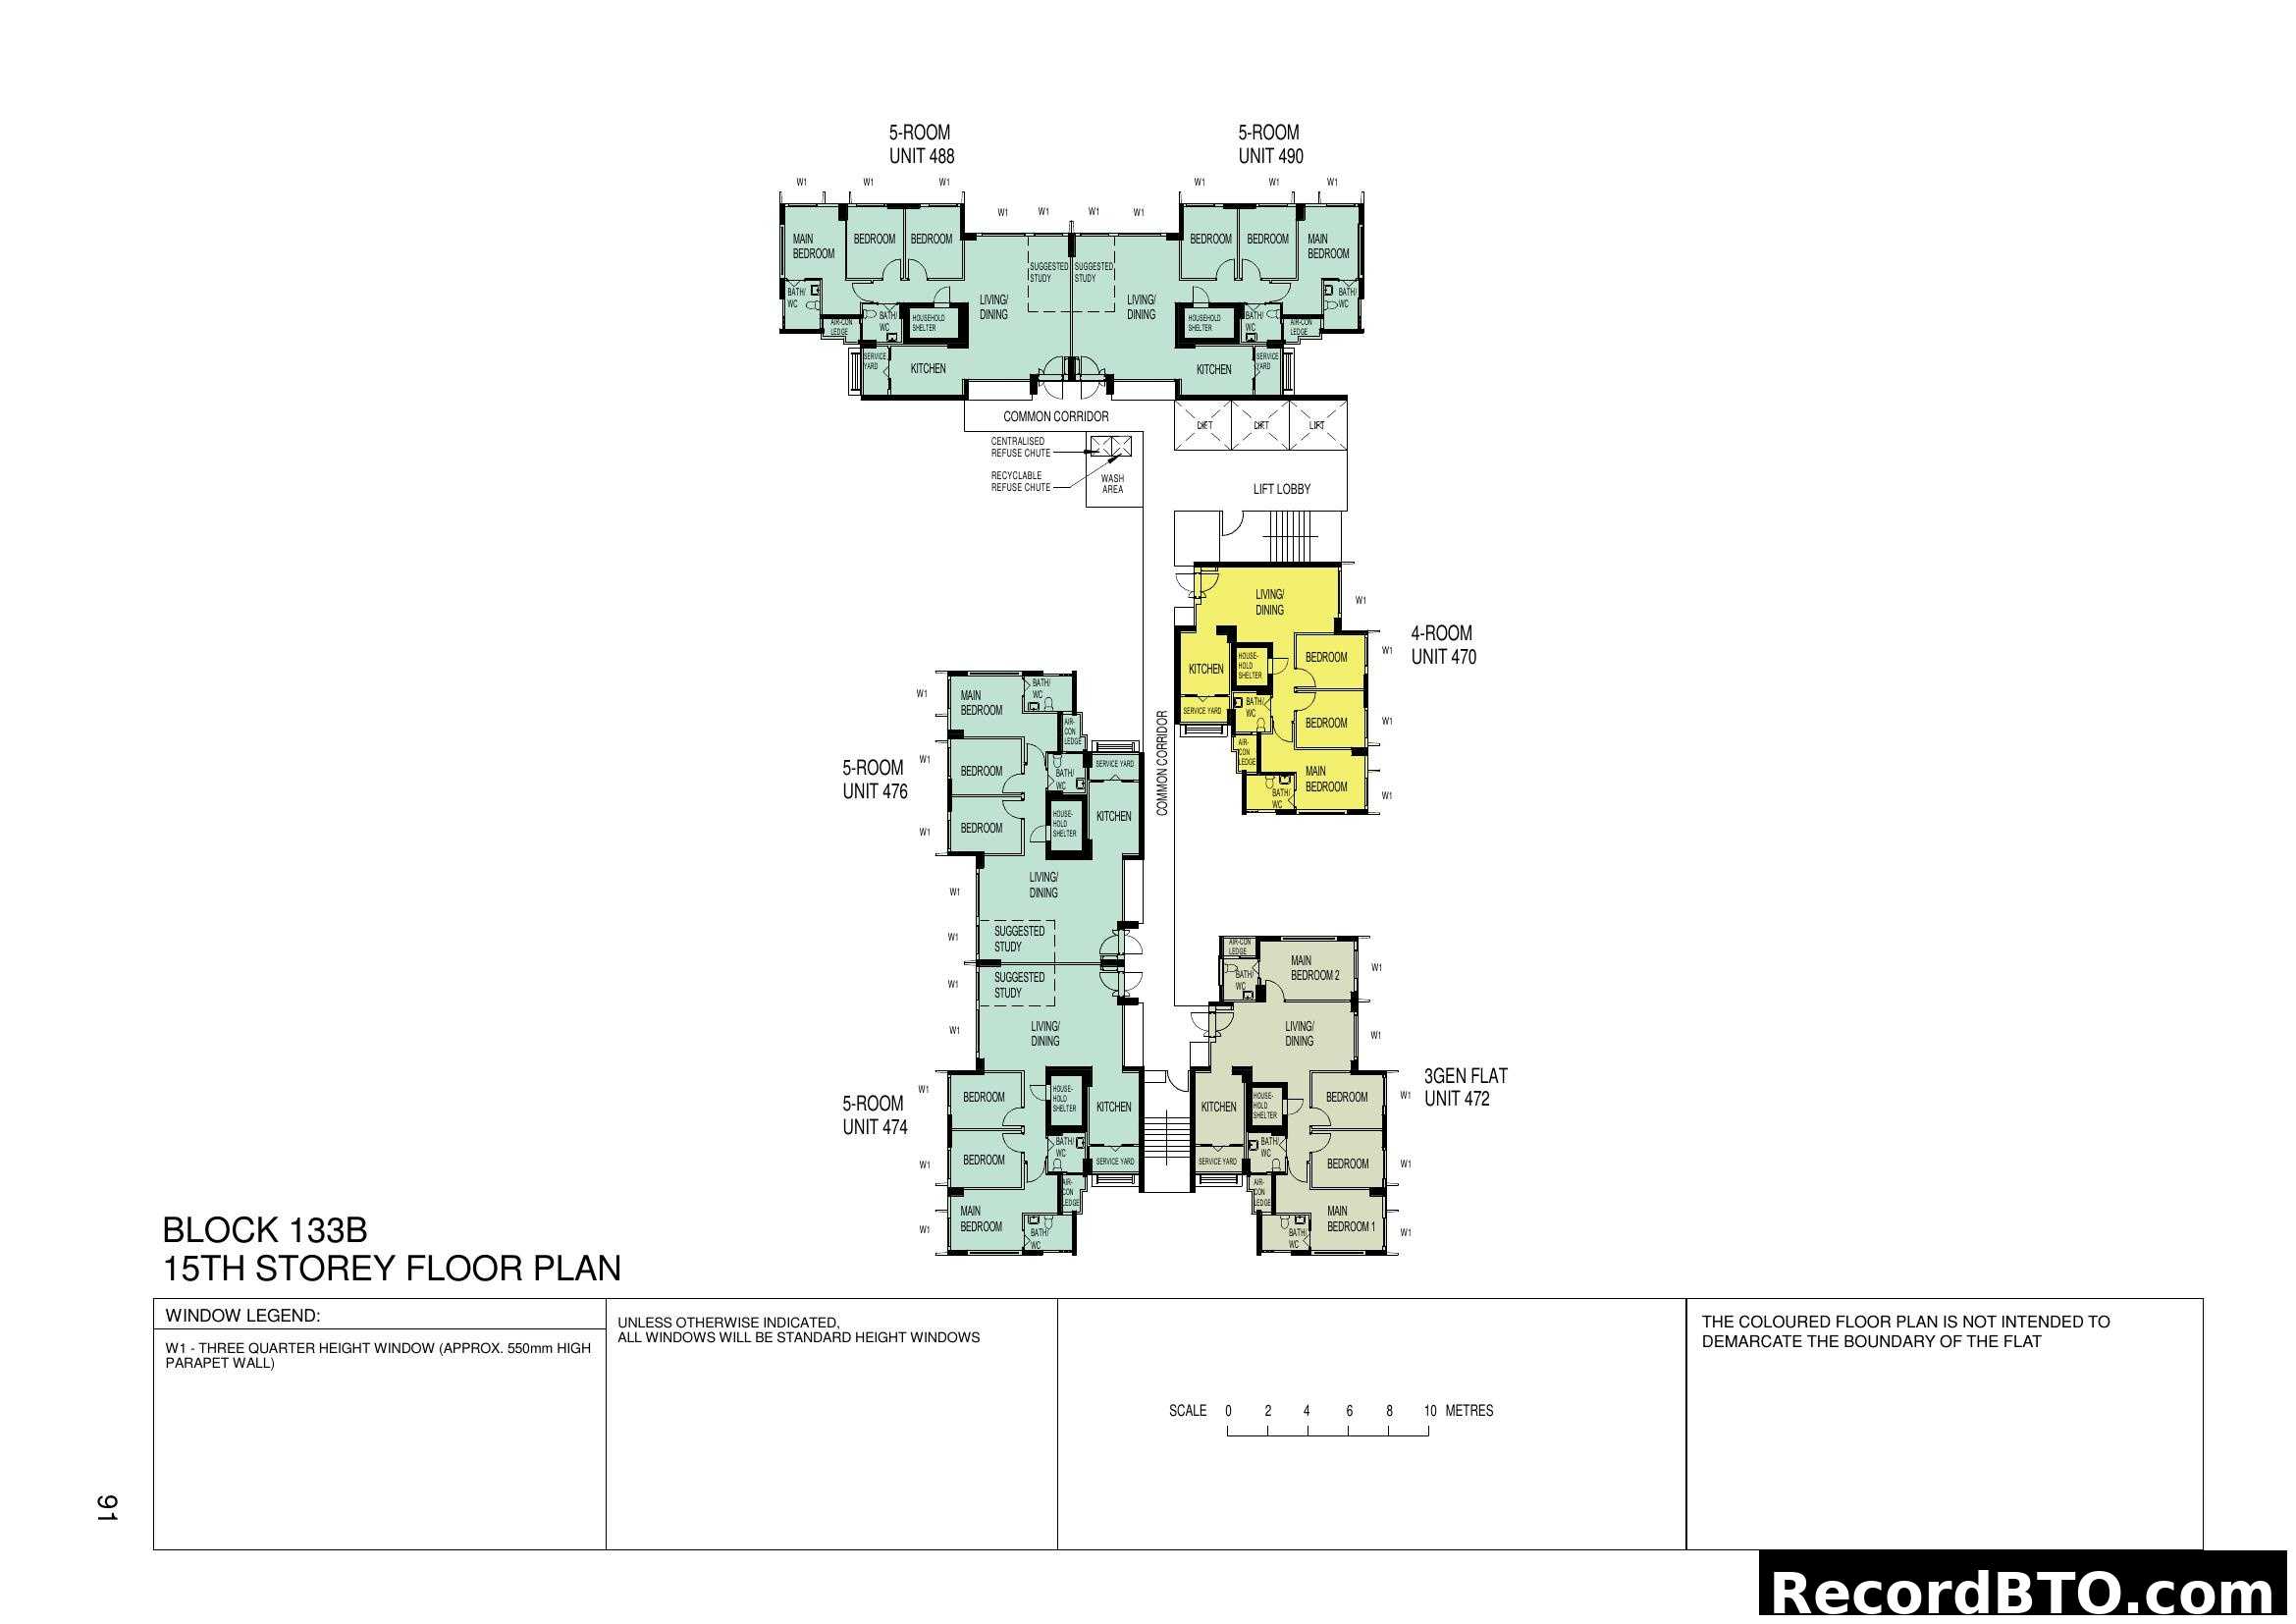
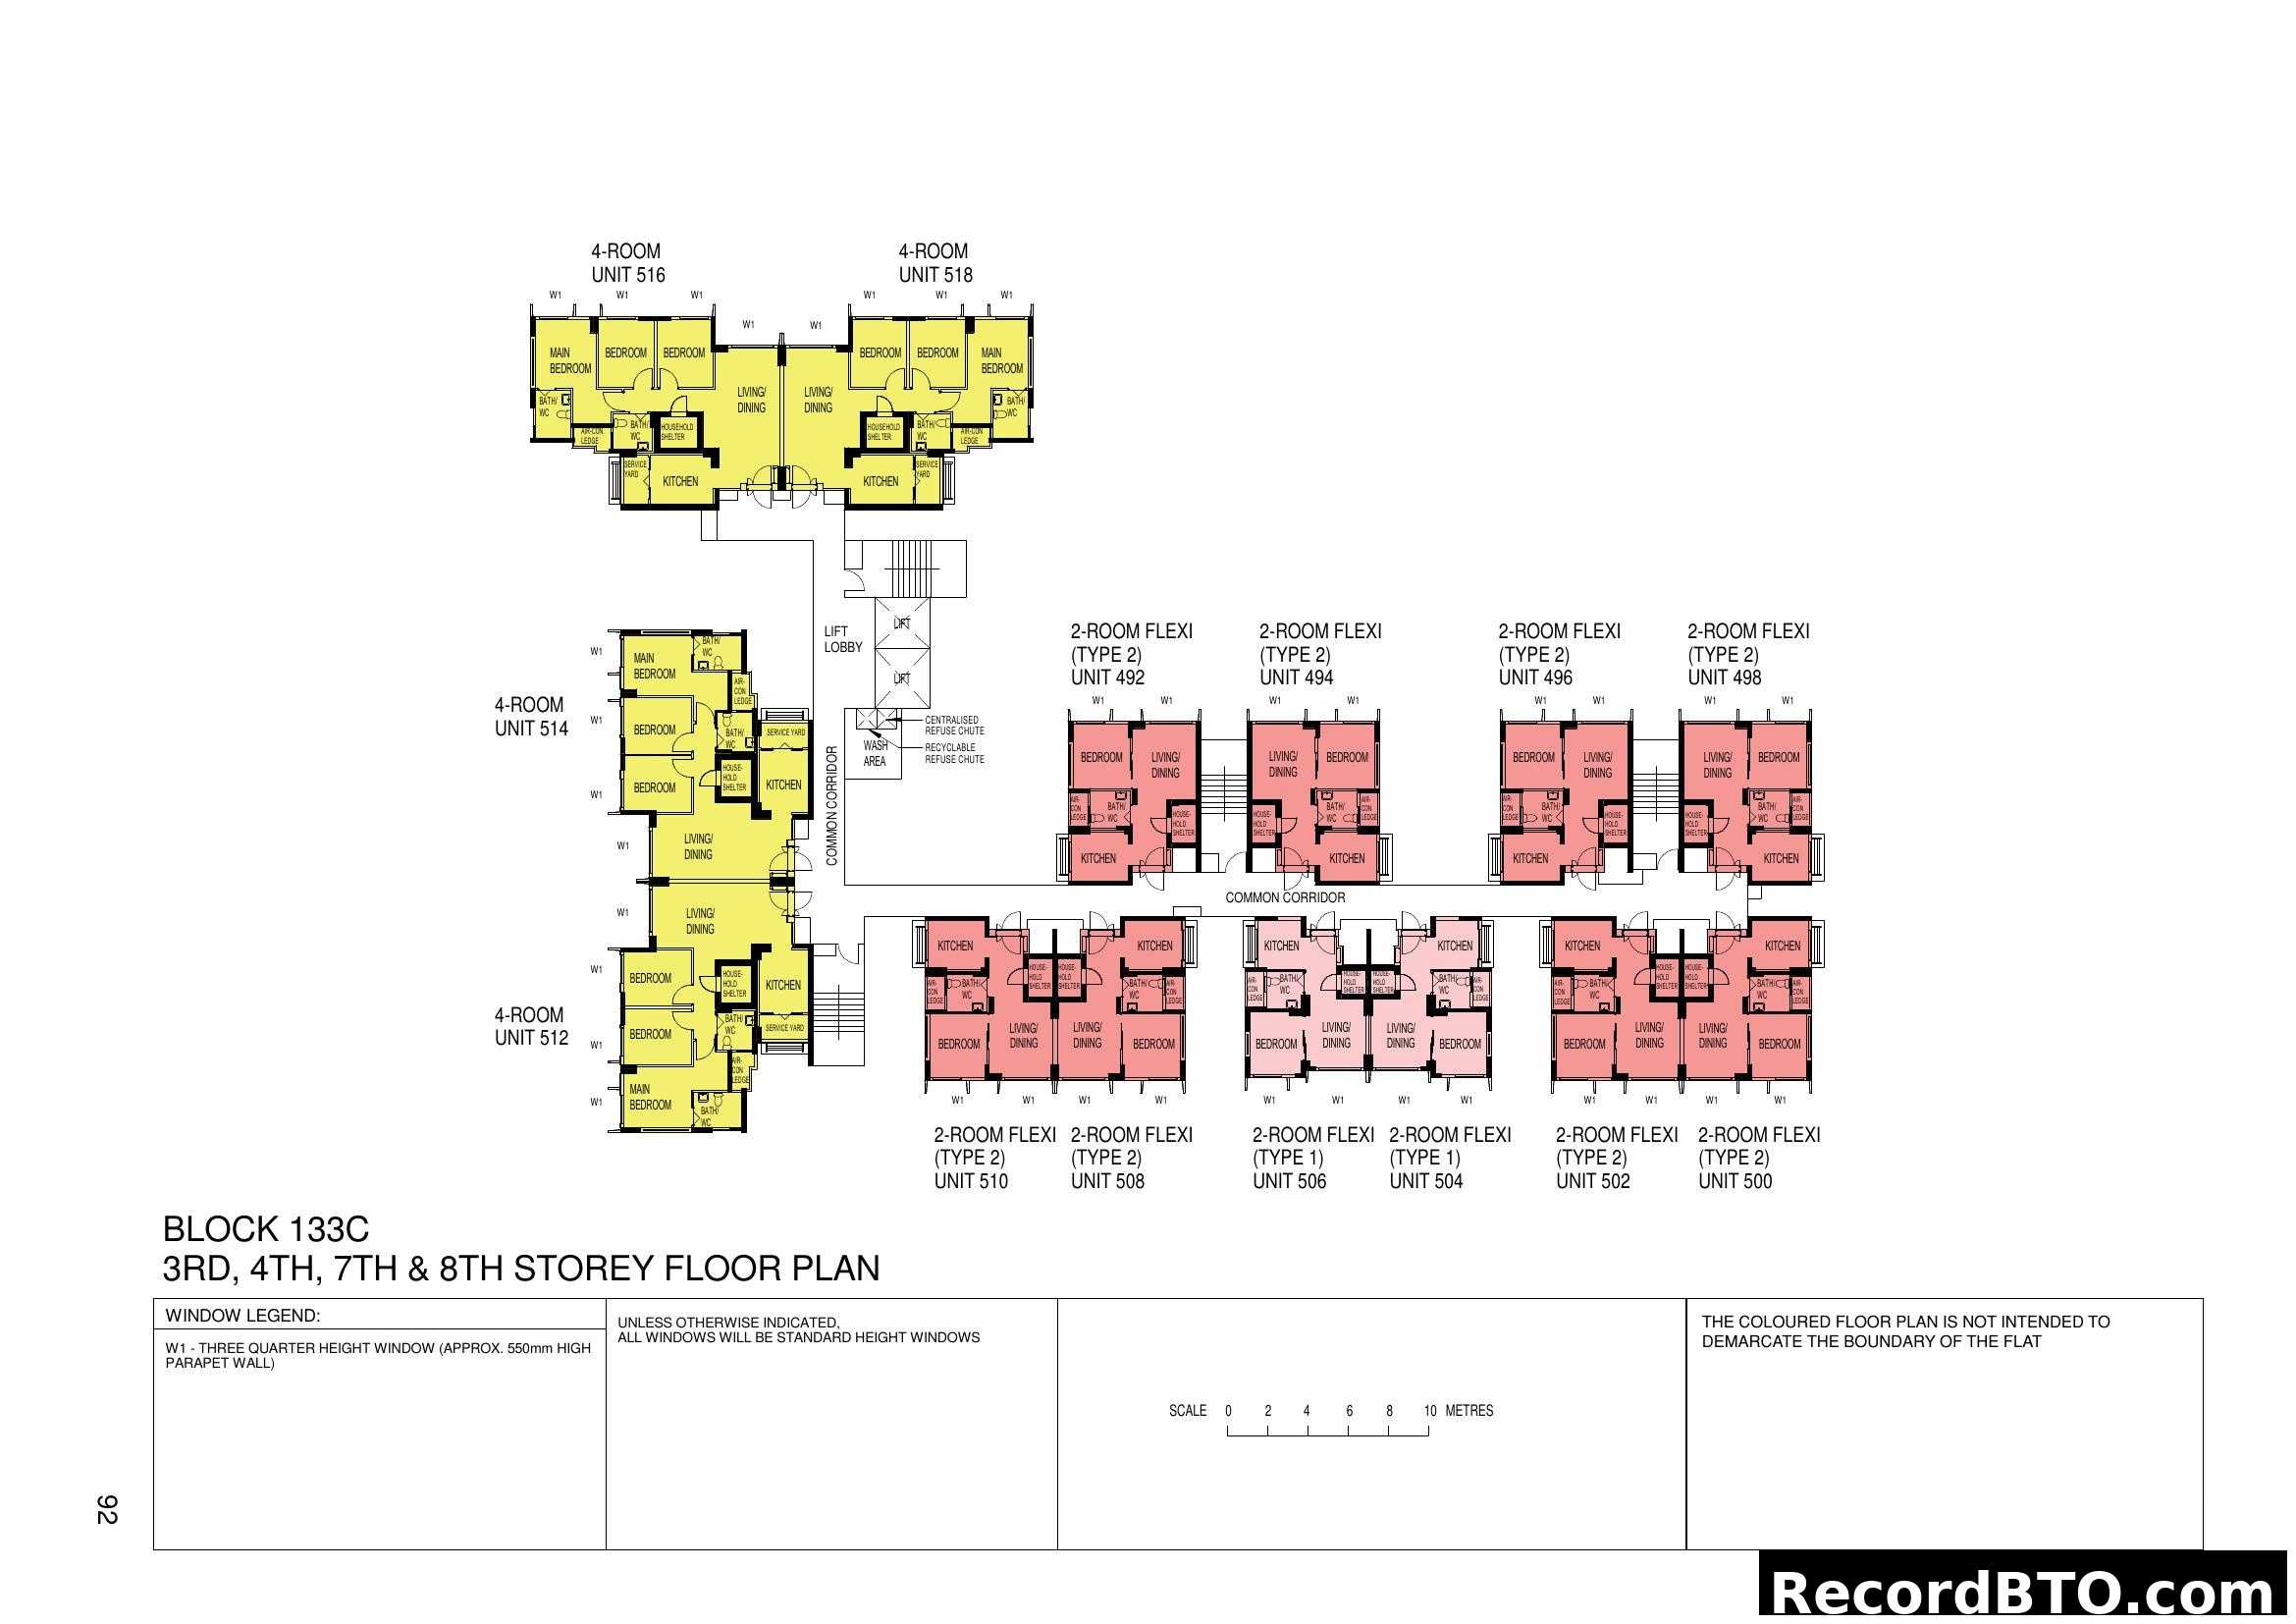
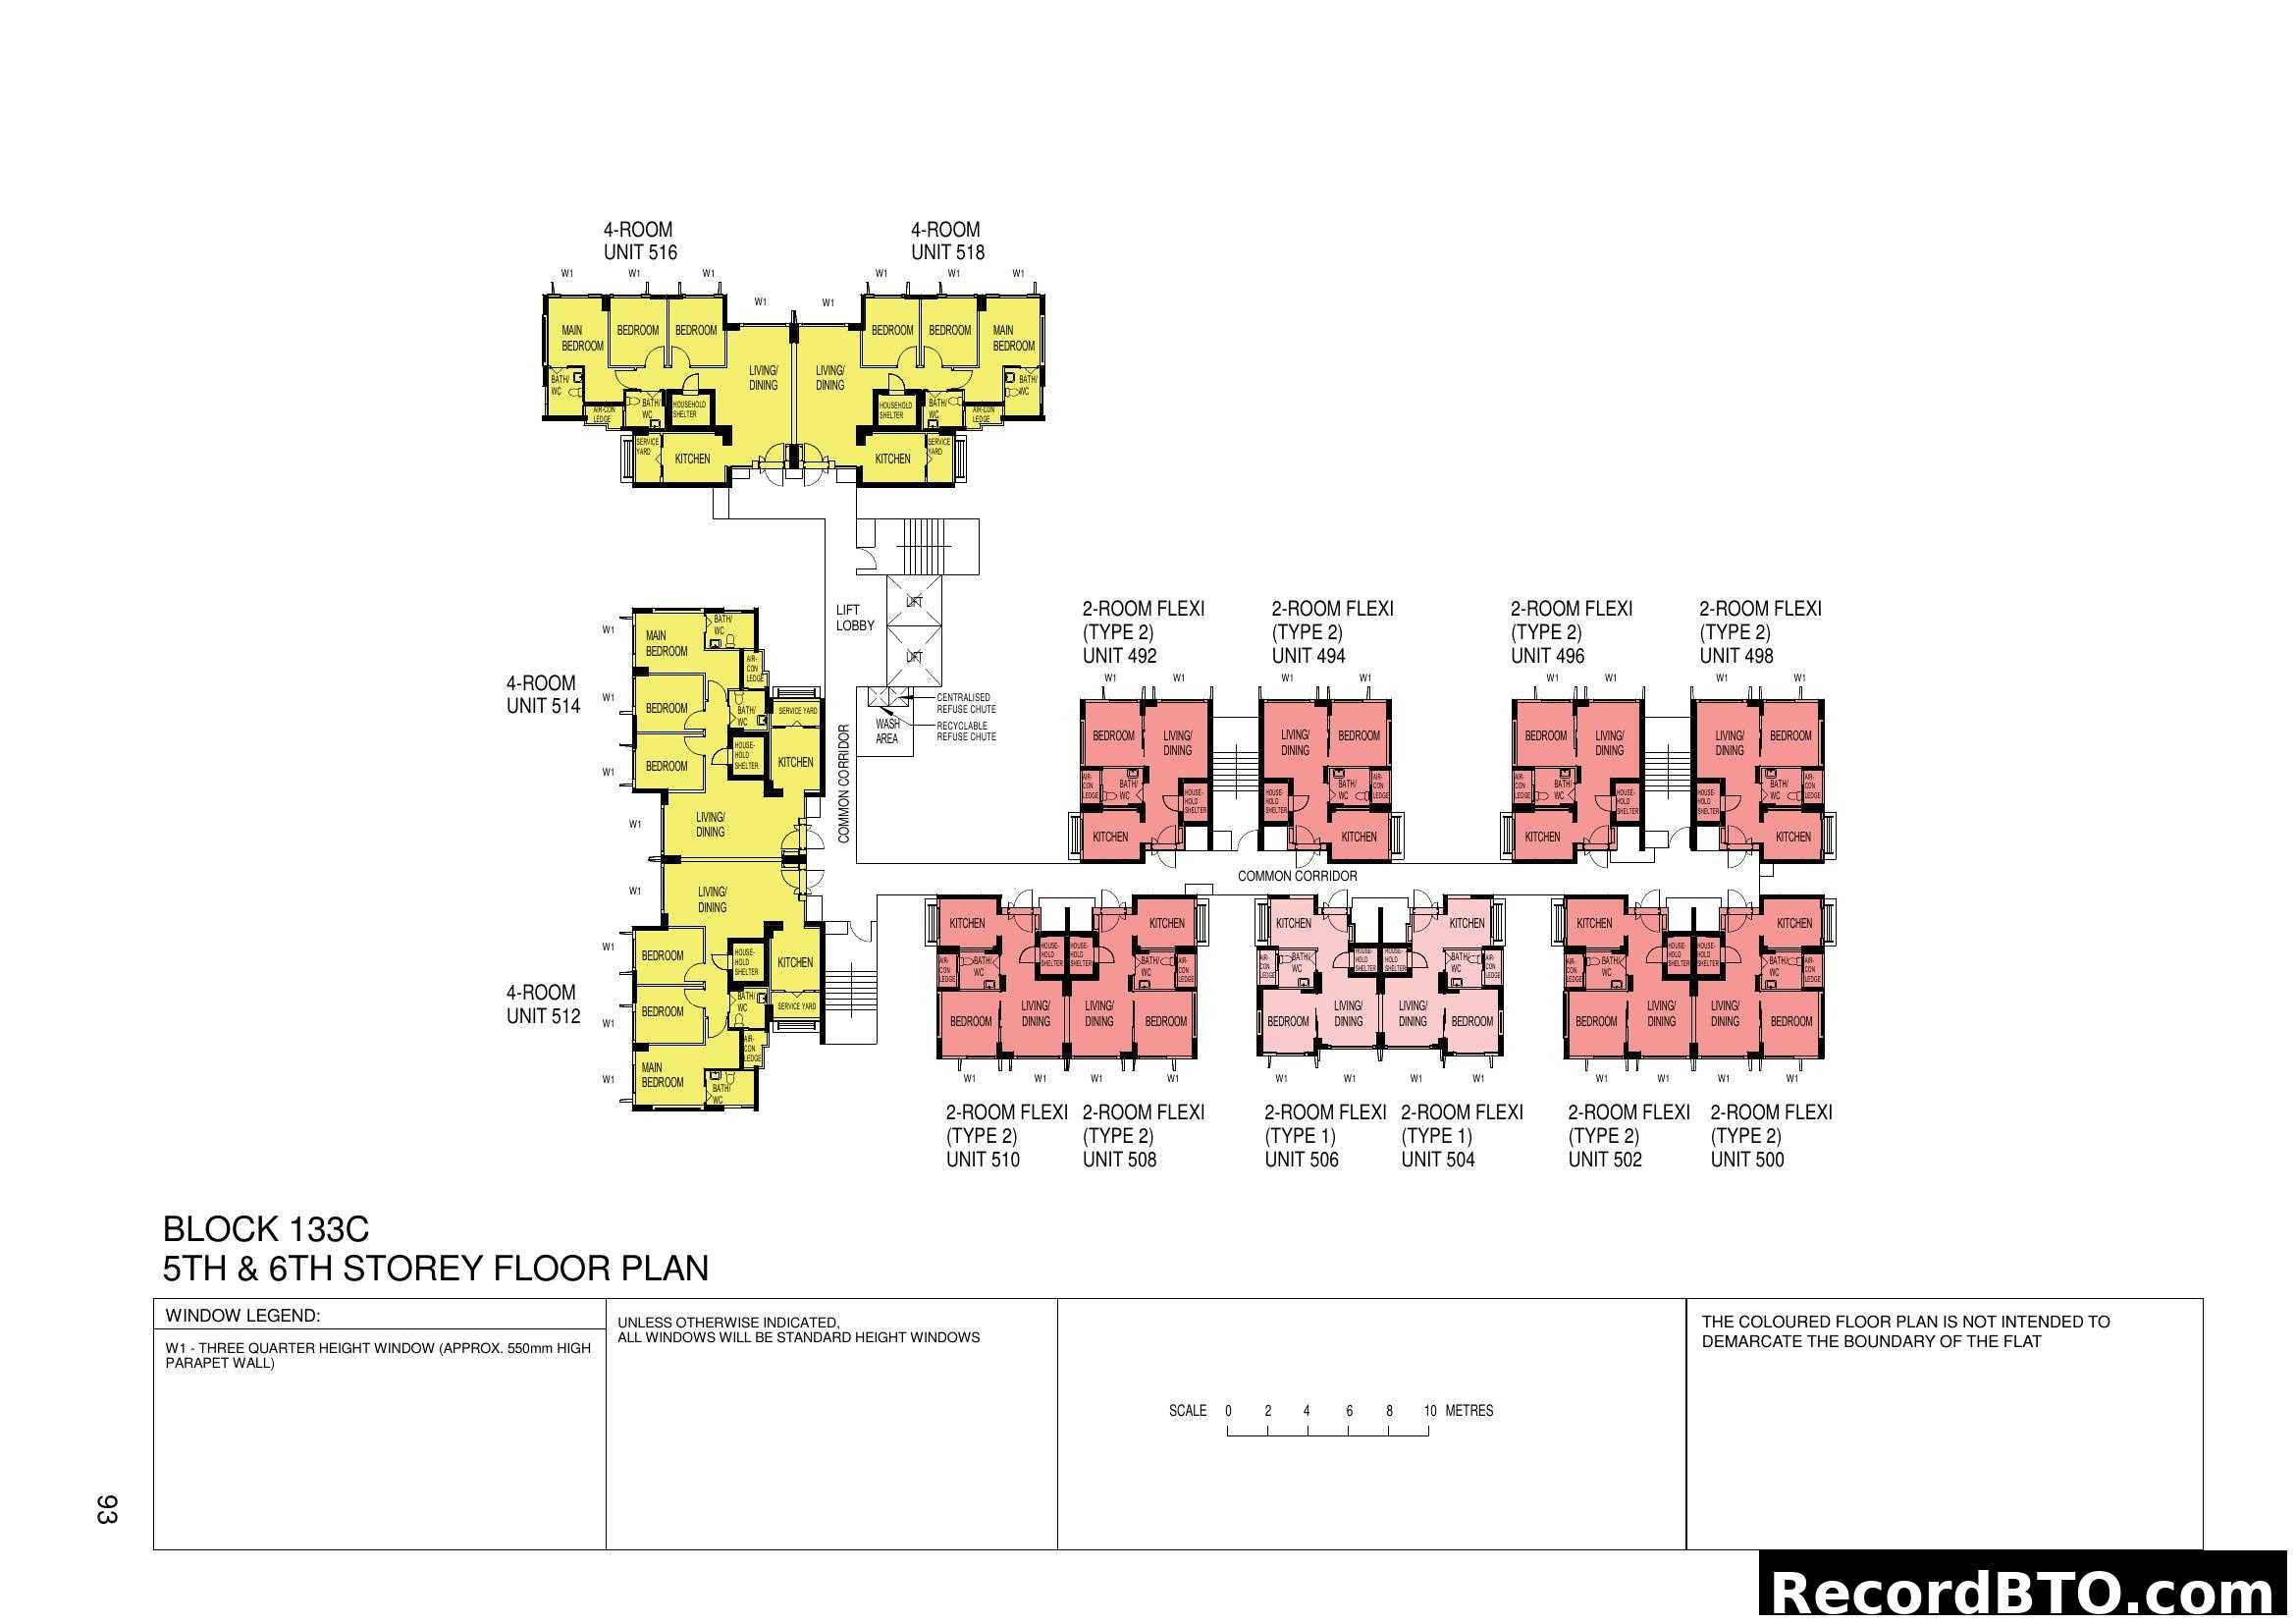
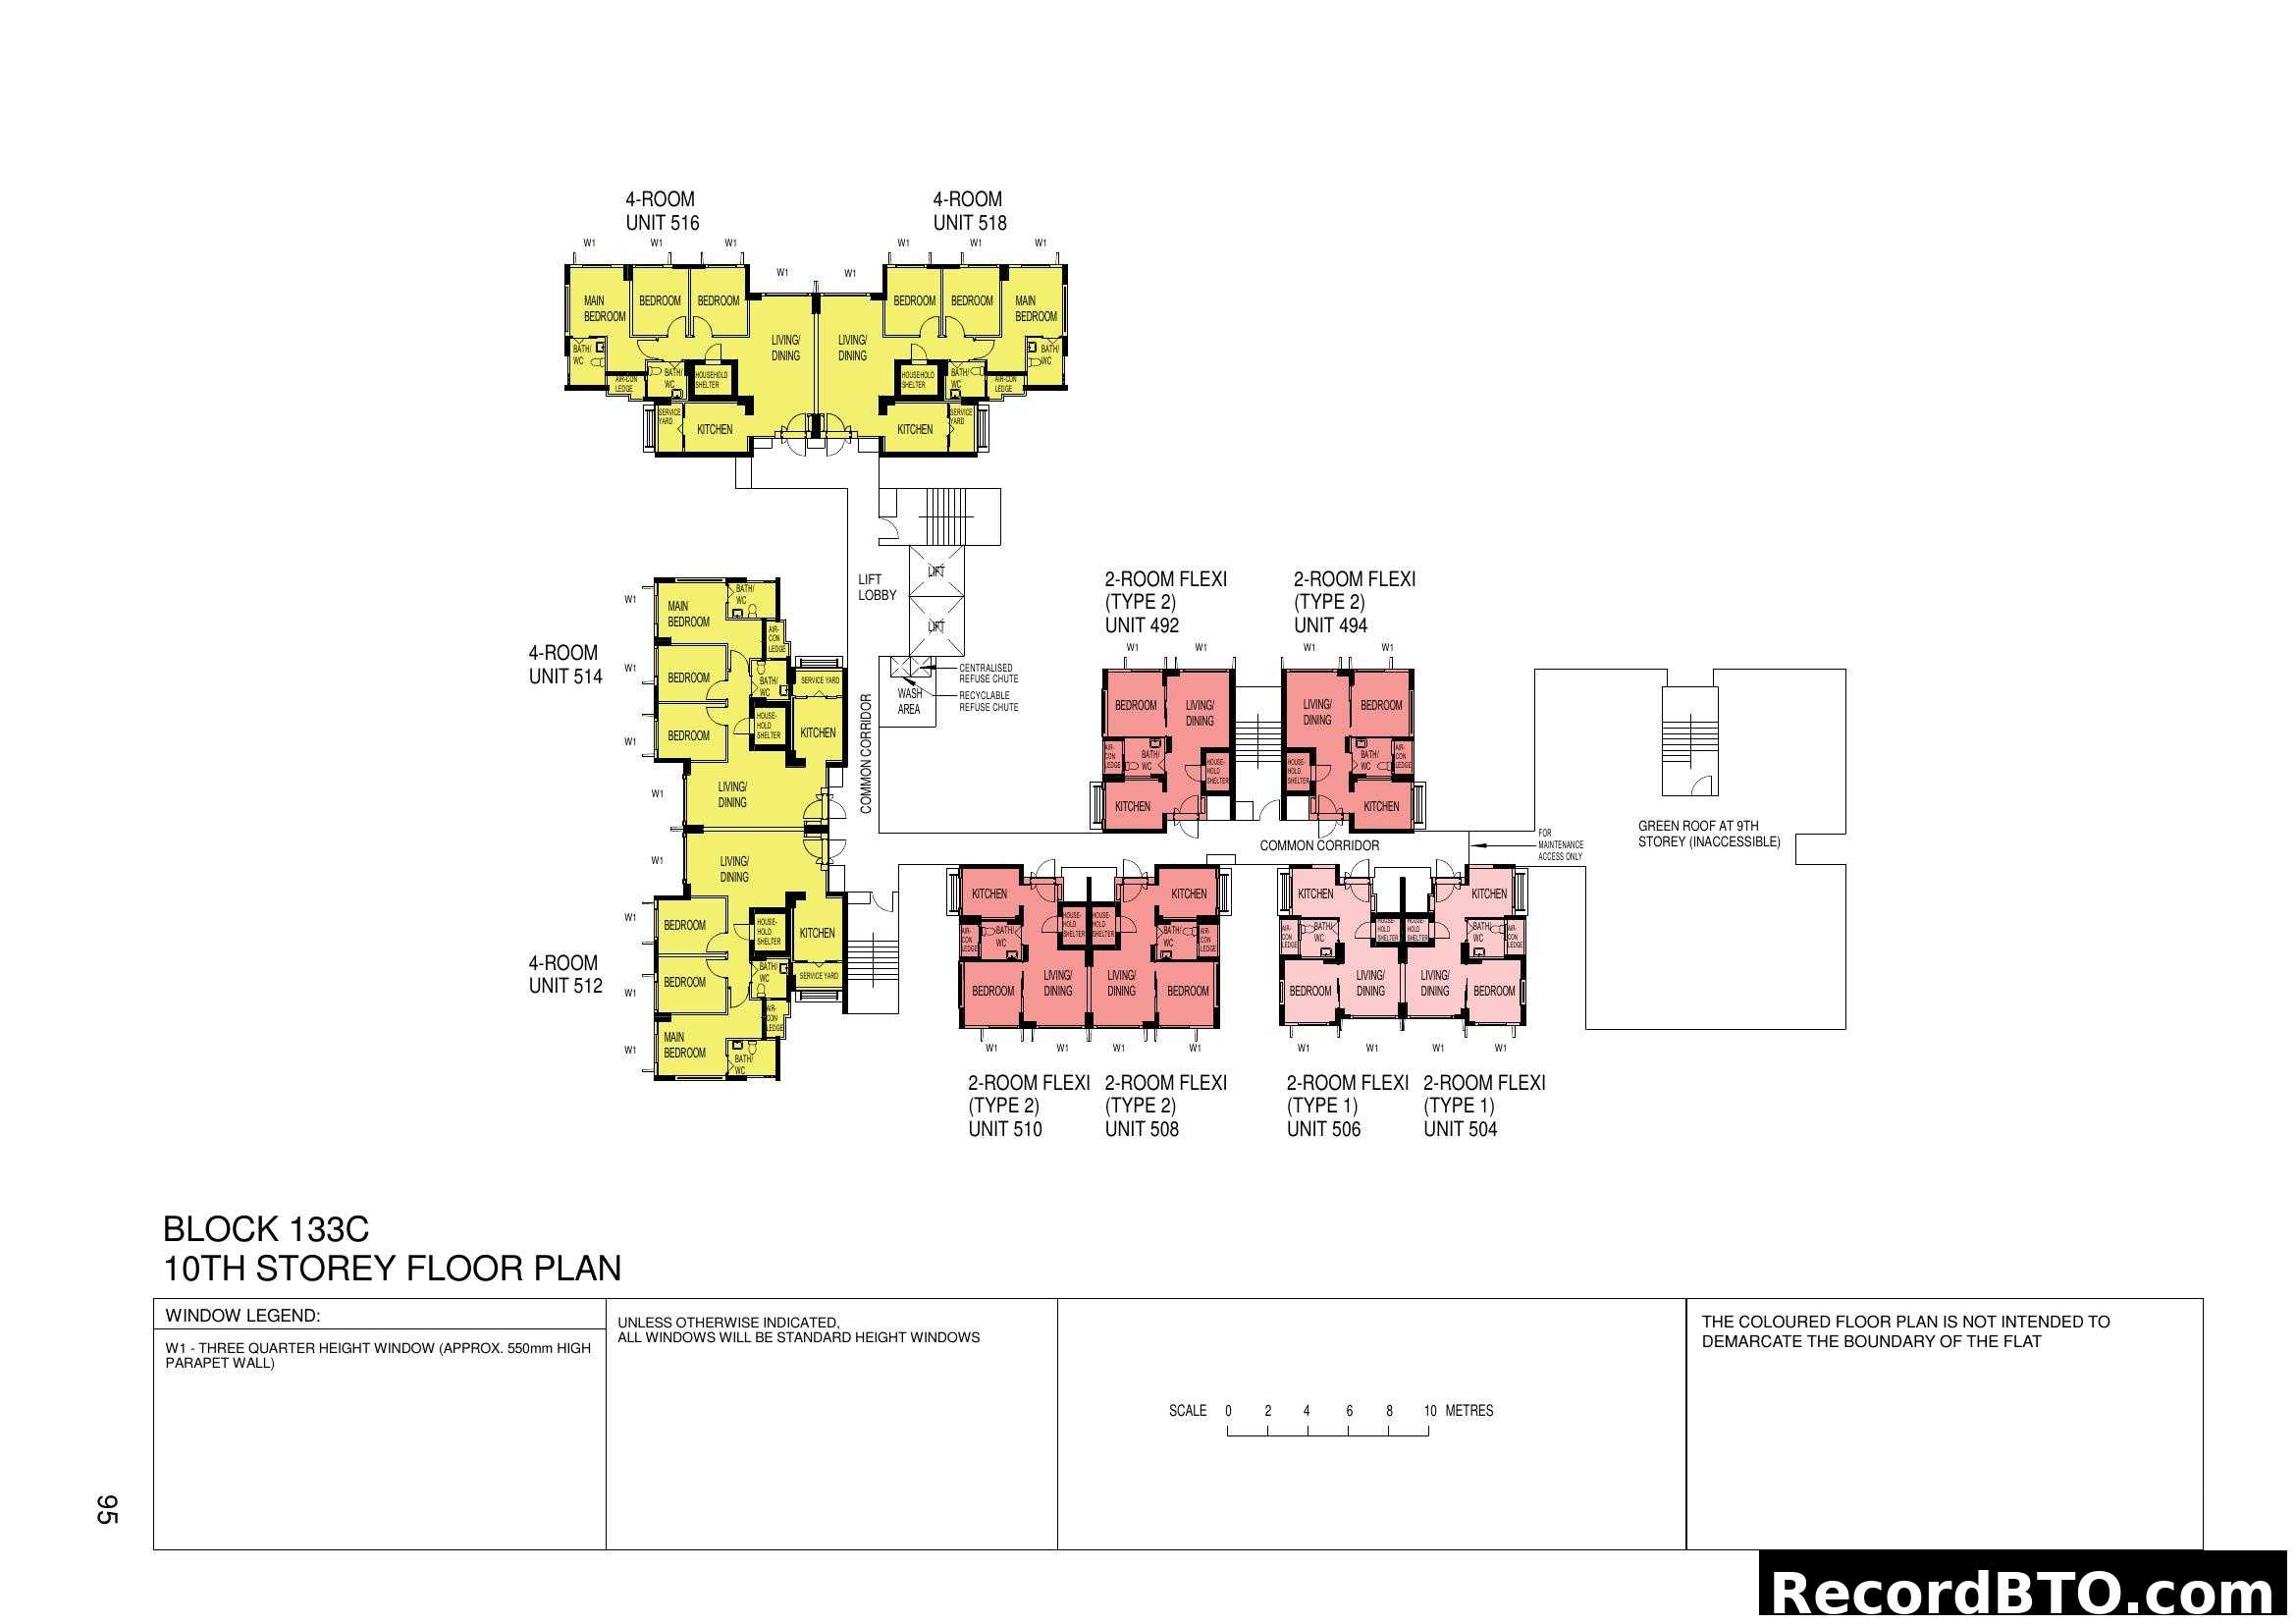
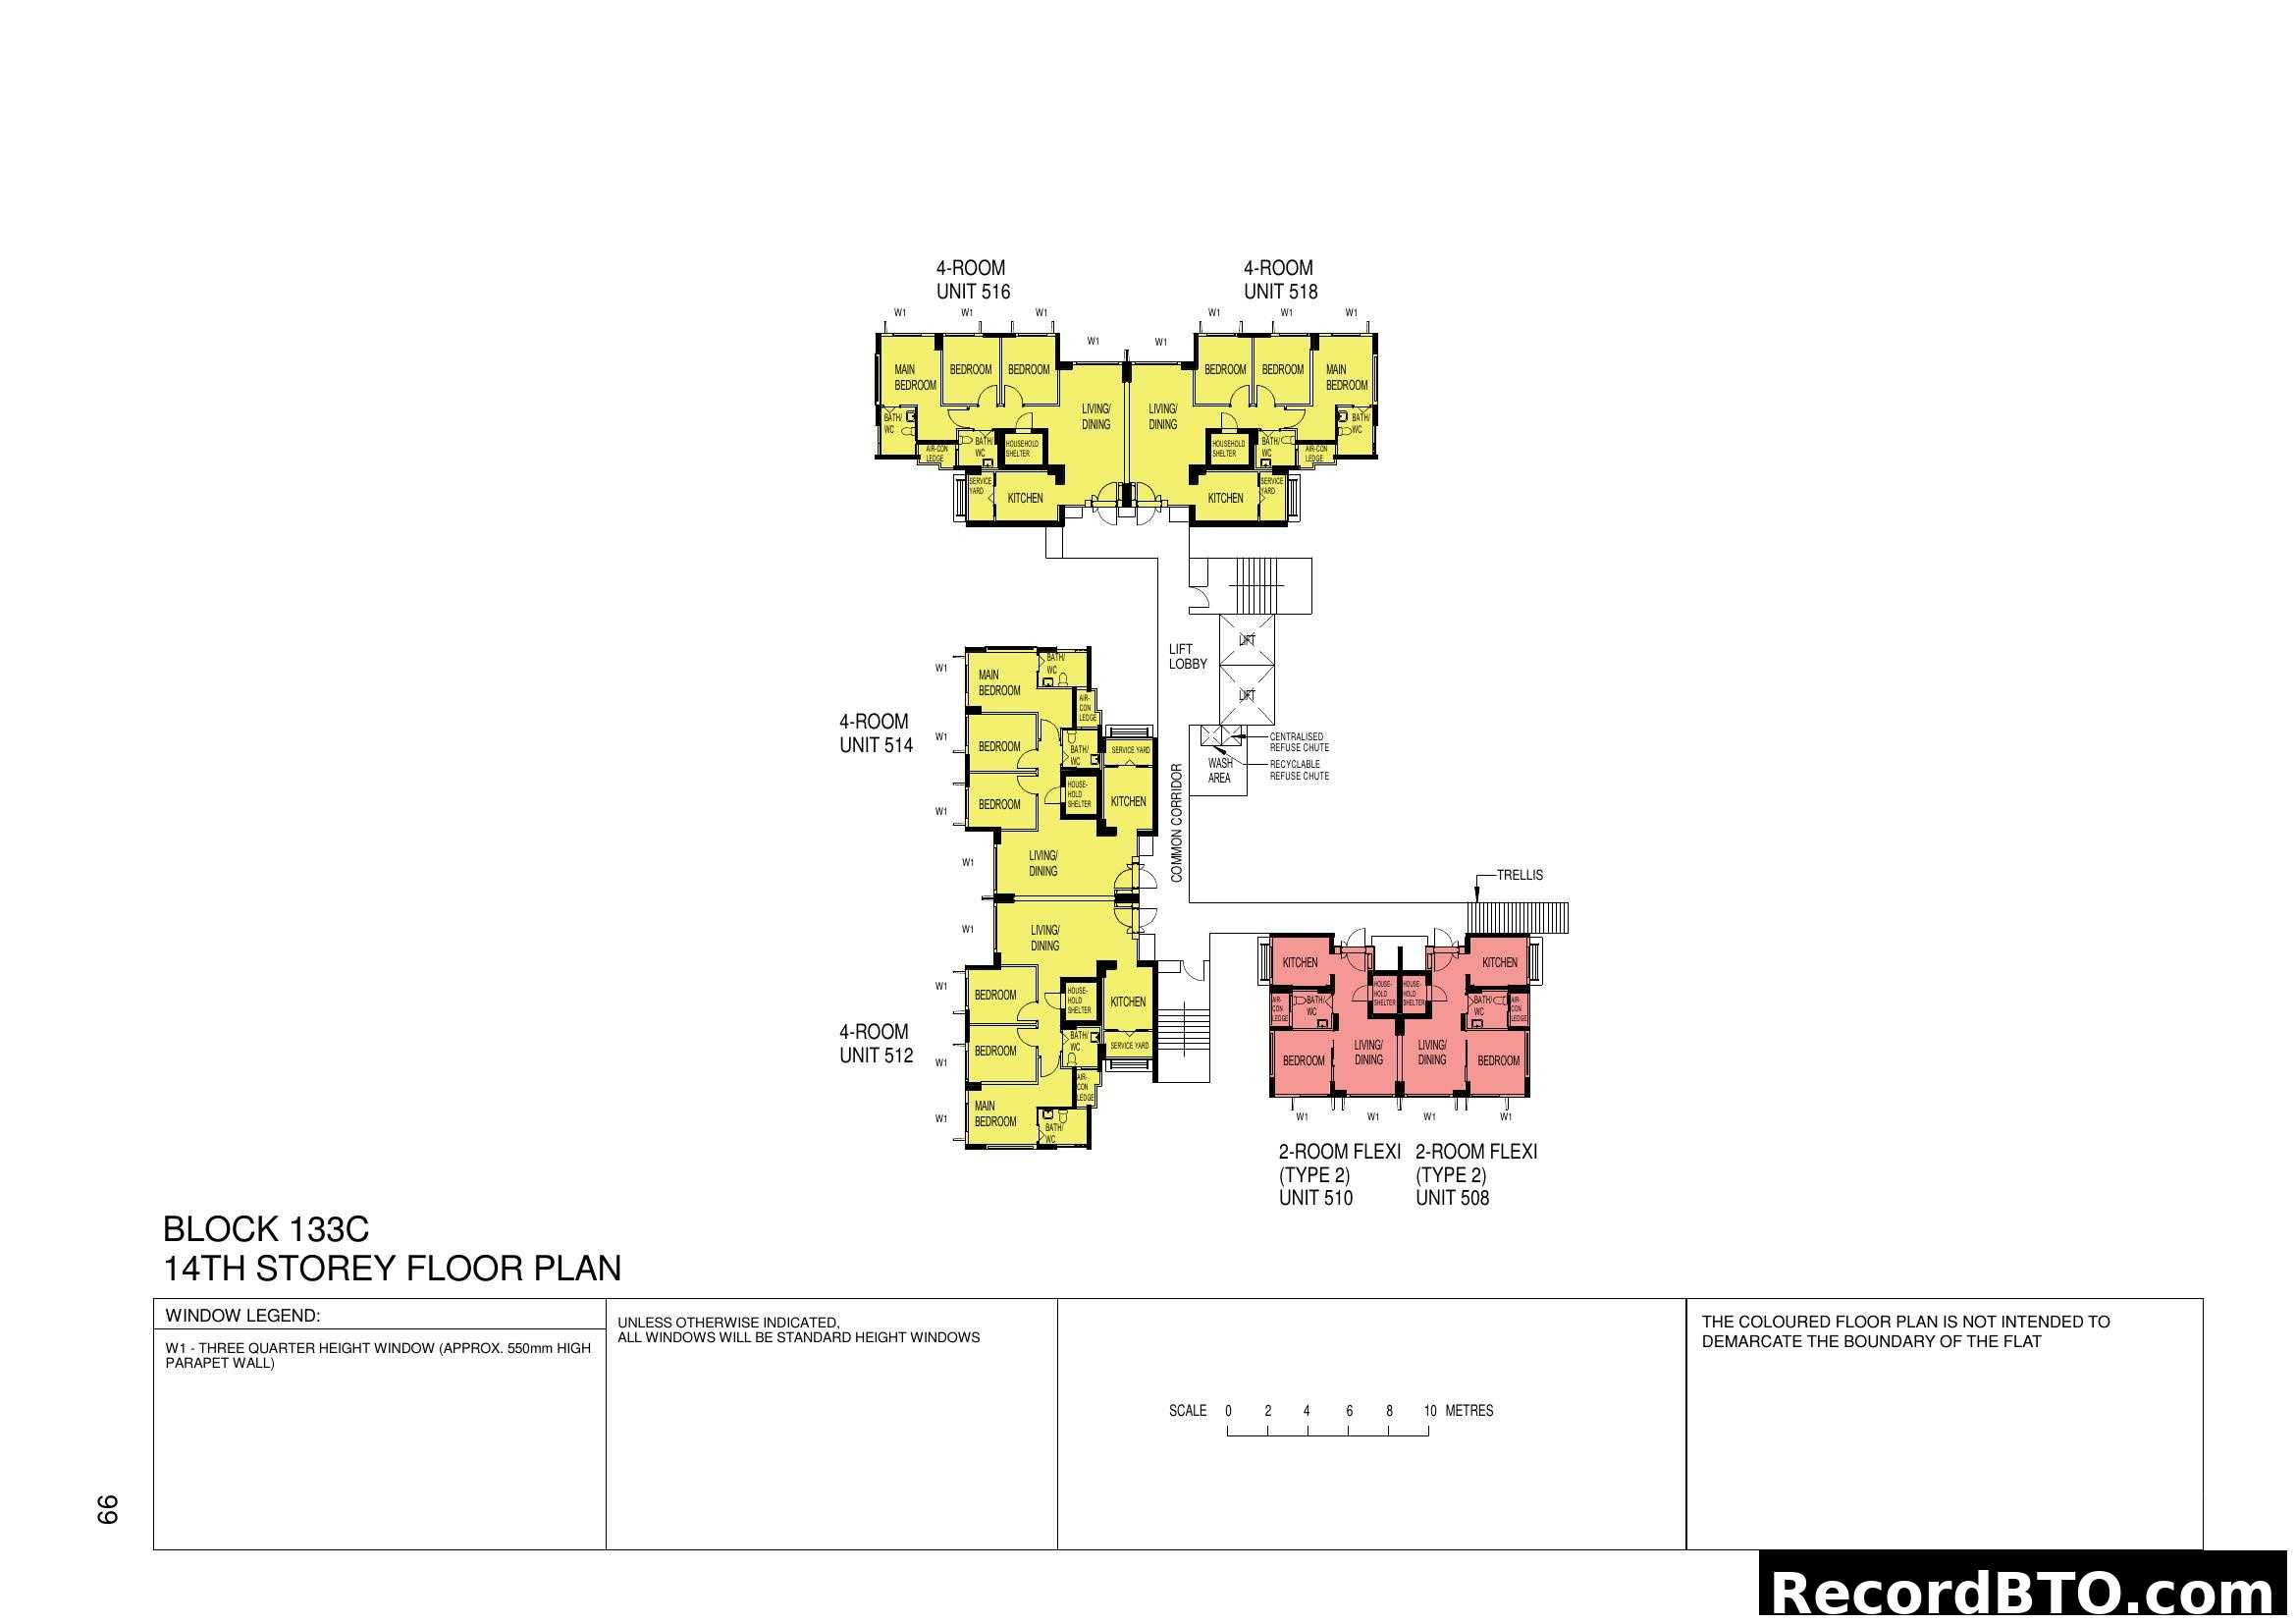
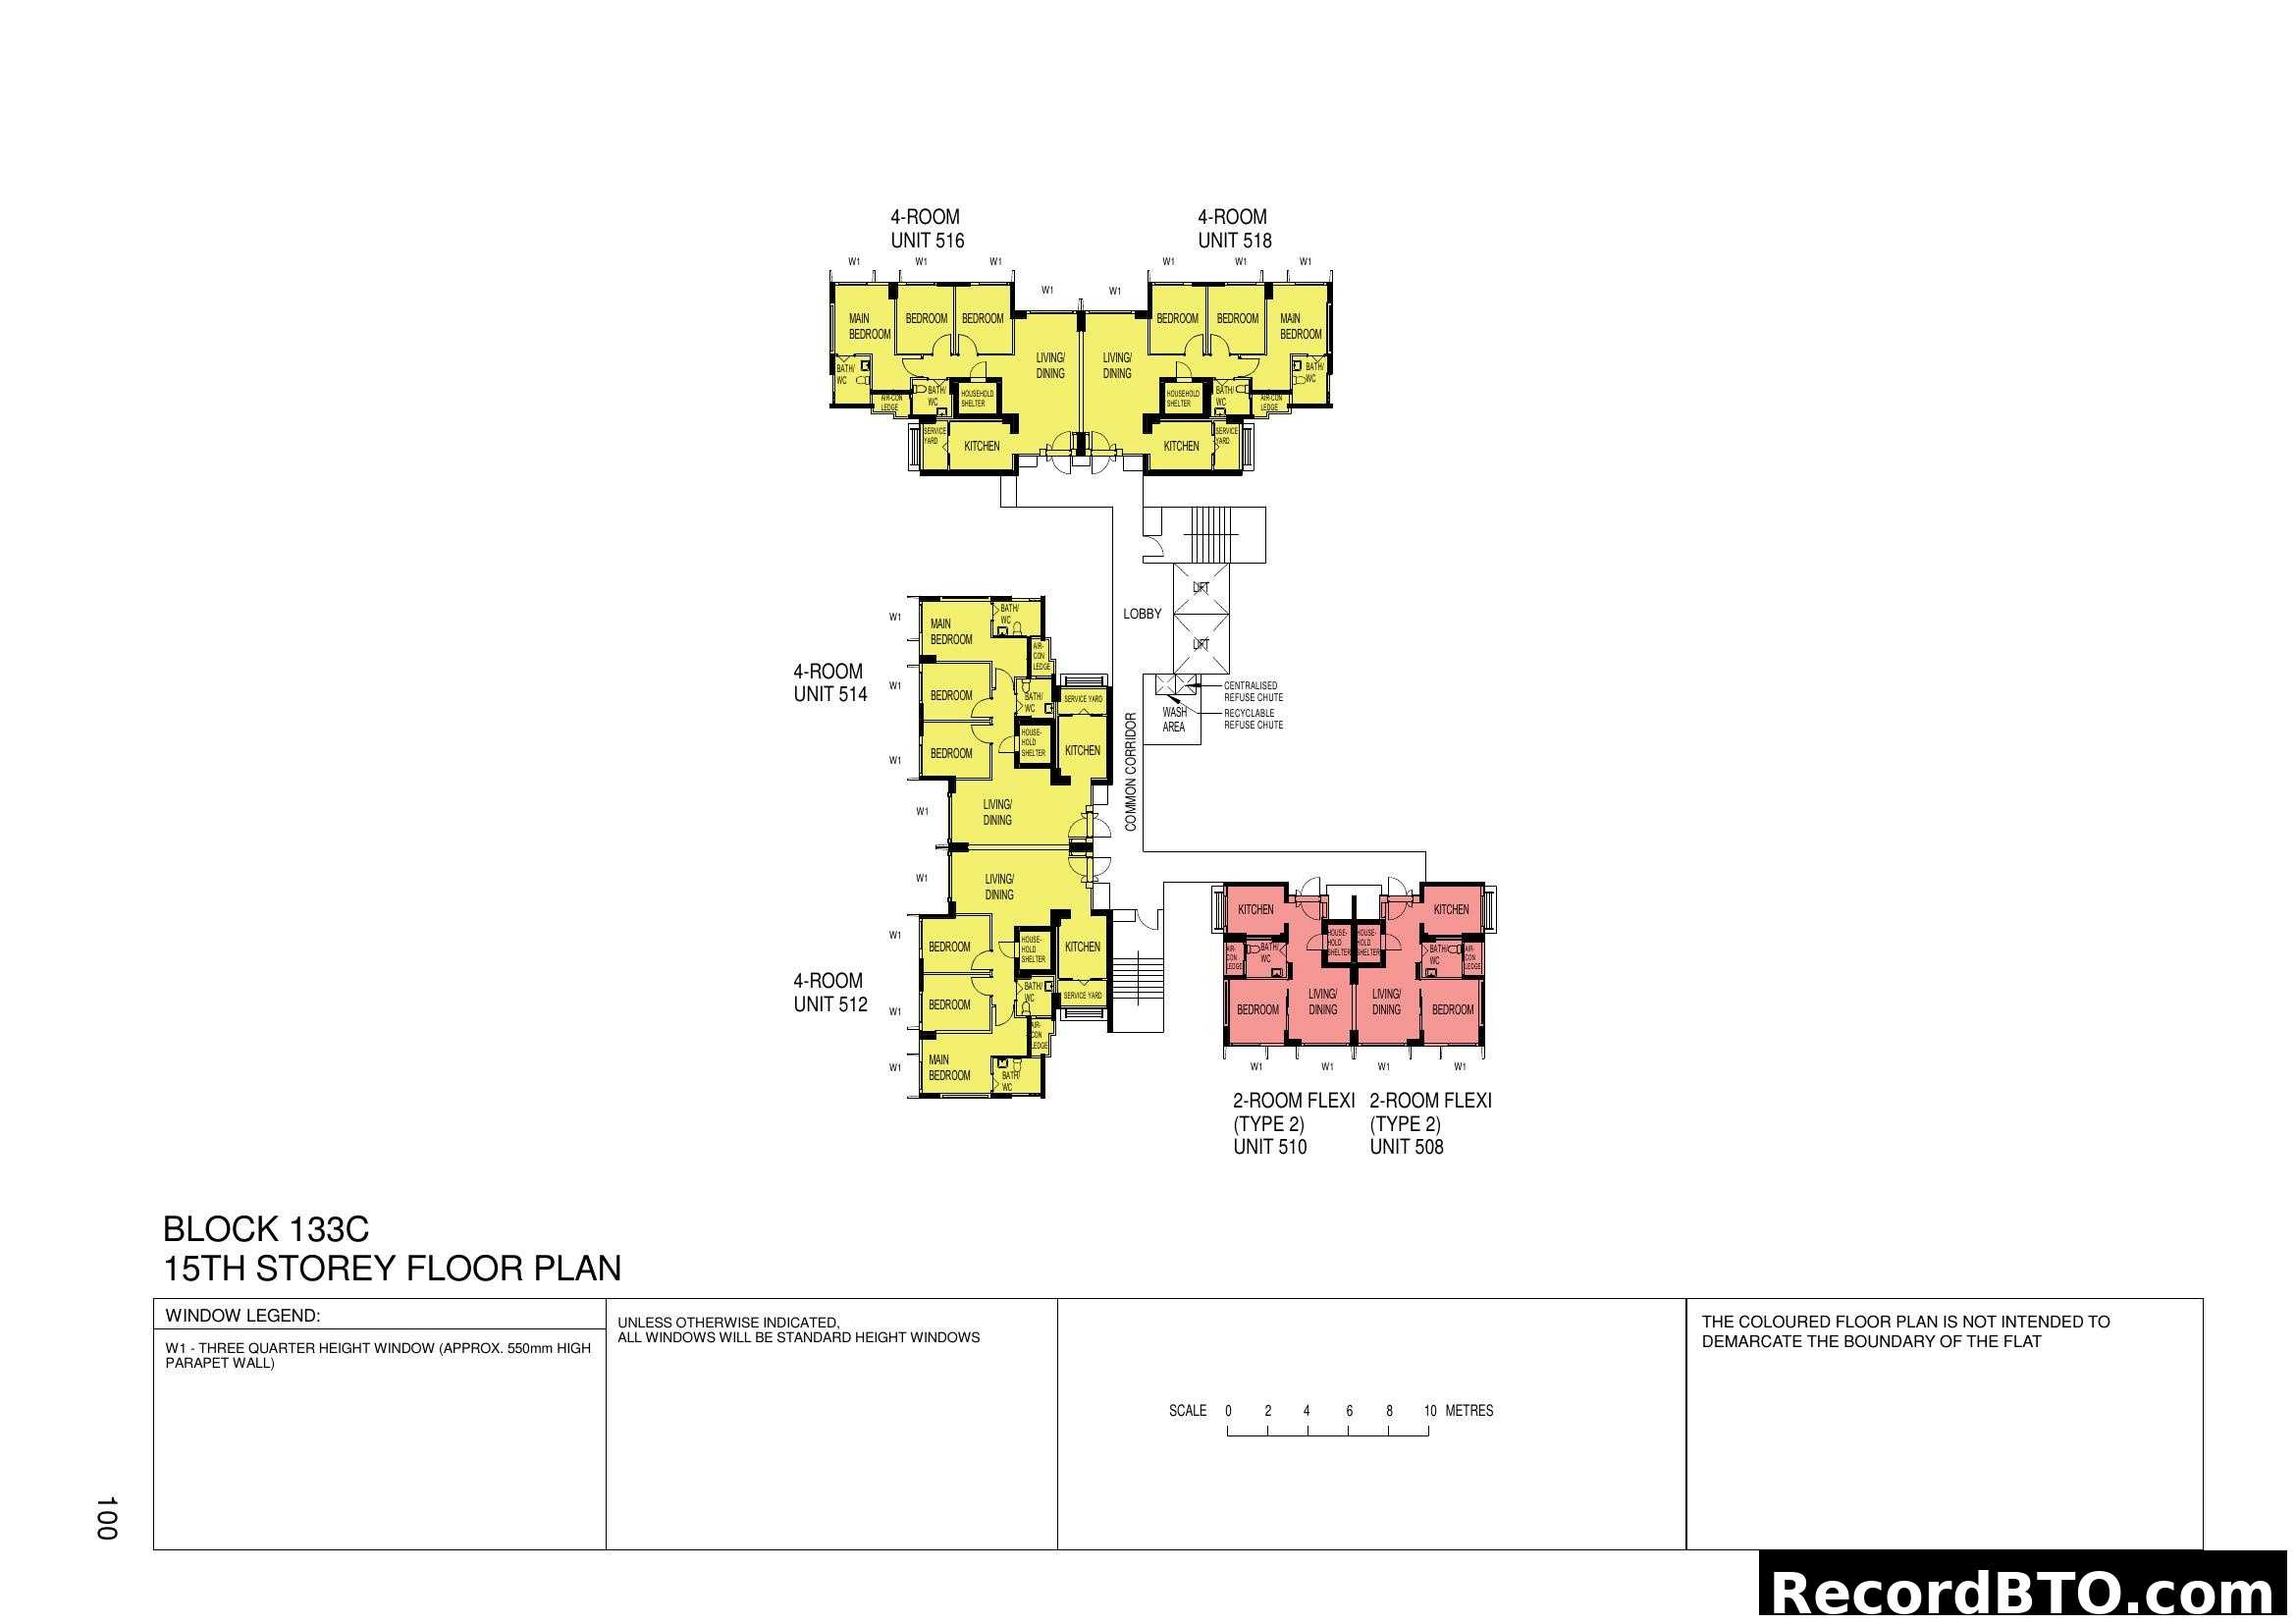
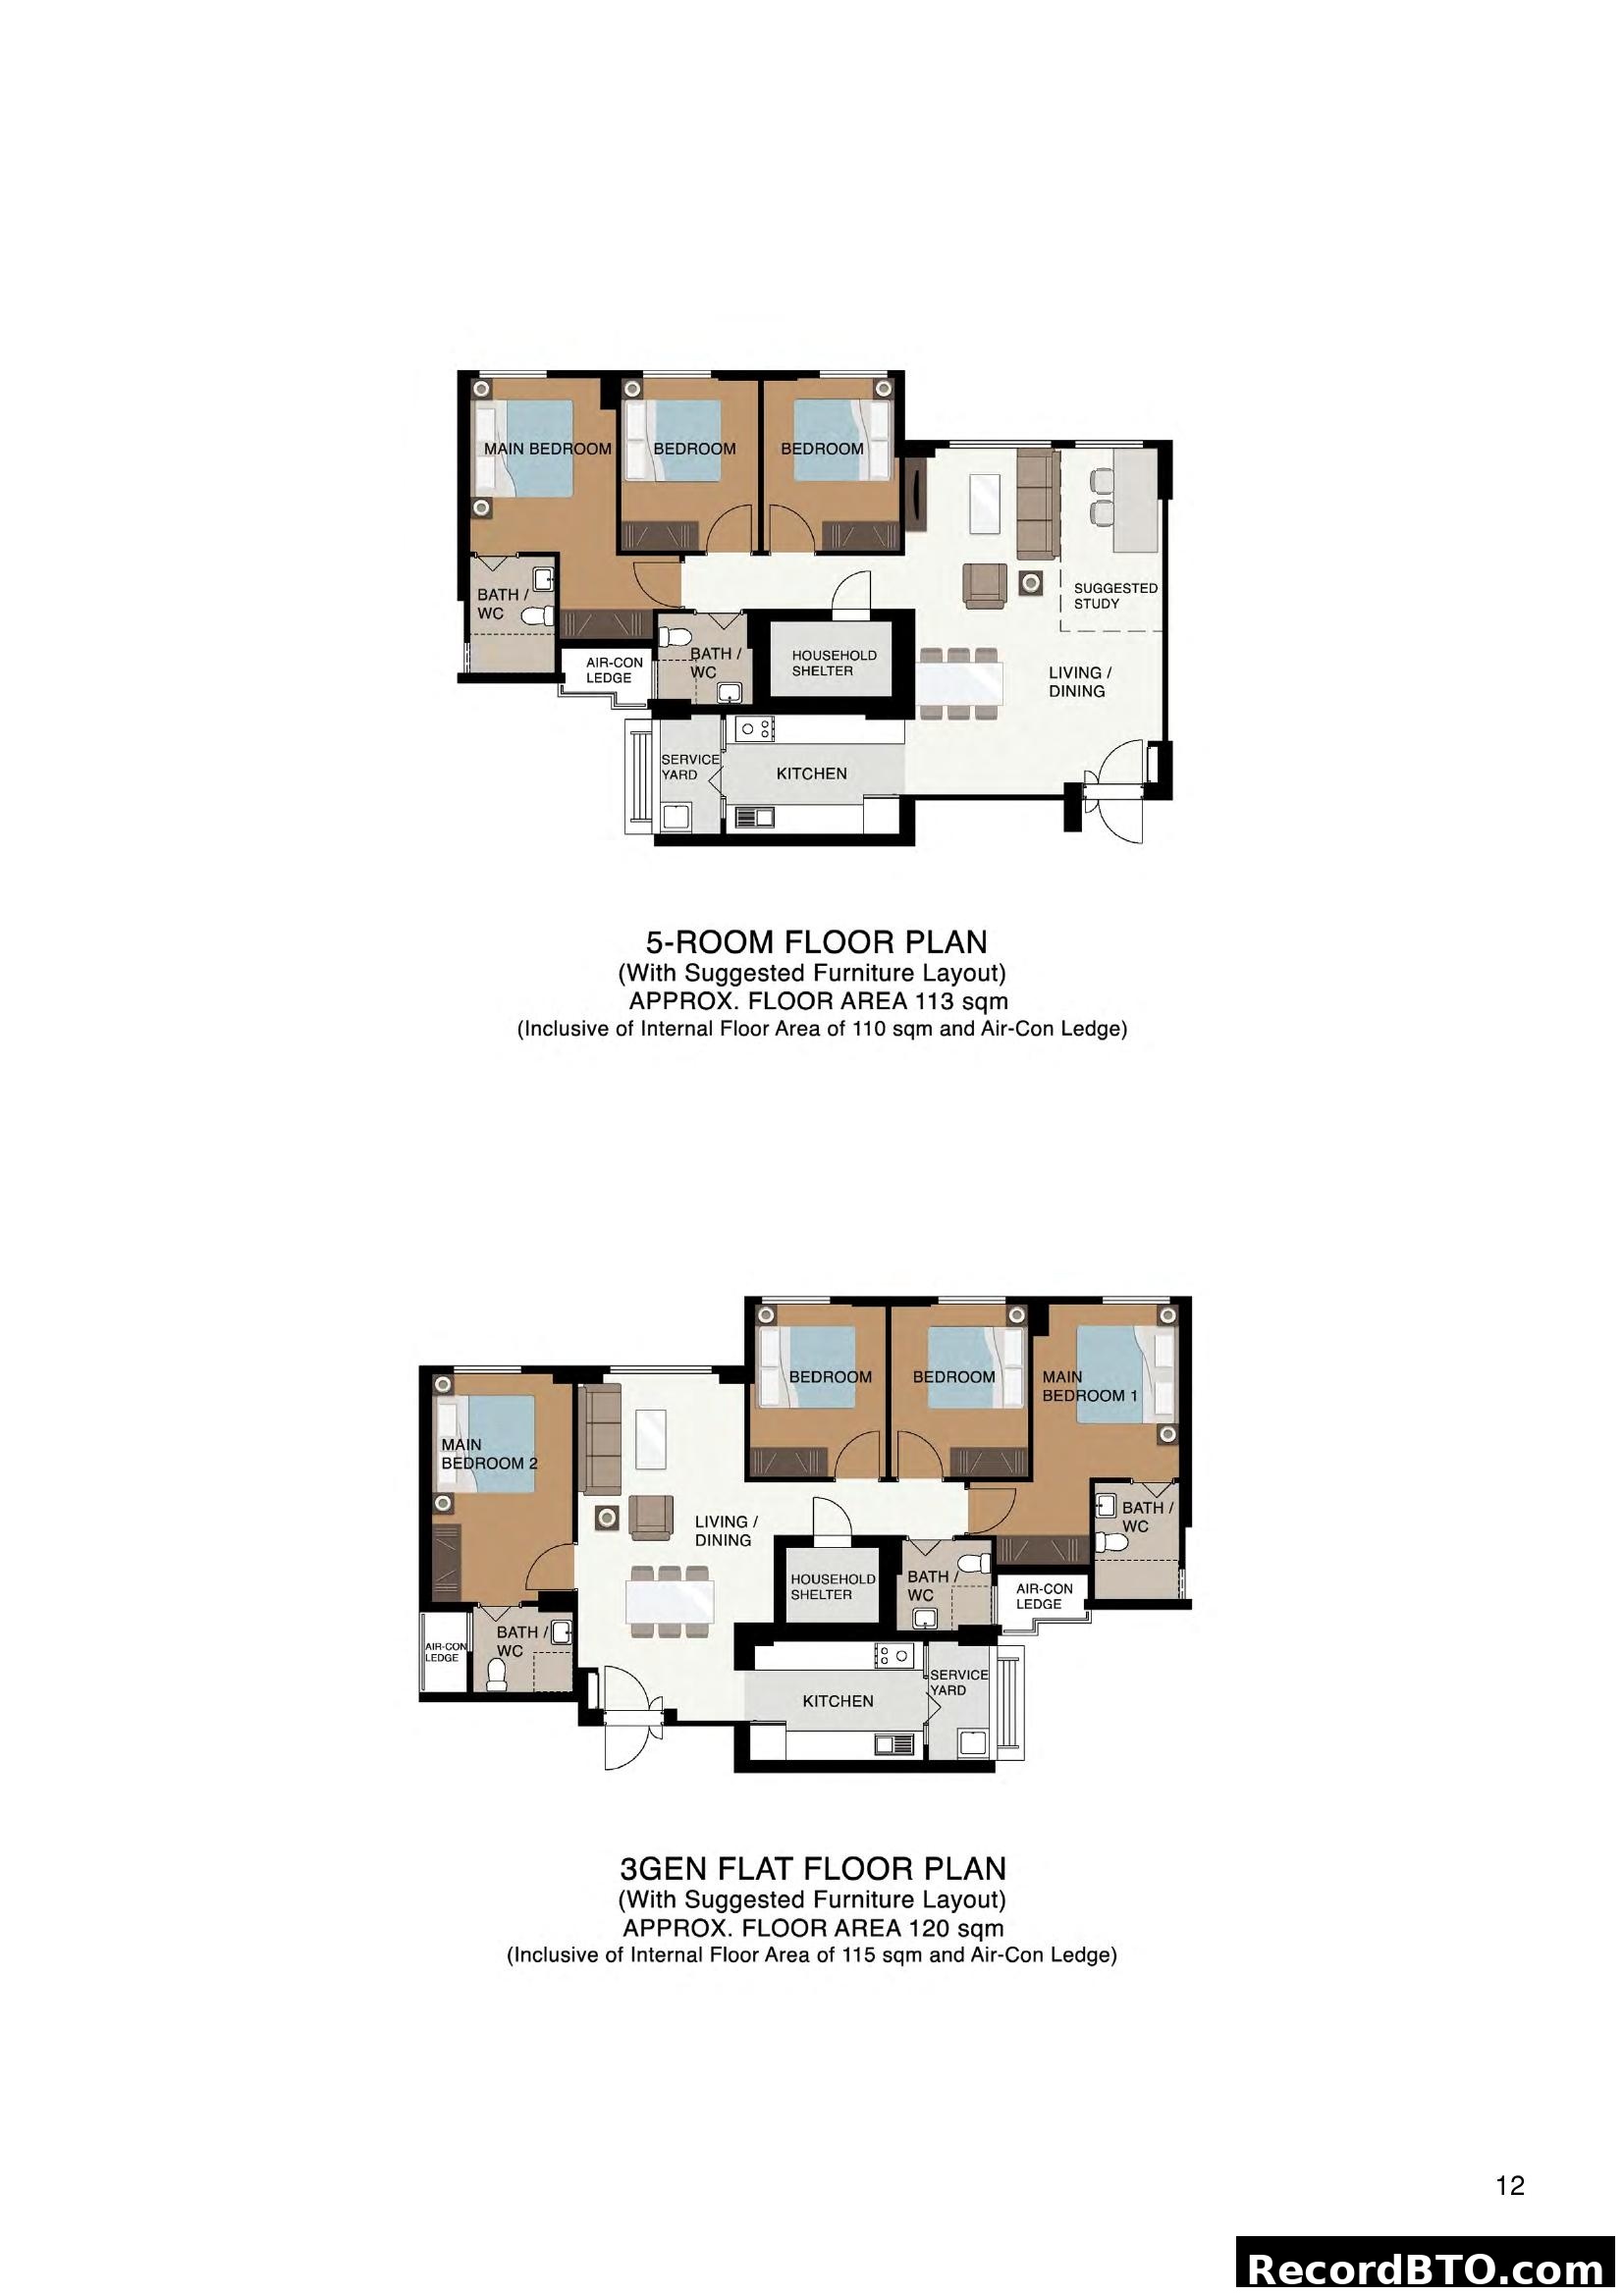
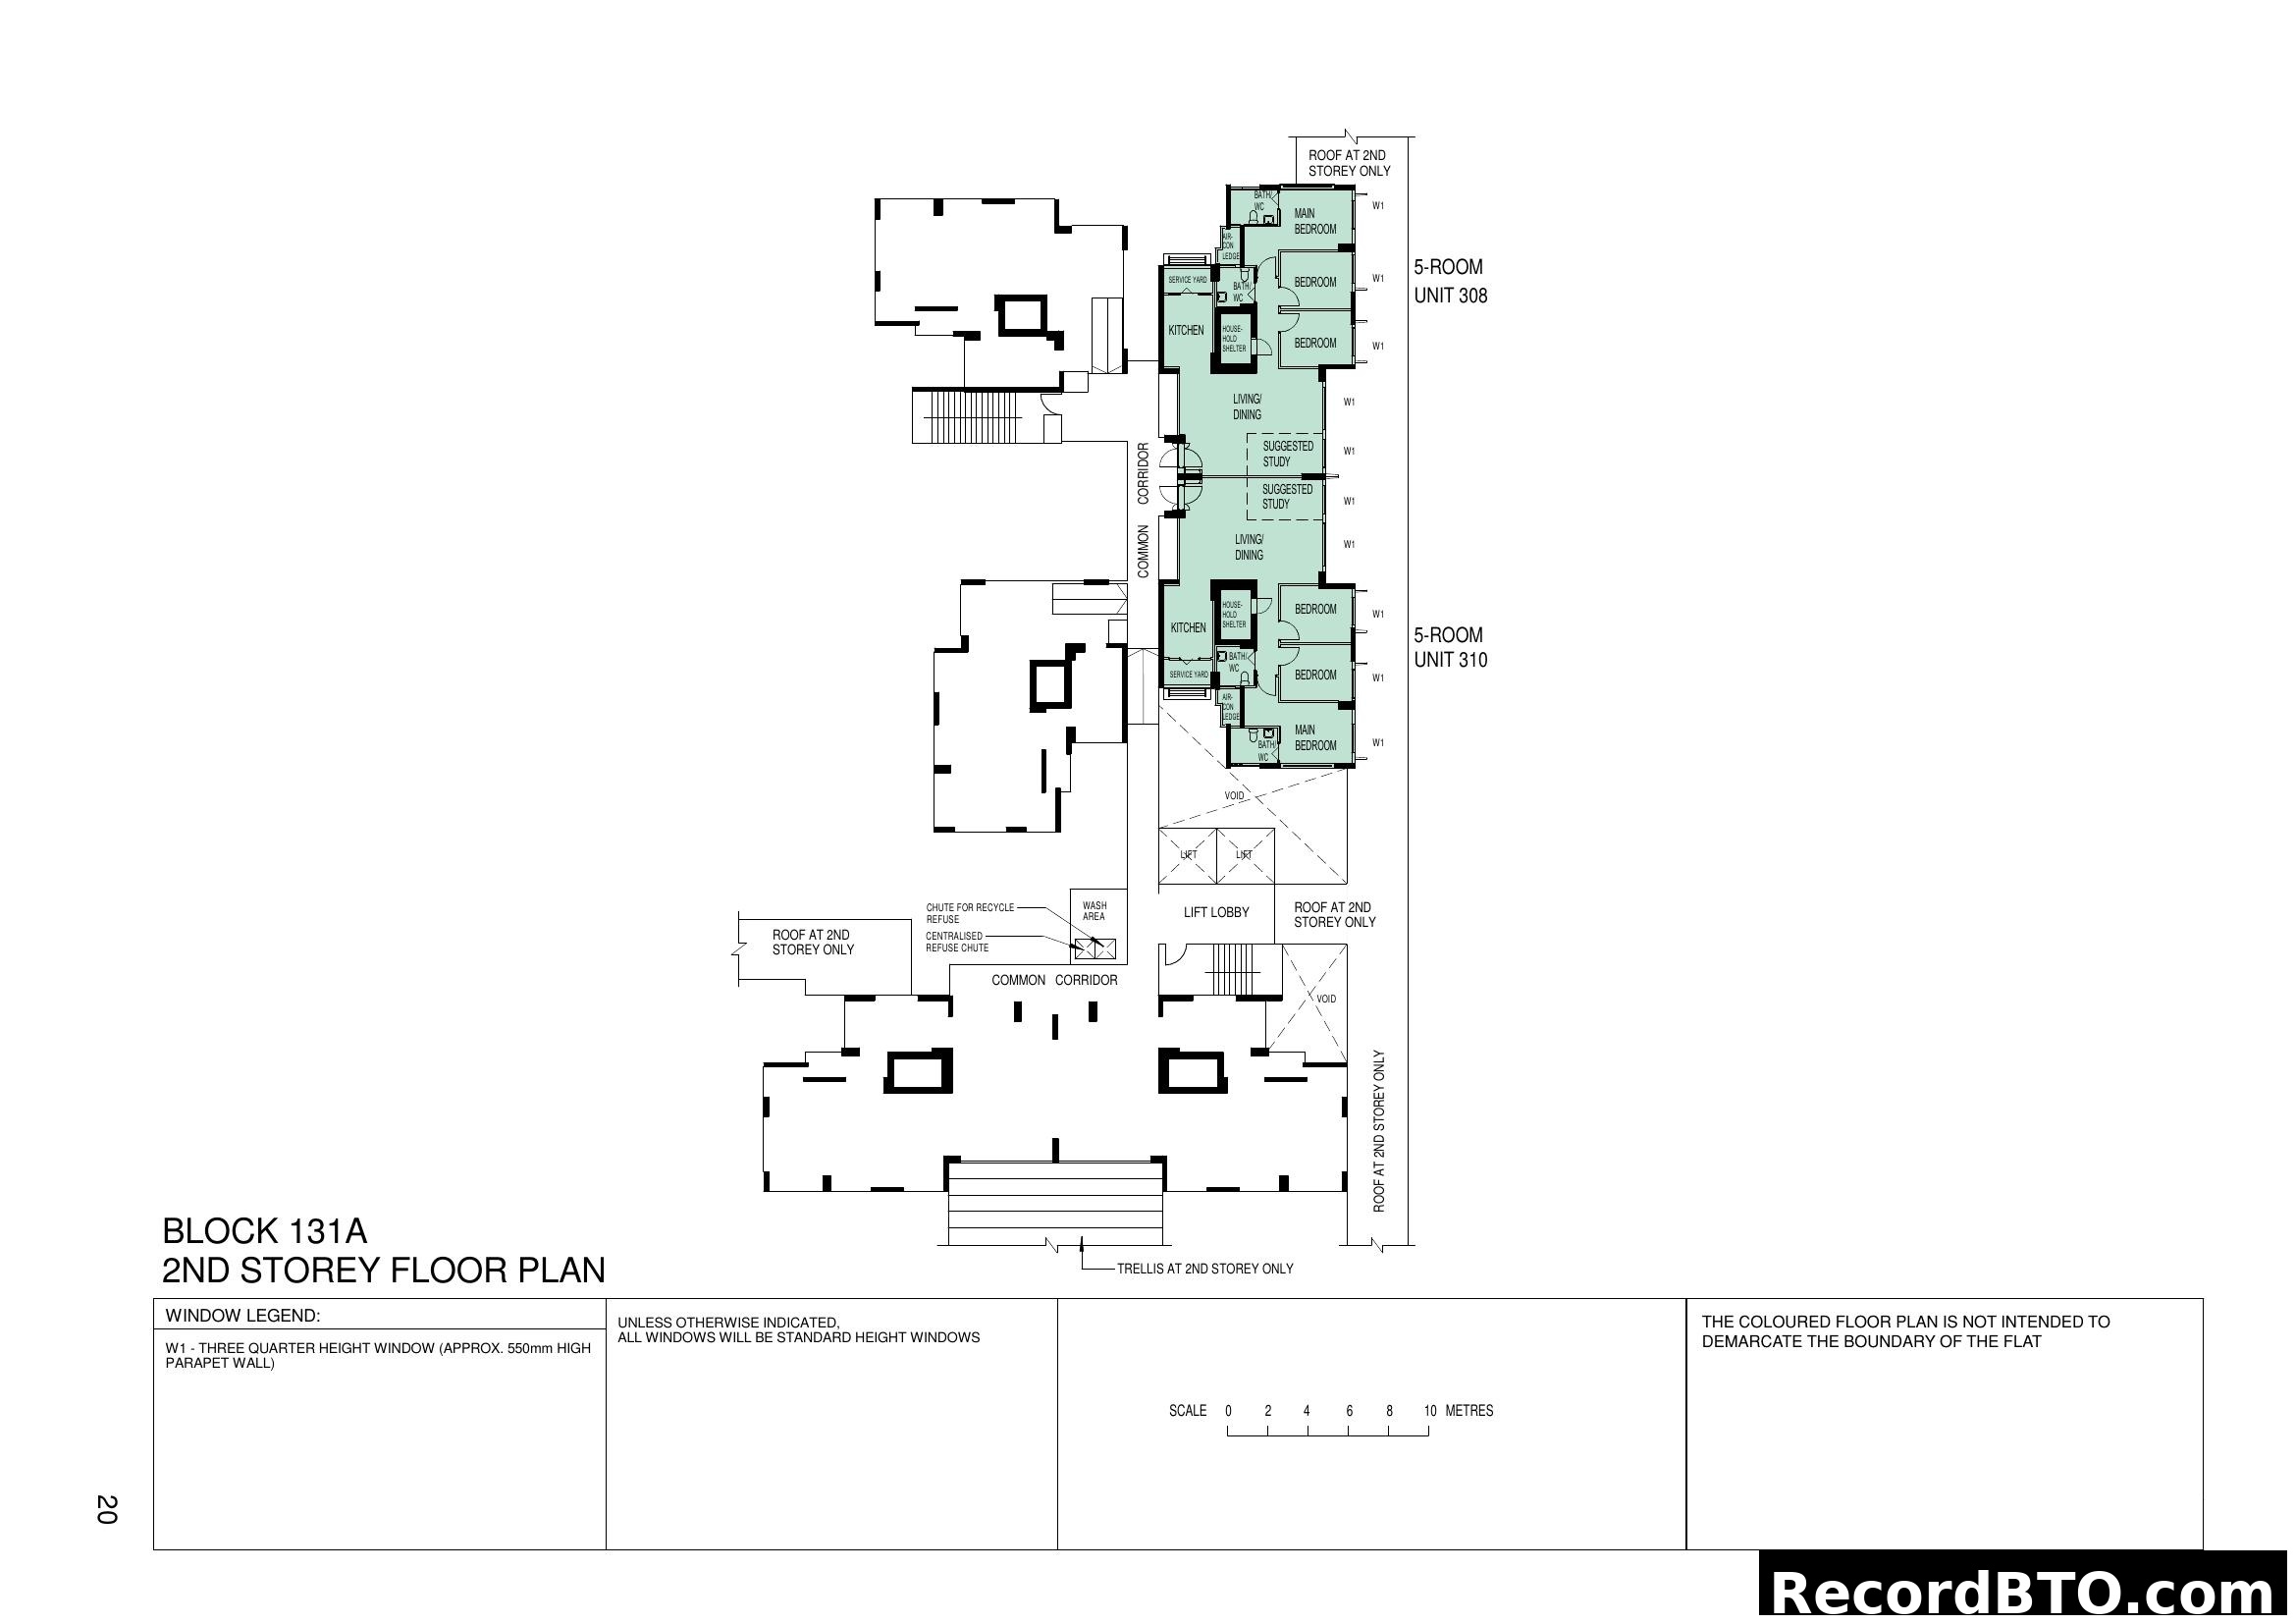
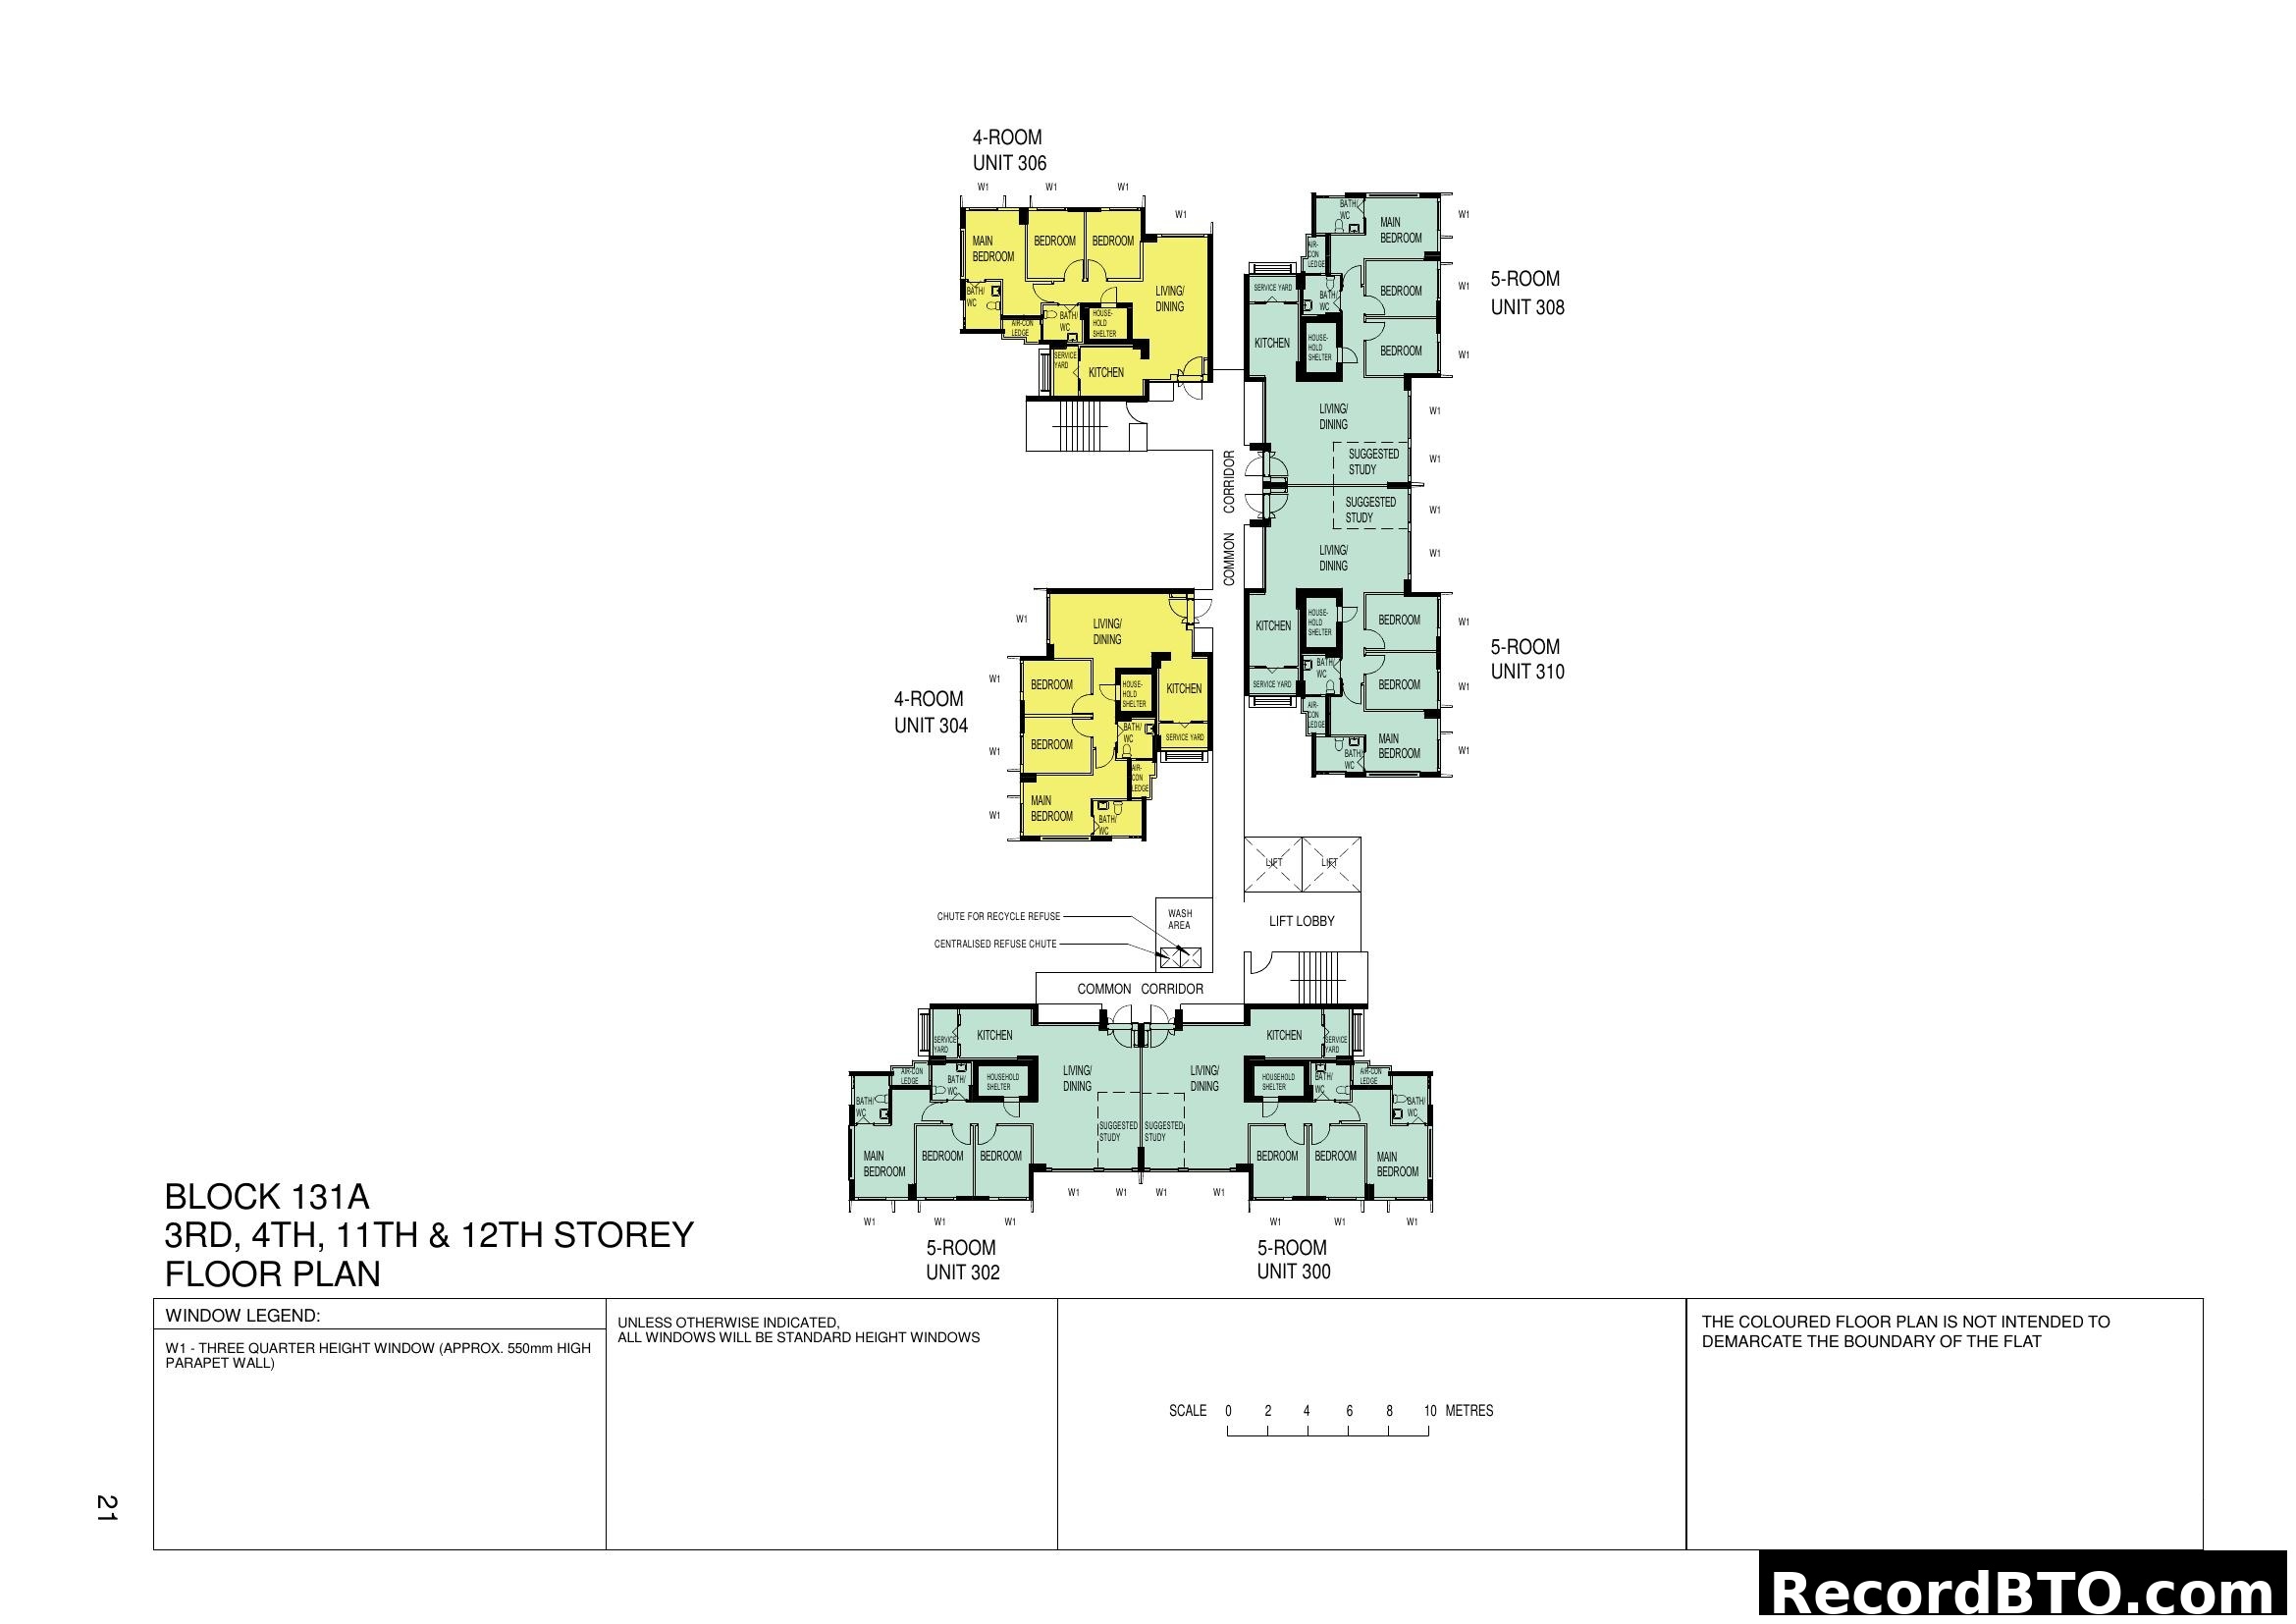
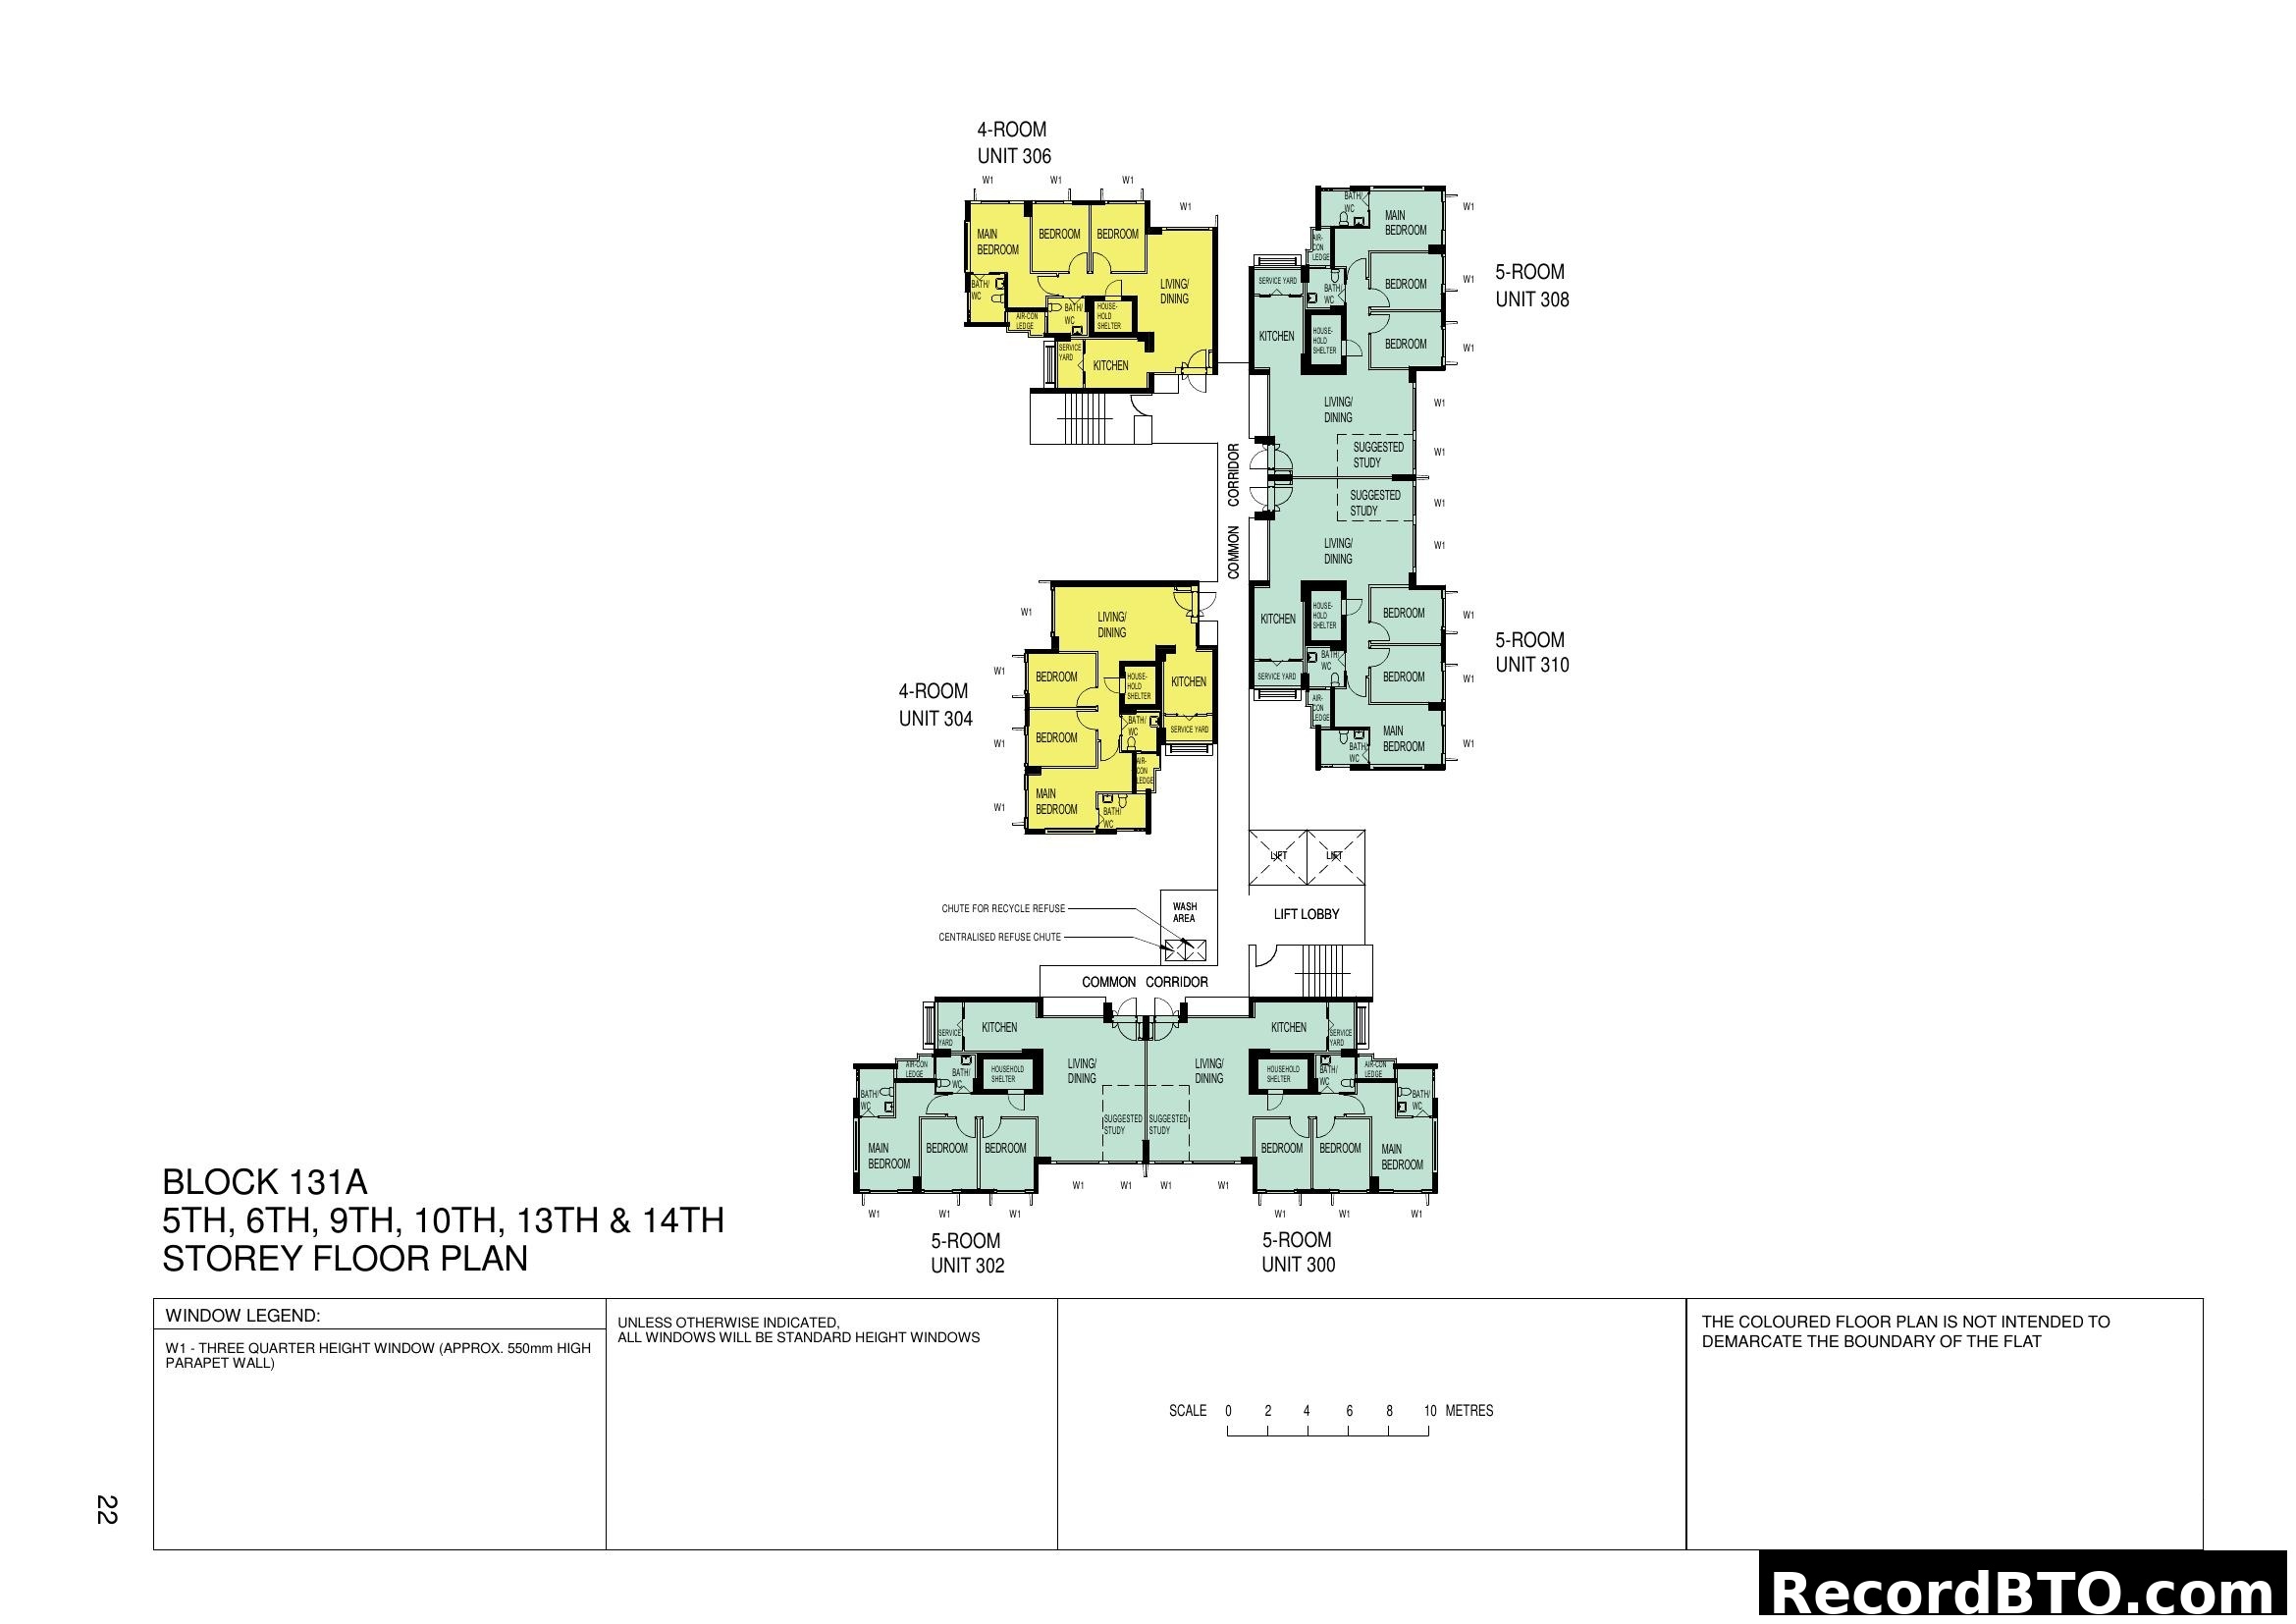
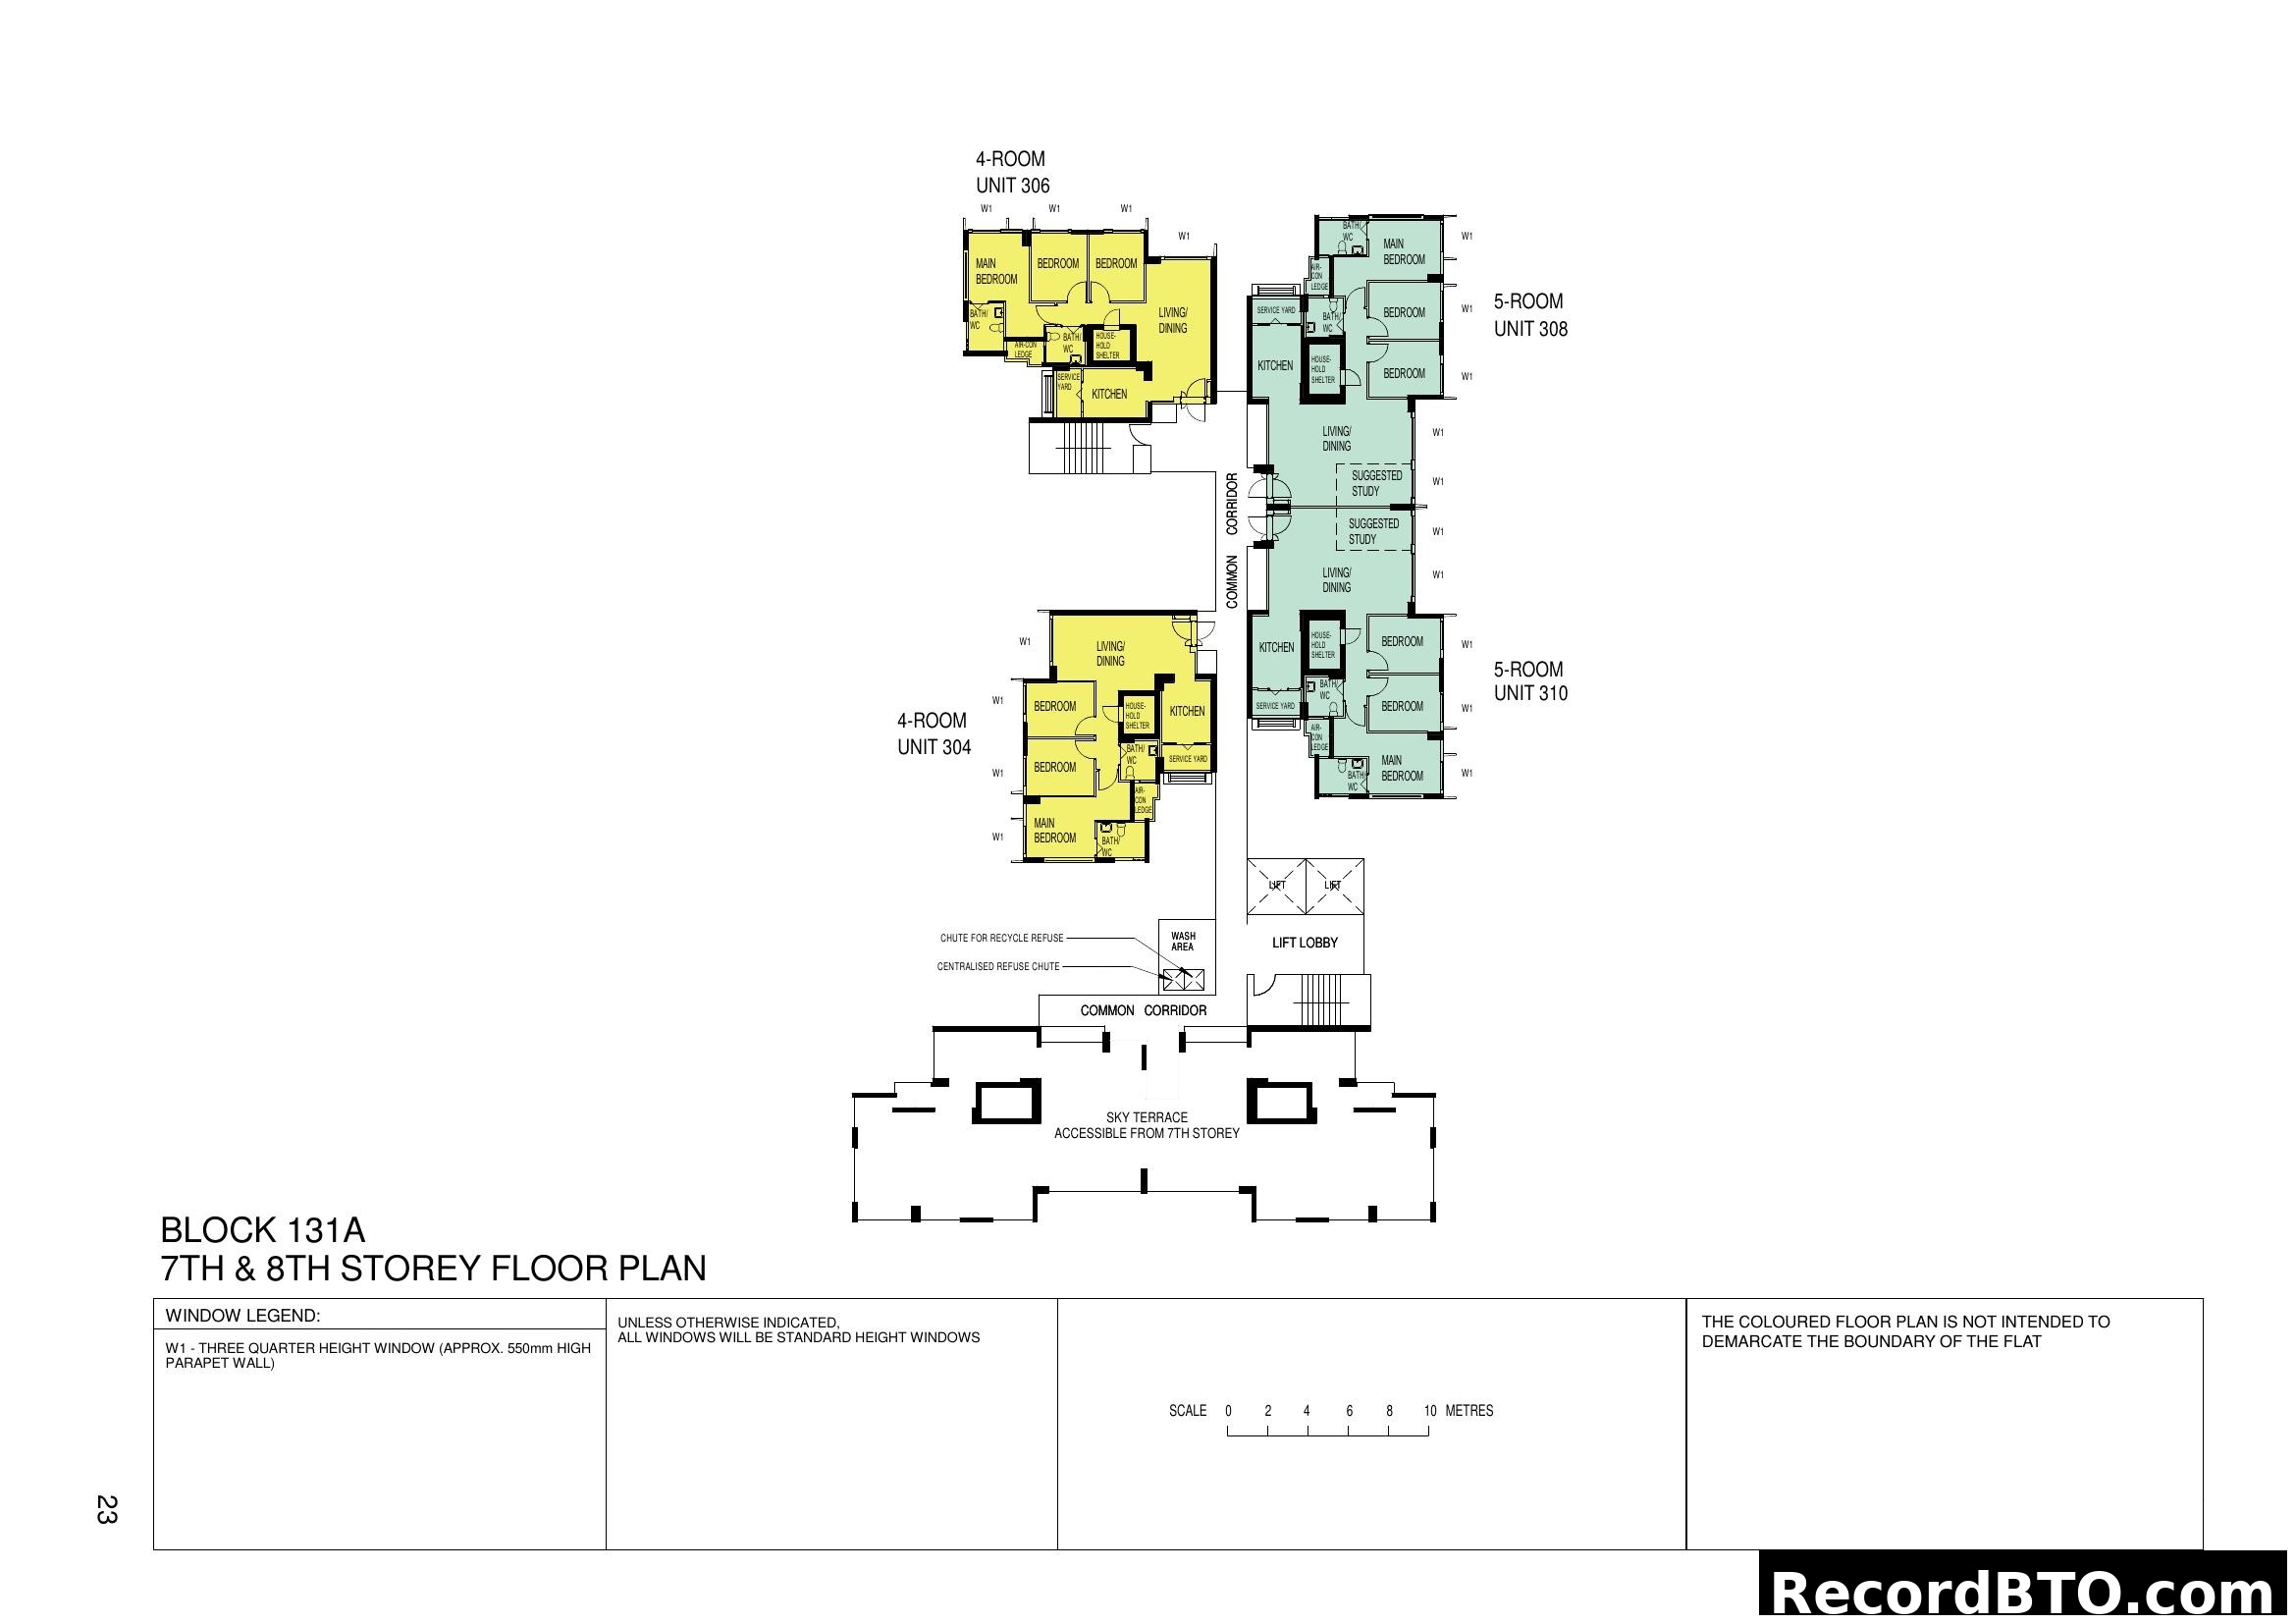
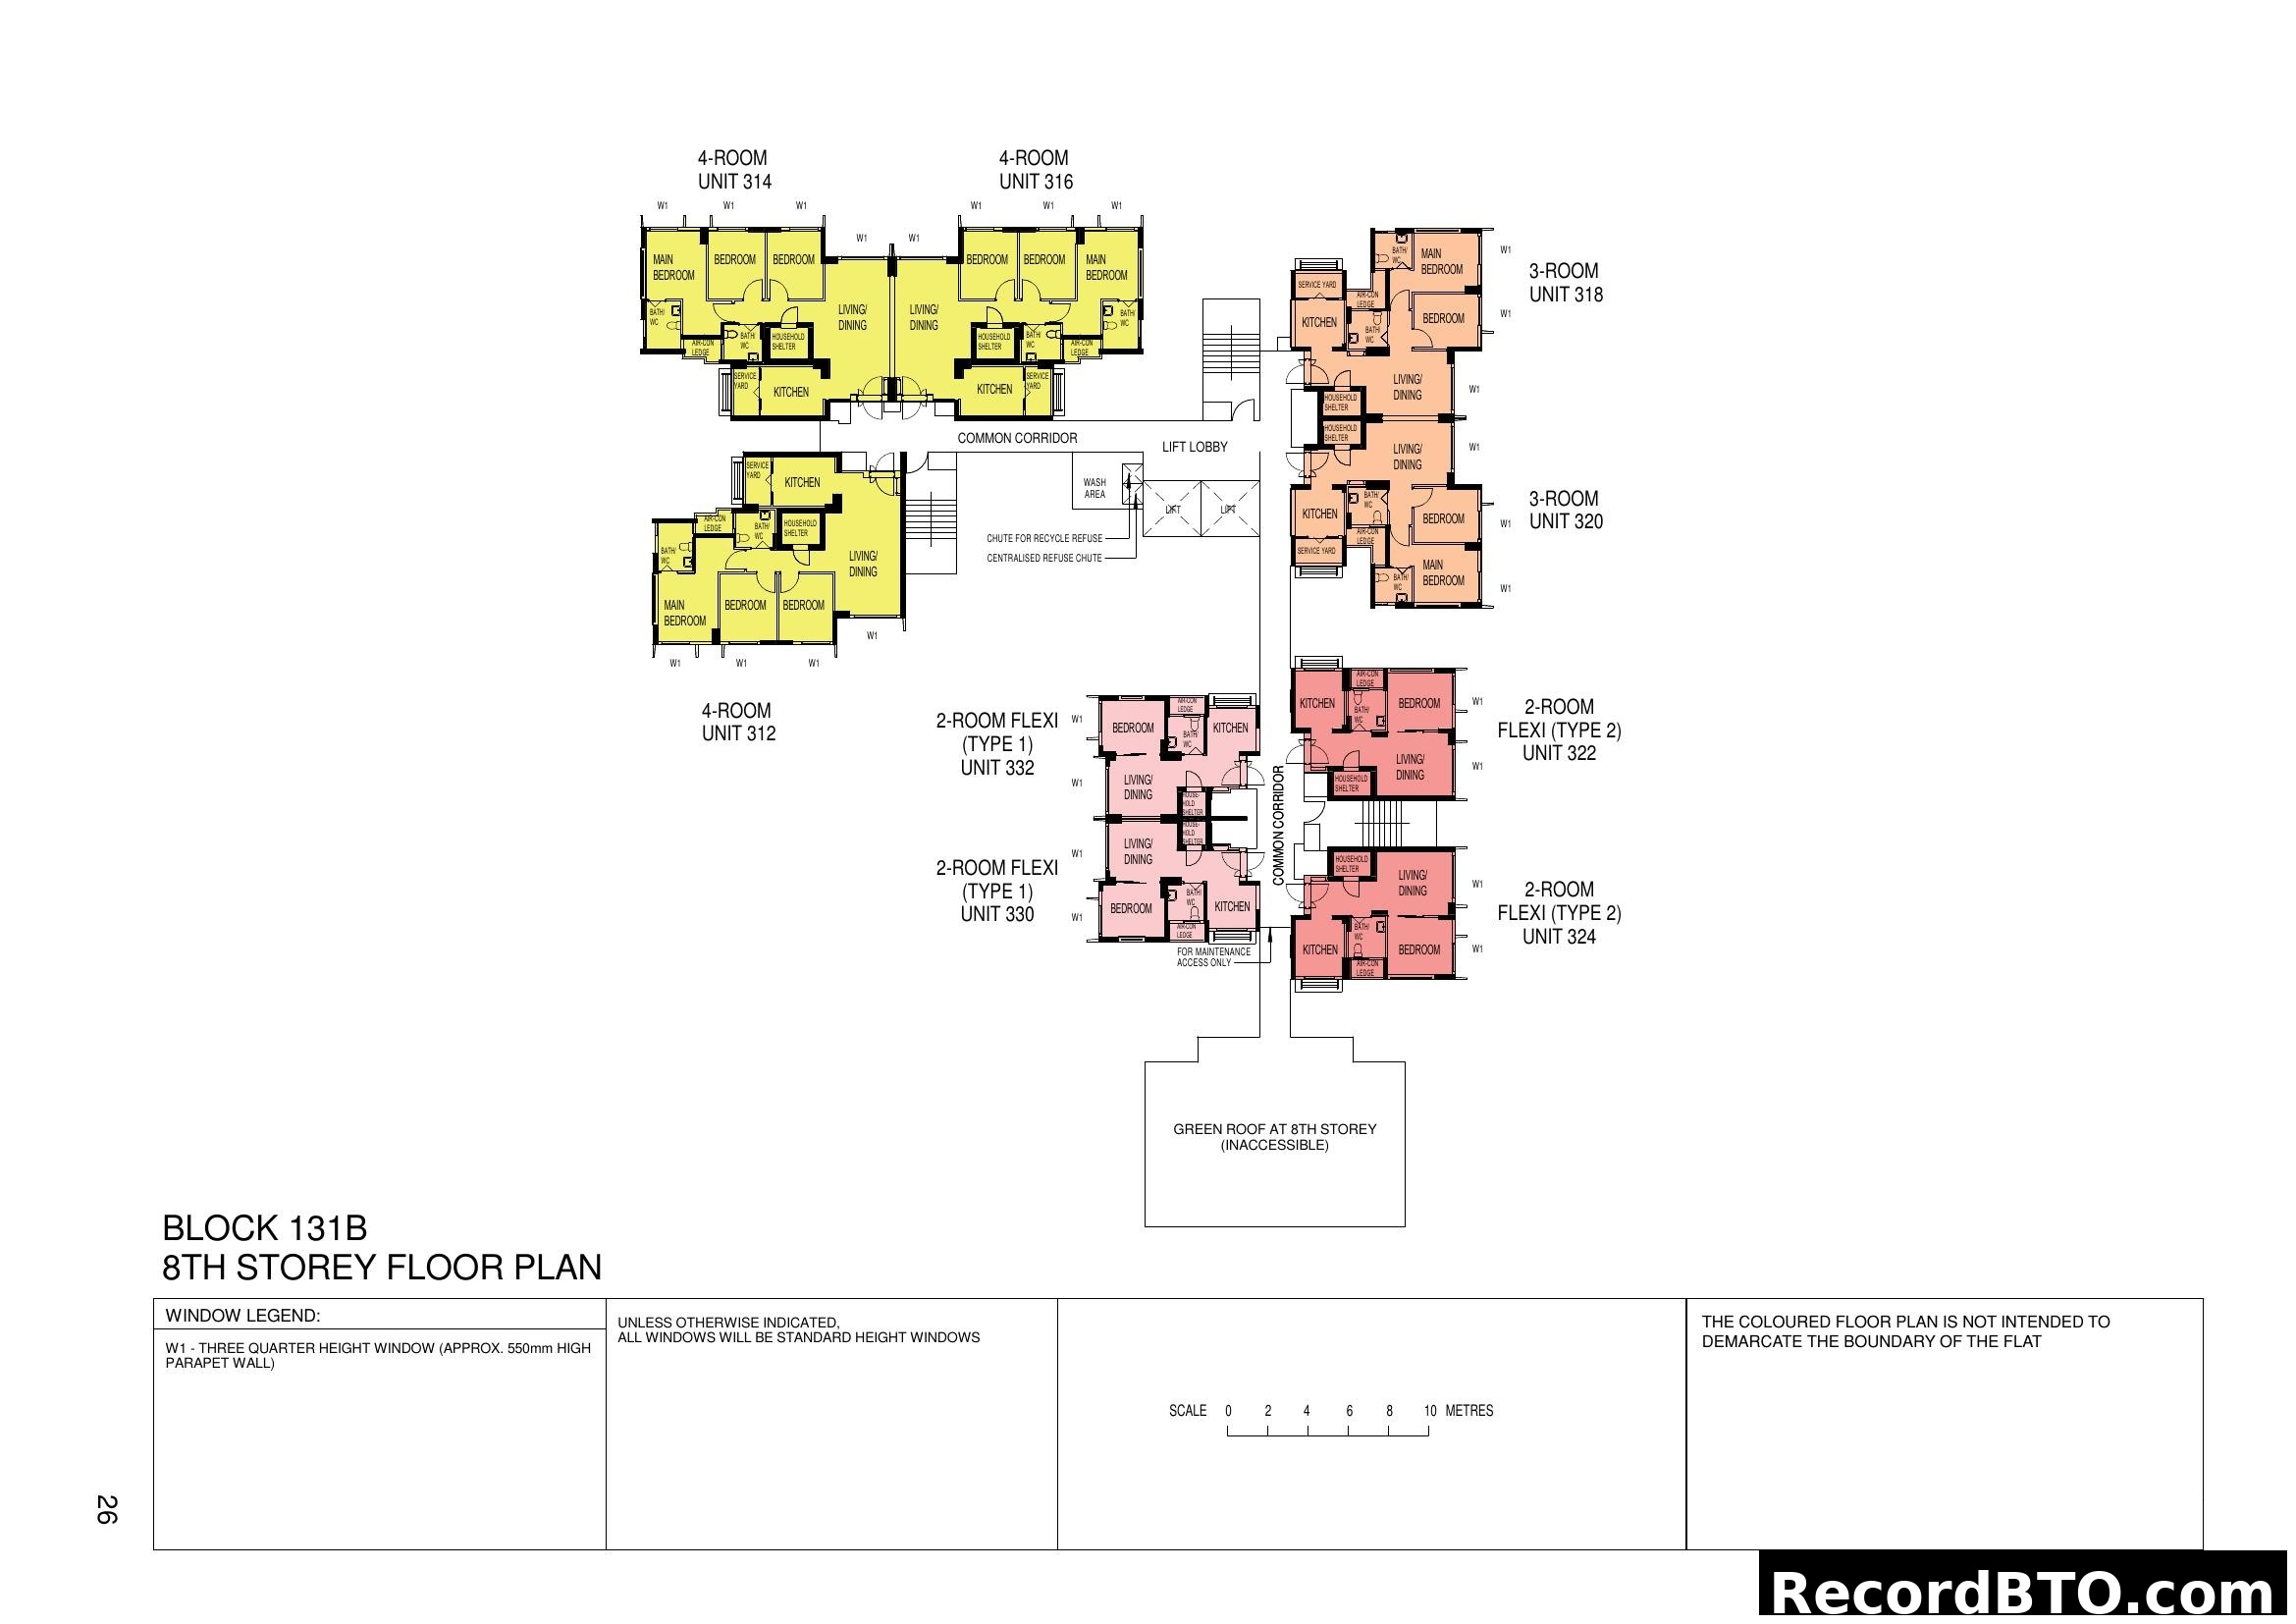
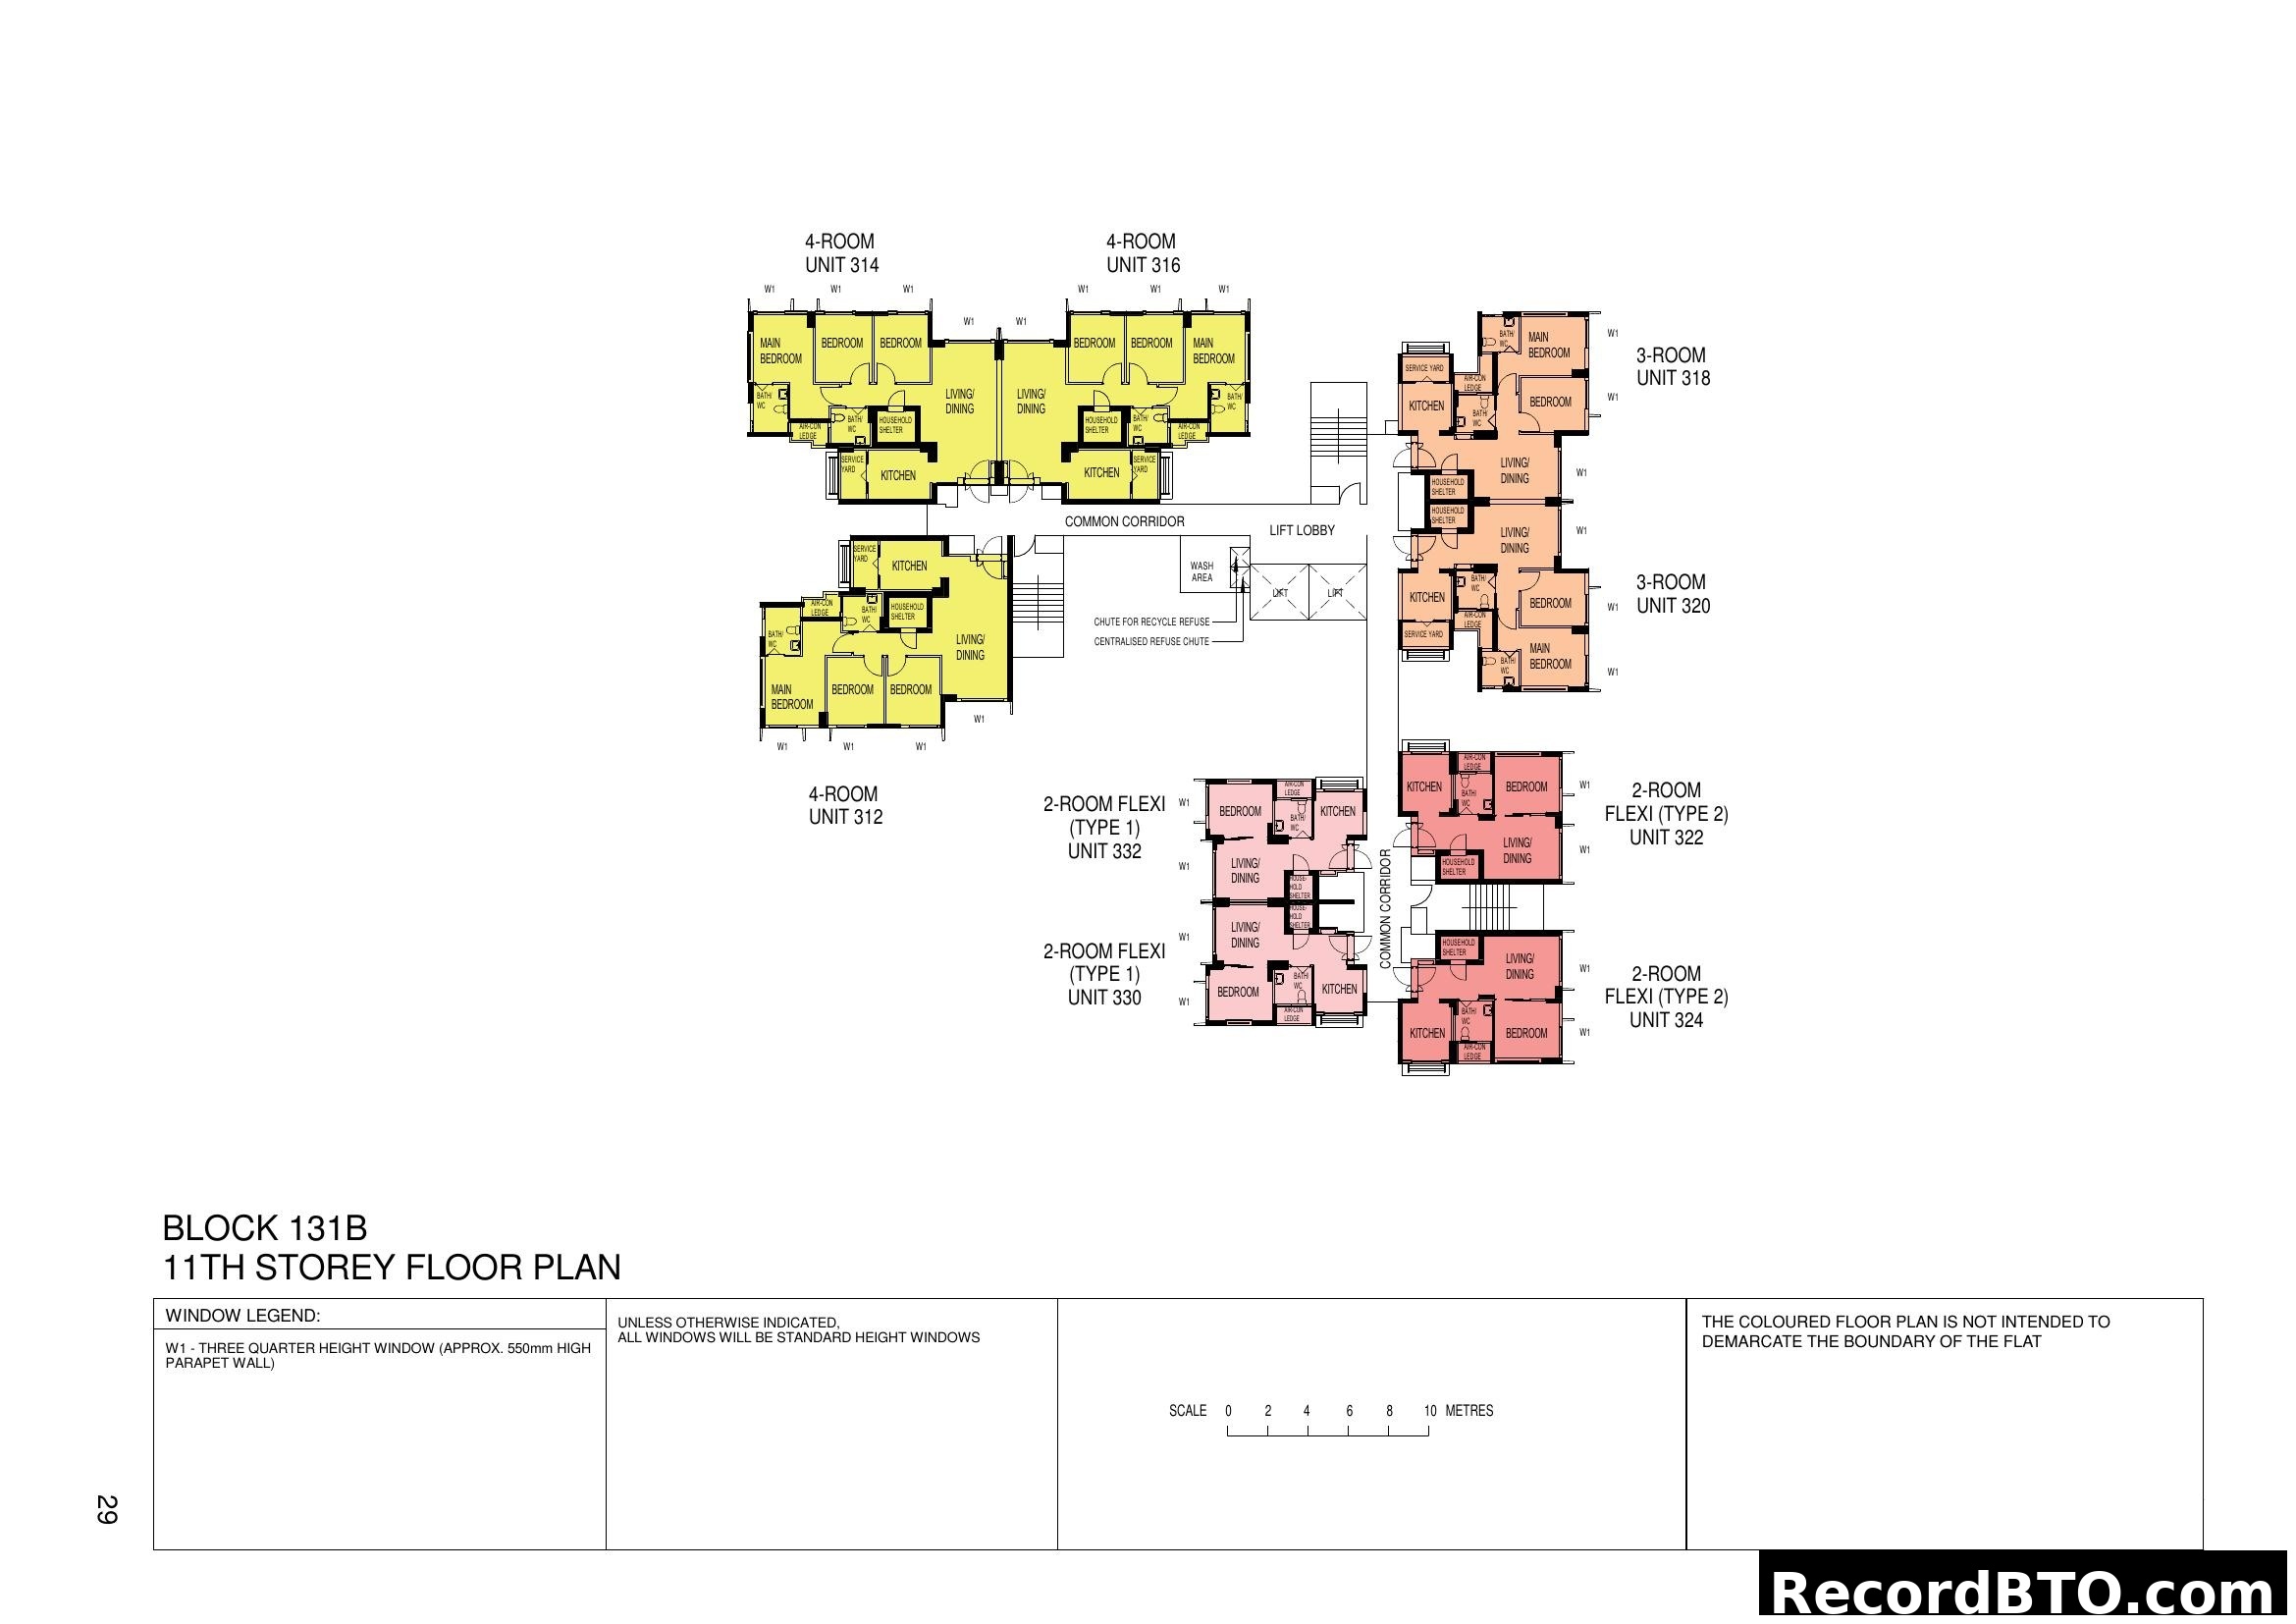
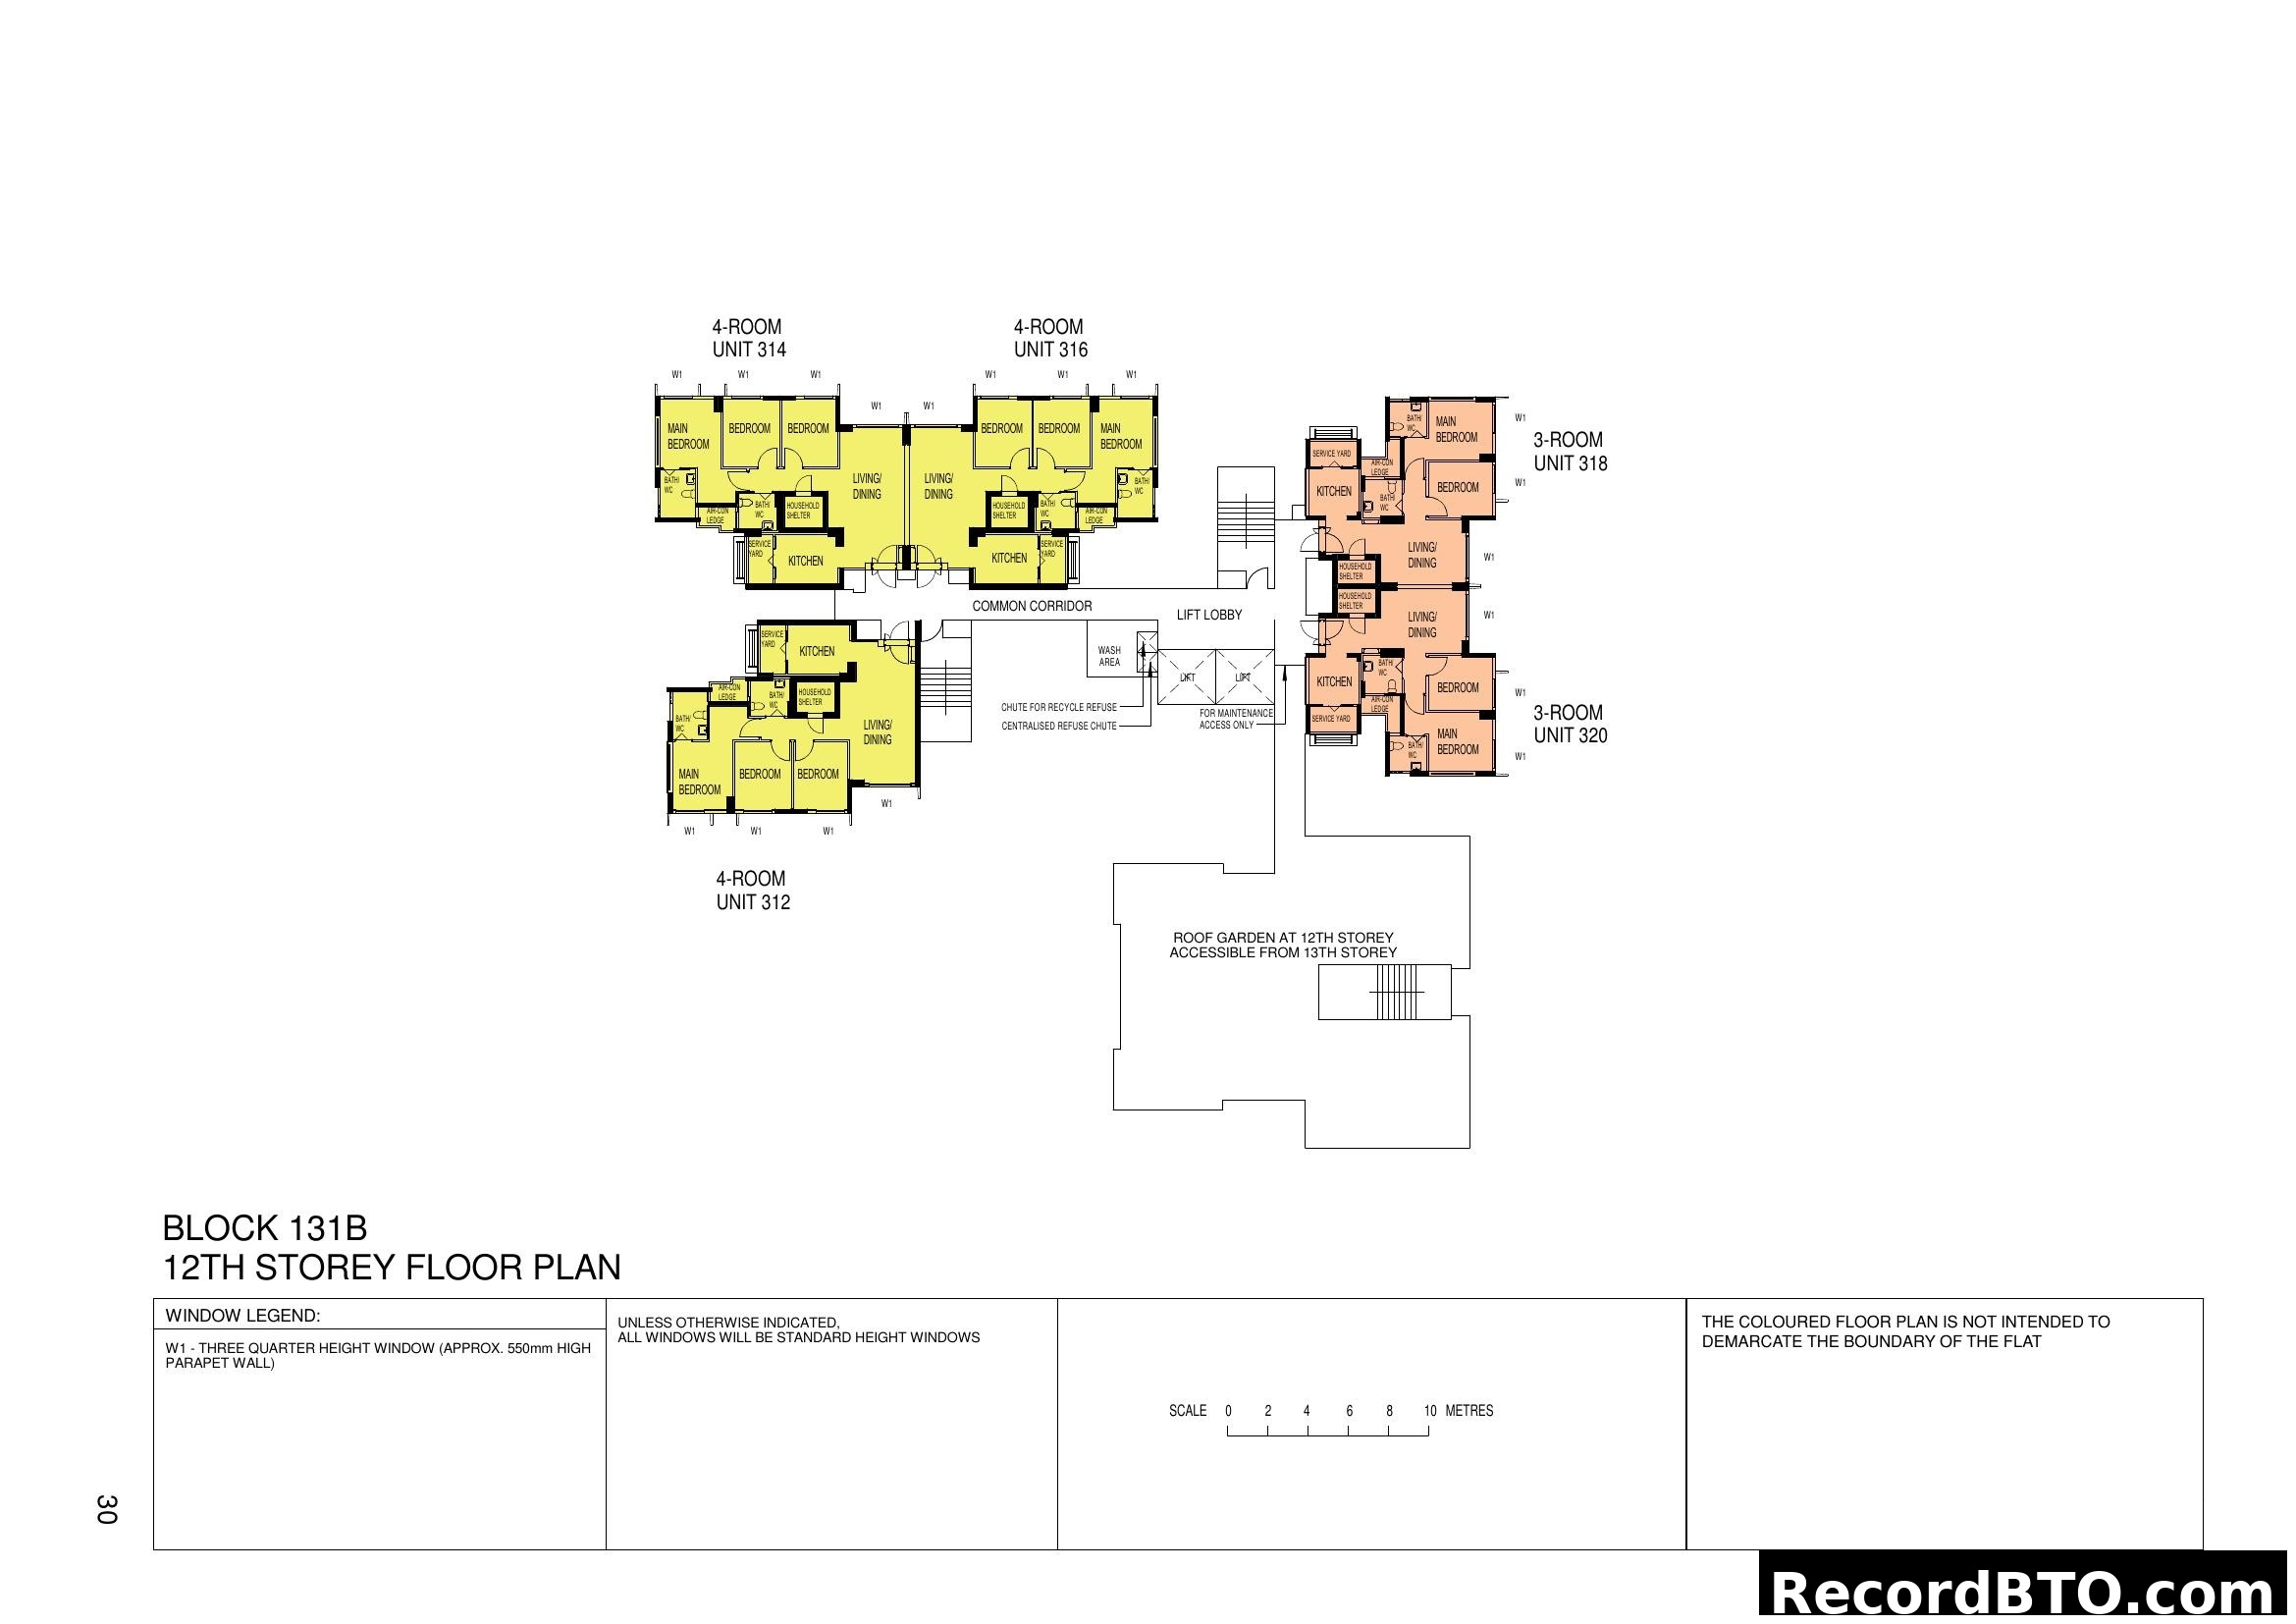
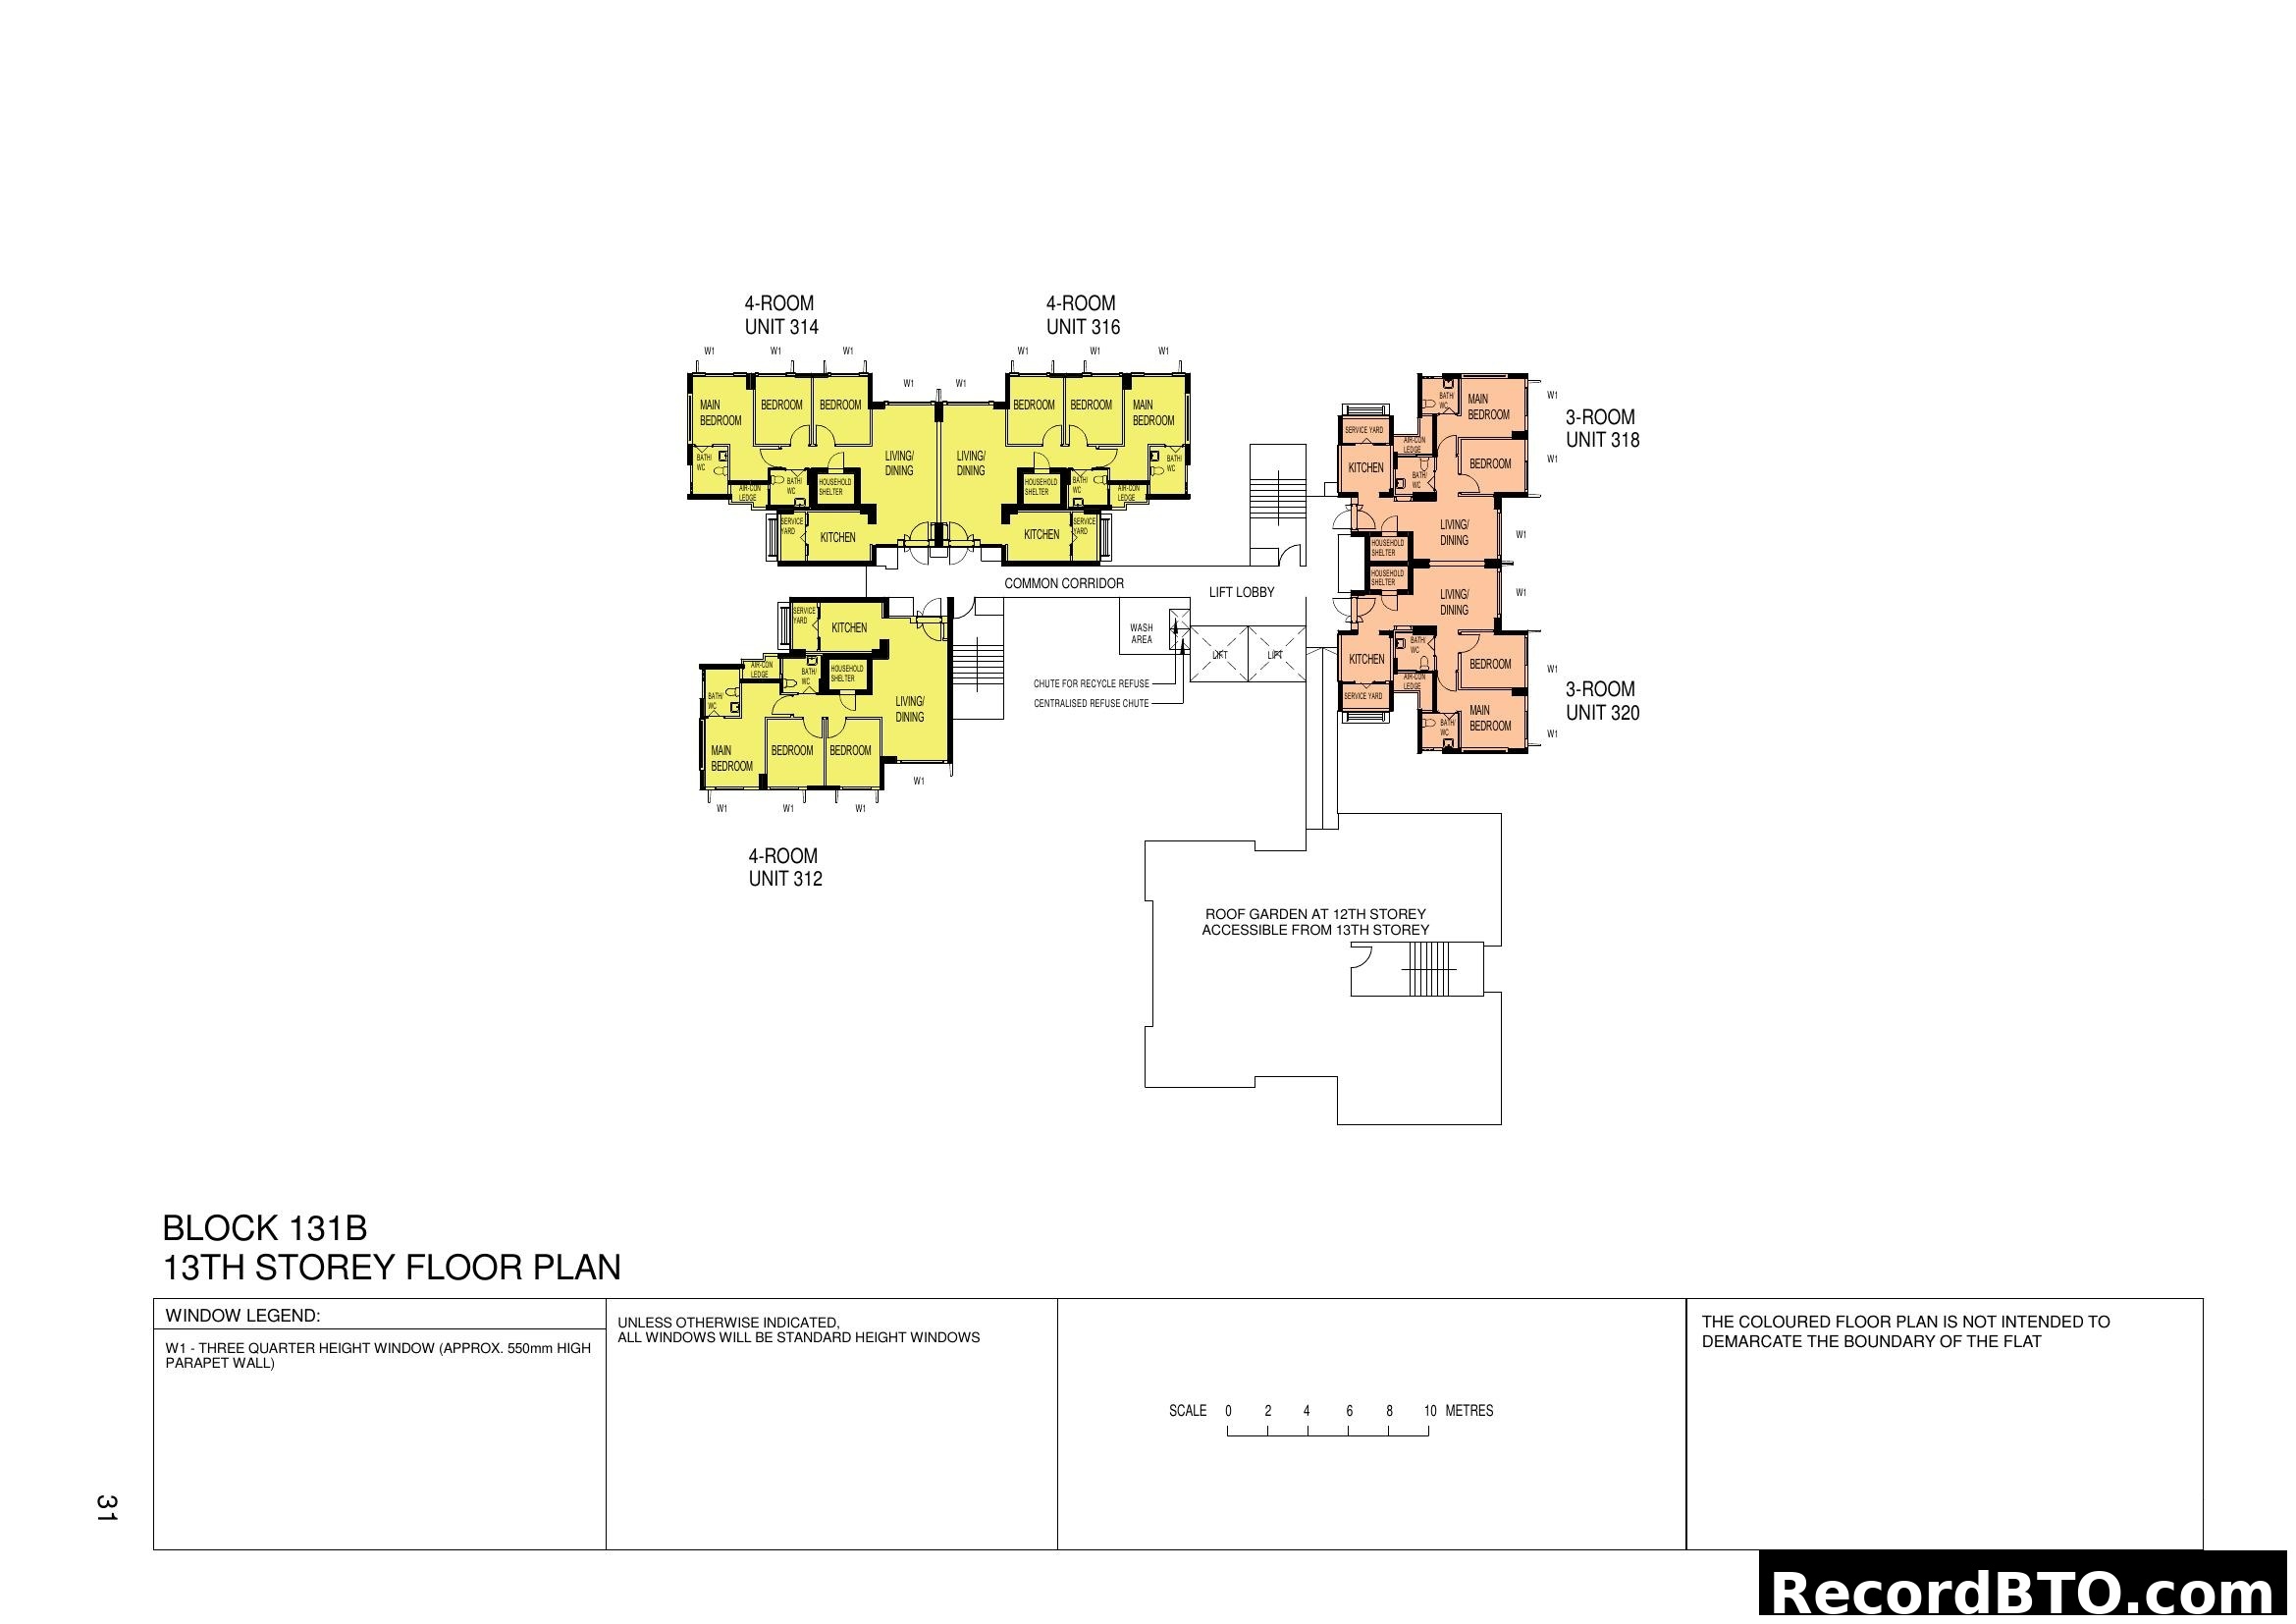
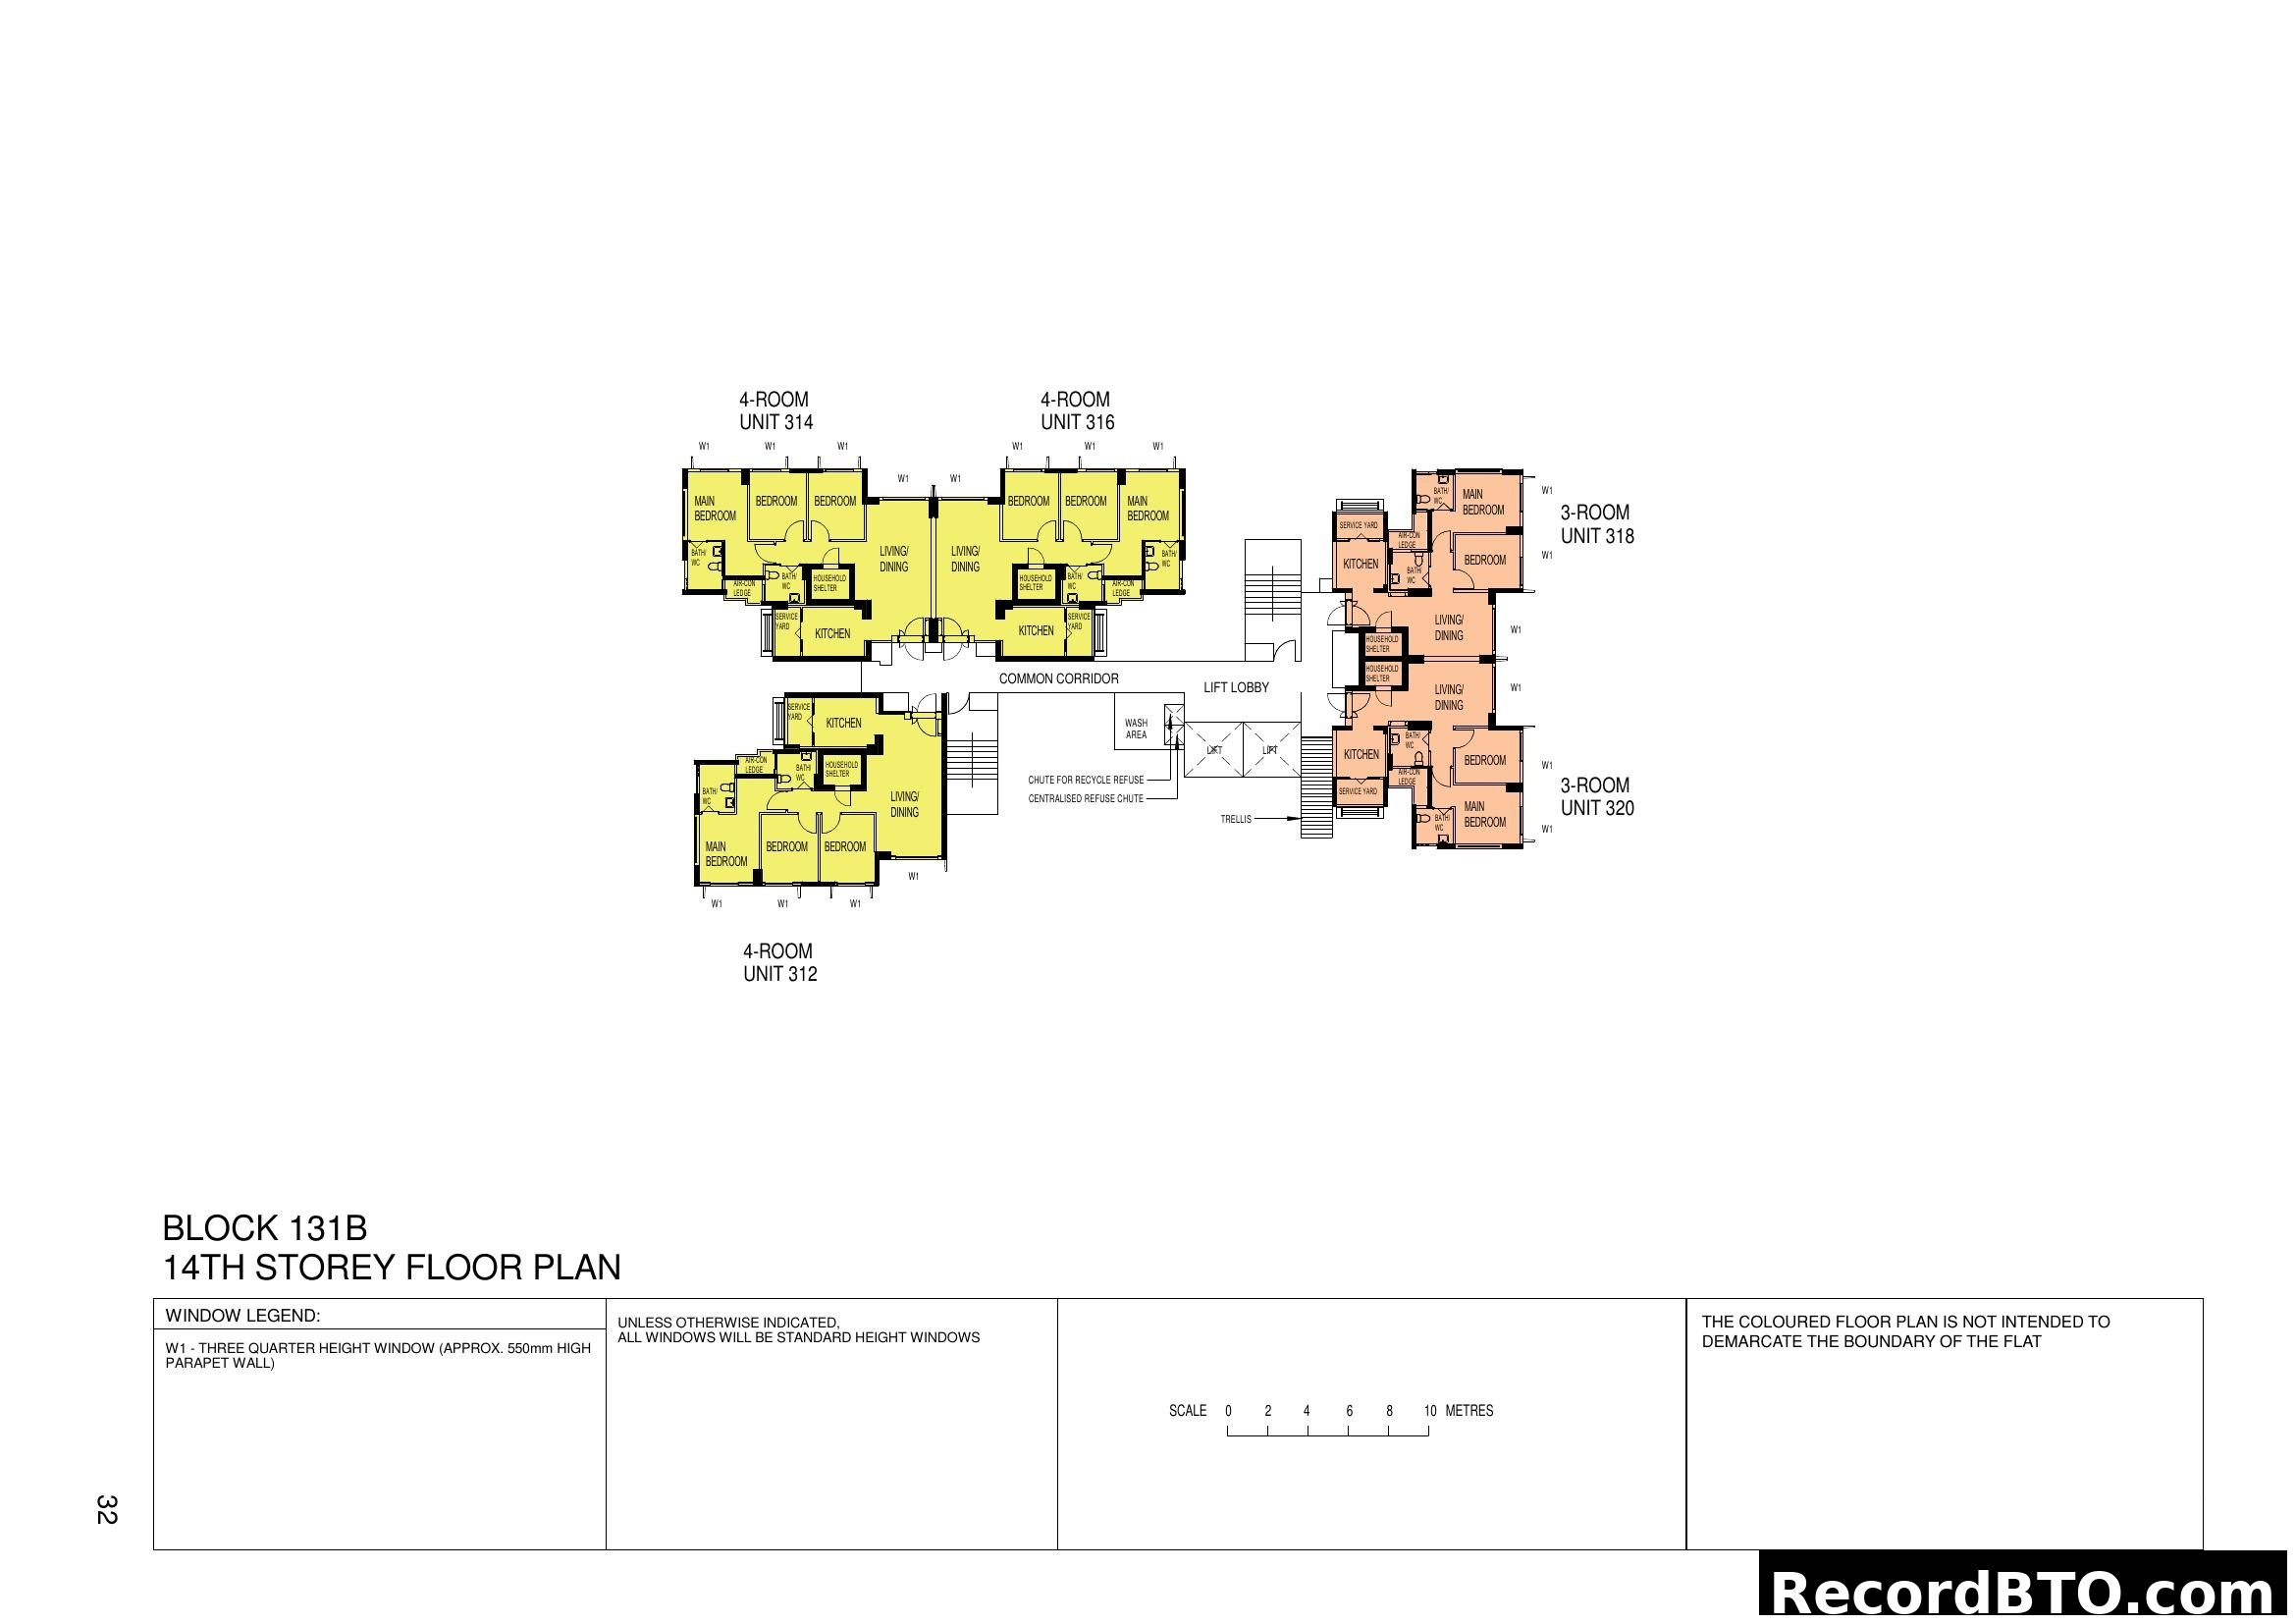
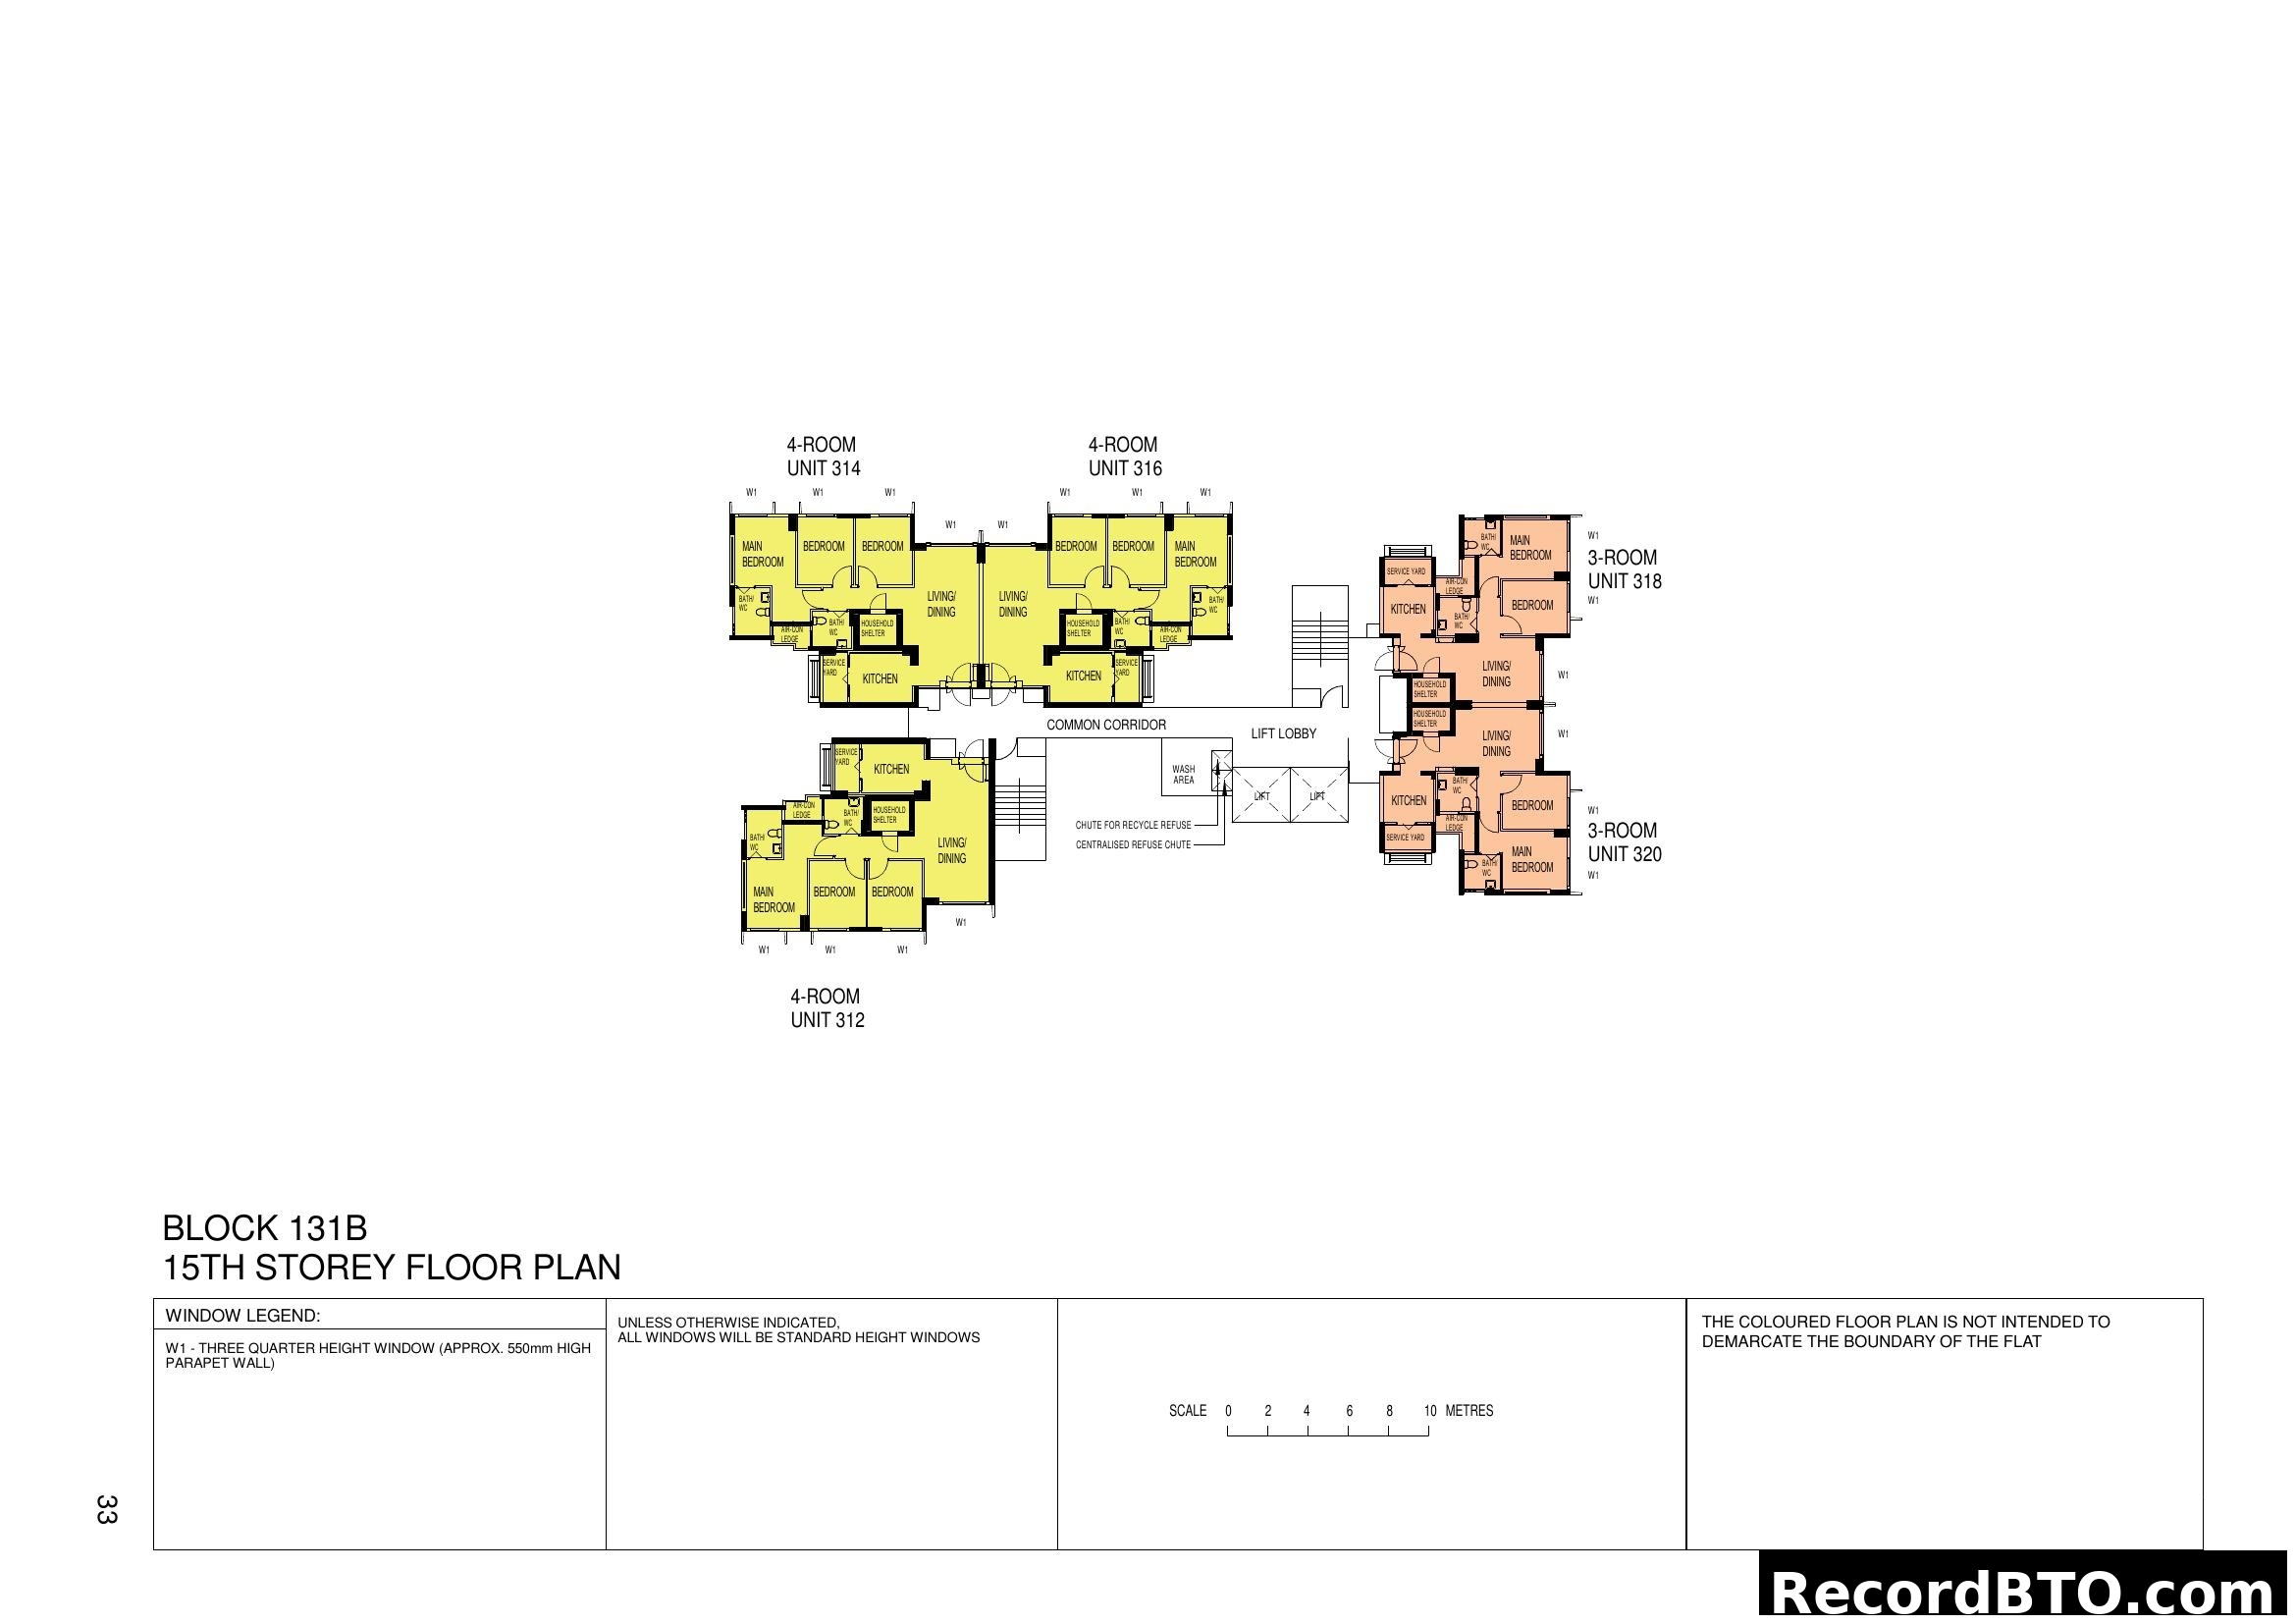
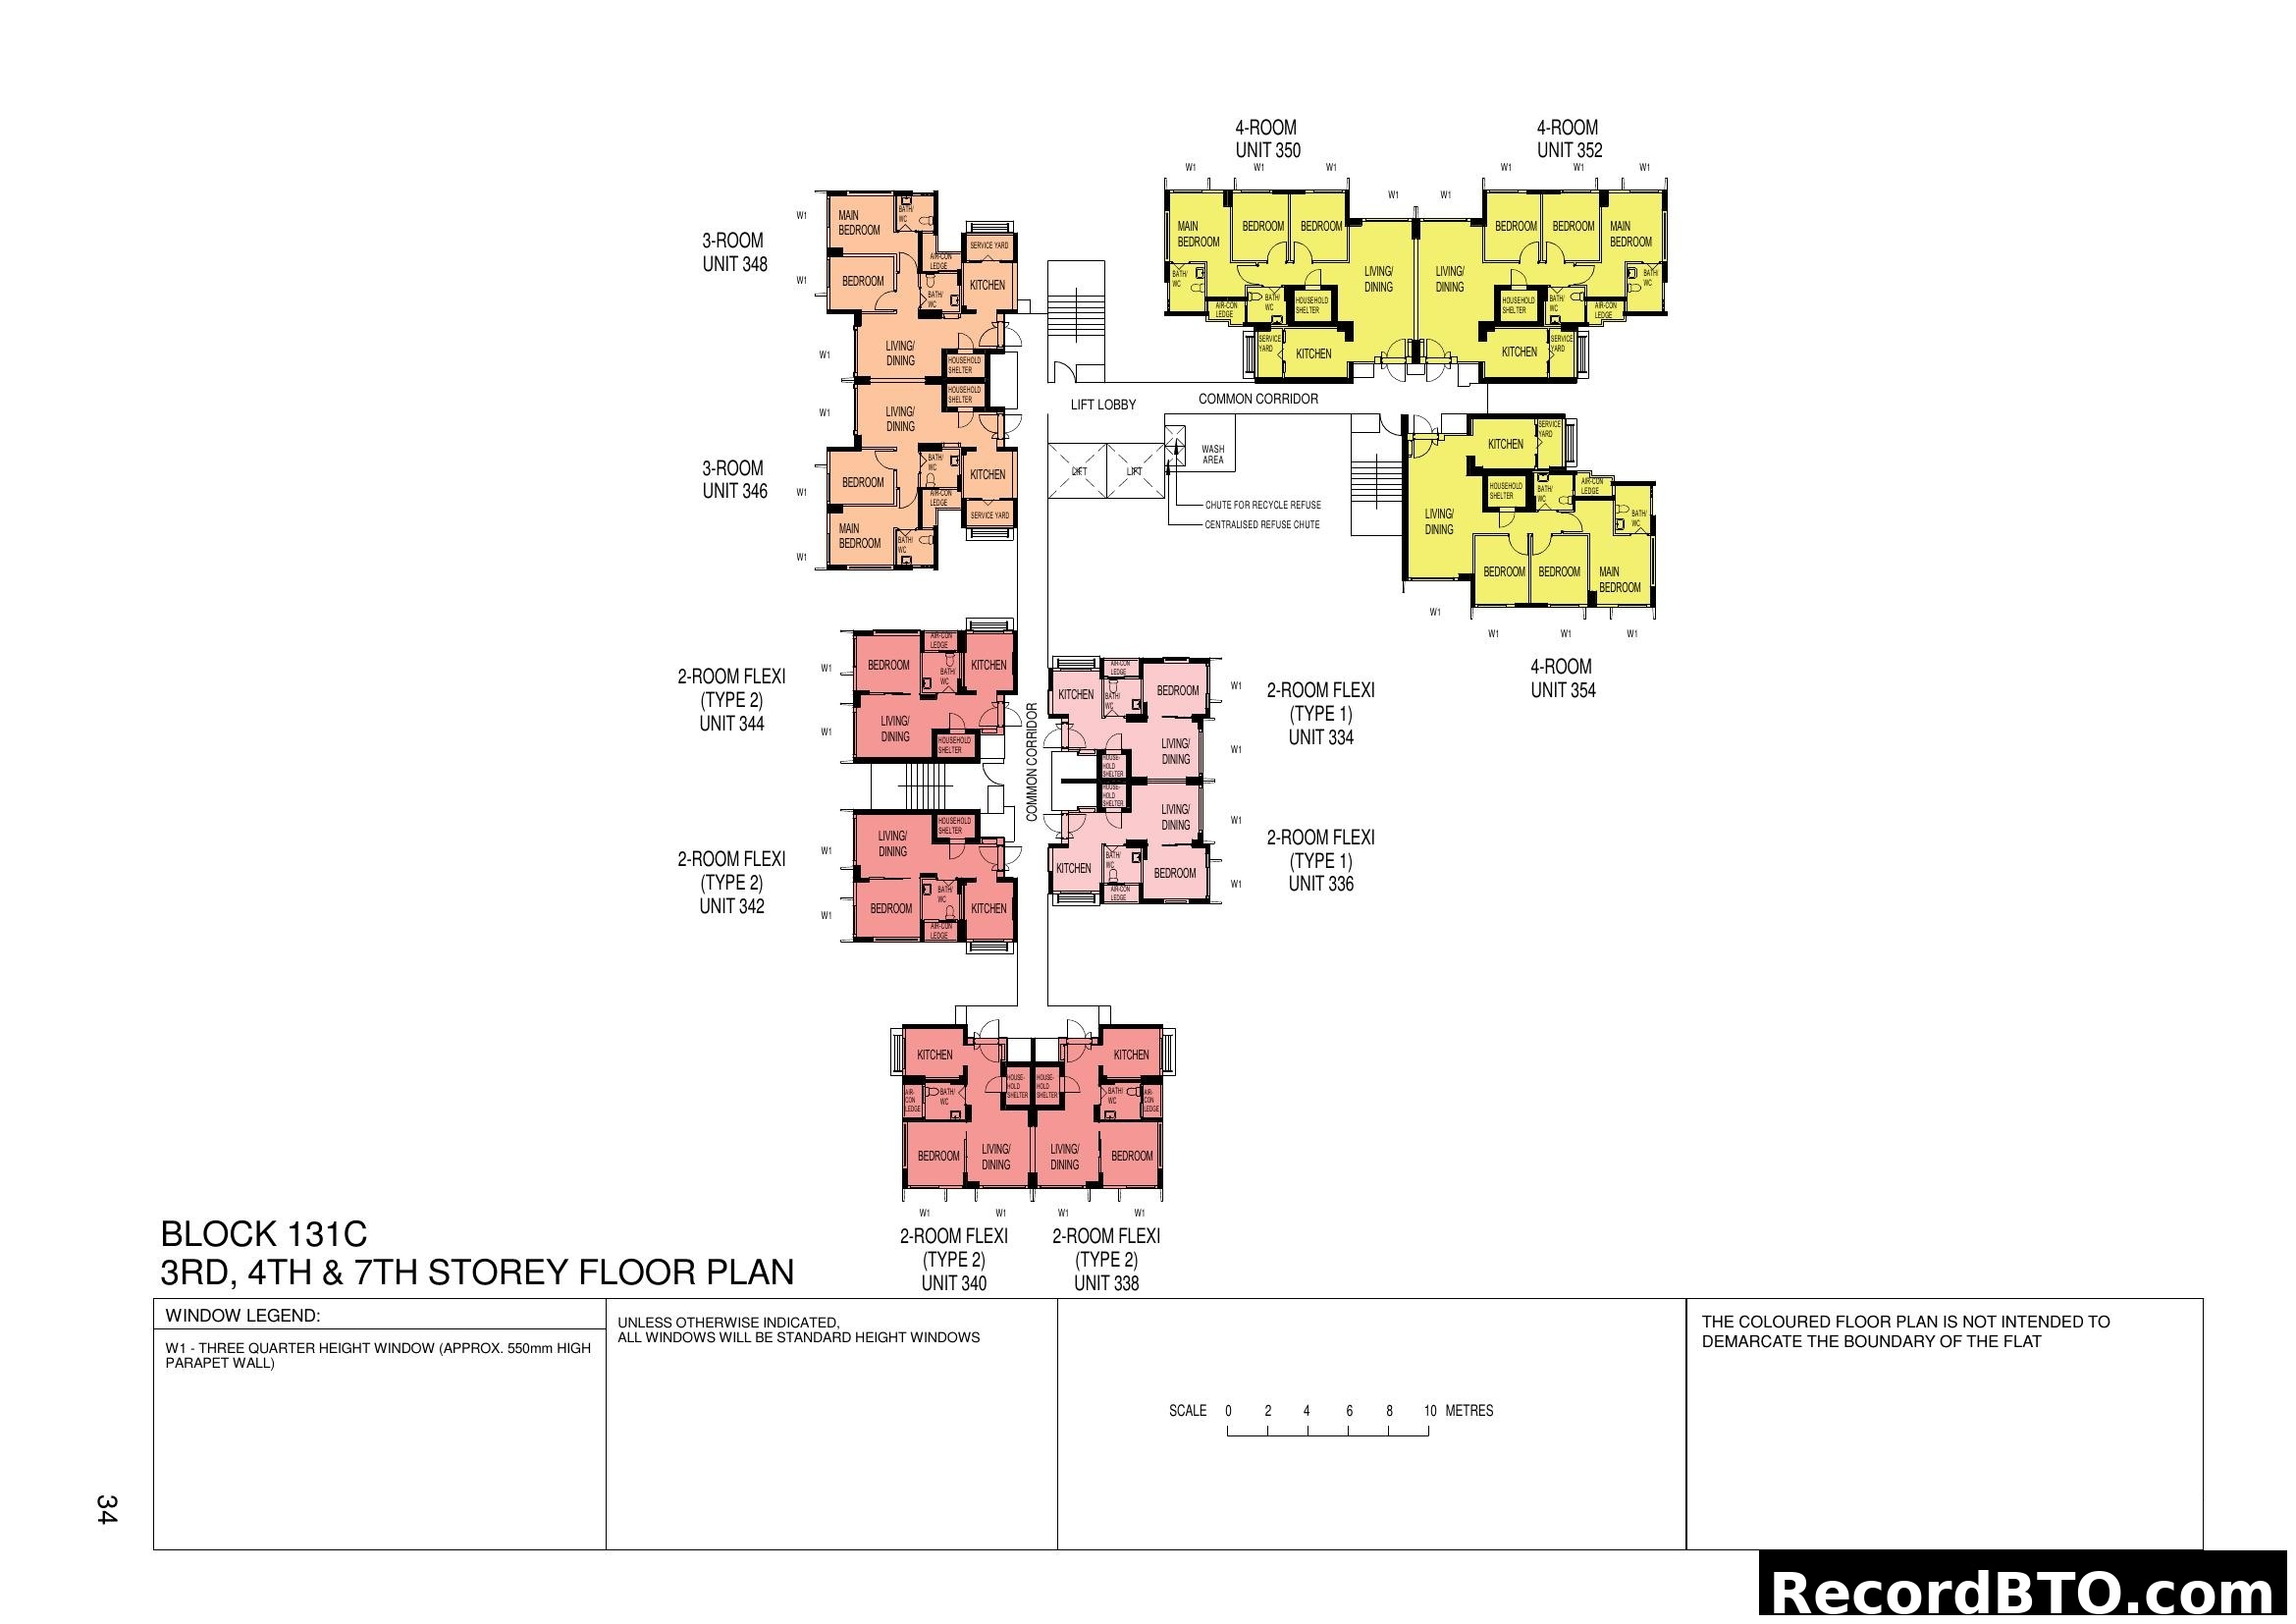
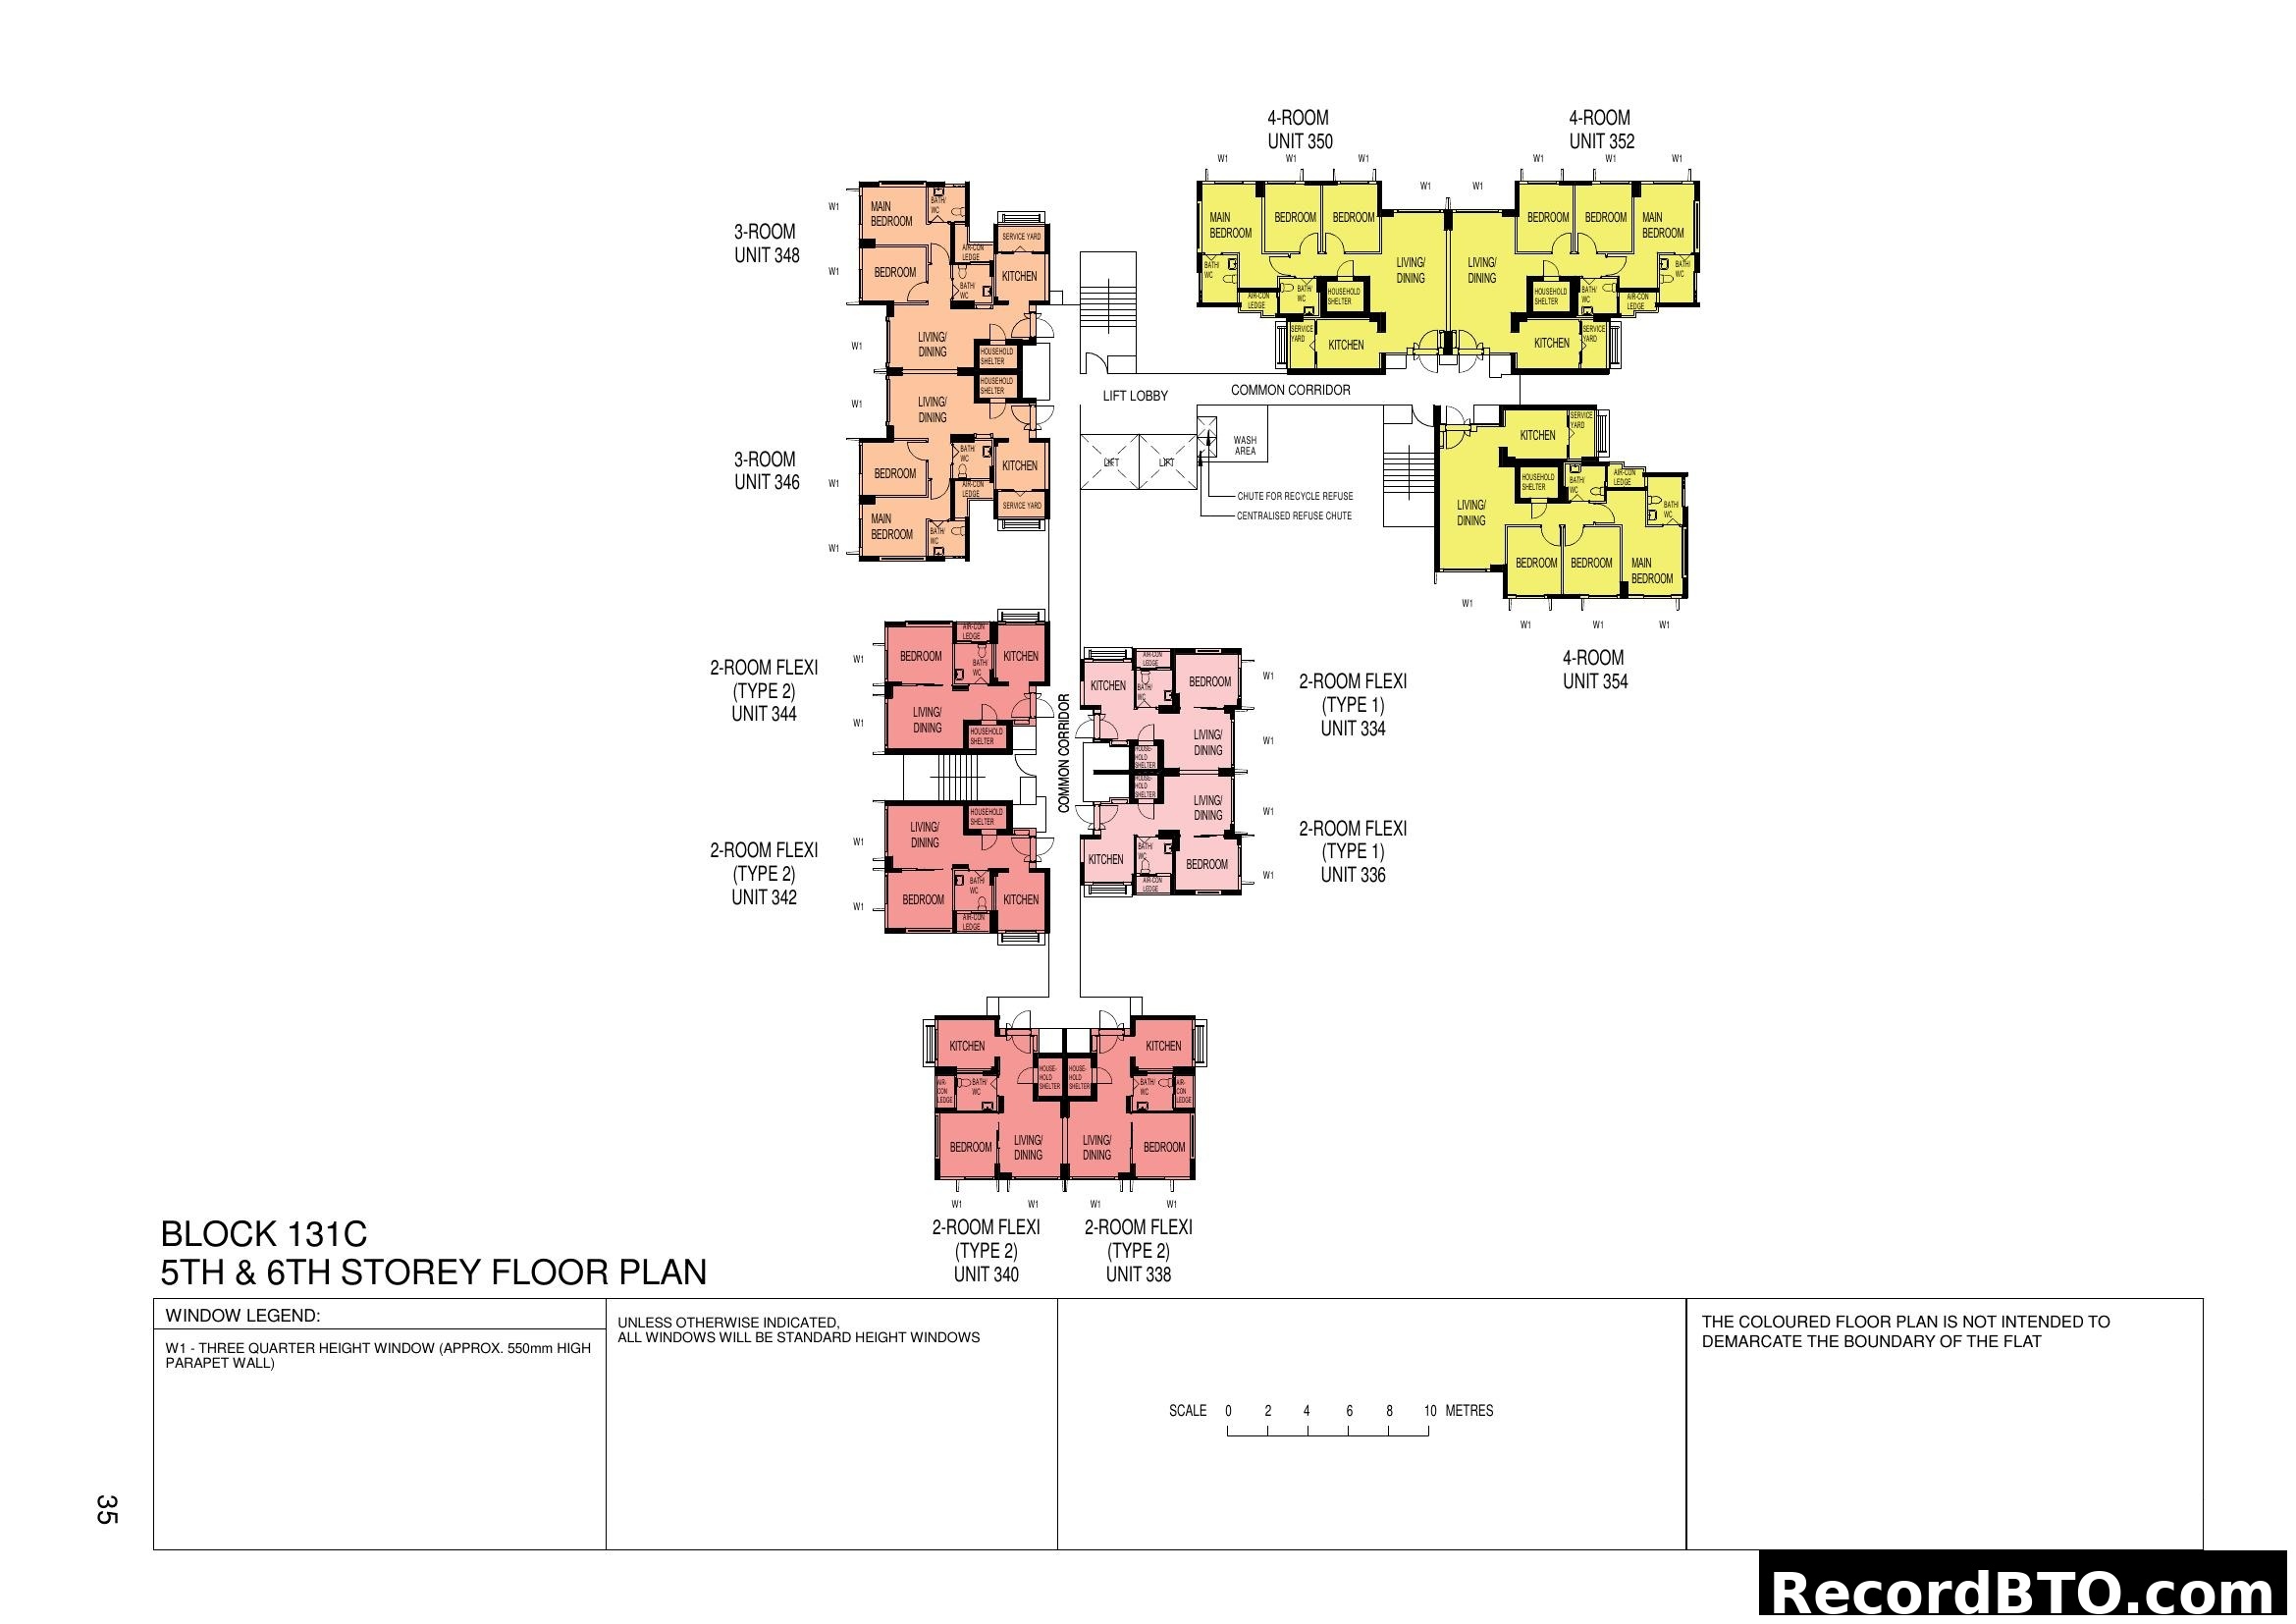
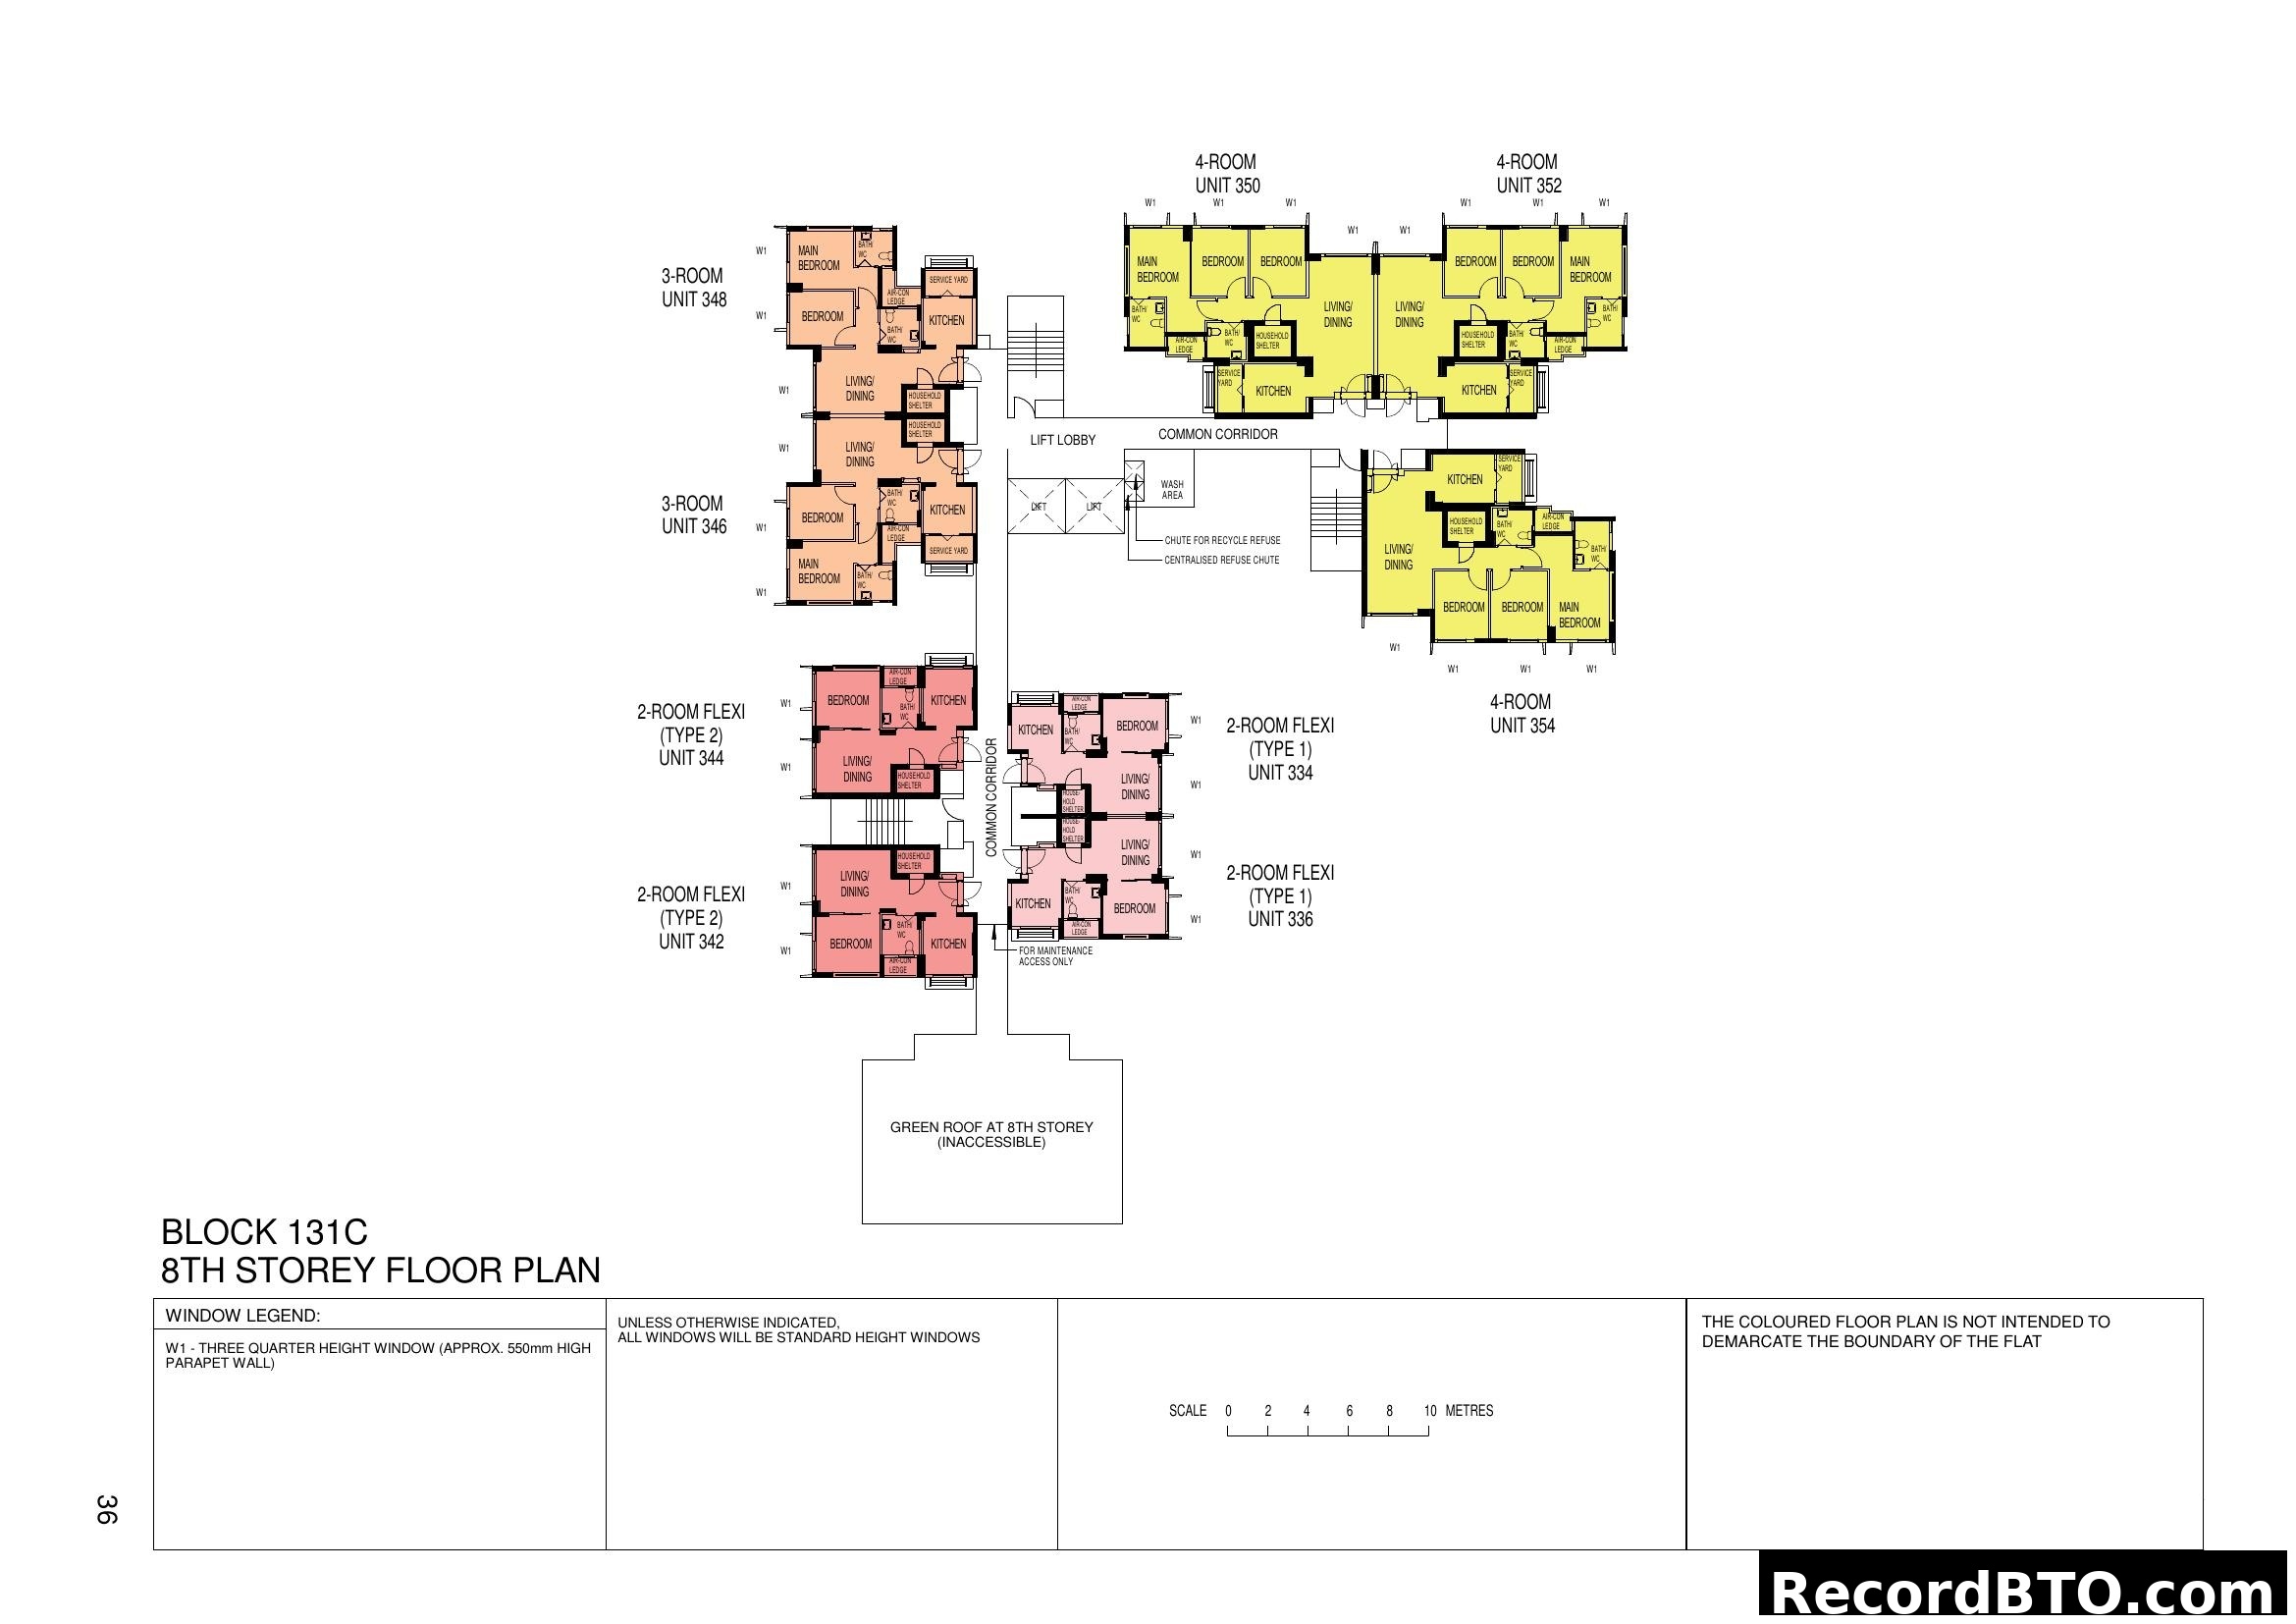
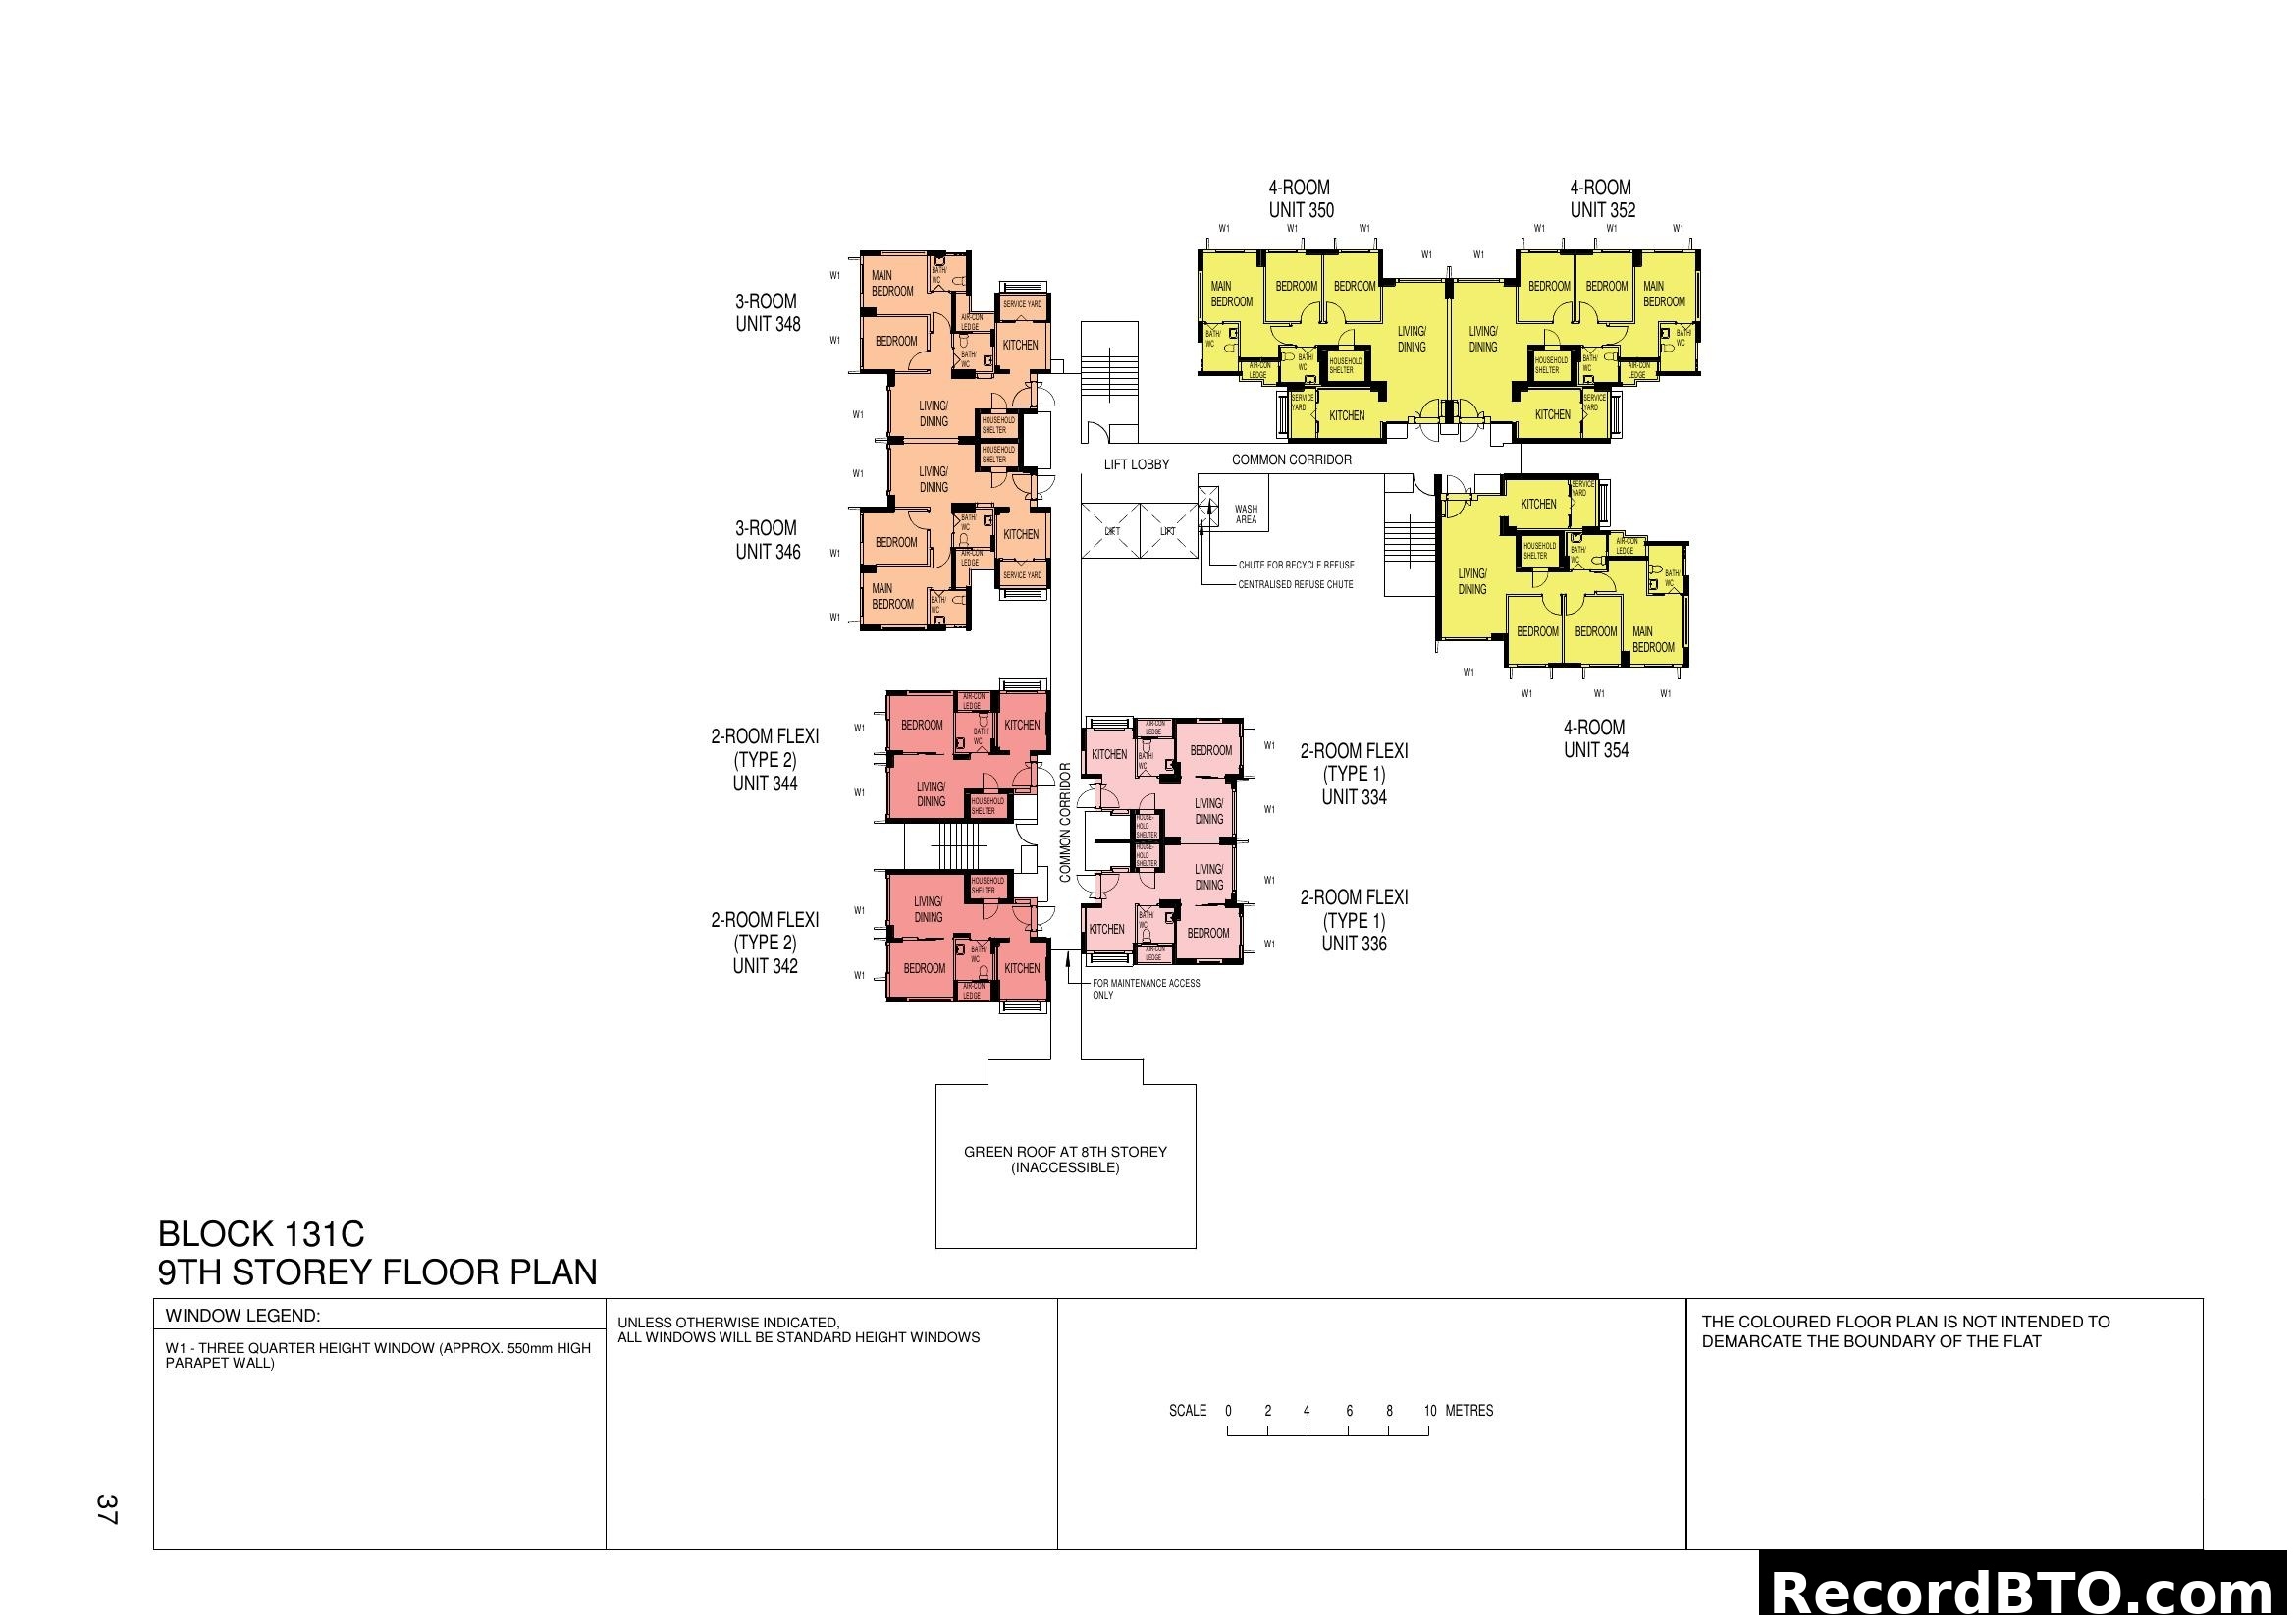
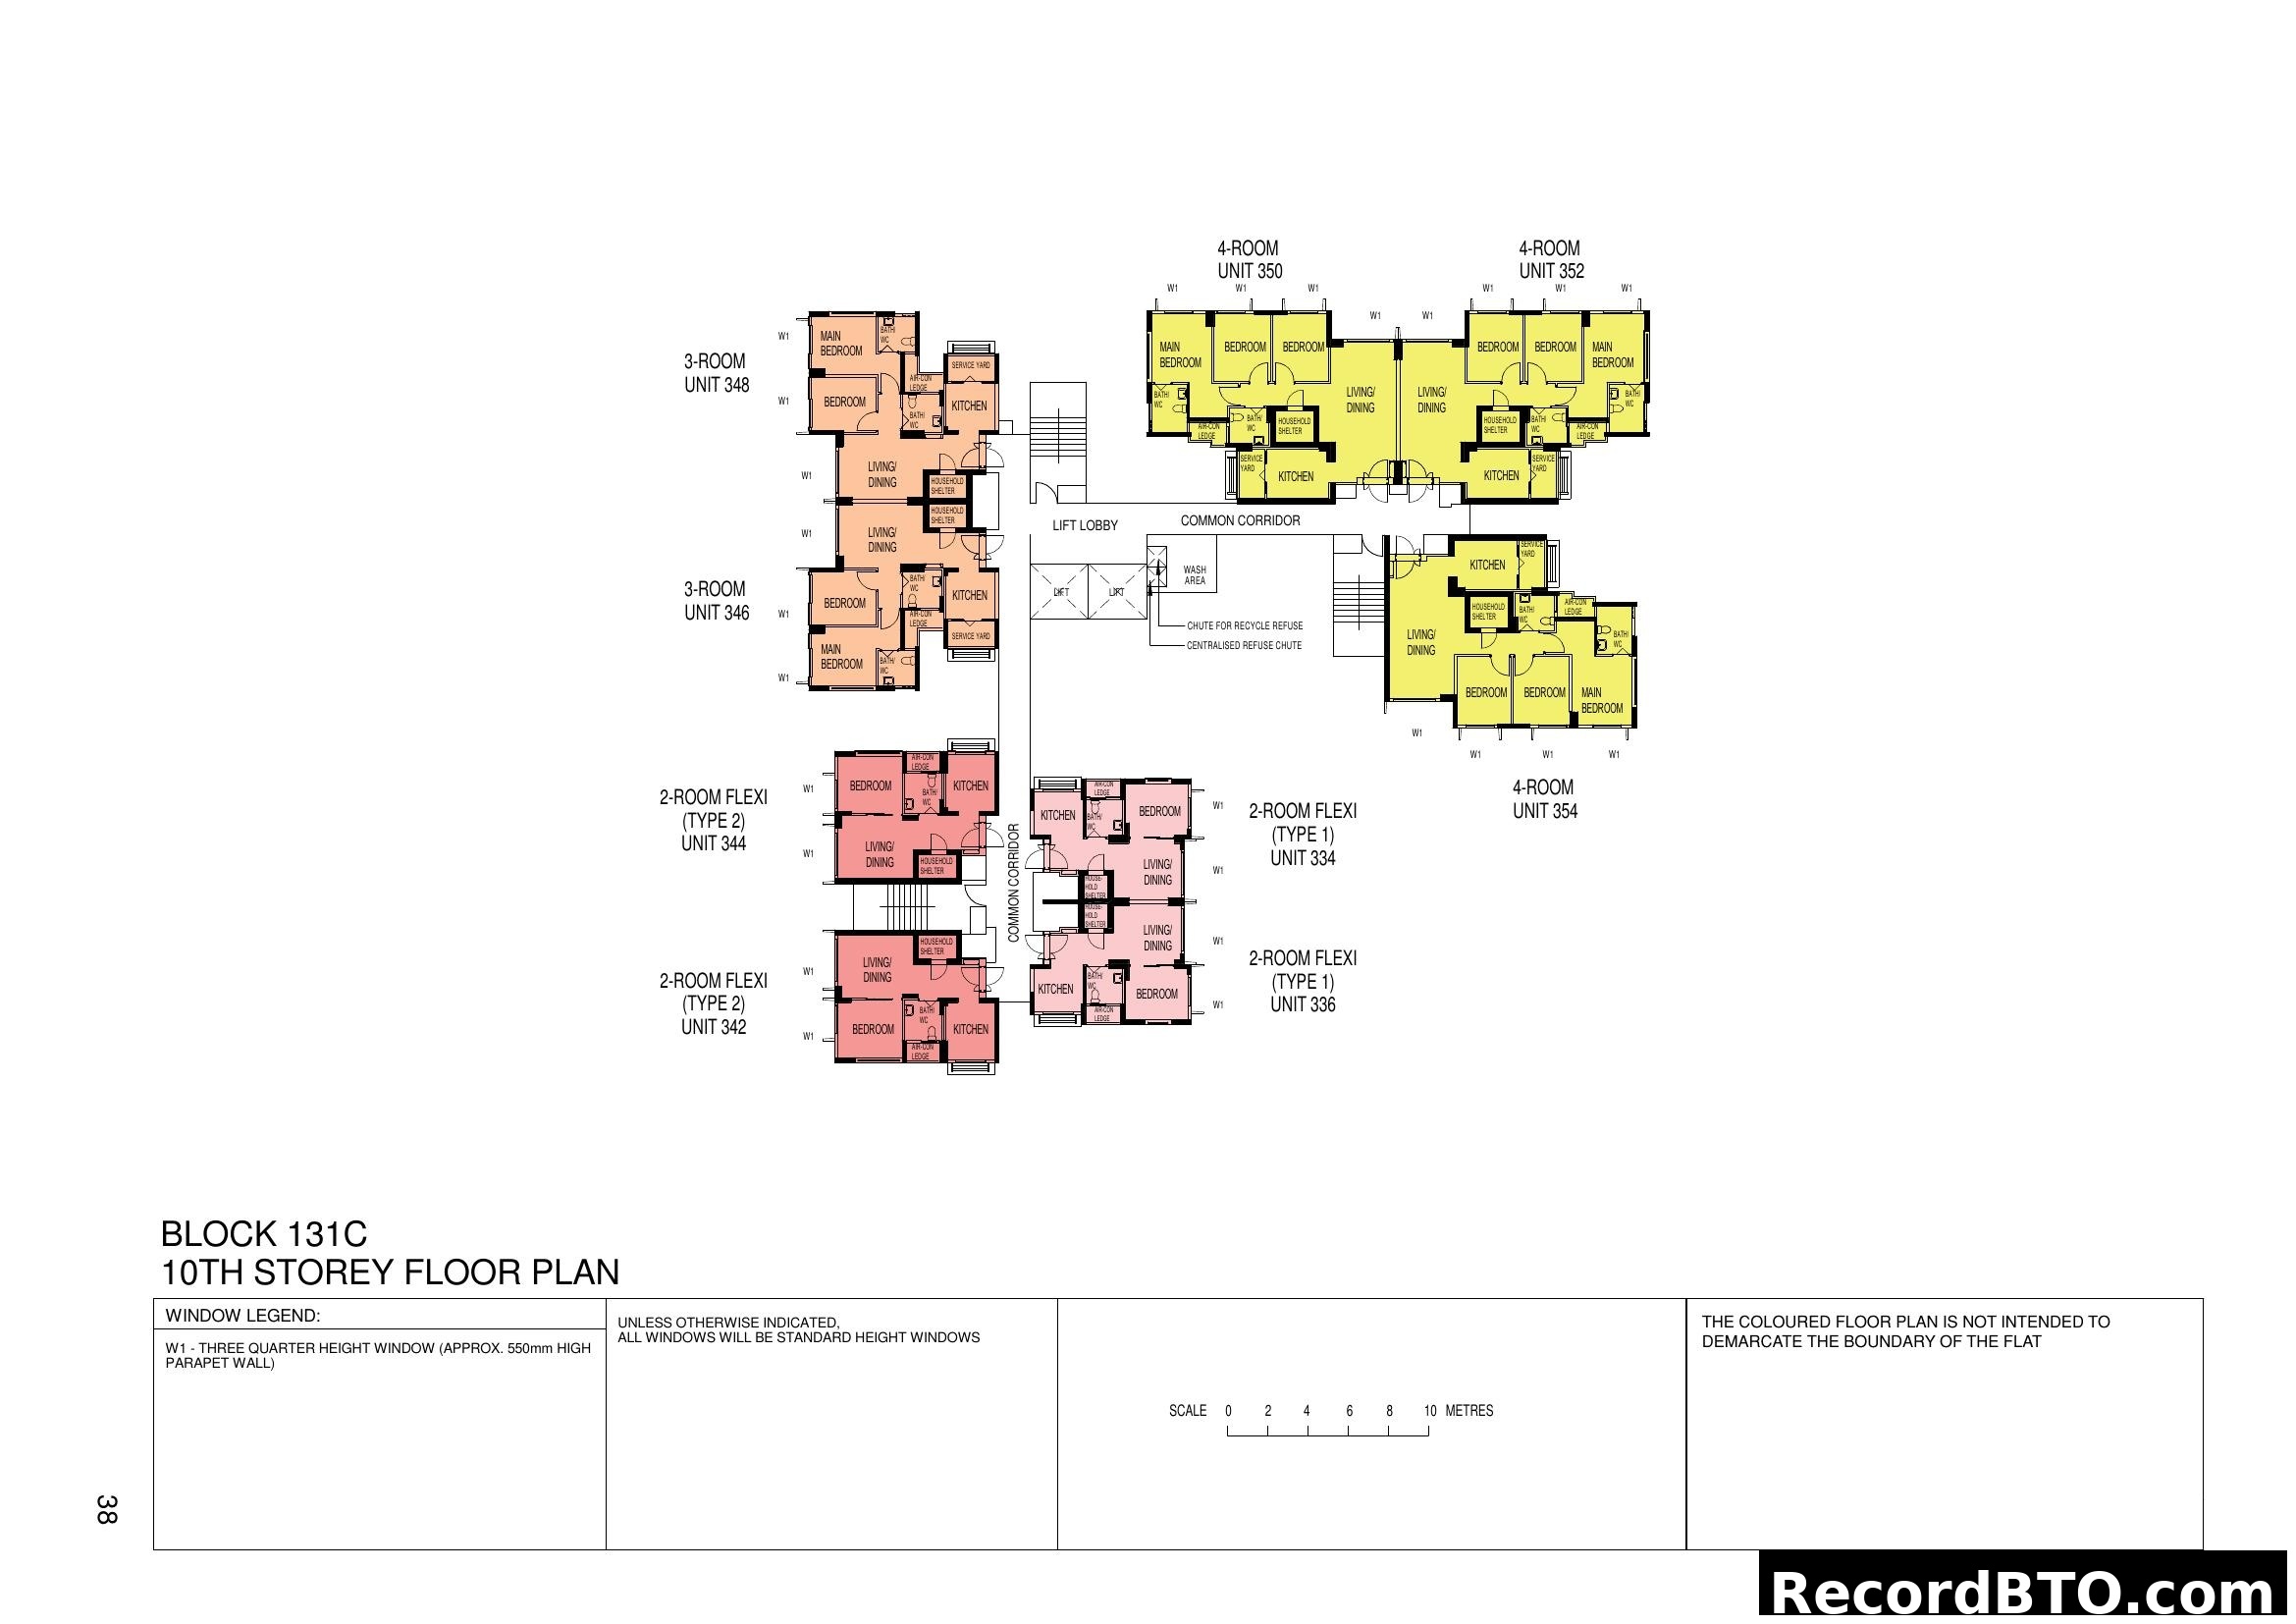
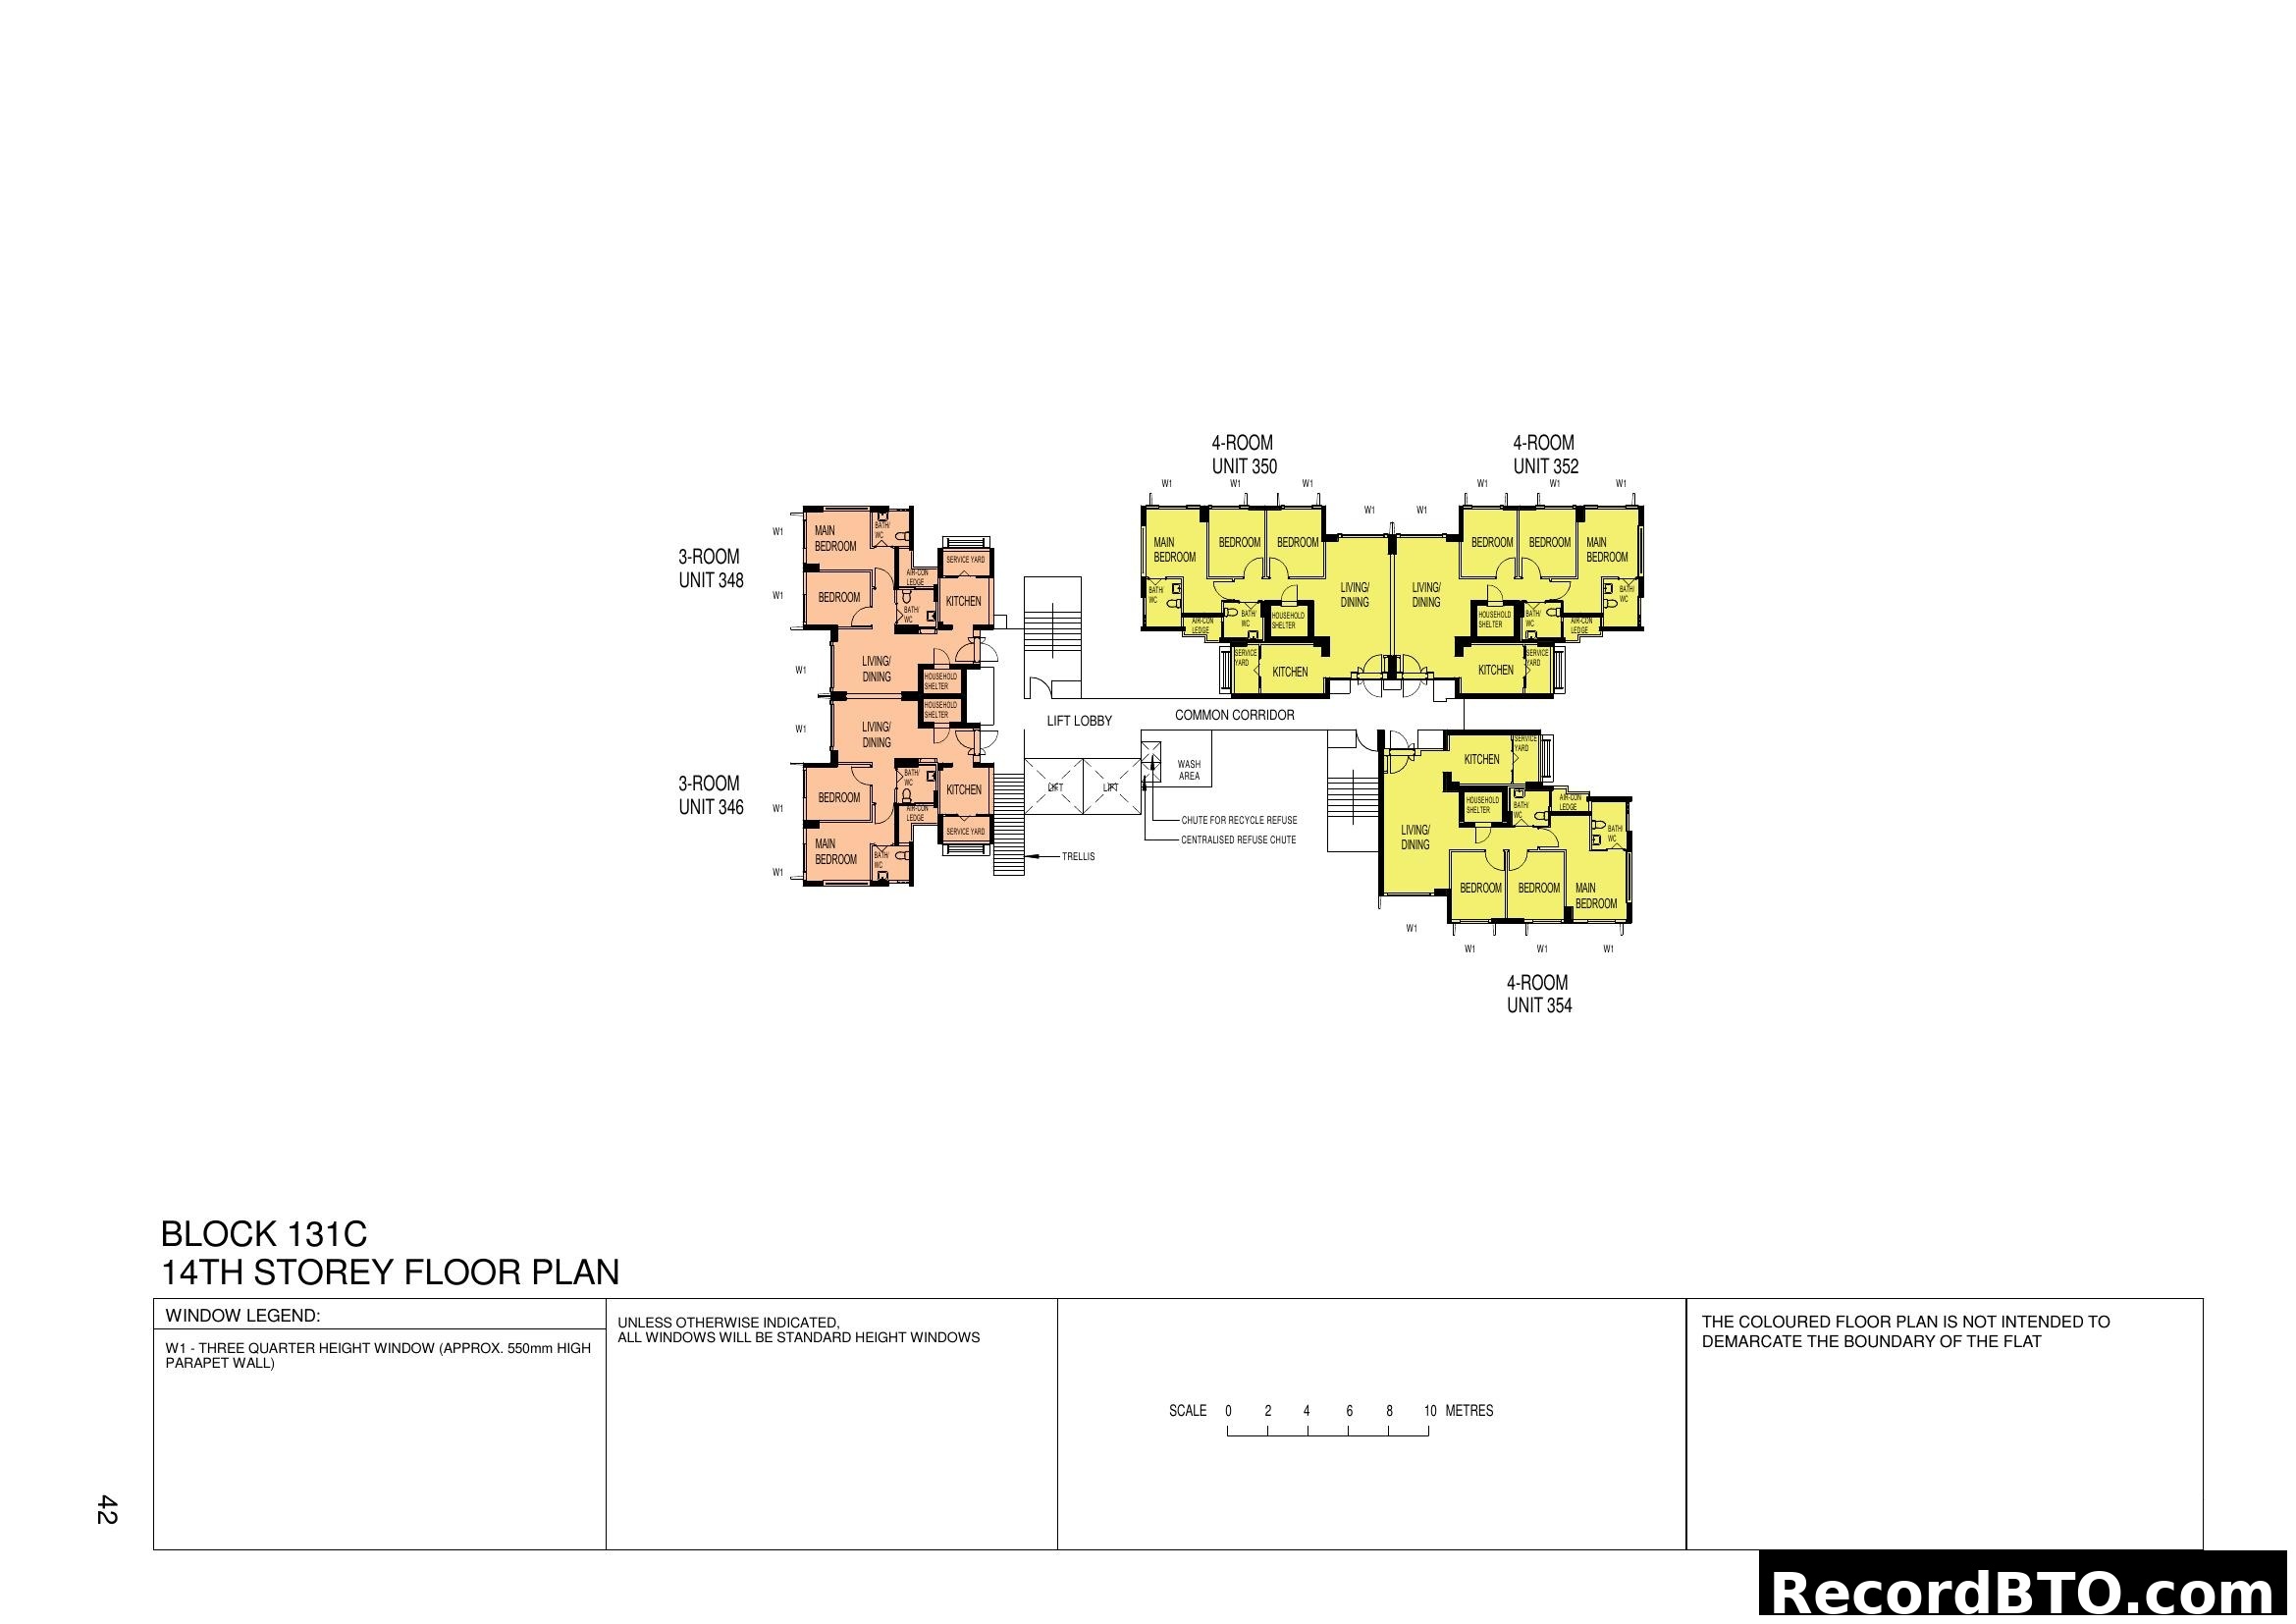
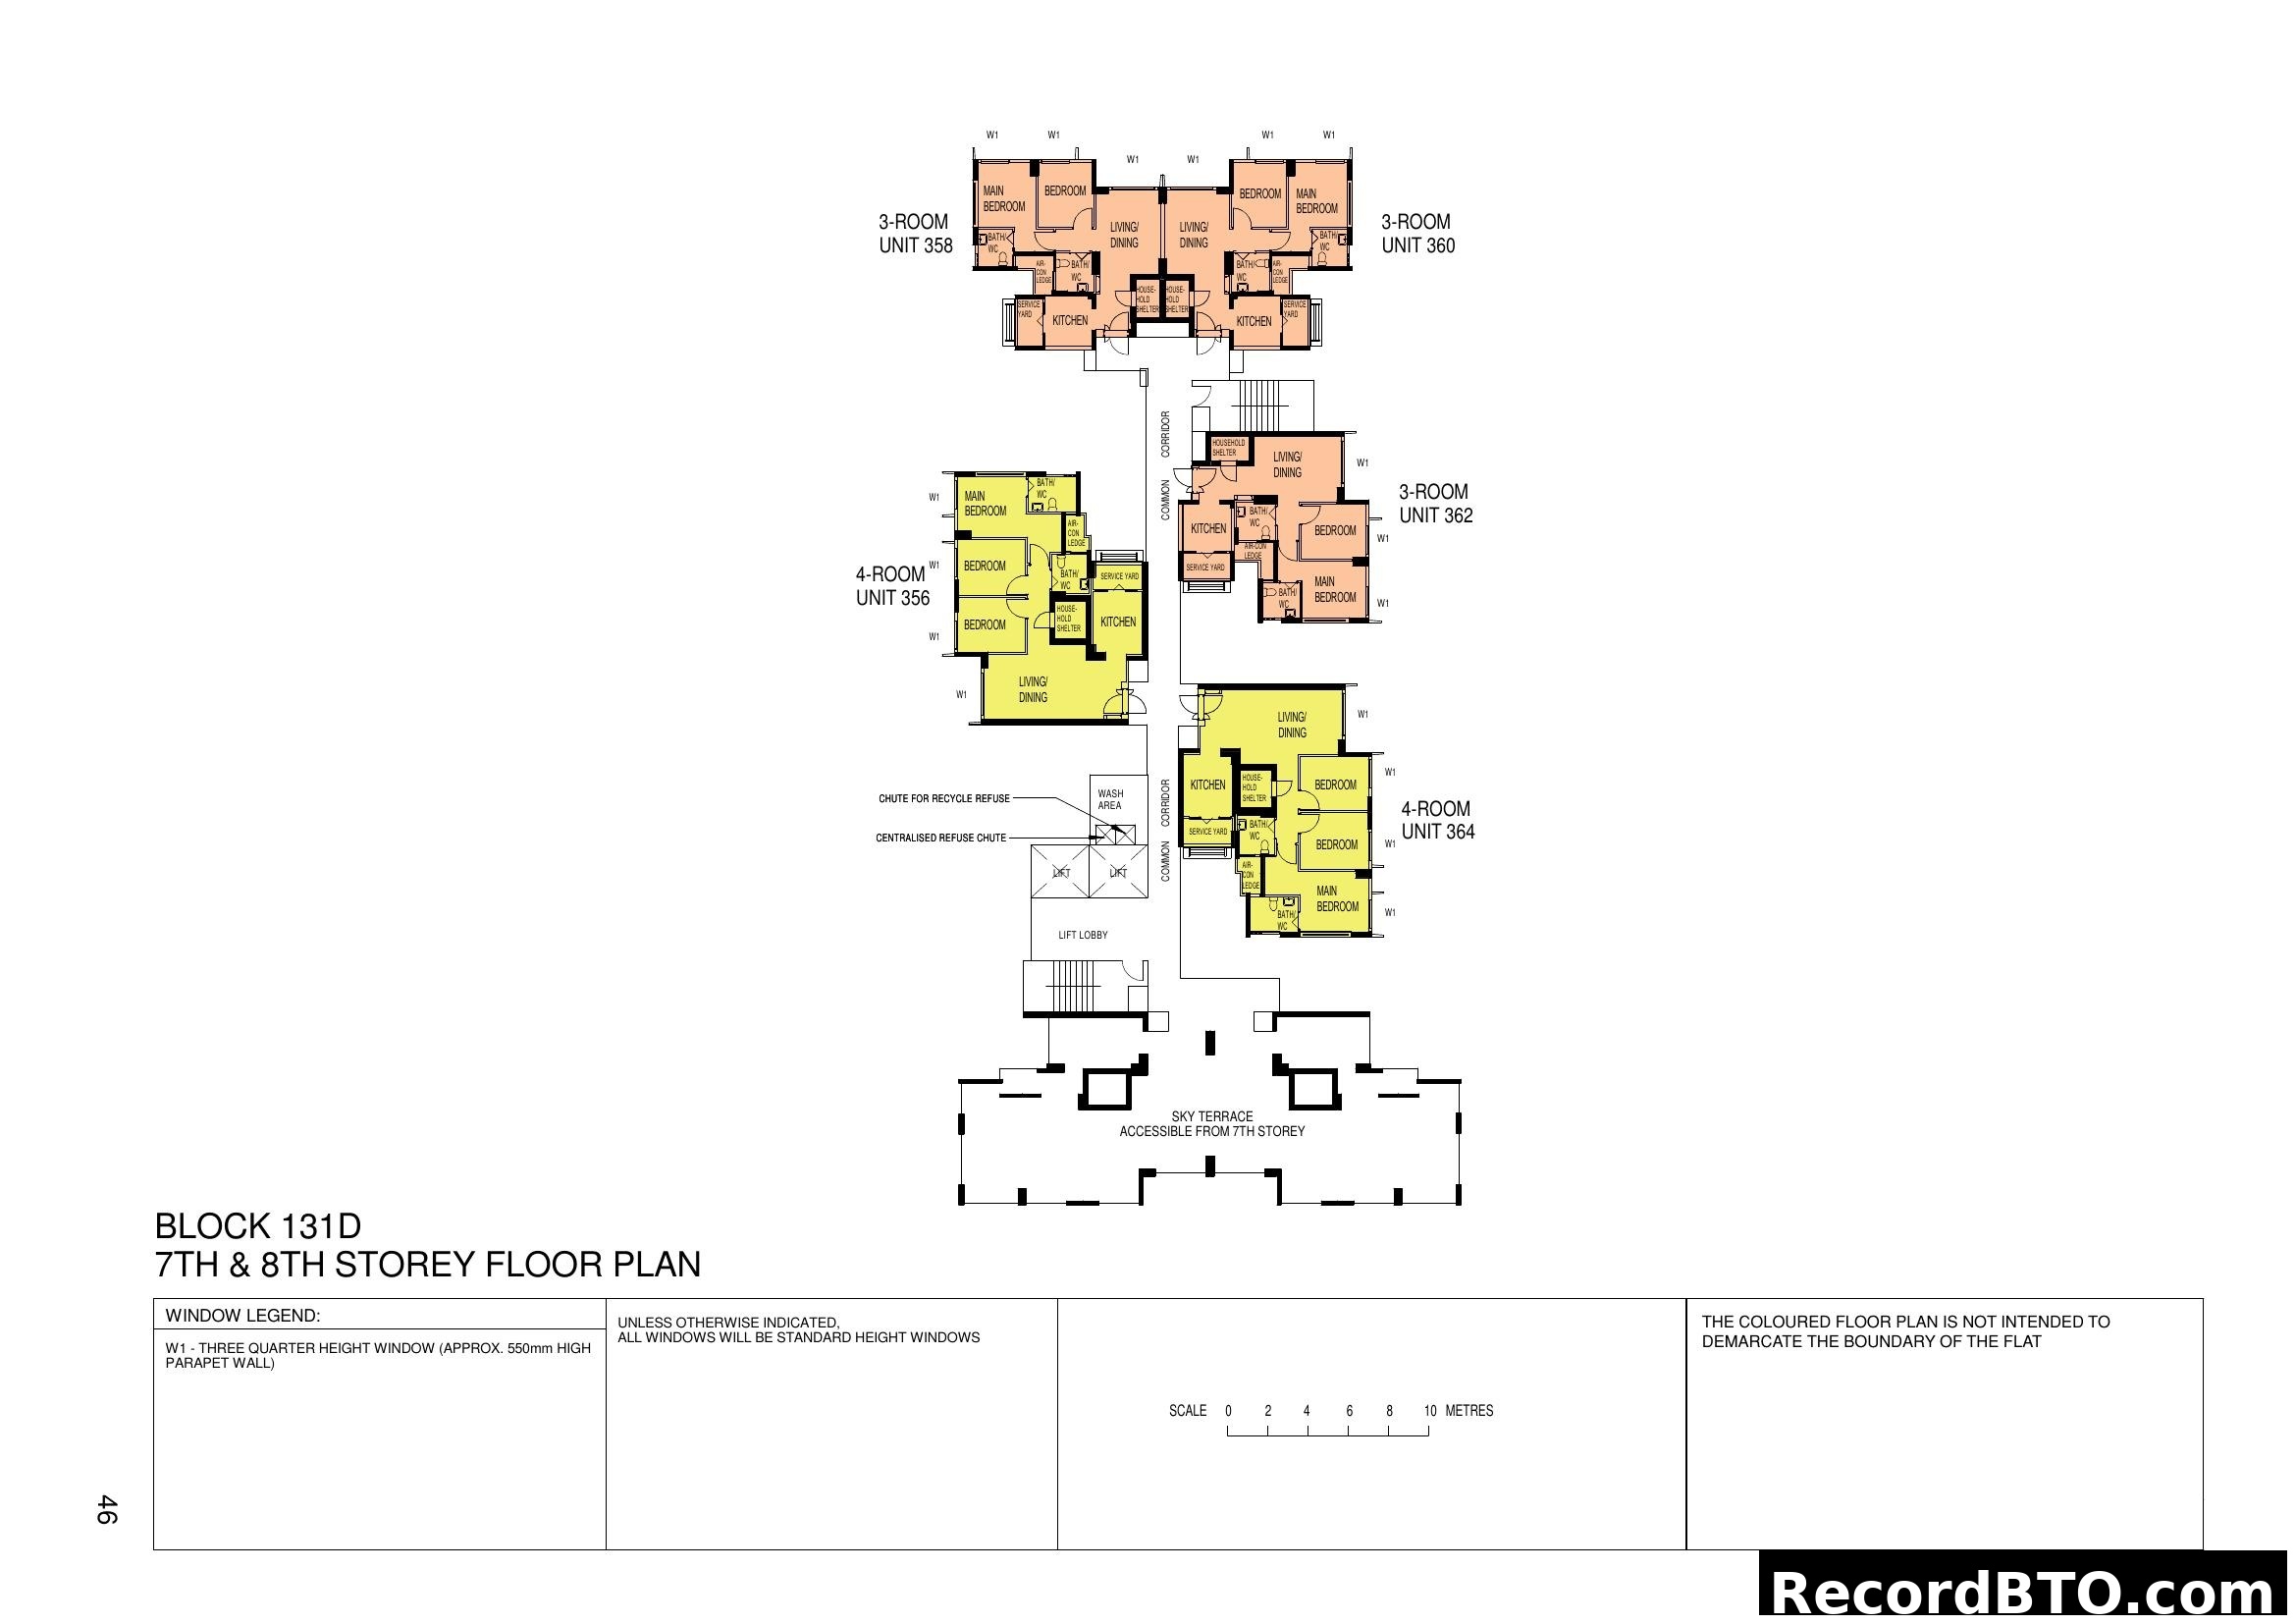
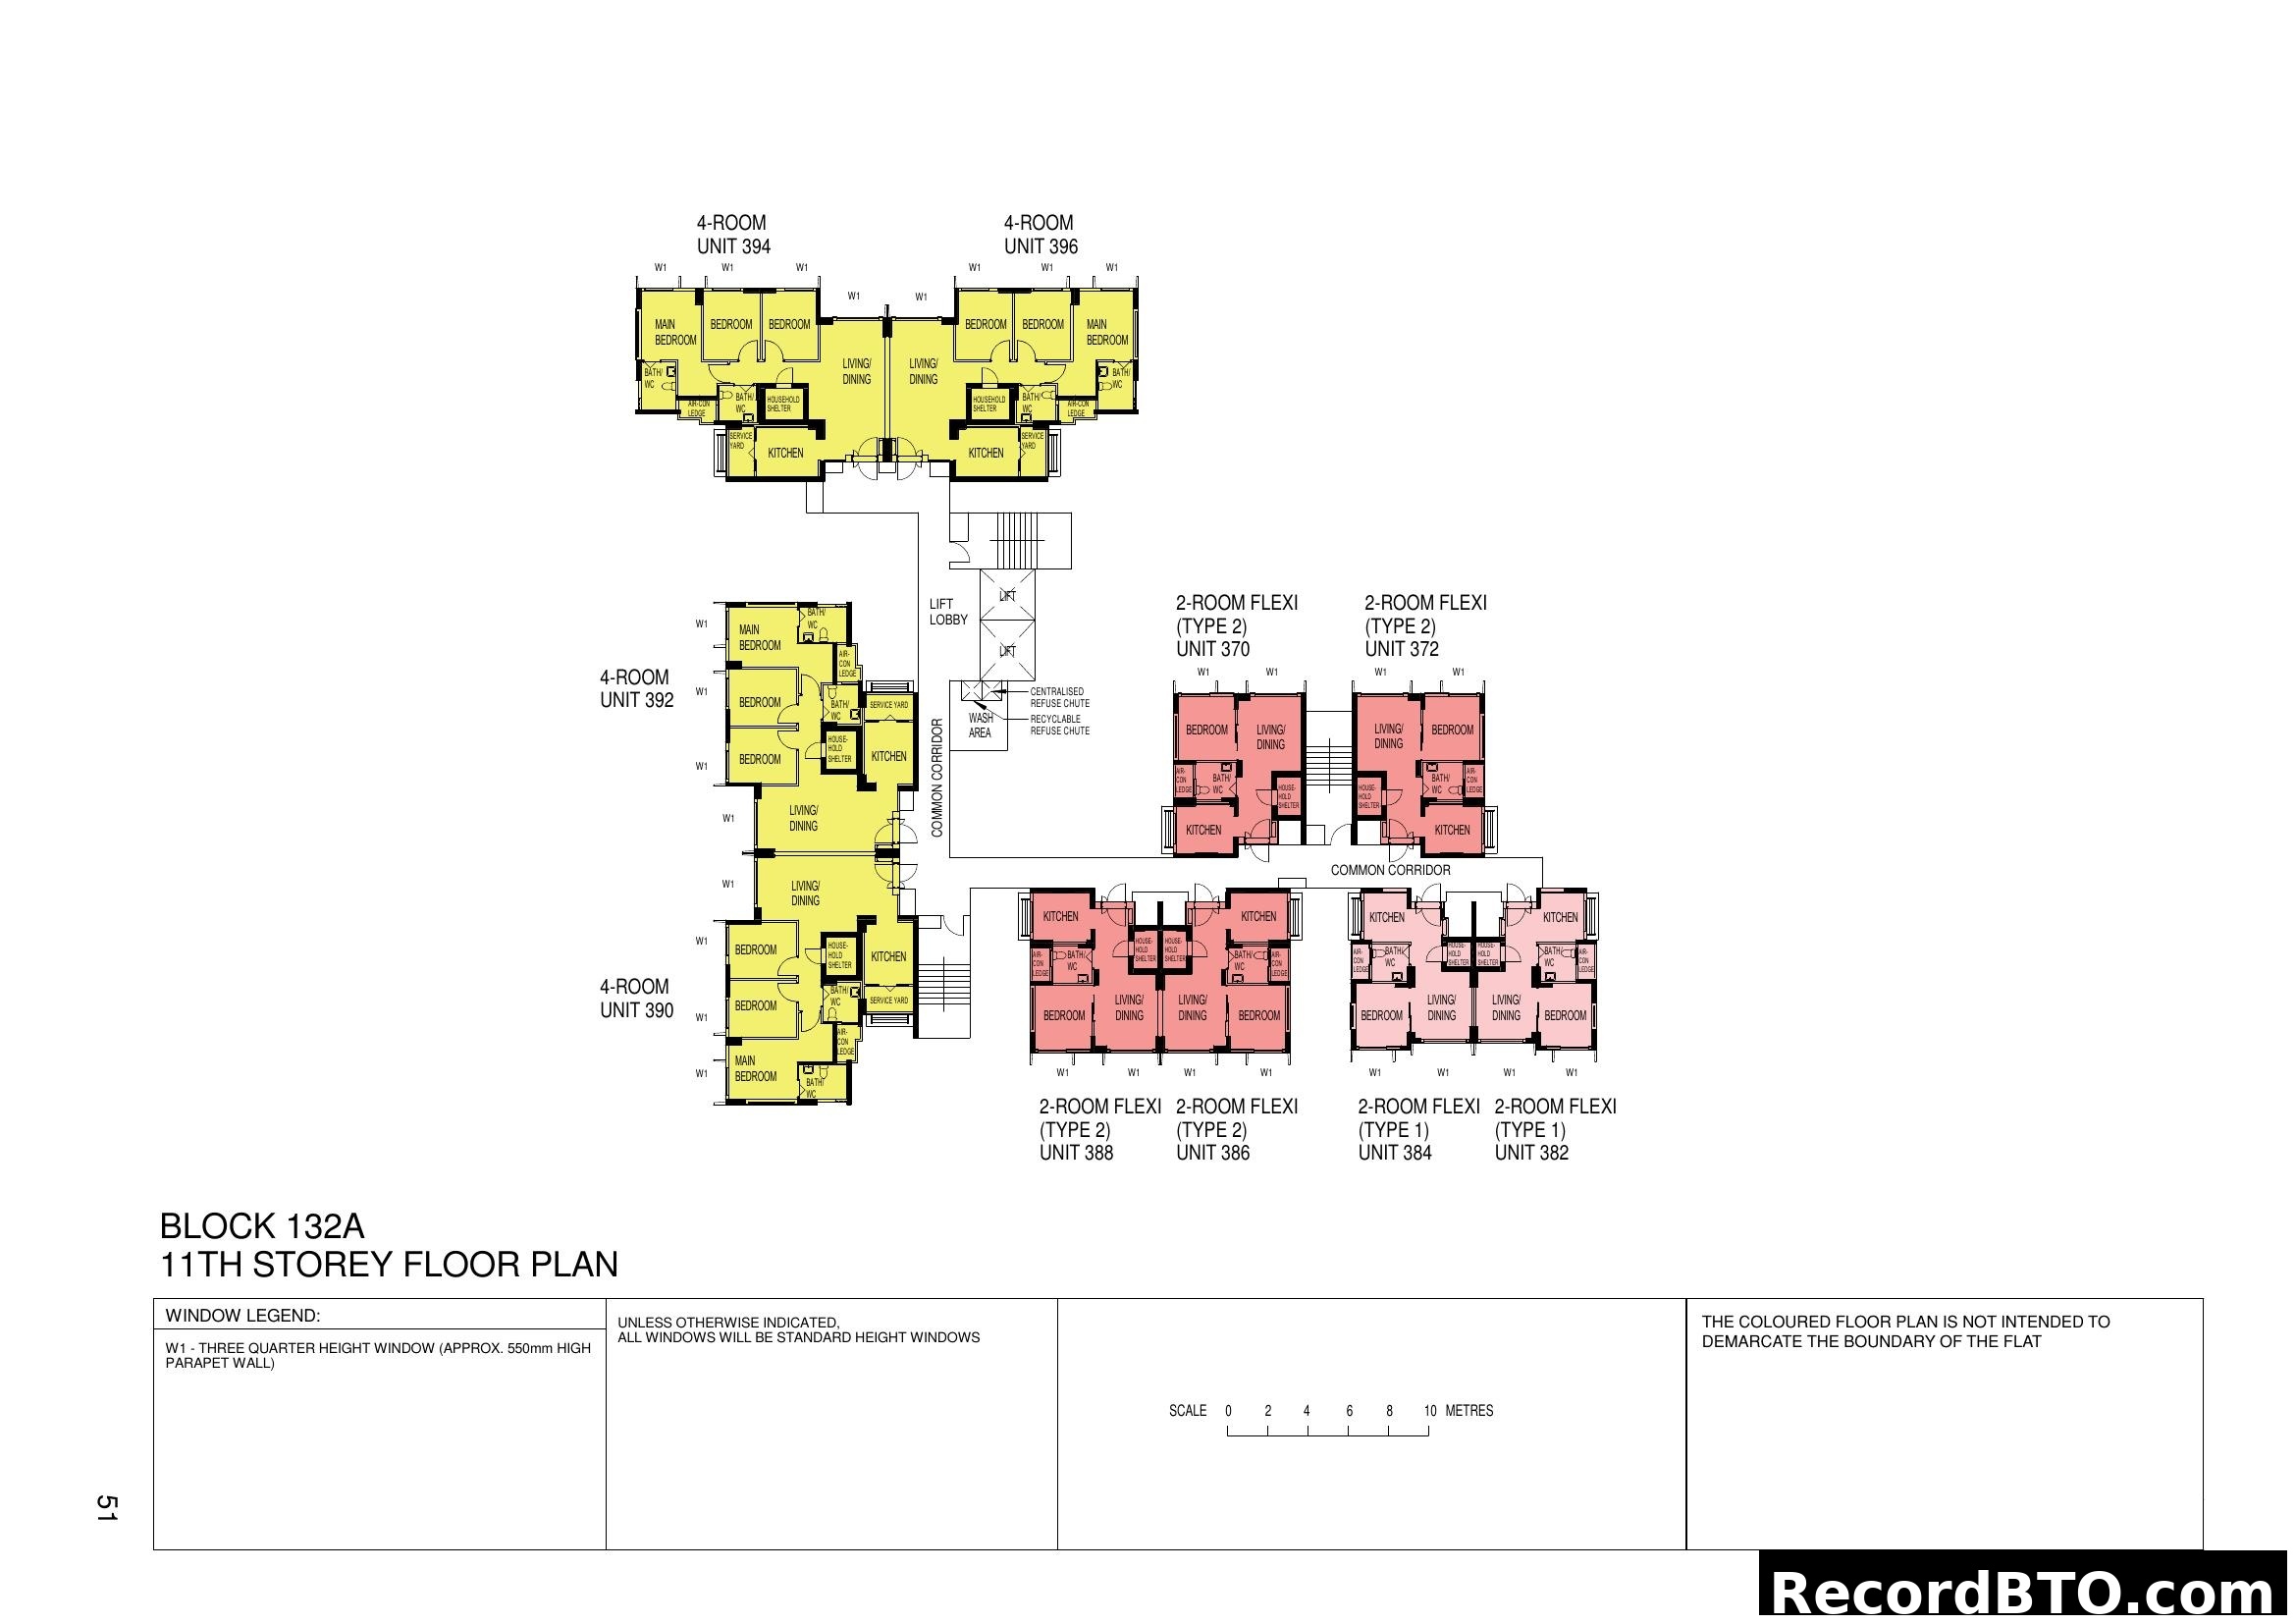
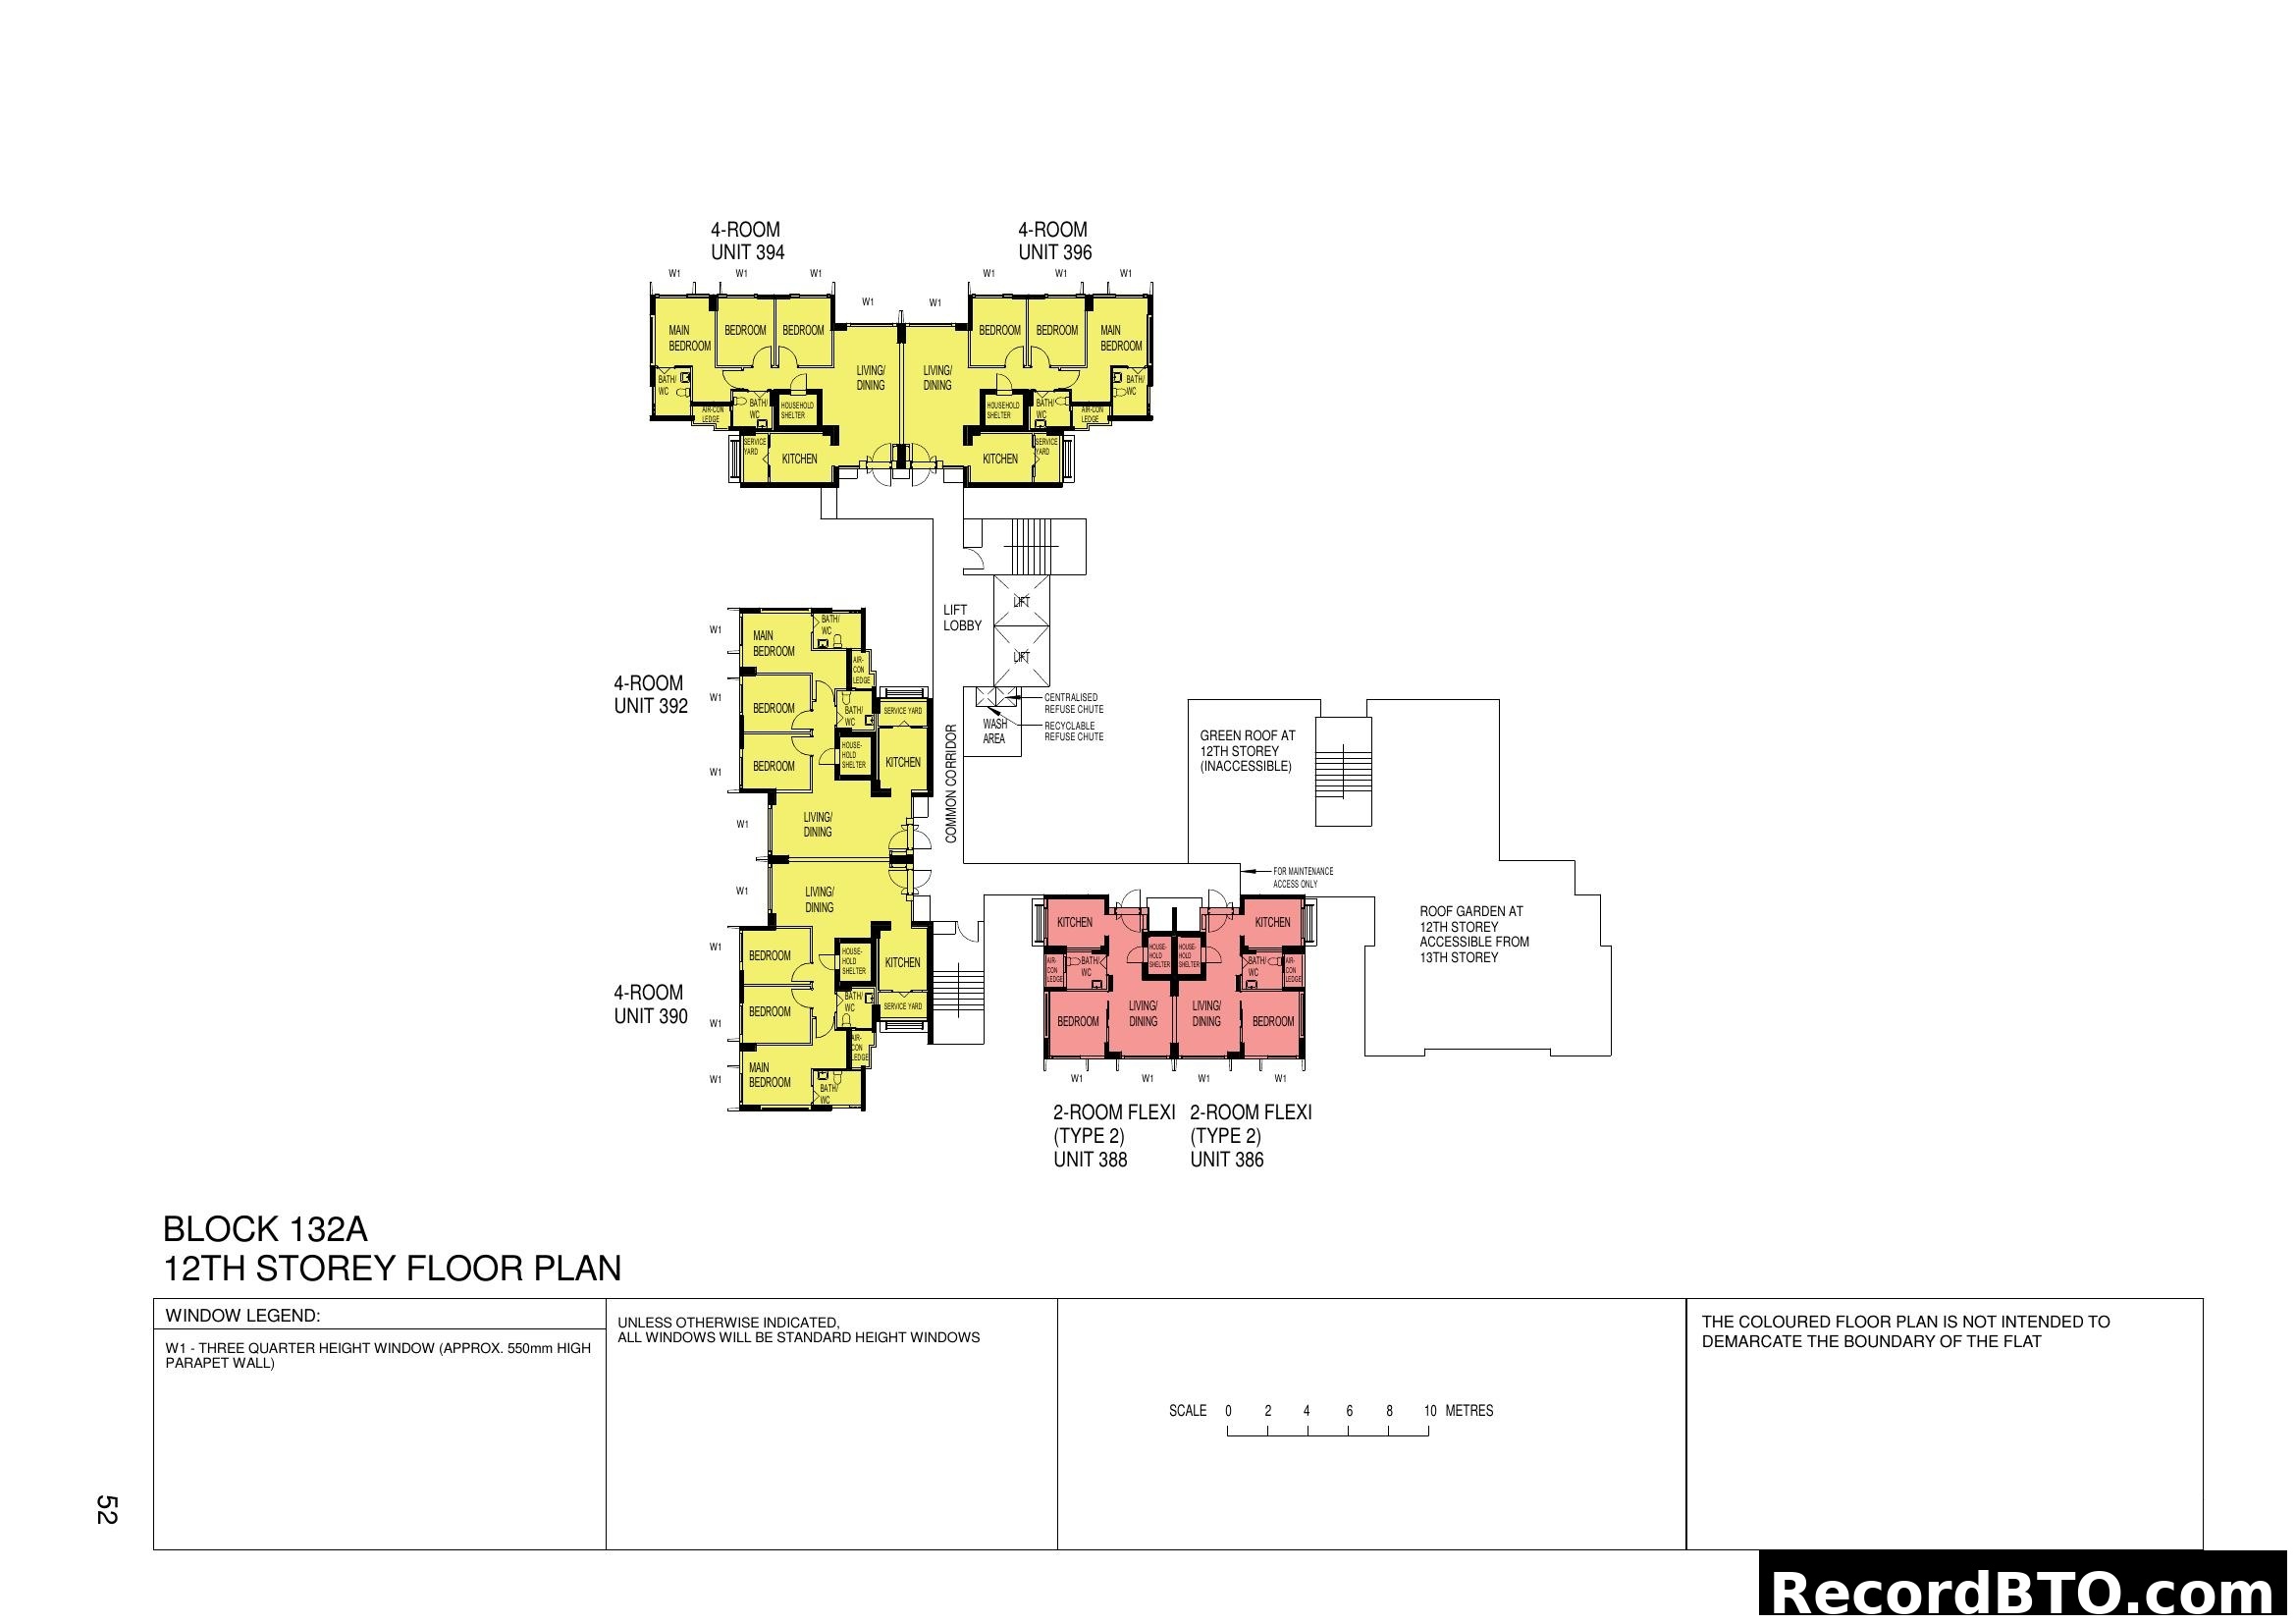
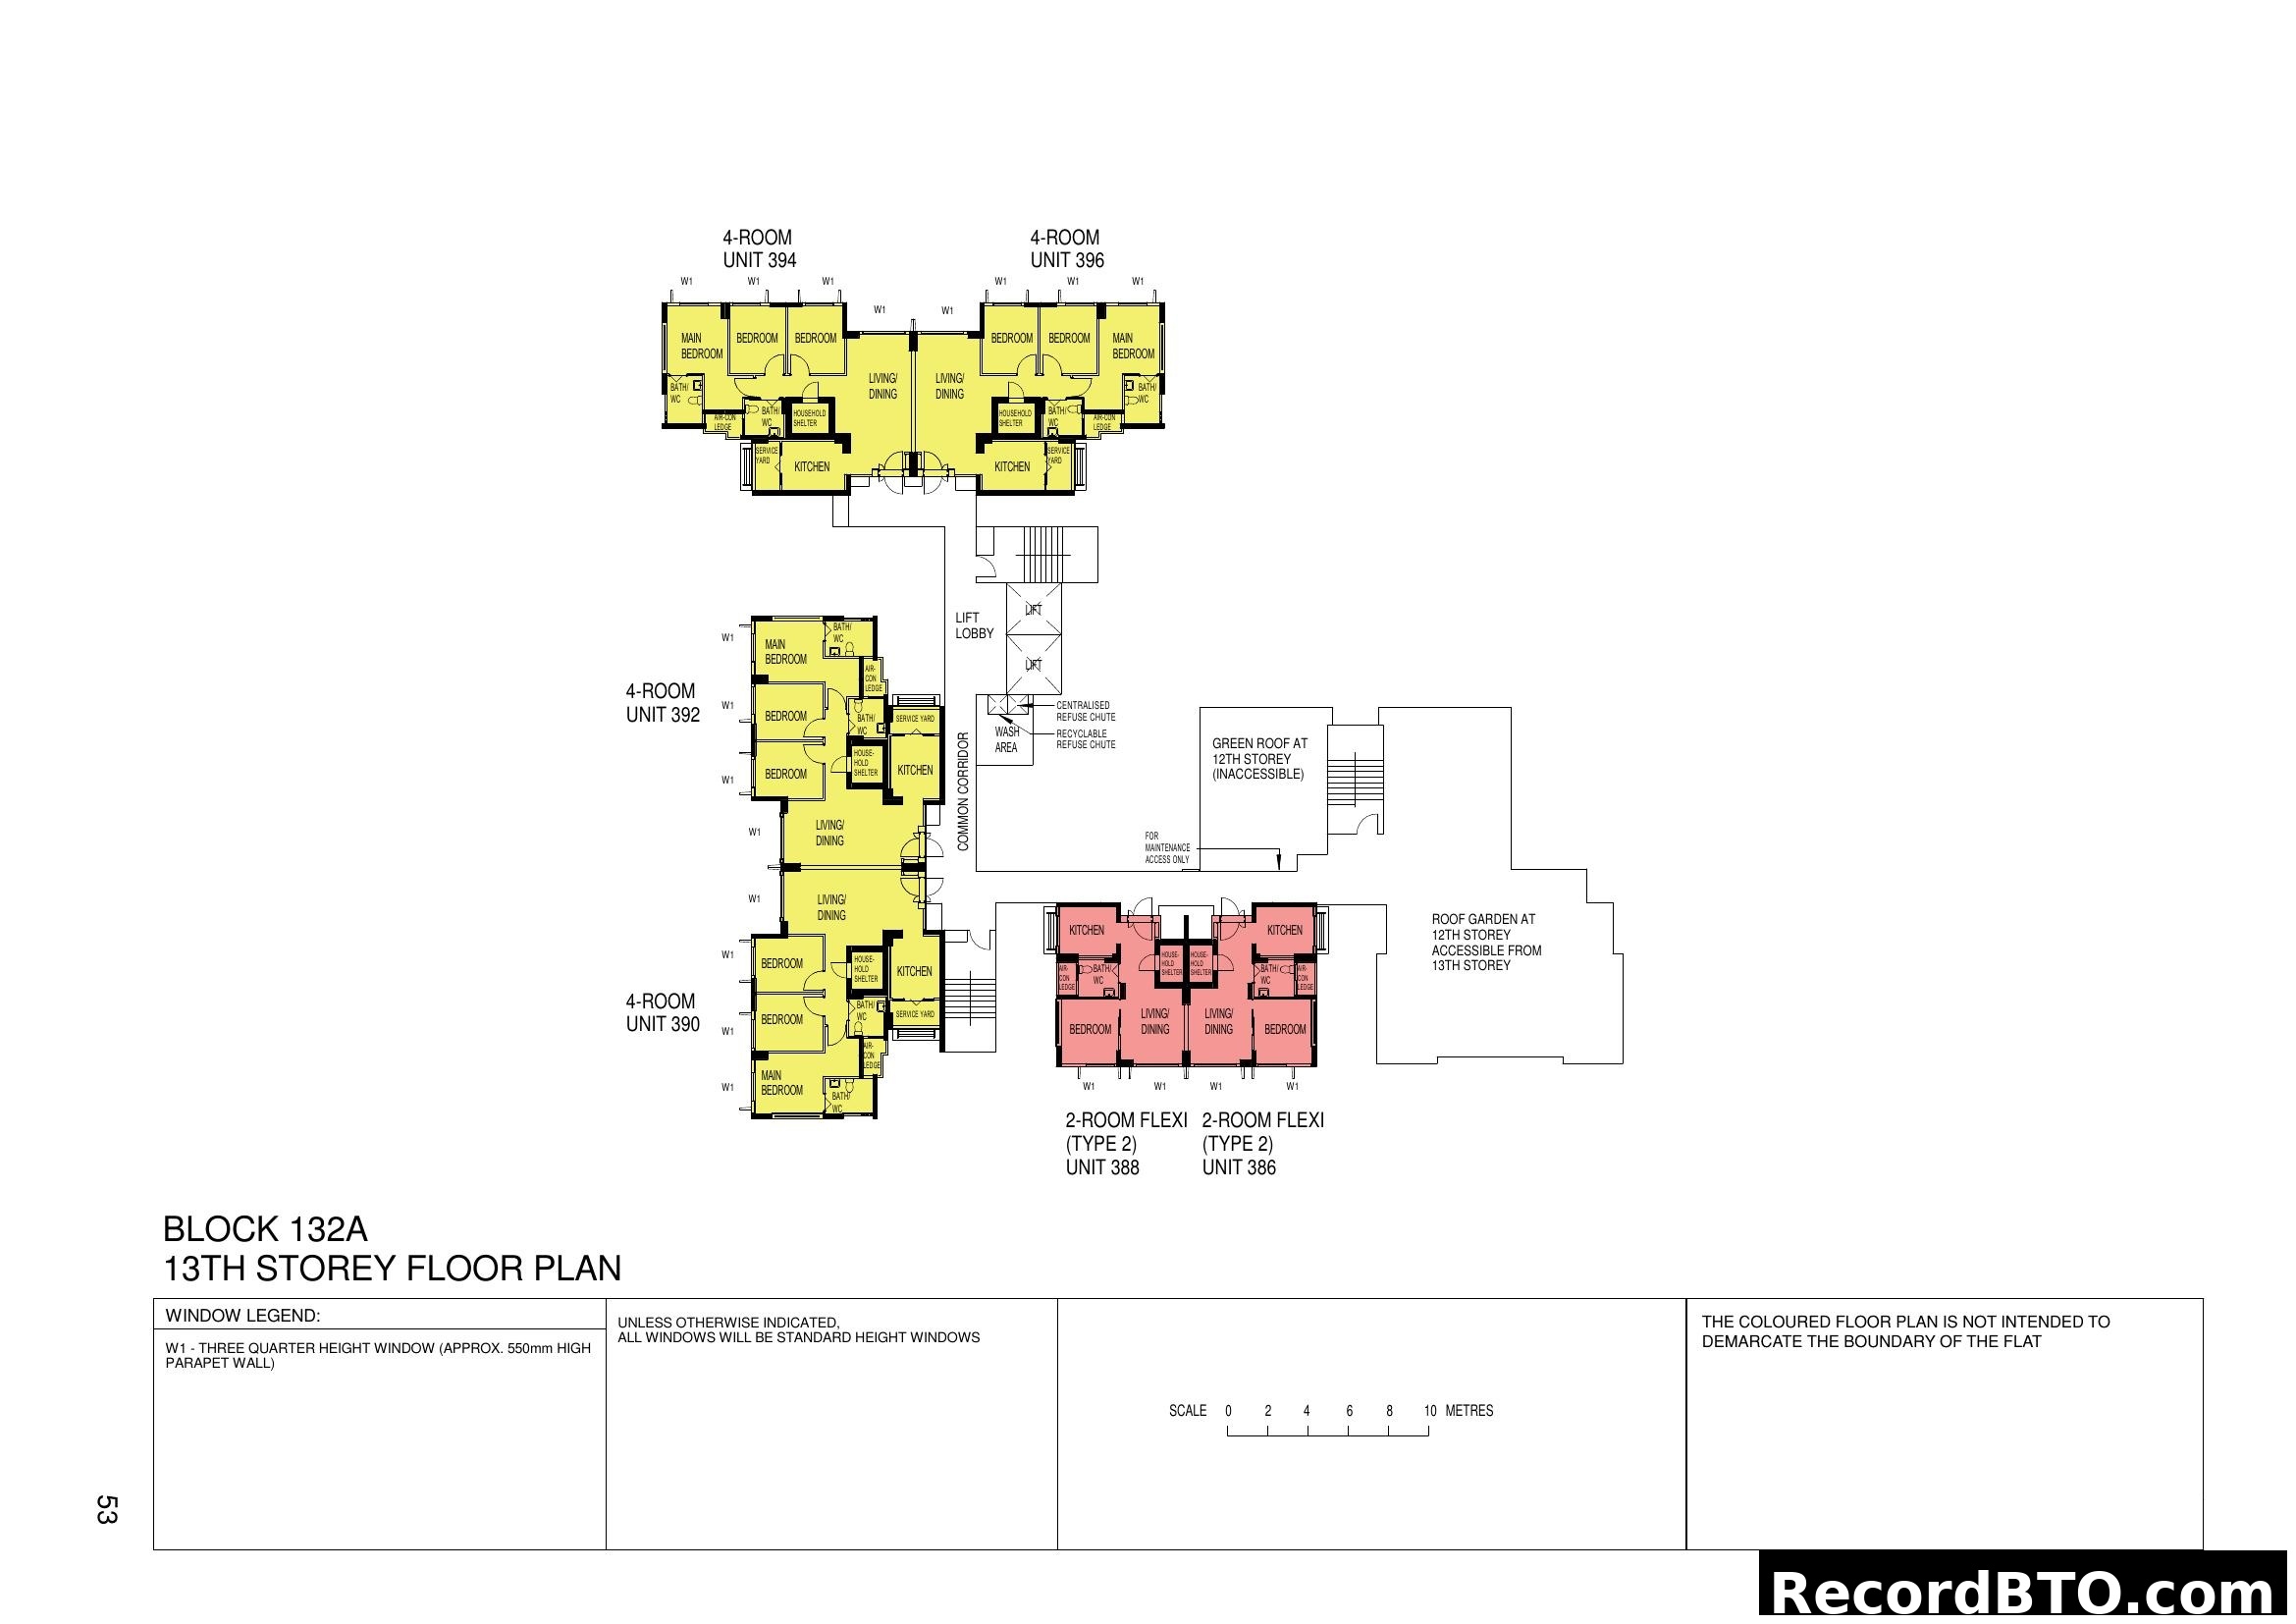
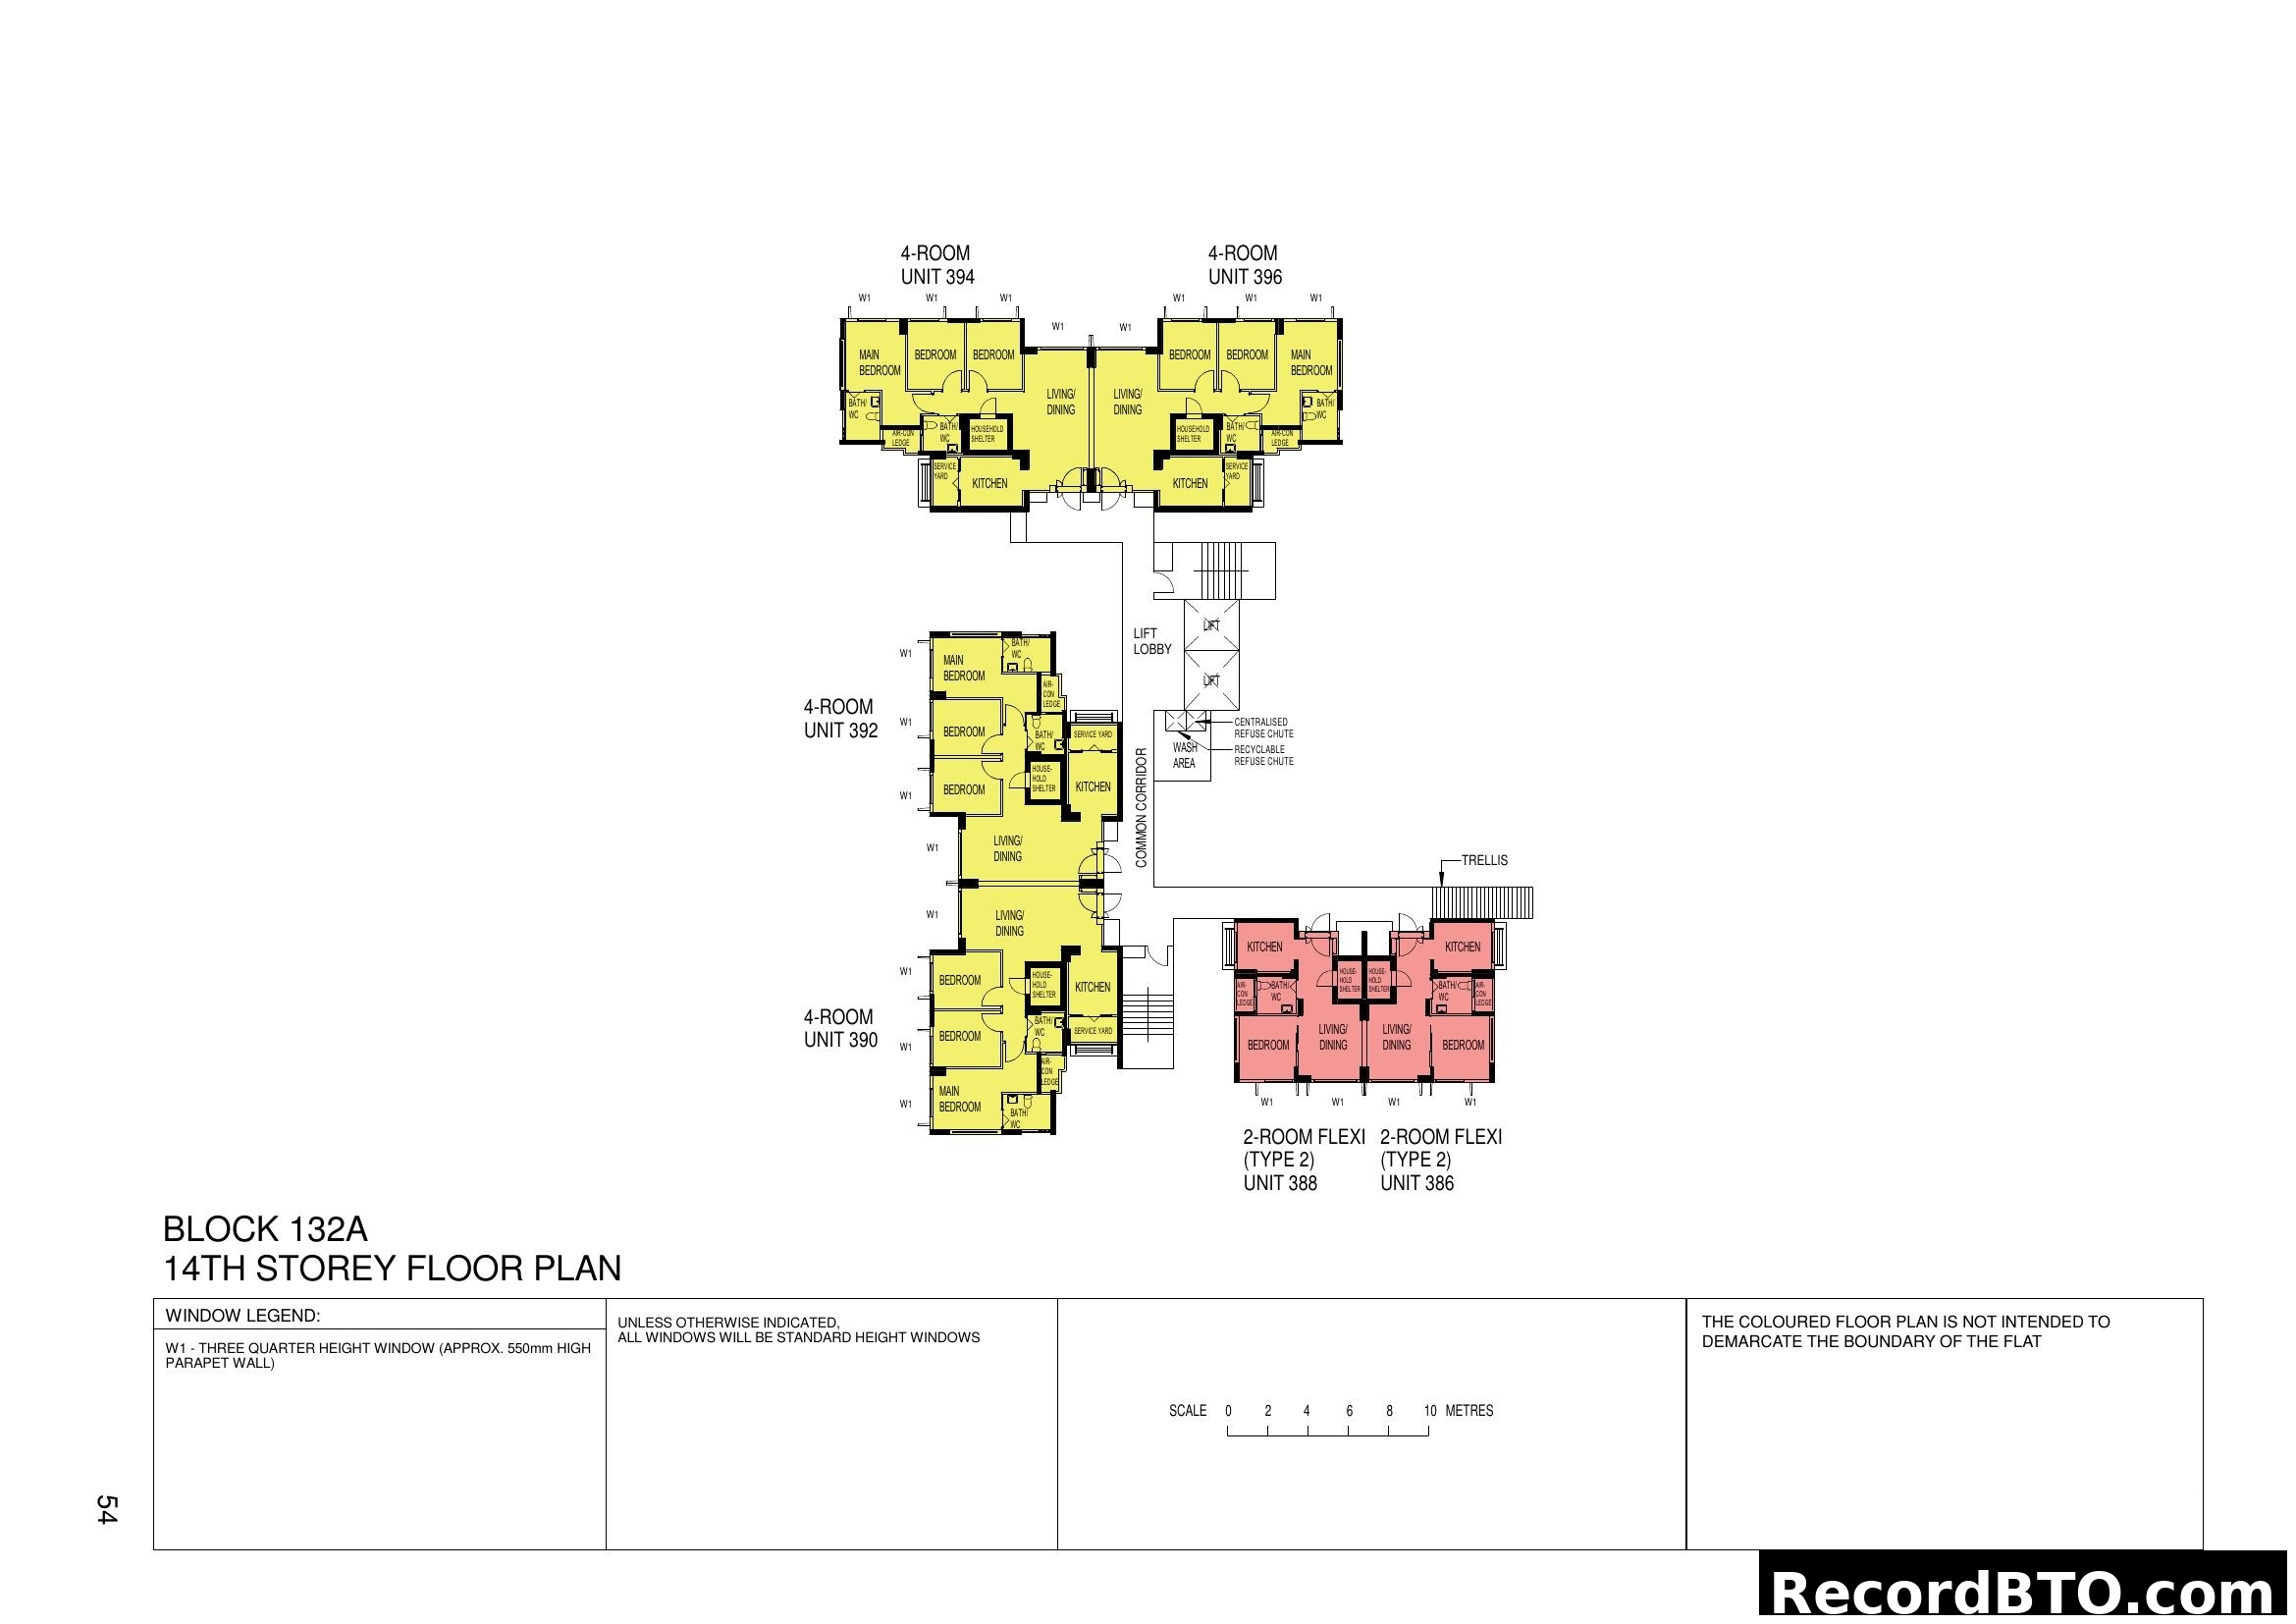
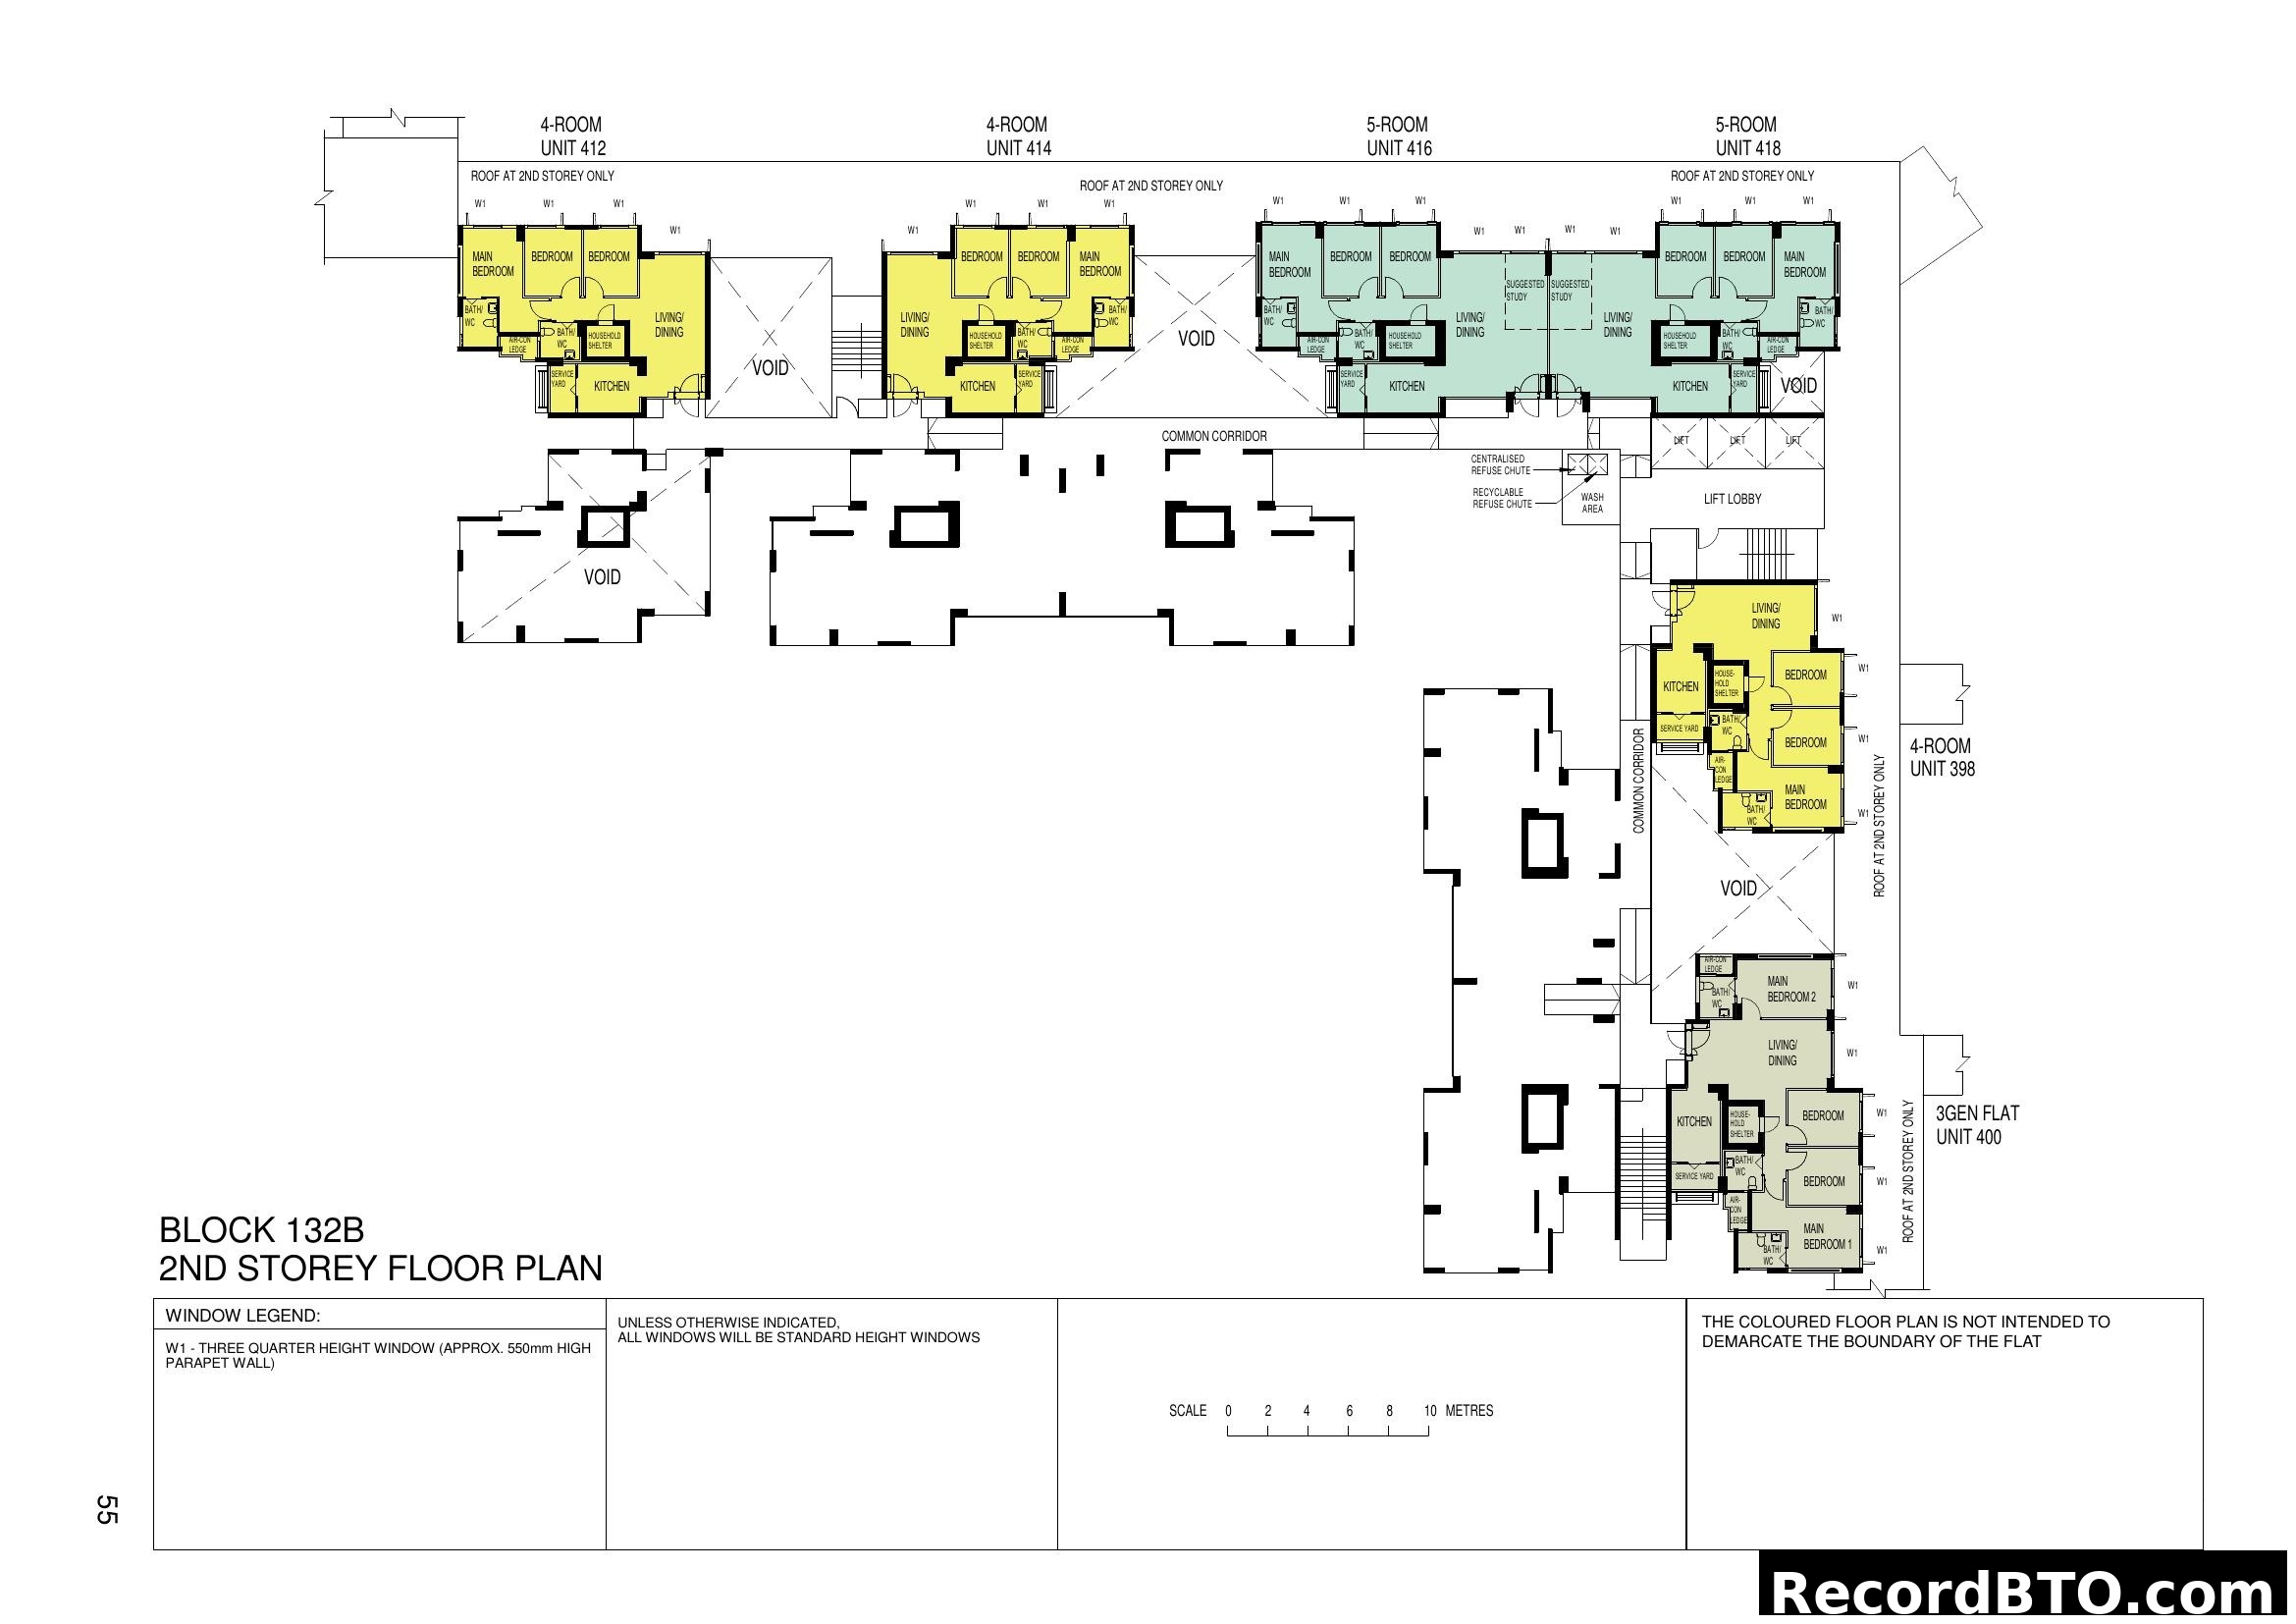
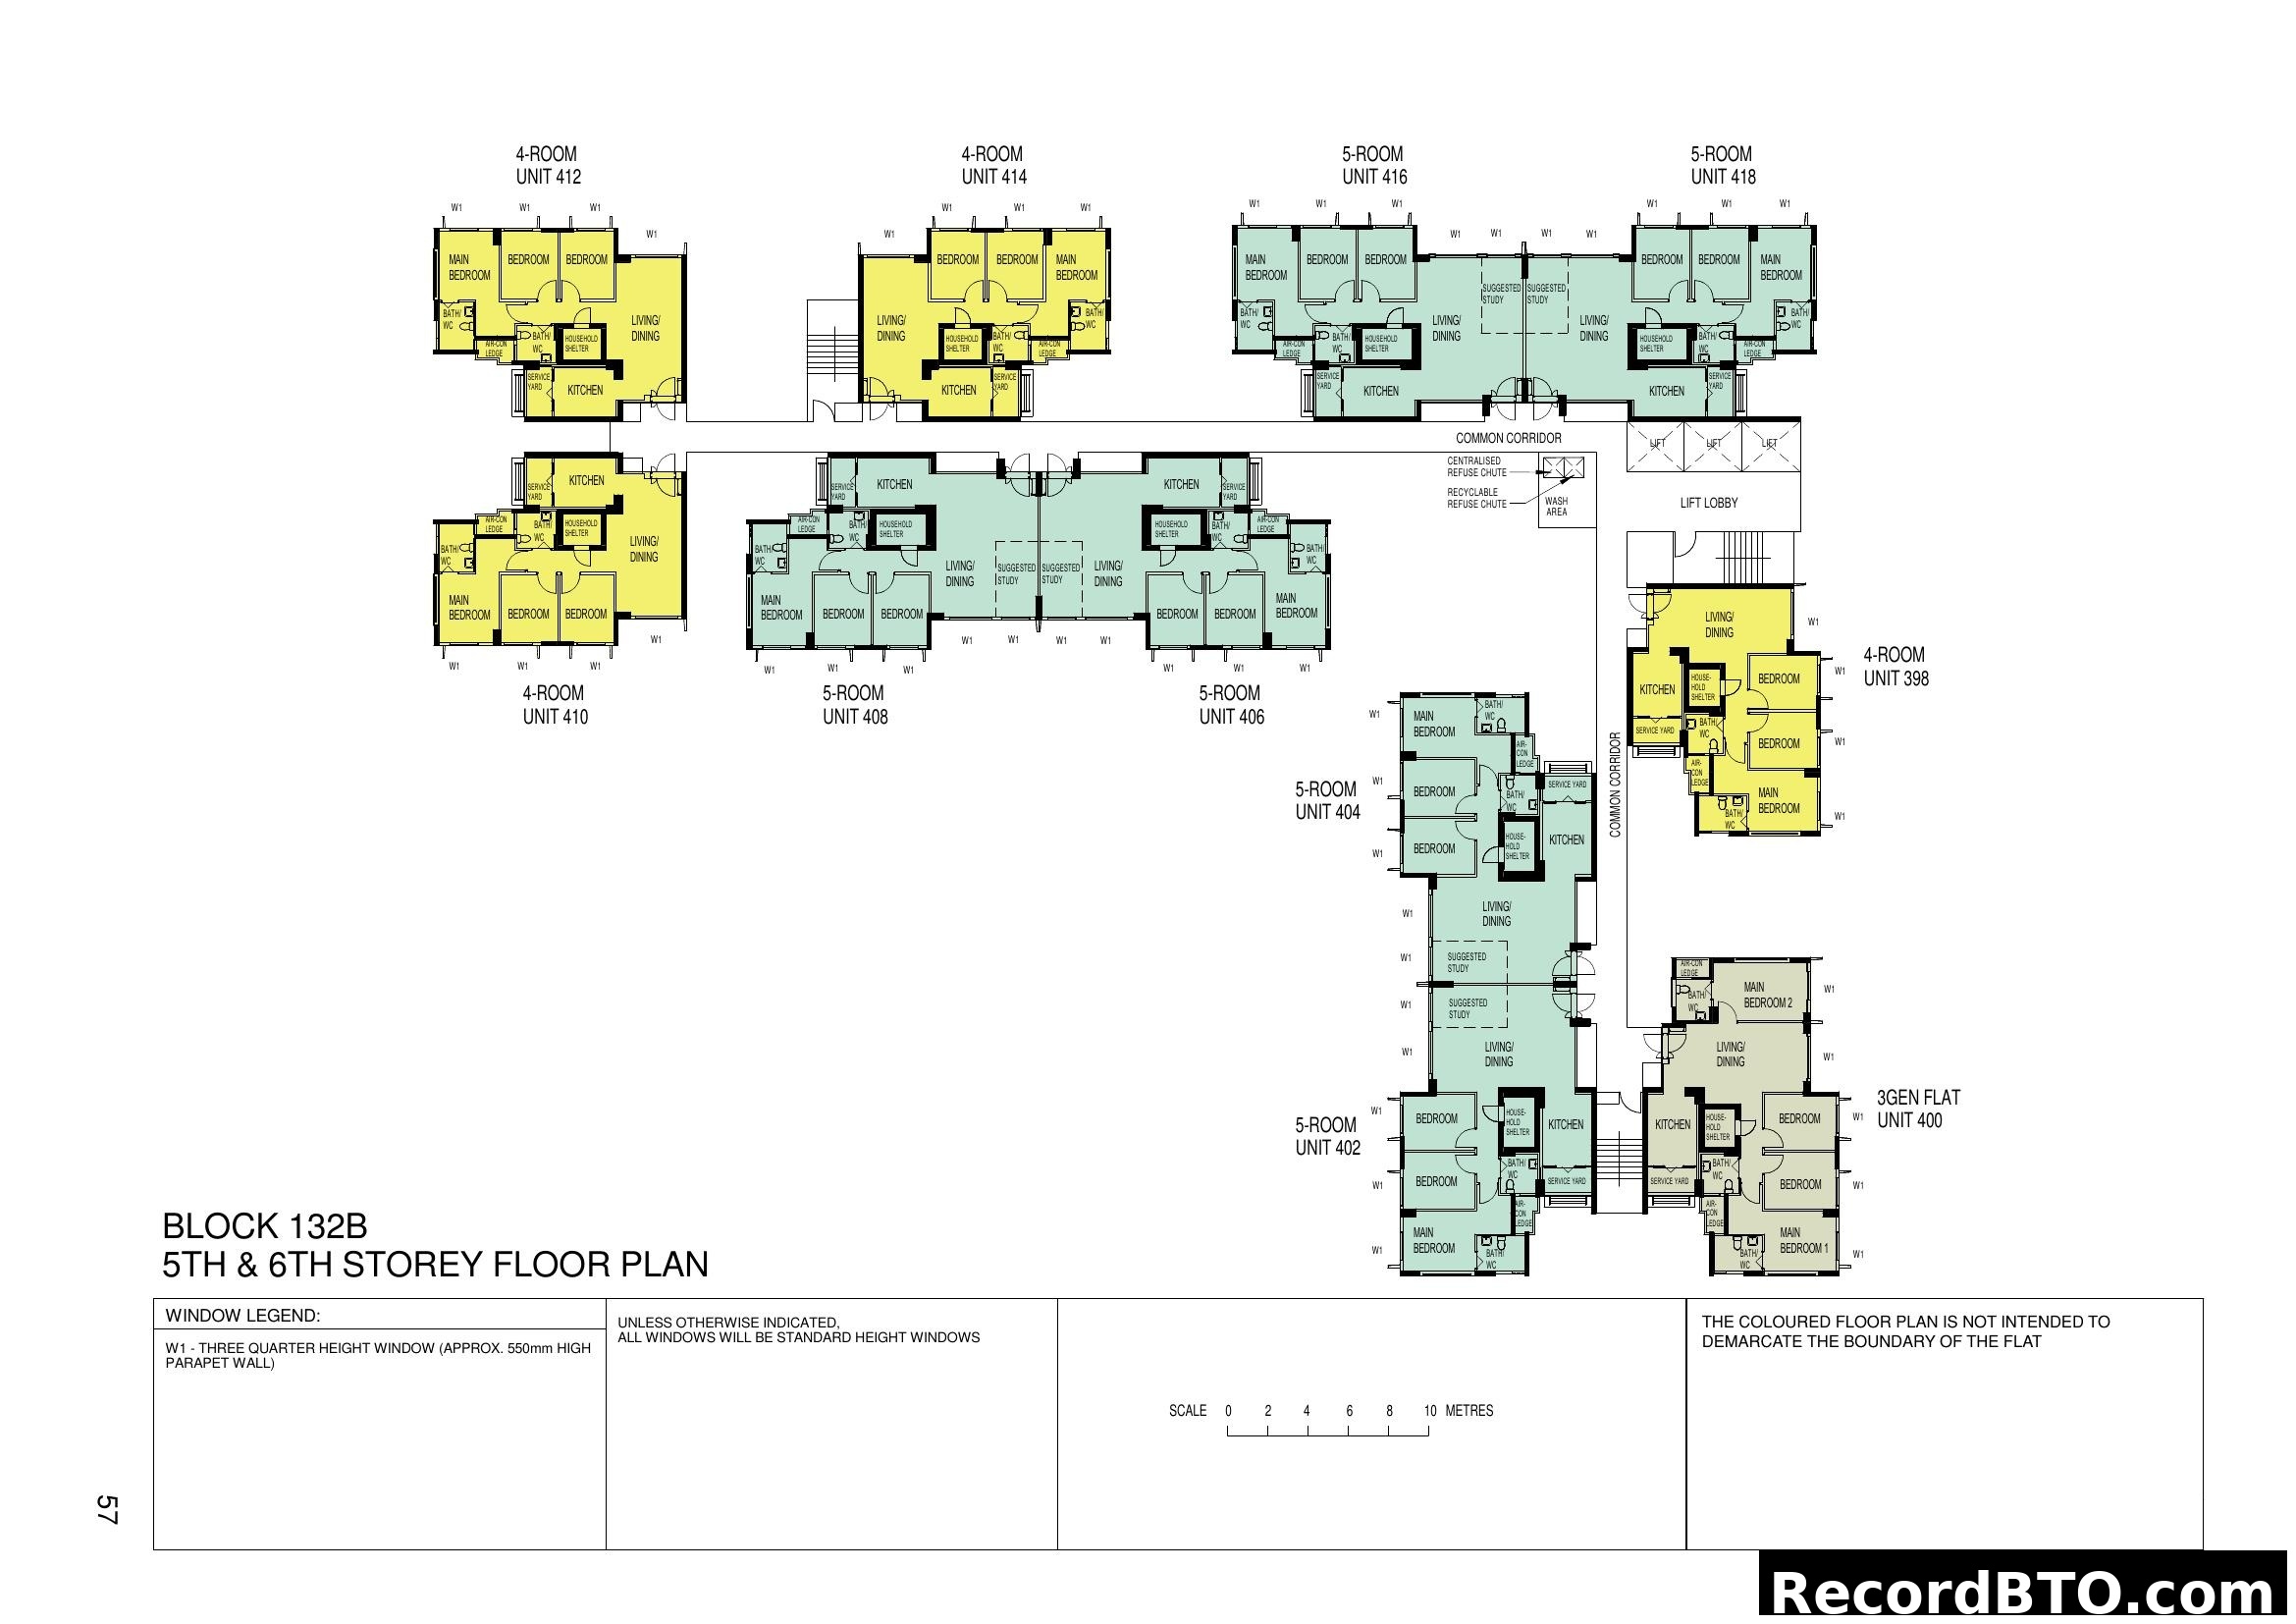
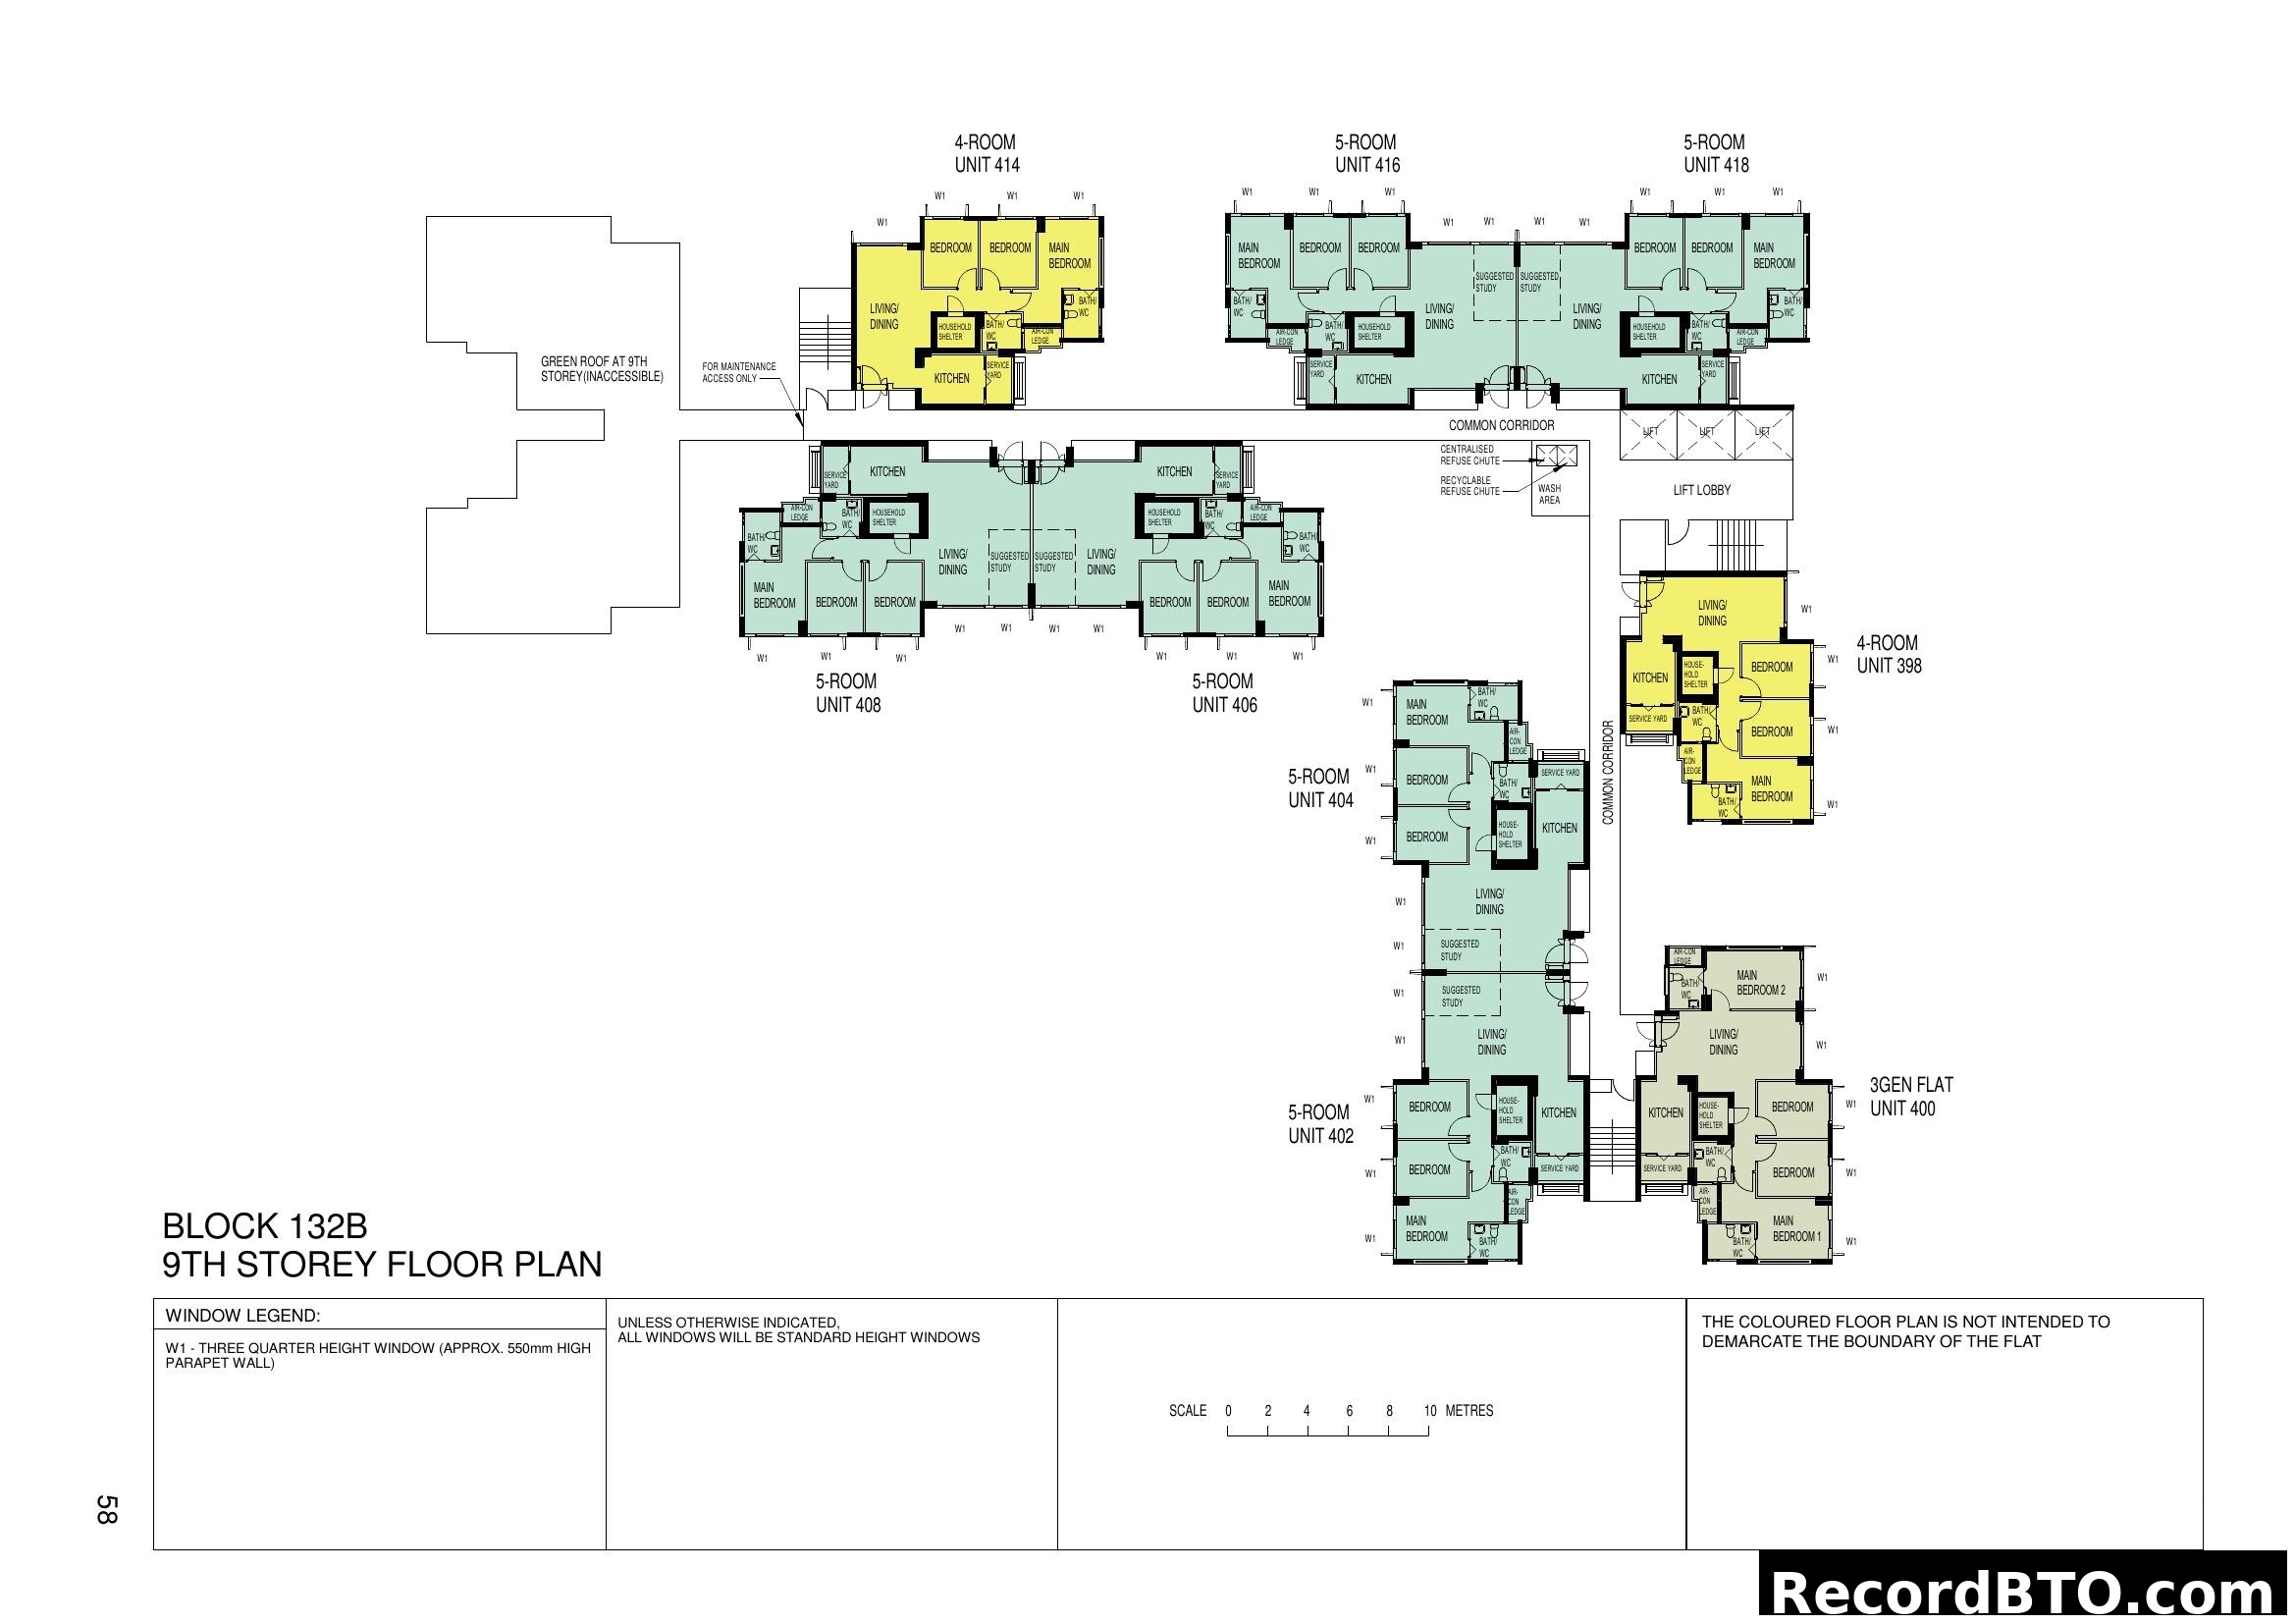
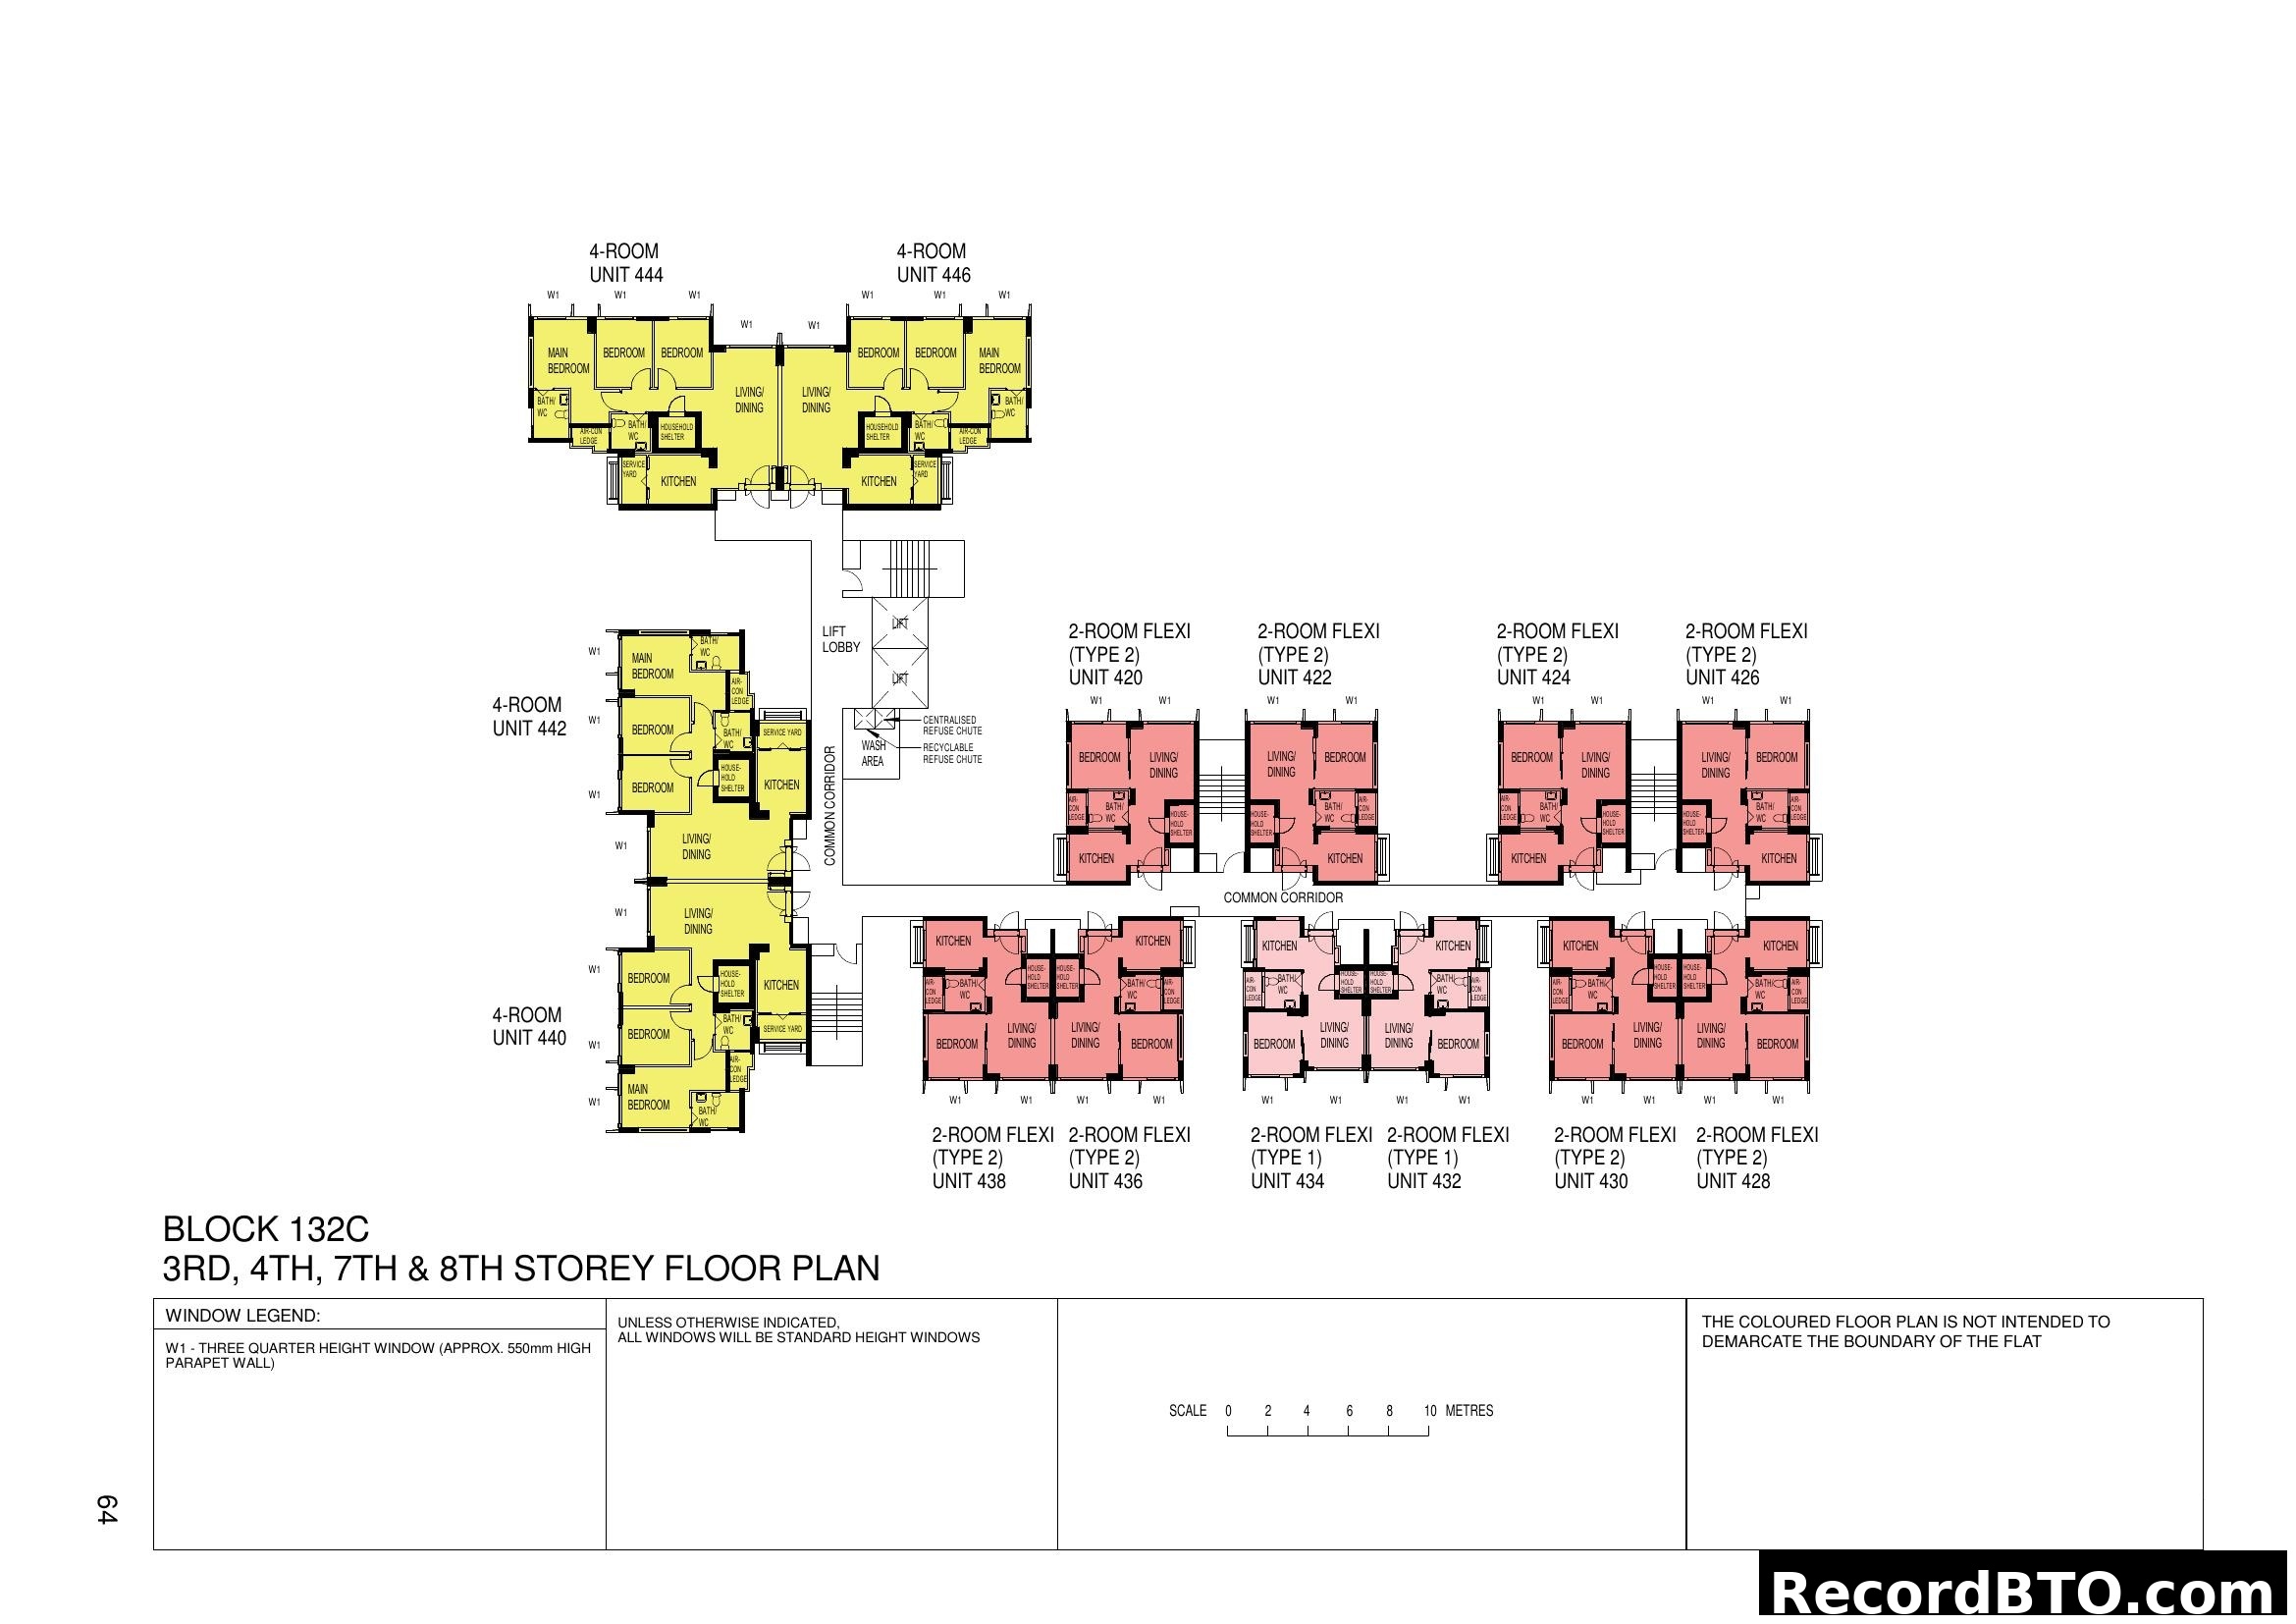
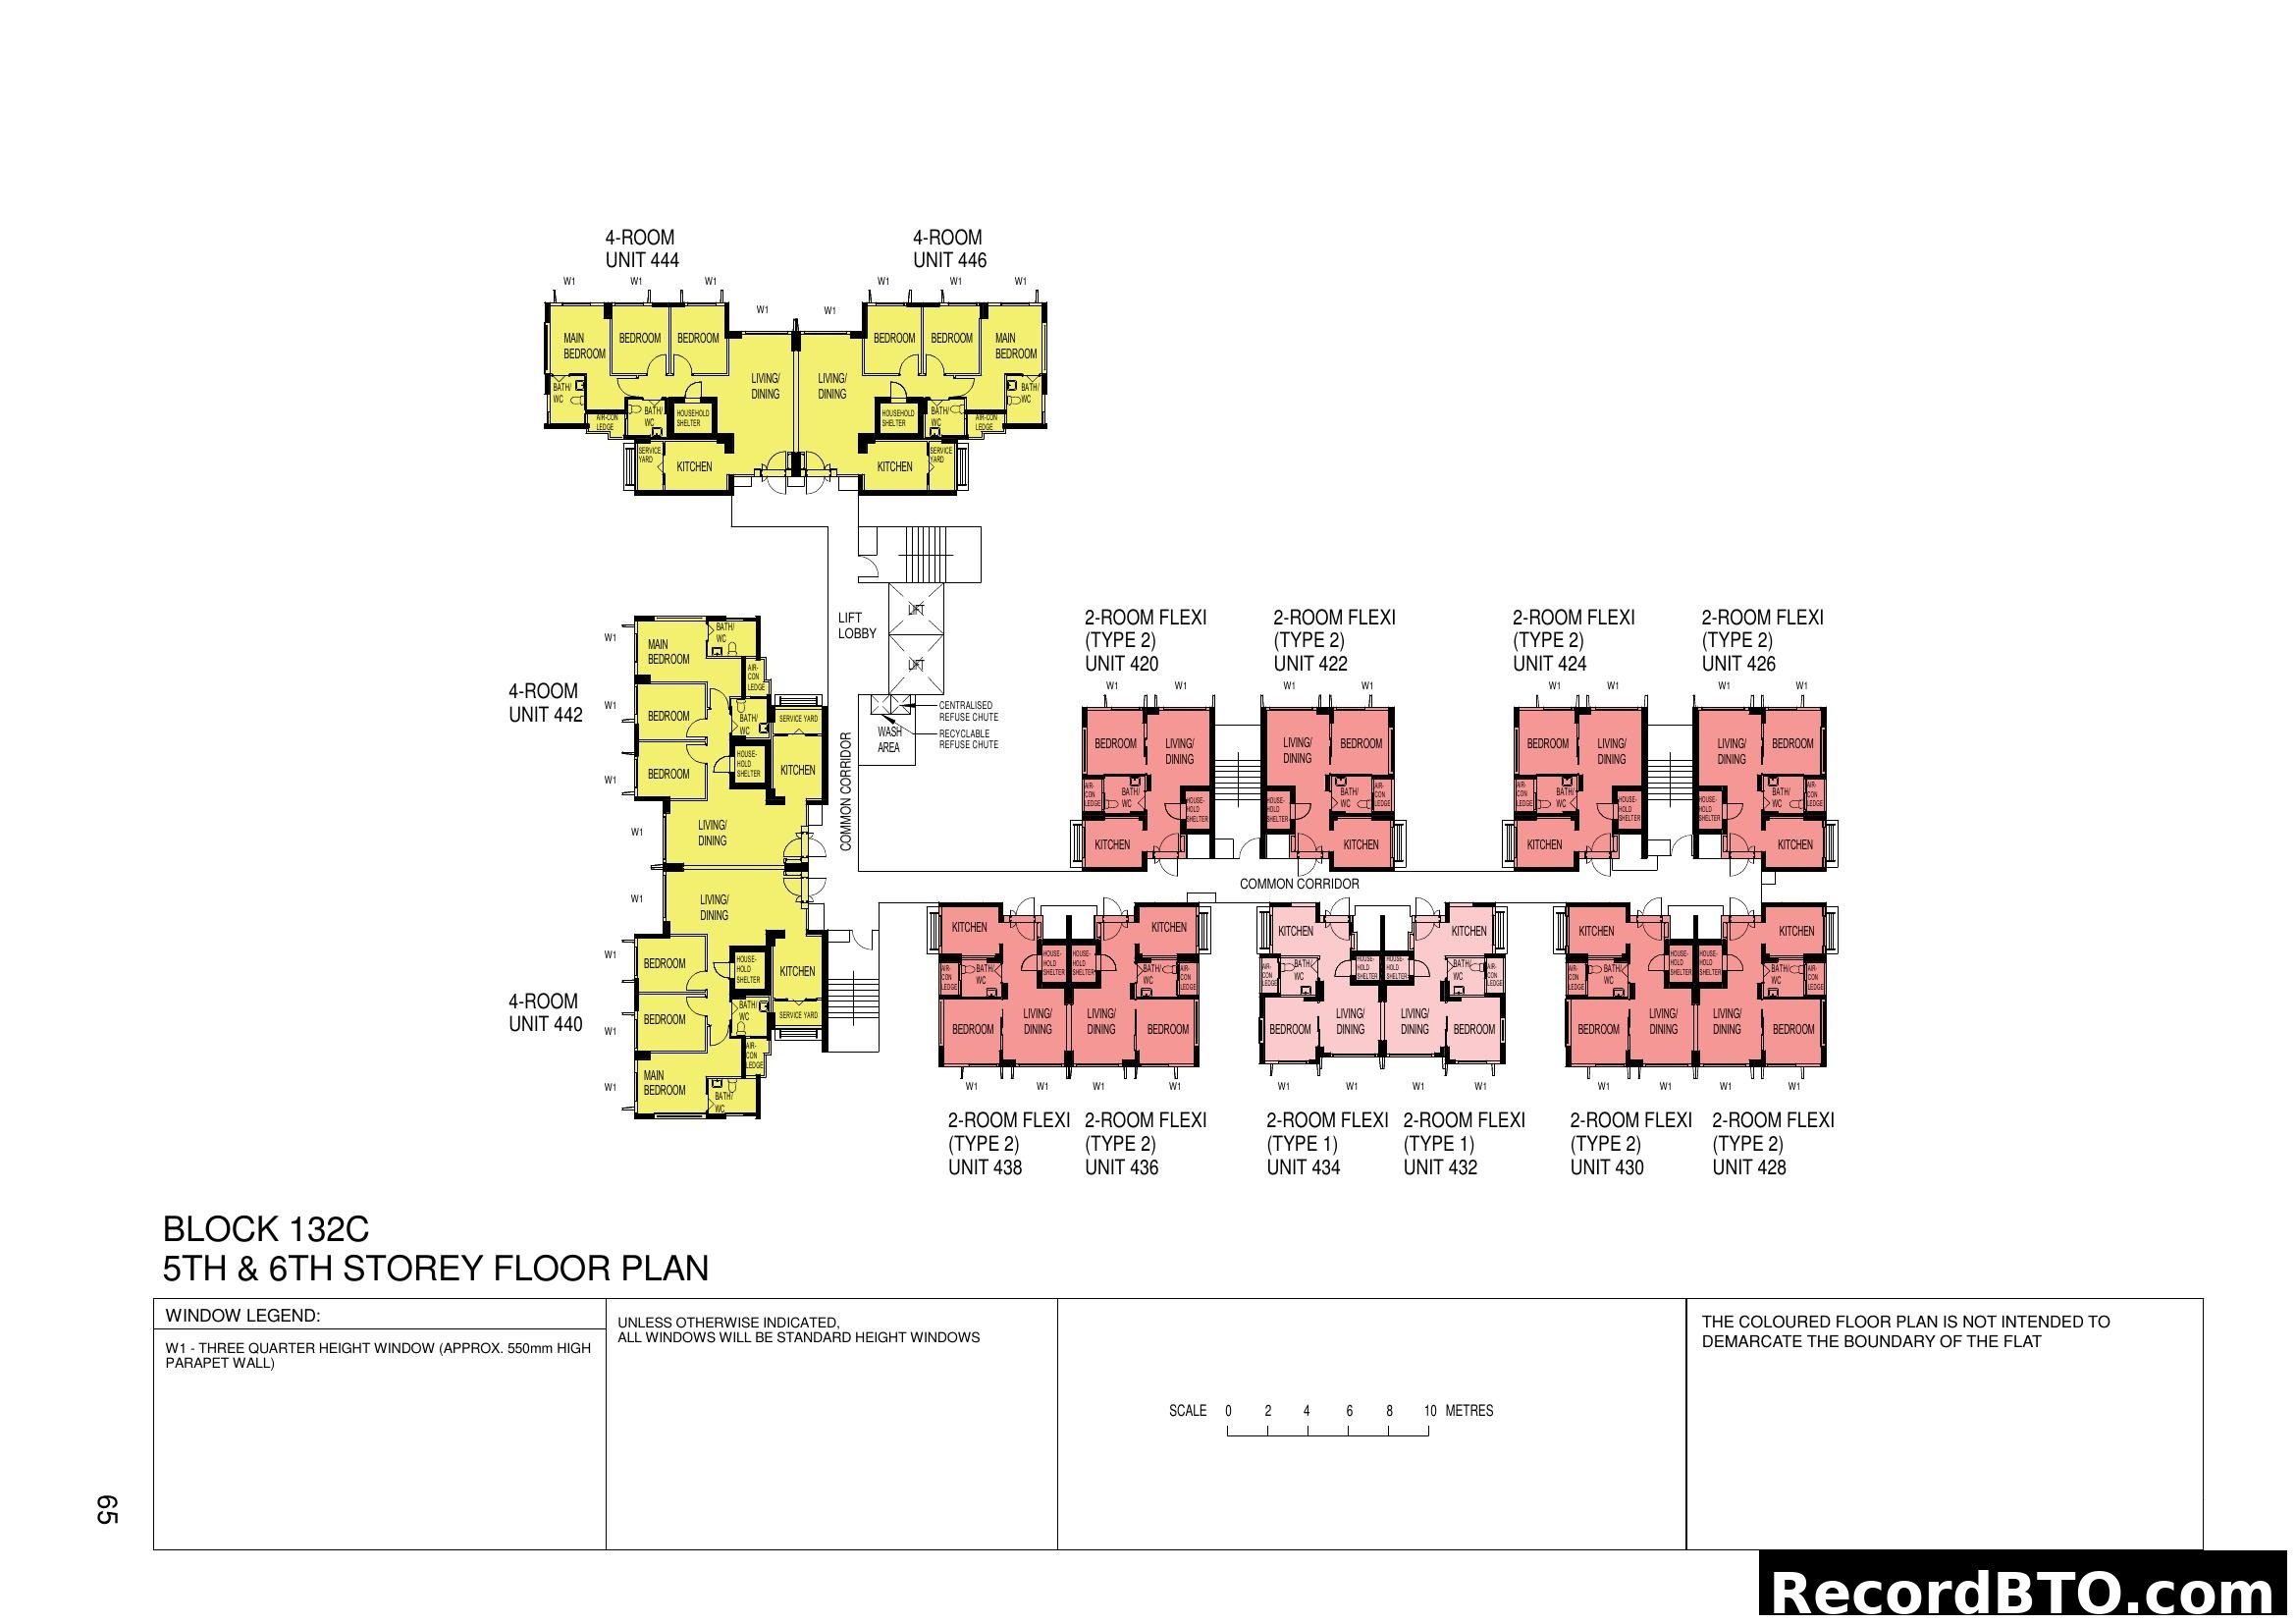
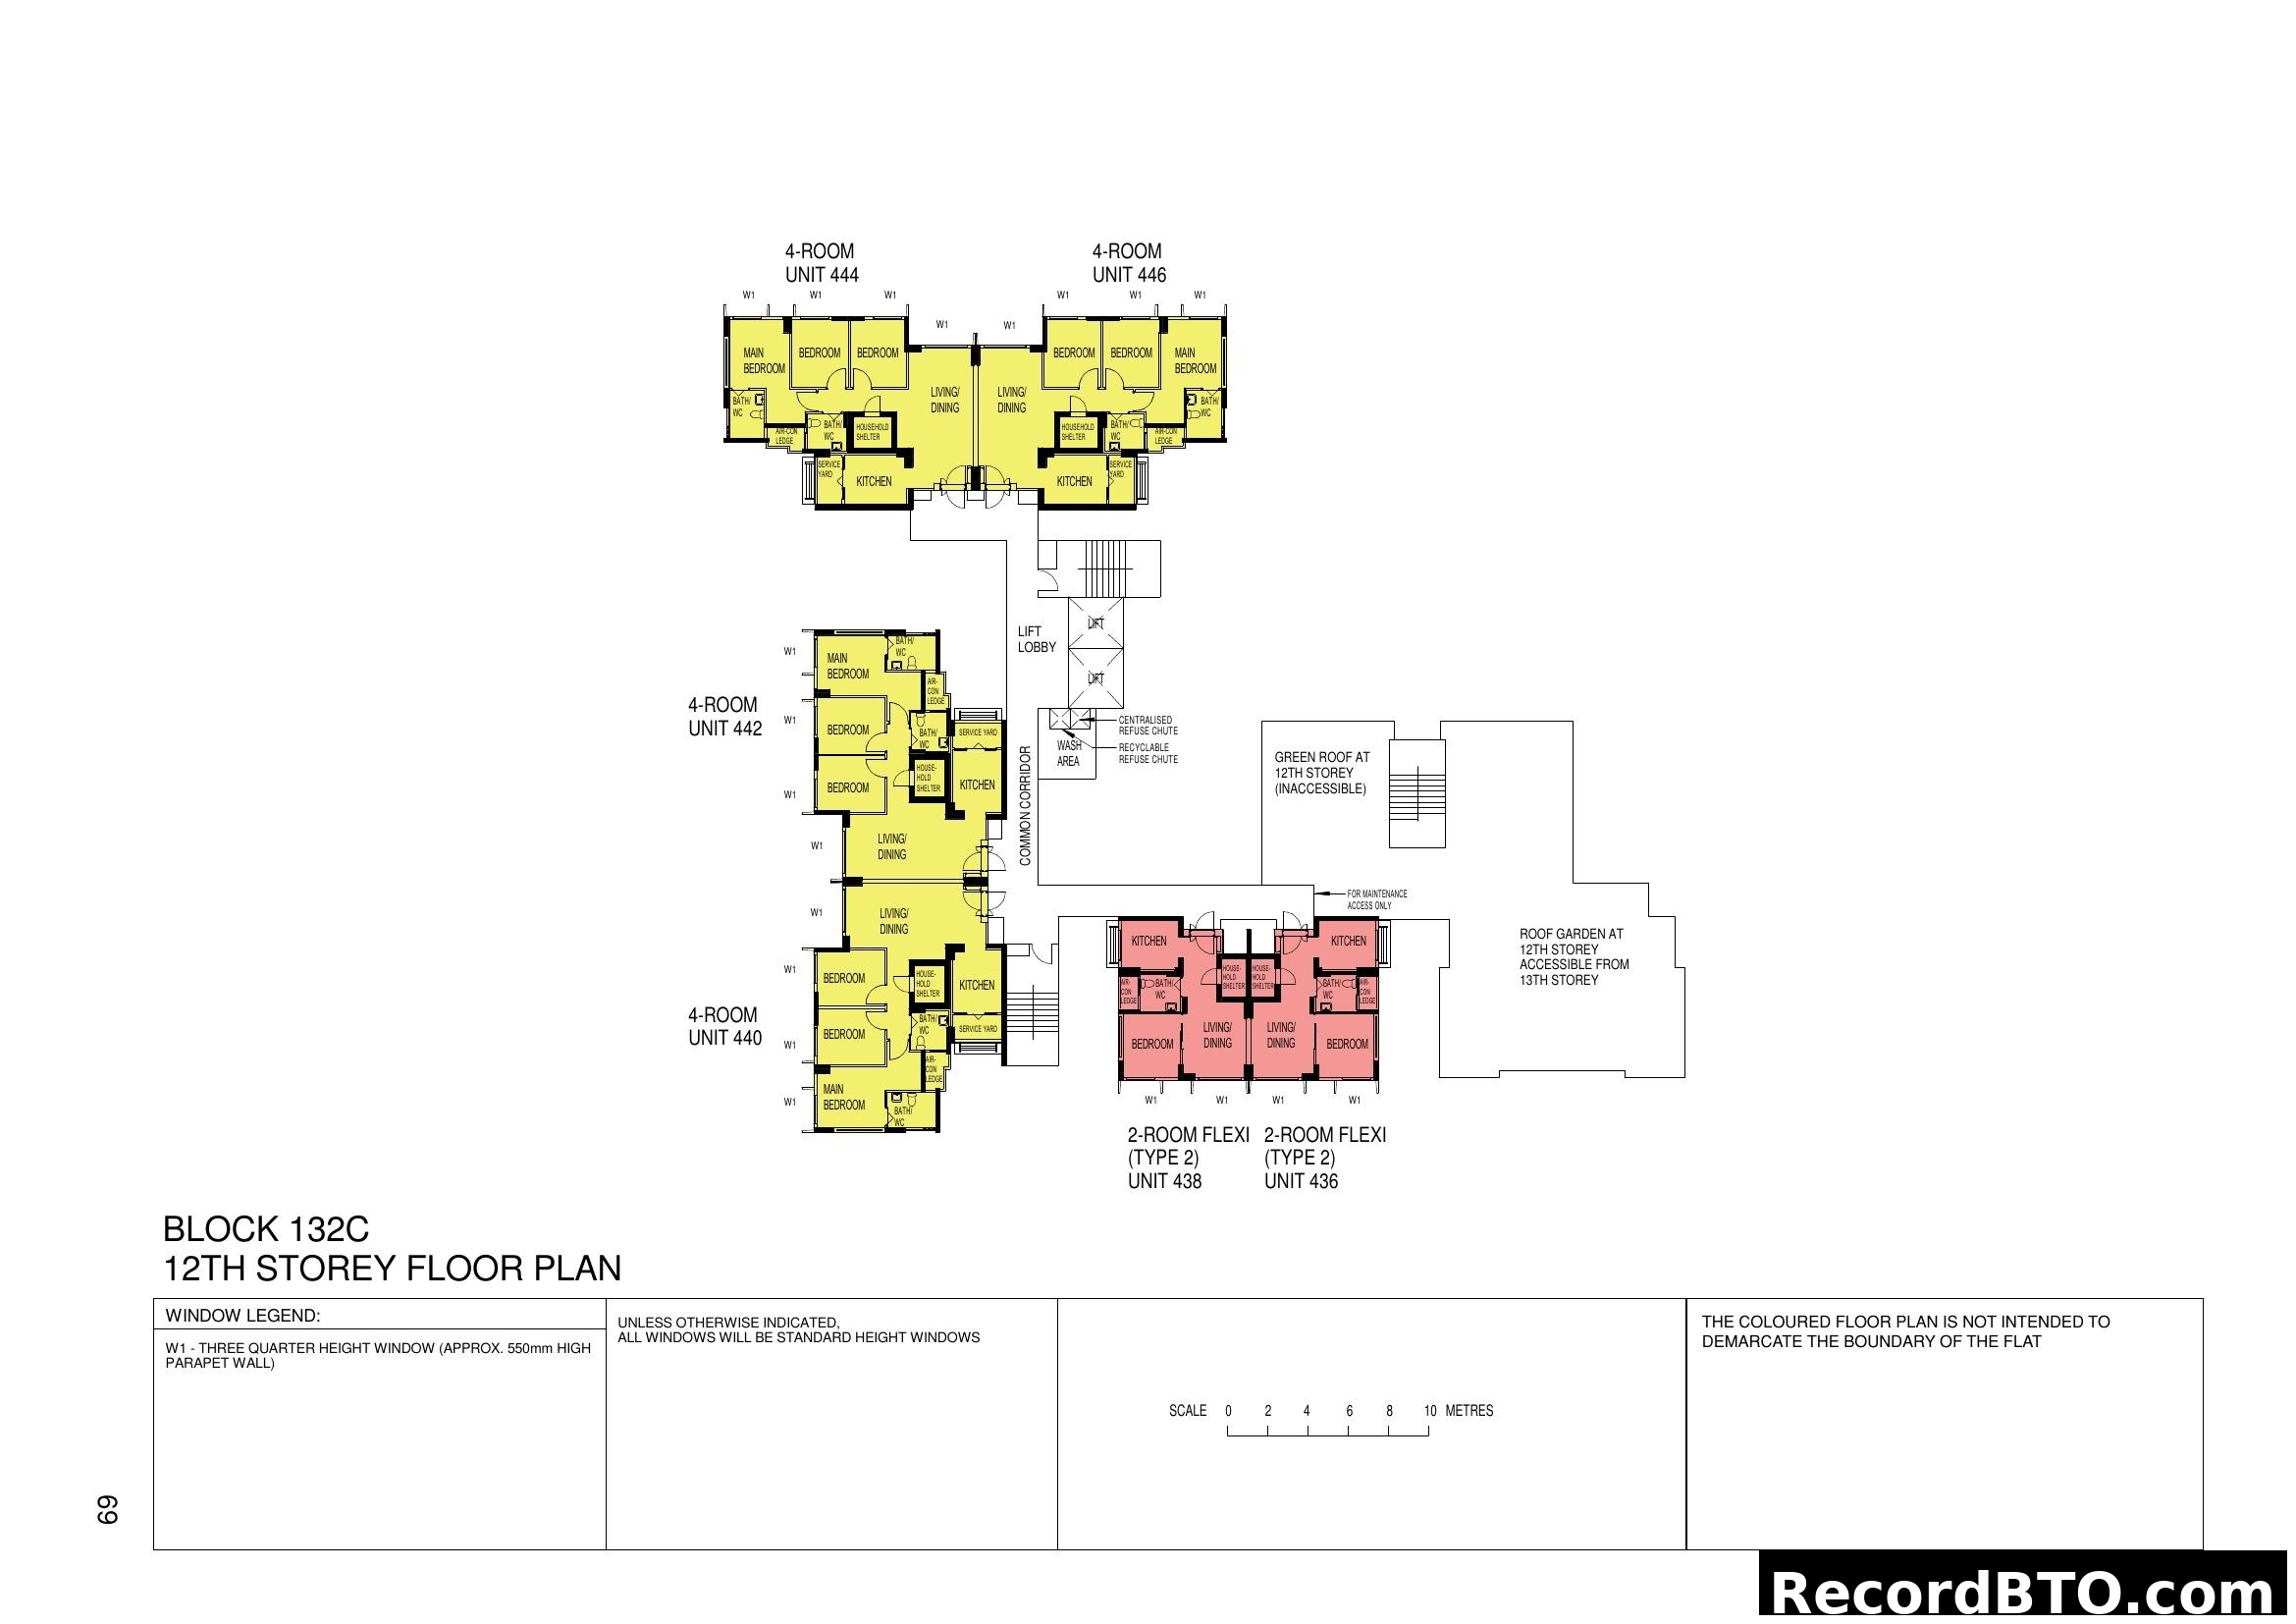
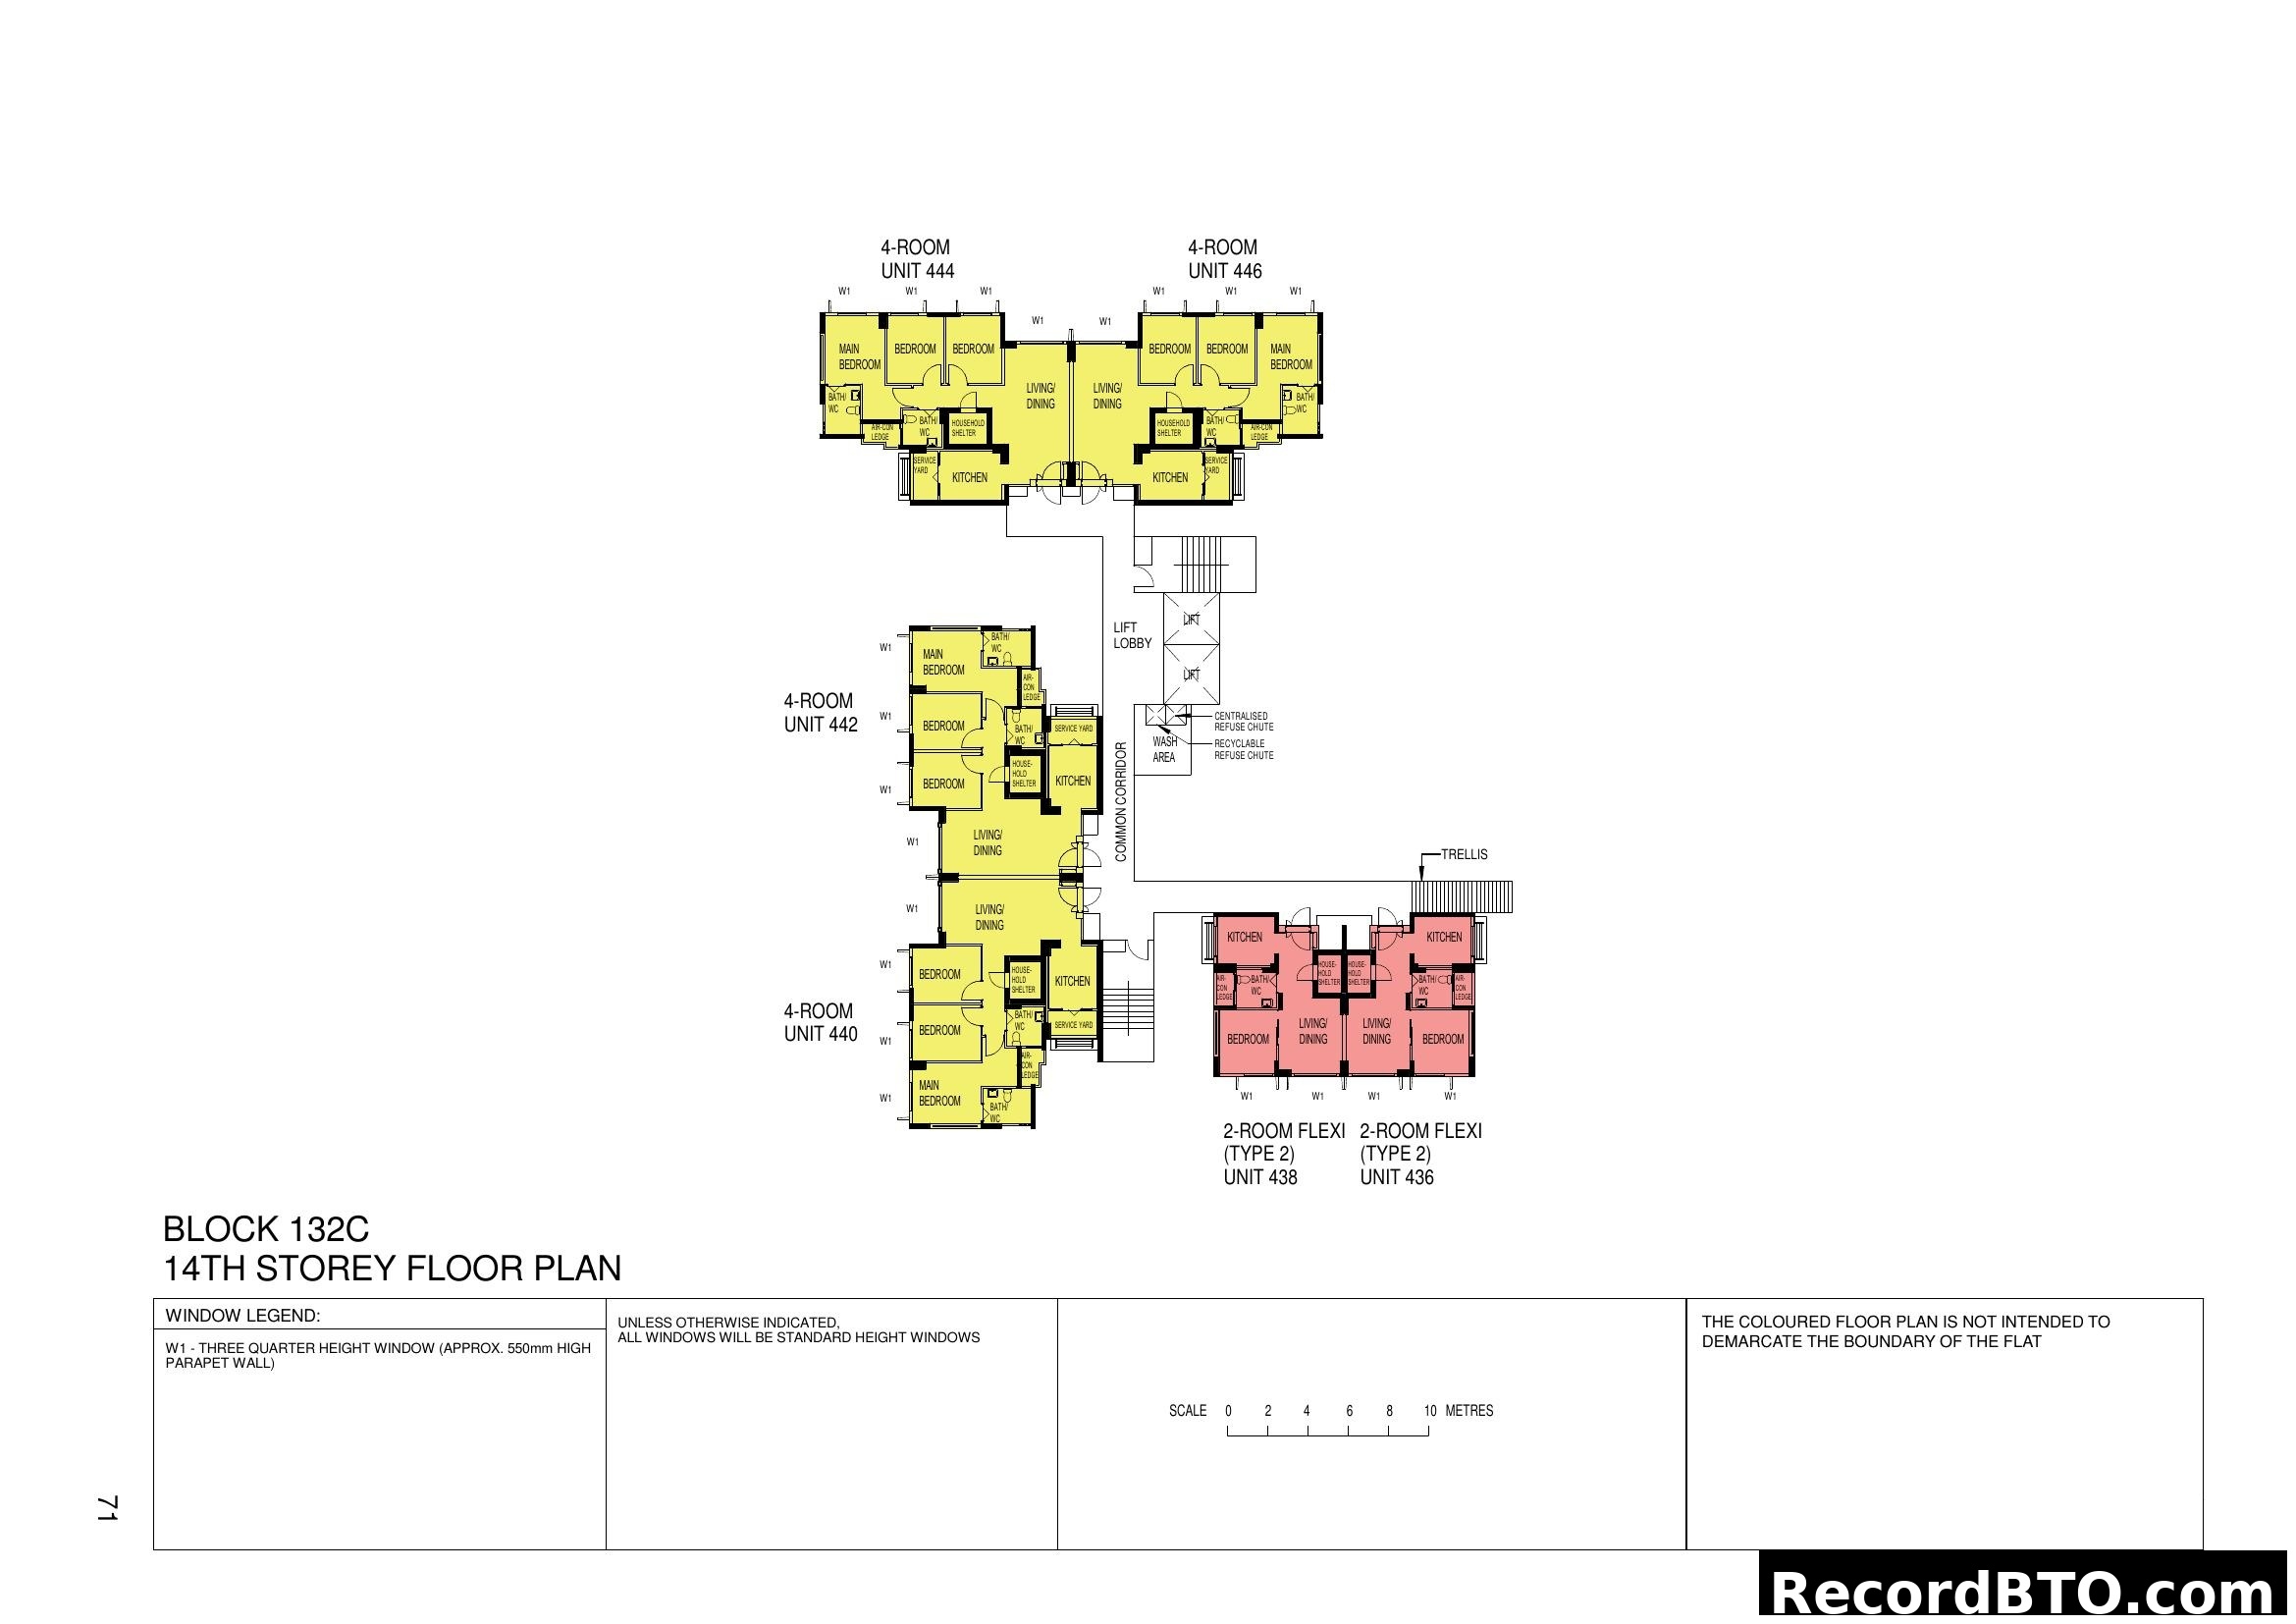
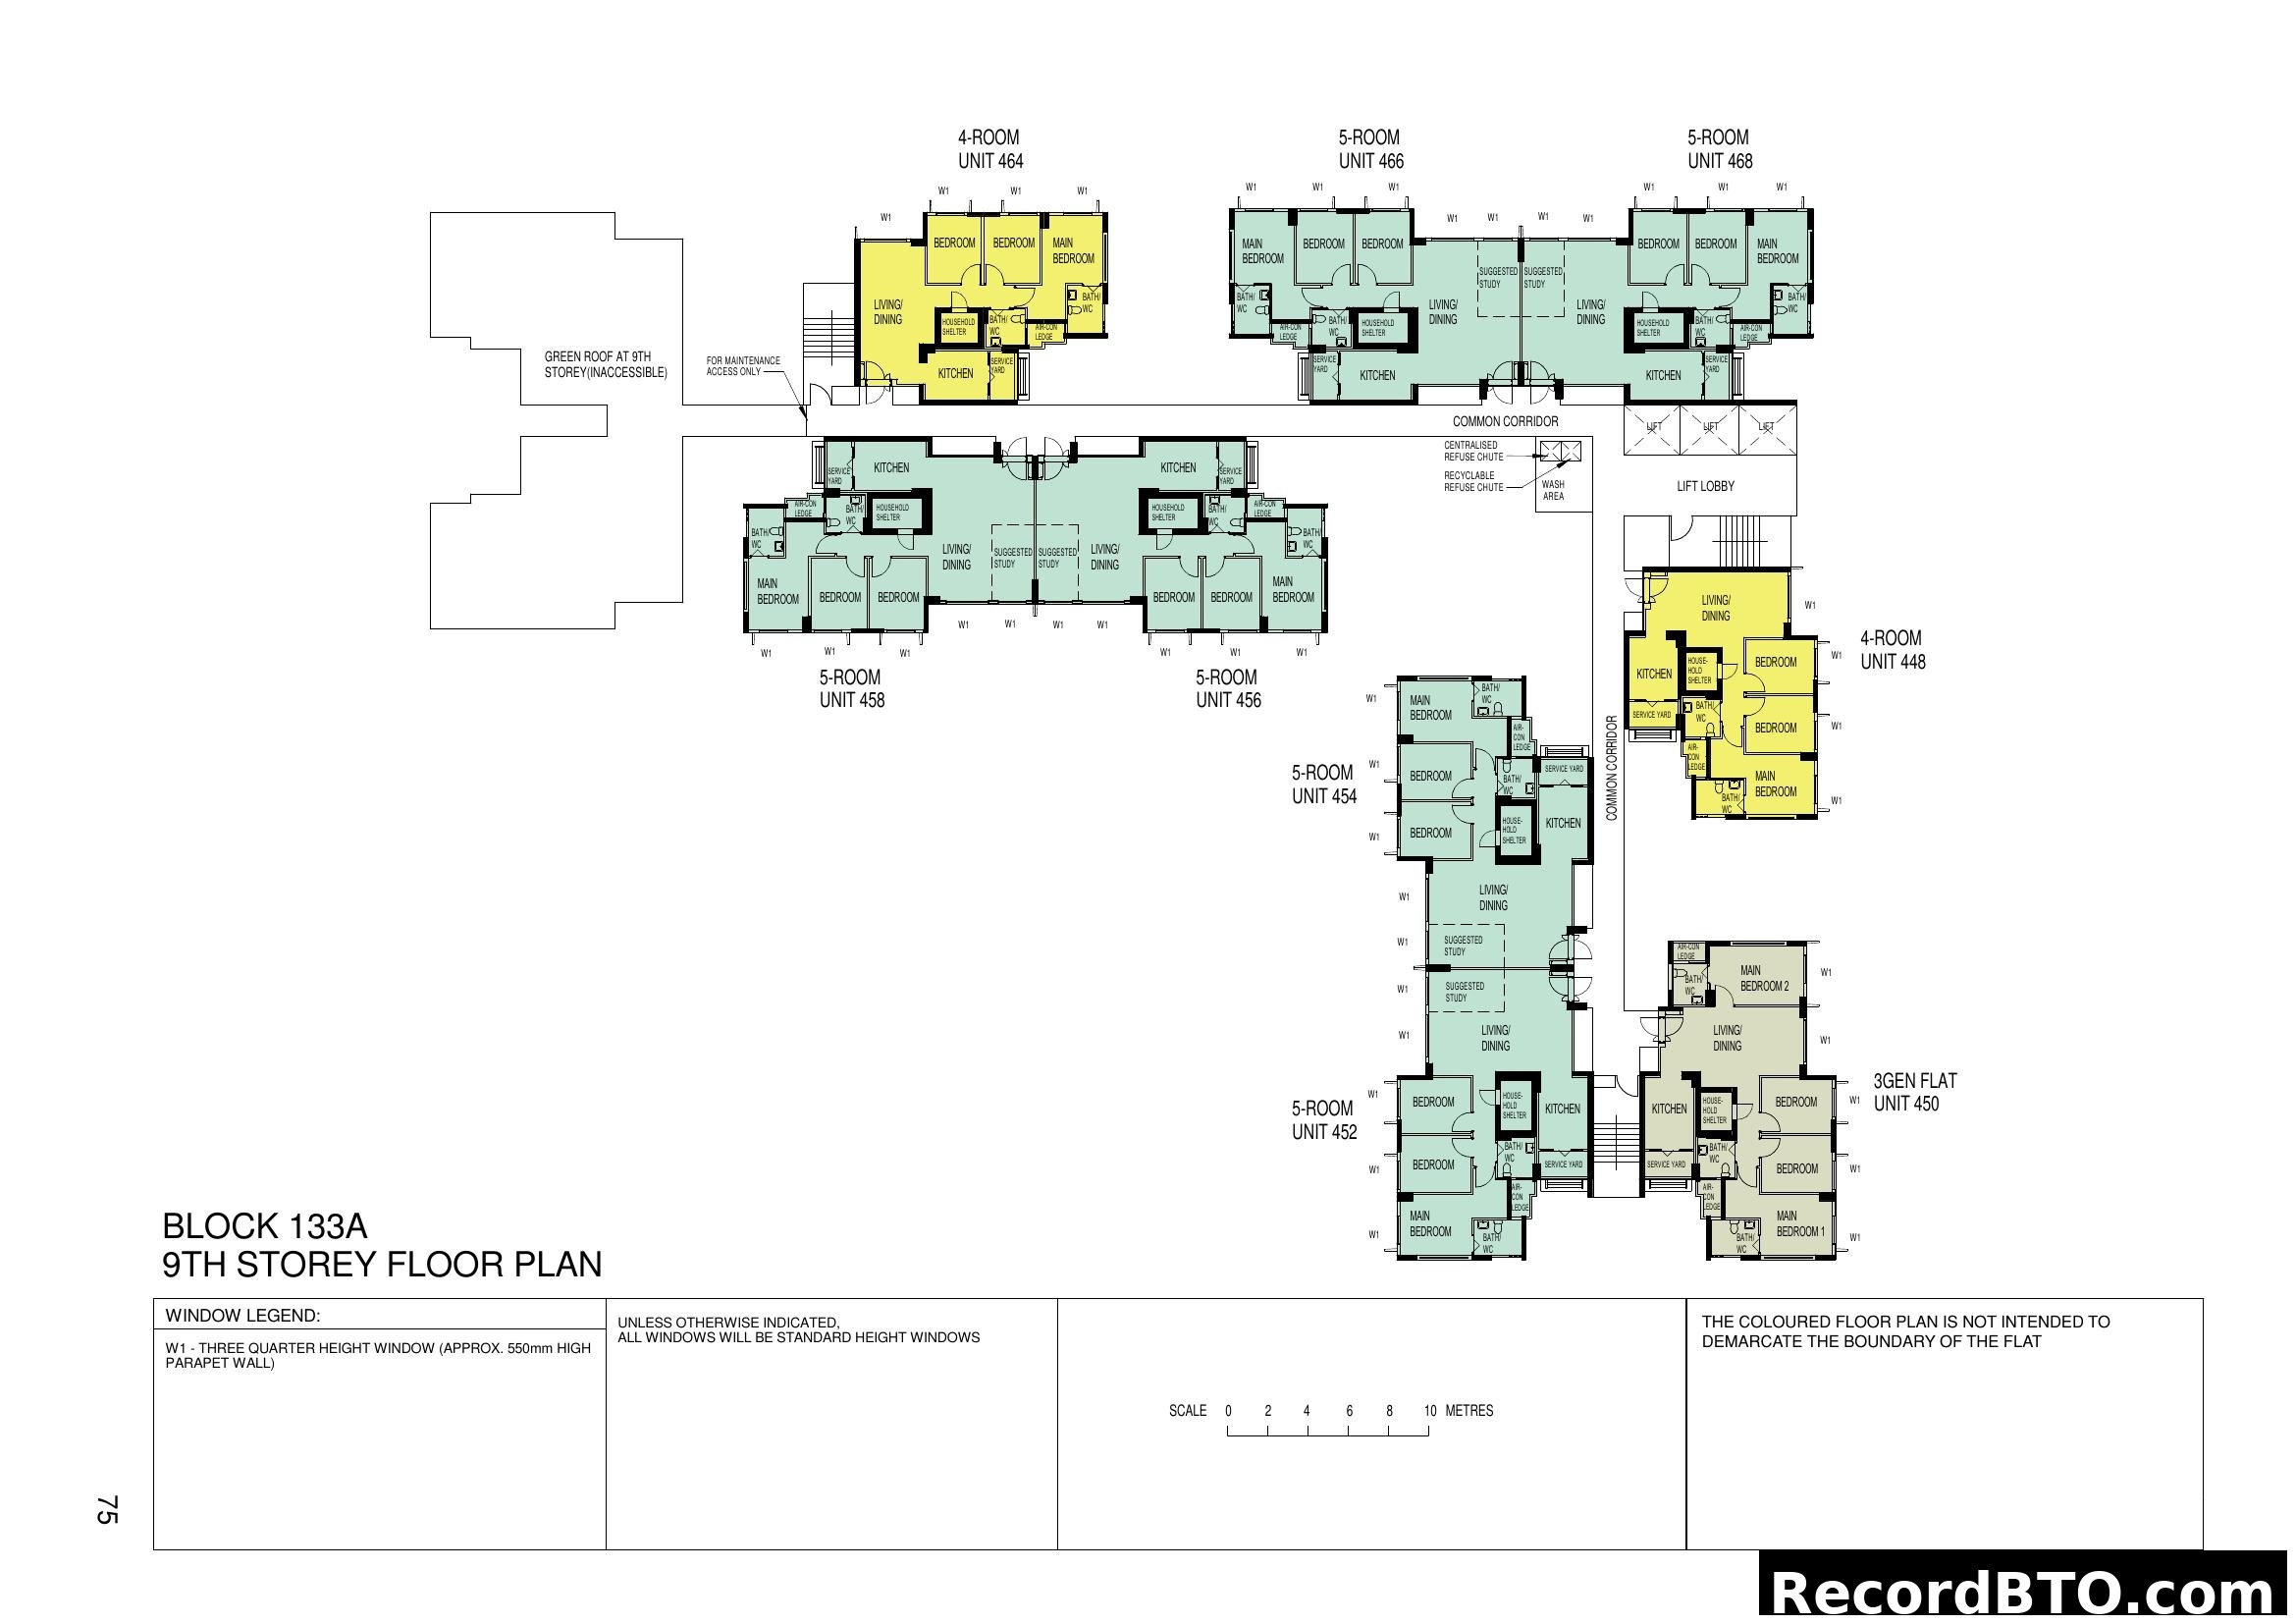
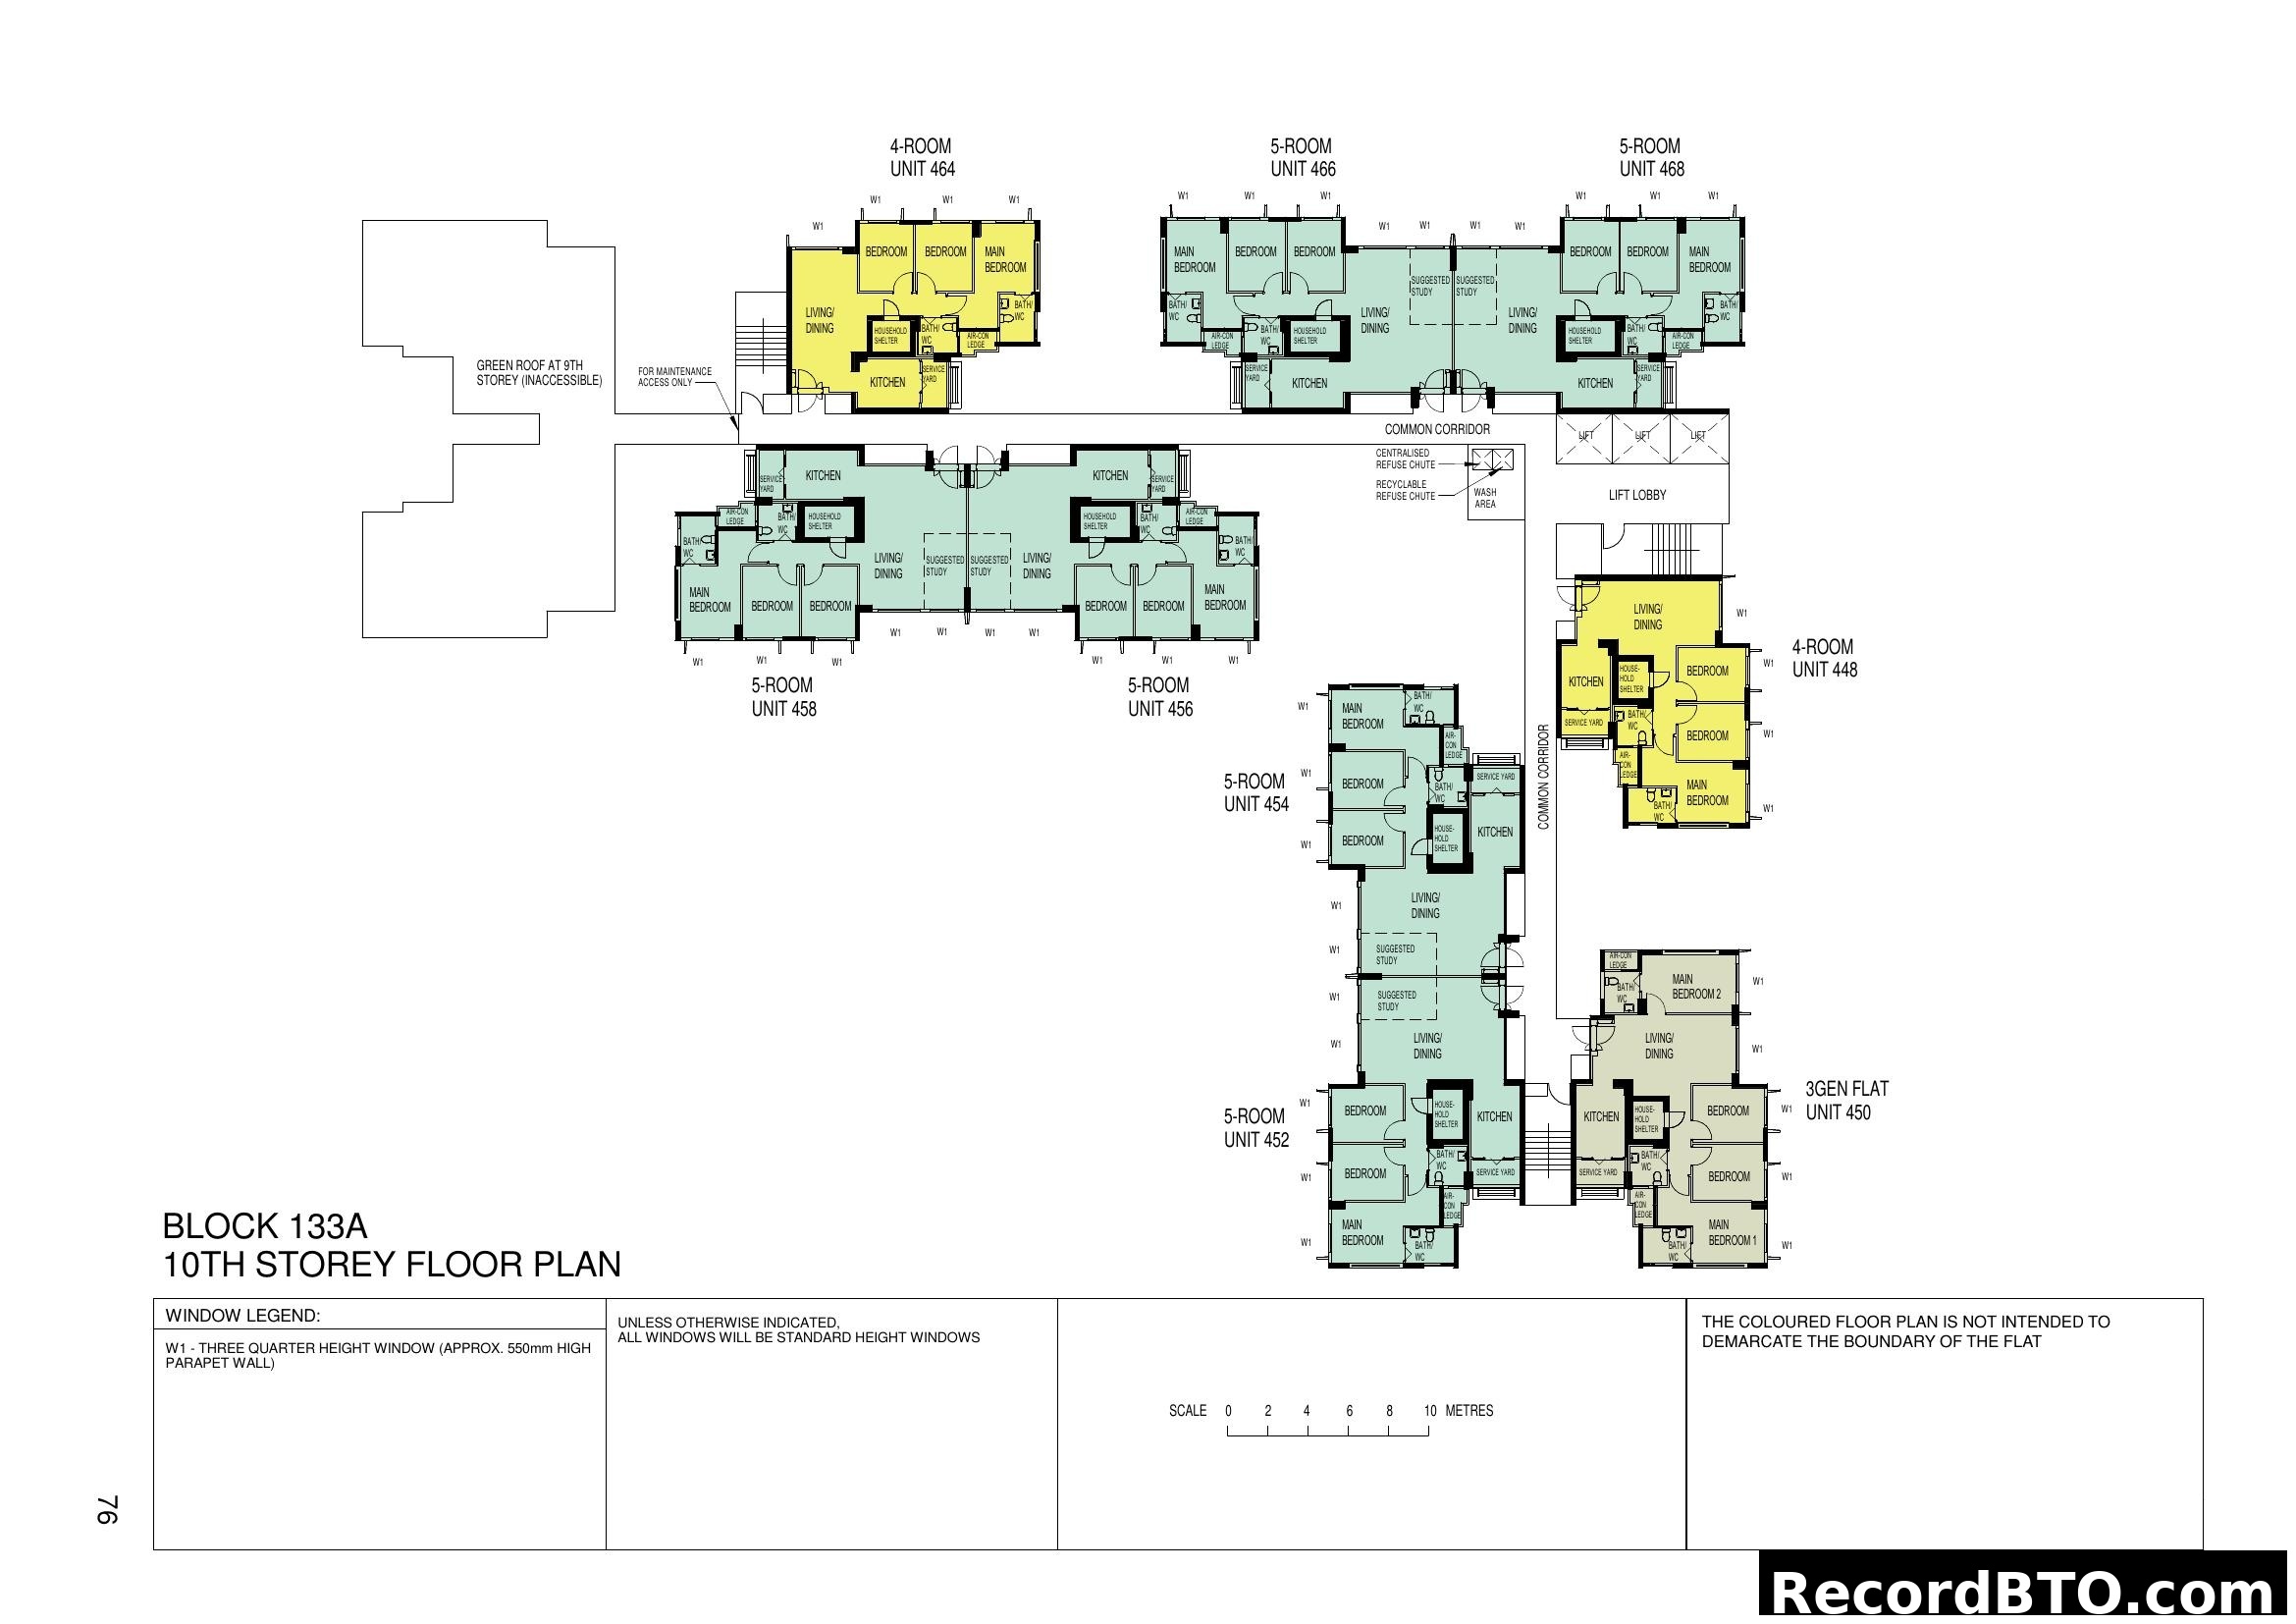
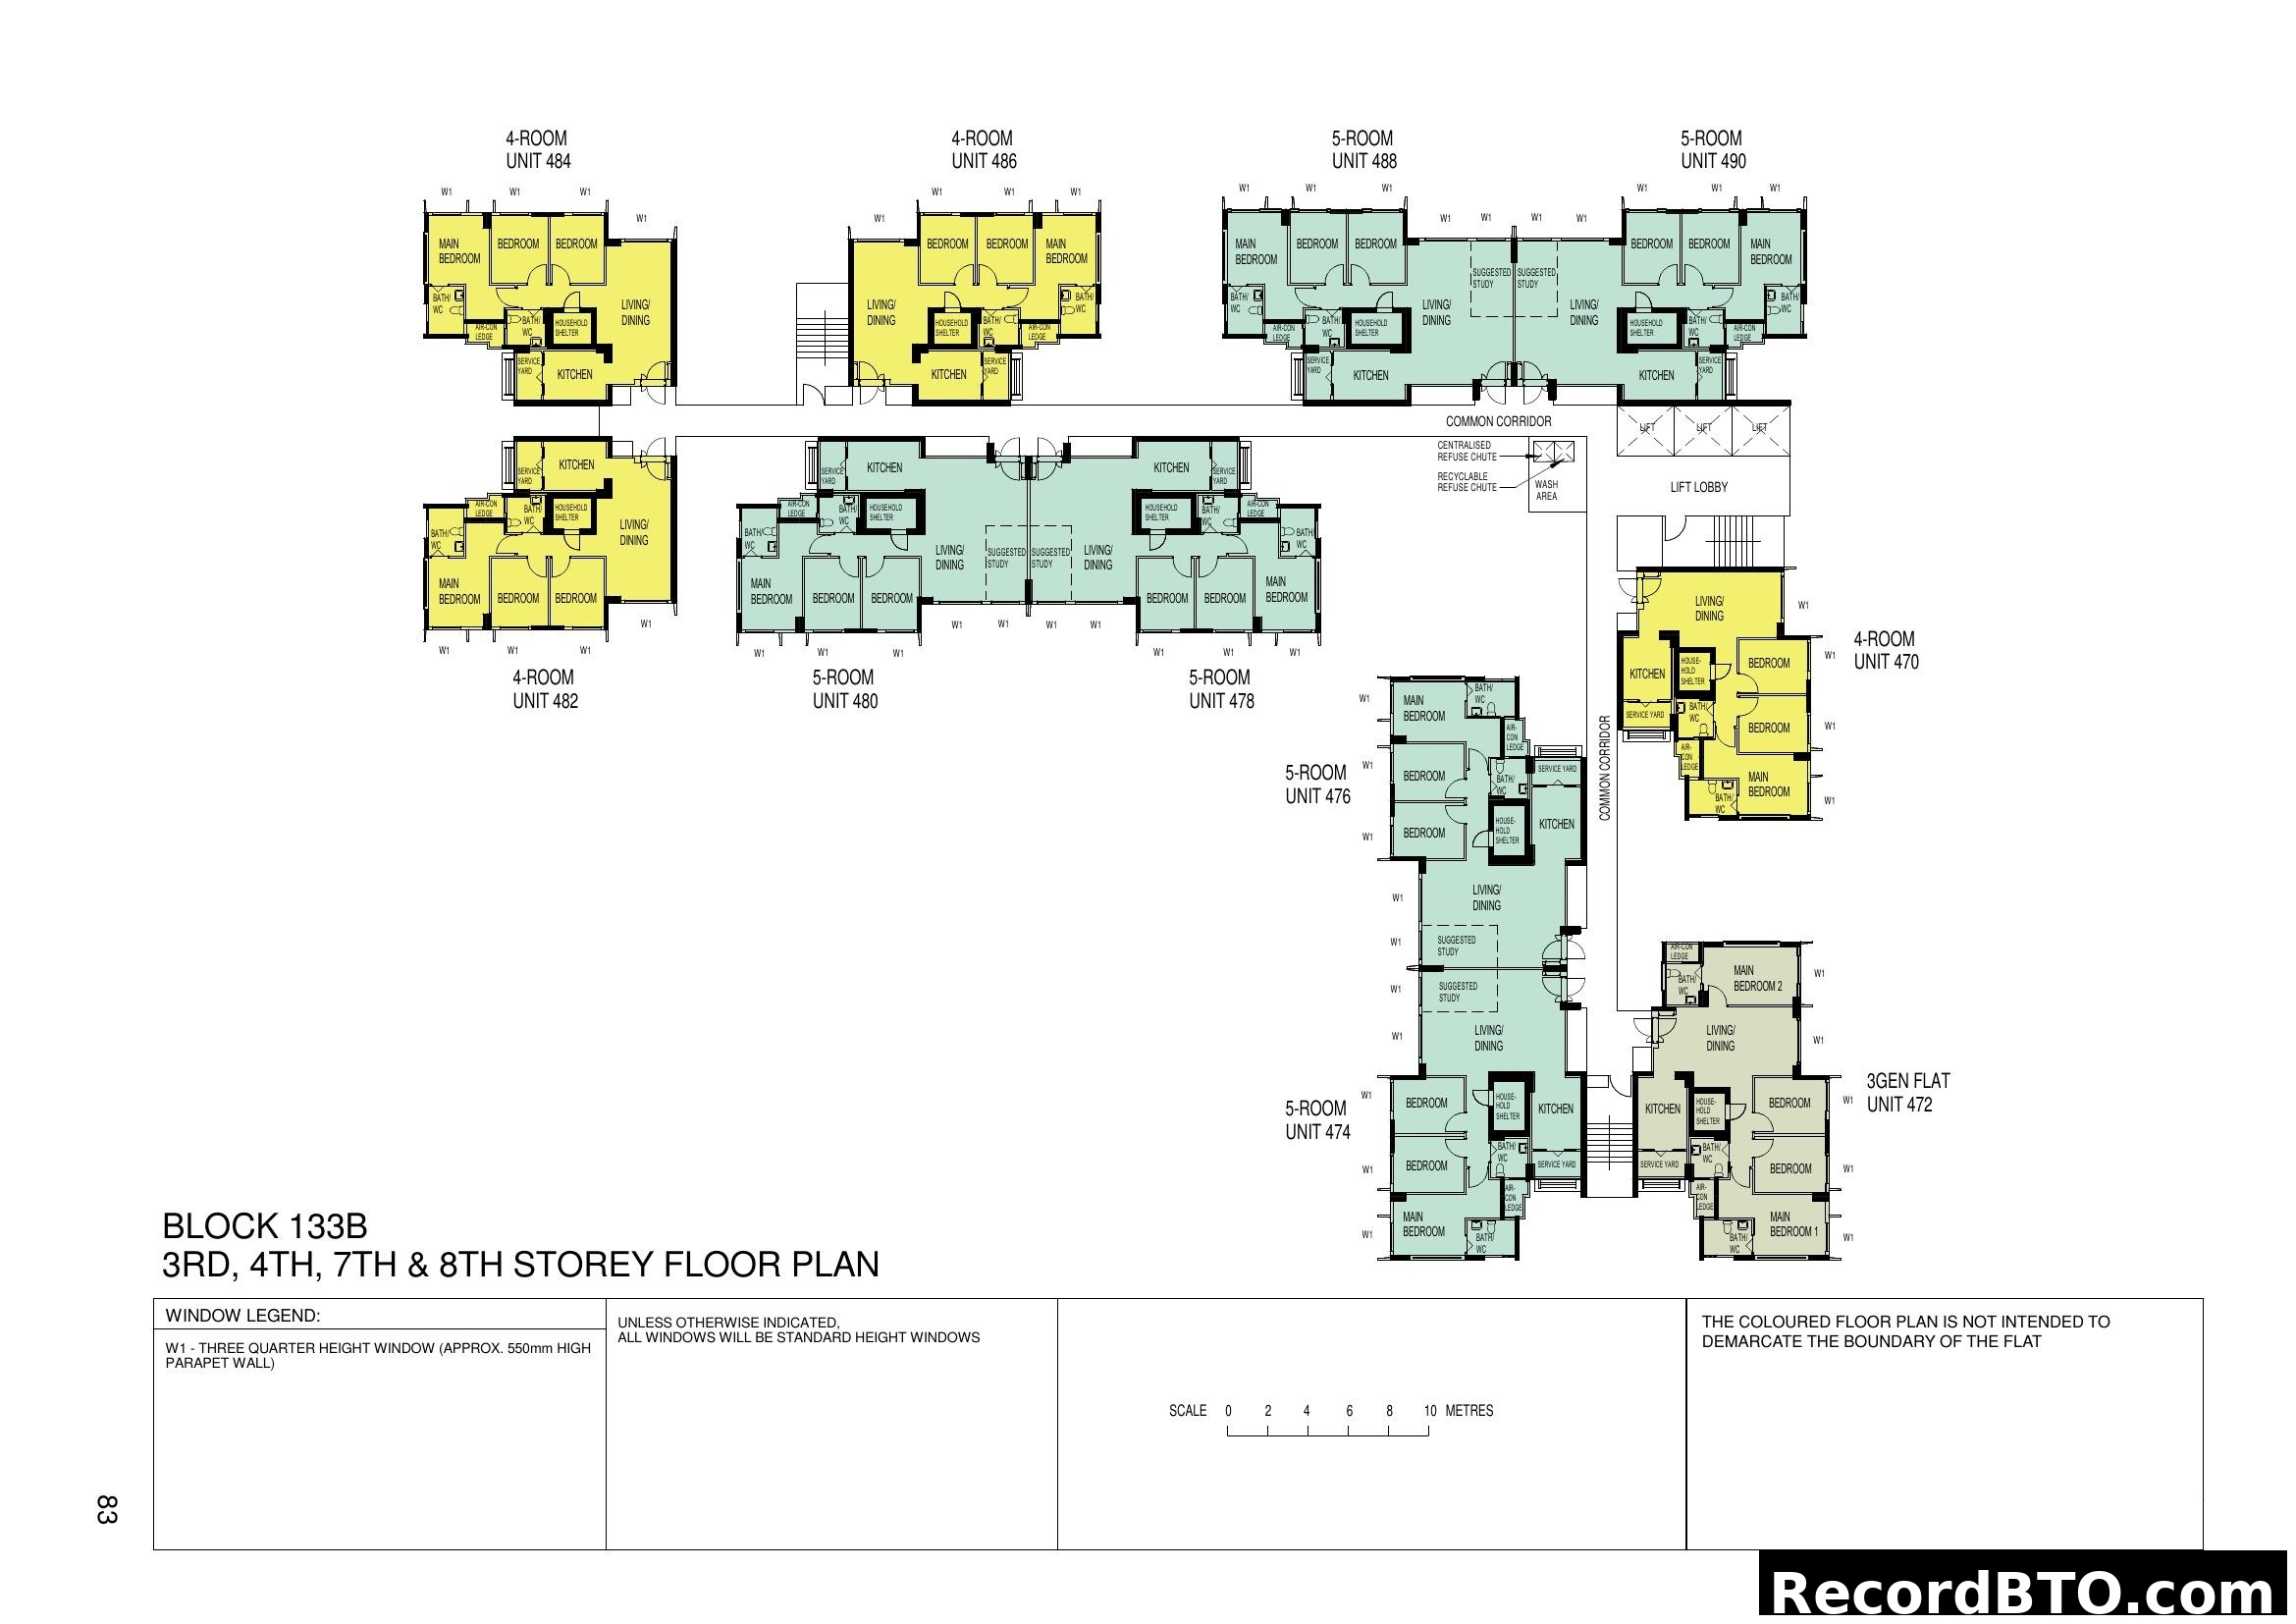
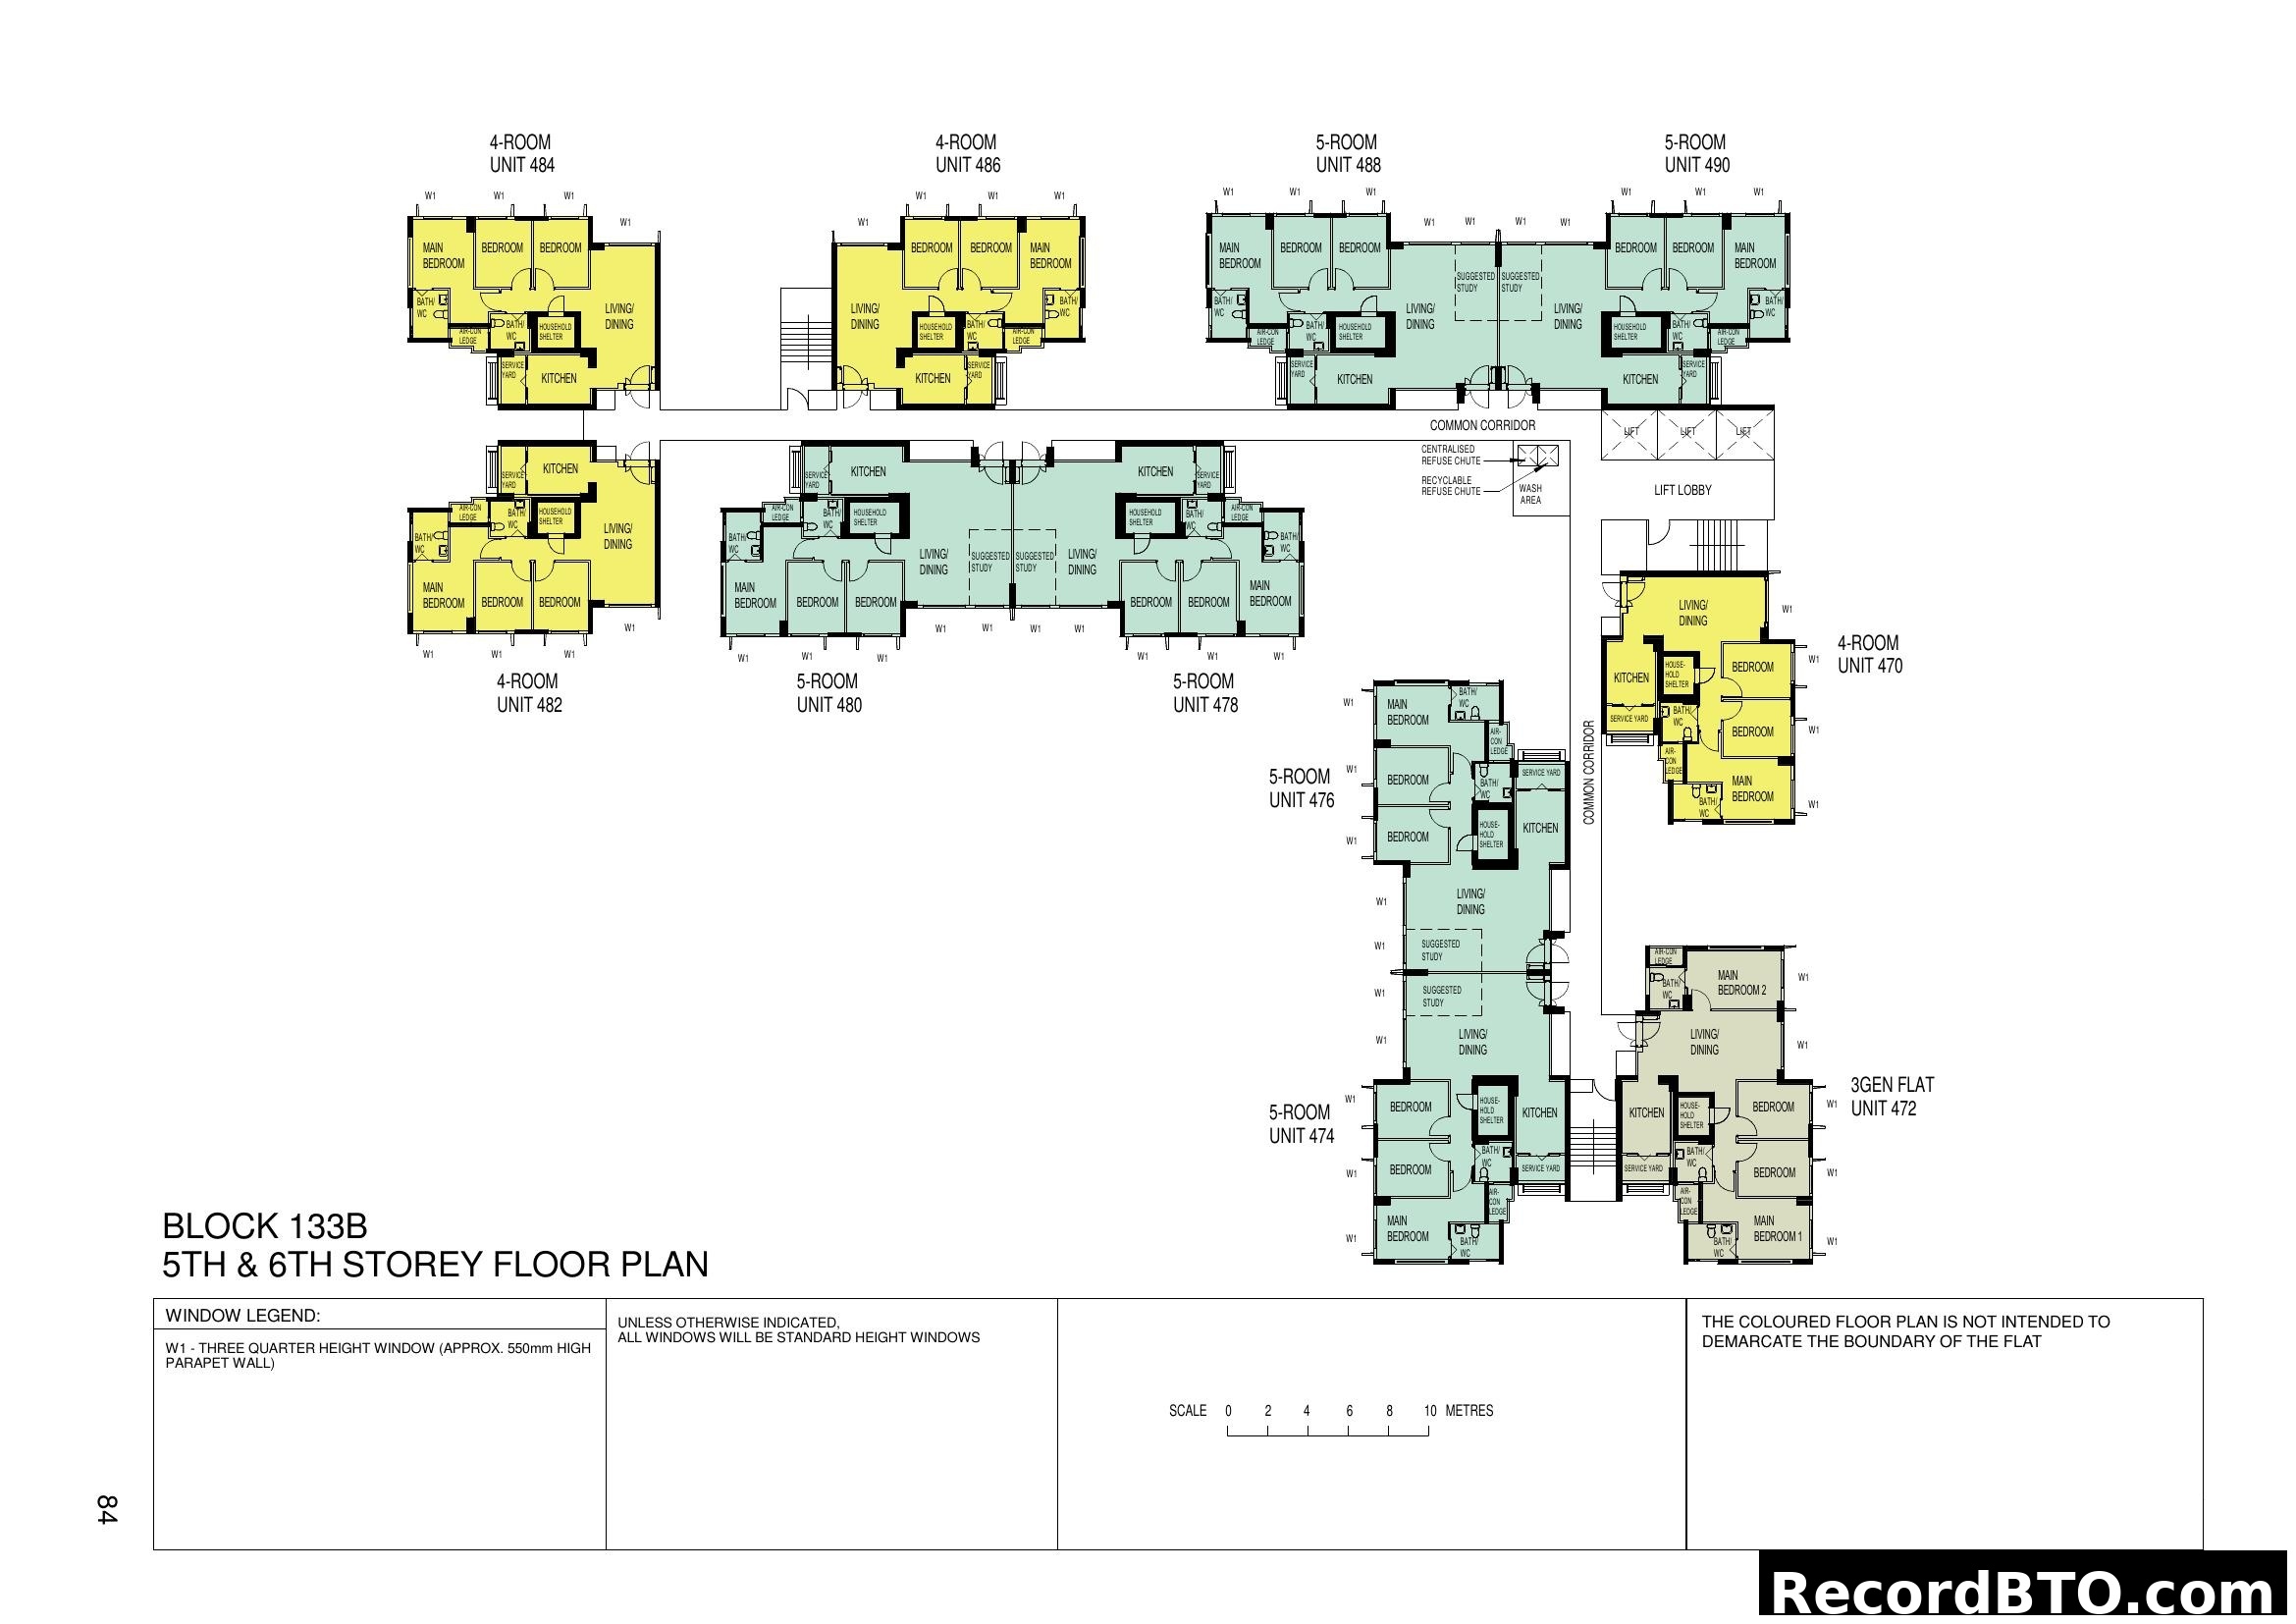
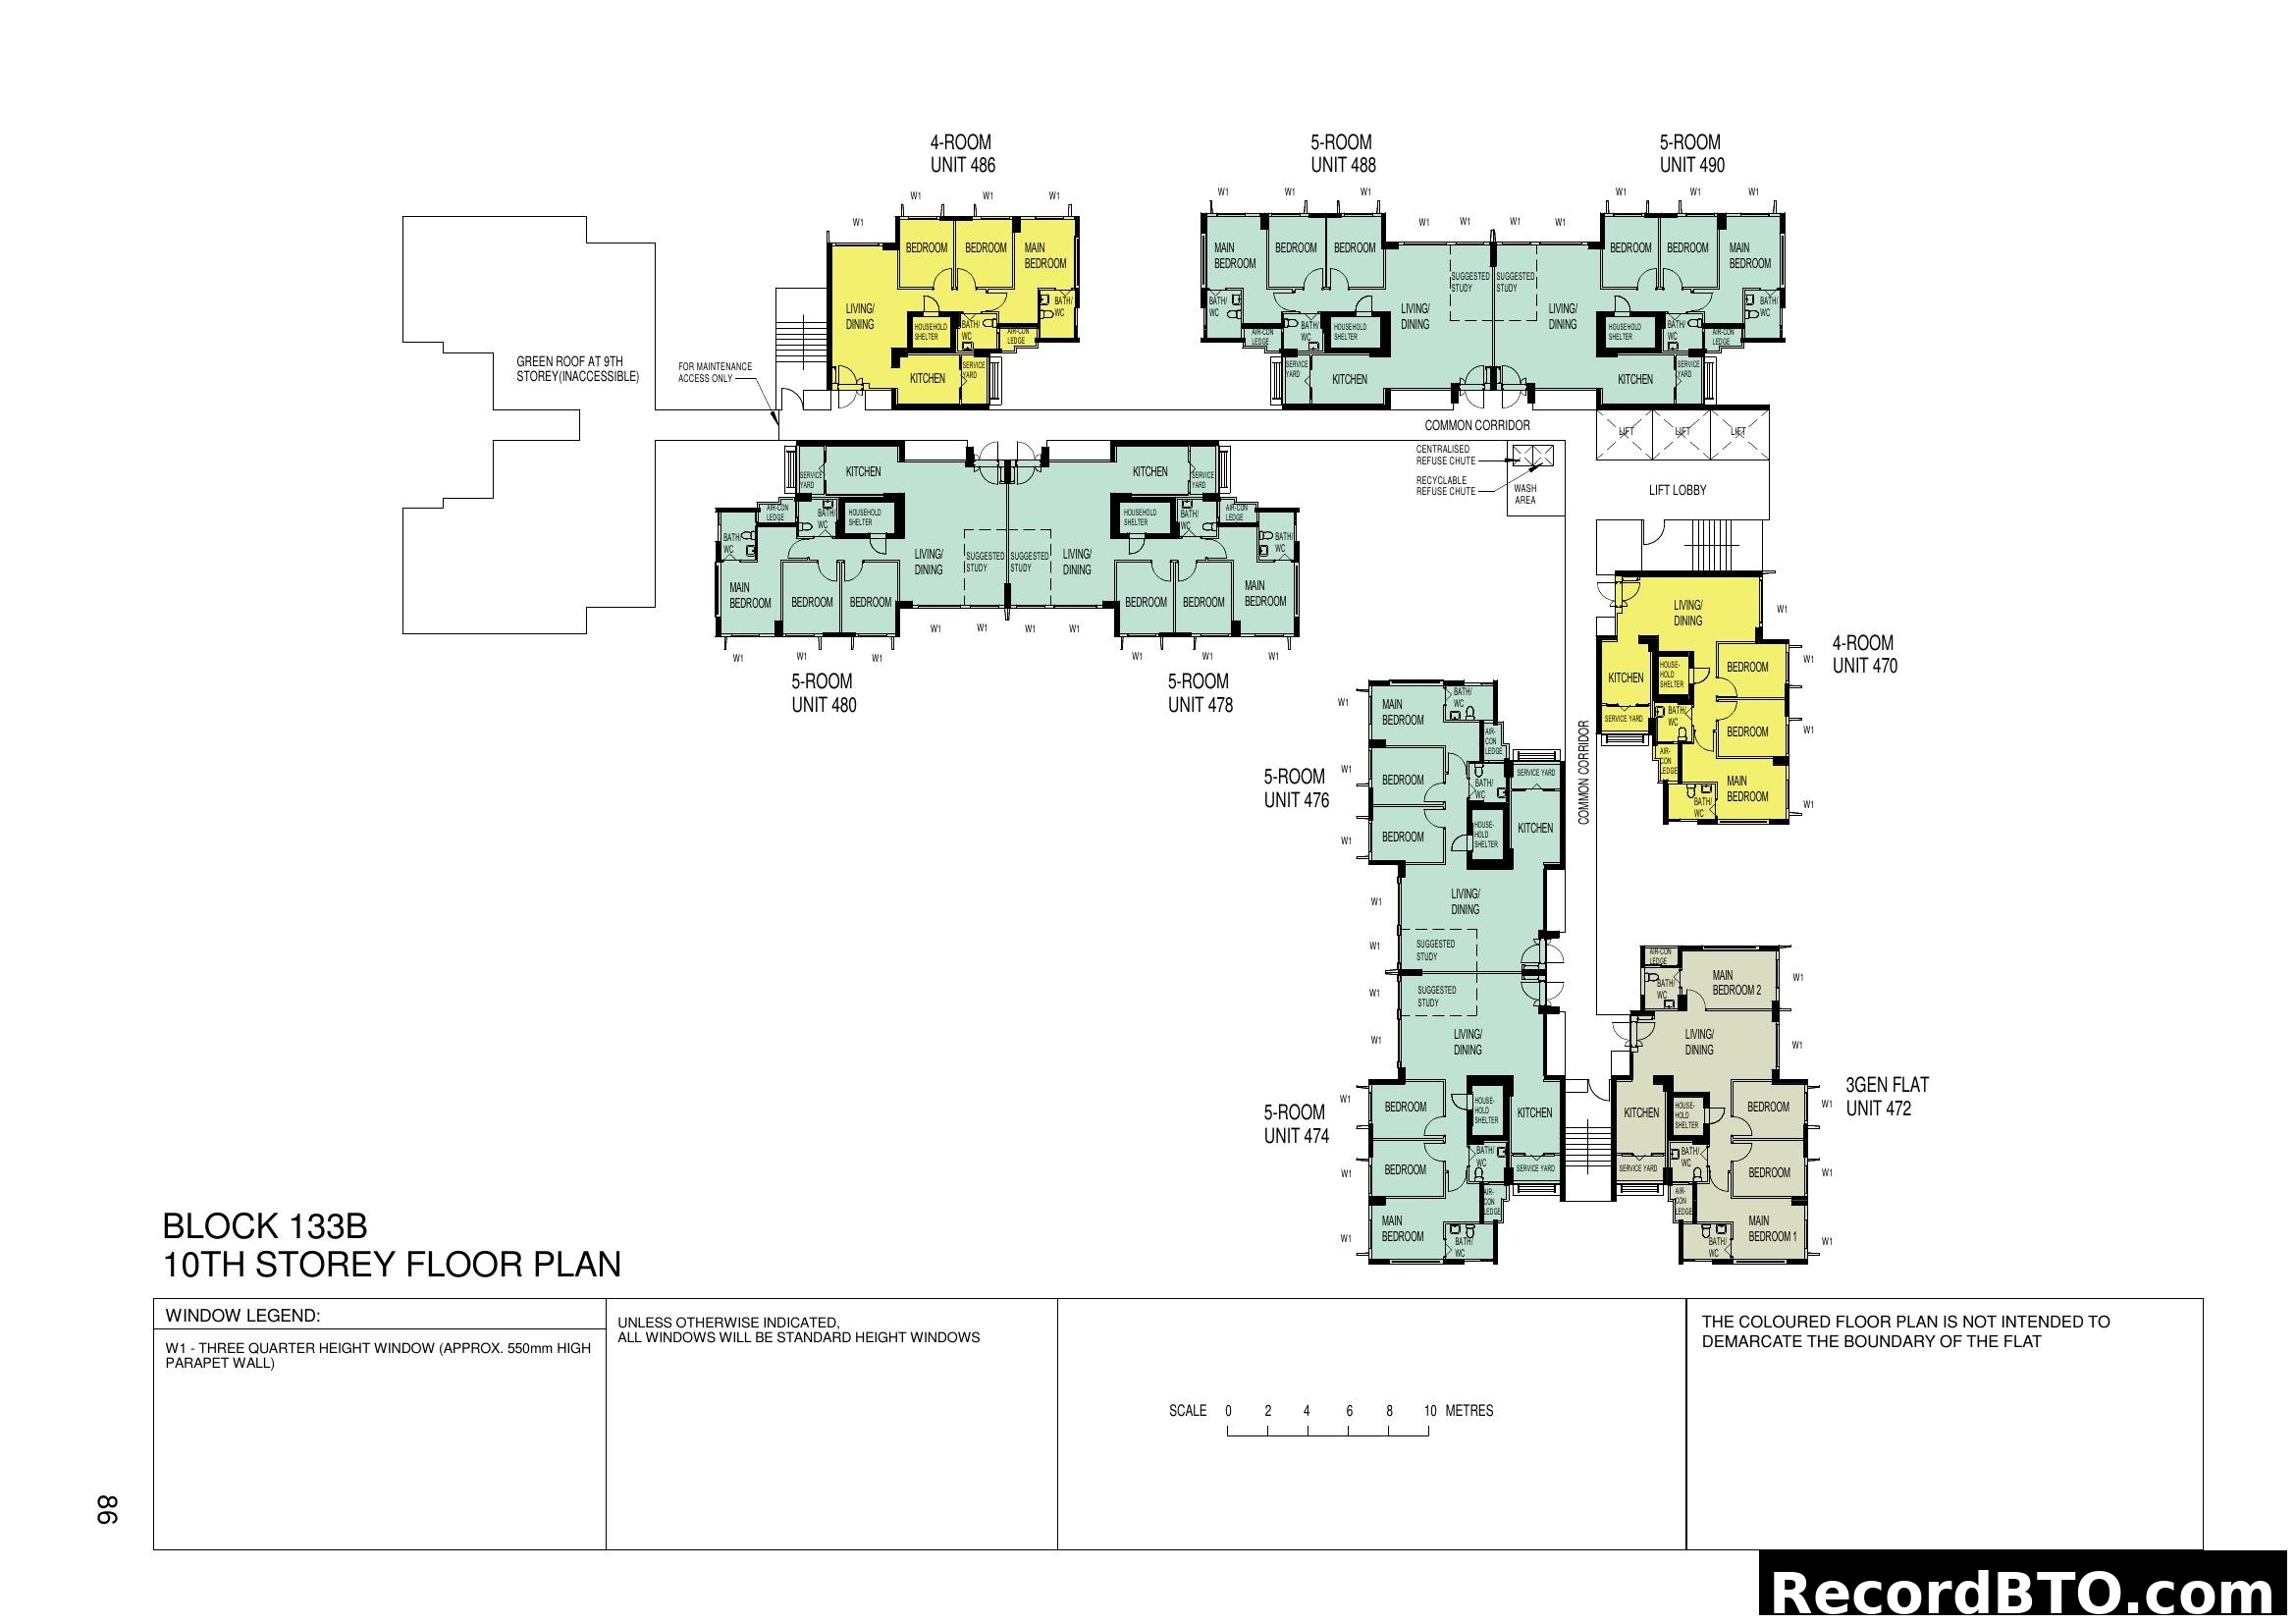
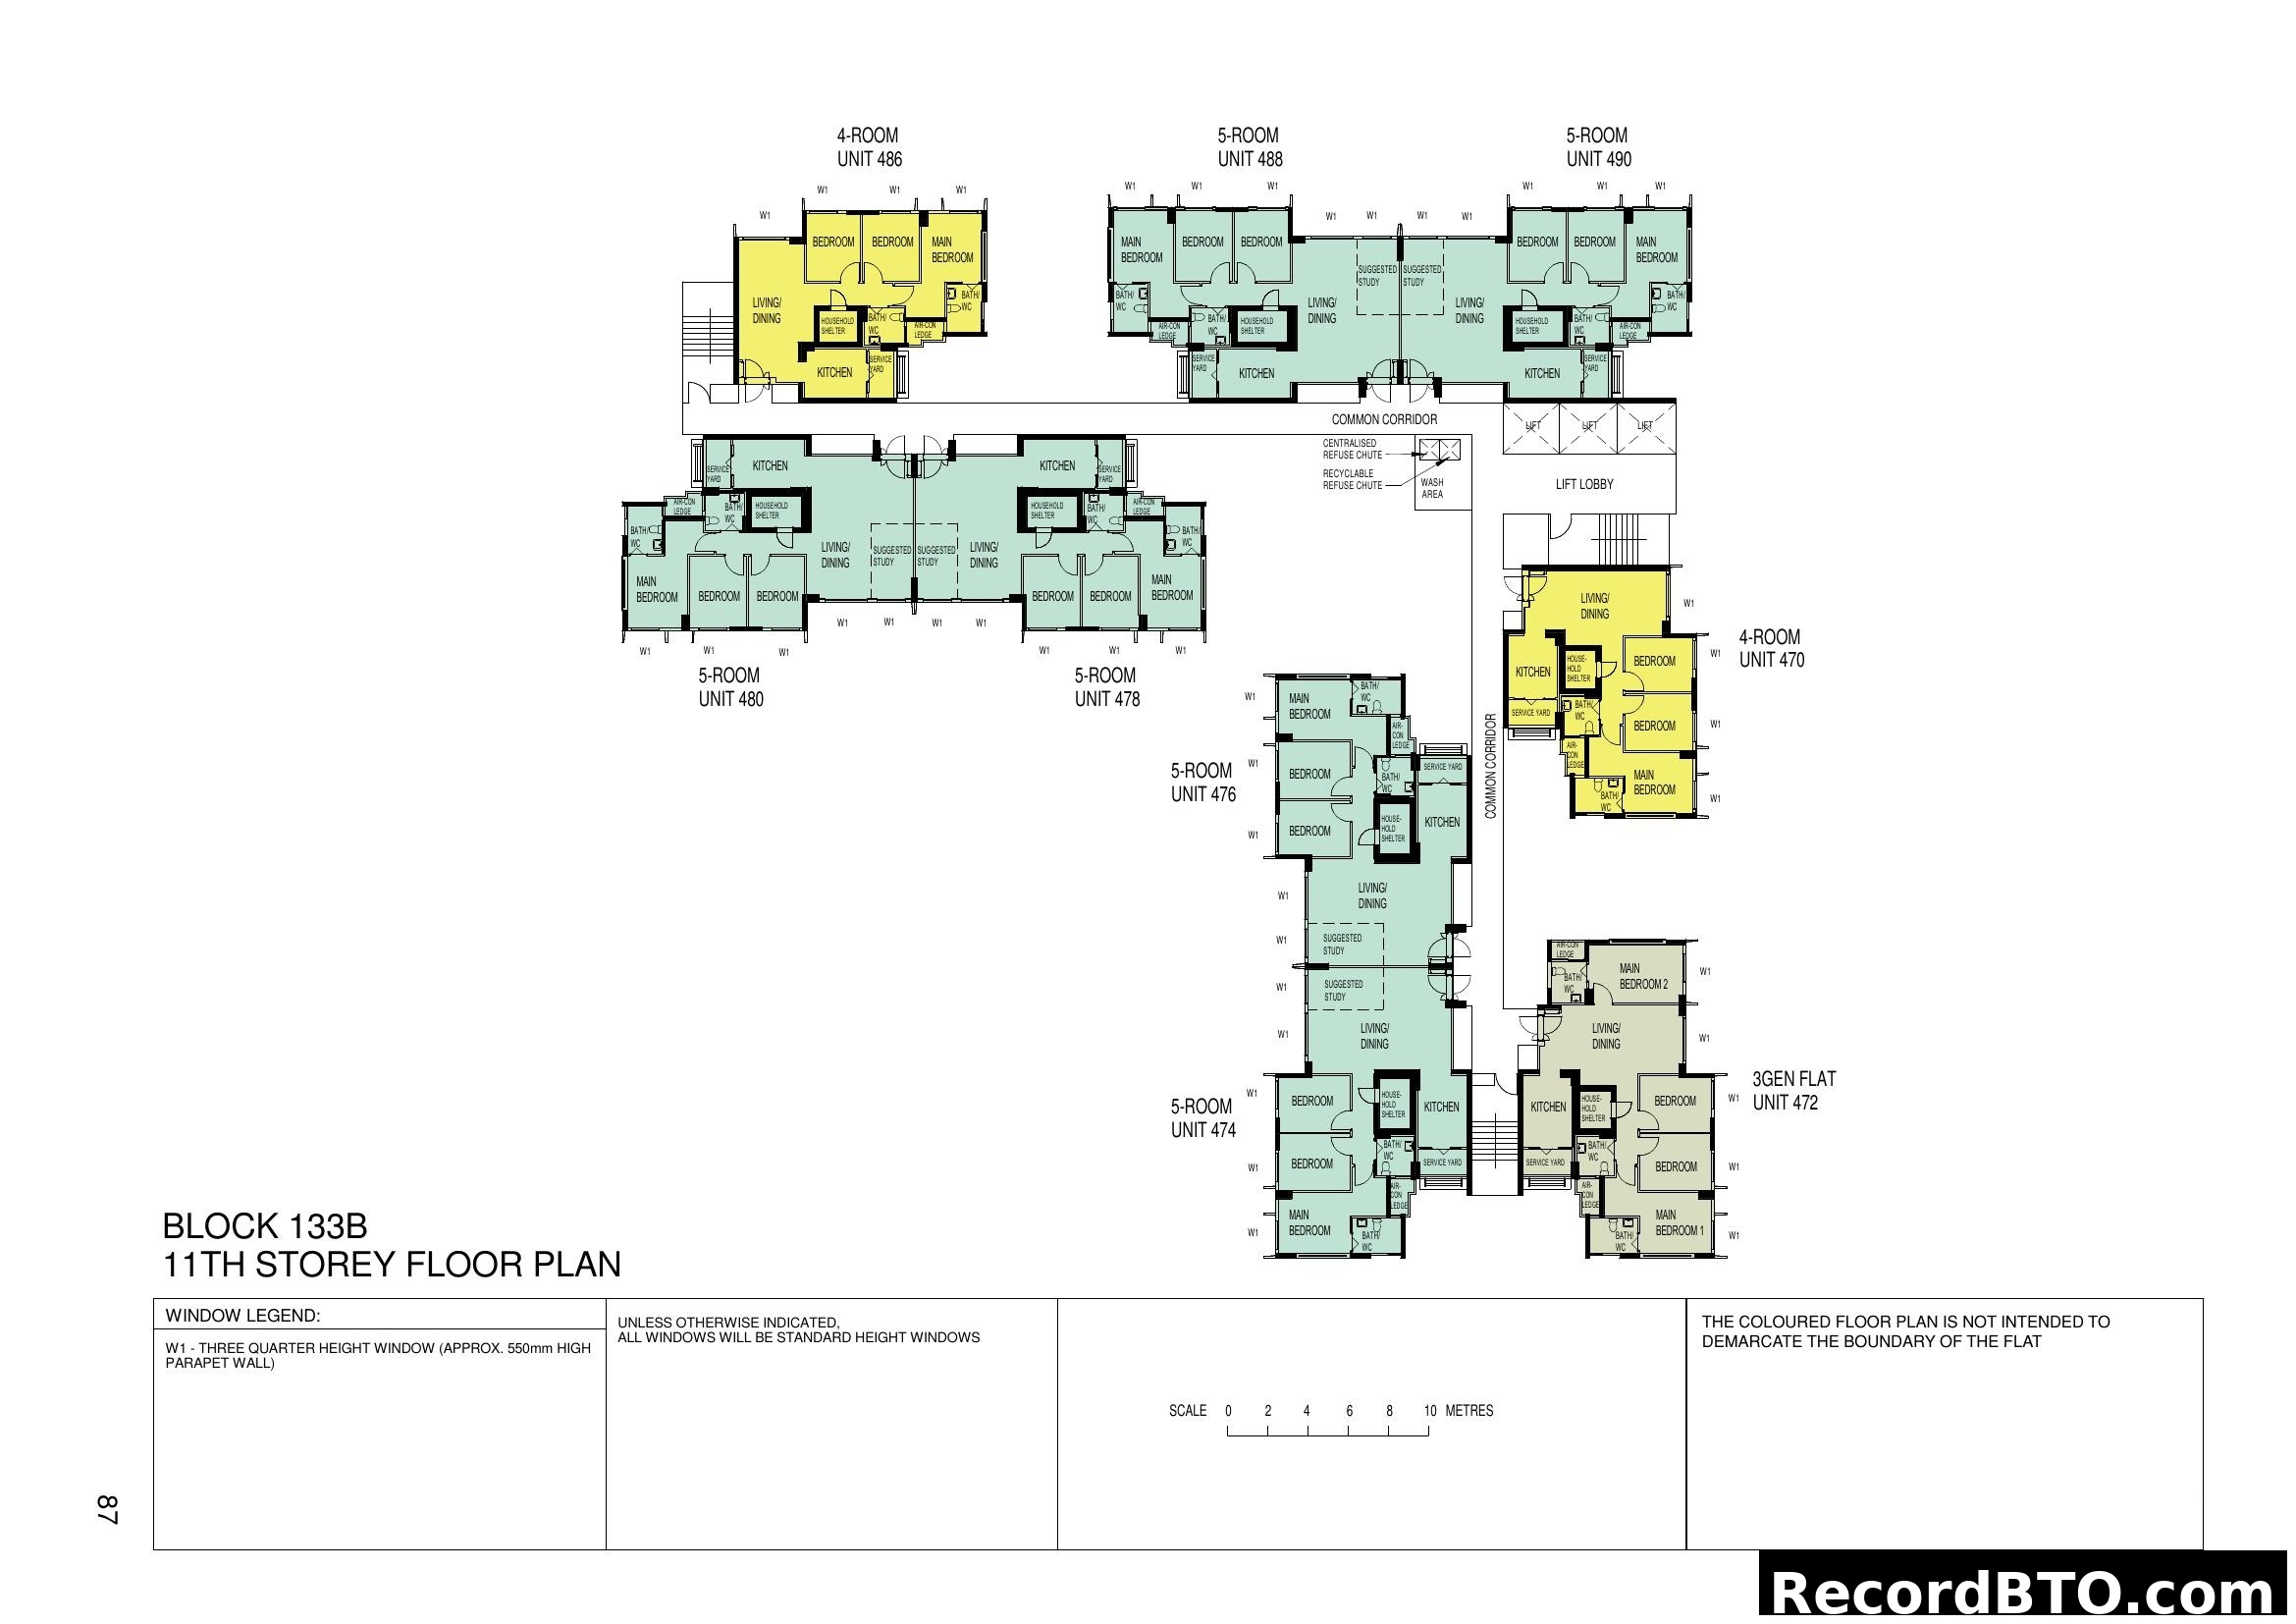
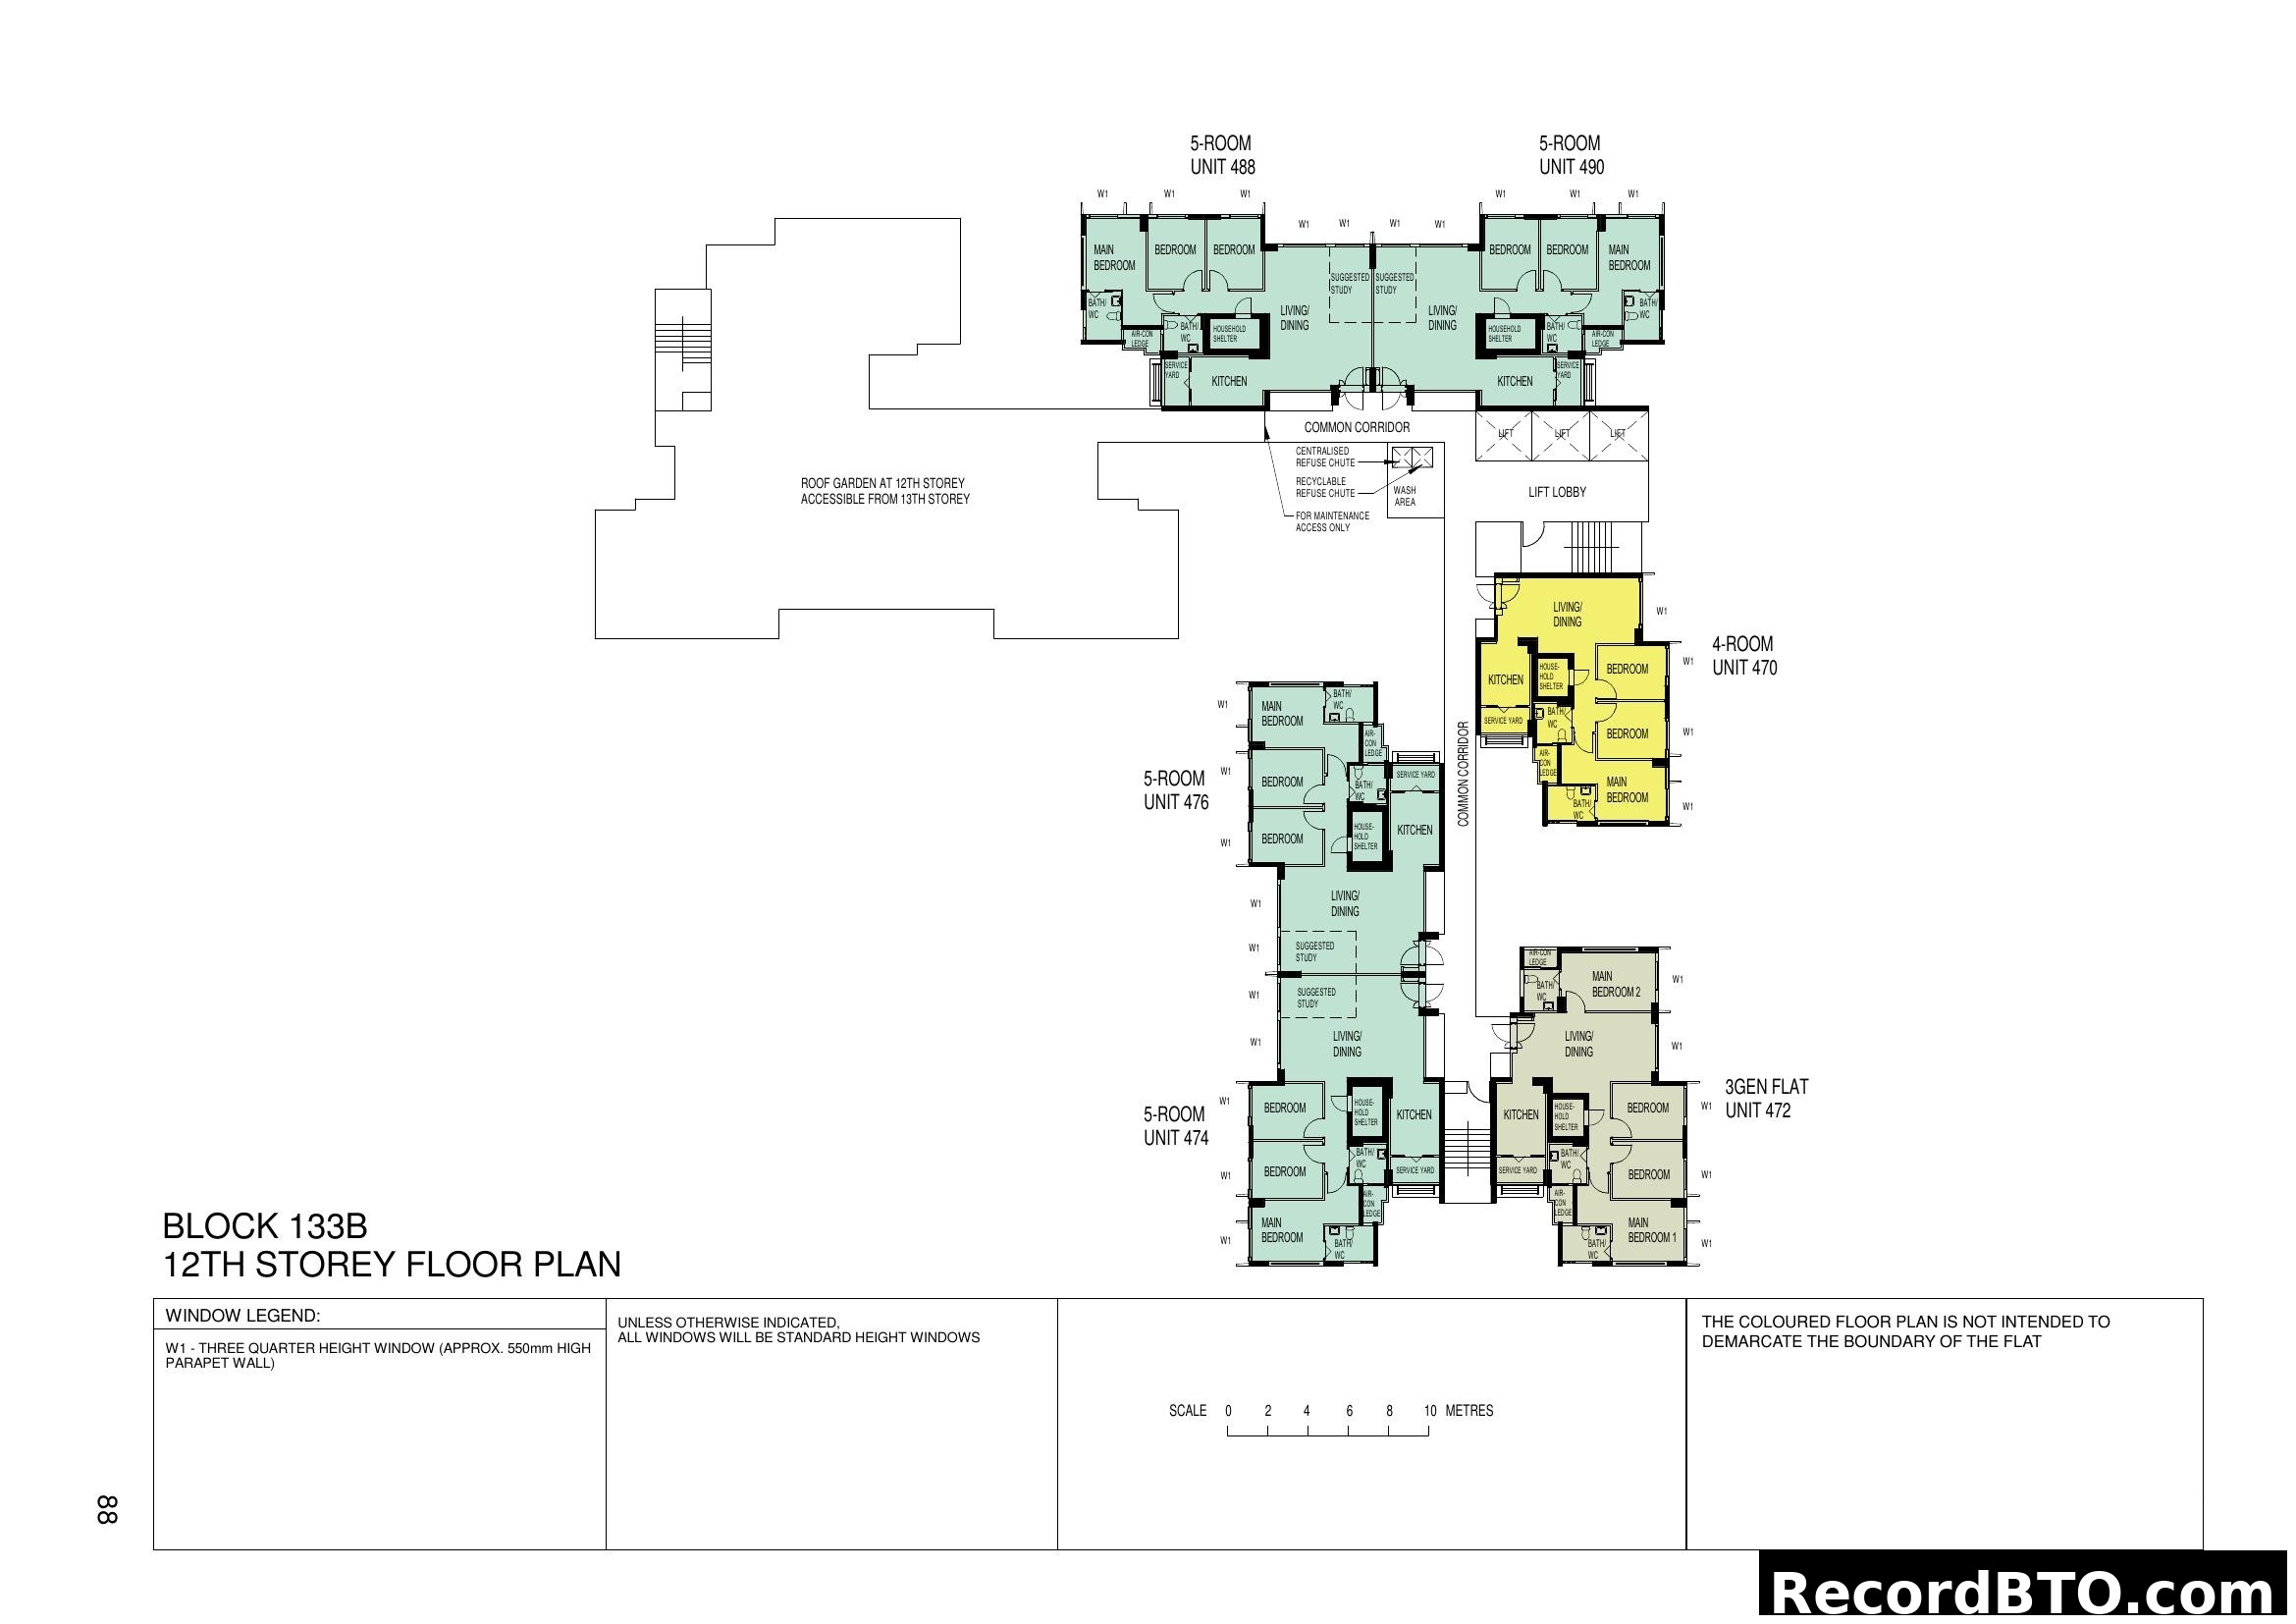
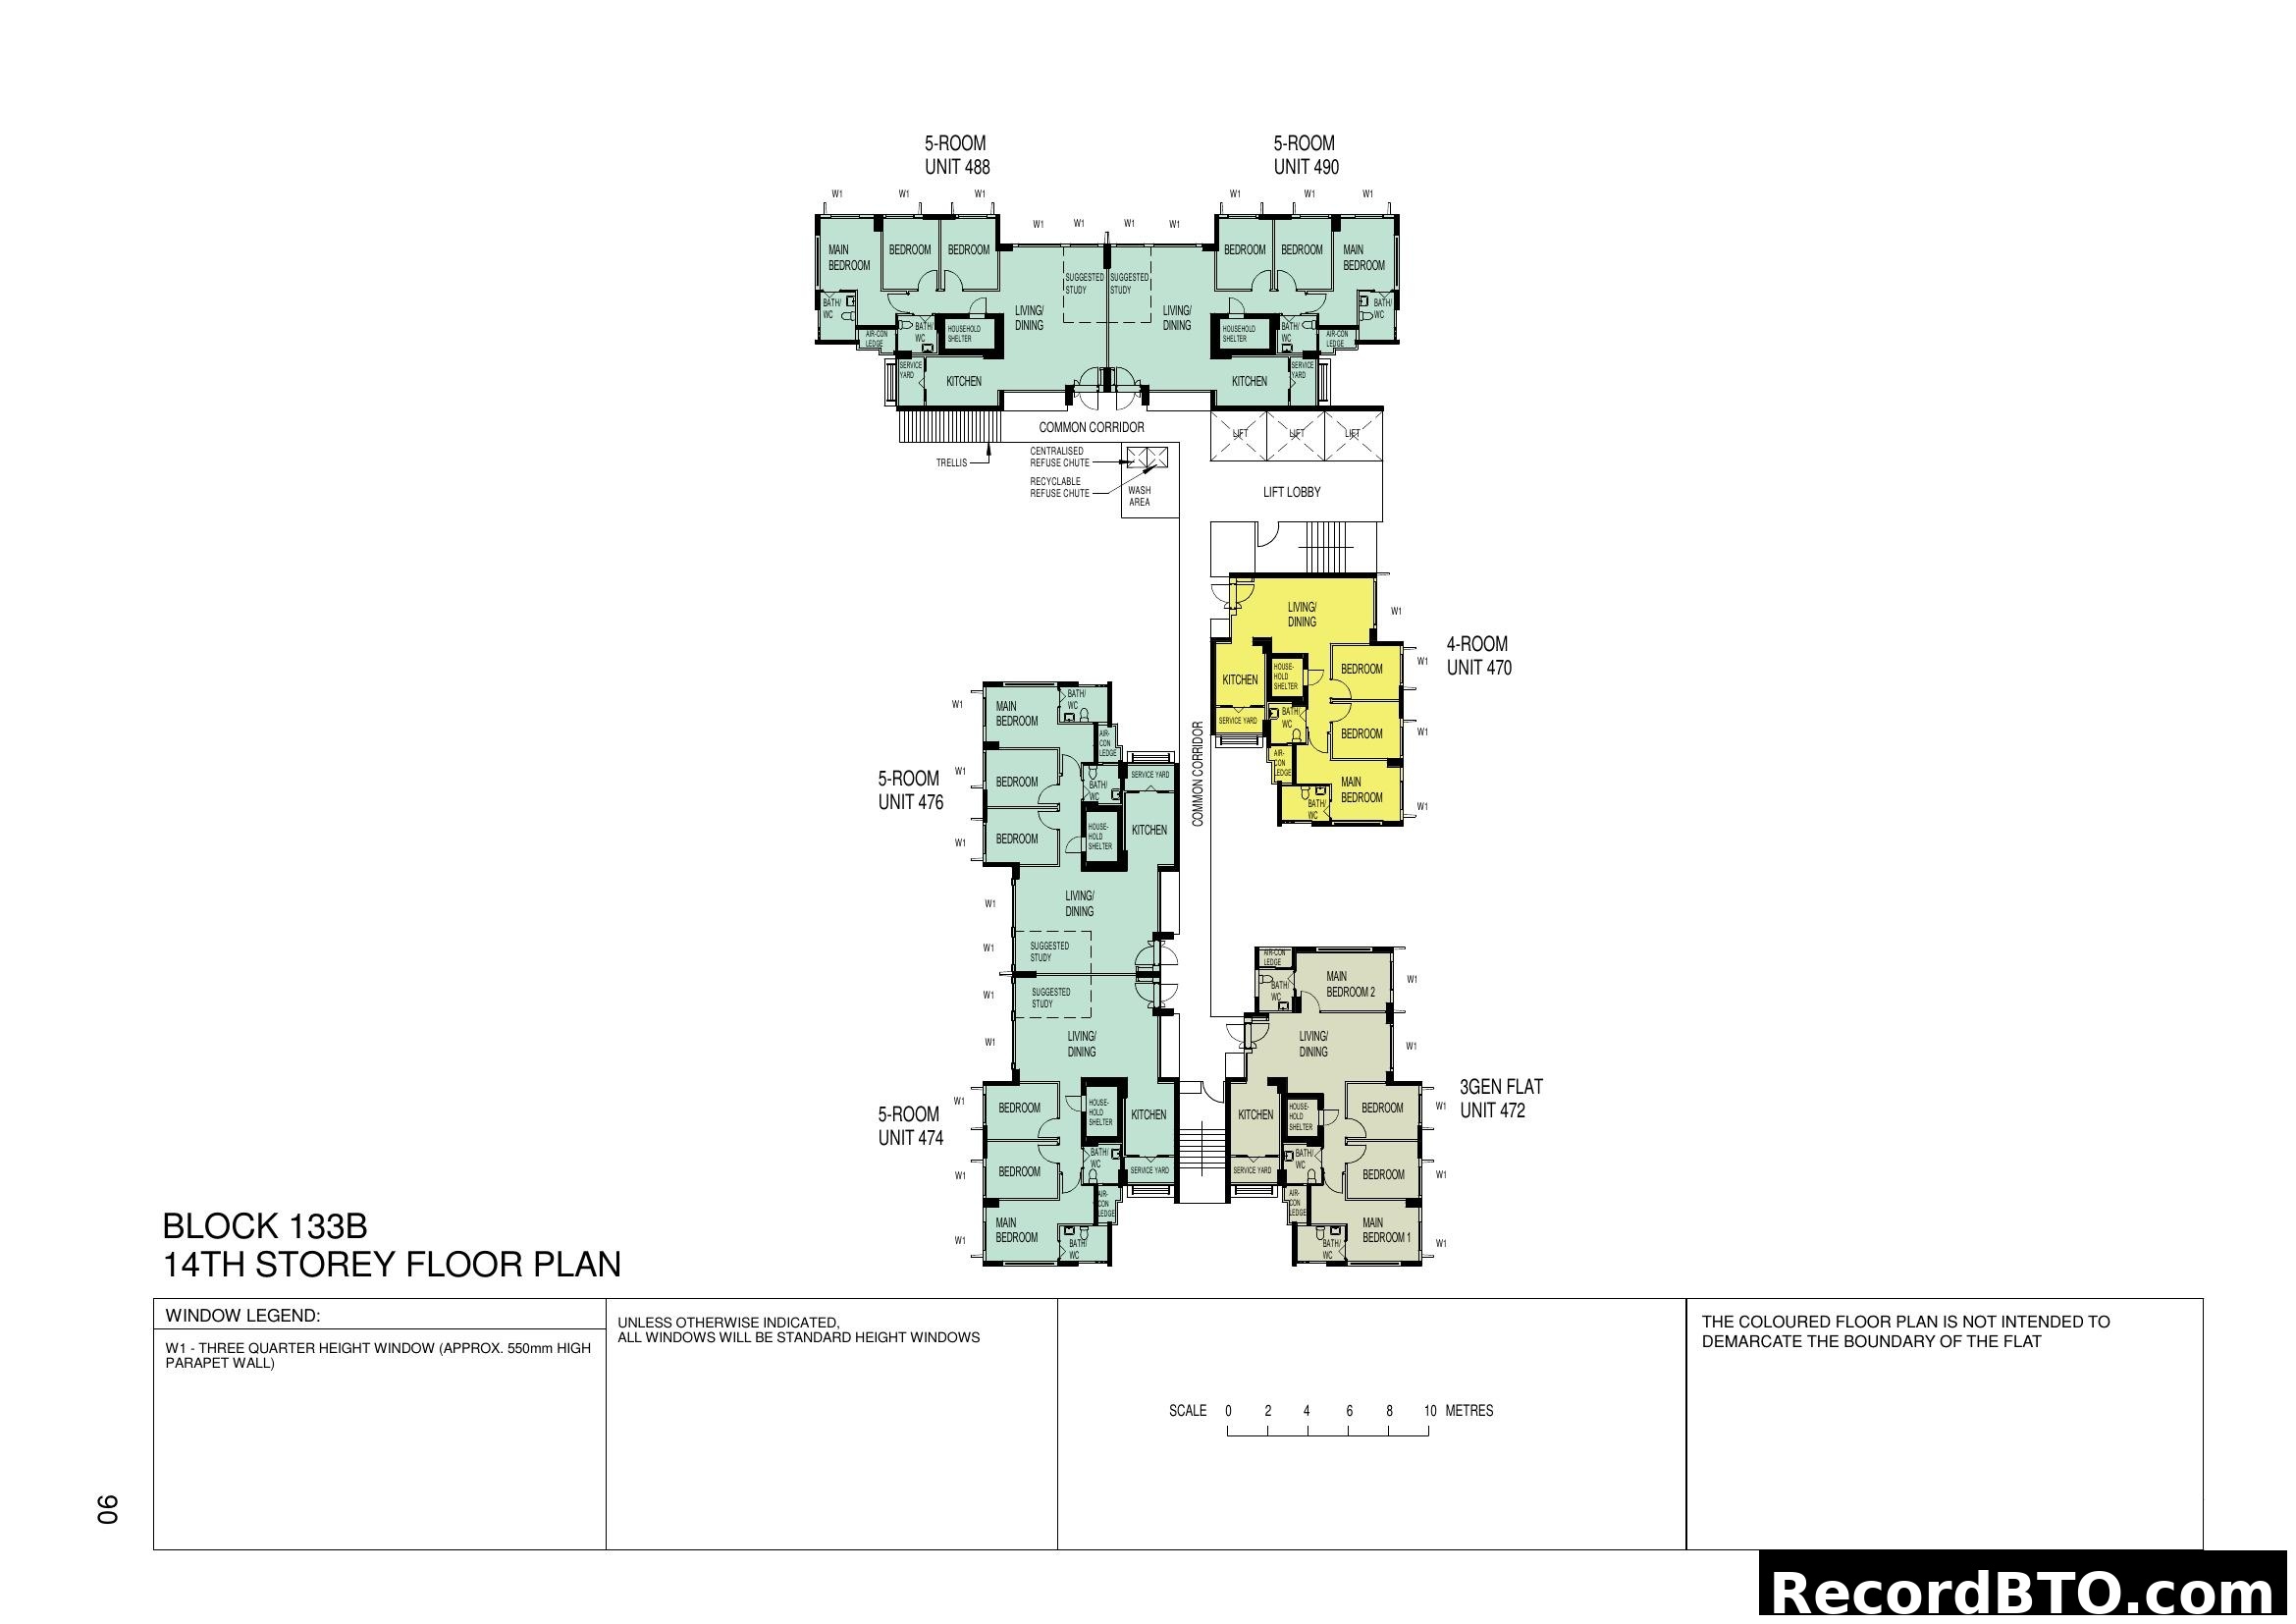
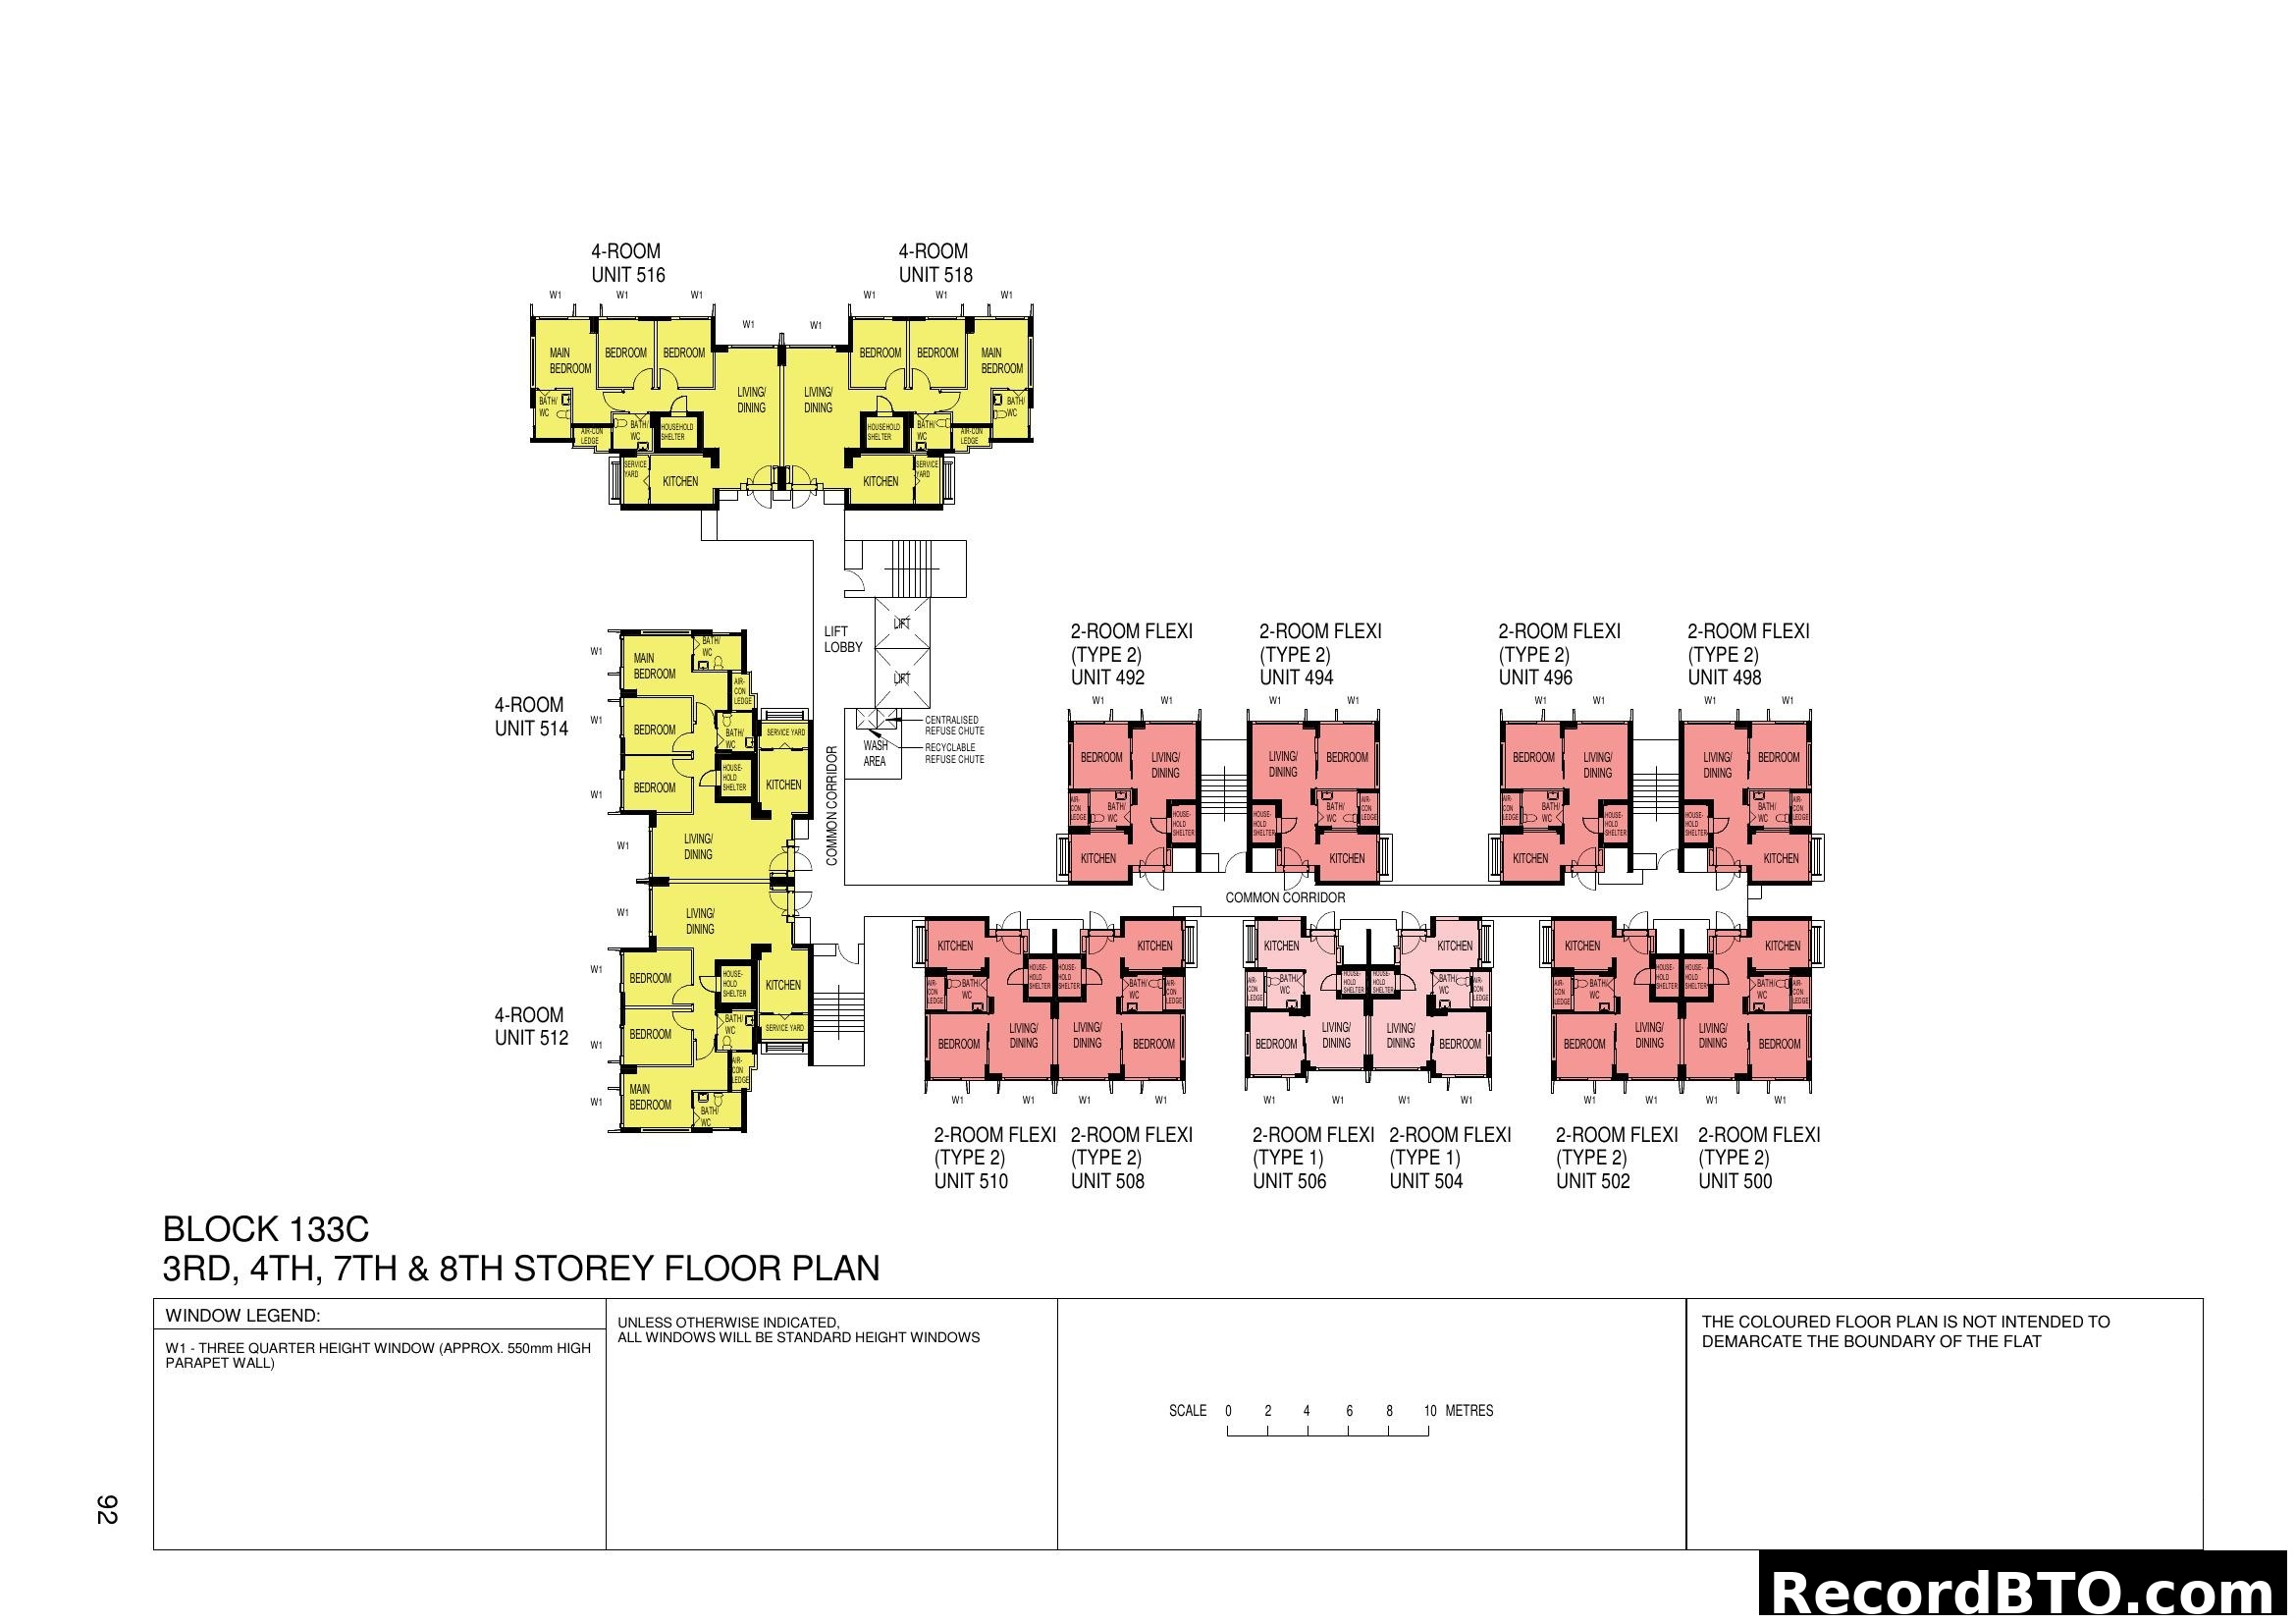
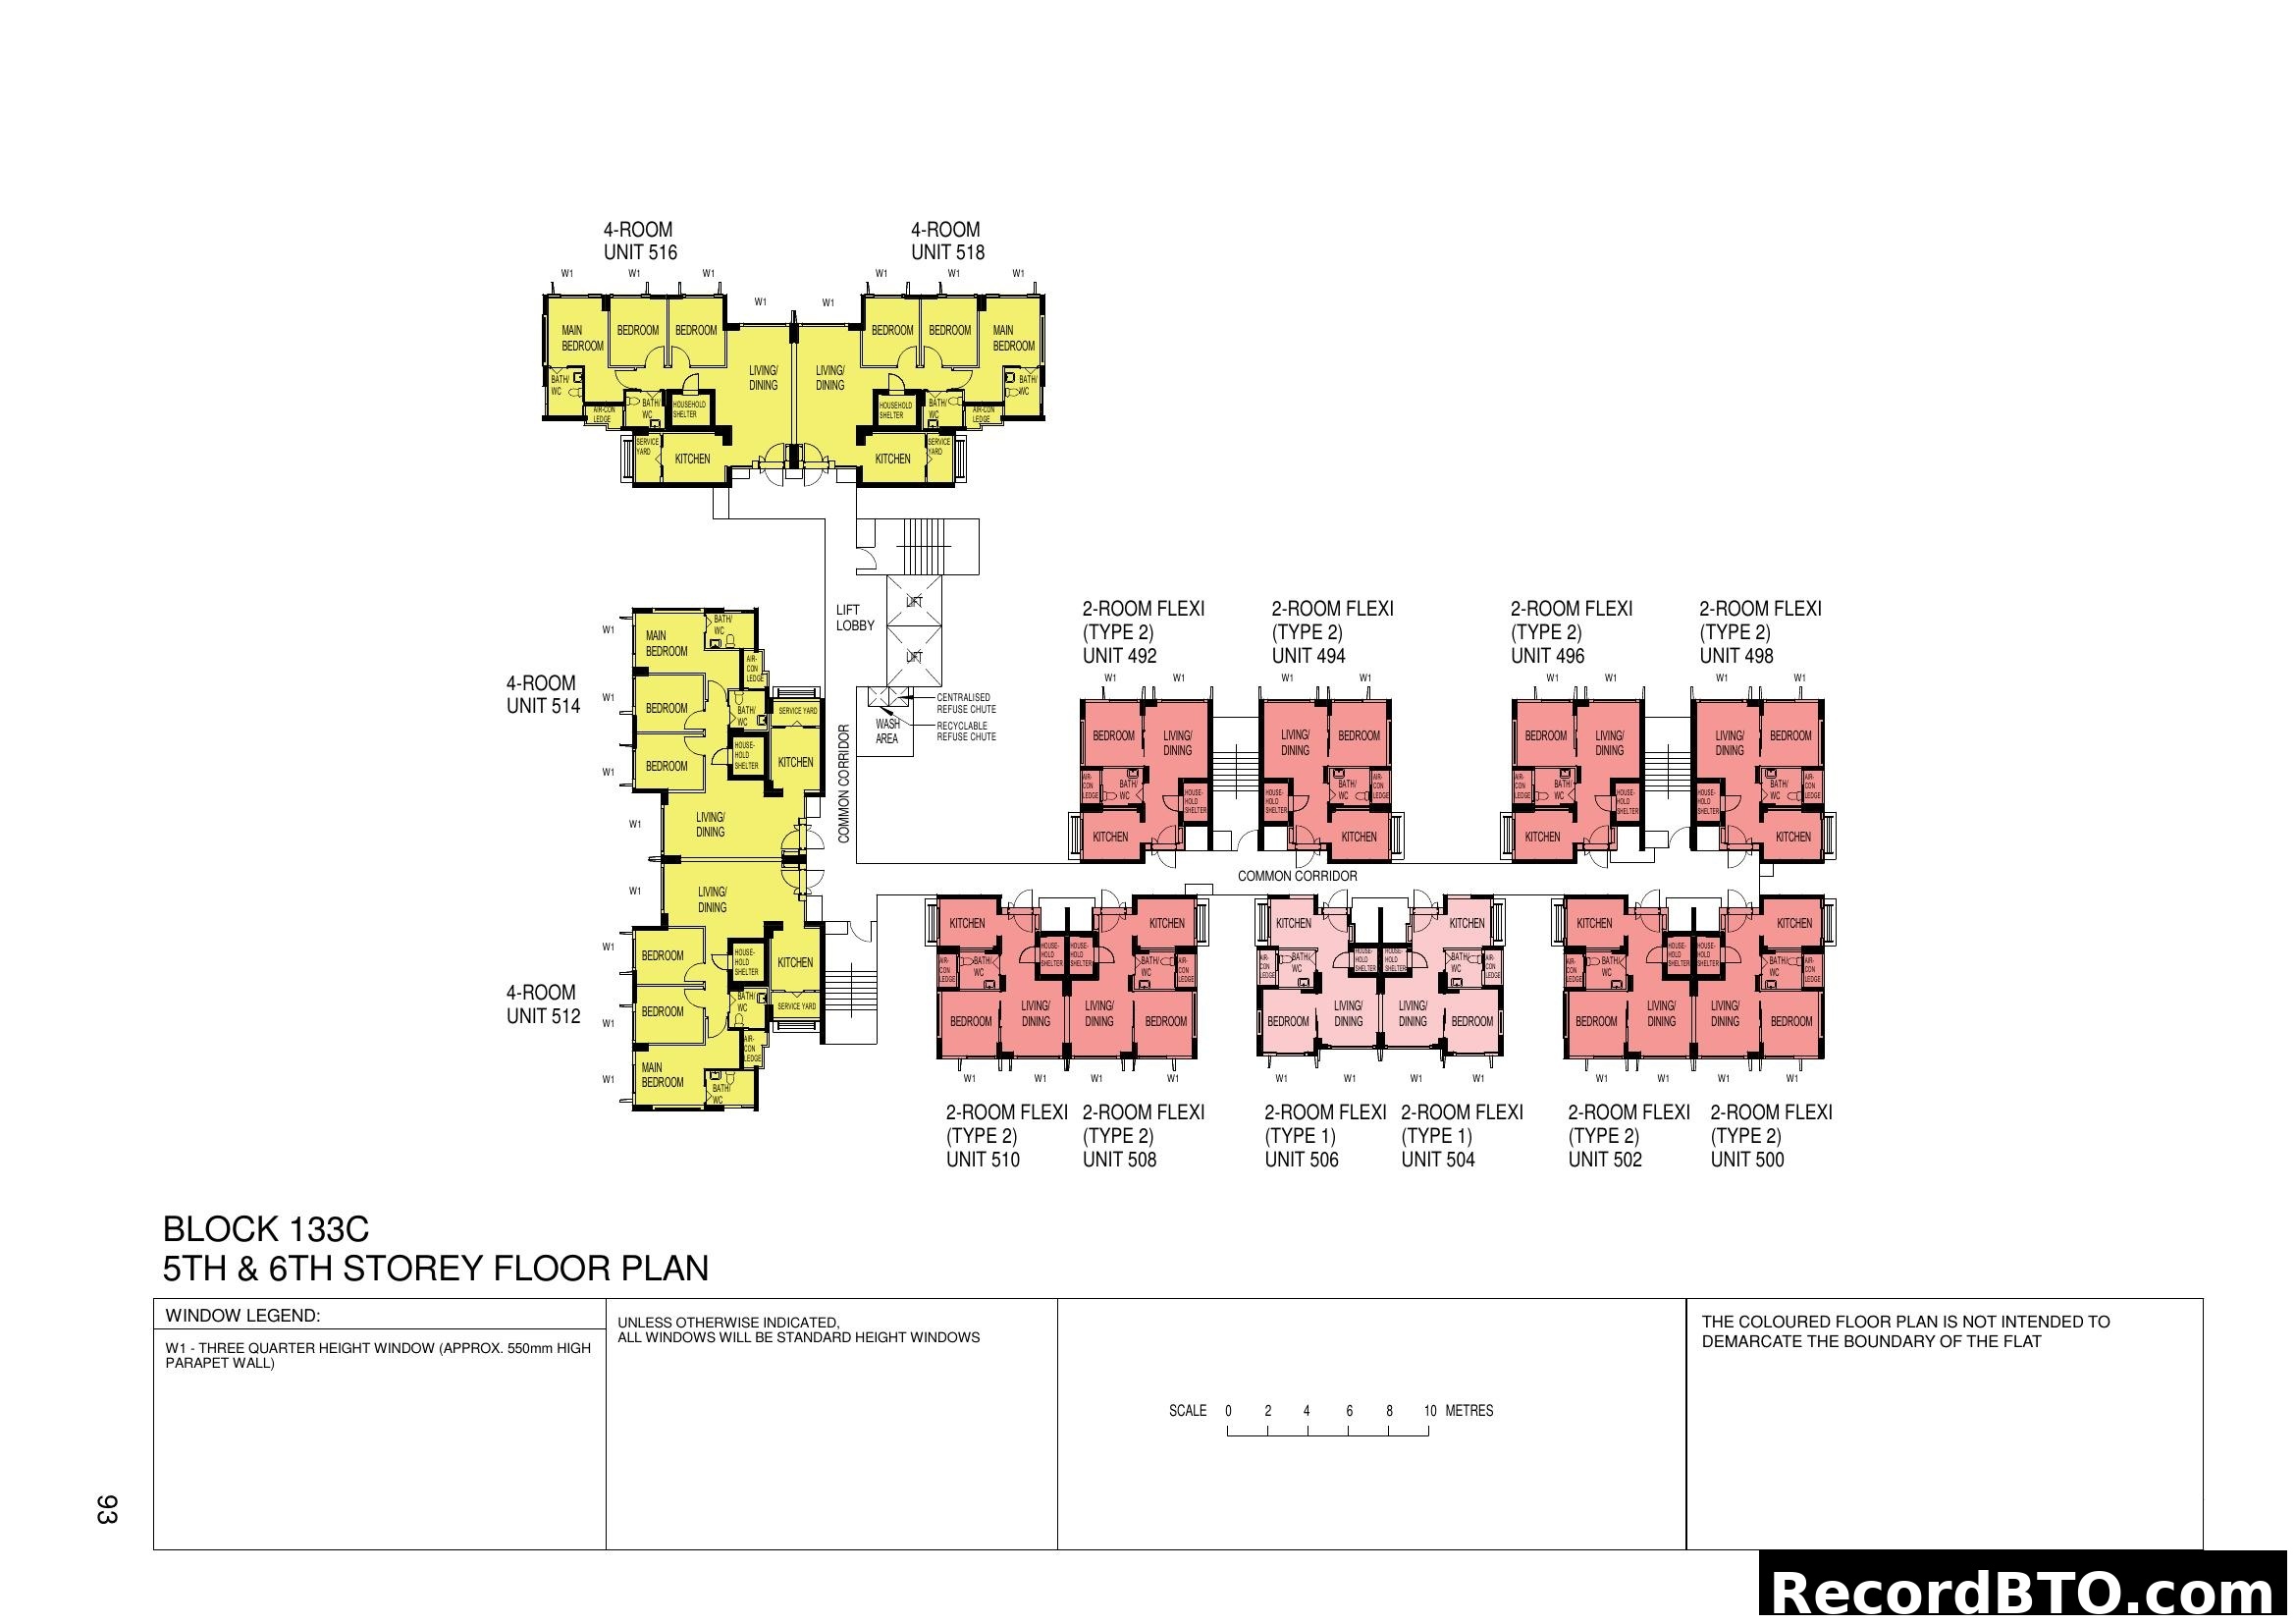
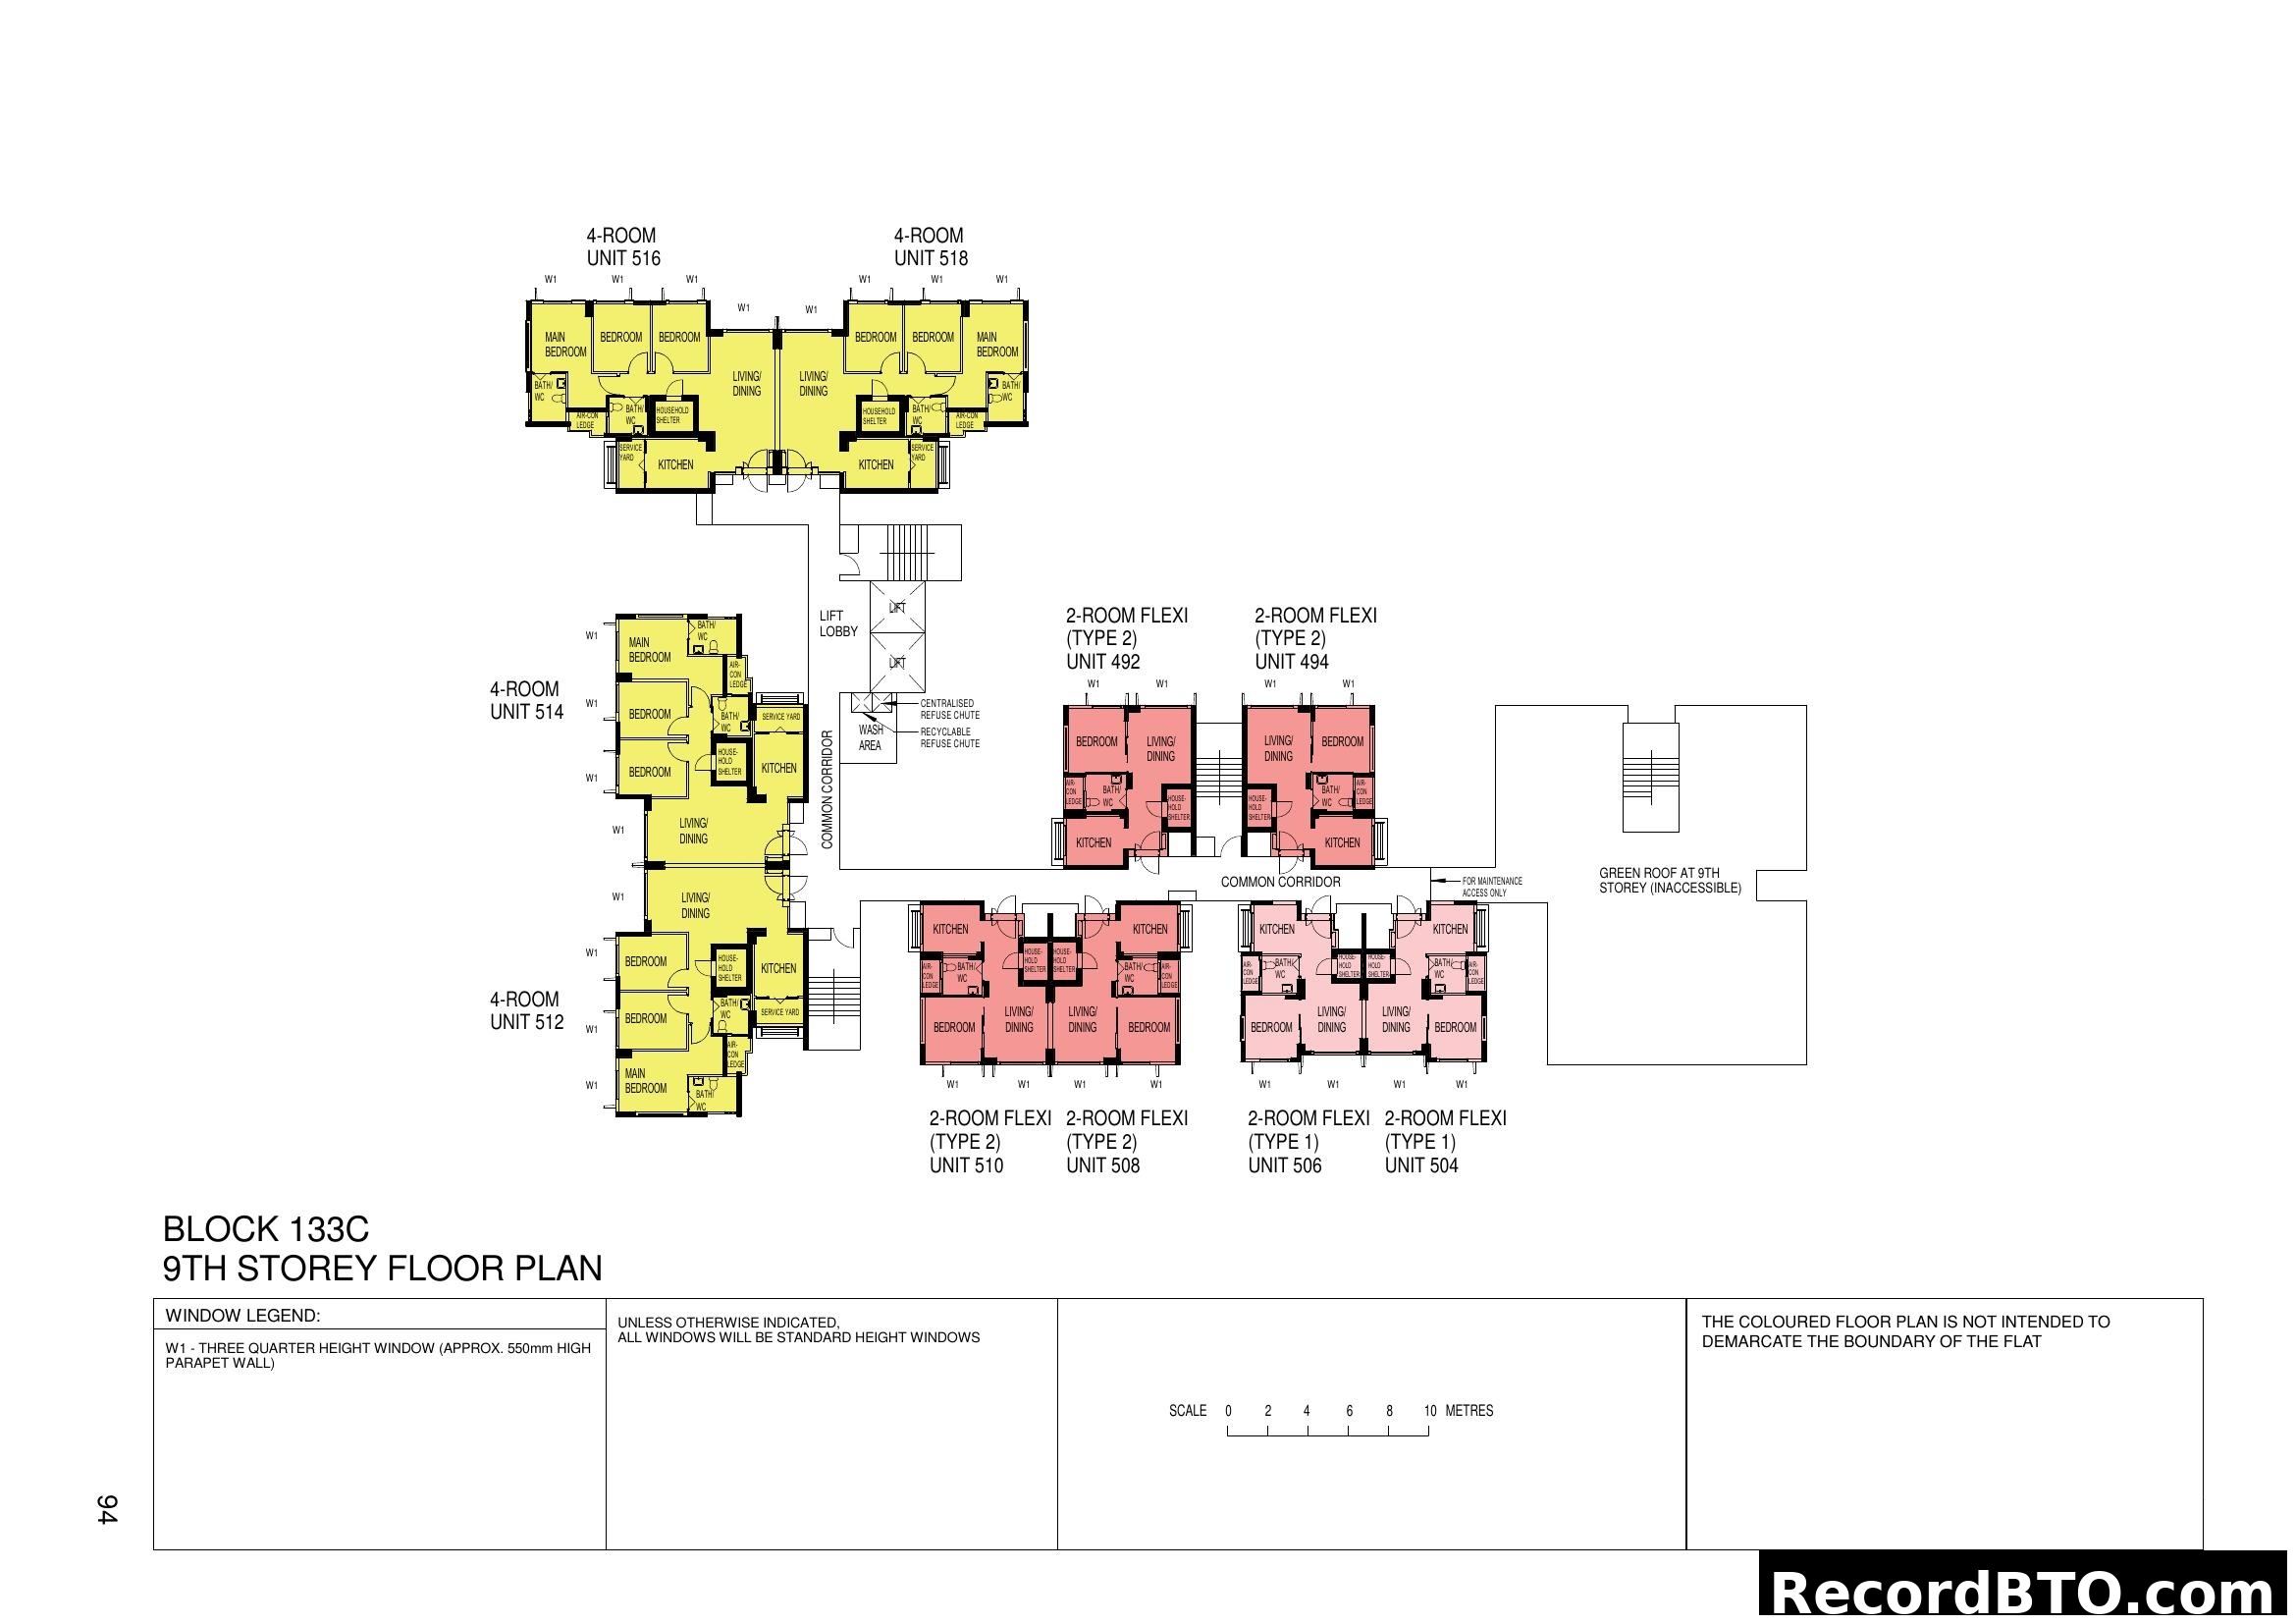
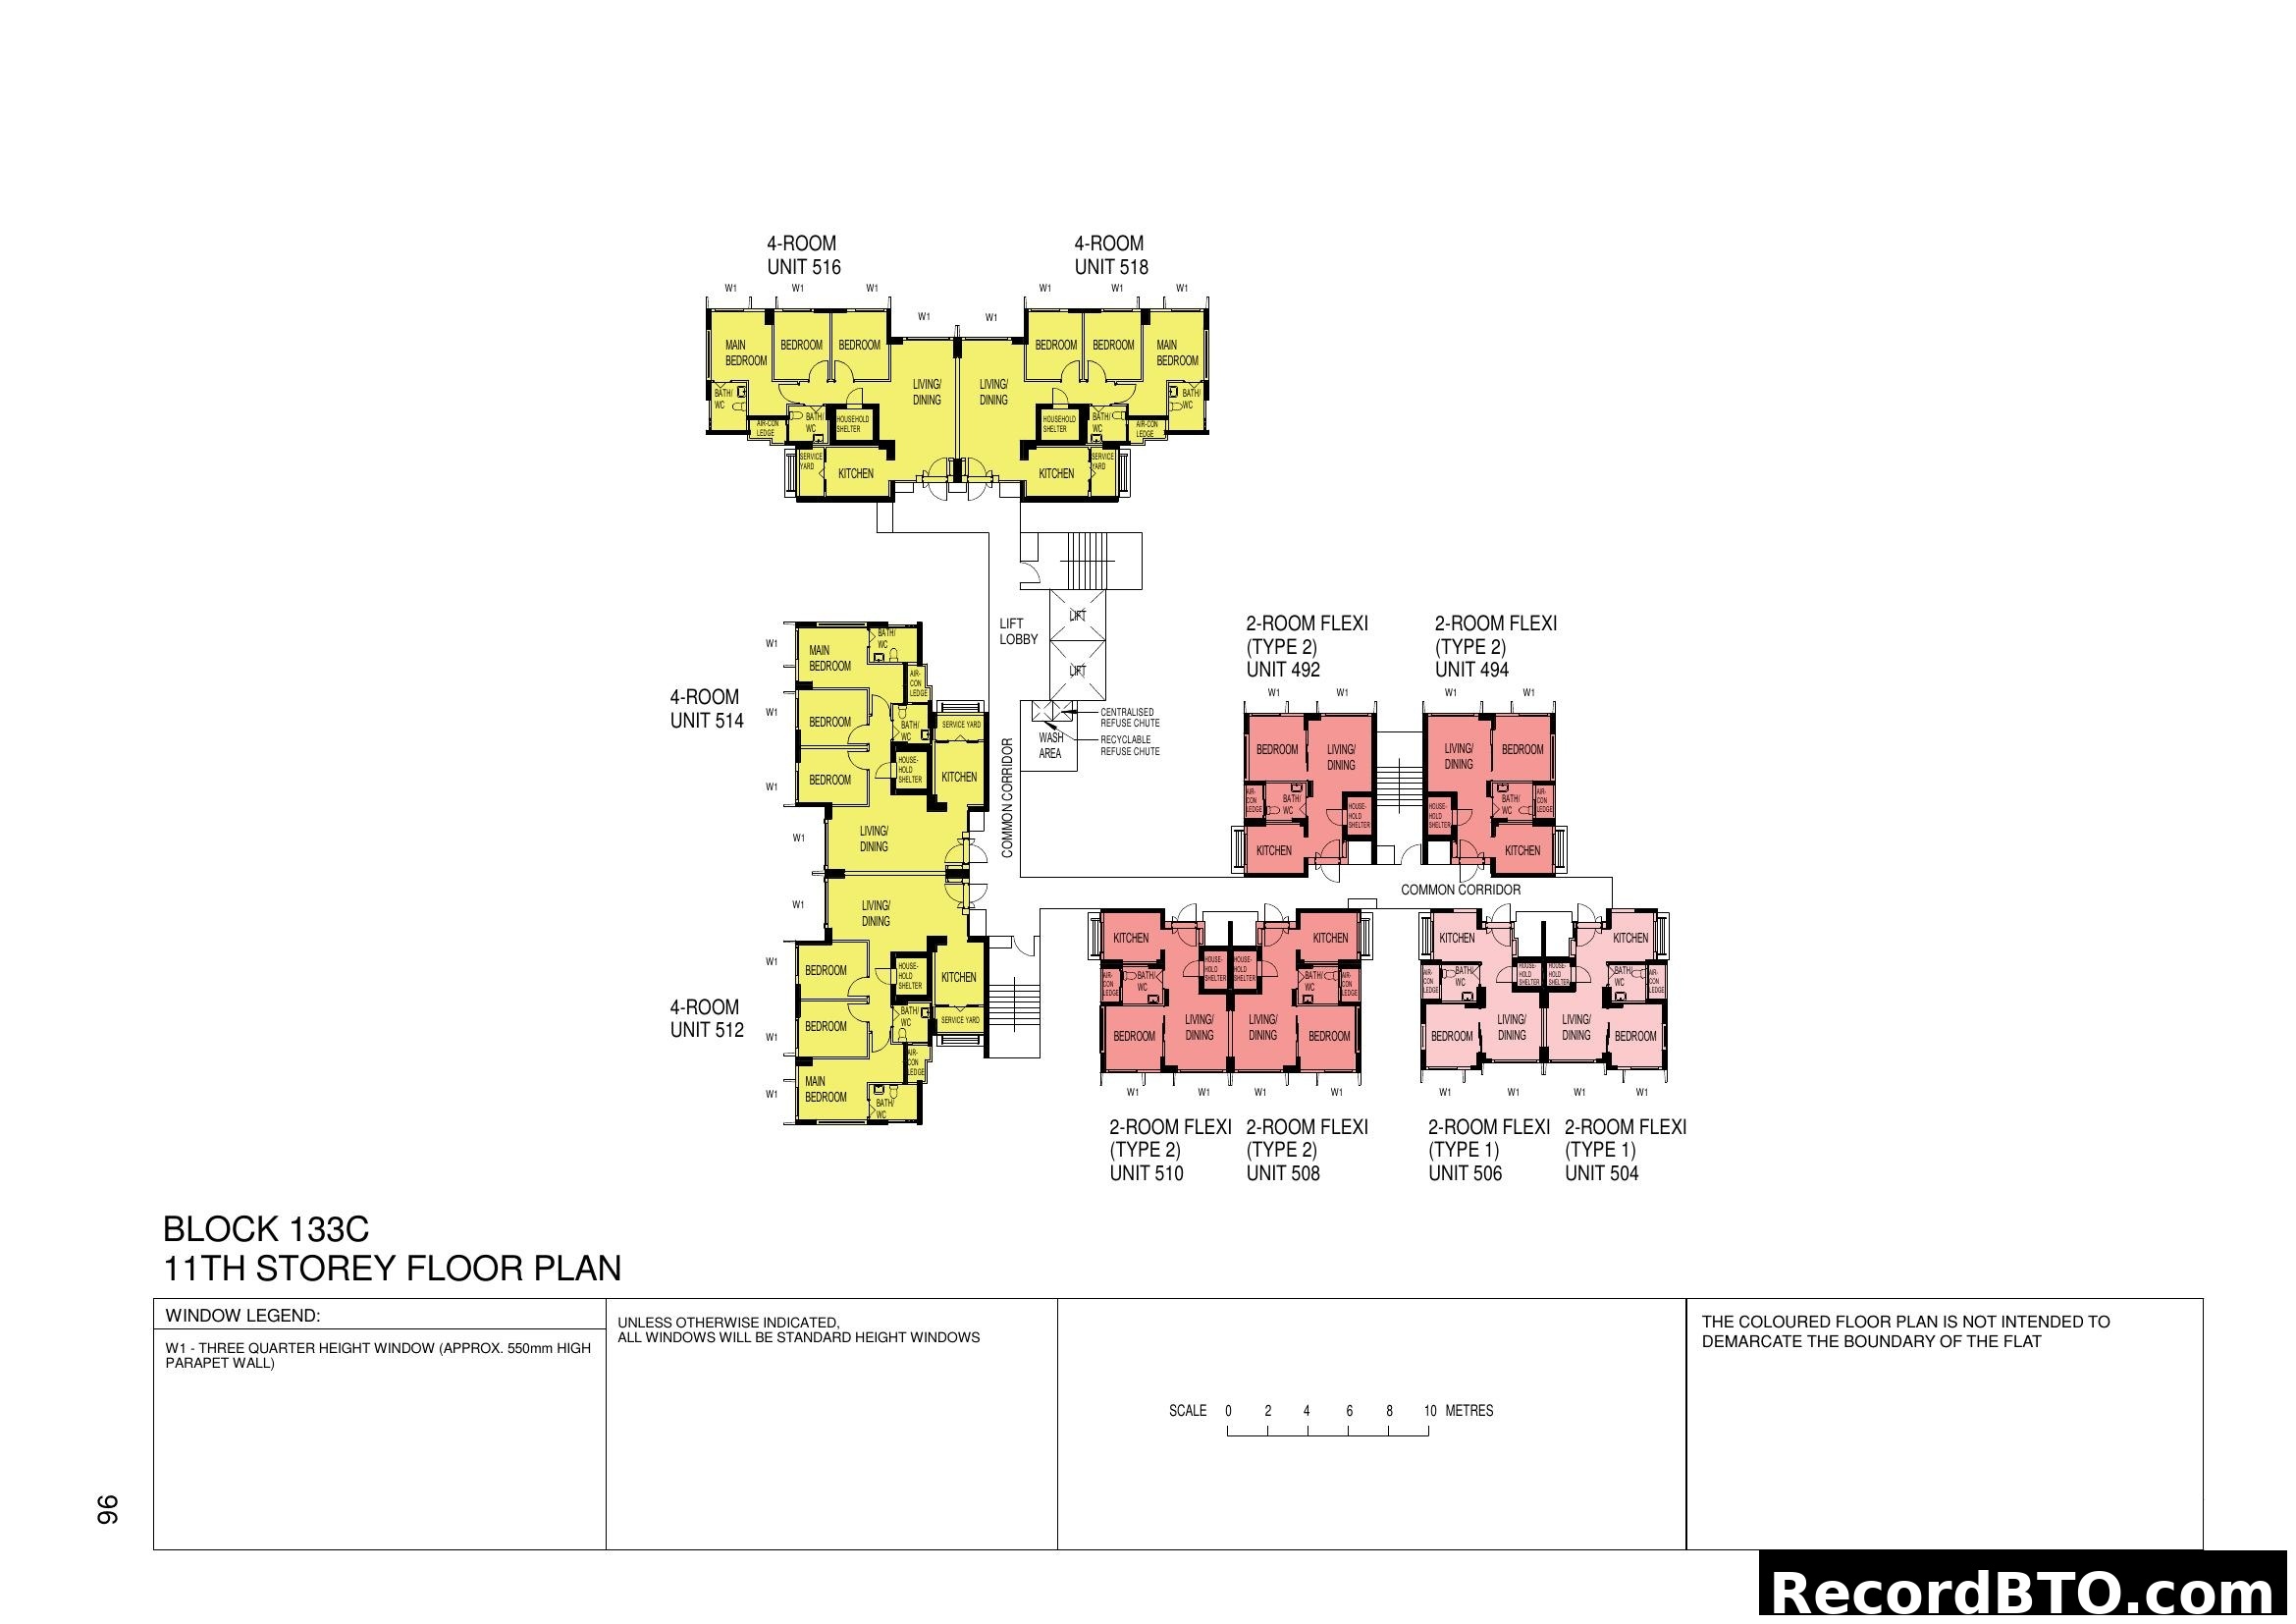
Floor Plans
Unit layouts and configurations
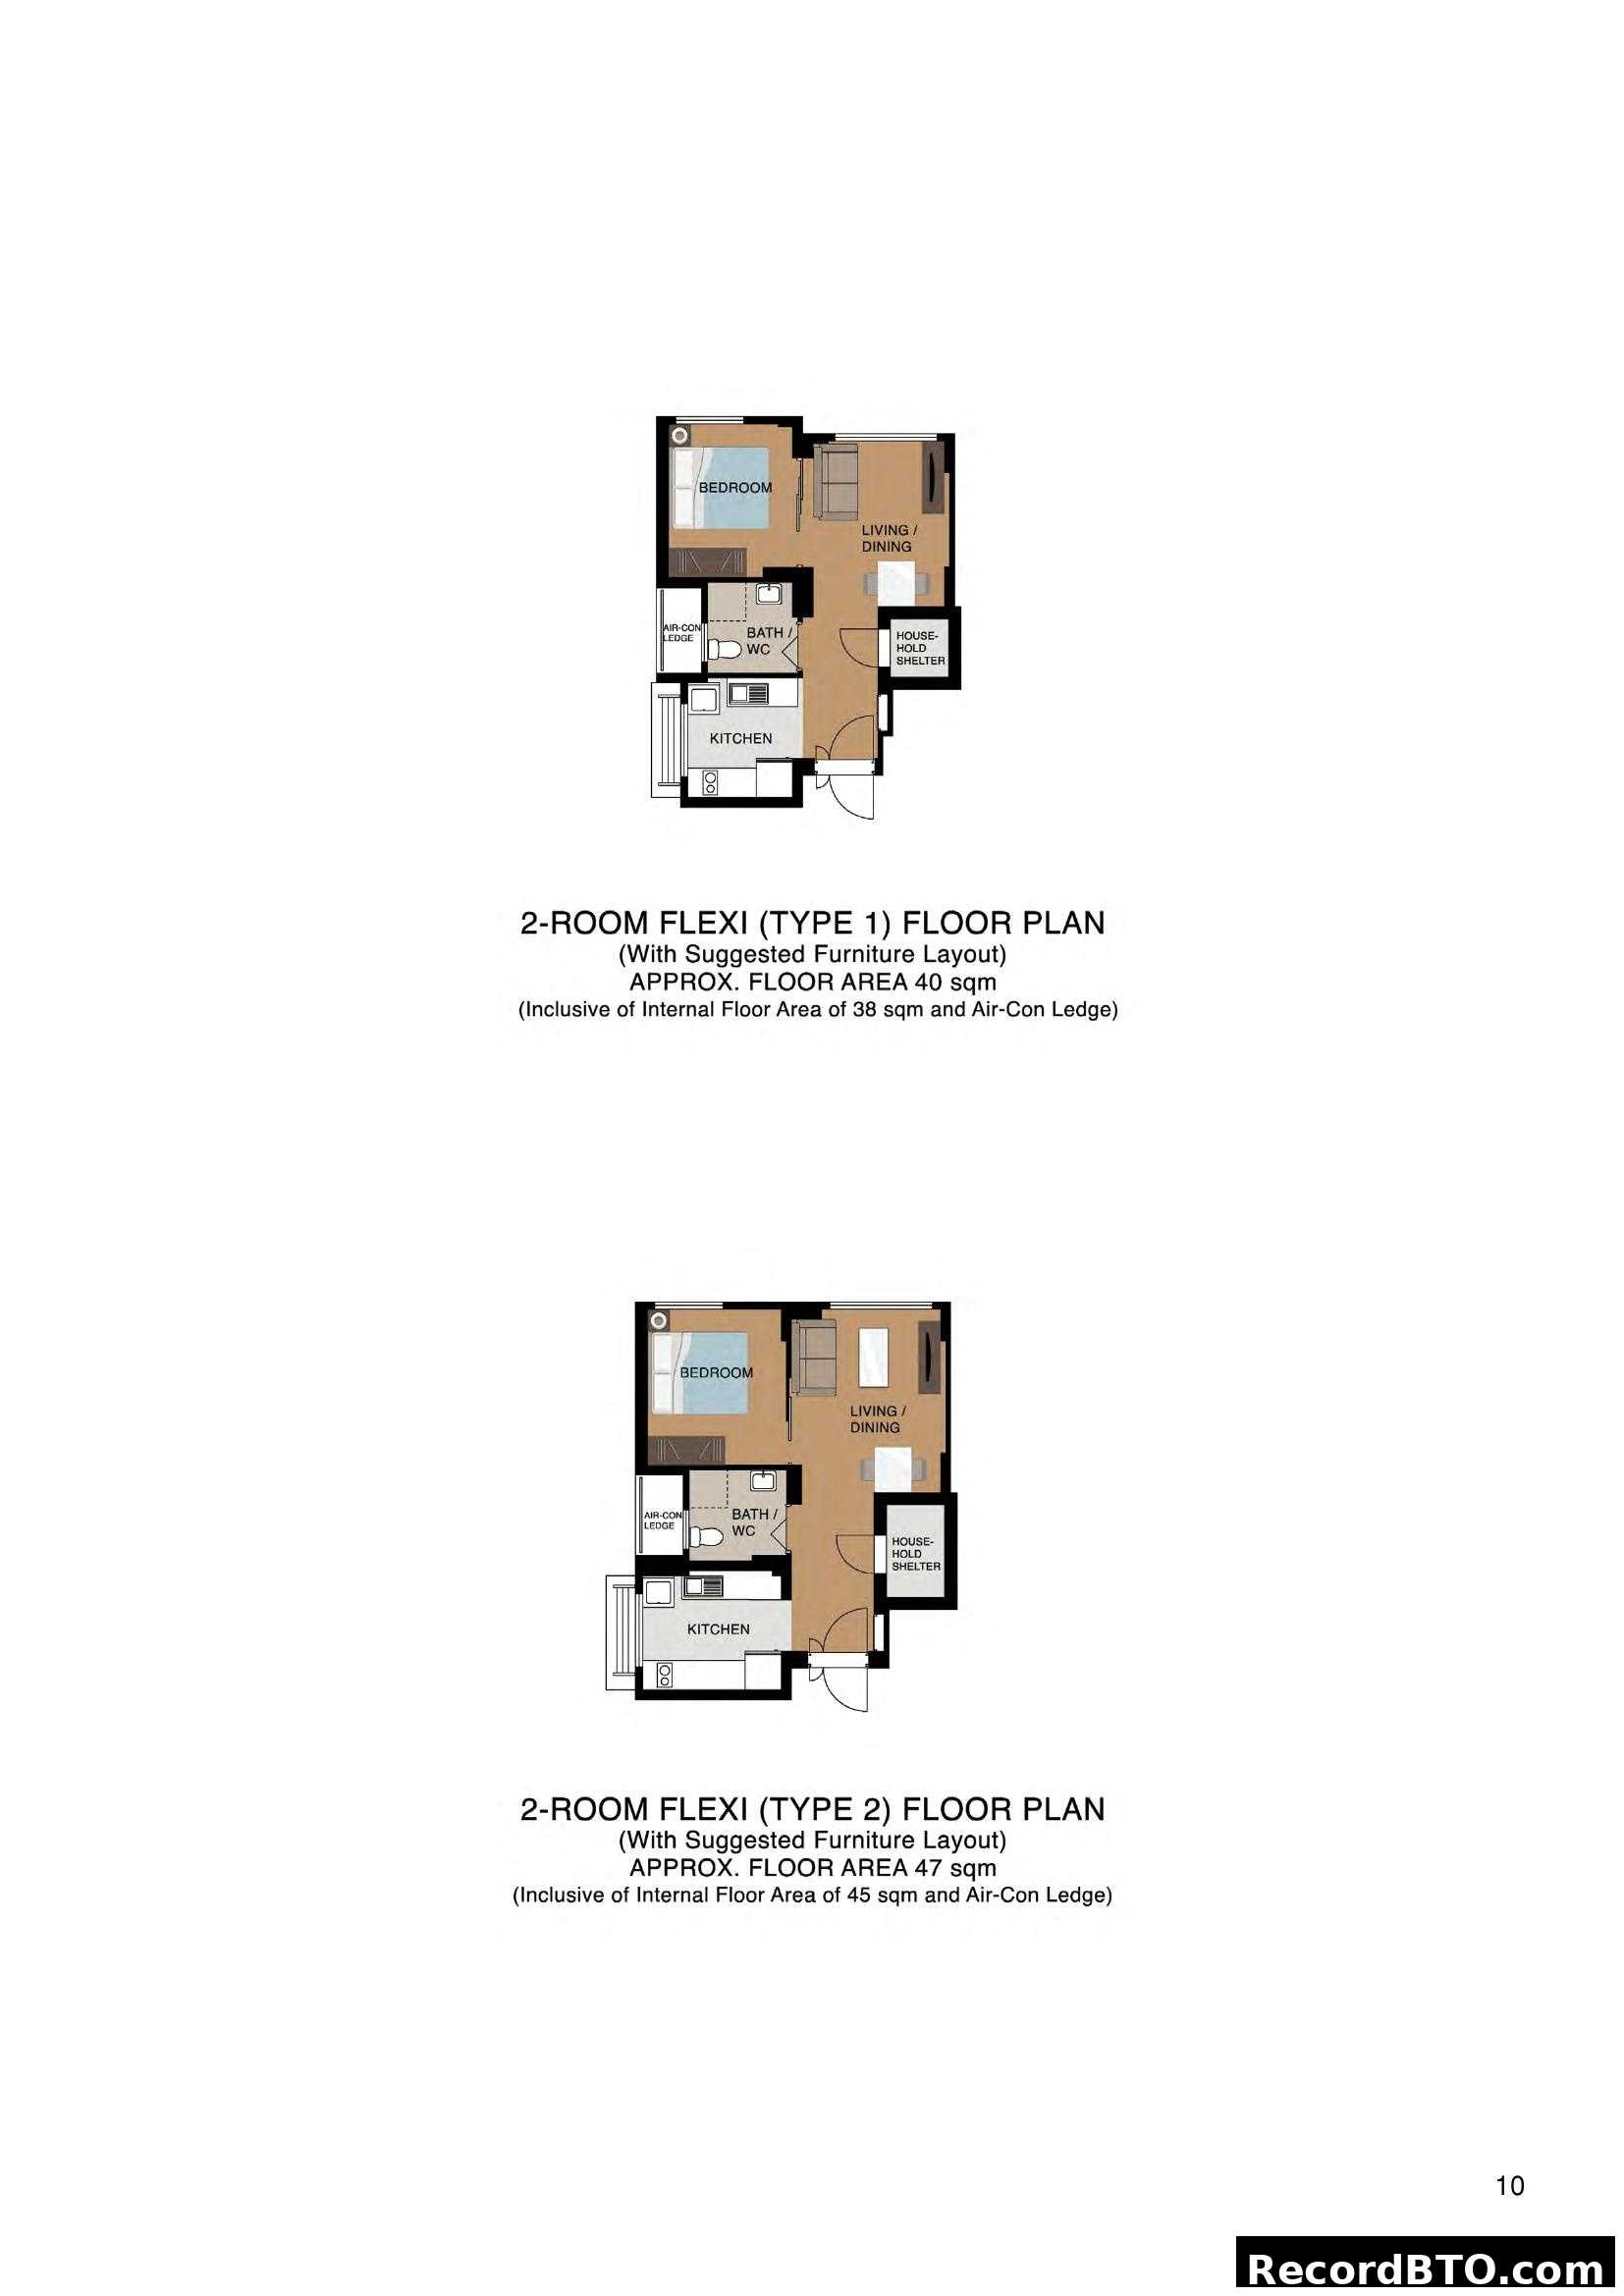
2-Room Flexi Floor Plans (Type 1 & 2)
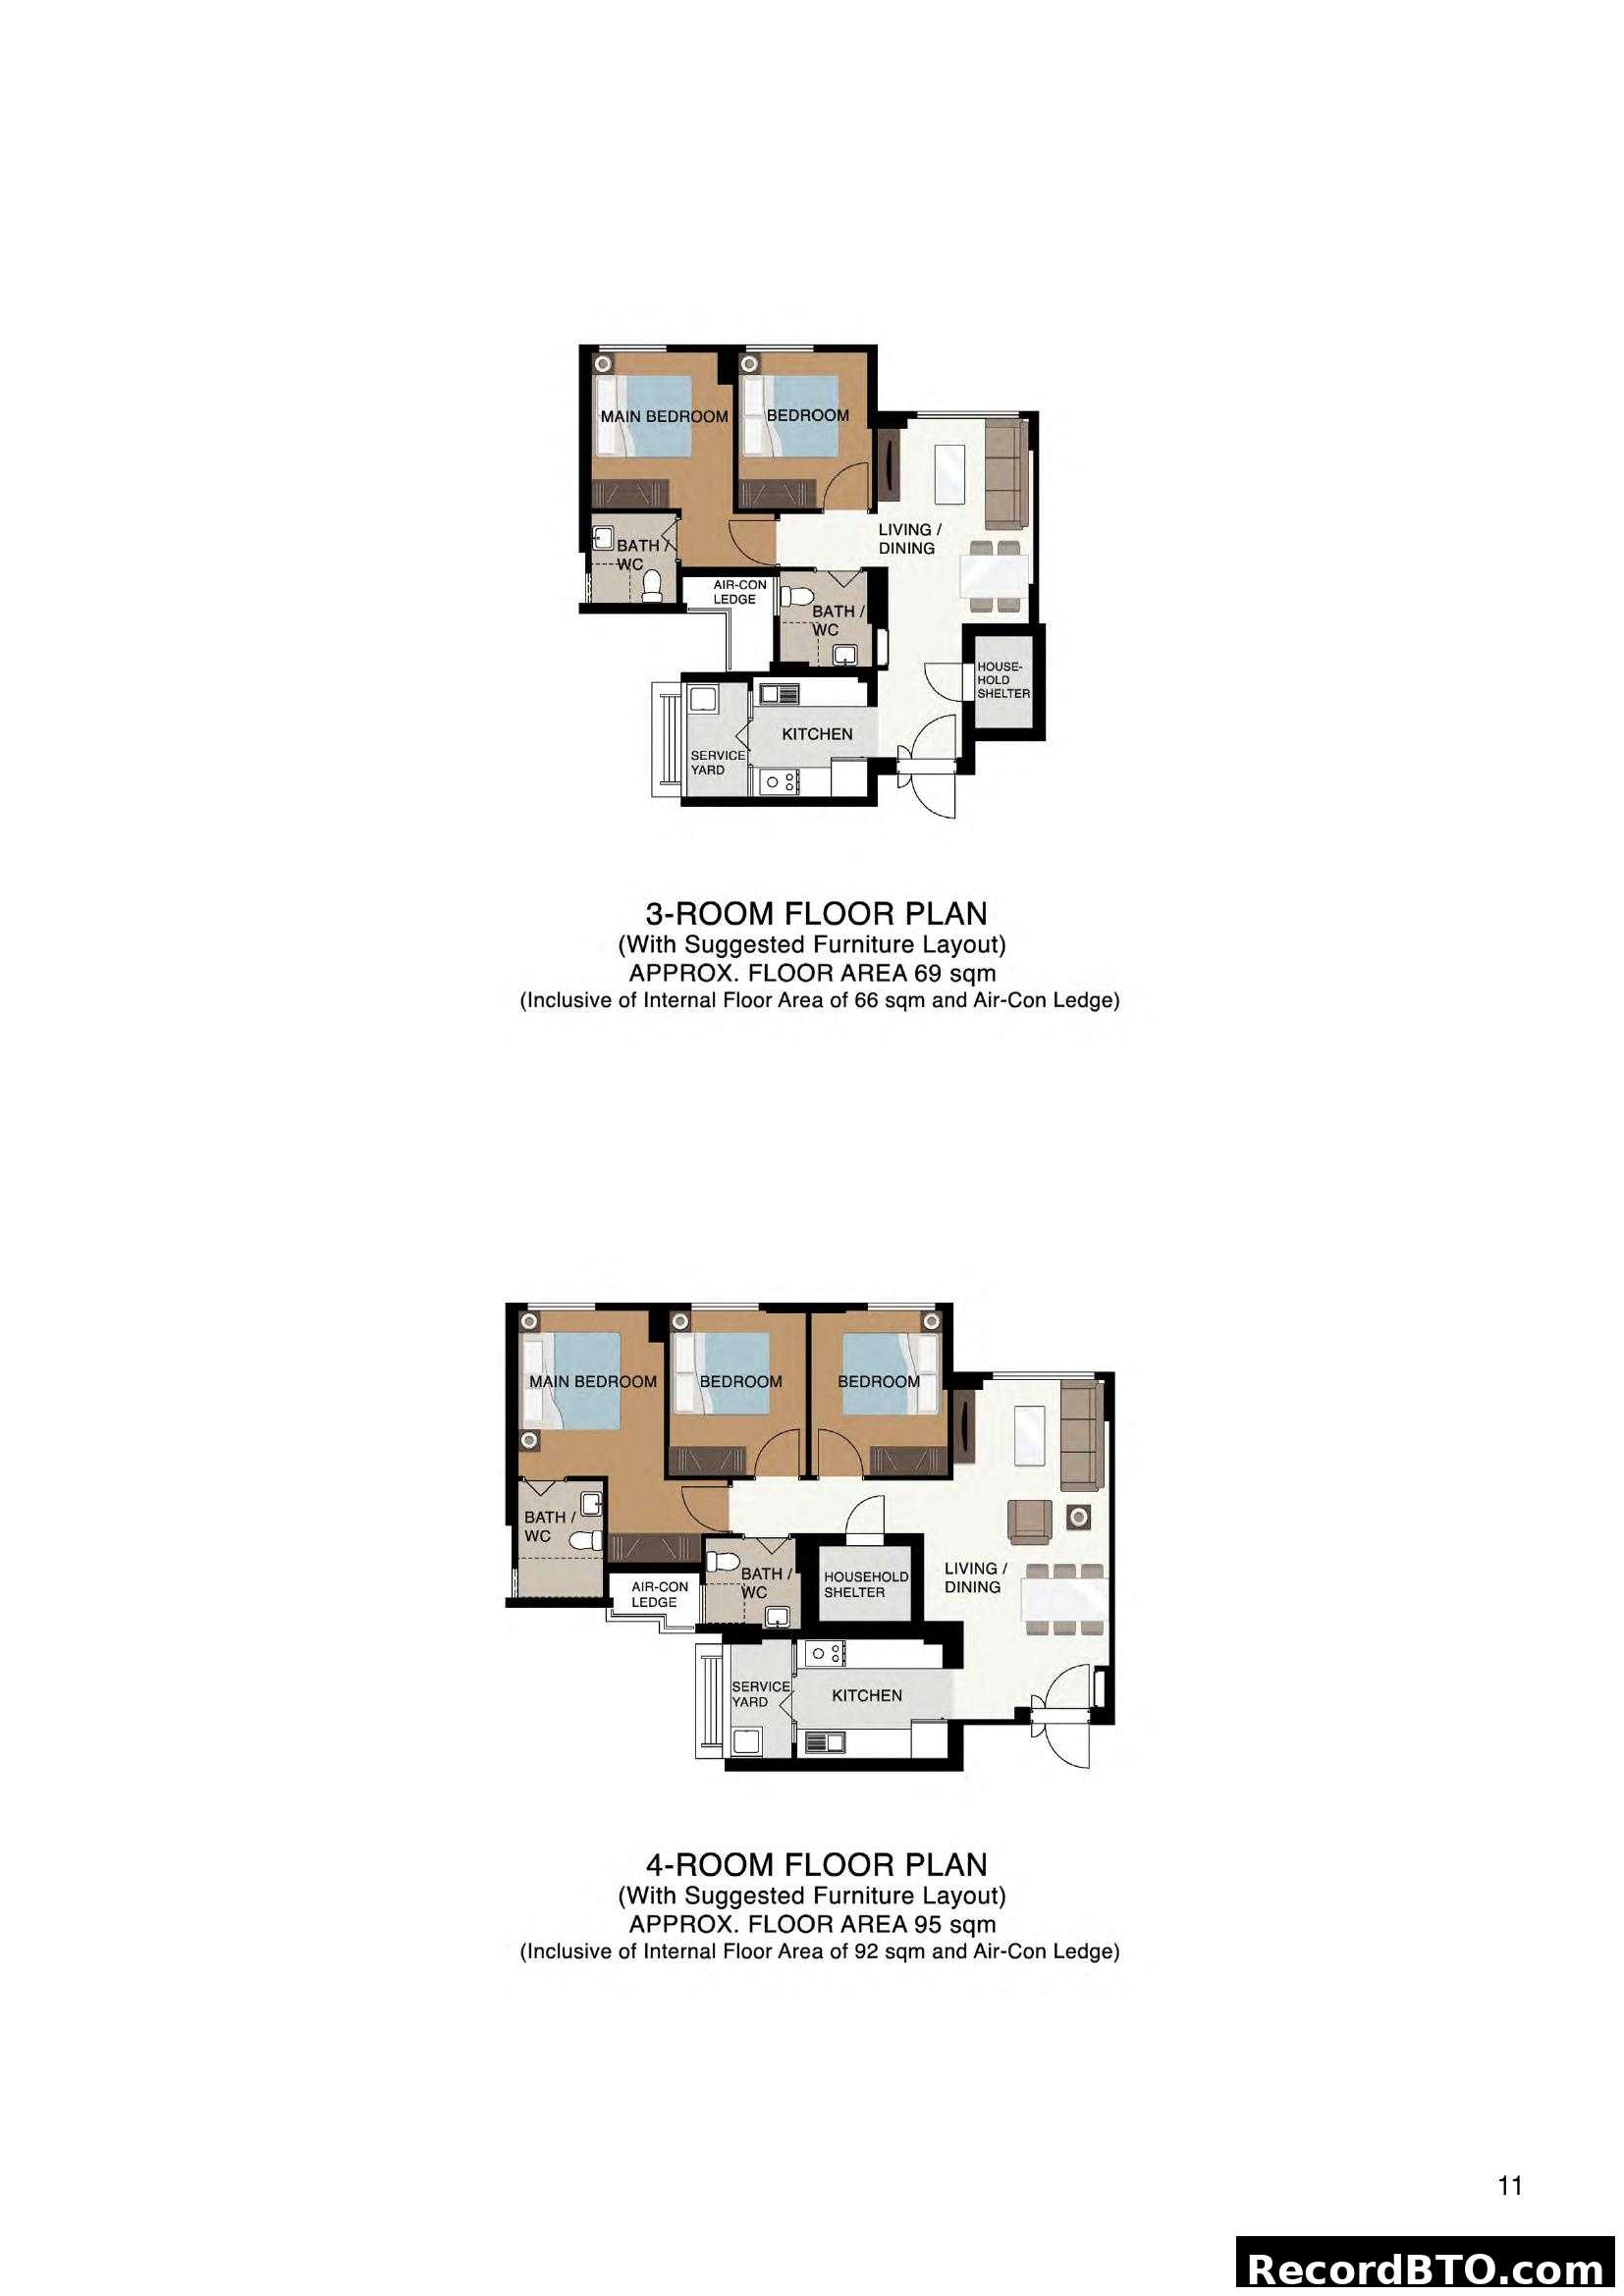
HDB BTO 3-Room and 4-Room Unit Floor Plans

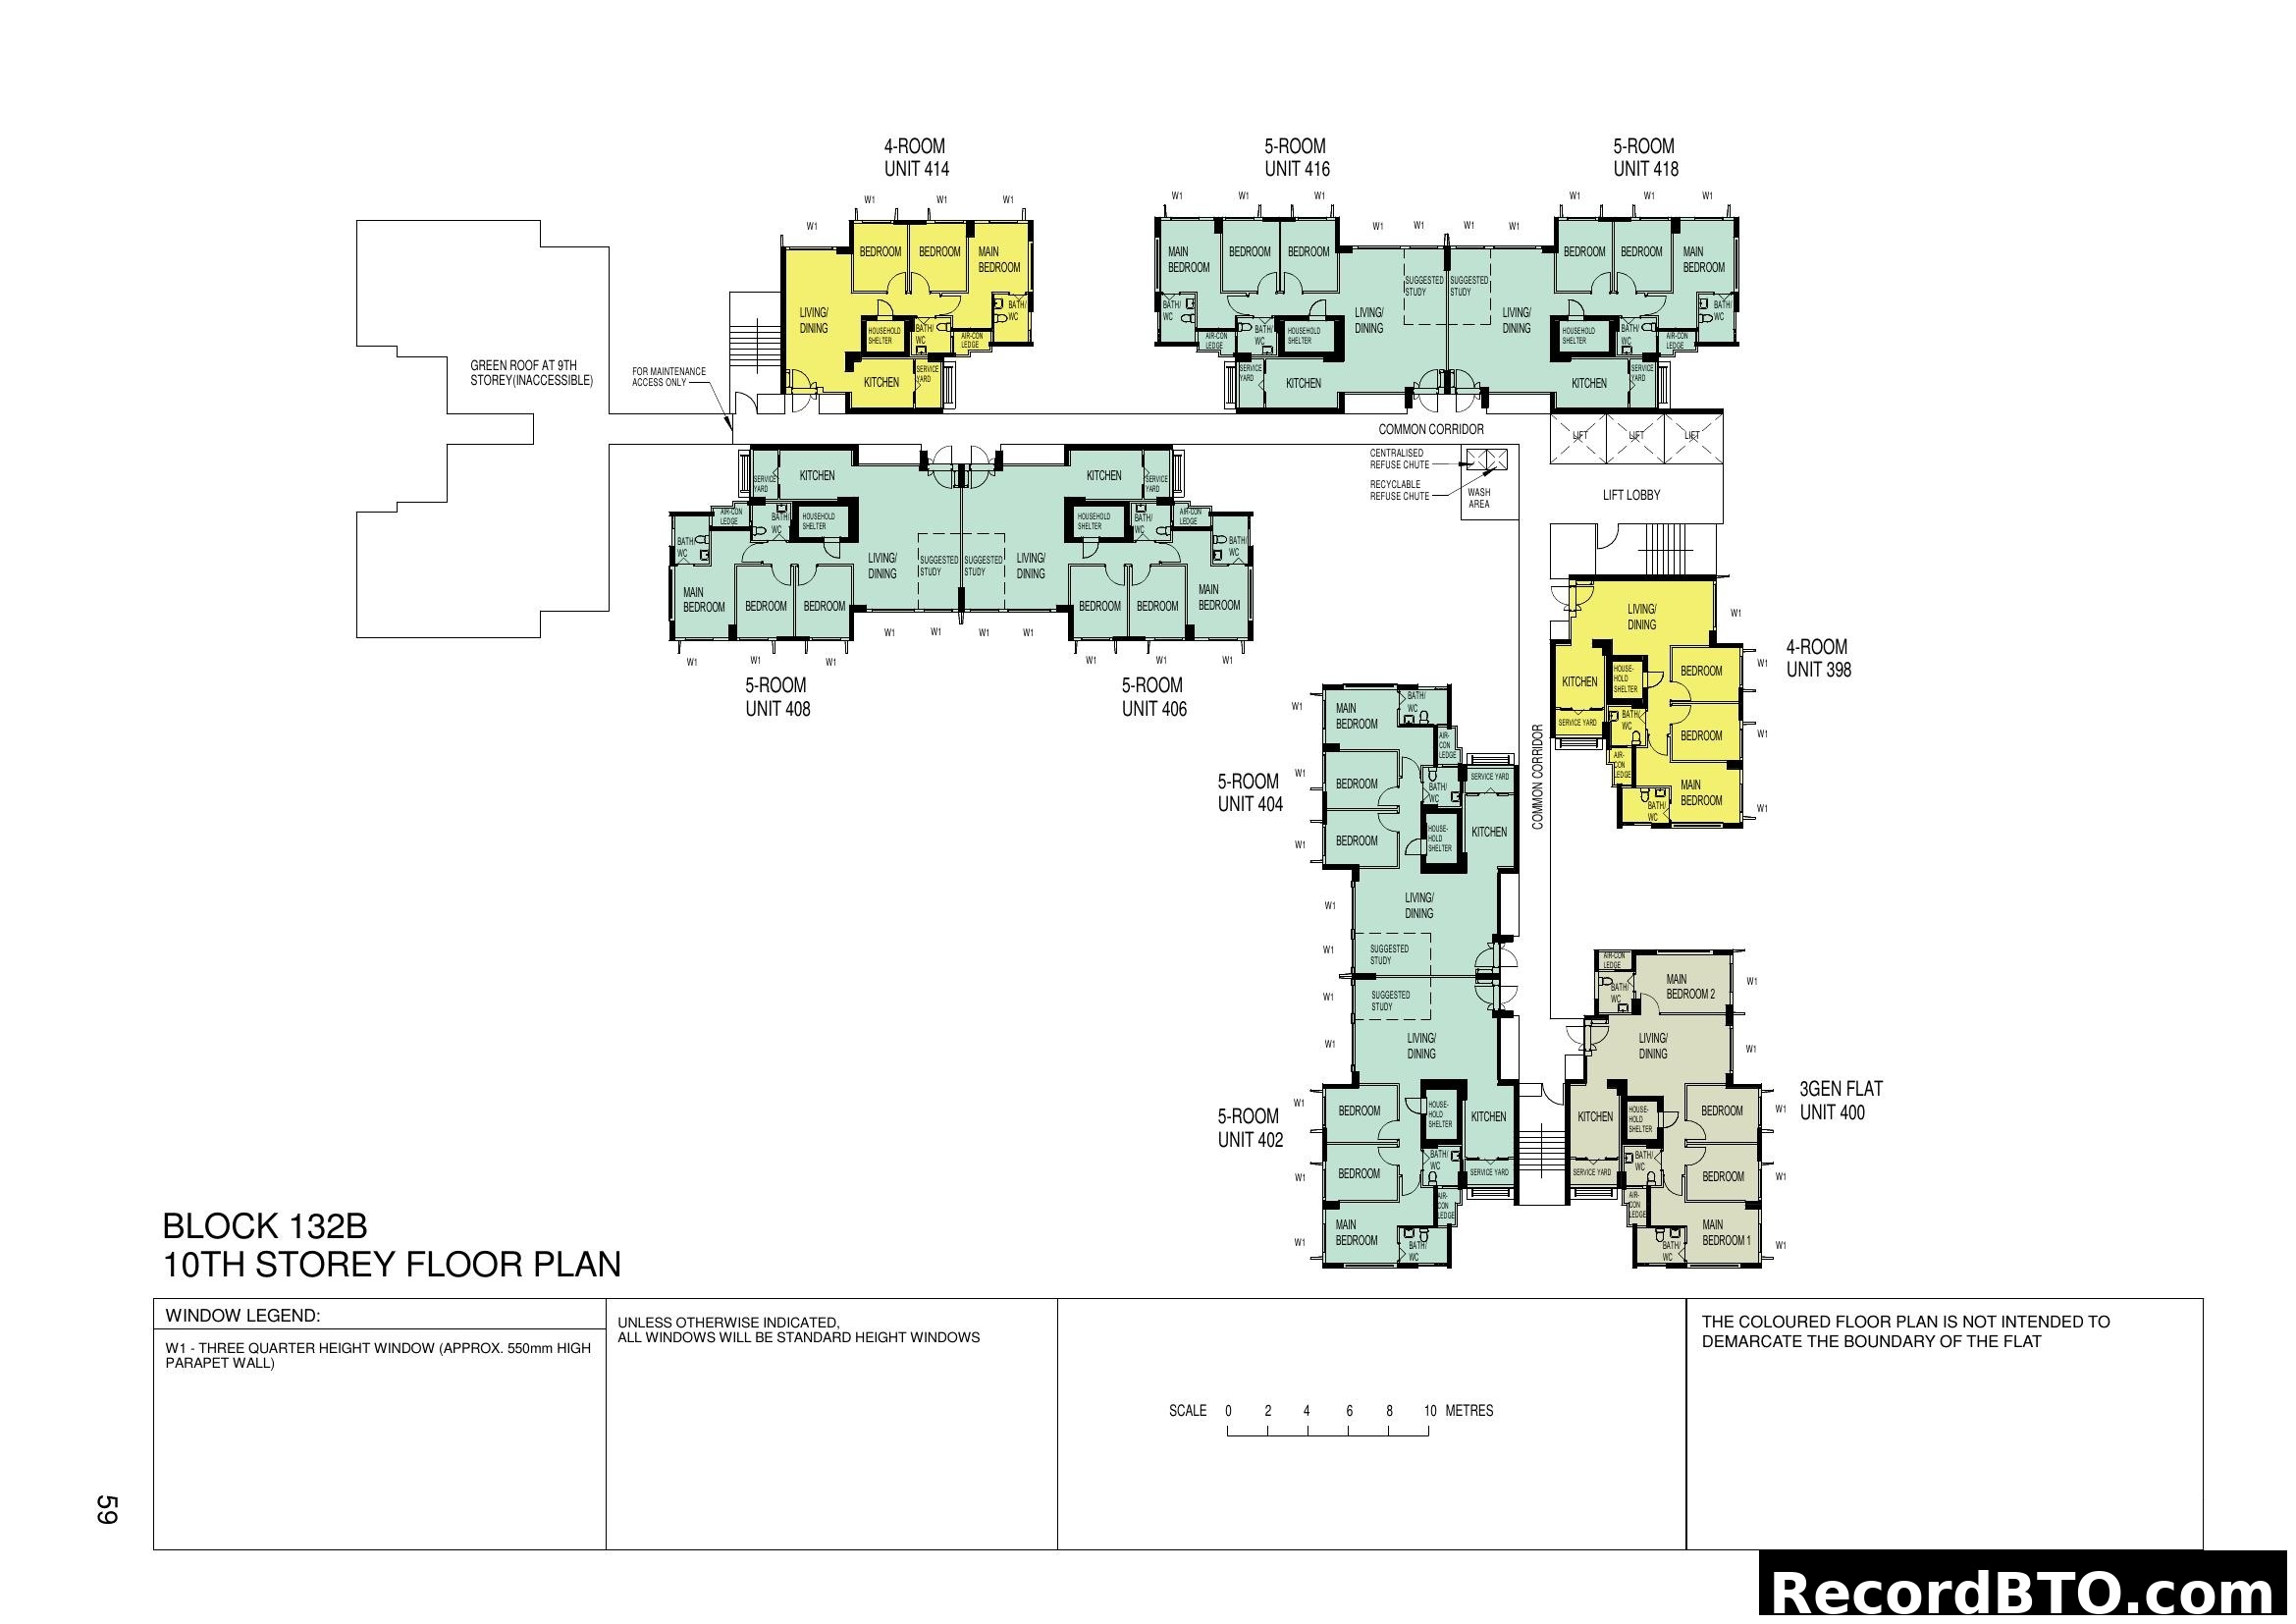
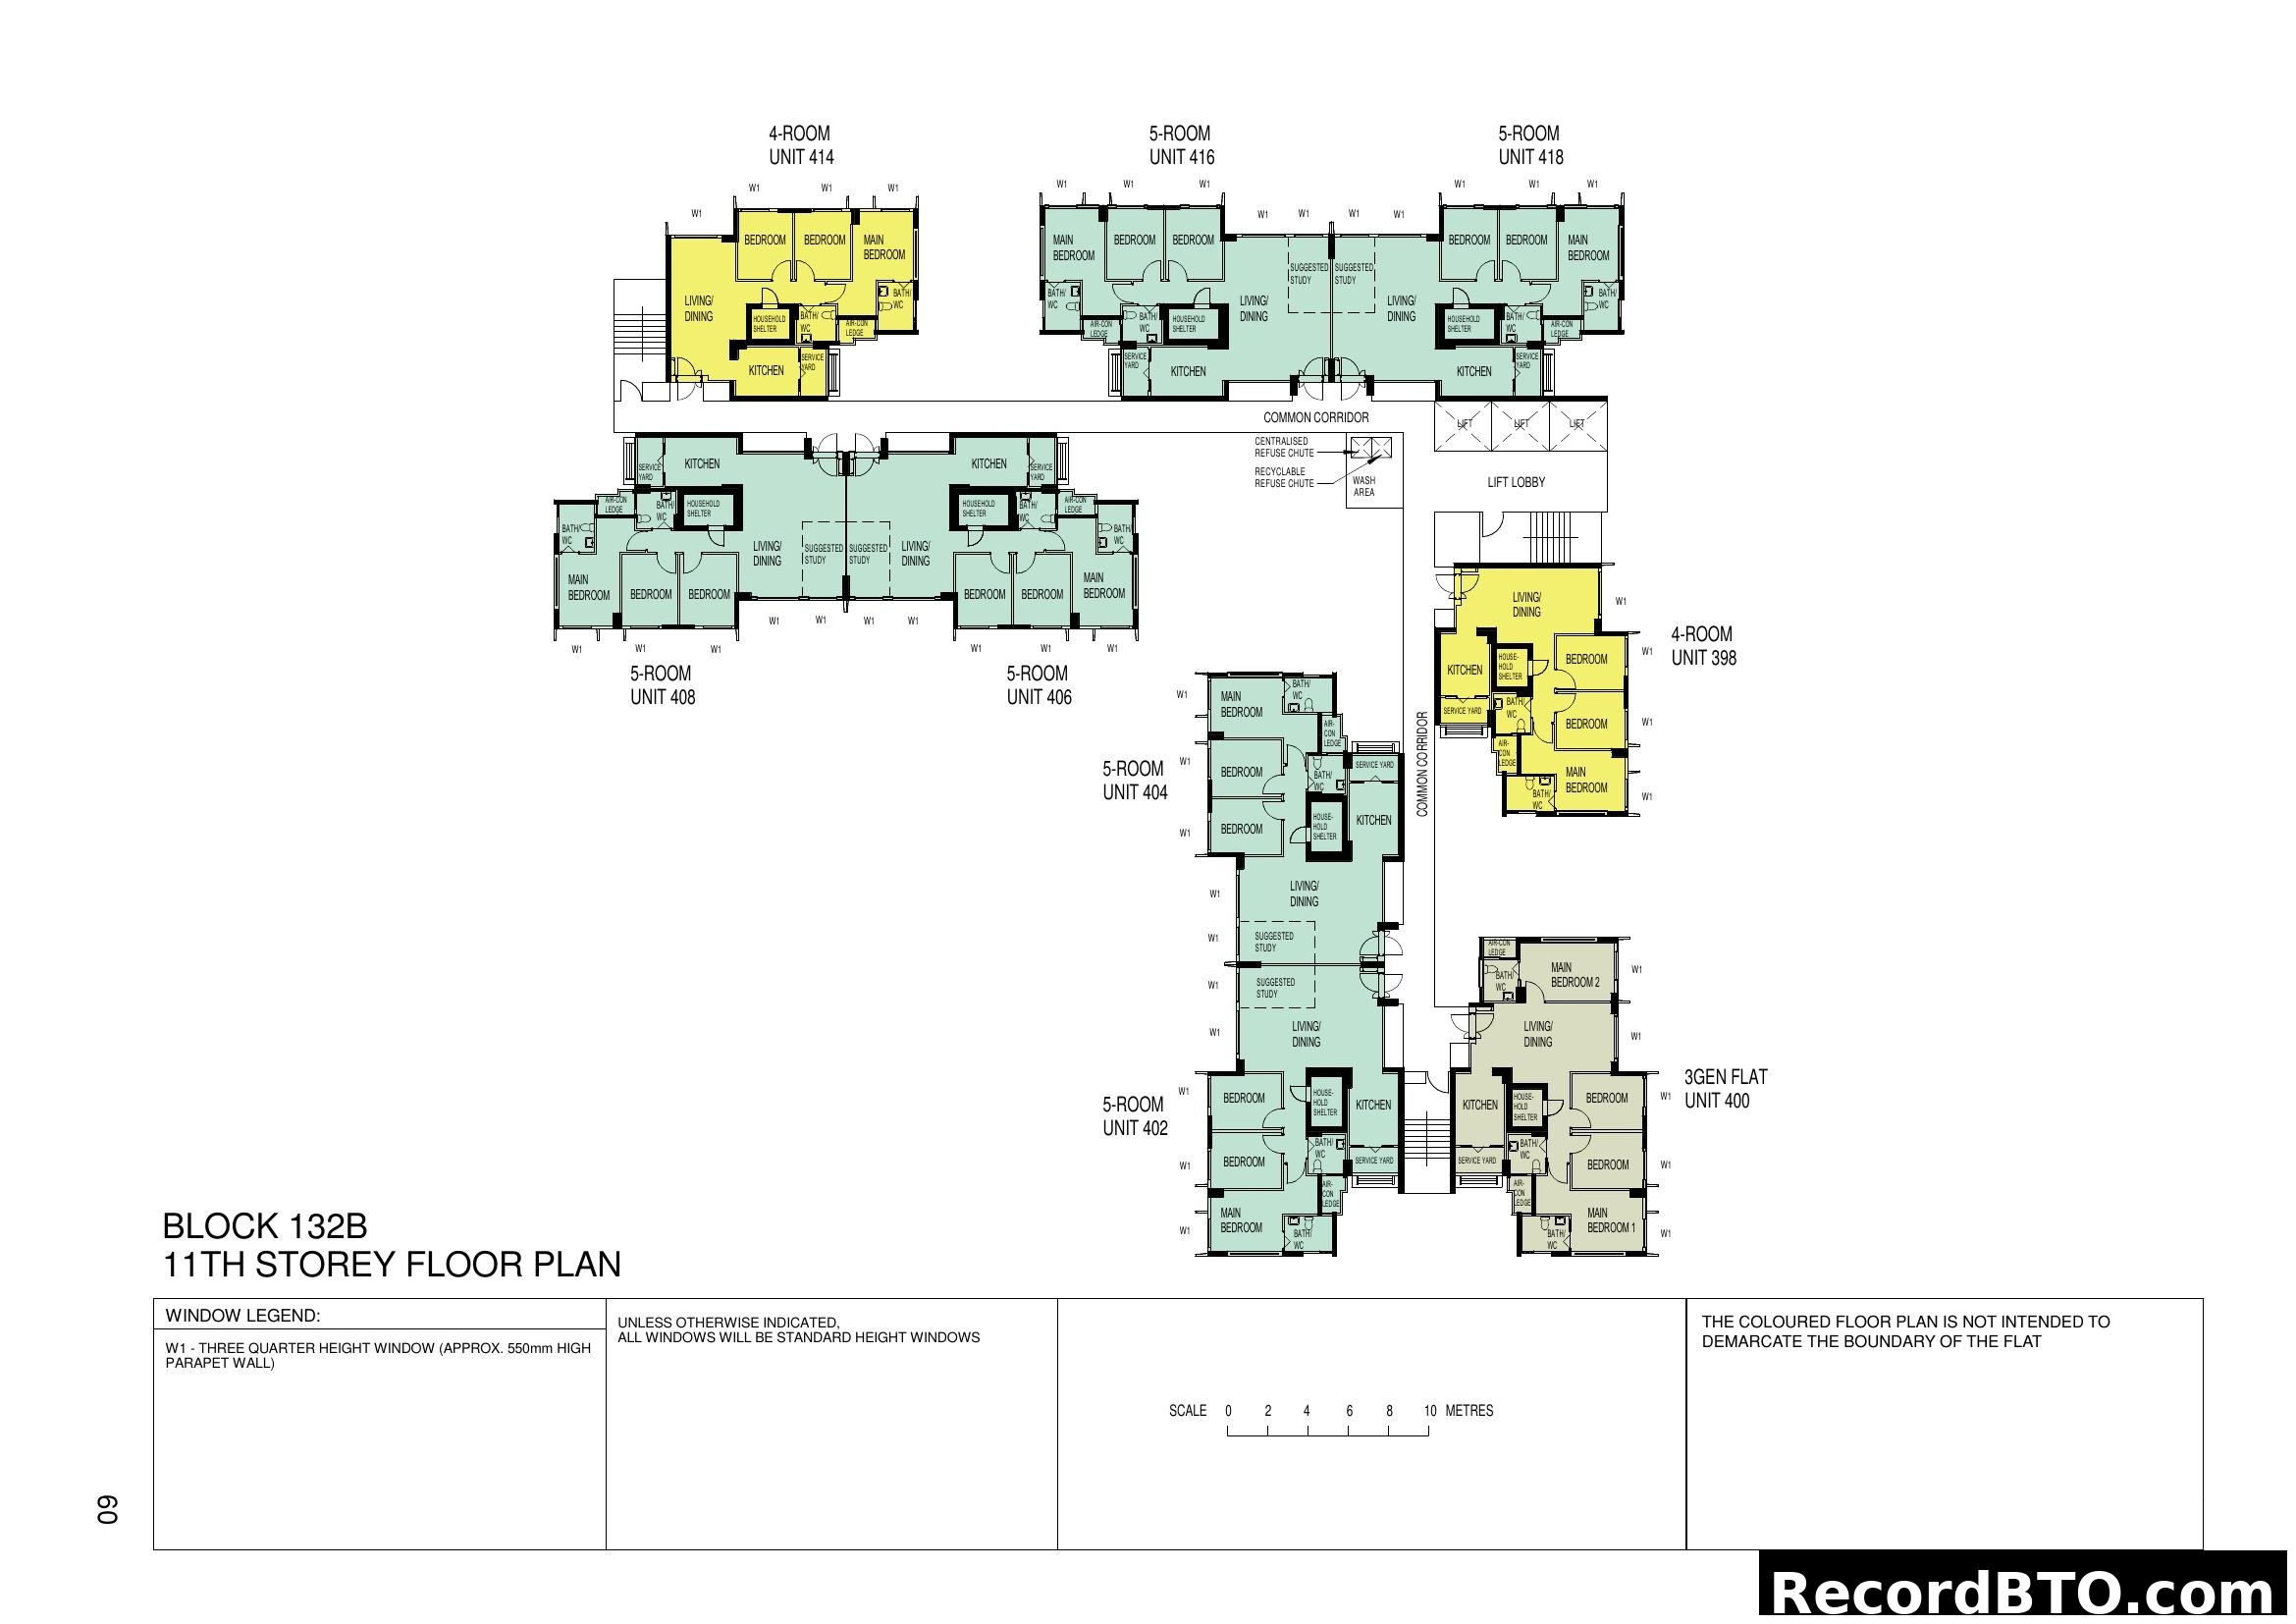
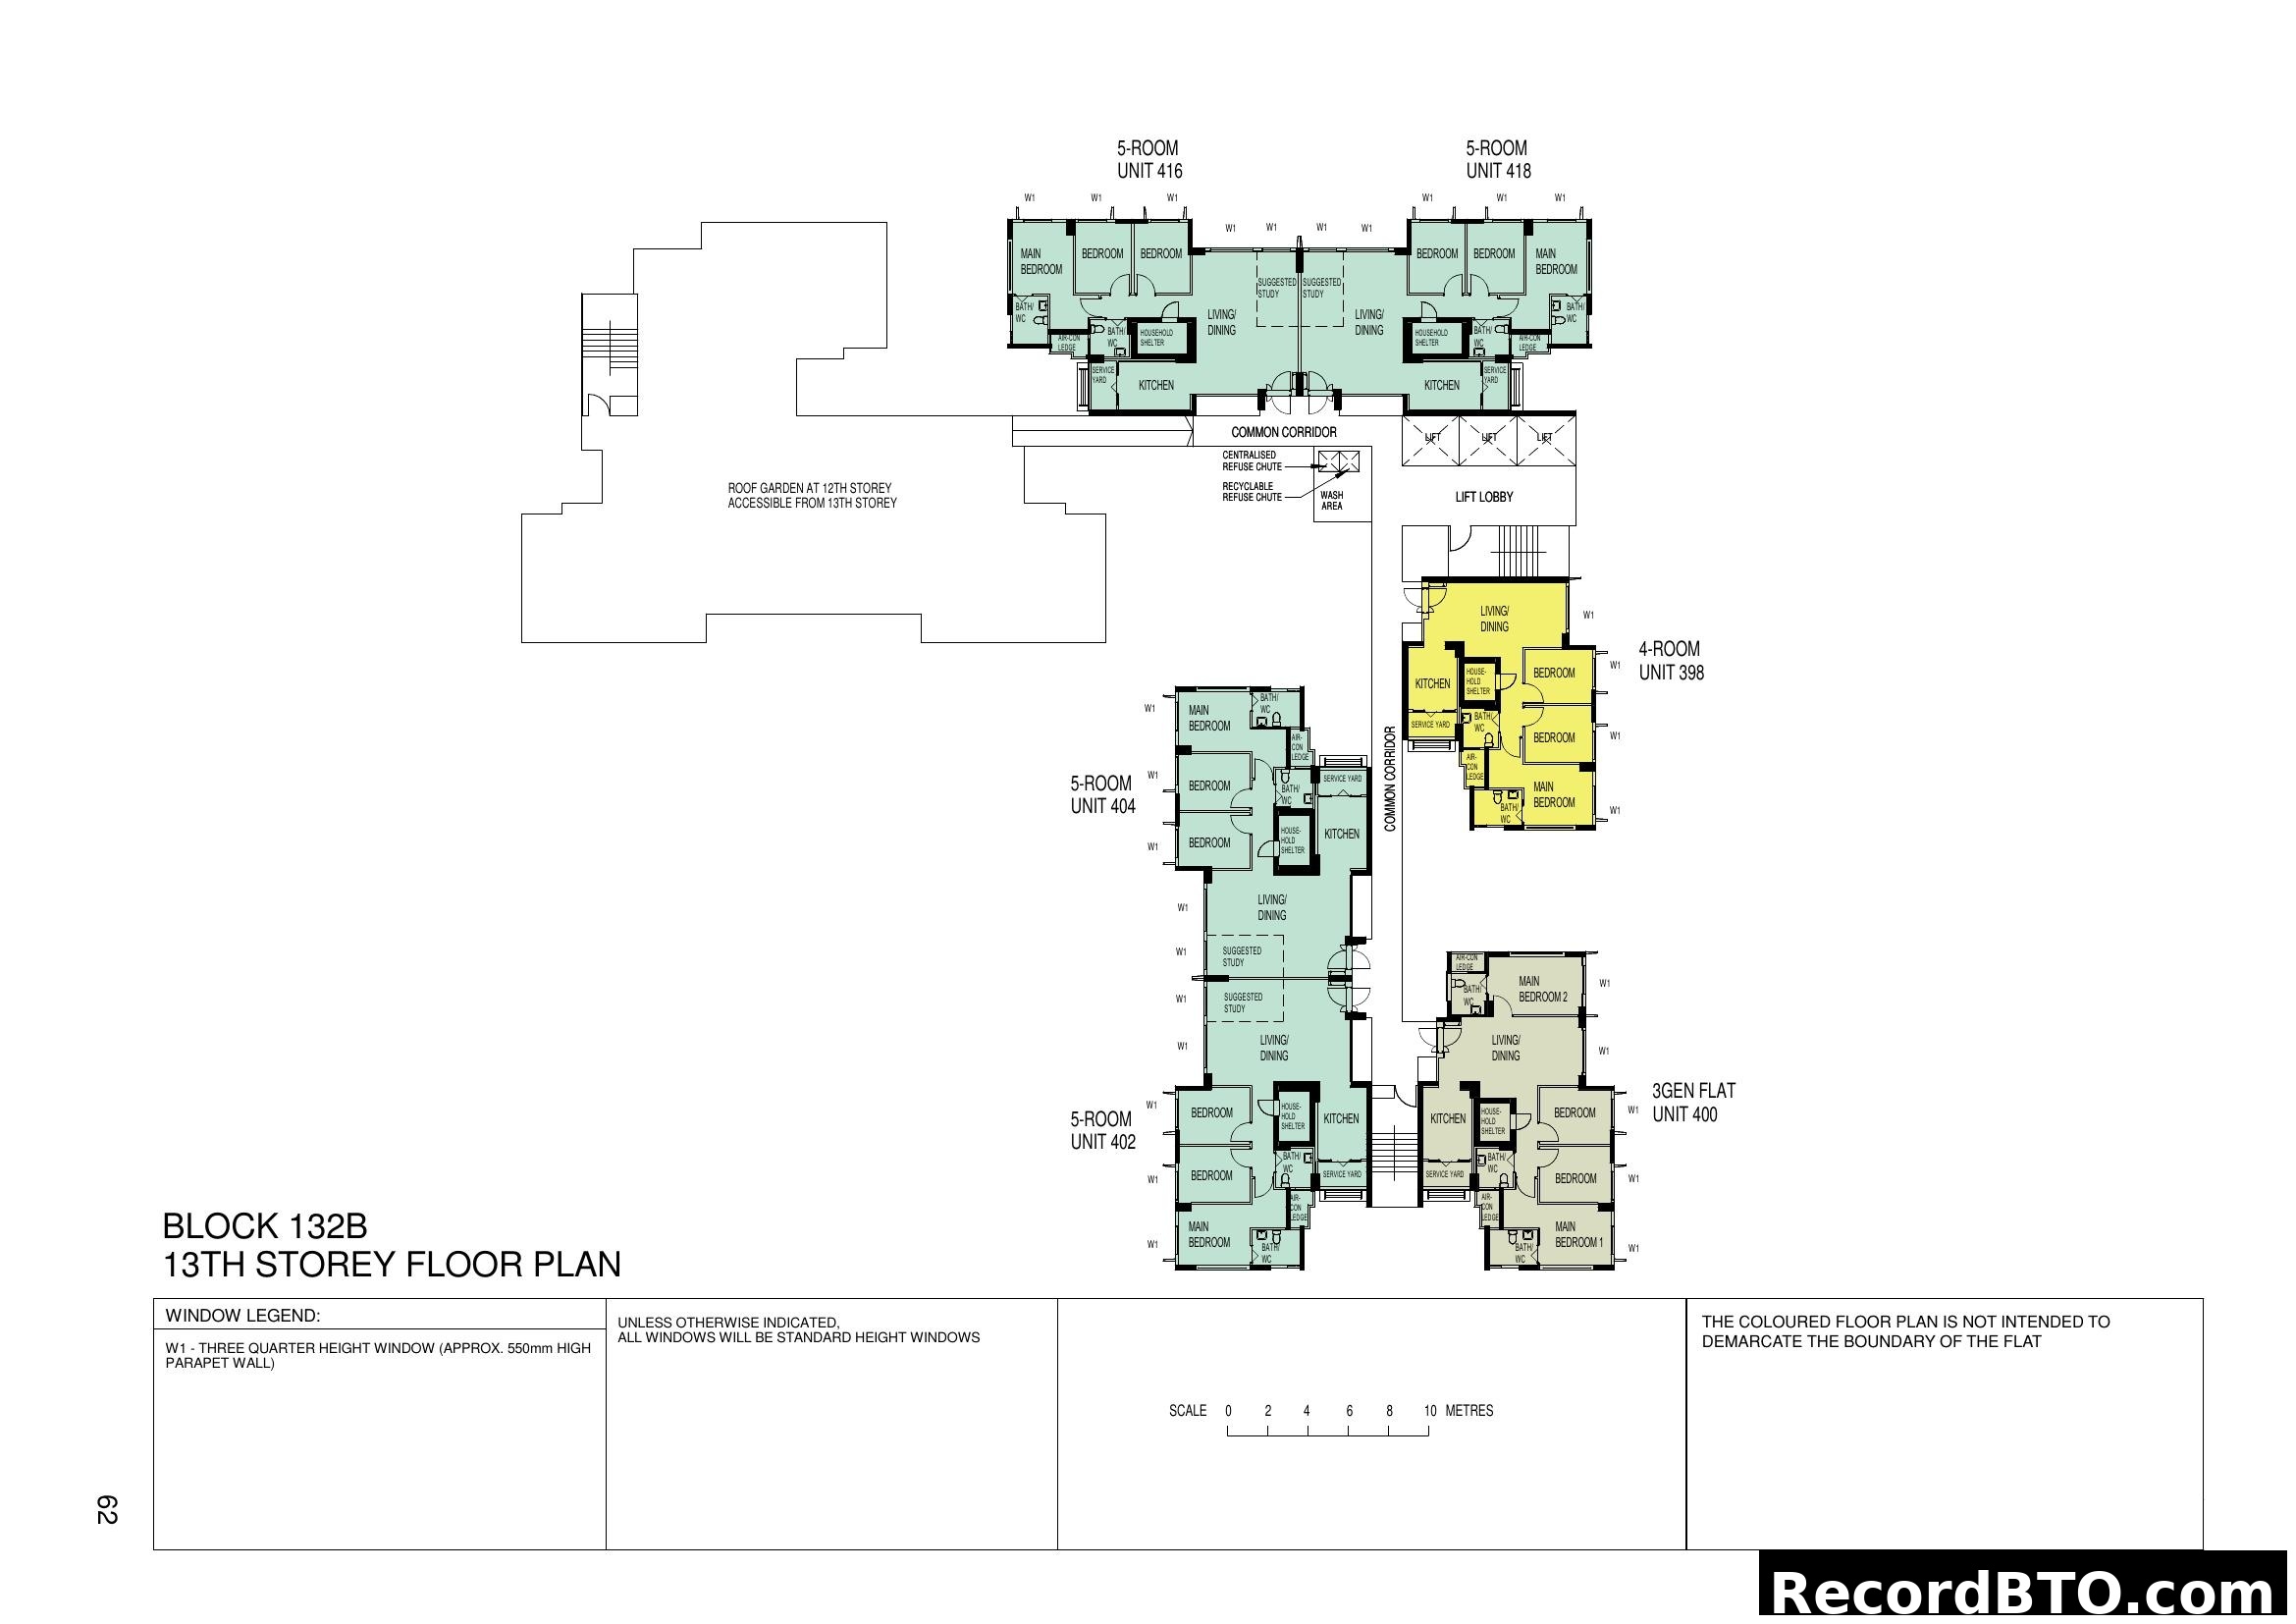
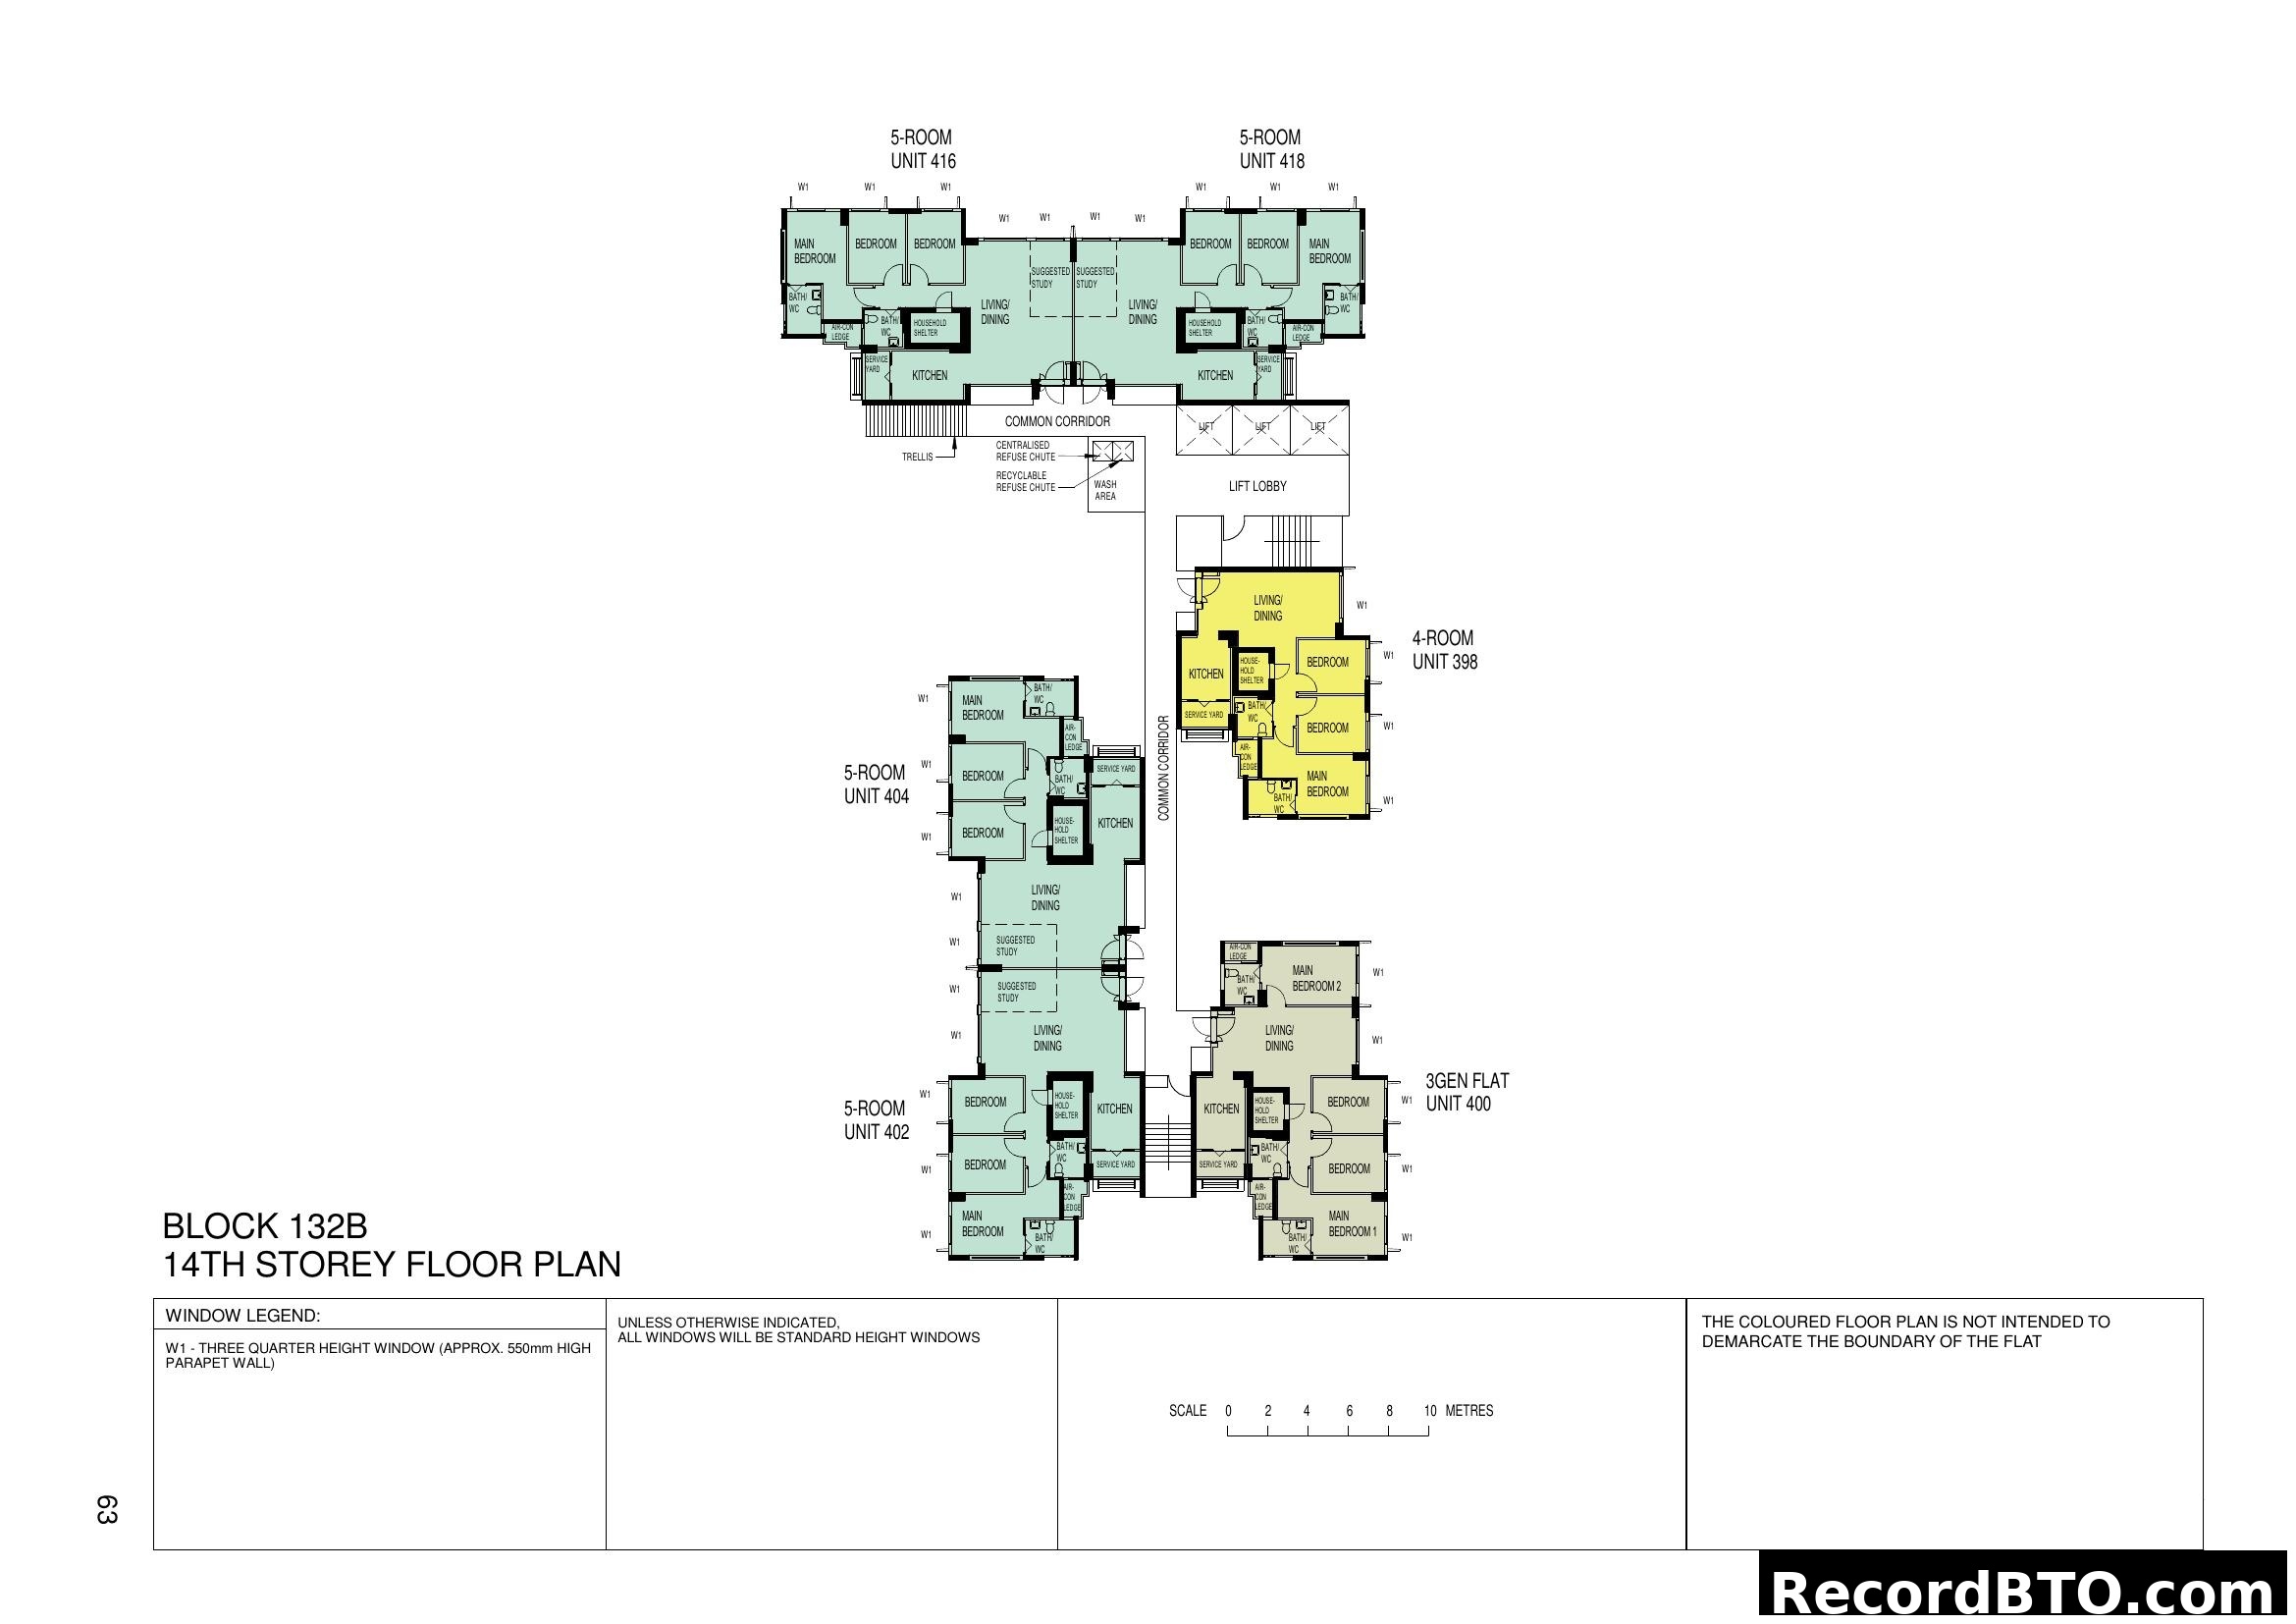
HDB Floor Plans: 5-Room and 3Gen Flat Layouts
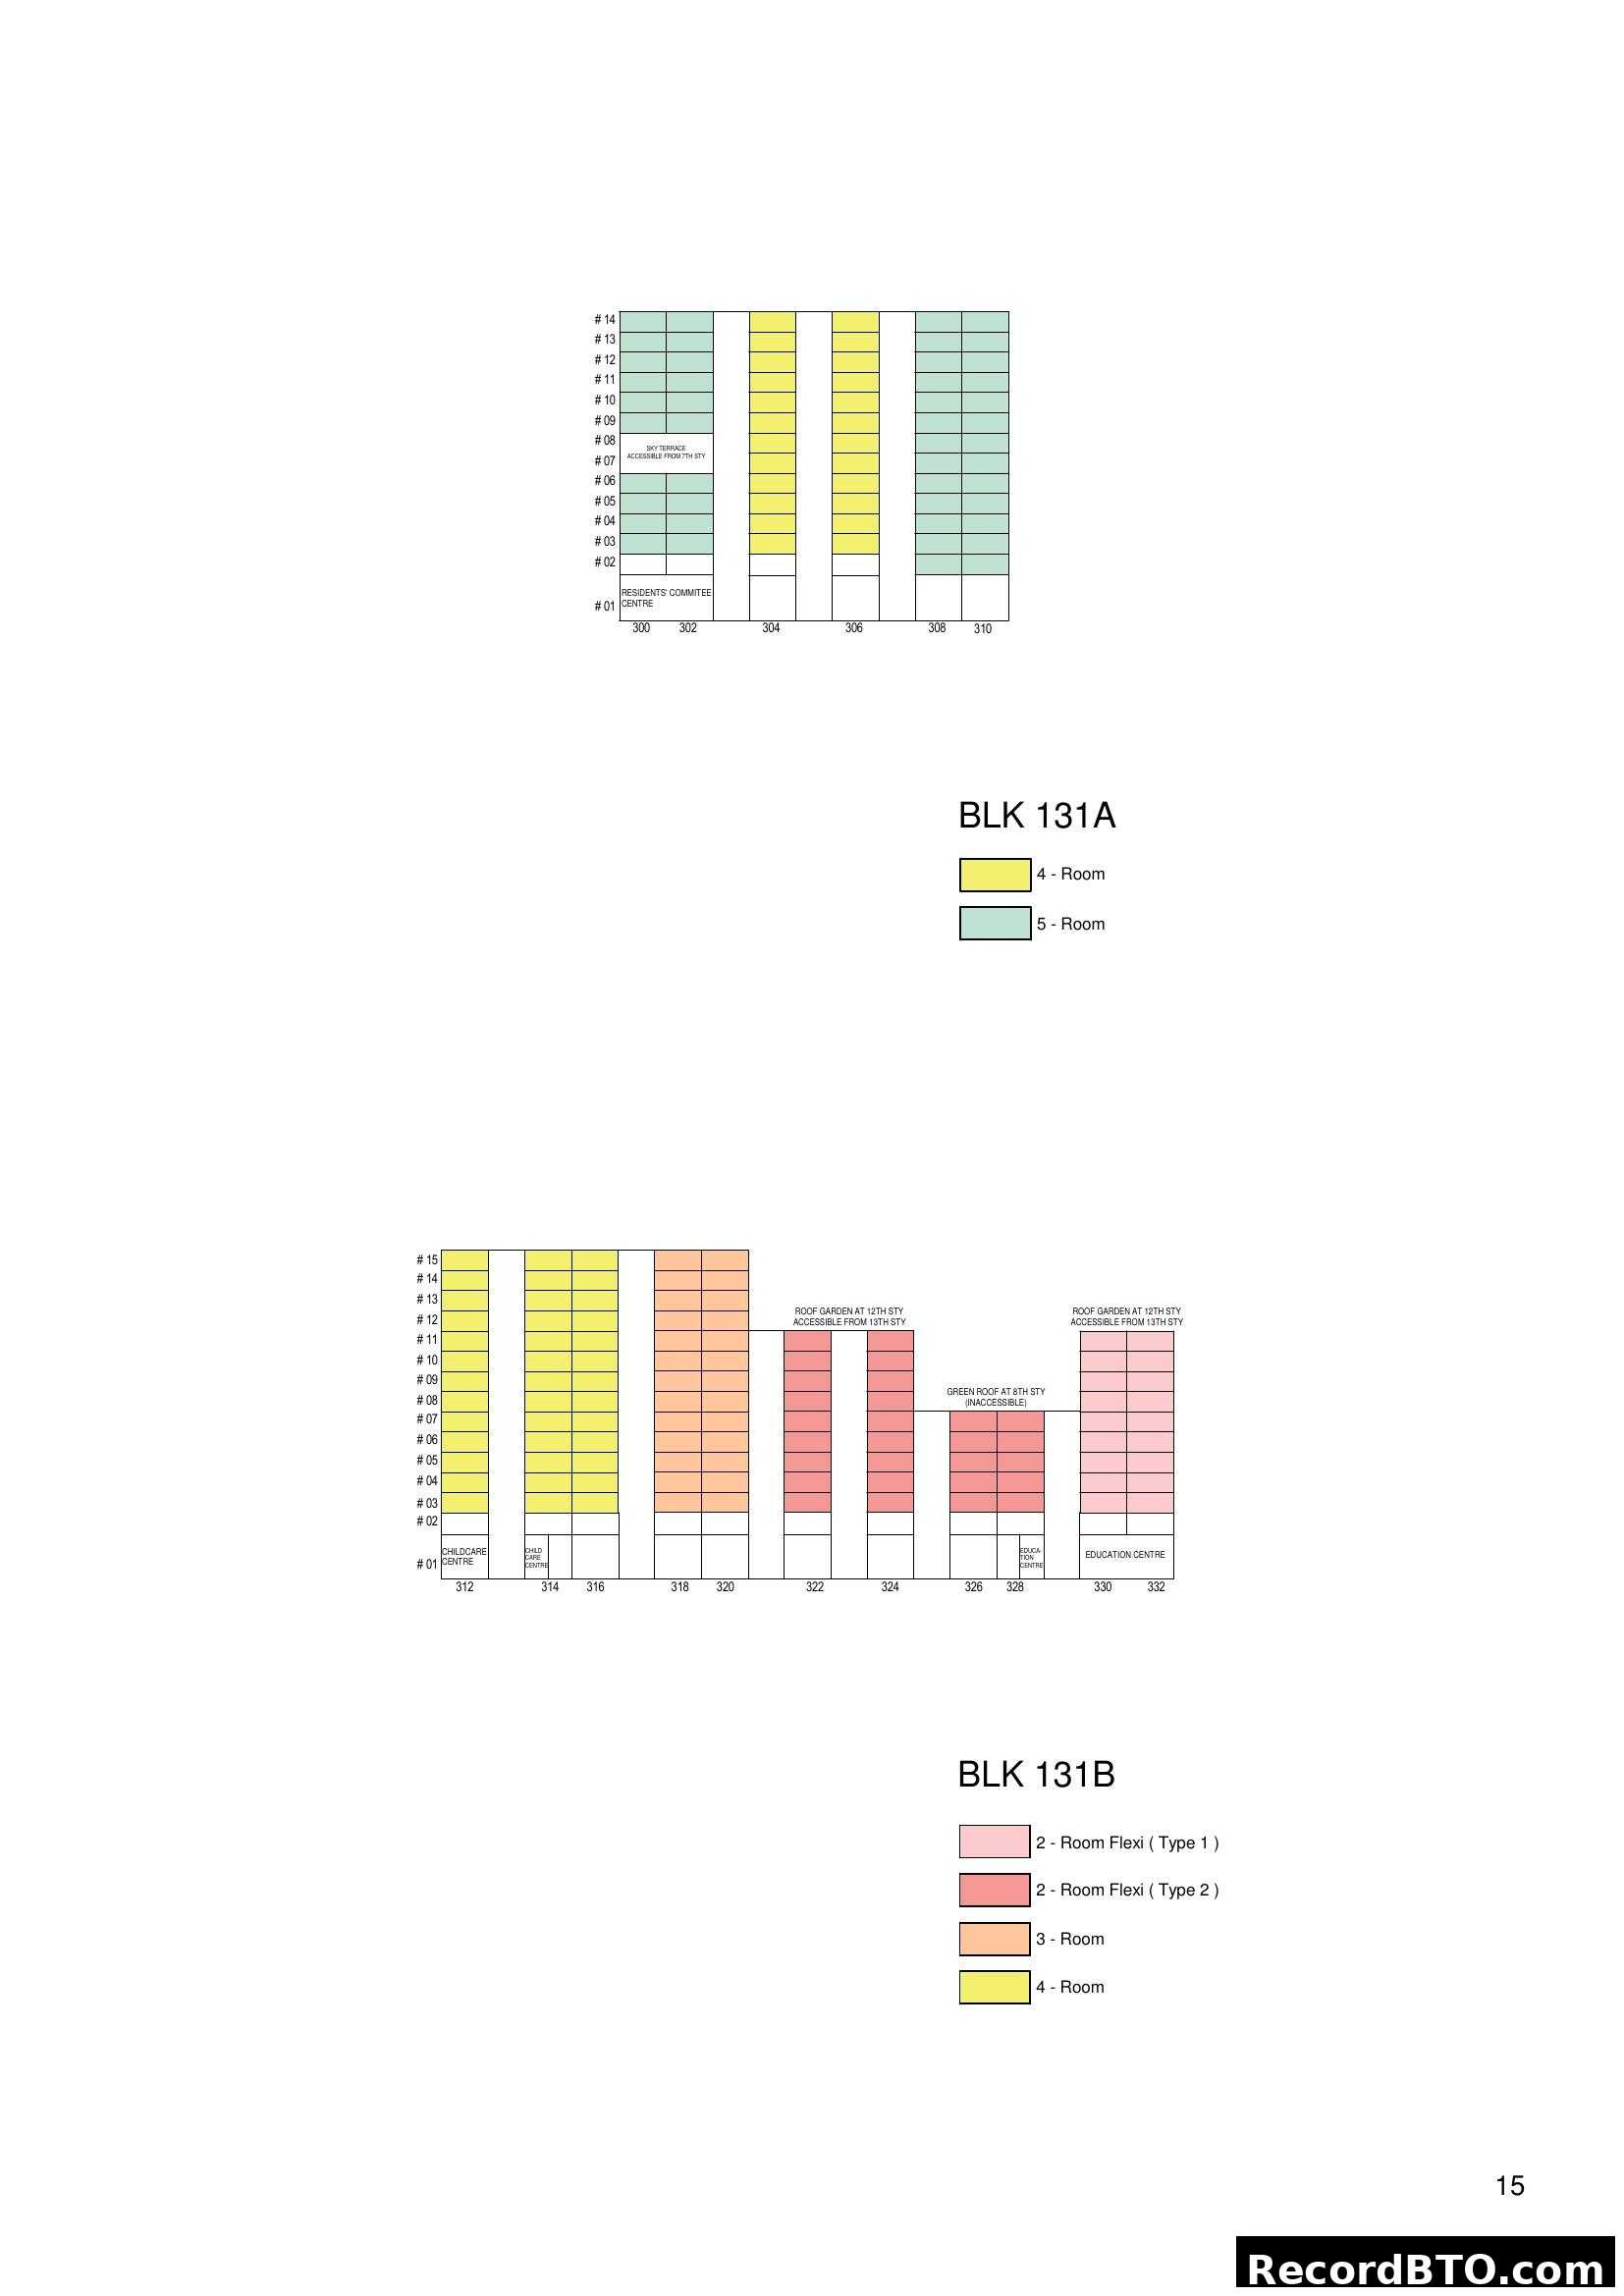
BLK 131A & 131B Stacking Plan with Unit Types

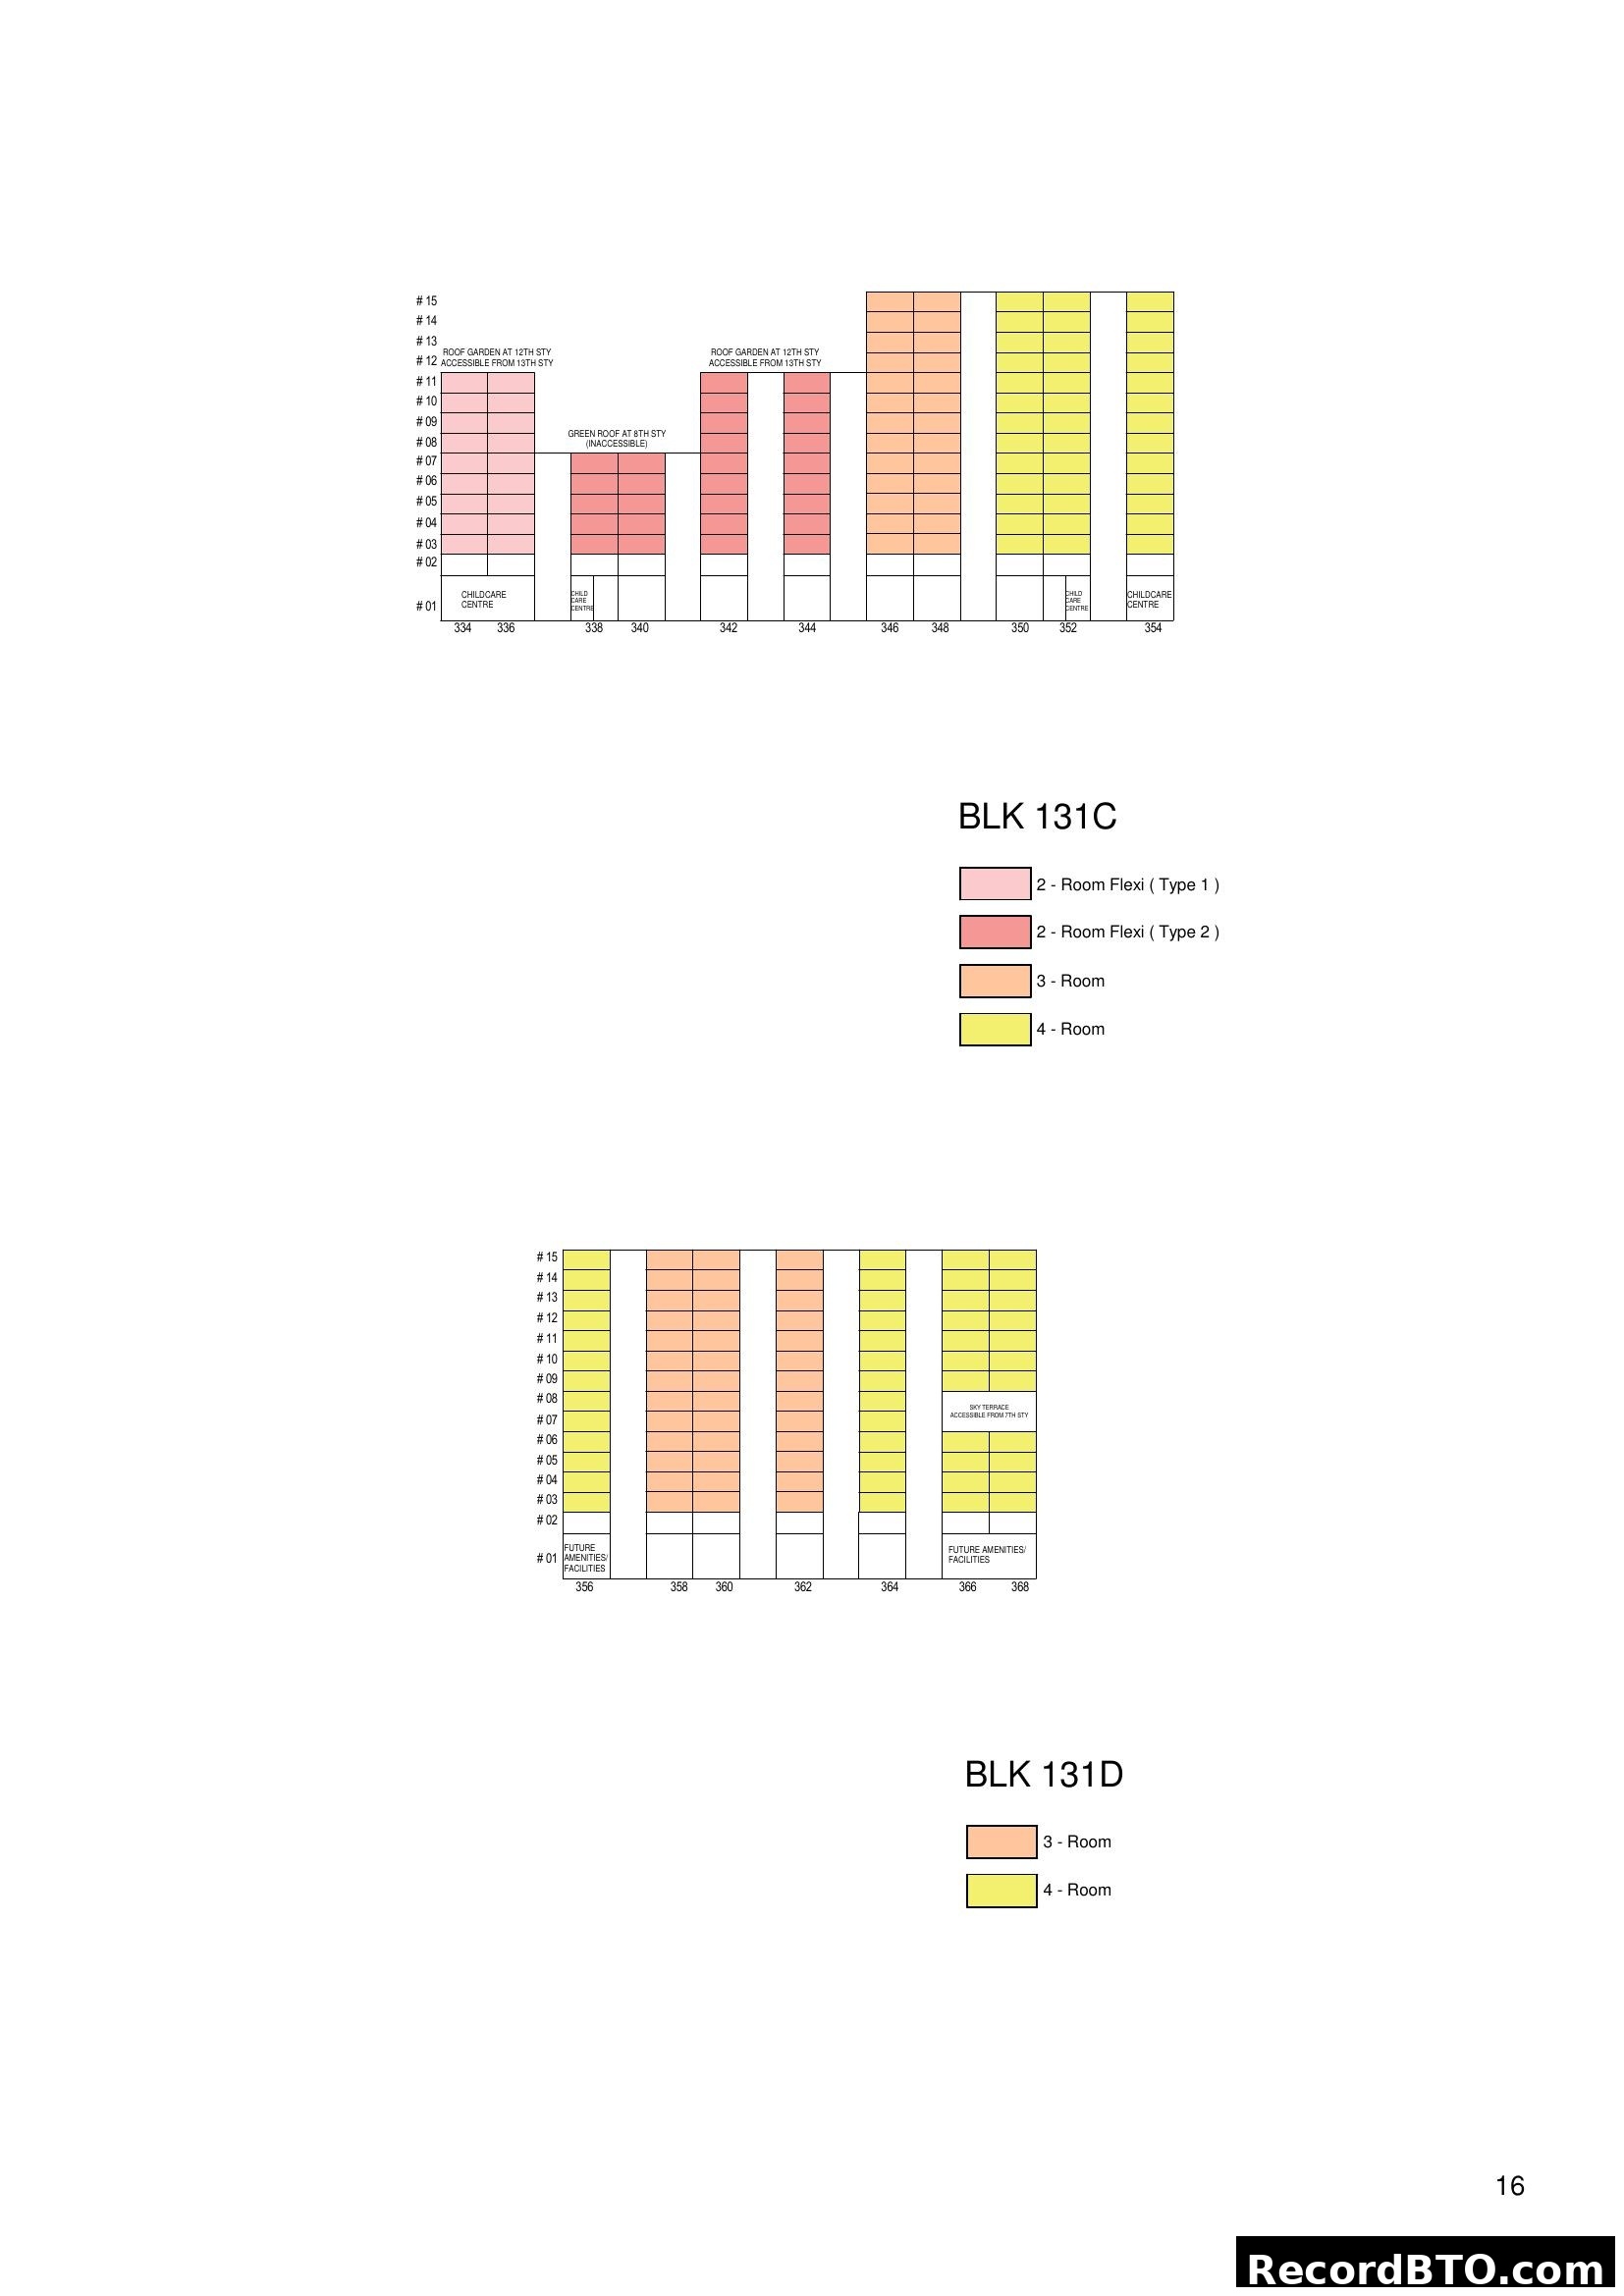
HDB Block 131C & 131D Unit Stacking Chart

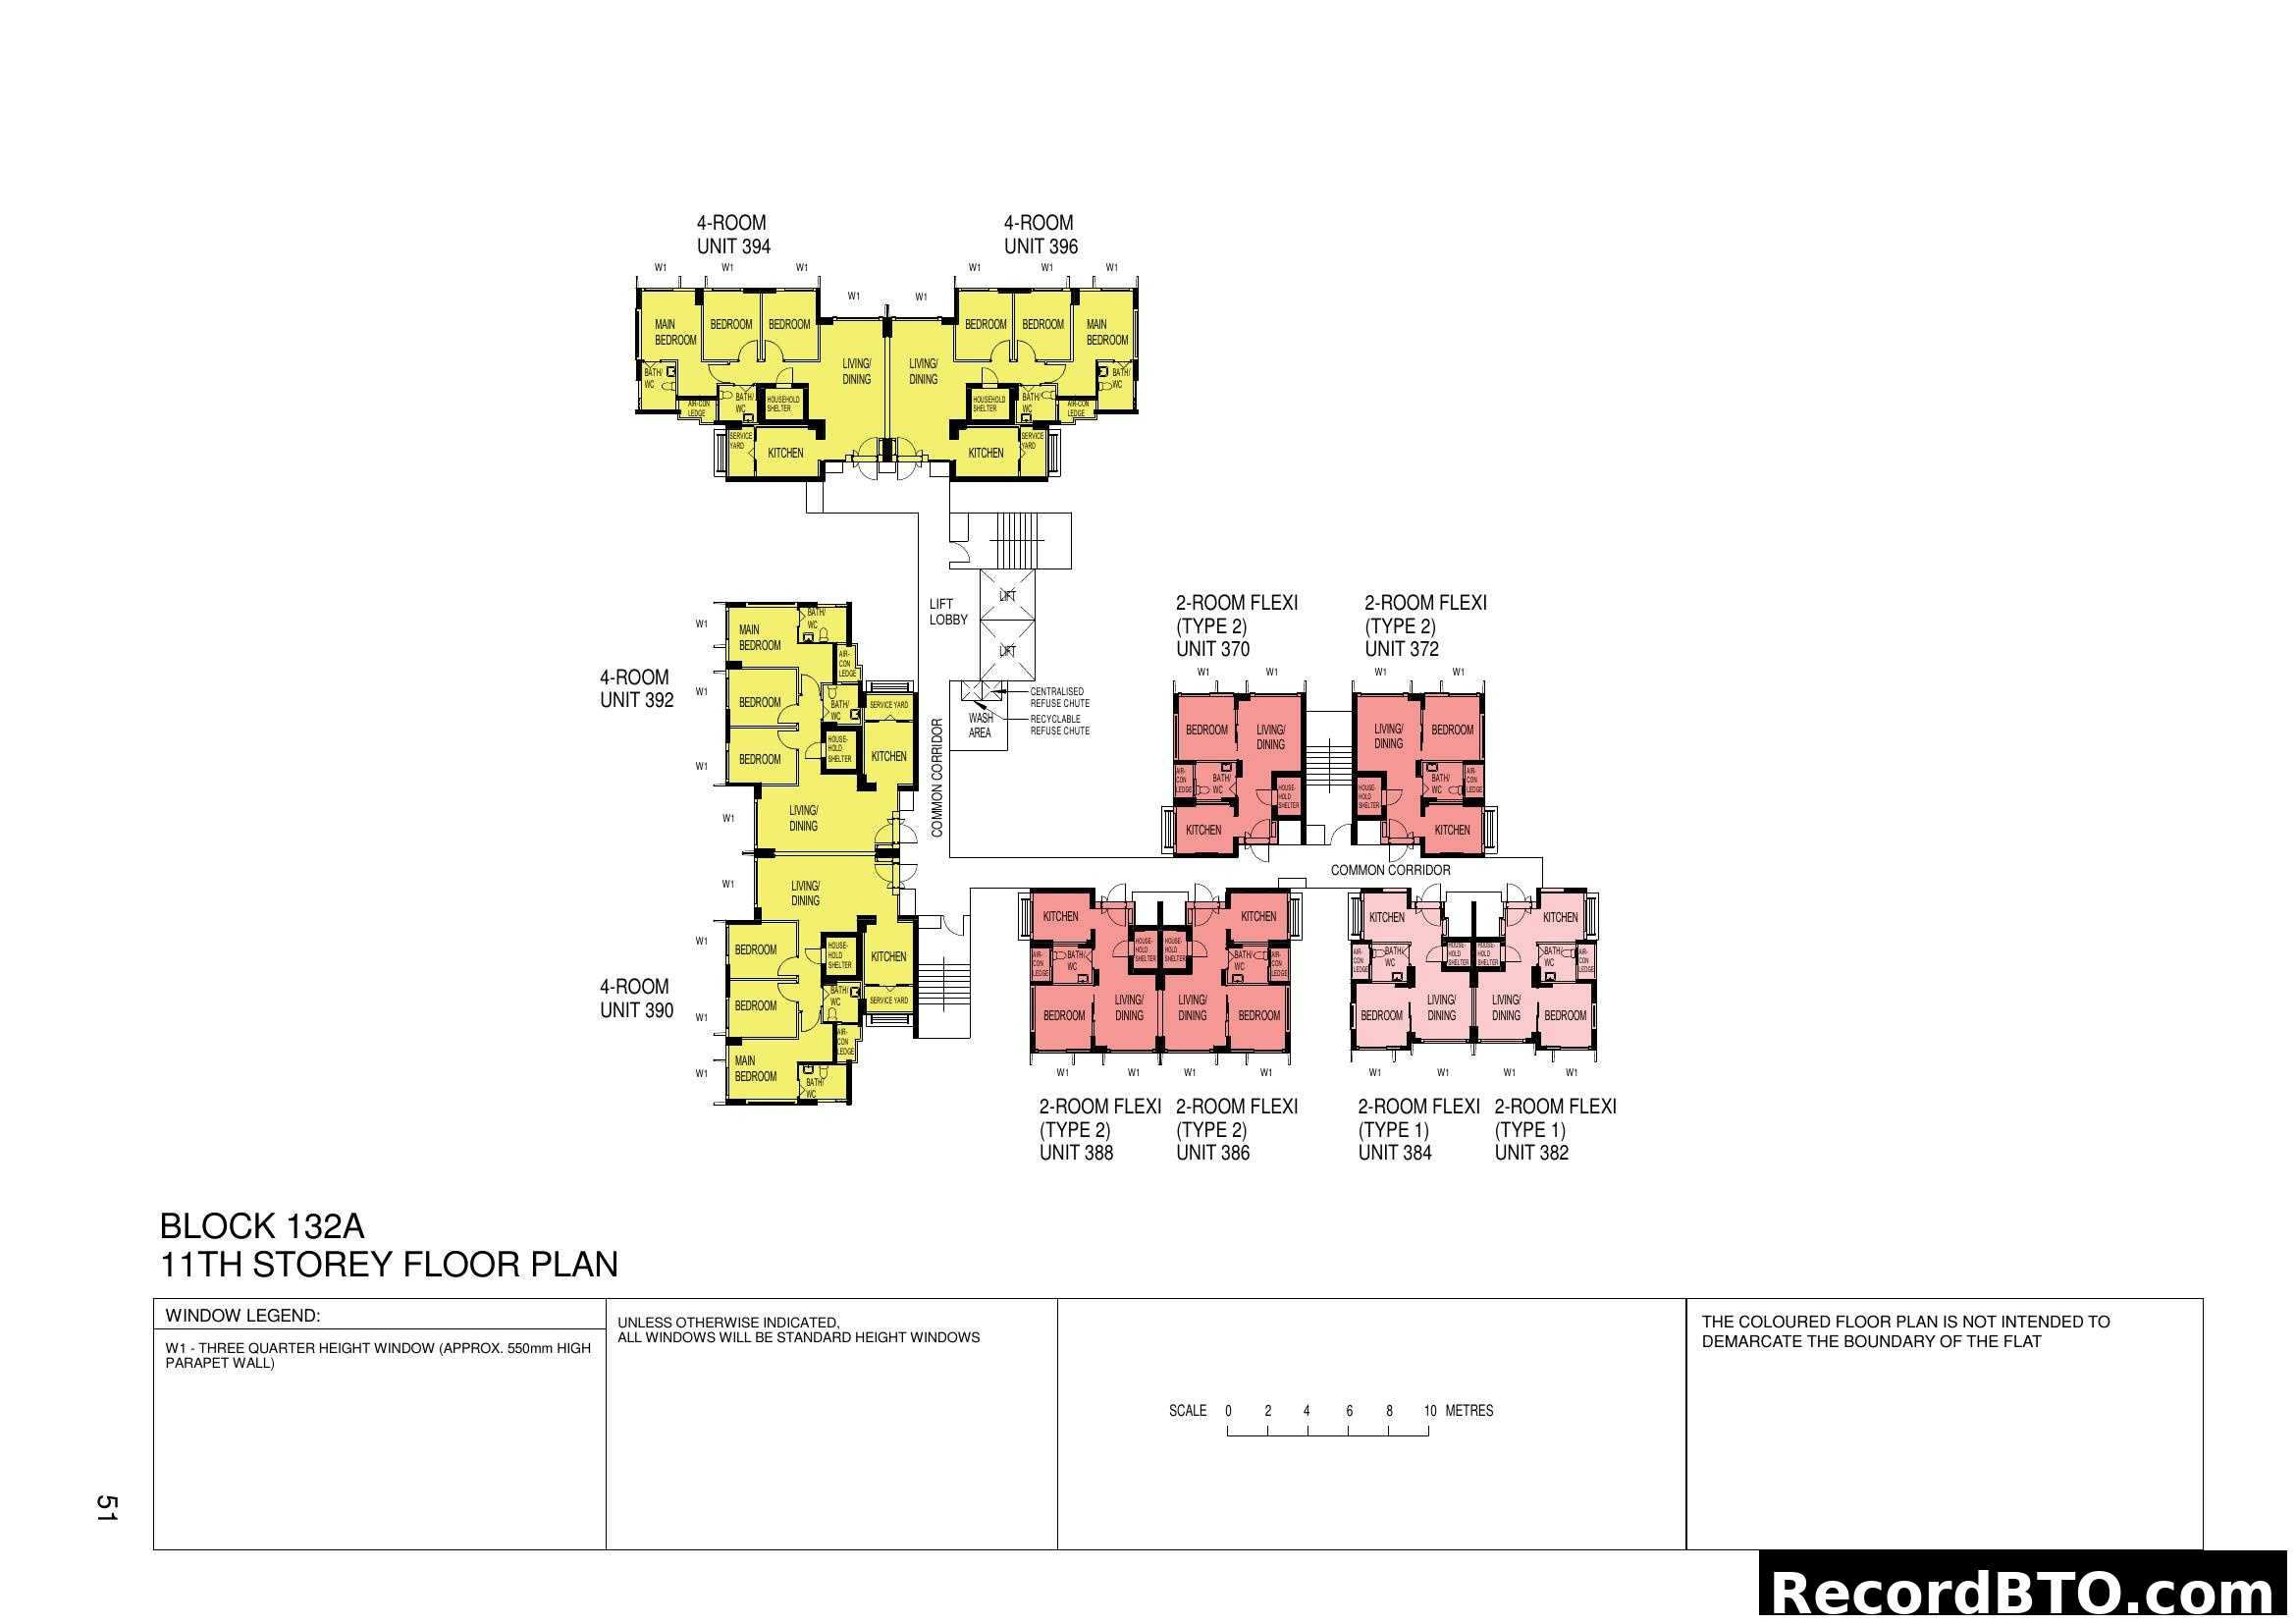
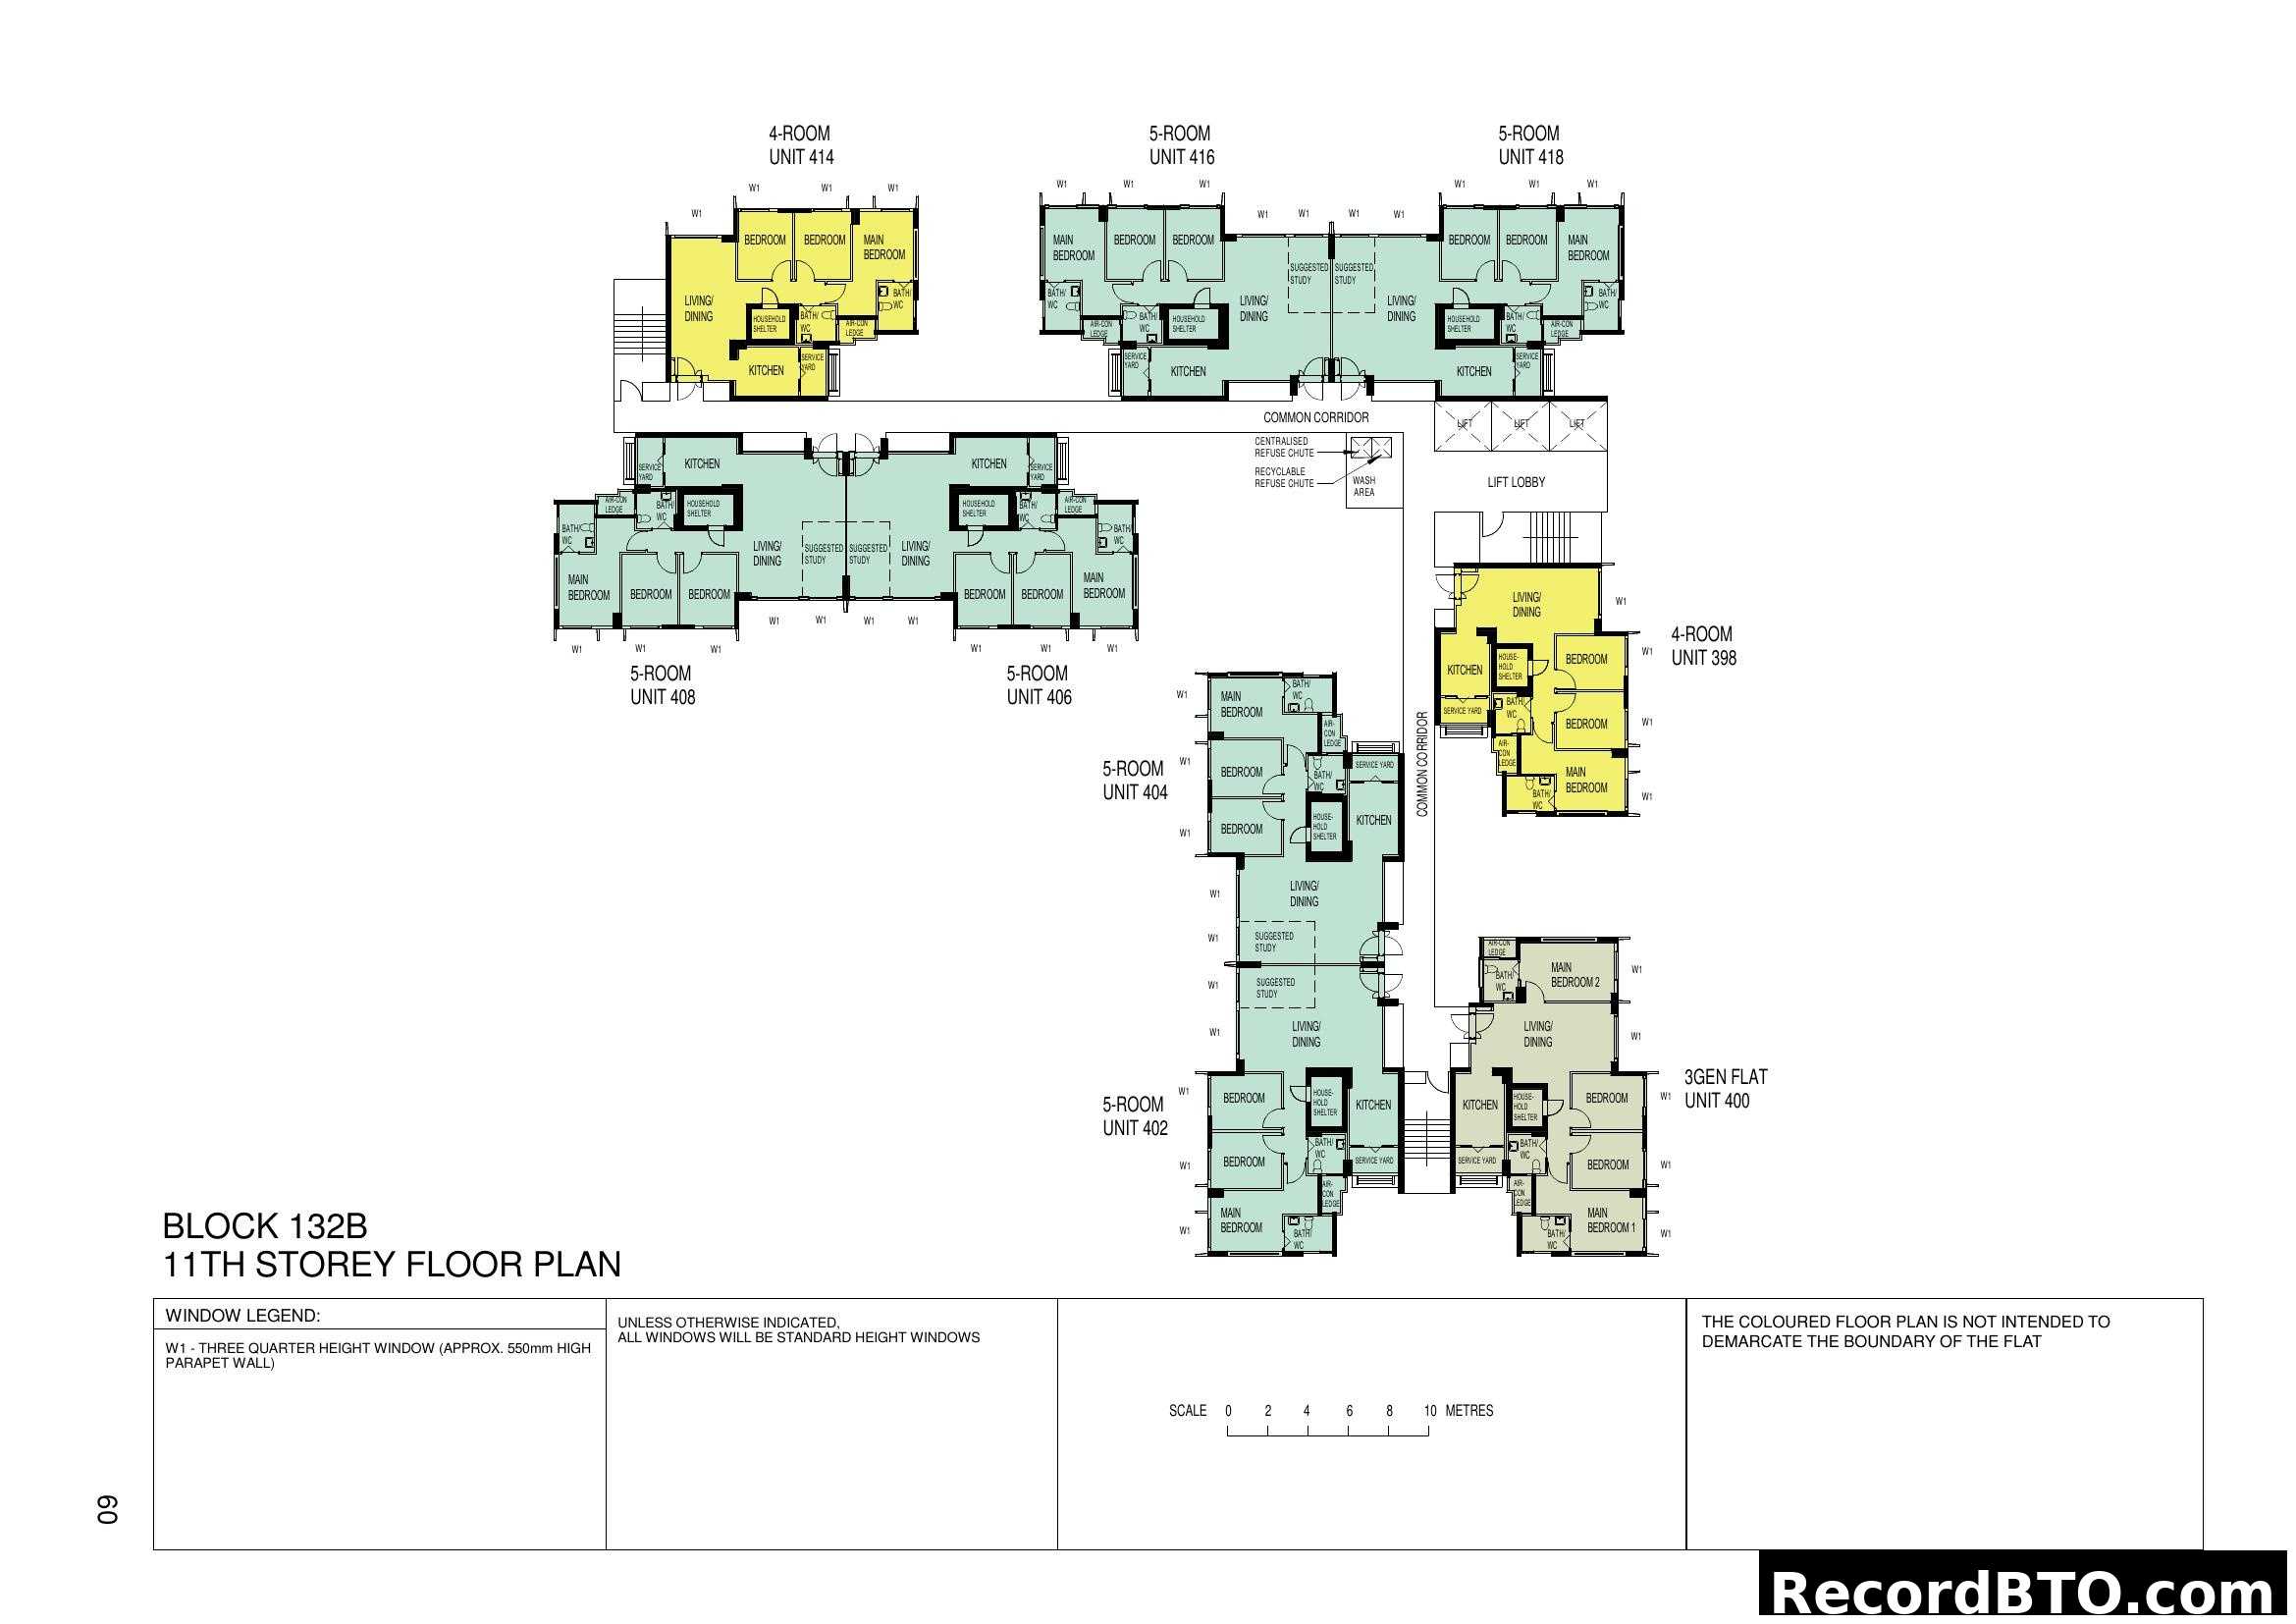
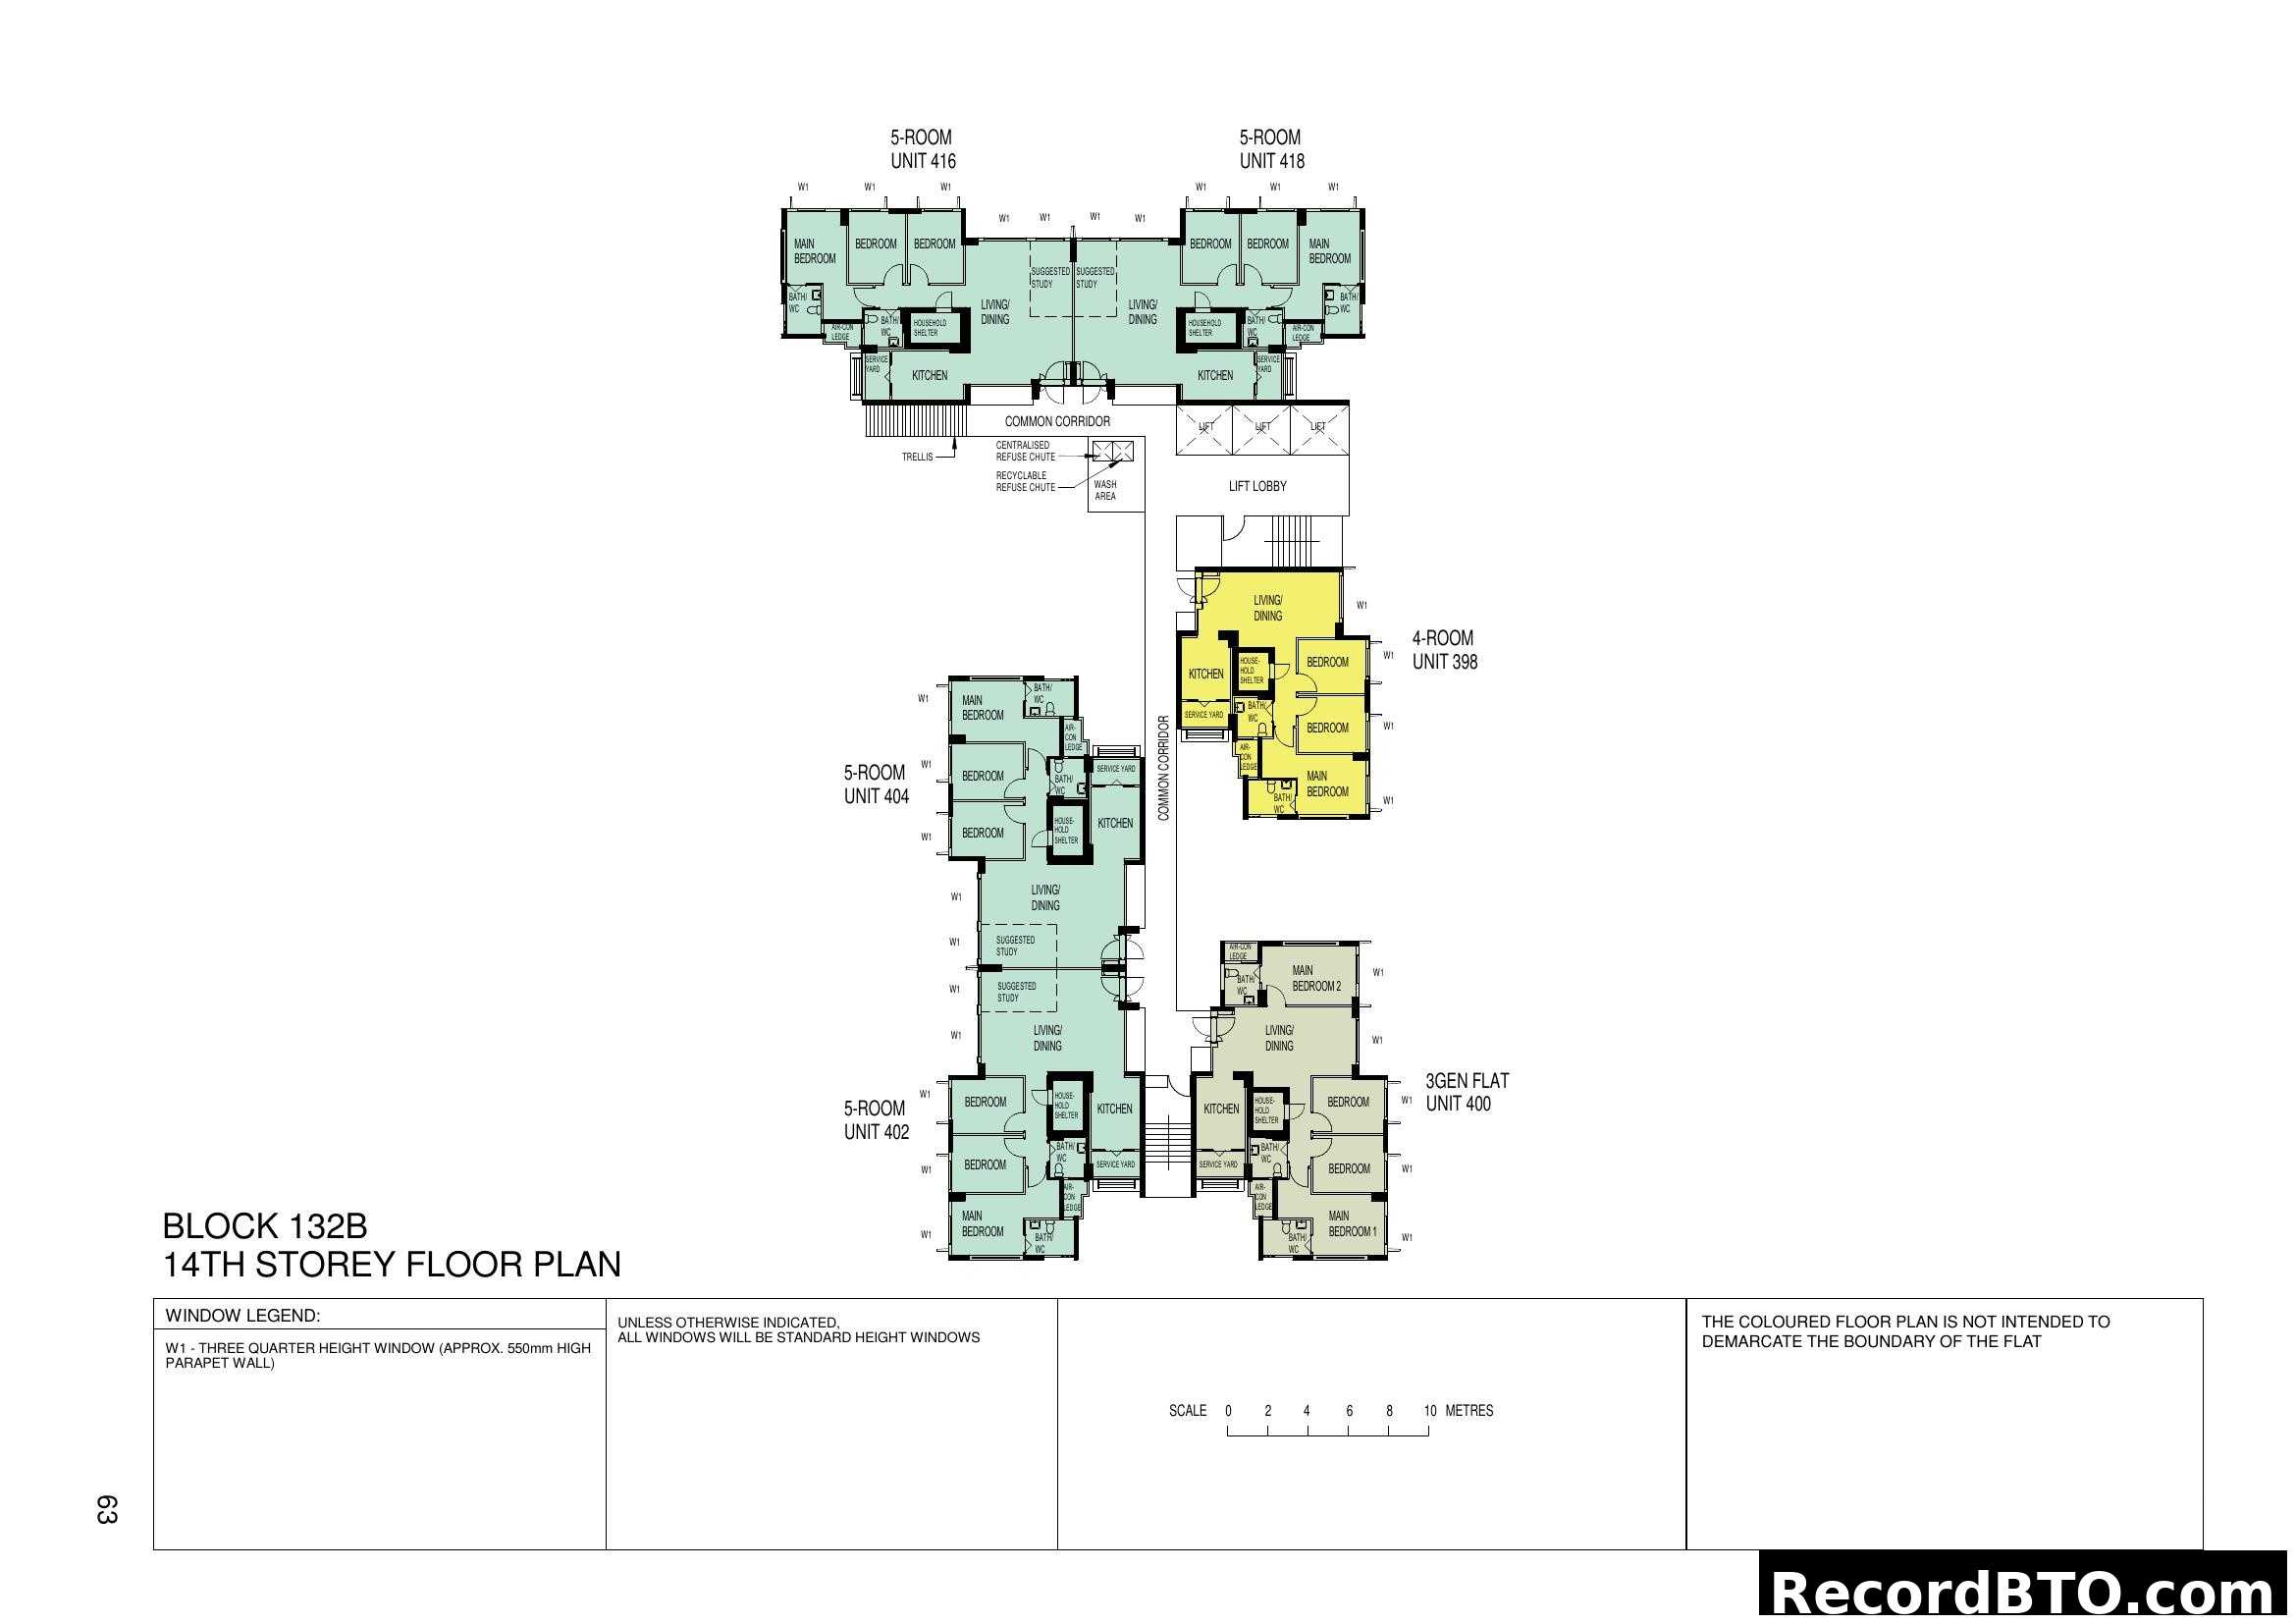
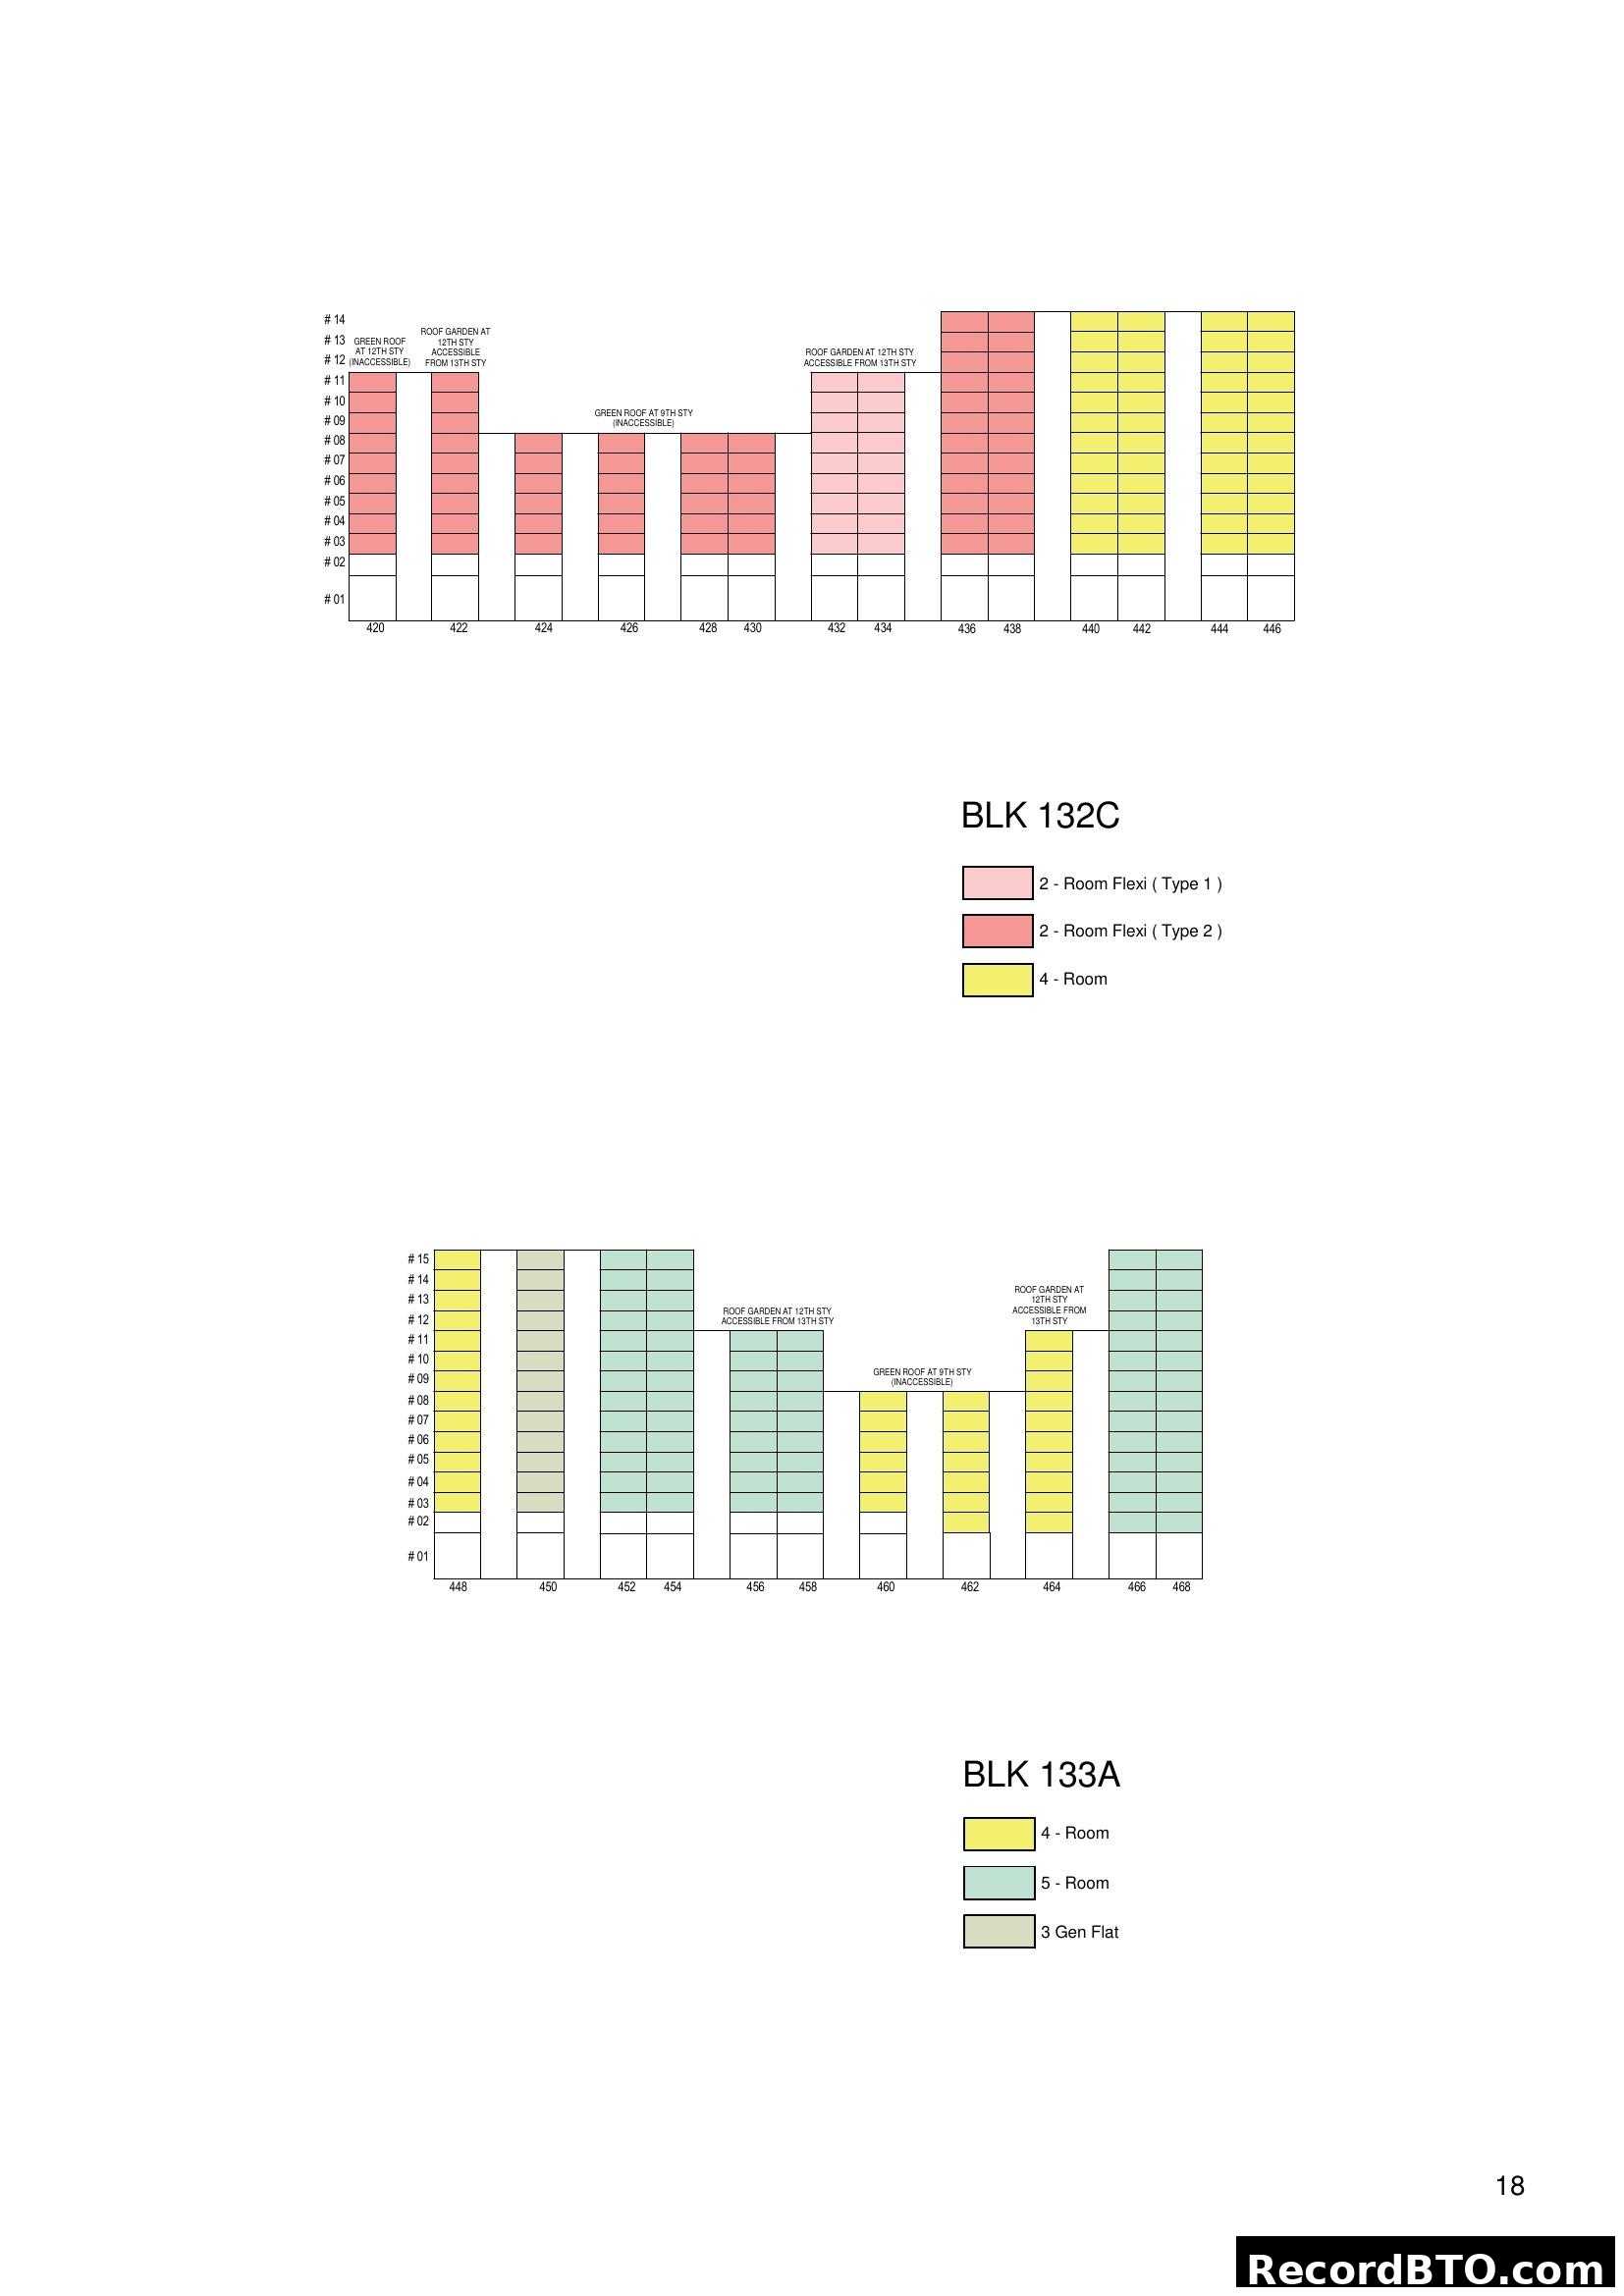
Block 132A & 132B Stacking Plans with Unit Distribution
Quick Info
Project Brochure
7 pages

Table of Contents
Important Notes on HDB Precincts and Amenities
This page provides important notes regarding HDB precinct planning. It details how precincts are designed to include various amenities like childcare centres, elderly facilities, education centres, and commercial spaces, which can be located in void decks, car parks, or standalone buildings. It also clarifies that information on surrounding land use and proposed facilities within the brochure's maps and plans is indicative and subject to review by government agencies.
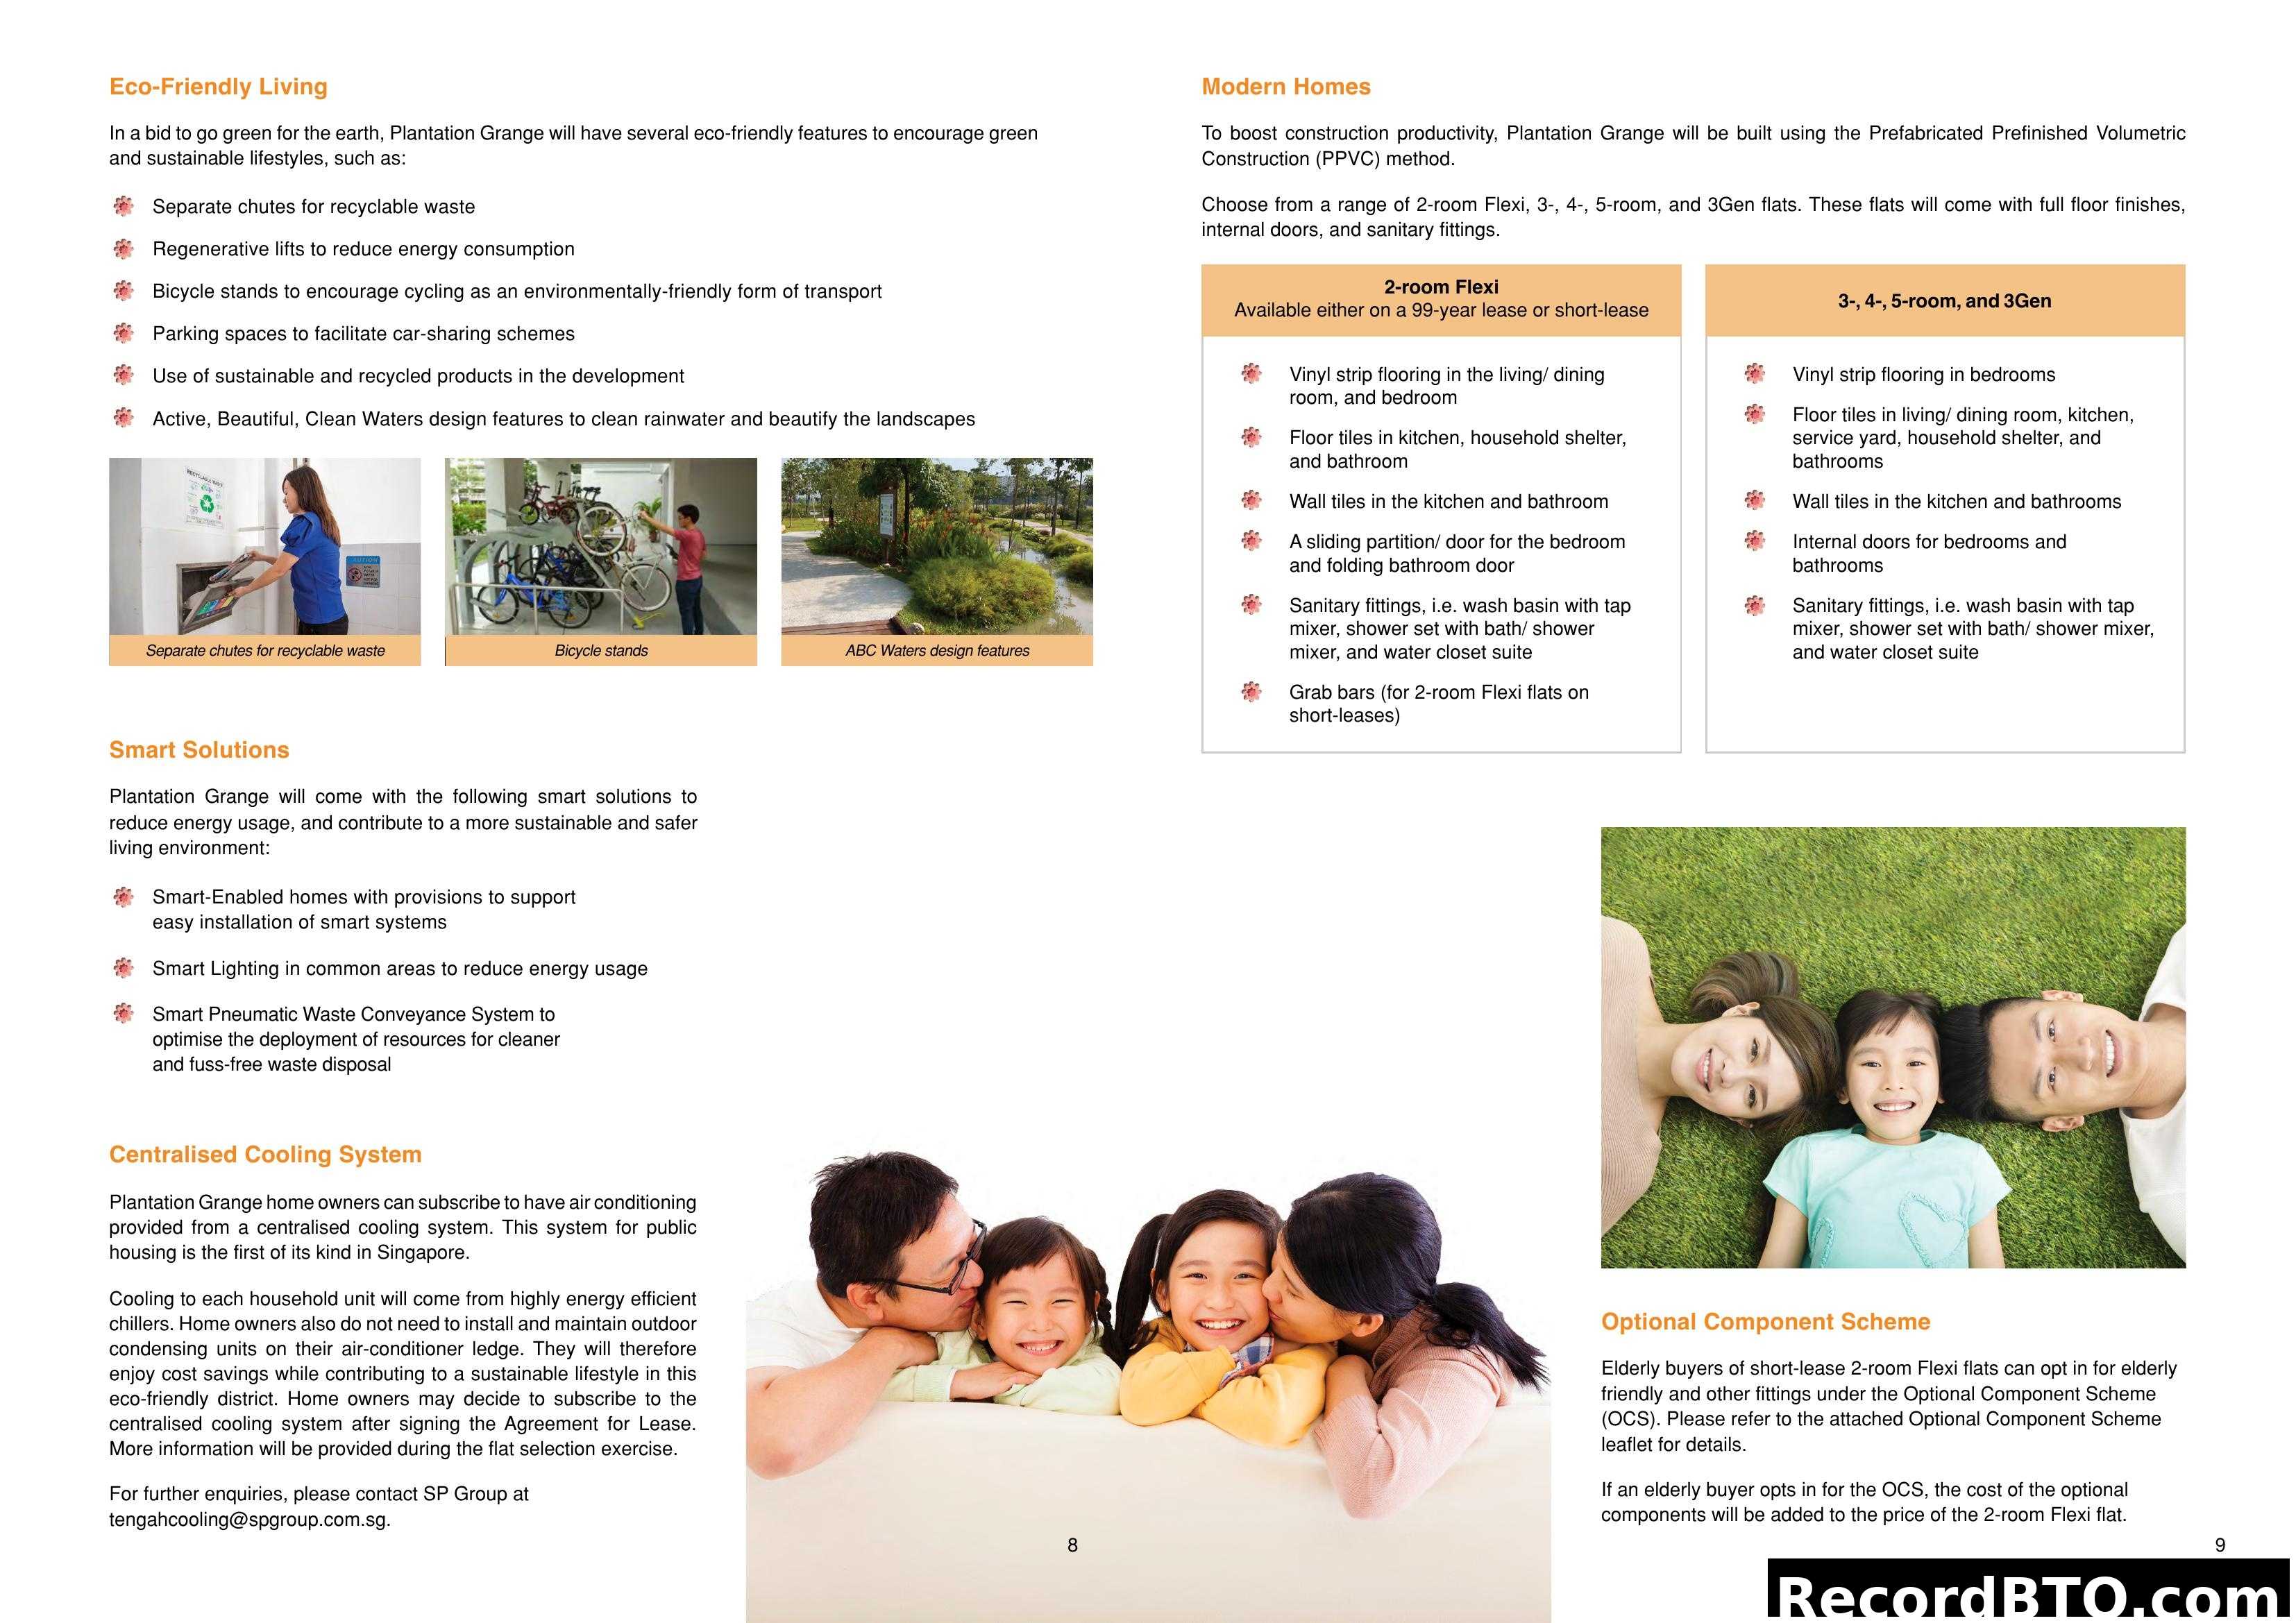
Eco-Friendly Features & Flat Information
This brochure page outlines the eco-friendly and smart features of Plantation Grange, including waste management, energy-saving lifts, bicycle amenities, and smart home provisions. It details the modern construction method (PPVC), lists the available flat types (2-room Flexi, 3-, 4-, 5-room, and 3Gen) along with their standard provisions, and introduces a centralised cooling system. Additionally, it provides information on the Optional Component Scheme for elderly buyers of 2-room Flexi flats.
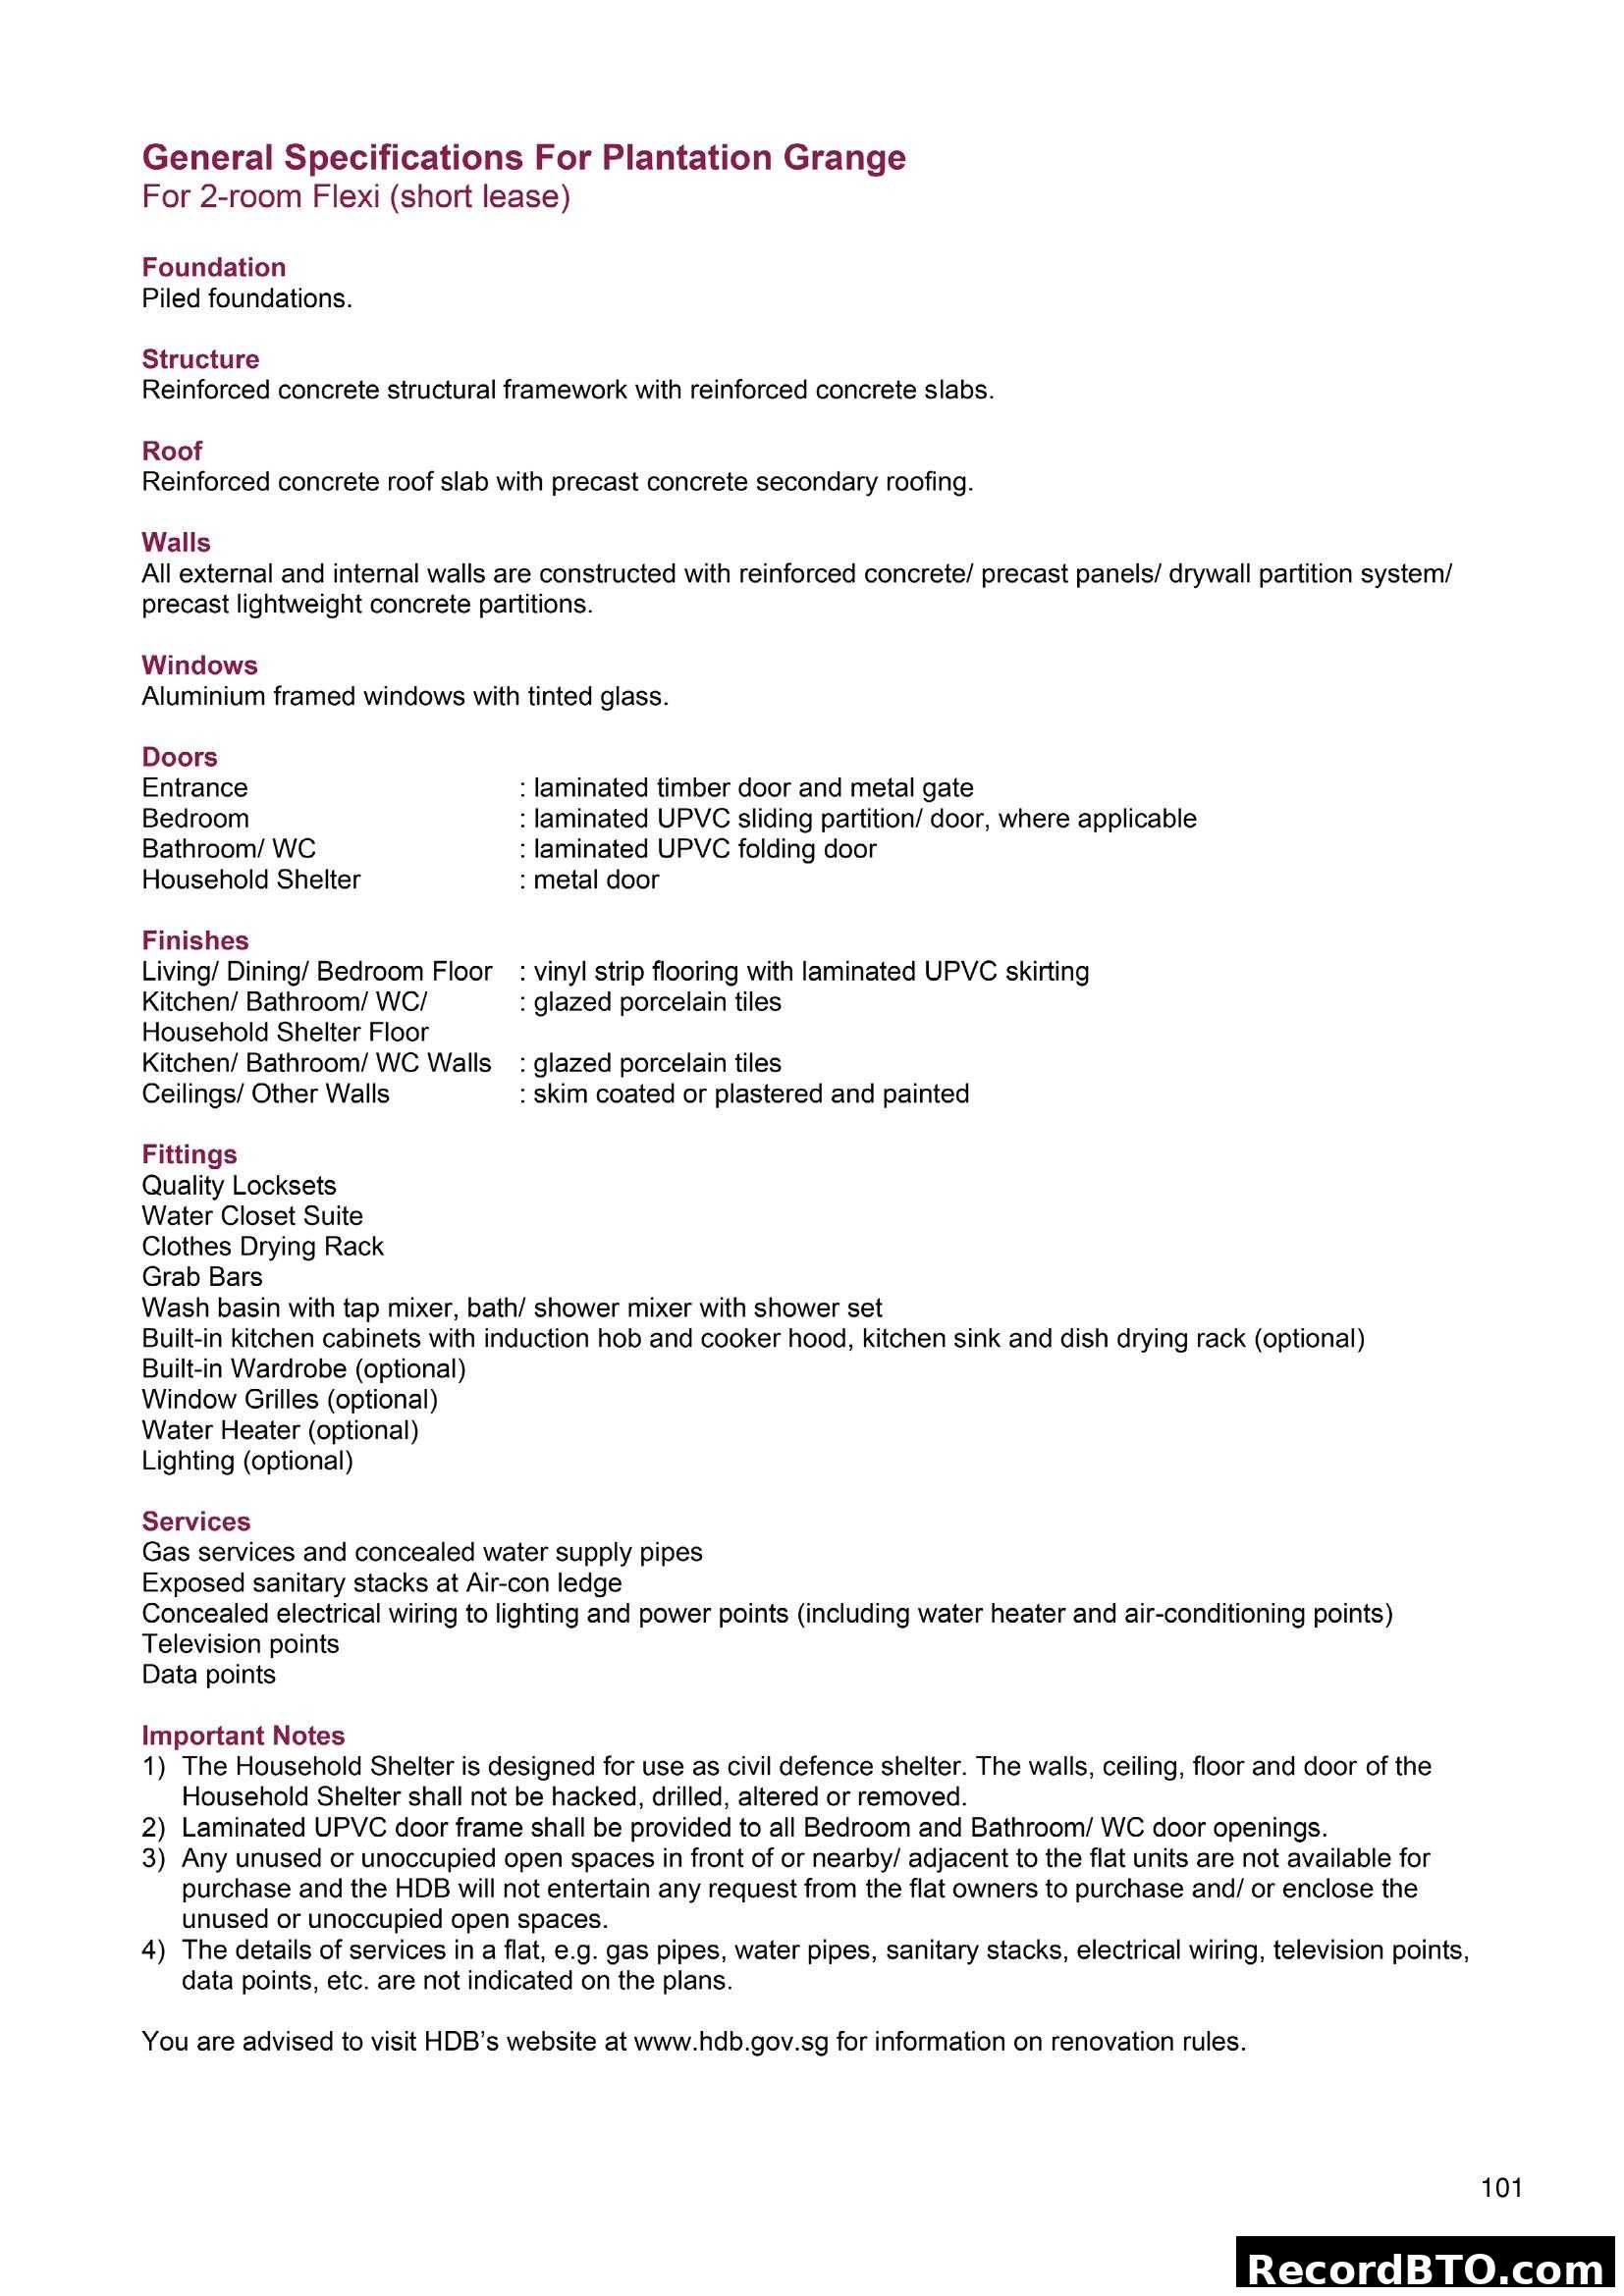
General Specifications for Plantation Grange
This page provides general specifications for the 2-room Flexi (short lease) units at Plantation Grange. It details information about the foundation, structure, roof, walls, windows, doors, finishes, fittings, and services. Additionally, it includes important notes regarding the Household Shelter, renovation rules, and details not shown on plans.
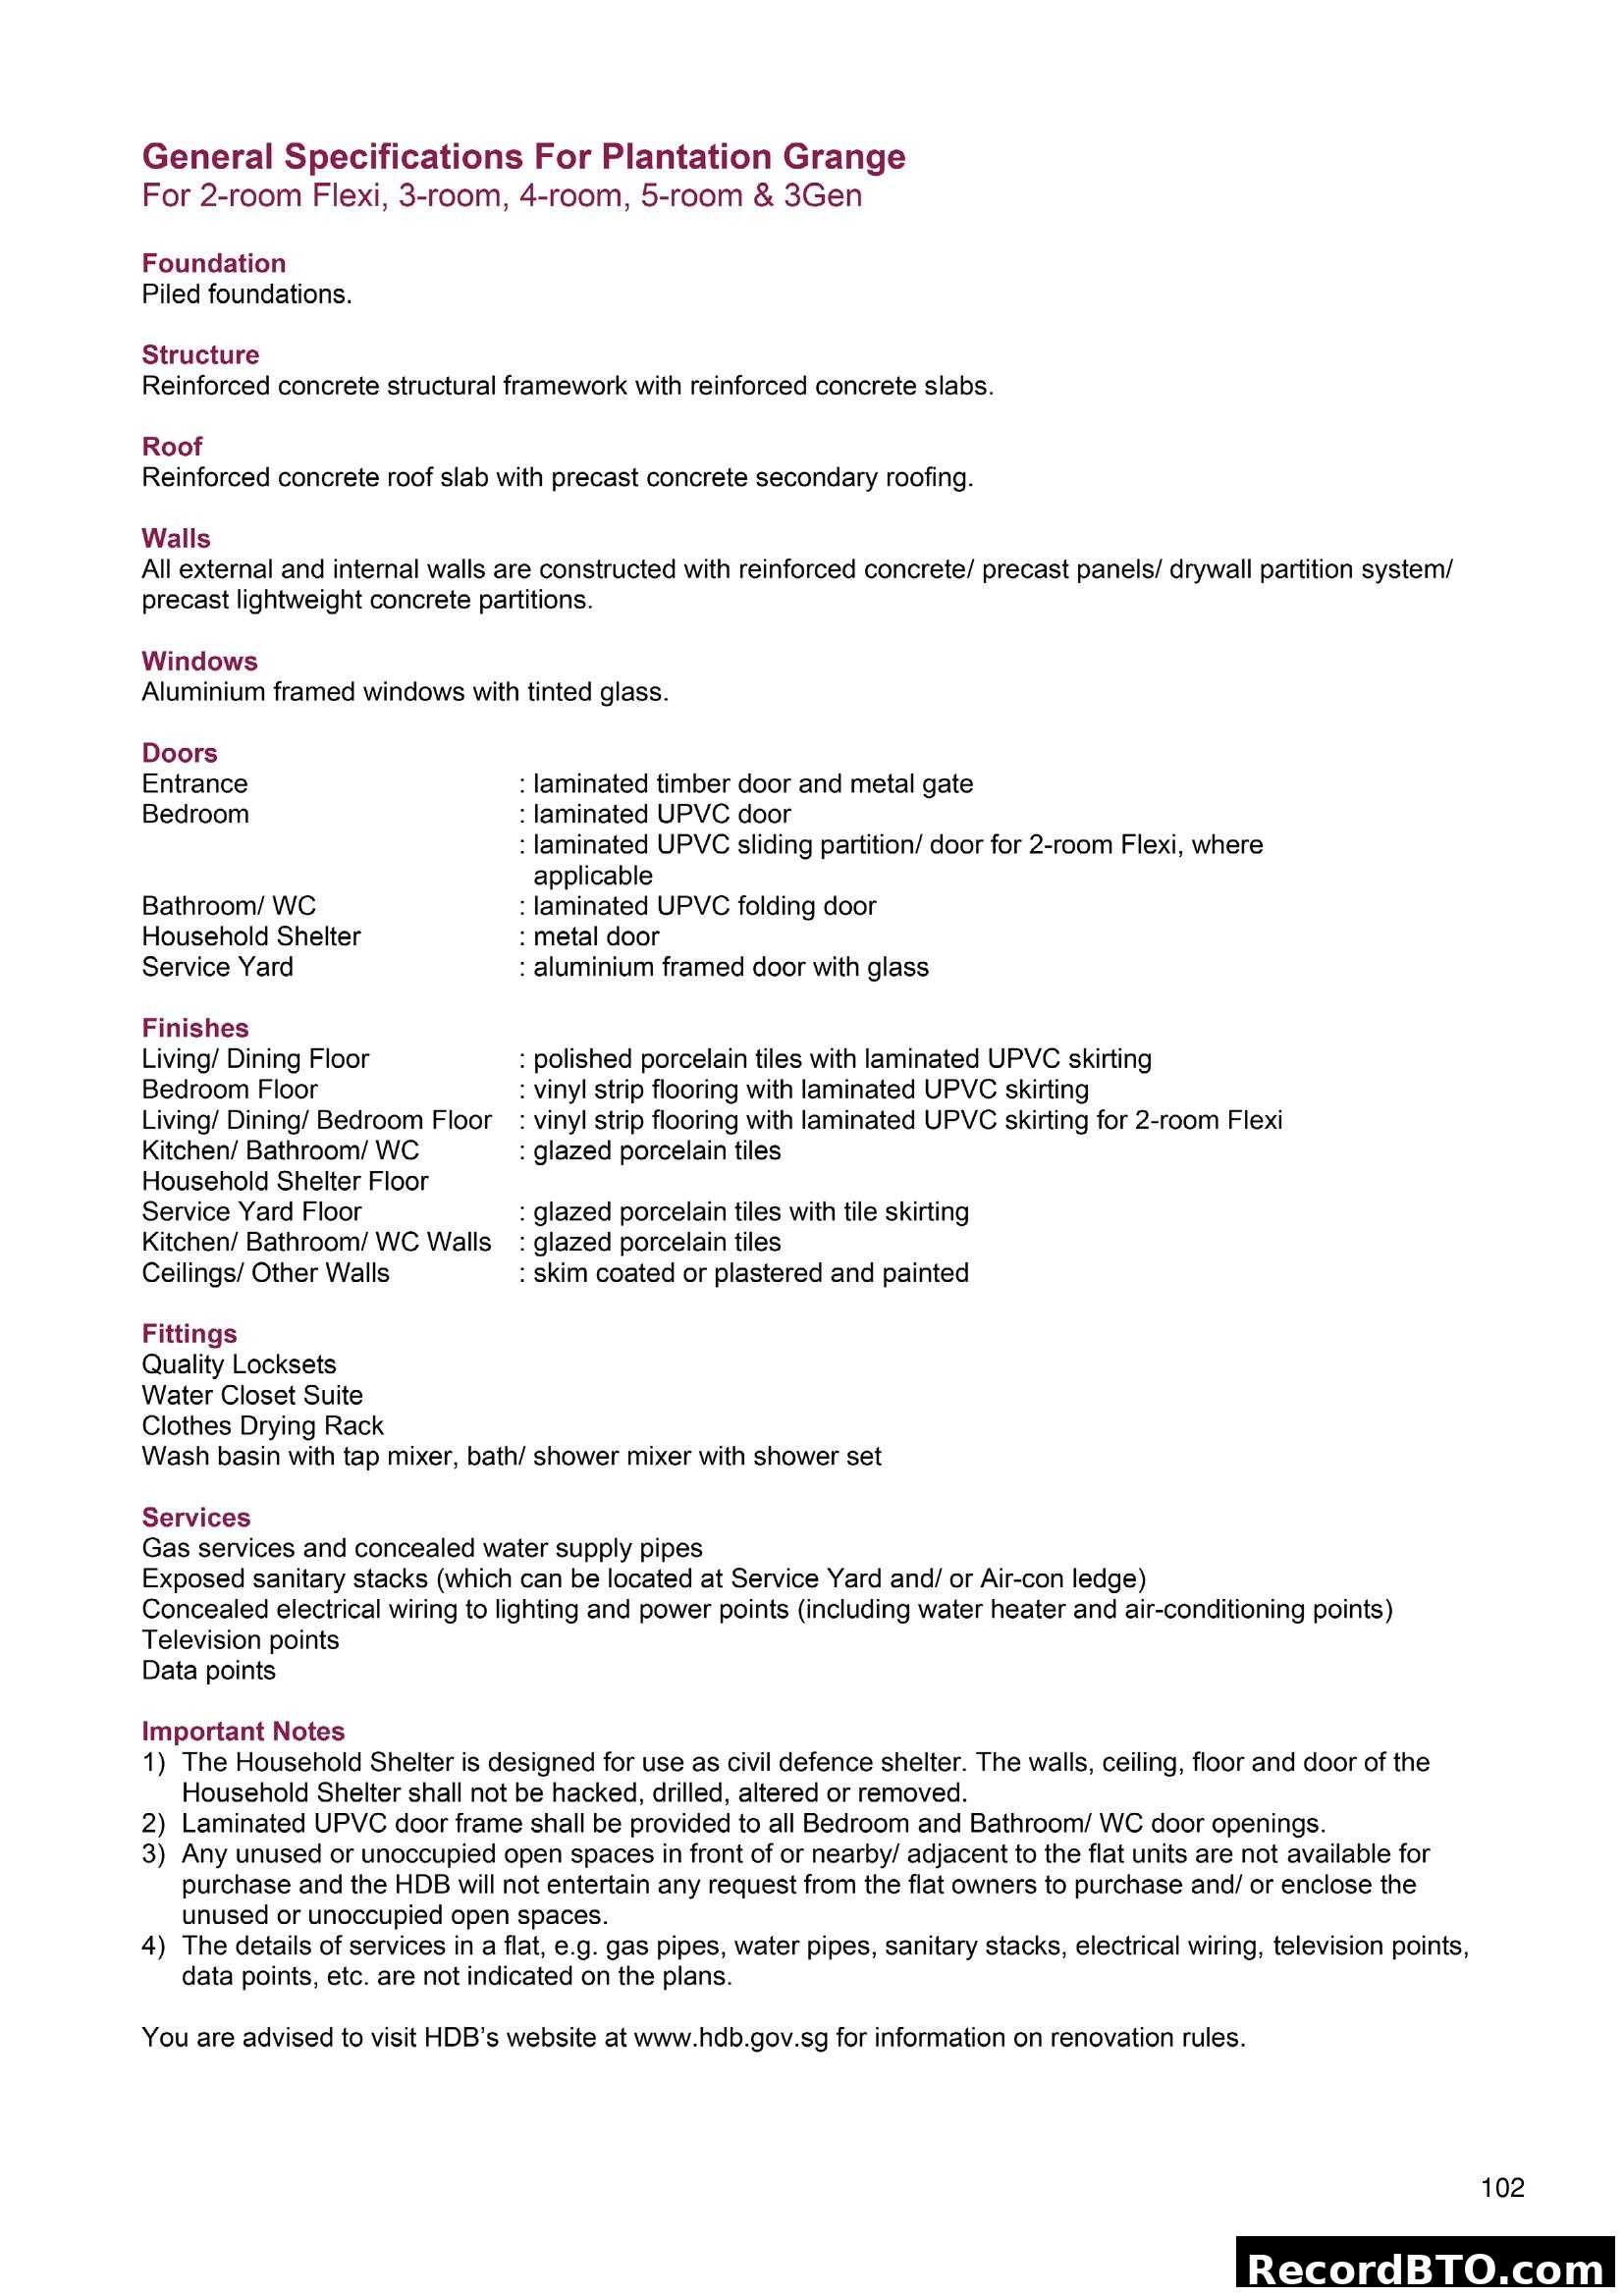
General Specifications For Plantation Grange
This page details the general specifications for HDB flats at Plantation Grange, covering building components like foundation, structure, roof, walls, windows, and doors. It also lists the finishes for various areas, fittings, and services provided. Important notes regarding household shelters, renovation rules, and services not indicated on plans are included for 2-room Flexi, 3-room, 4-room, 5-room, and 3Gen flat types.
Disclaimer
This page presents the disclaimer for an HDB brochure. It clarifies that HDB owns the copyright, information is for general purposes only and not contractual, and visual depictions are artistic impressions. It states that details like dimensions, plans, and specifications are subject to change without notice. The disclaimer also notes that floor areas are indicative, and surrounding land use and facilities may change. HDB reserves rights over common property use and advises readers to verify information directly with relevant authorities, as the brochure is not exhaustive.
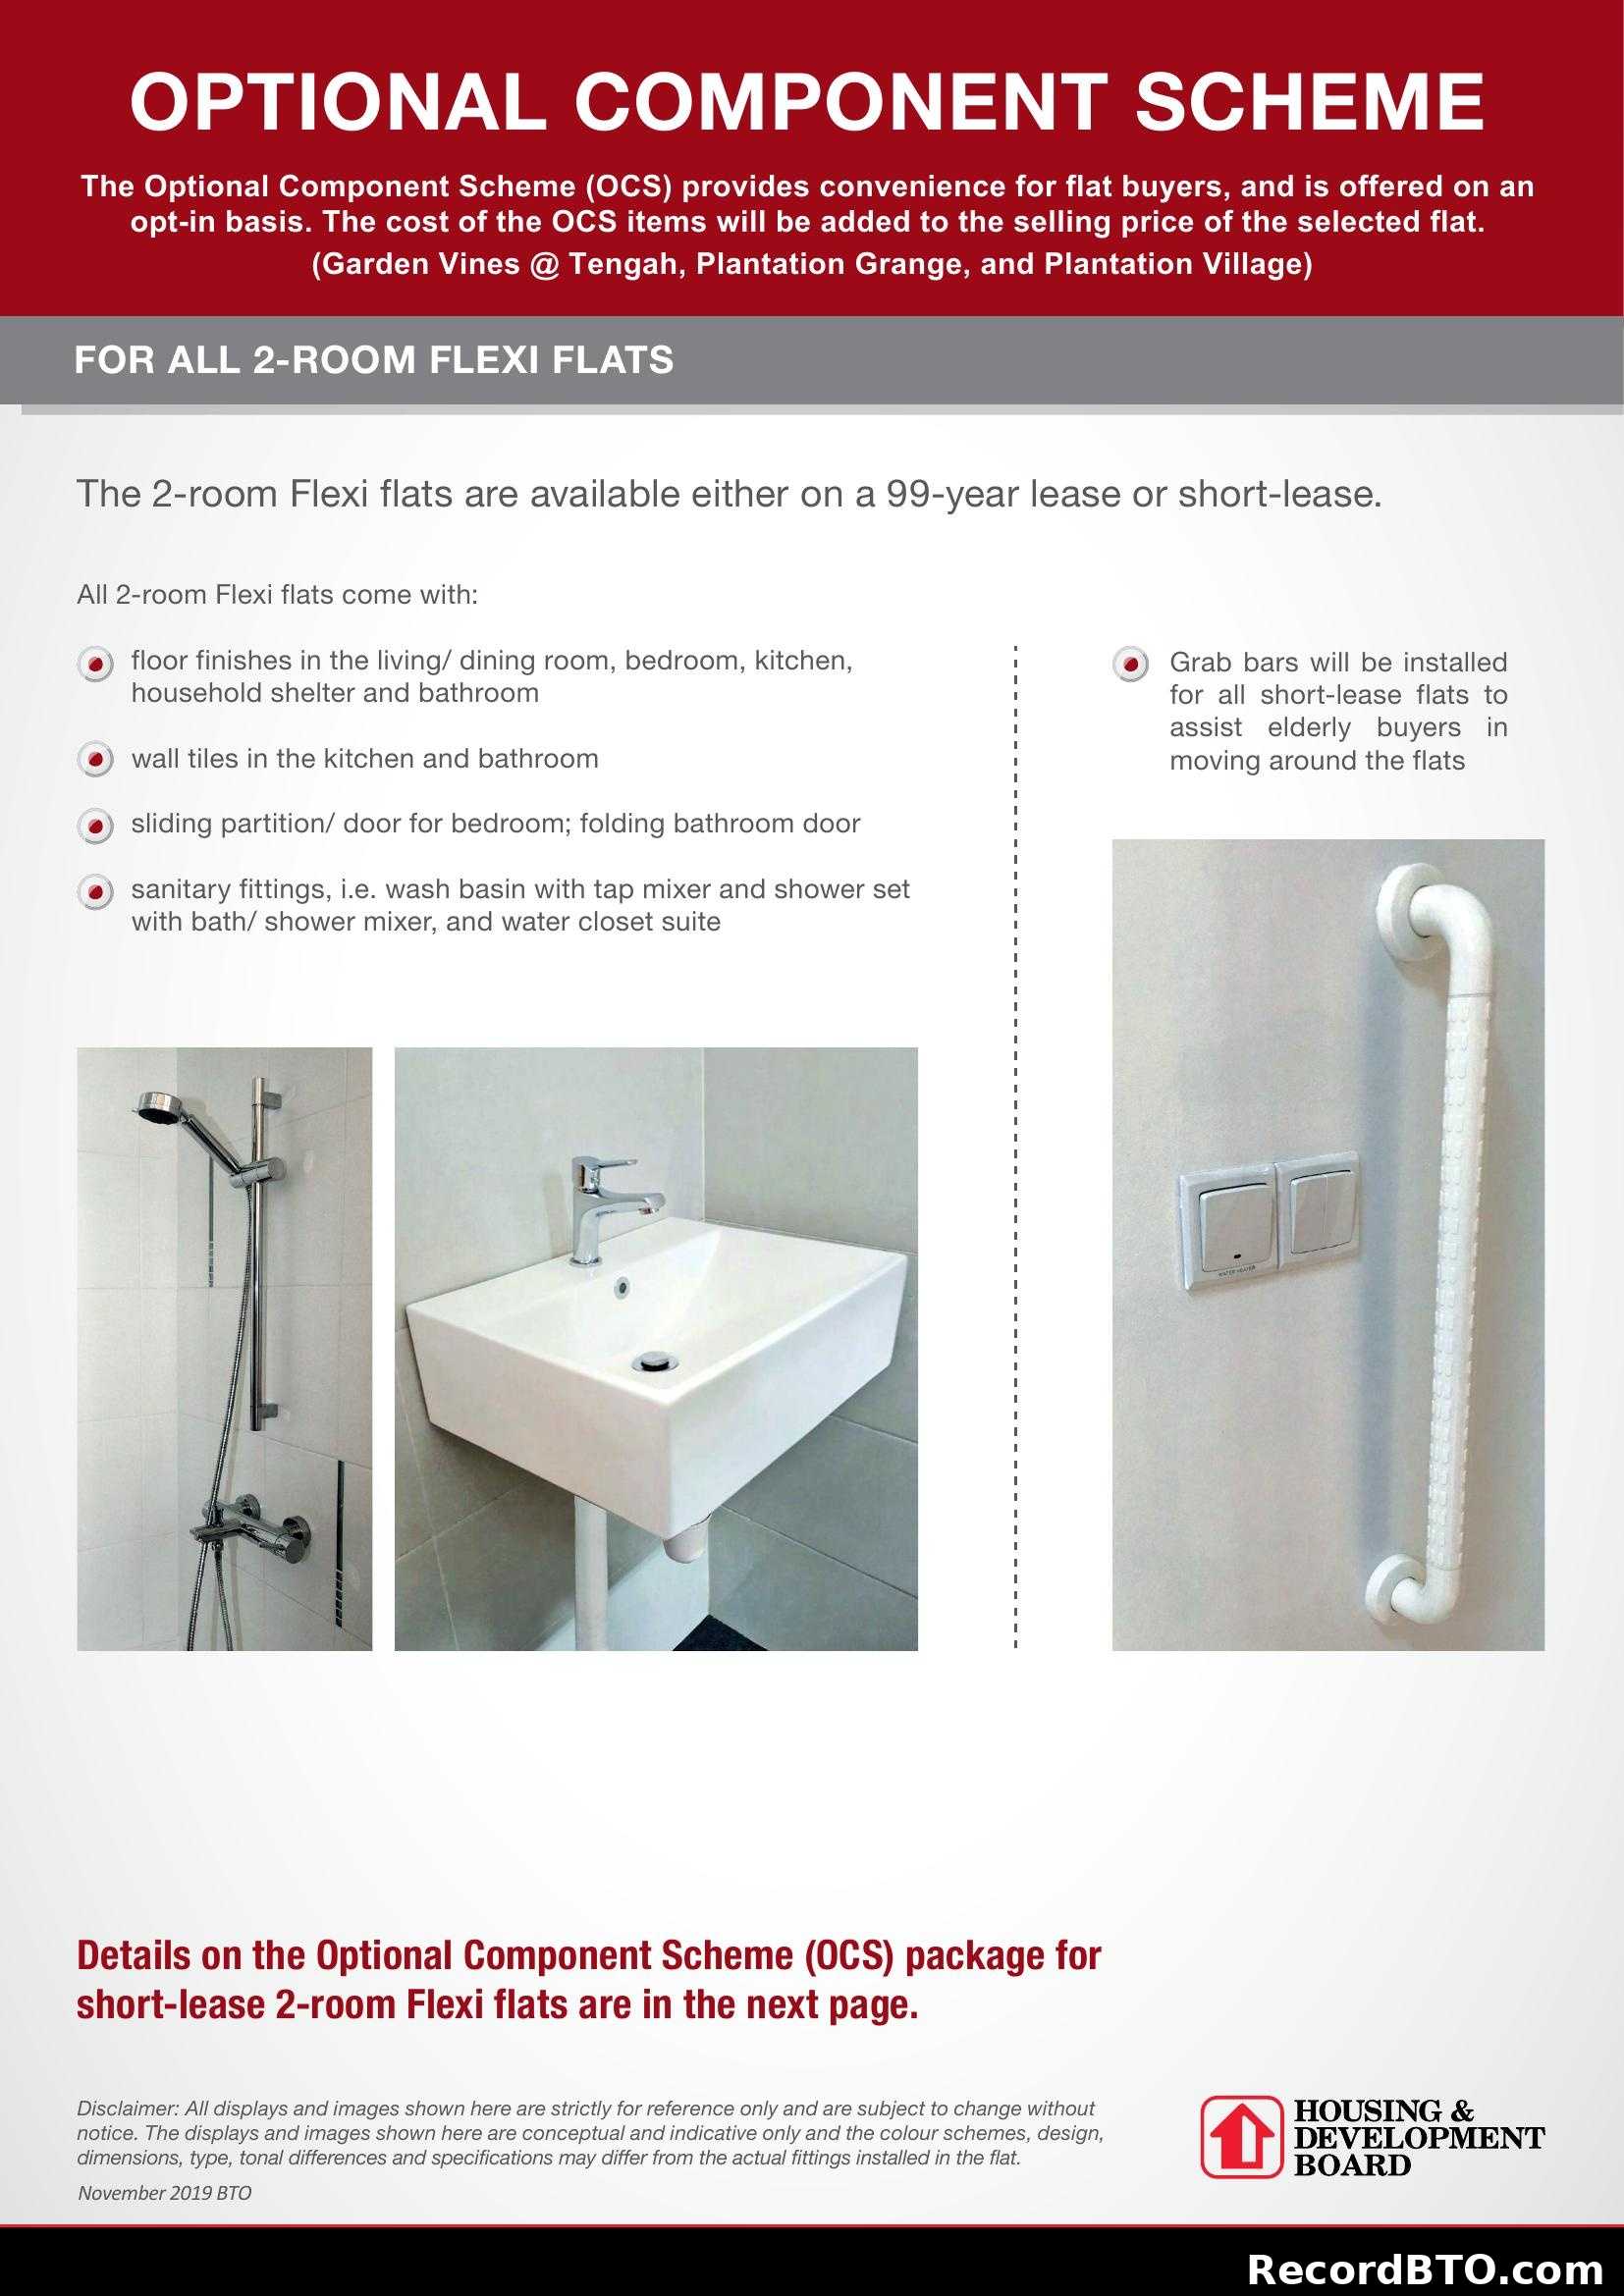
Optional Component Scheme for 2-Room Flexi Flats
This brochure page details the Optional Component Scheme (OCS) available for 2-room Flexi flats. It explains that the OCS provides convenience for flat buyers on an opt-in basis, with costs added to the selling price. The page lists standard inclusions like floor finishes, wall tiles, partitions, and sanitary fittings. It also highlights the installation of grab bars for short-lease flats to assist elderly buyers. Illustrative images of a shower, wash basin, and grab bars are included.
Optional Component Scheme for 2-Room Flexi Flats
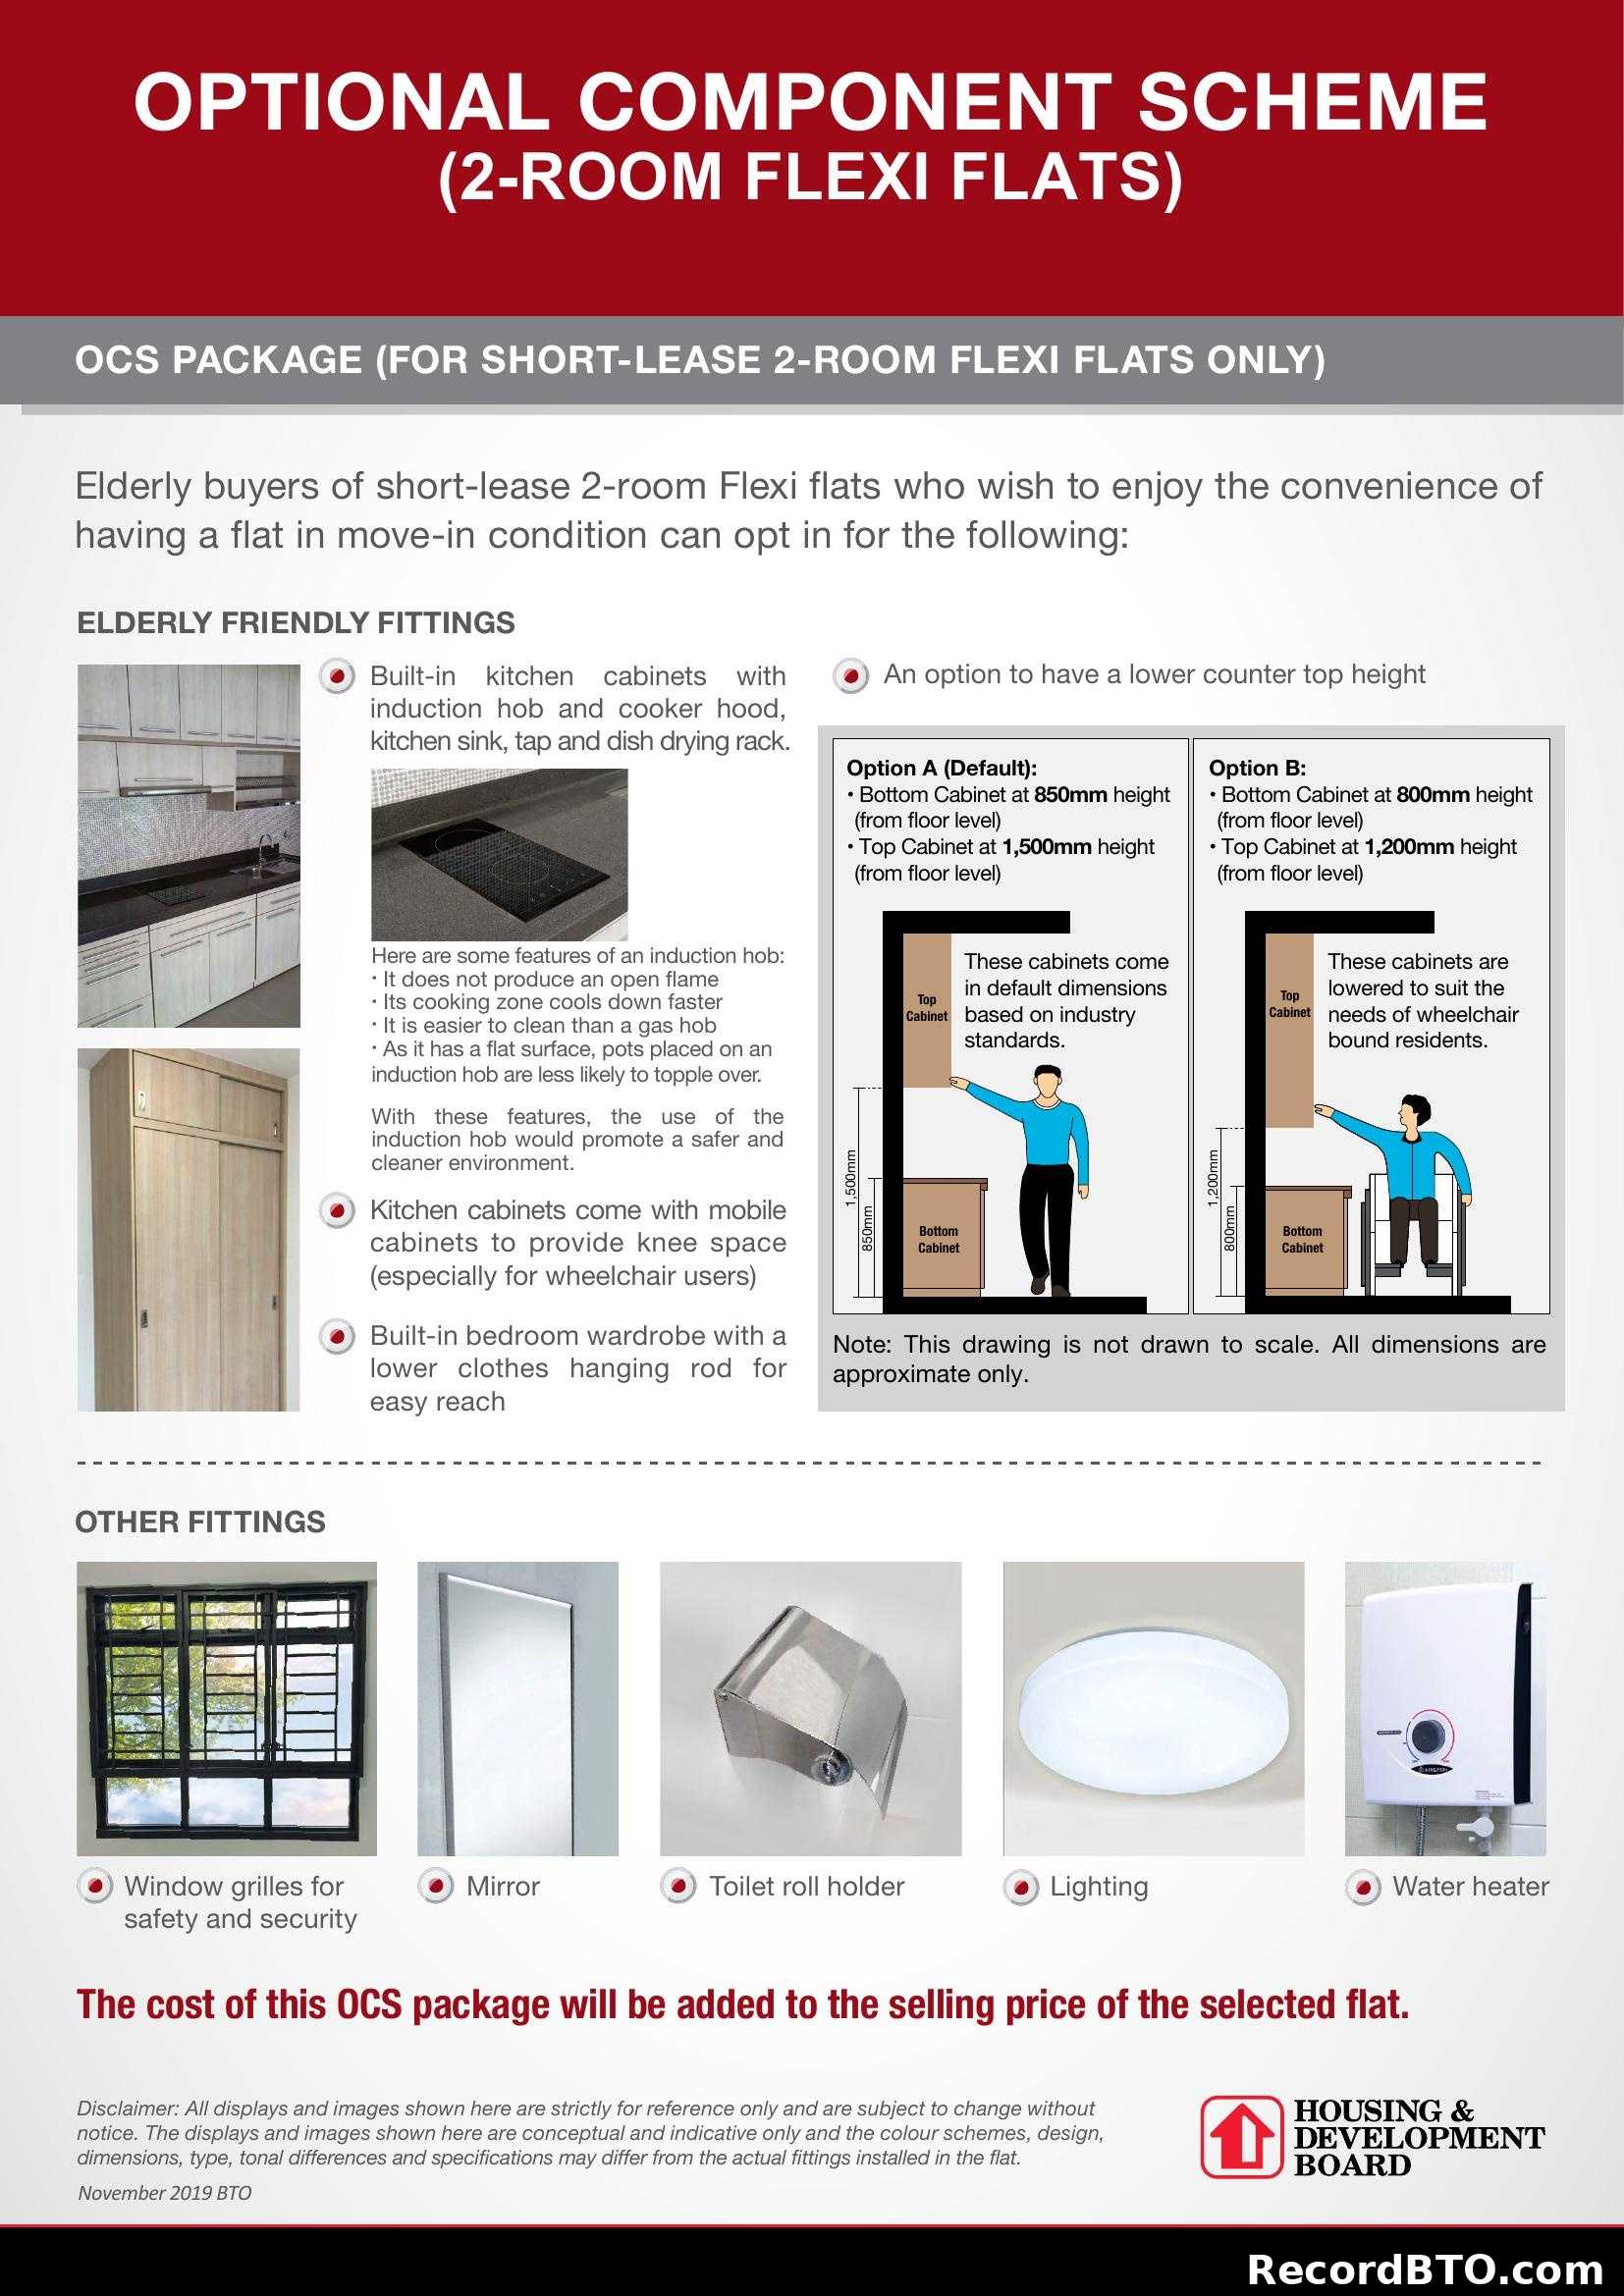
This brochure page details the Optional Component Scheme (OCS) for short-lease 2-room Flexi Flats, aimed at elderly buyers. It outlines 'Elderly Friendly Fittings' such as kitchen cabinets with induction hob and adjustable counter heights (including an option for wheelchair users), and a wardrobe with a lower hanging rod. It also lists 'Other Fittings' like window grilles, mirror, lighting, and water heater, explaining that the cost is added to the flat's selling price.
Tip: Click on any page to jump directly to that brochure page
Photo Gallery
102 photos

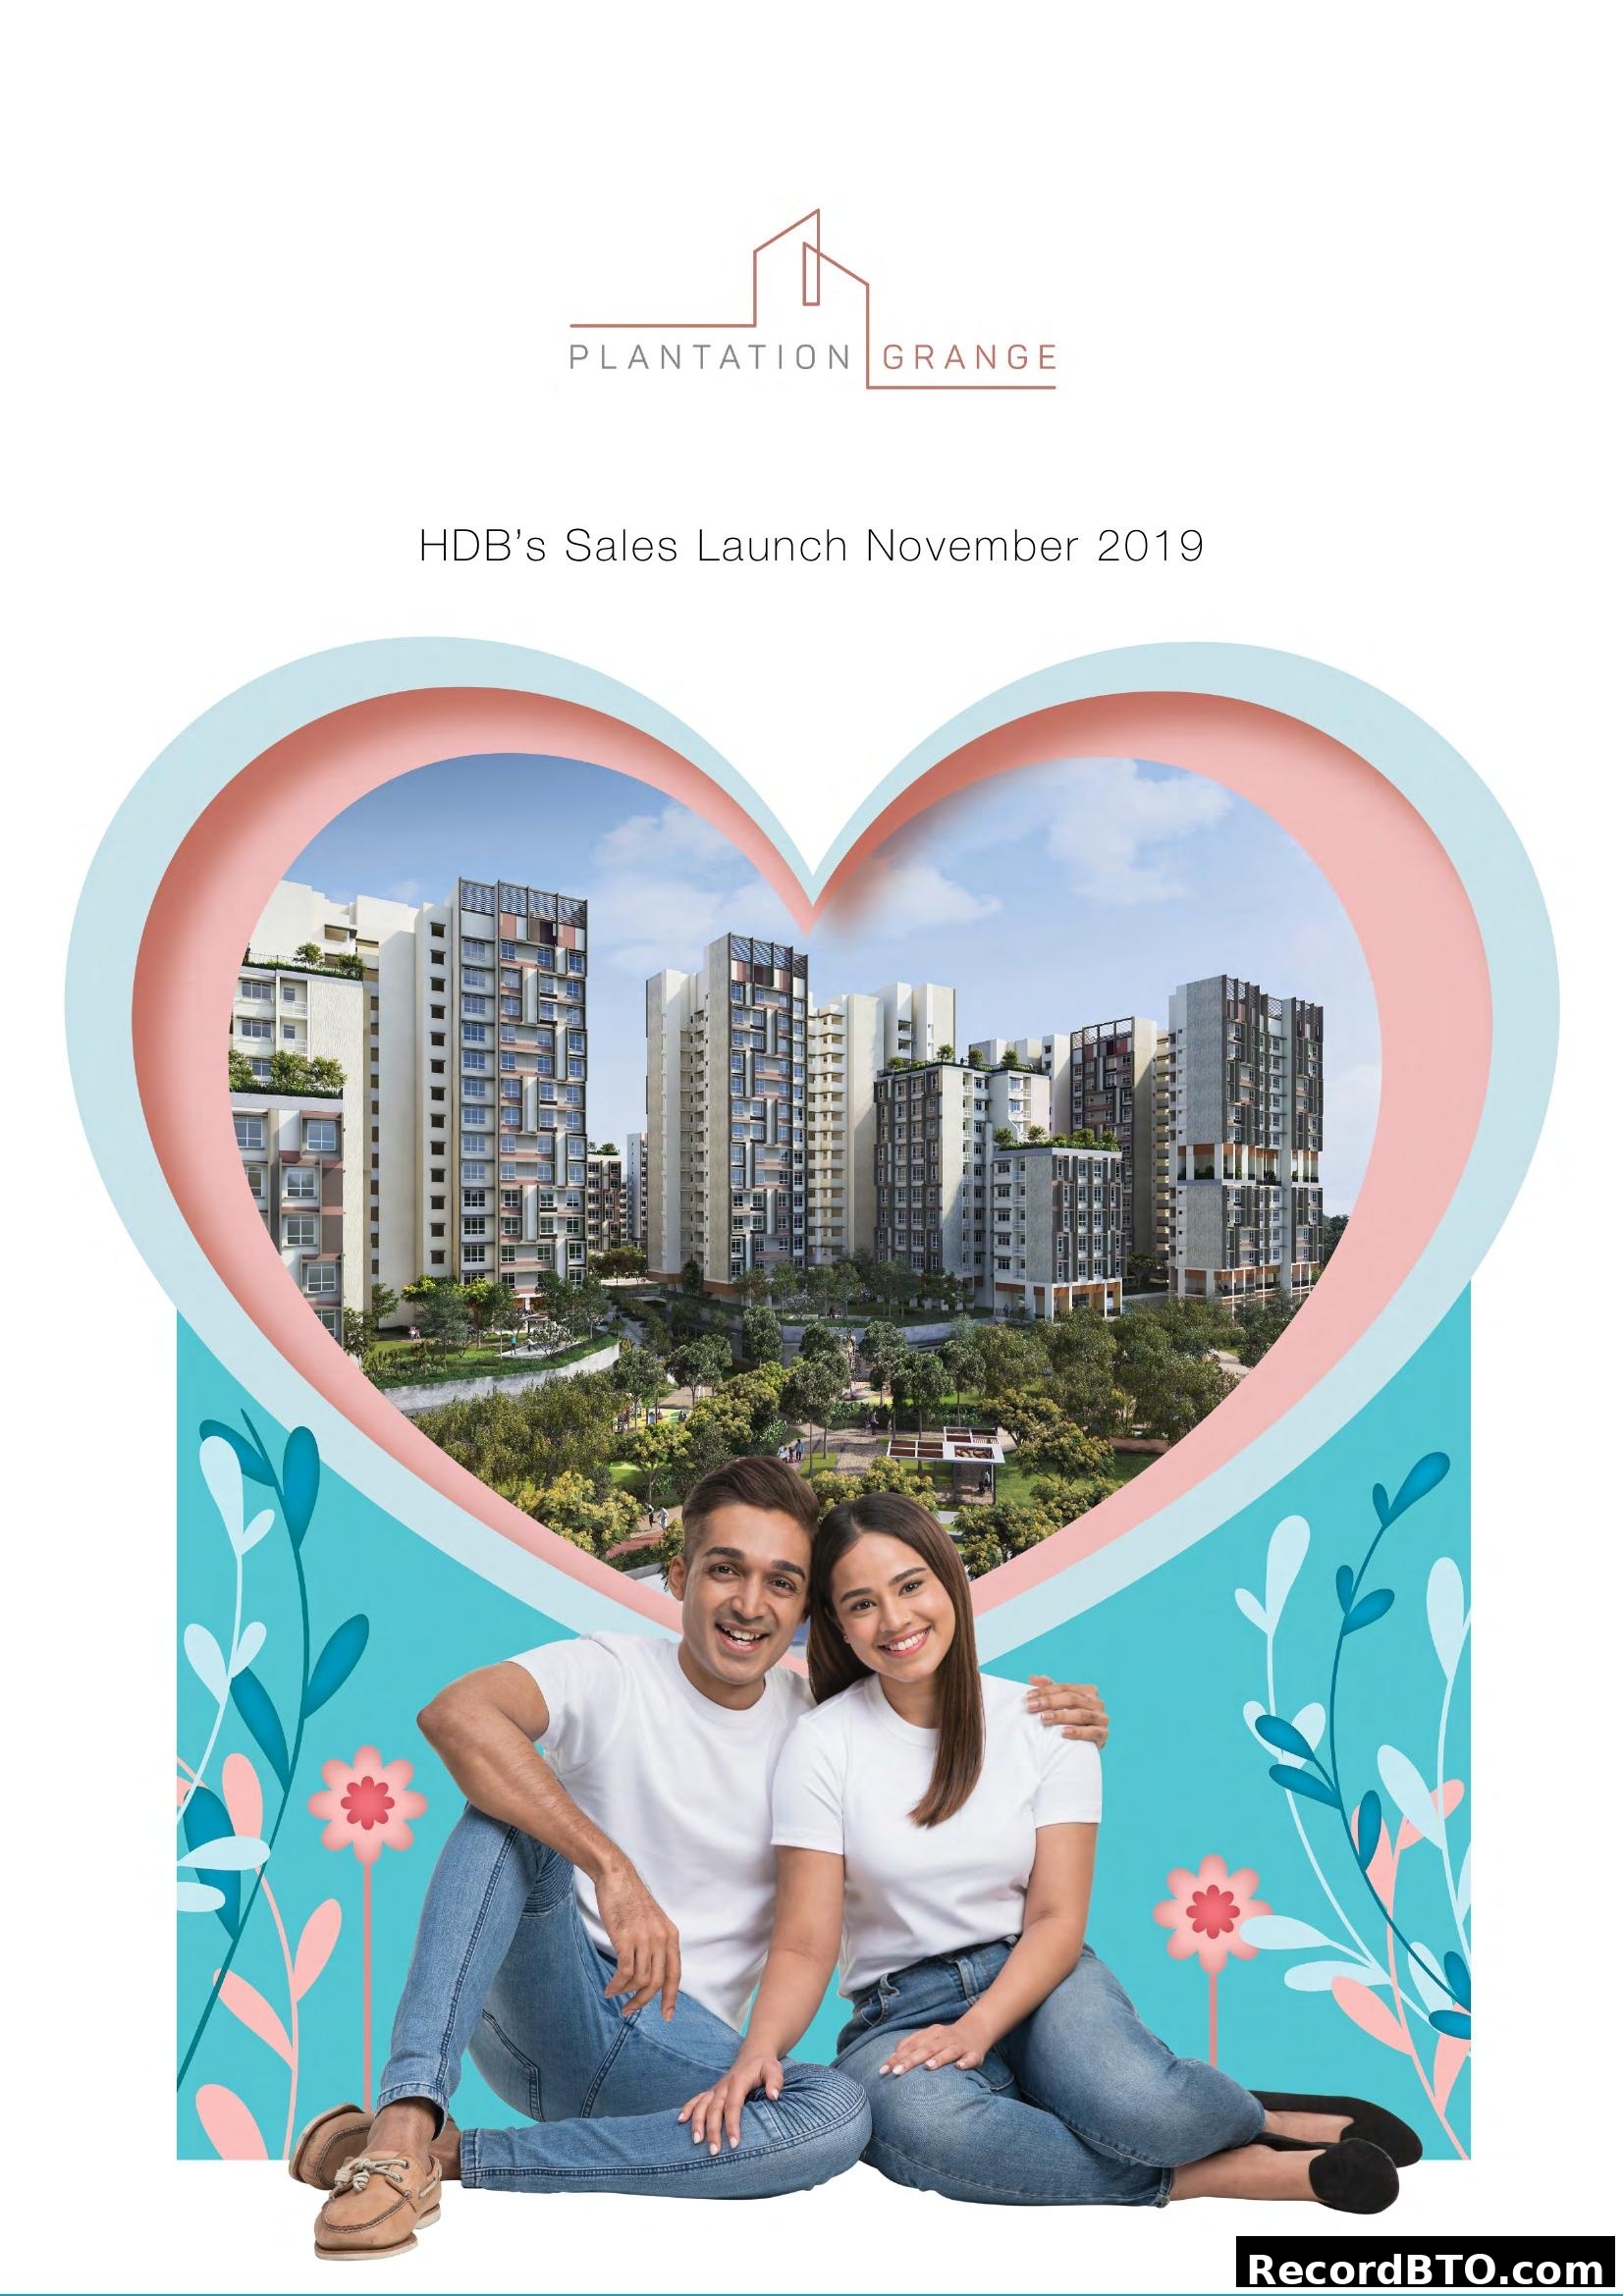
Plantation Grange HDB Sales Launch November 2019 Cover Page

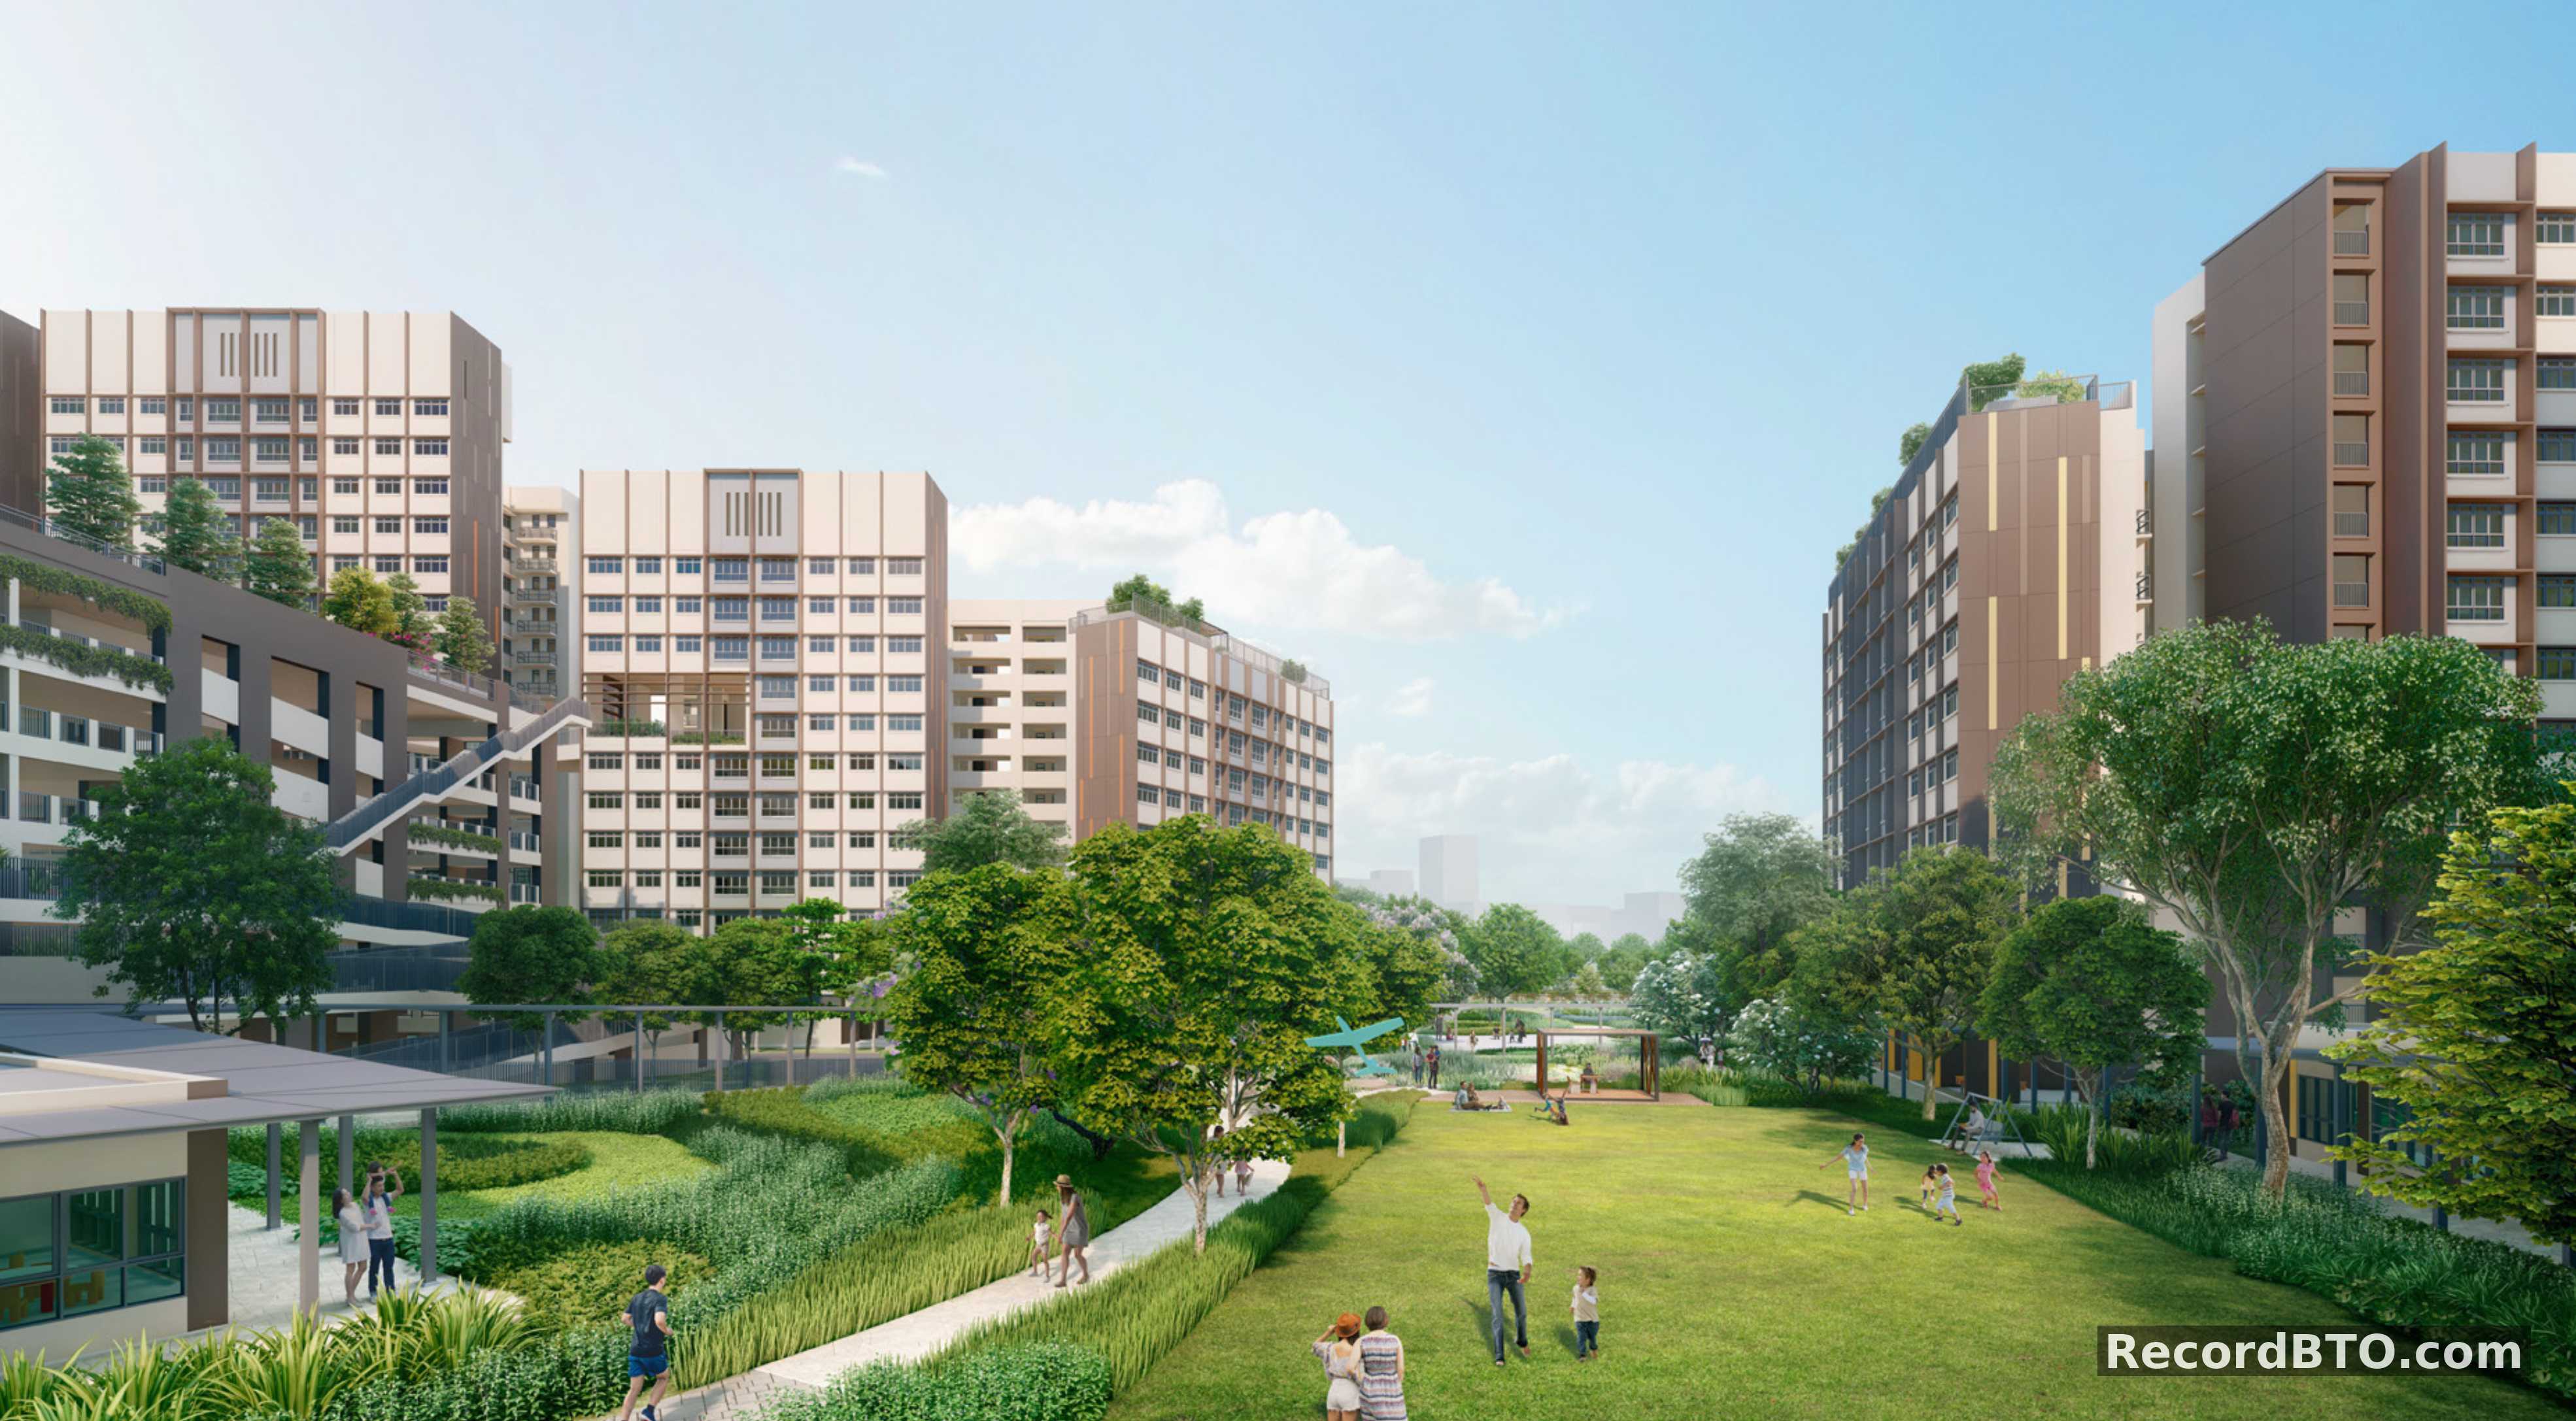
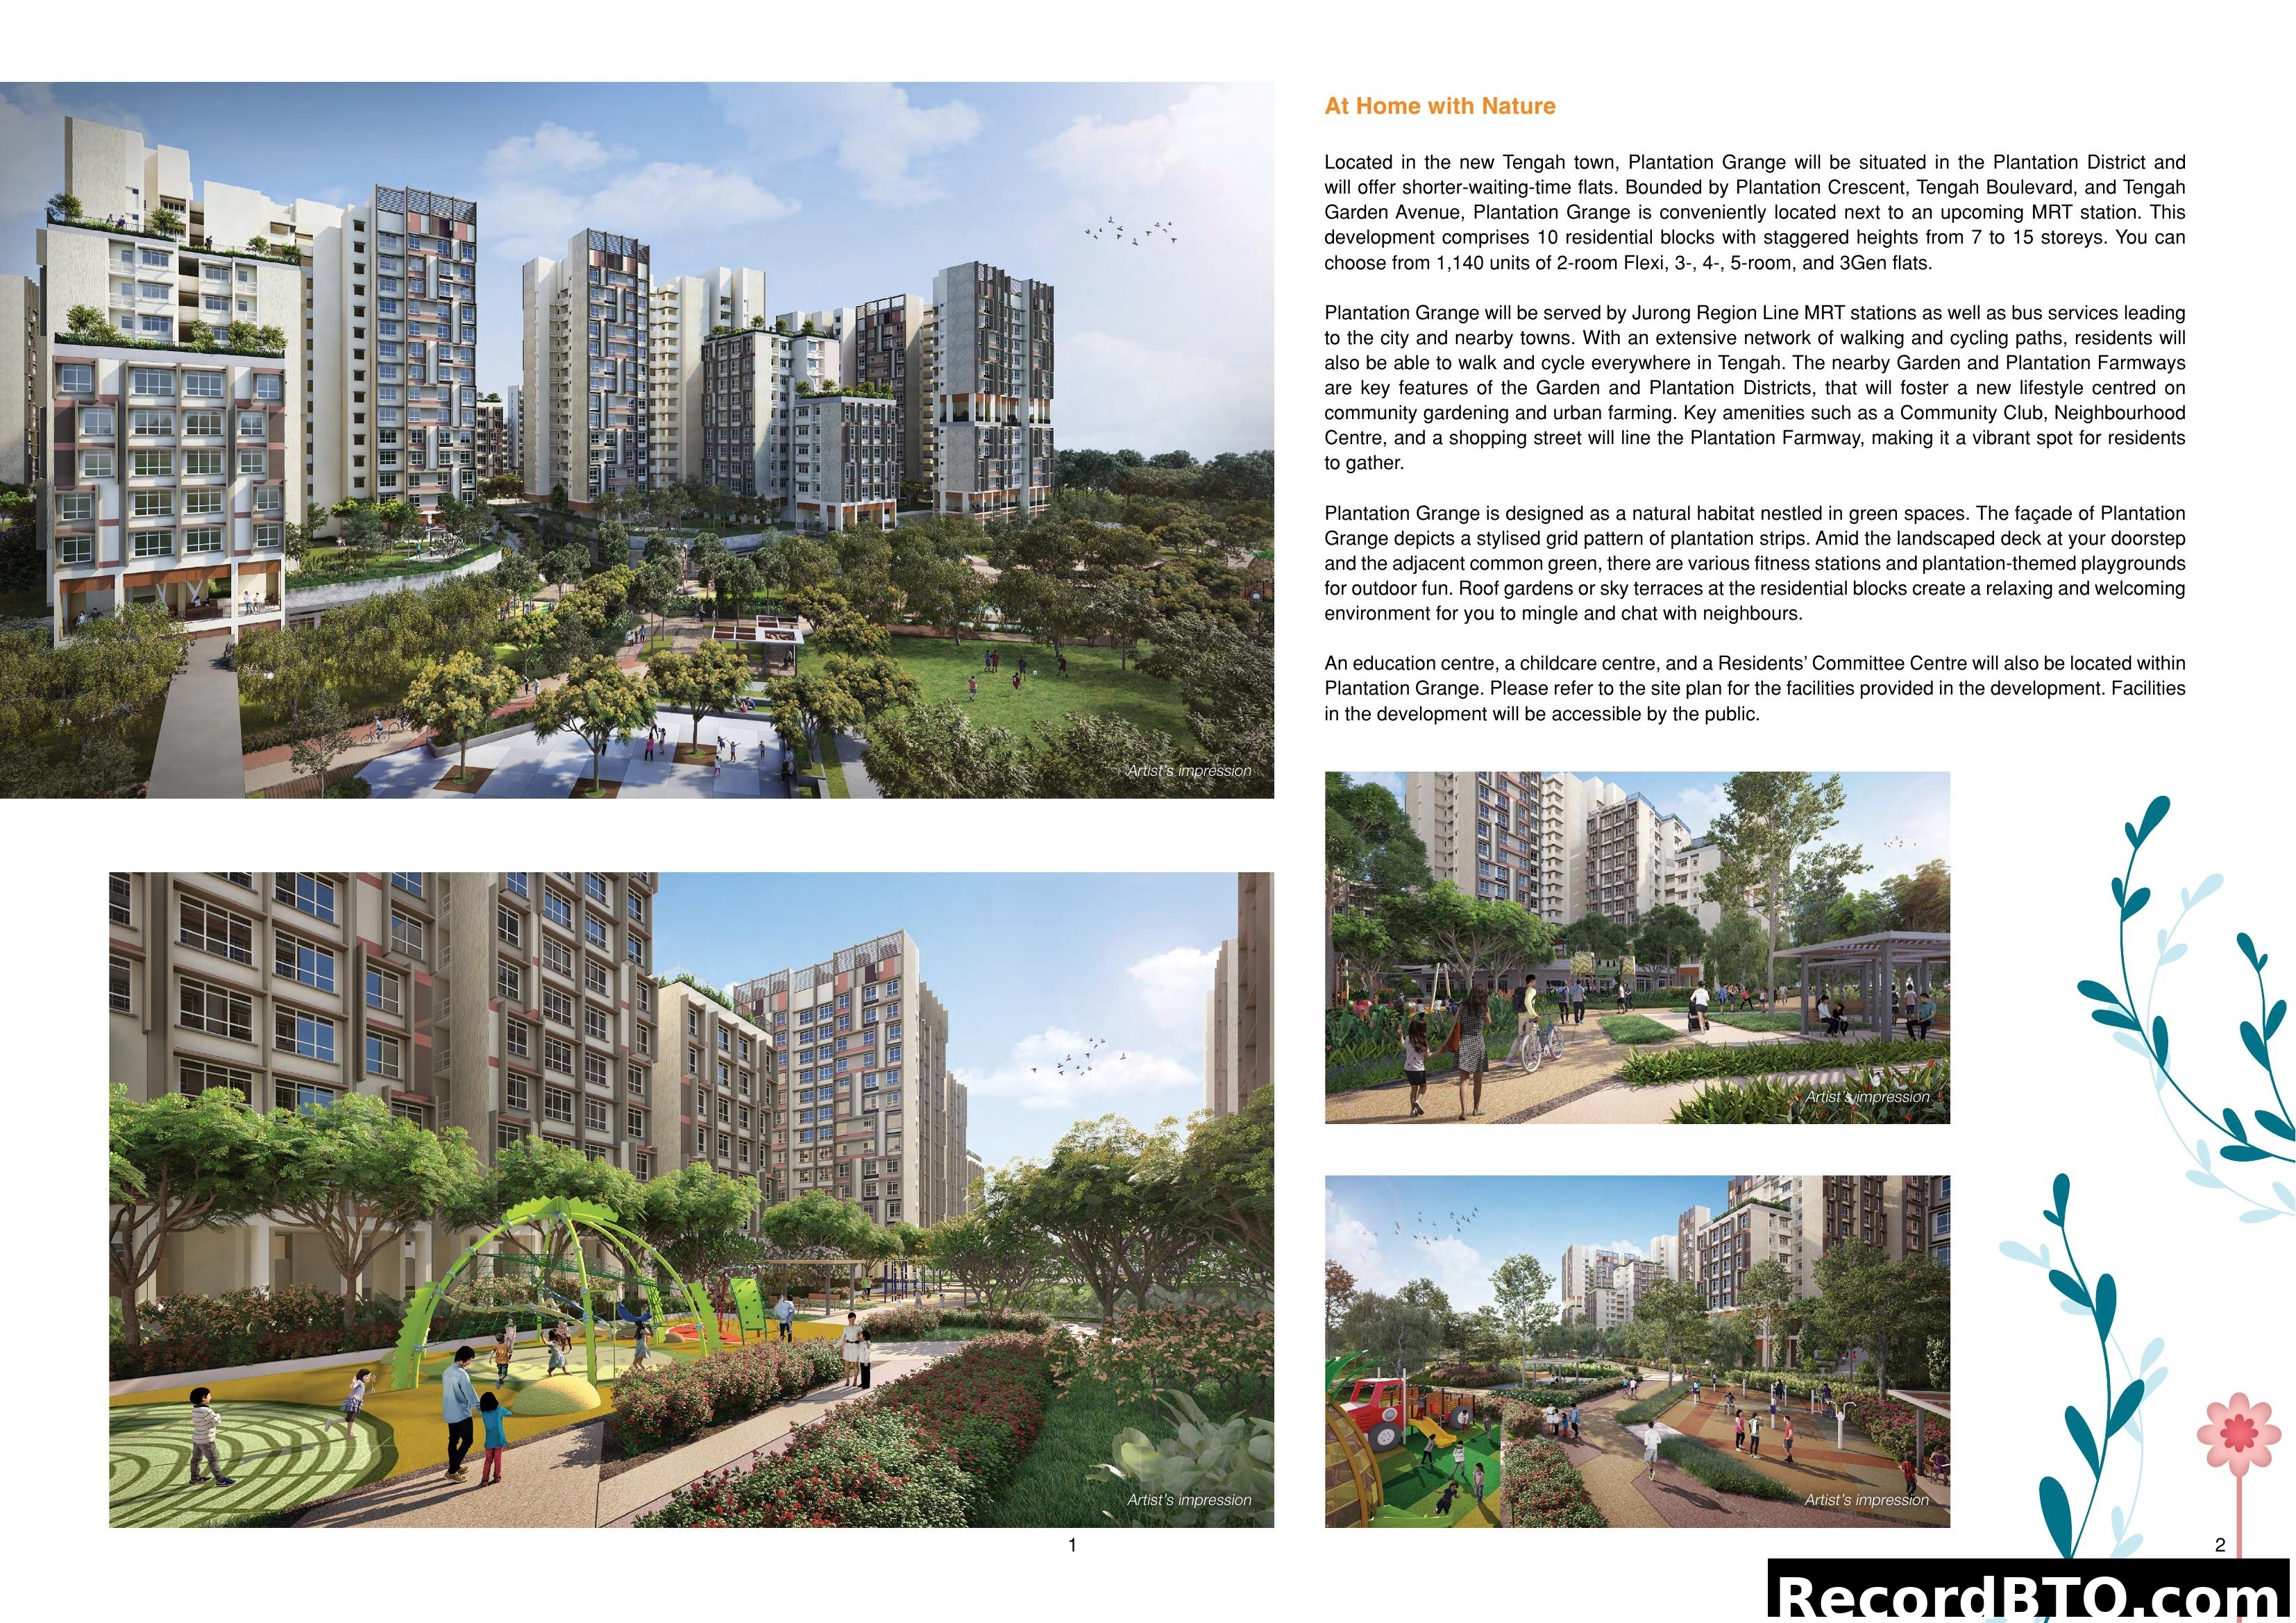
Plantation Grange: At Home with Nature Artist's Impression

Important Notes on HDB Precincts and Amenities
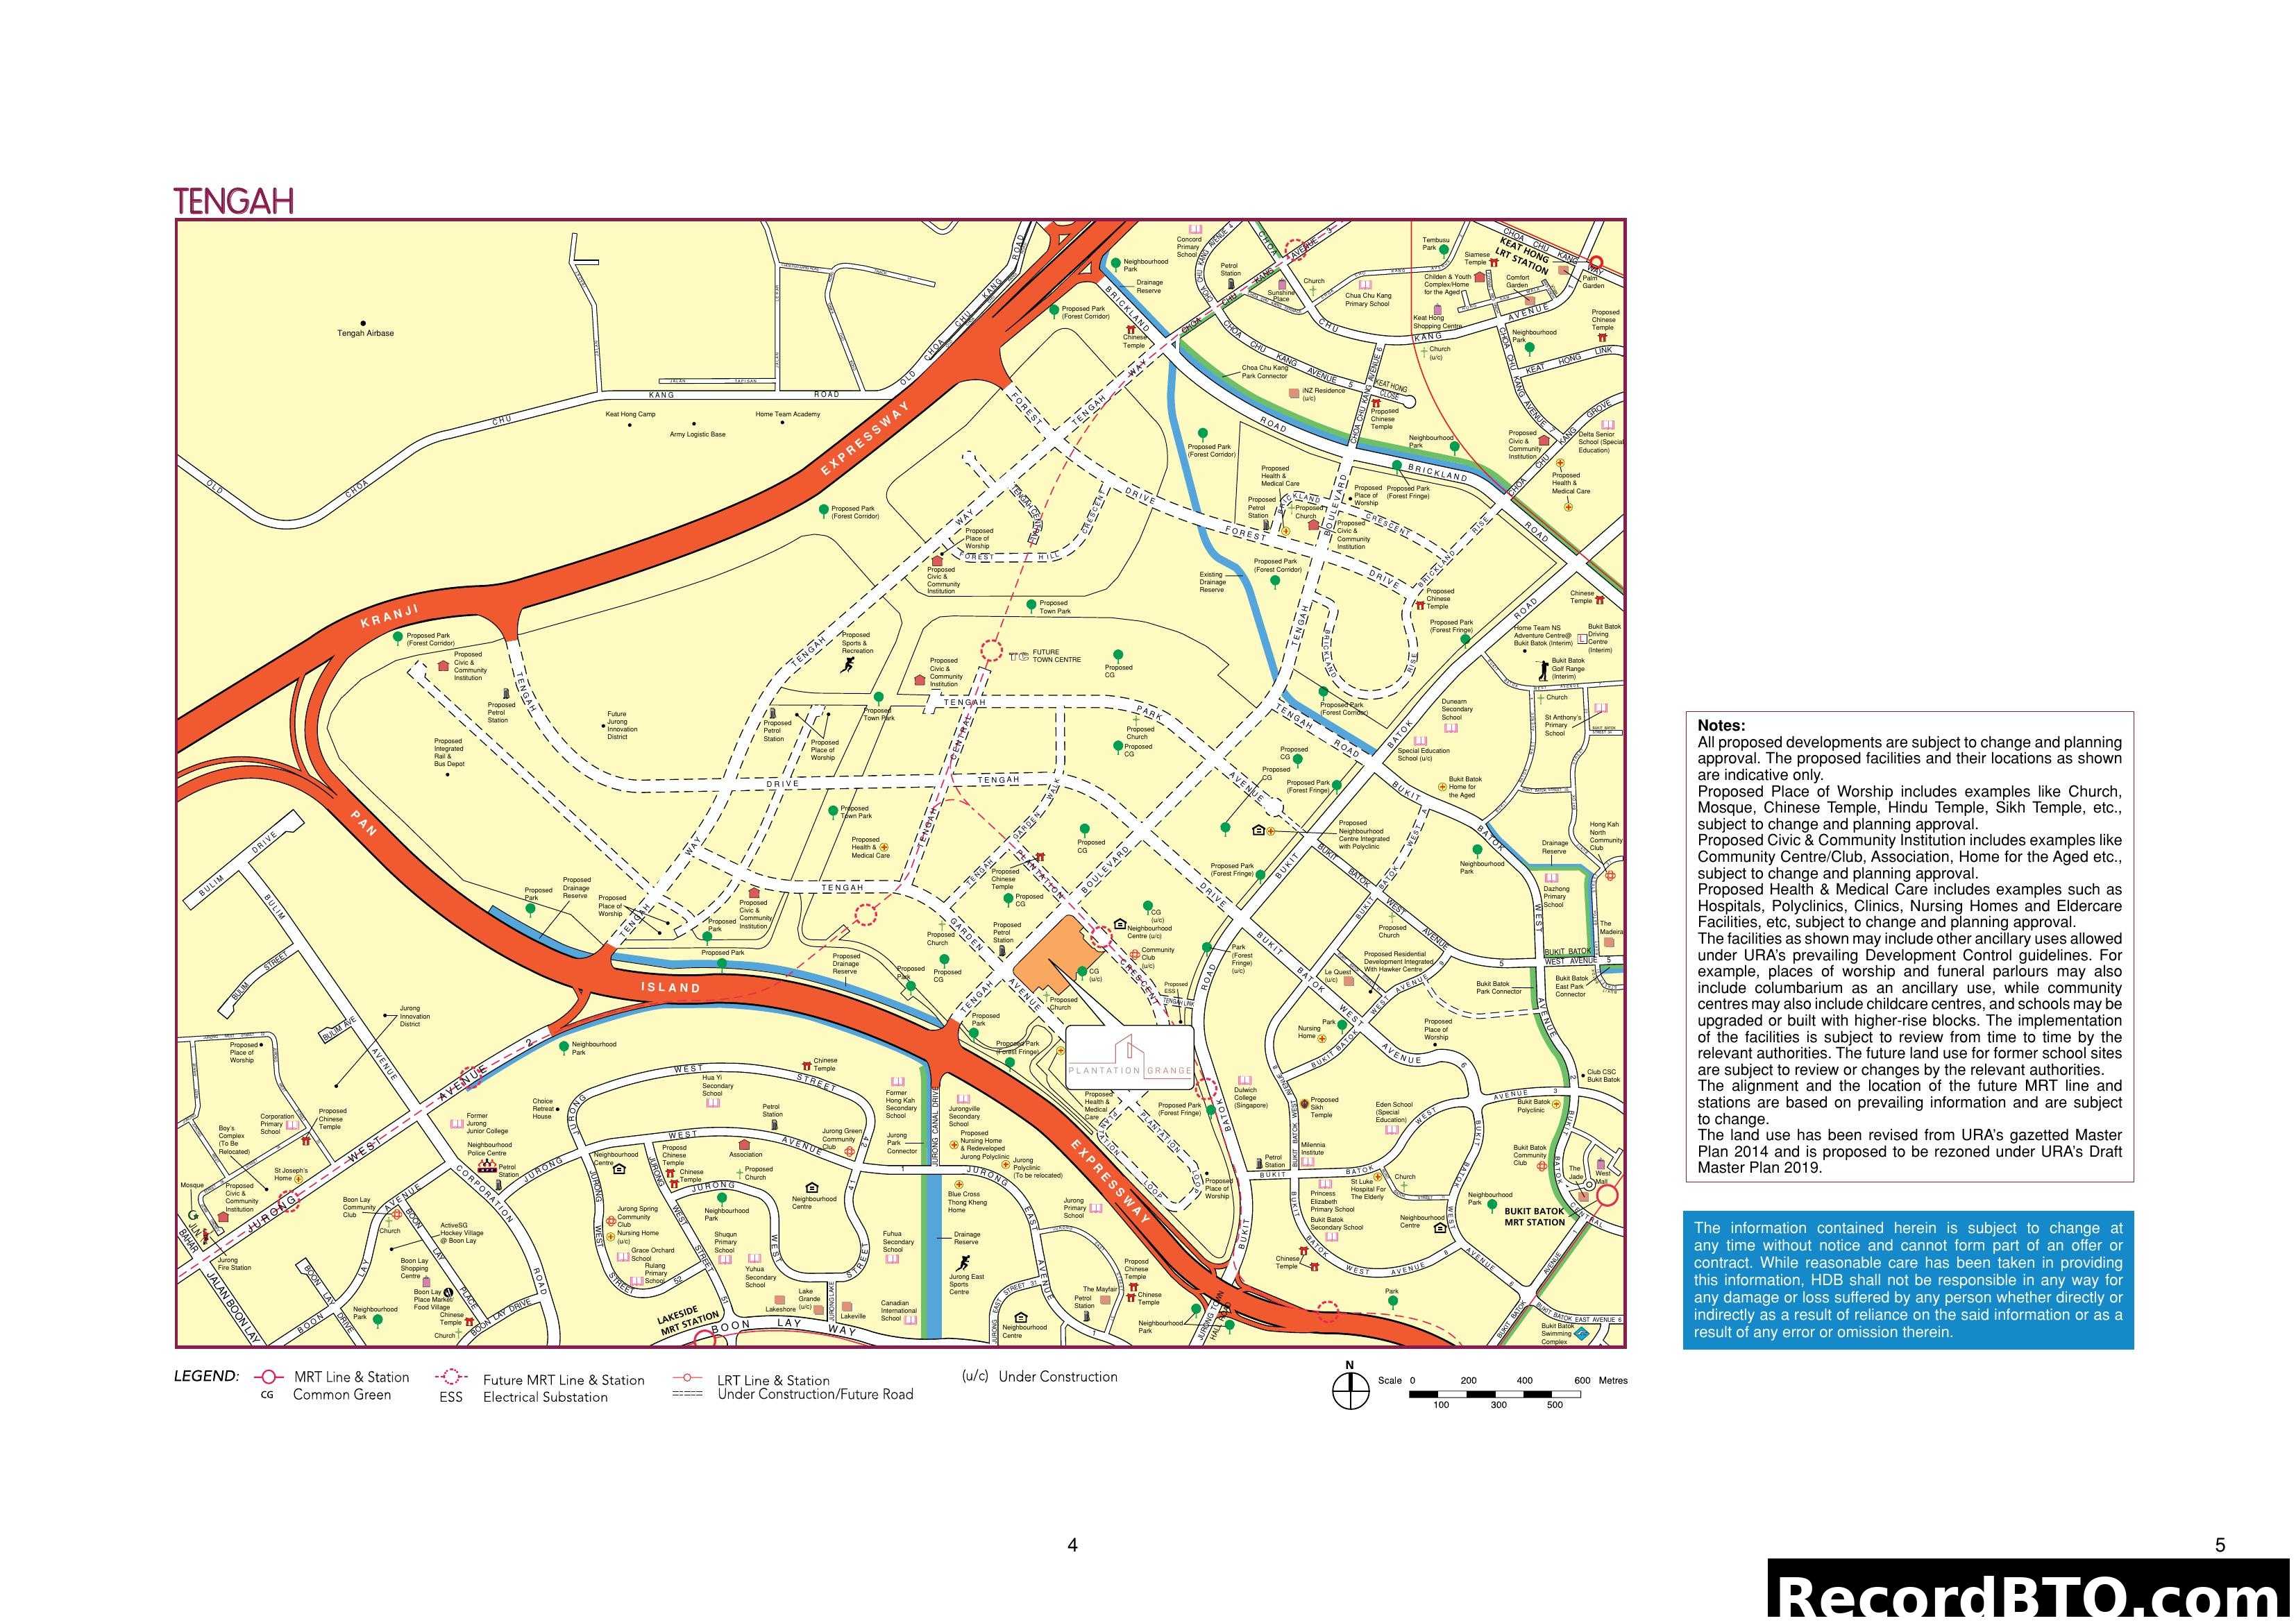
Tengah & Vicinity Location Map
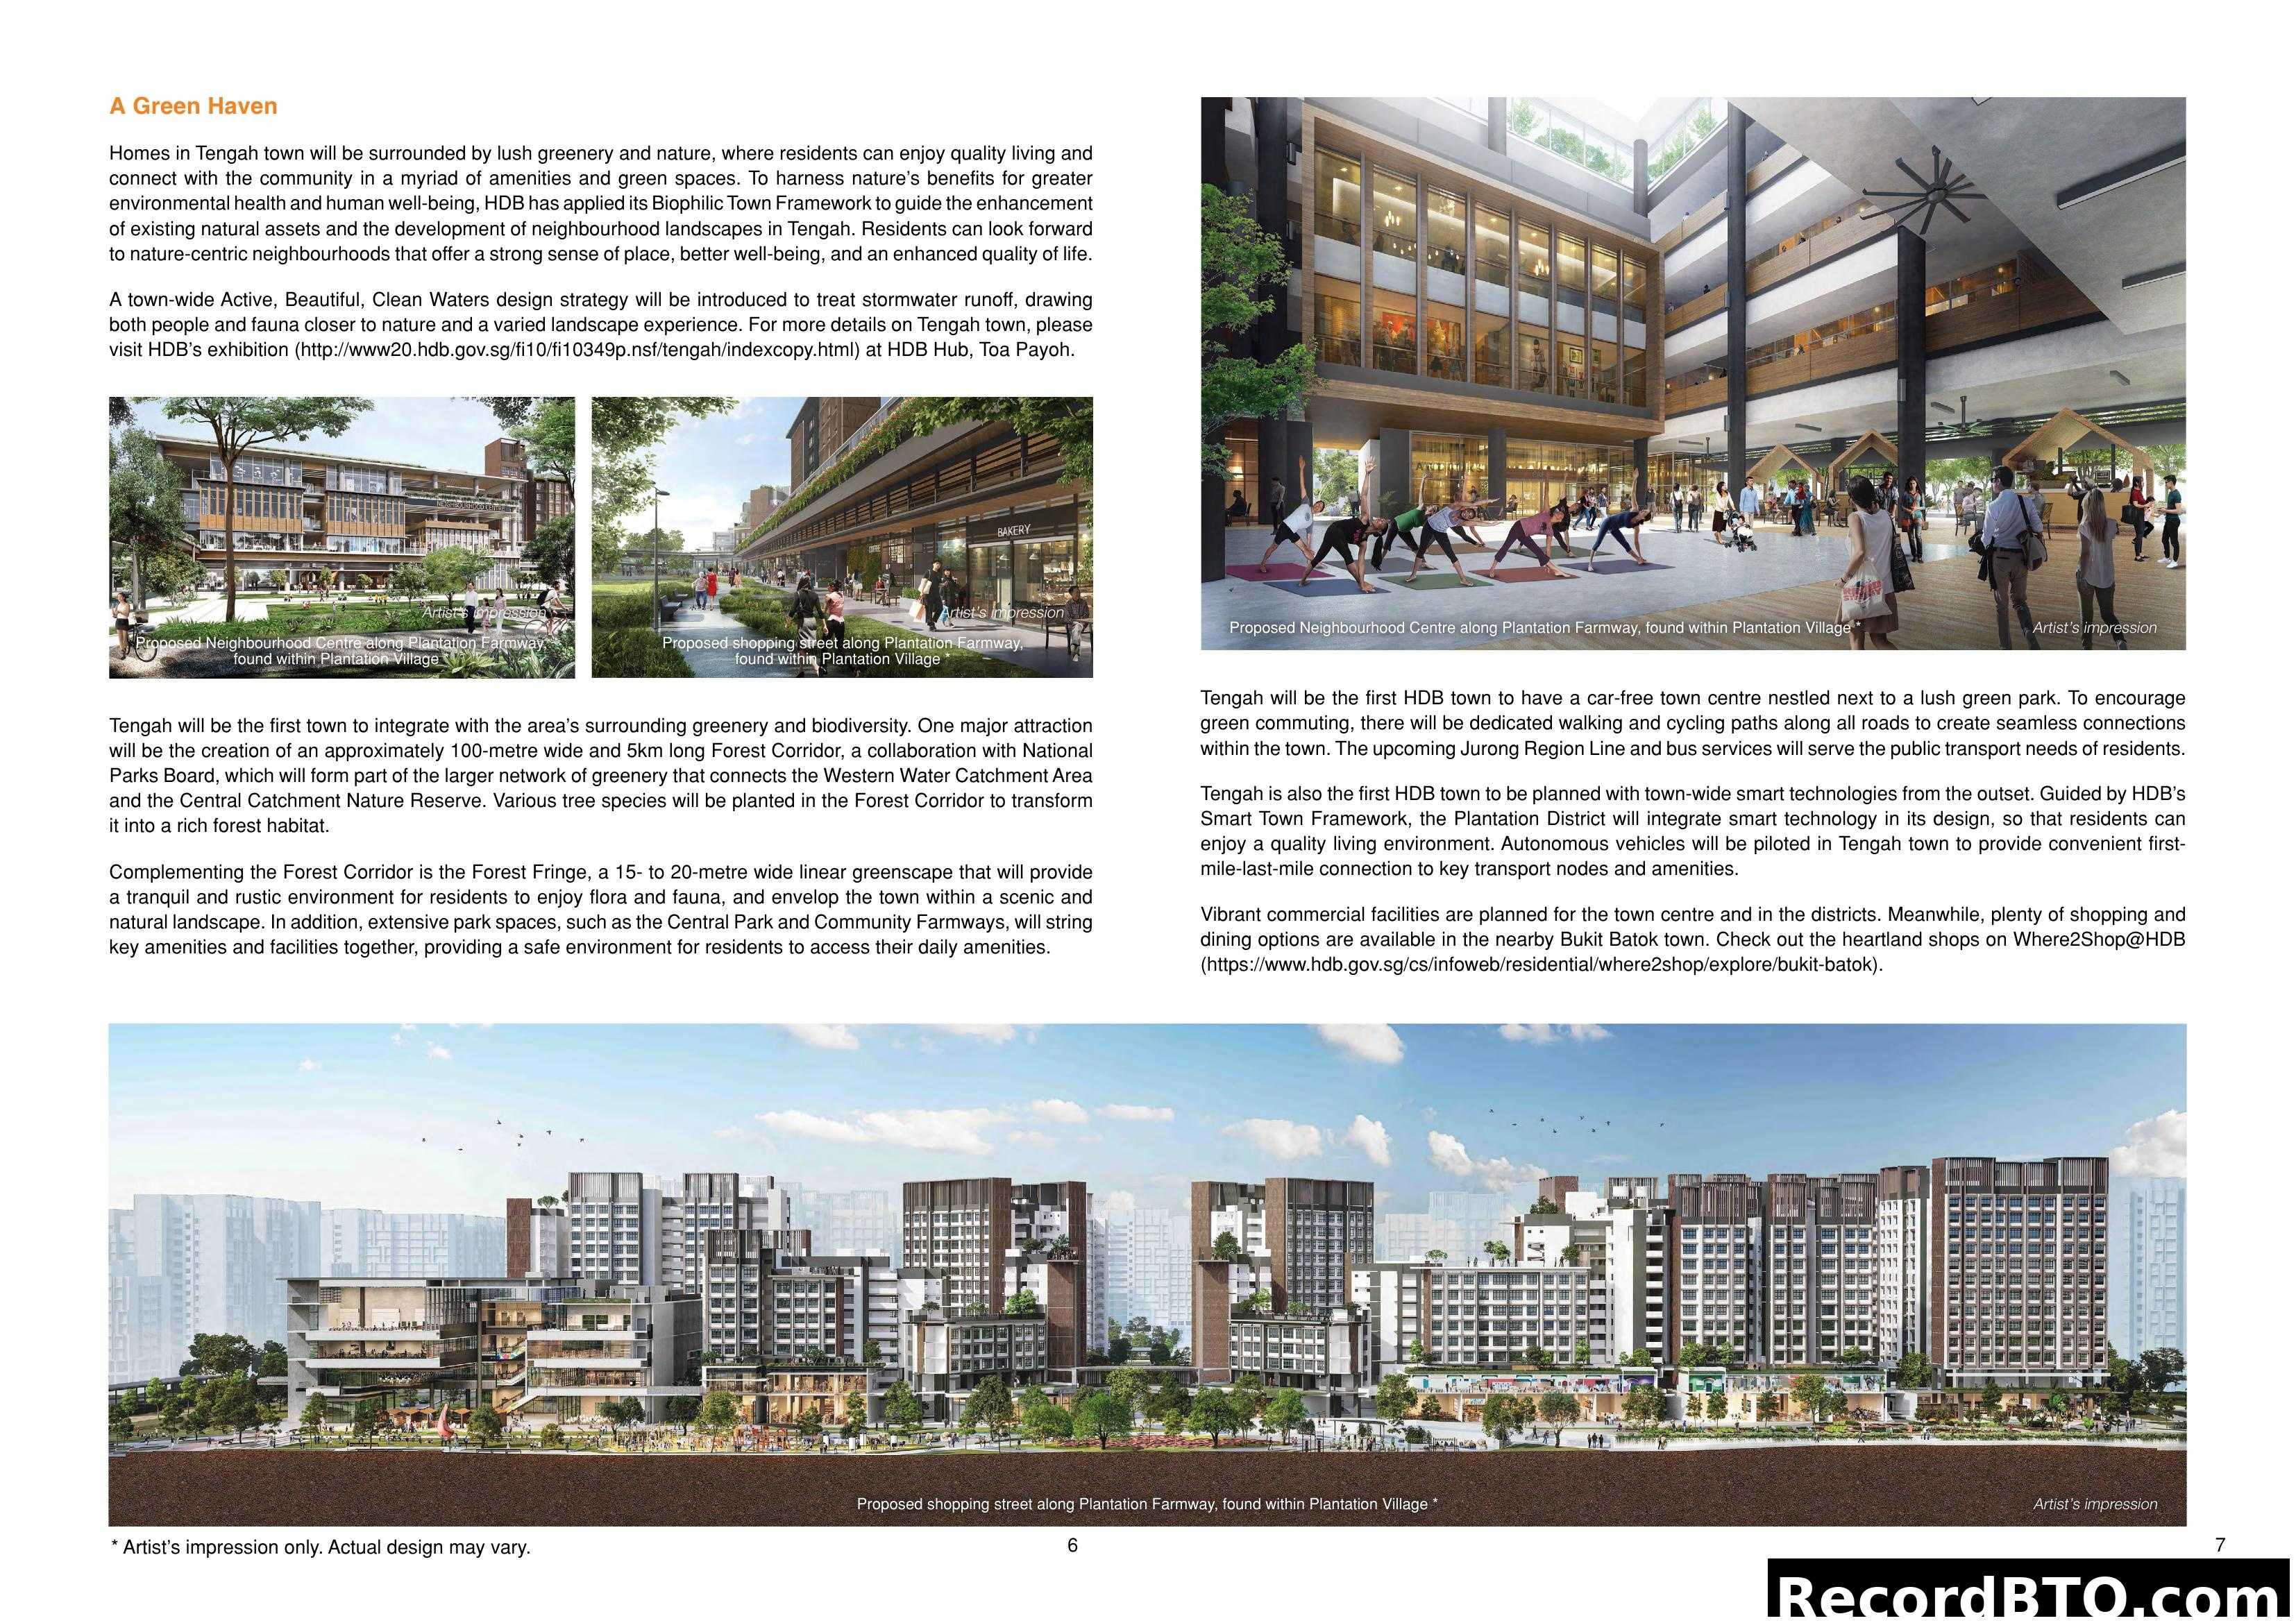
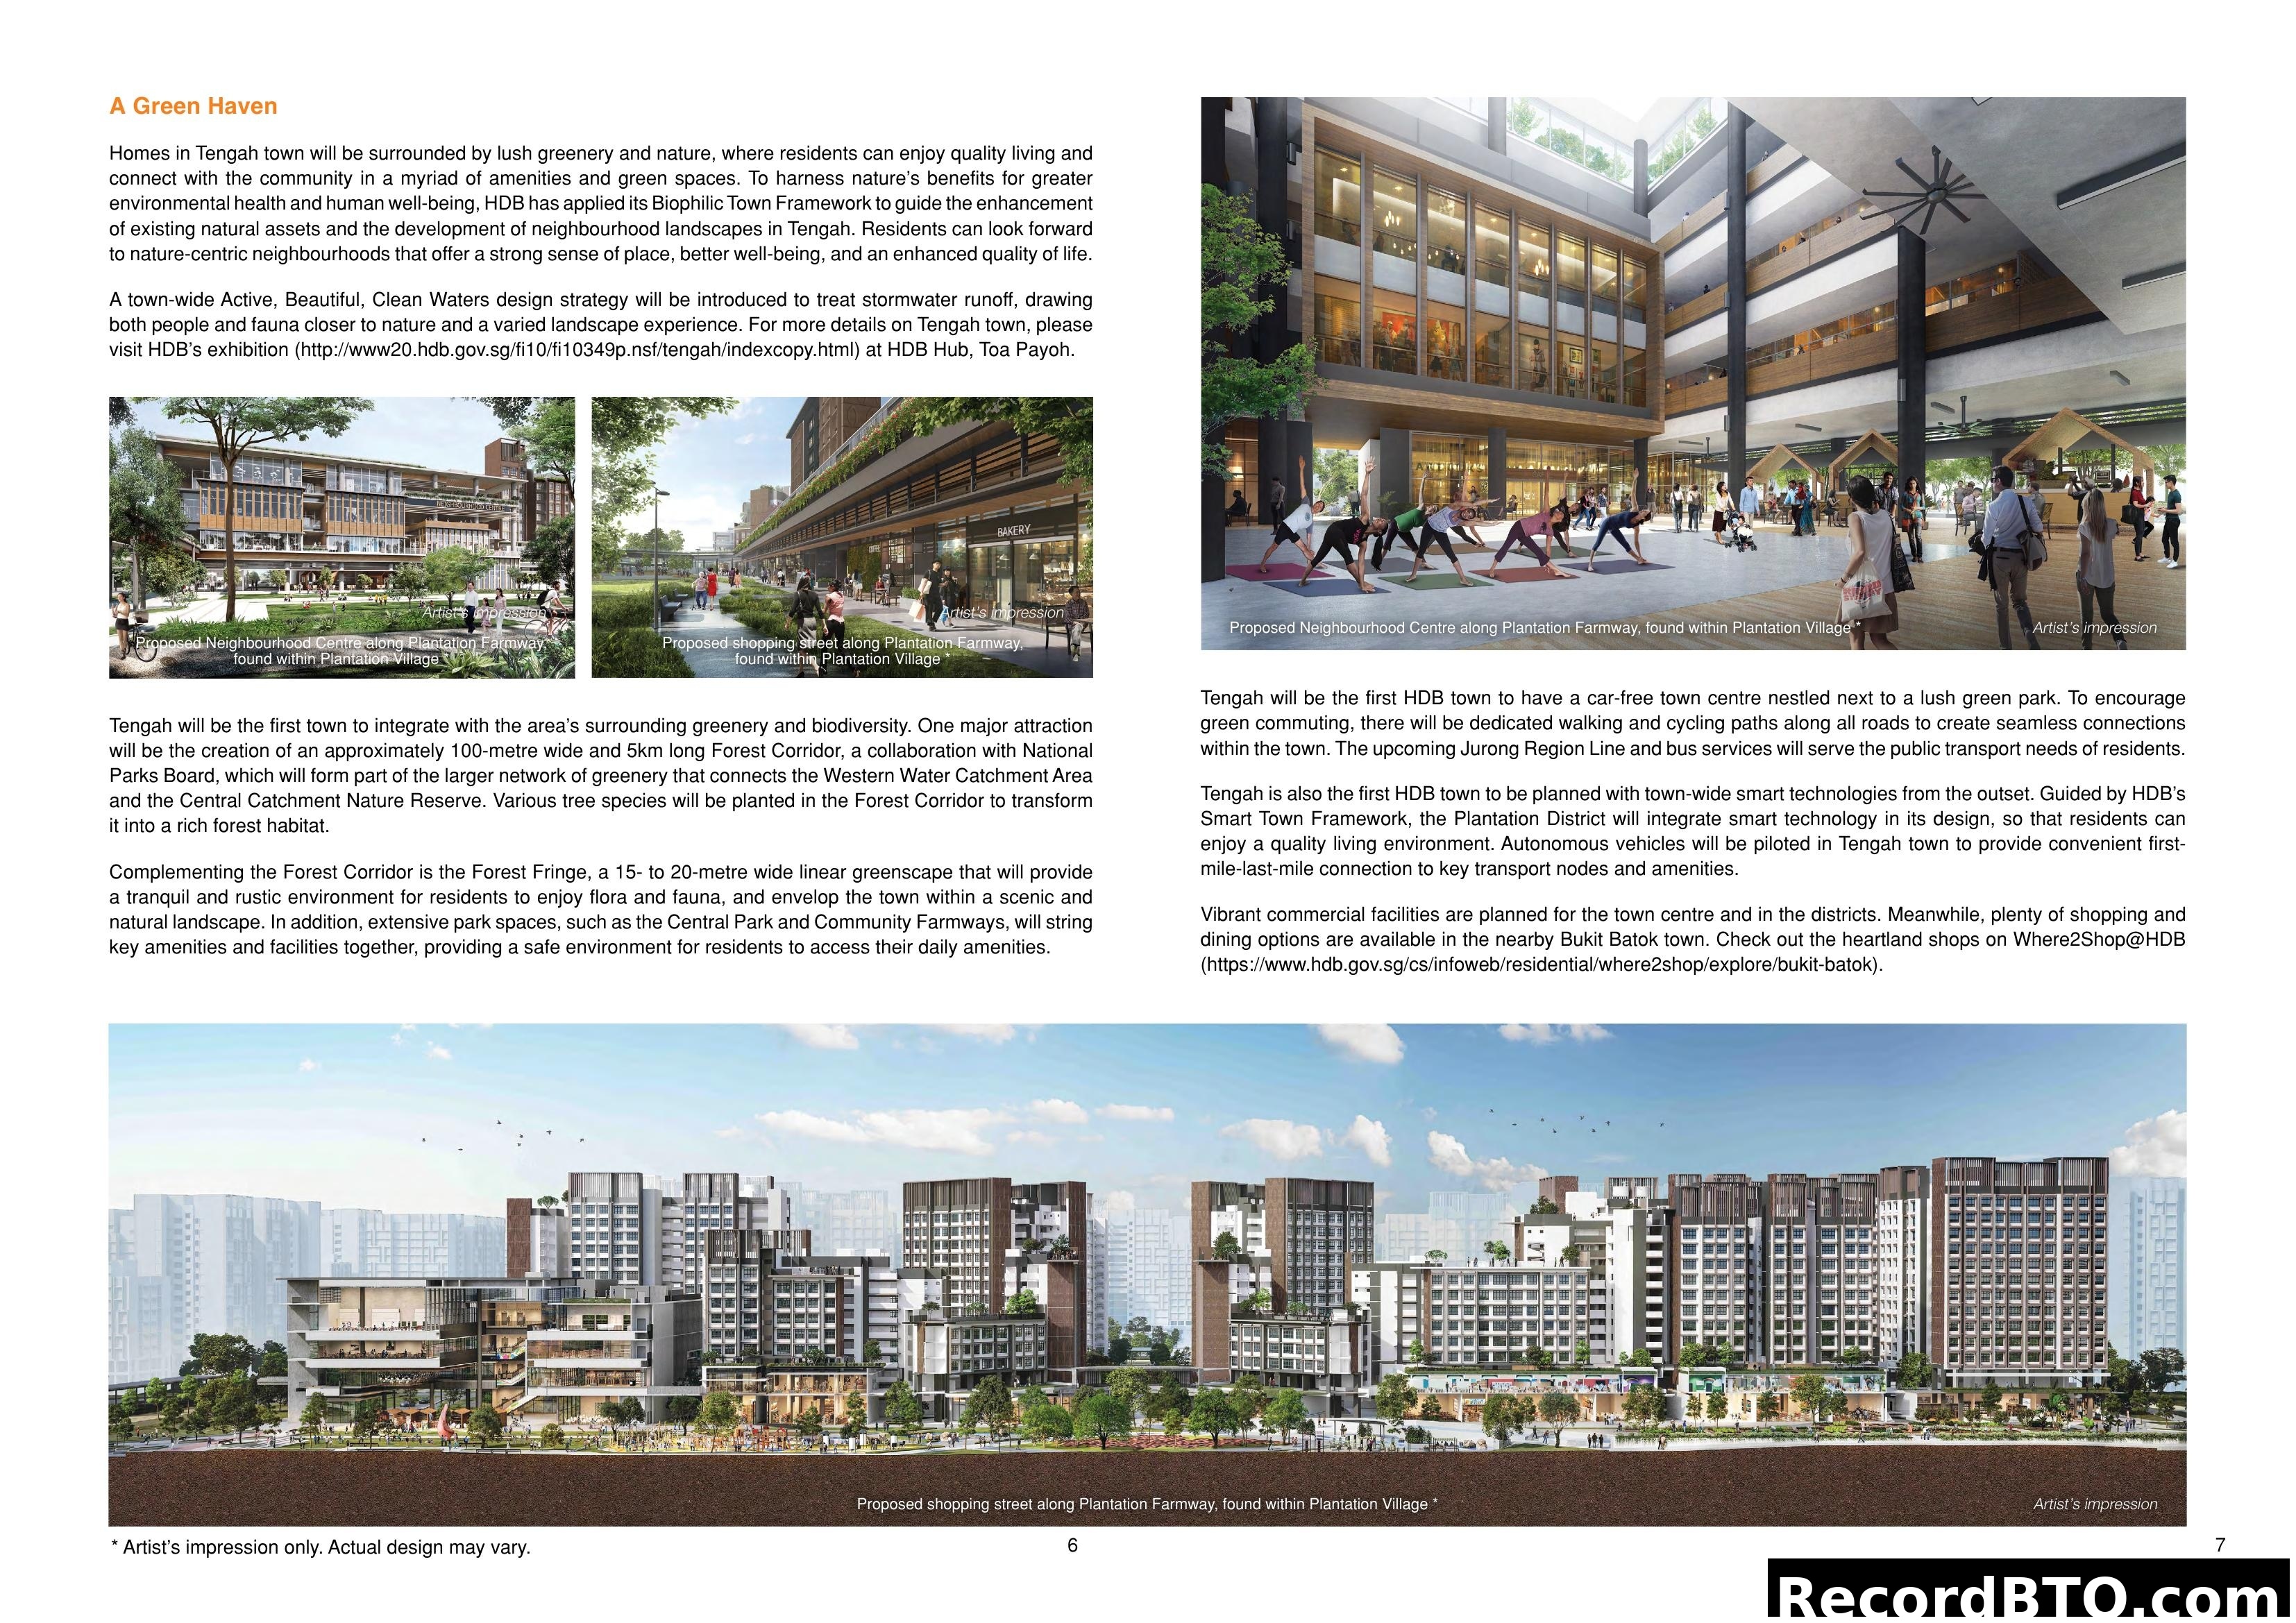
A Green Haven in Tengah Town