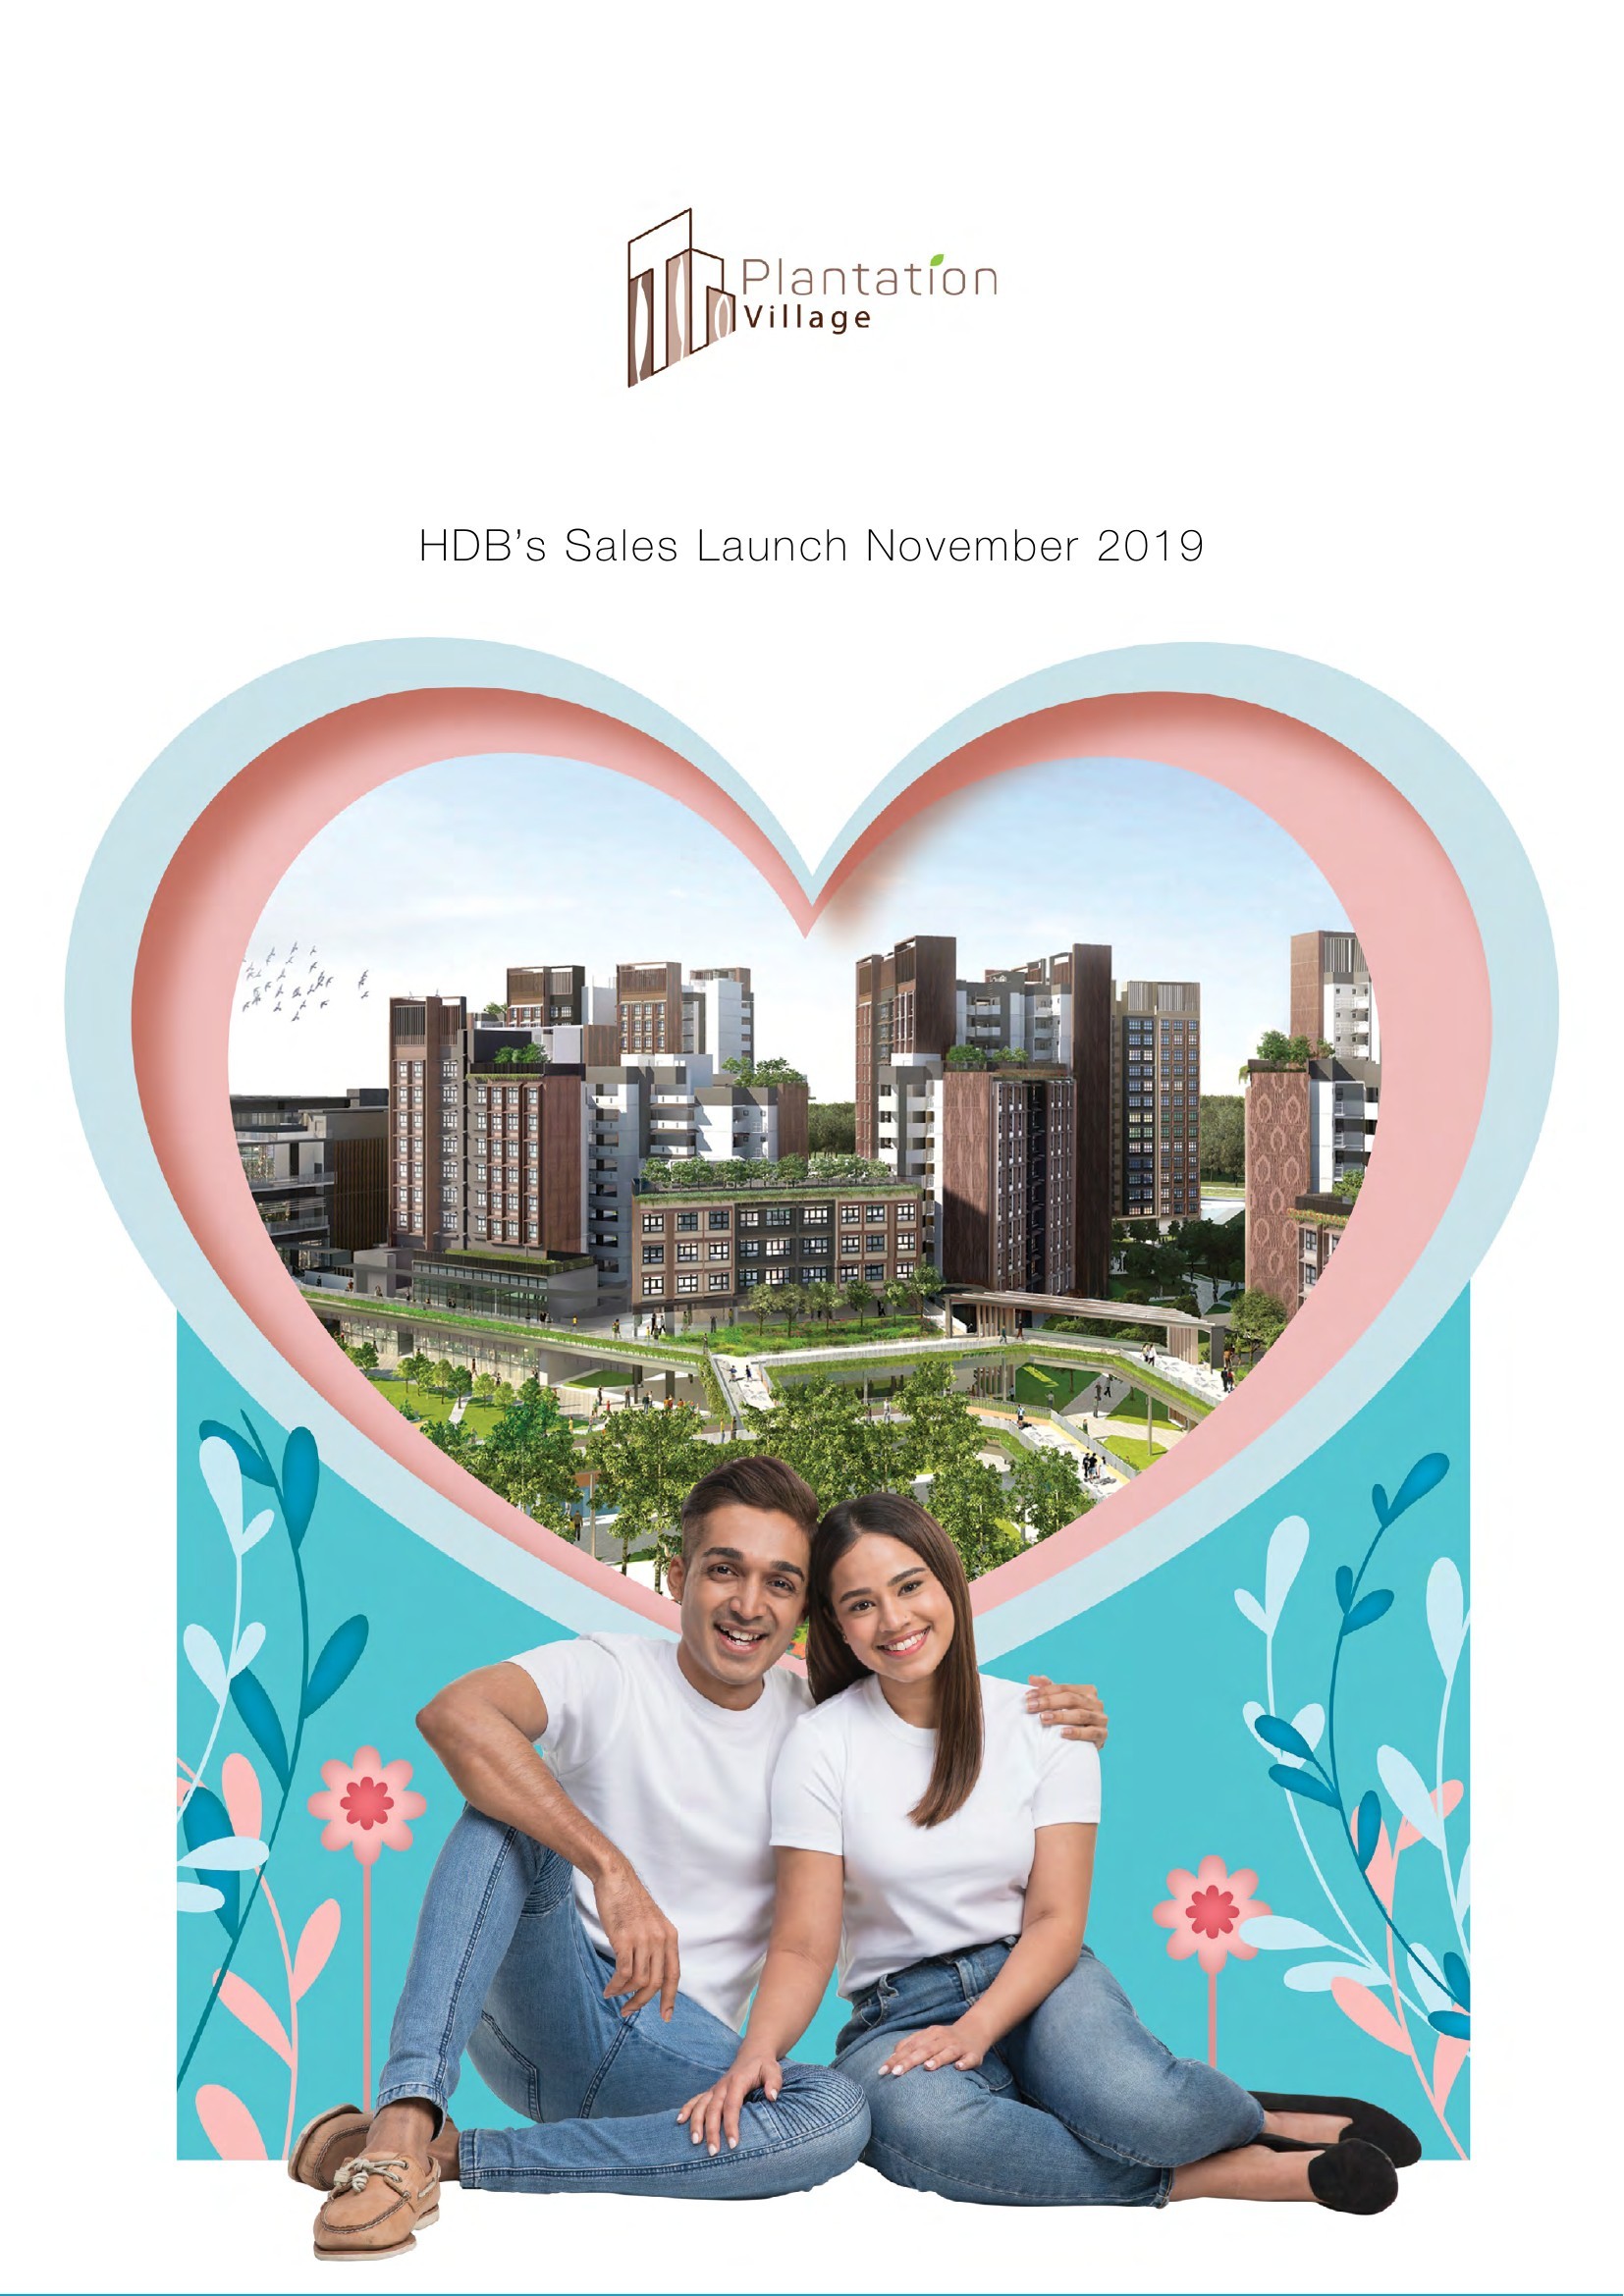


Plantation Village
Project Details
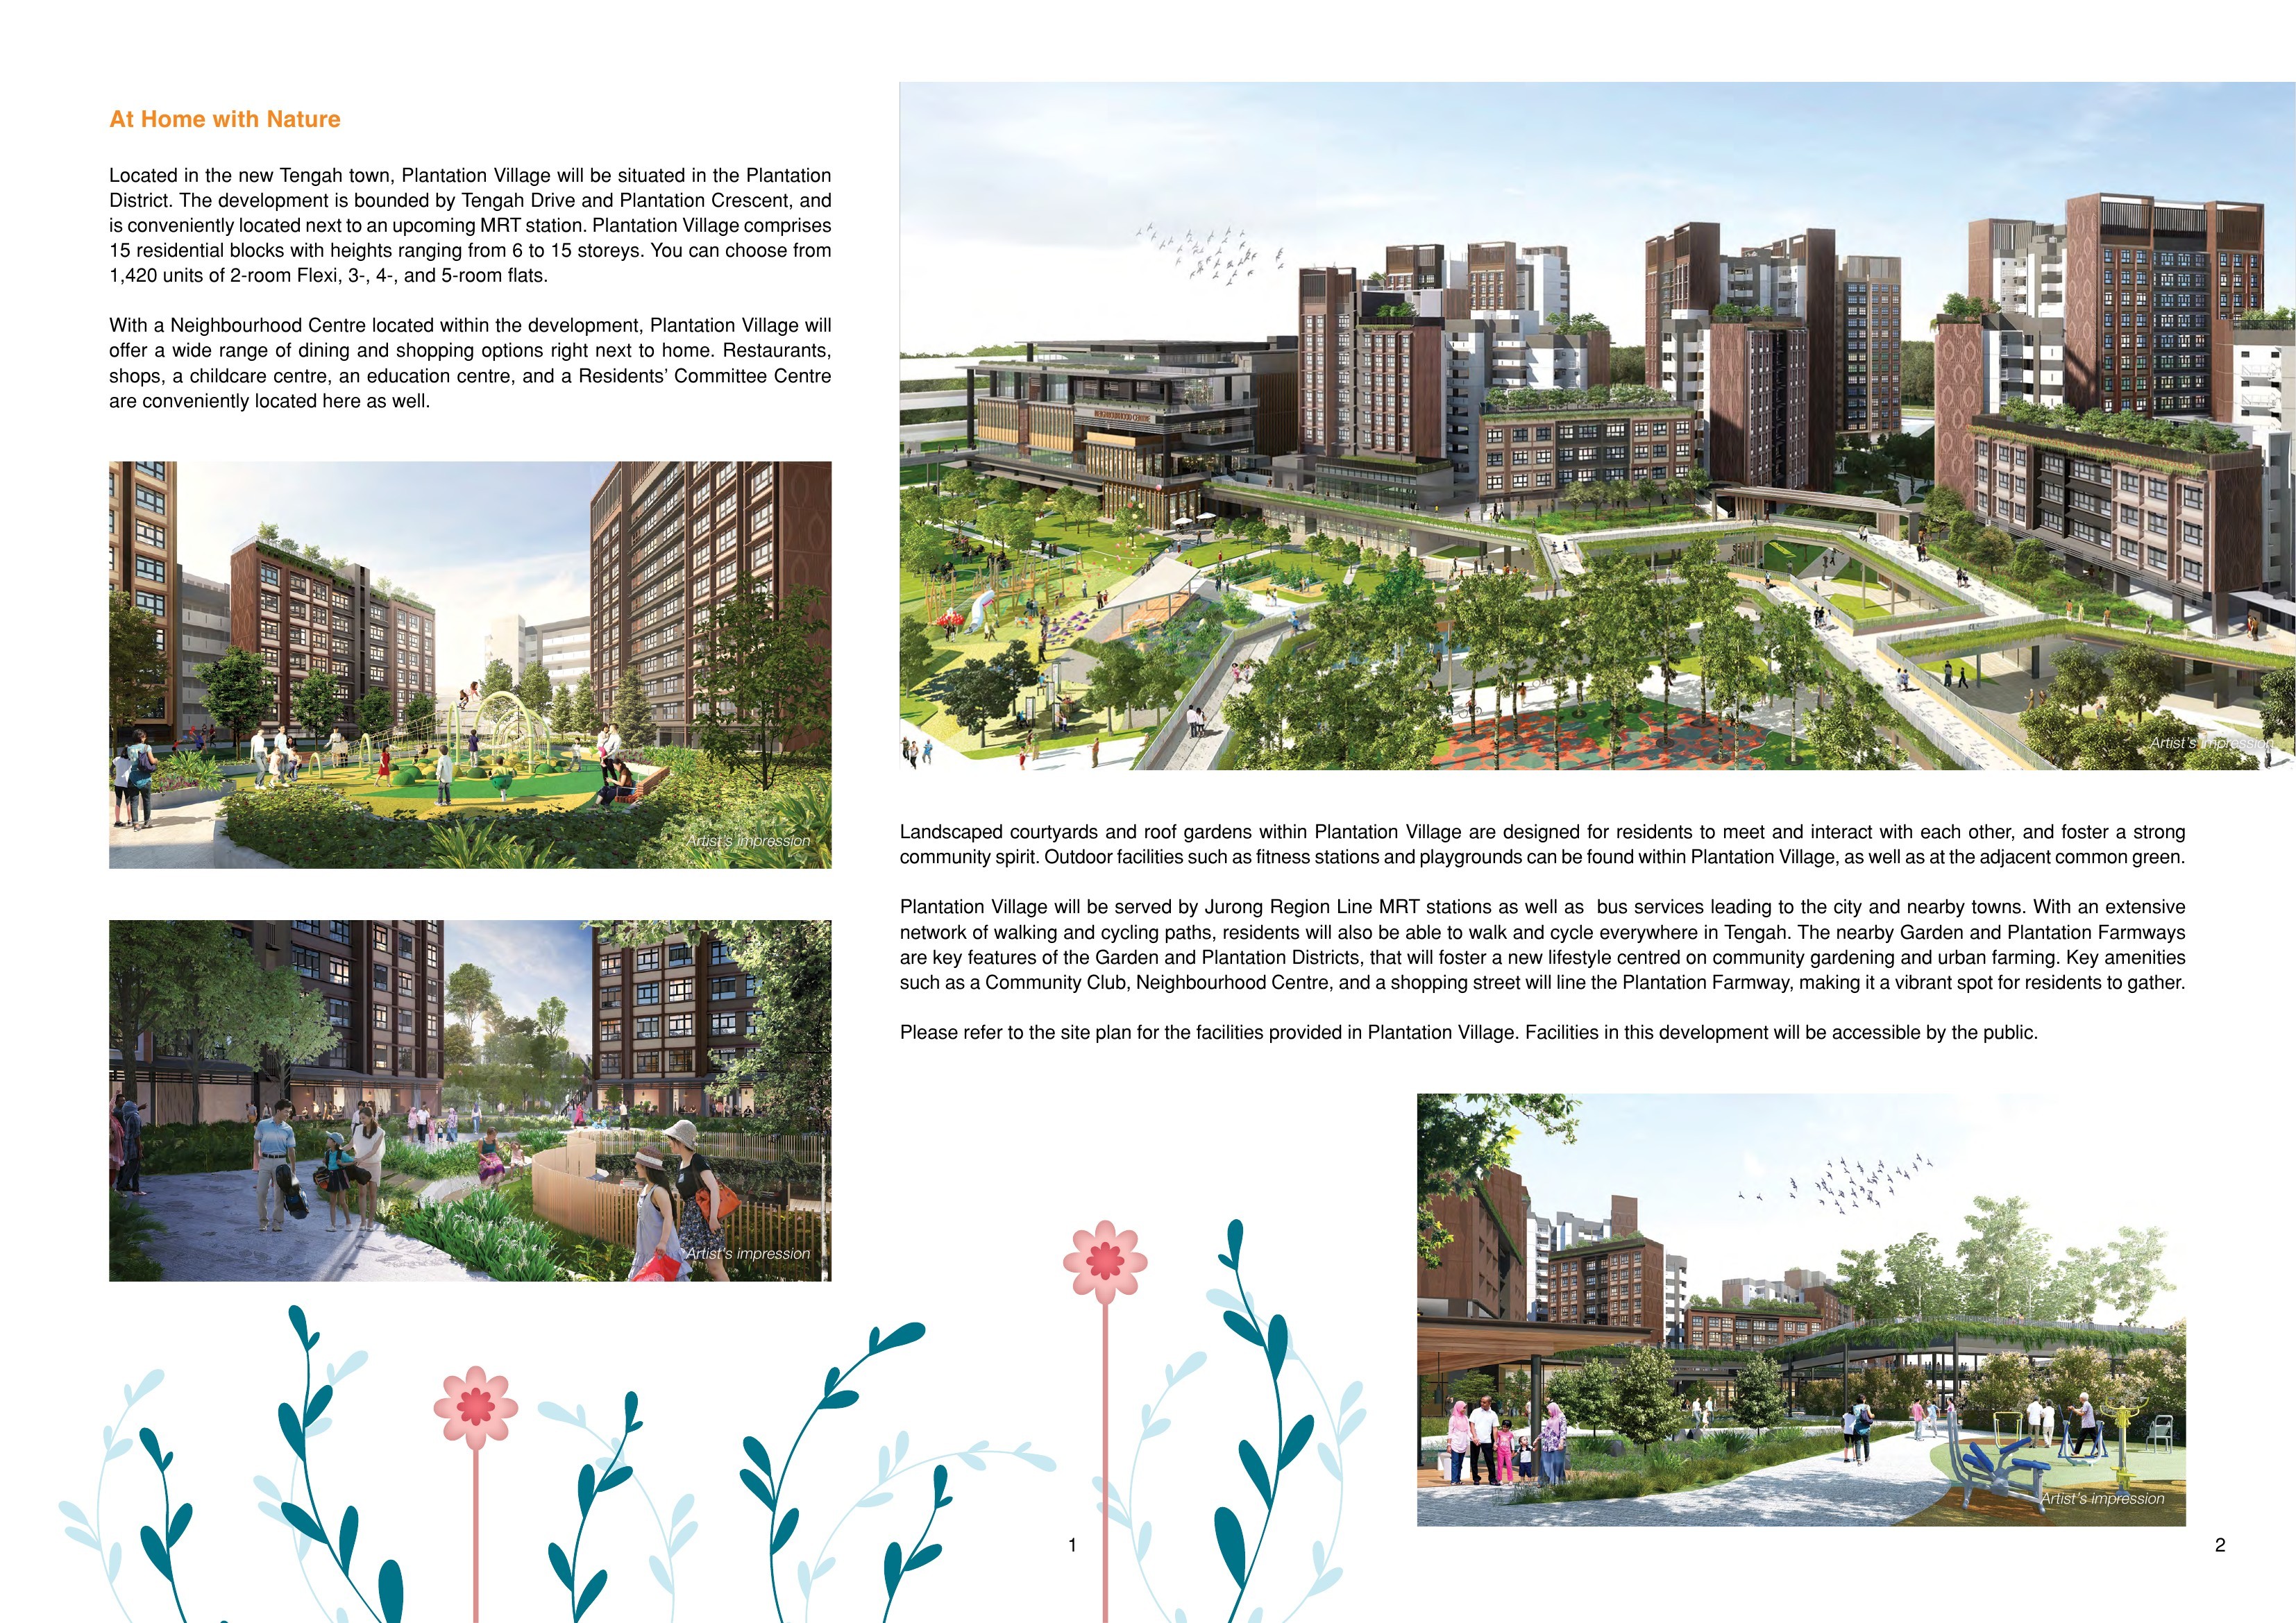
About This Project
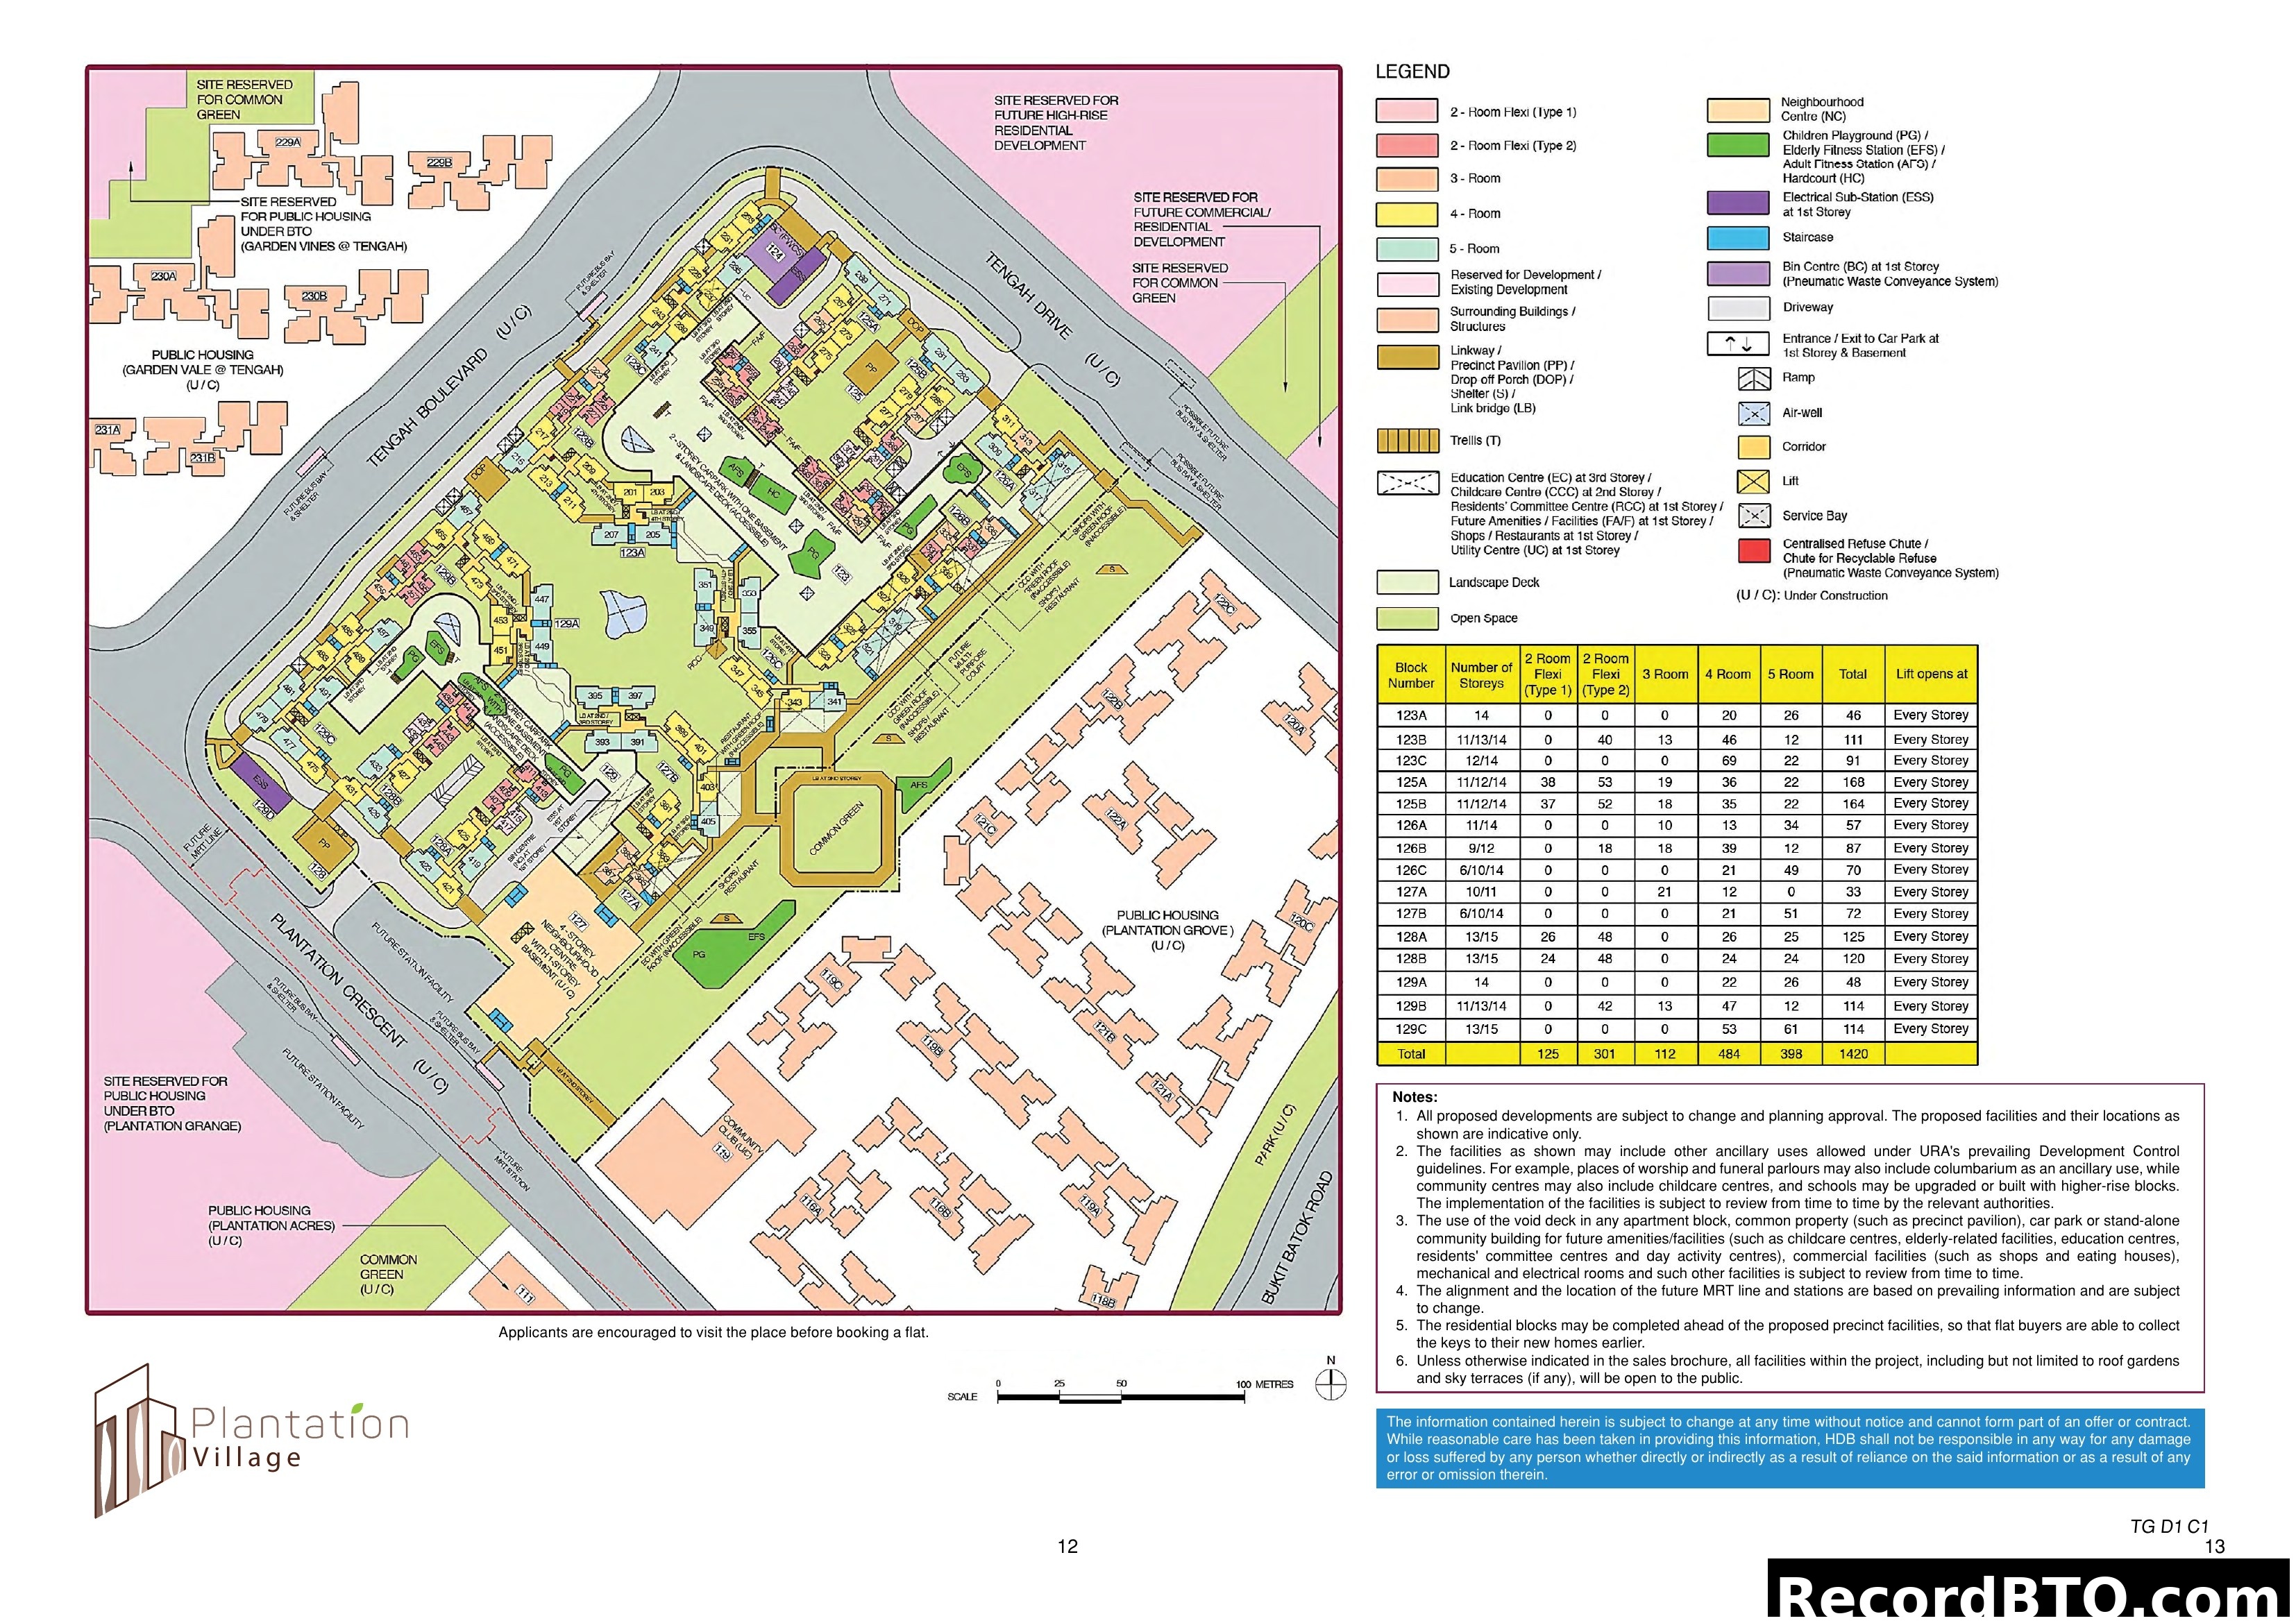
Site Plan
Detailed layout and block arrangement
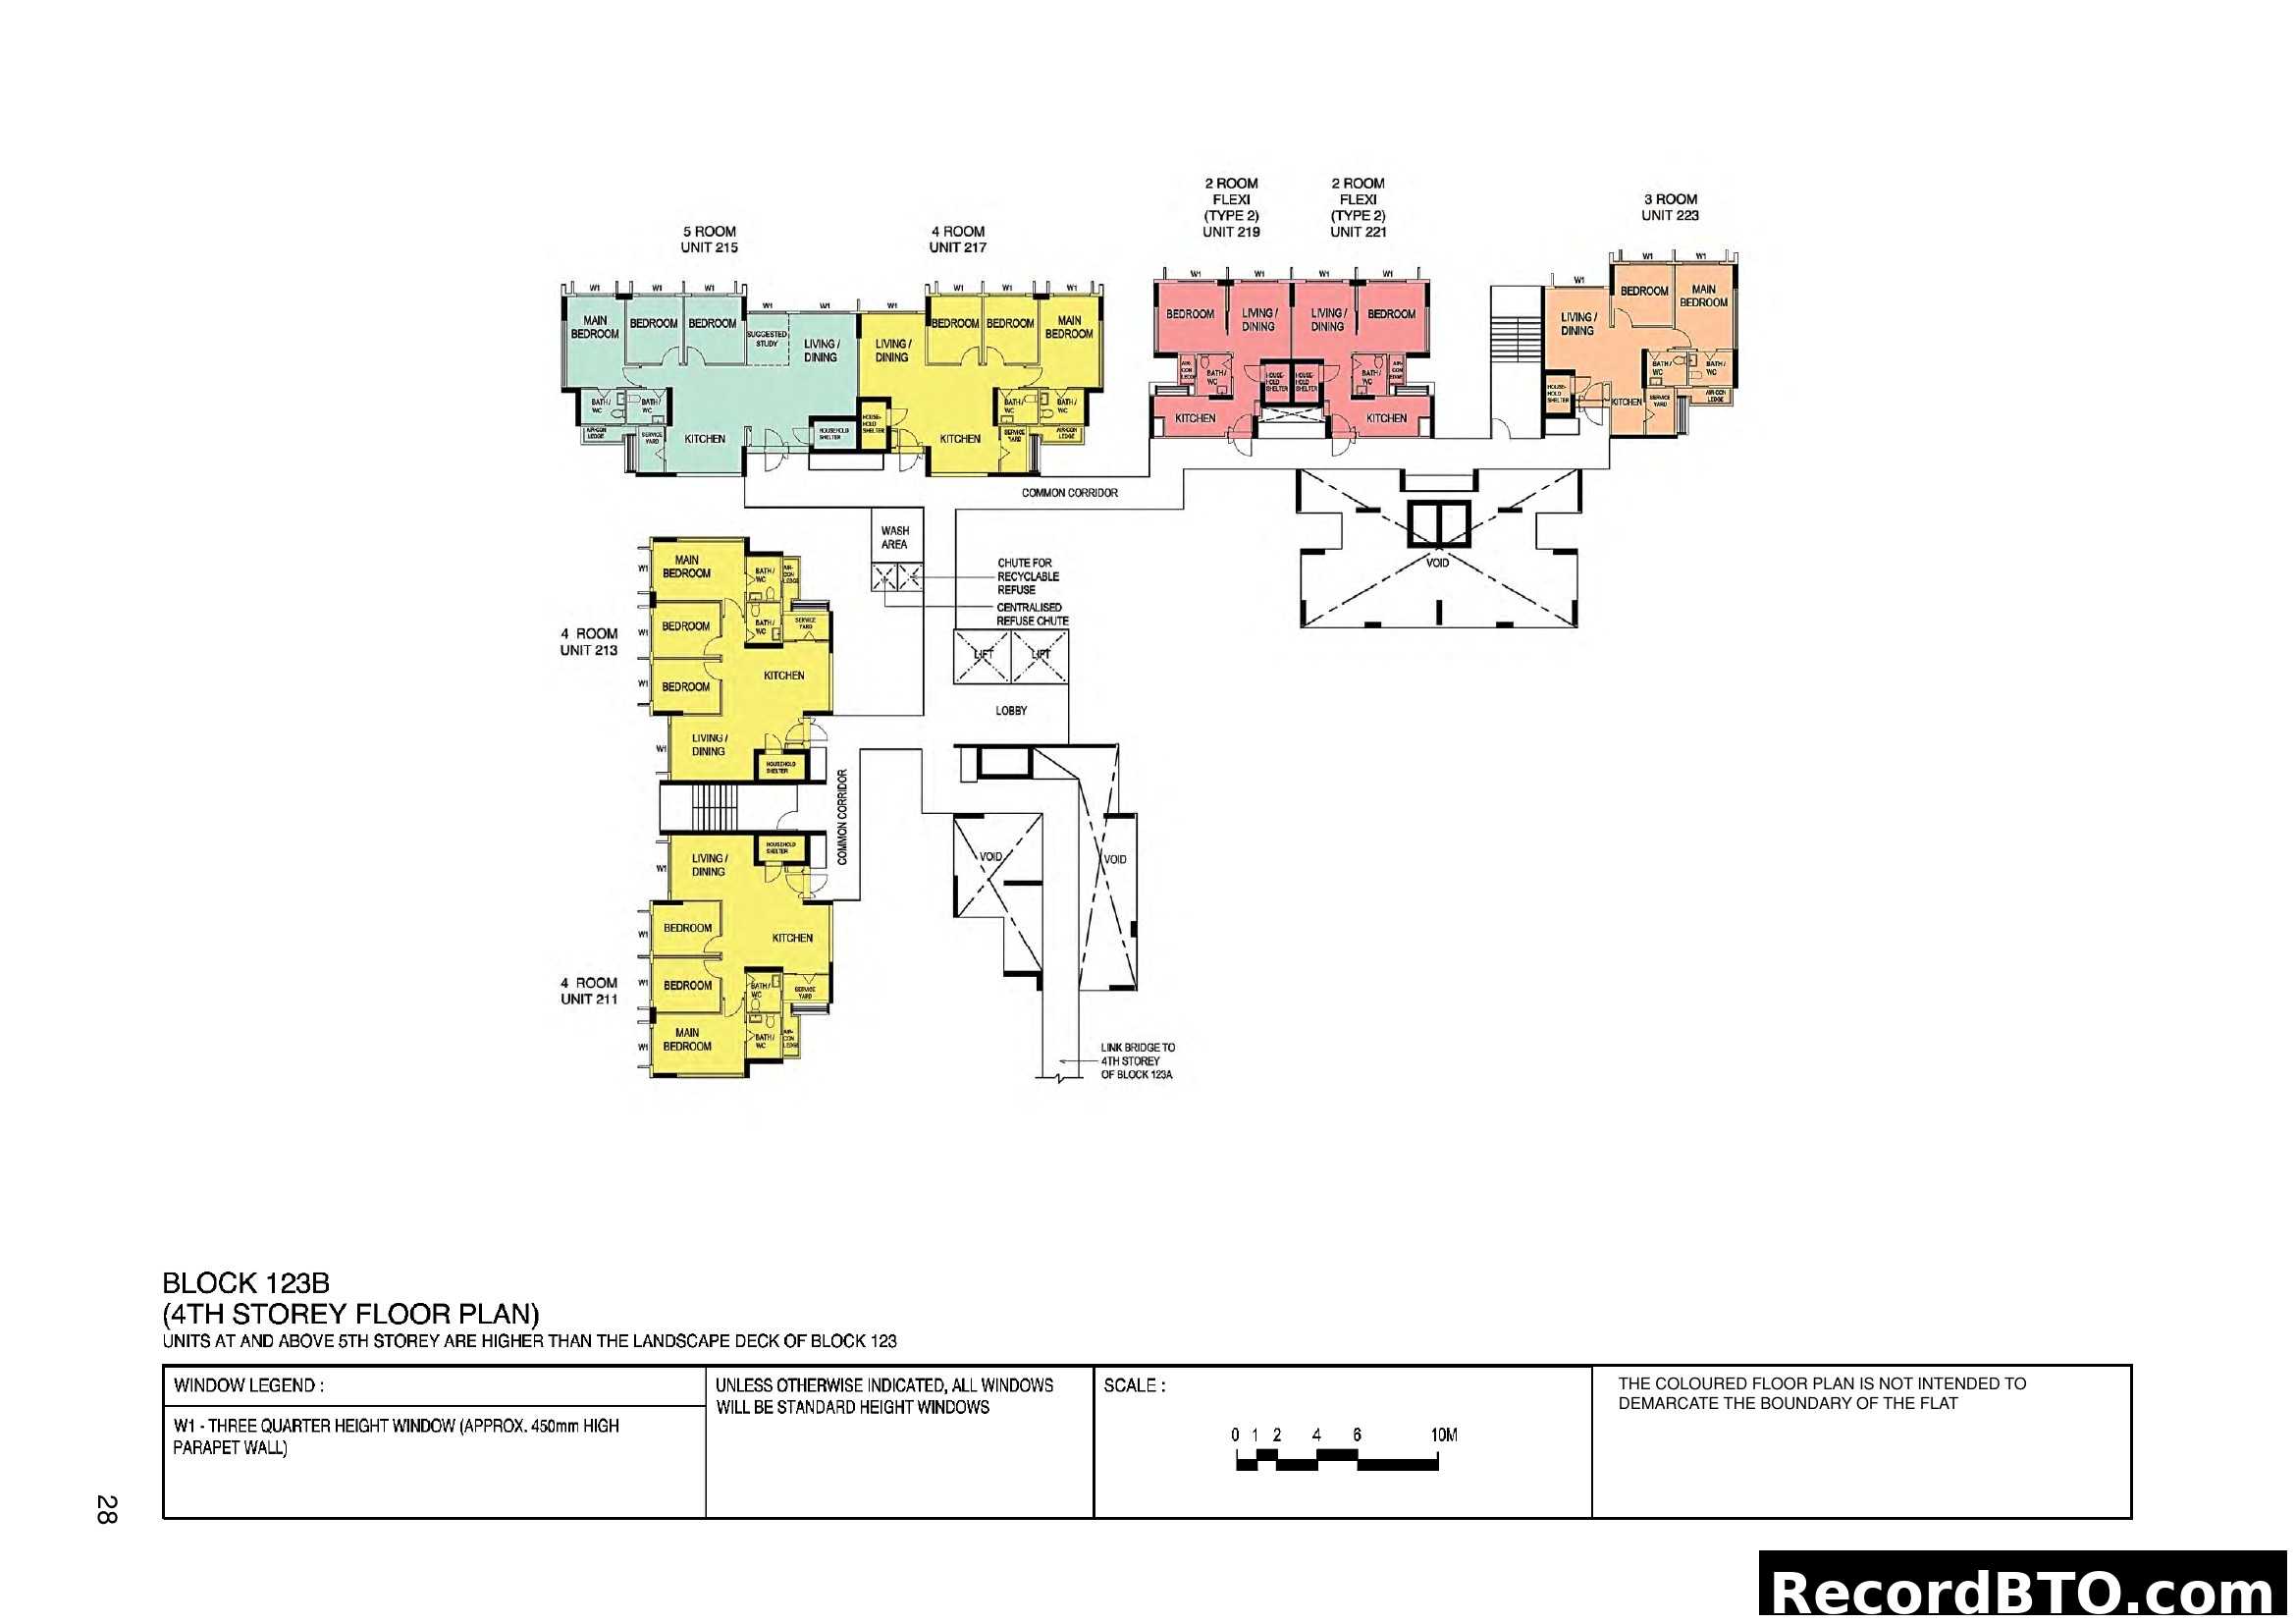
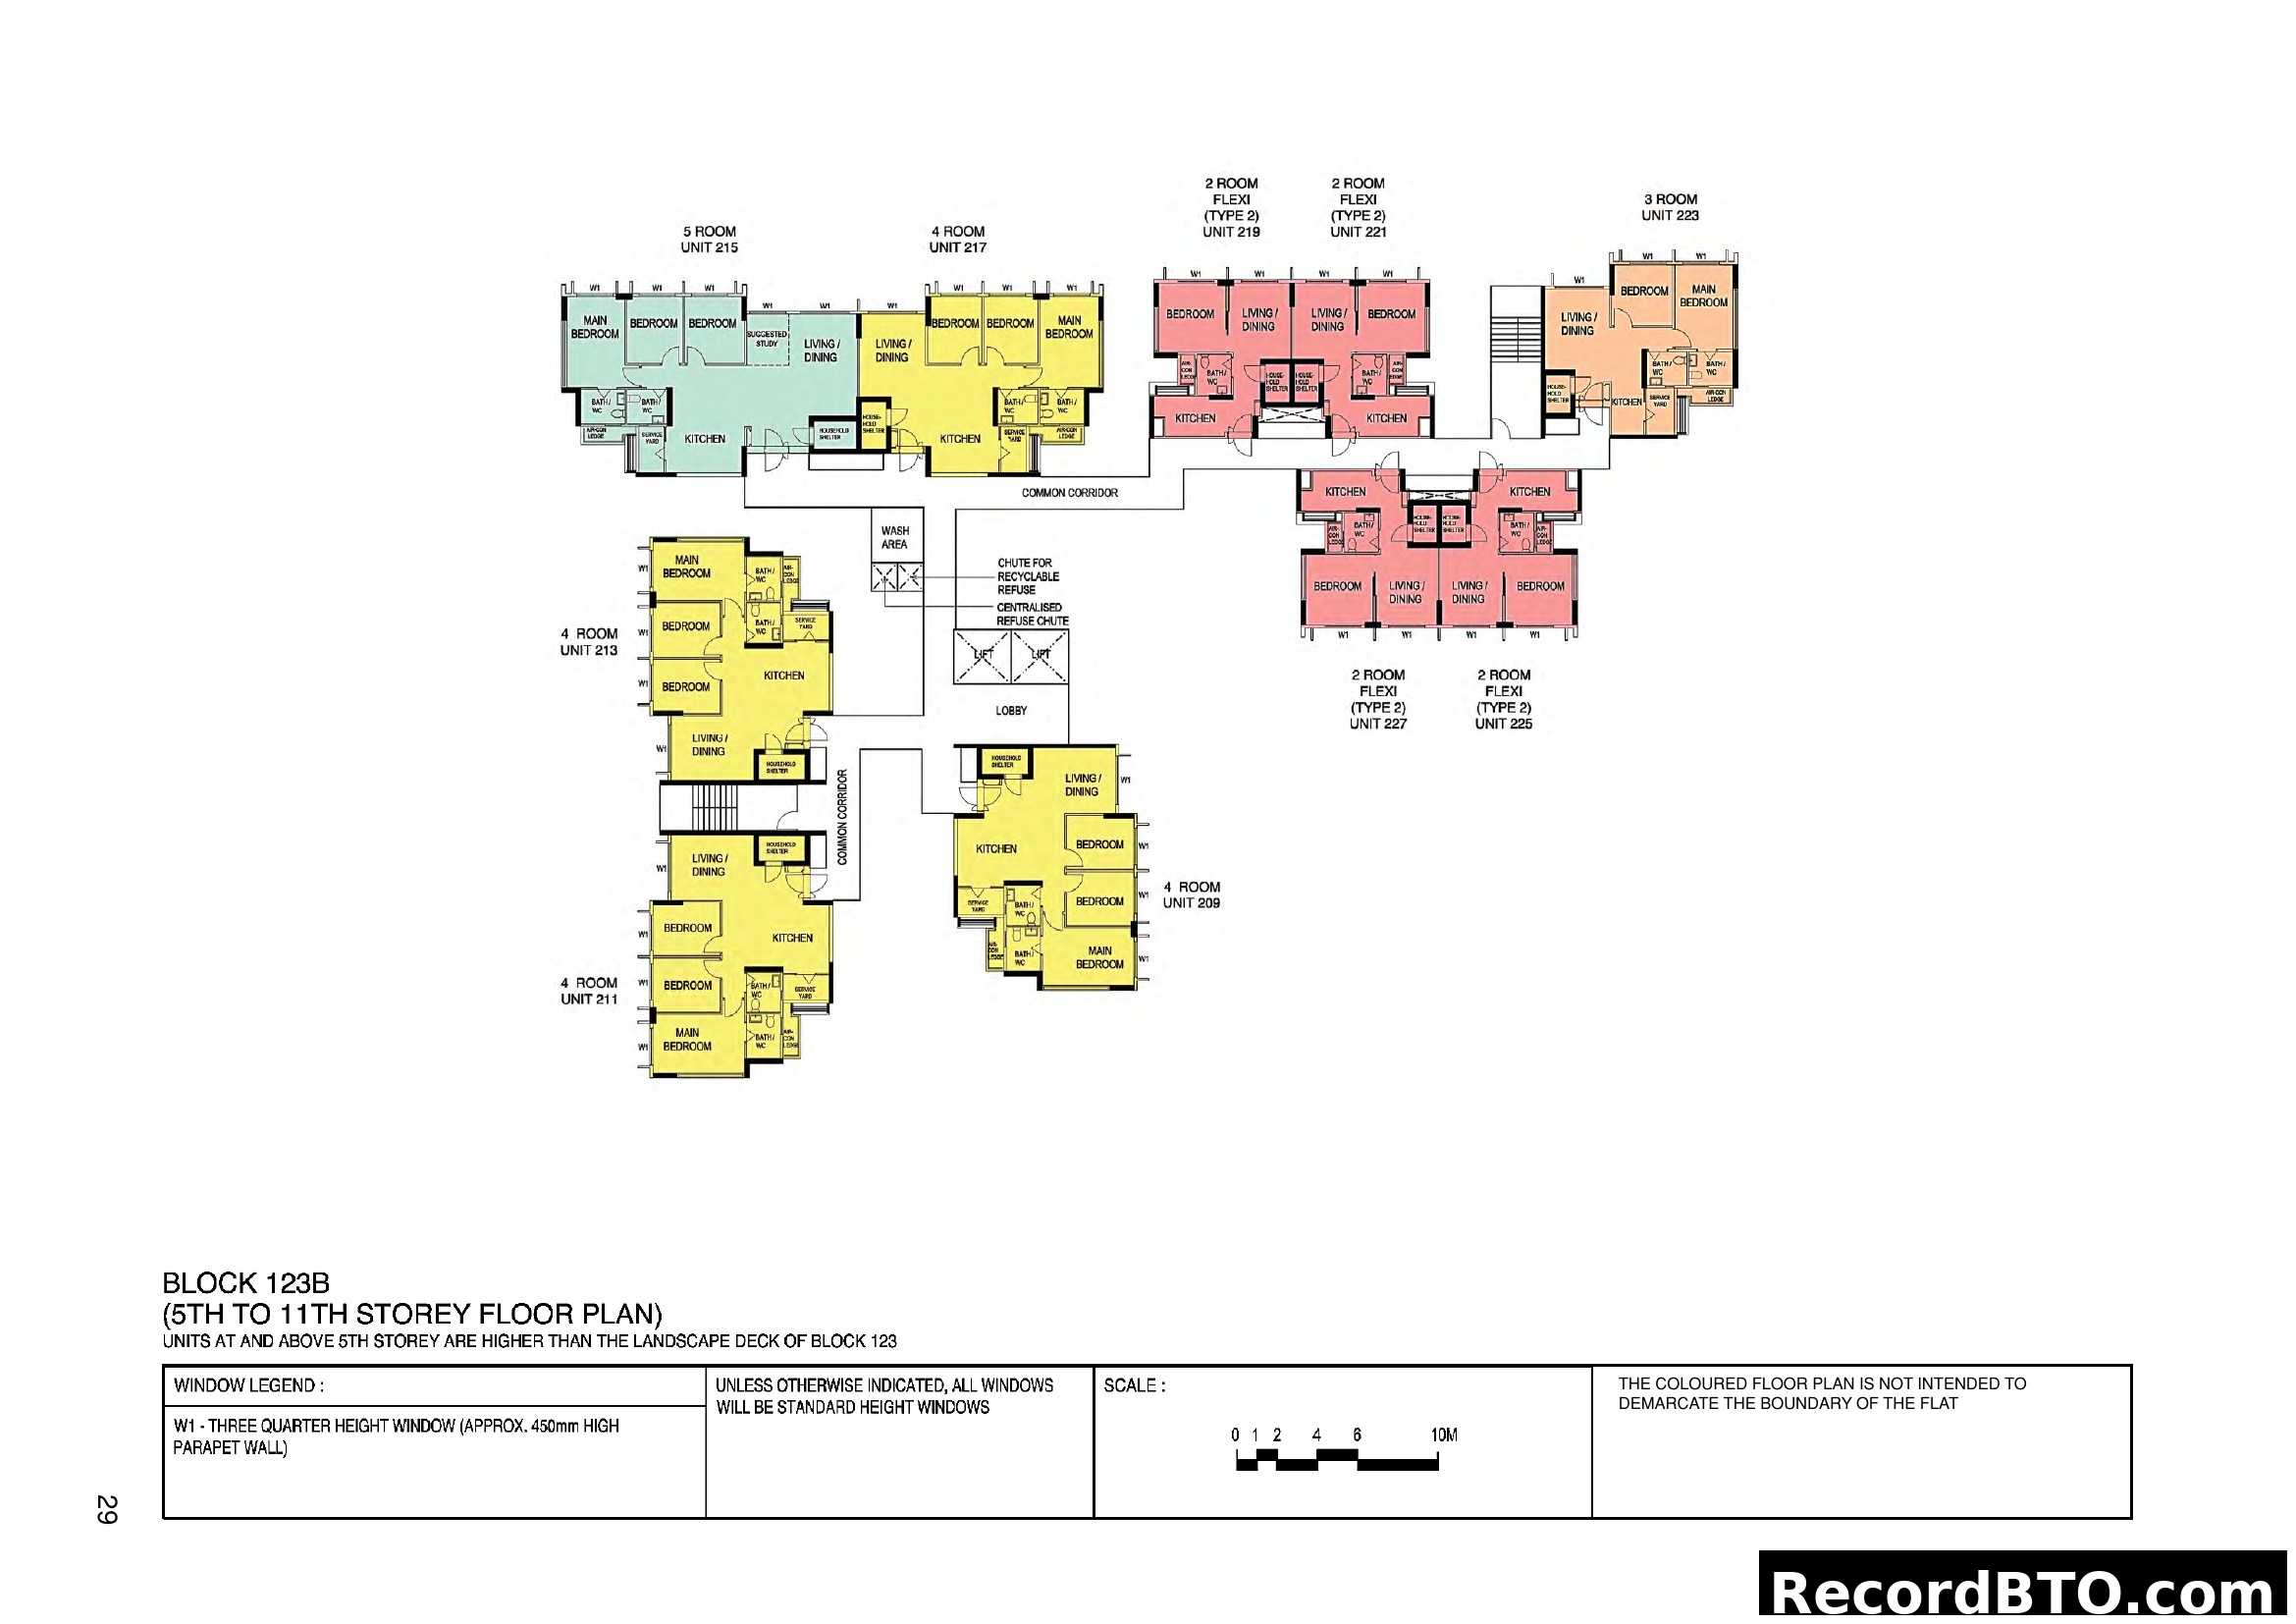
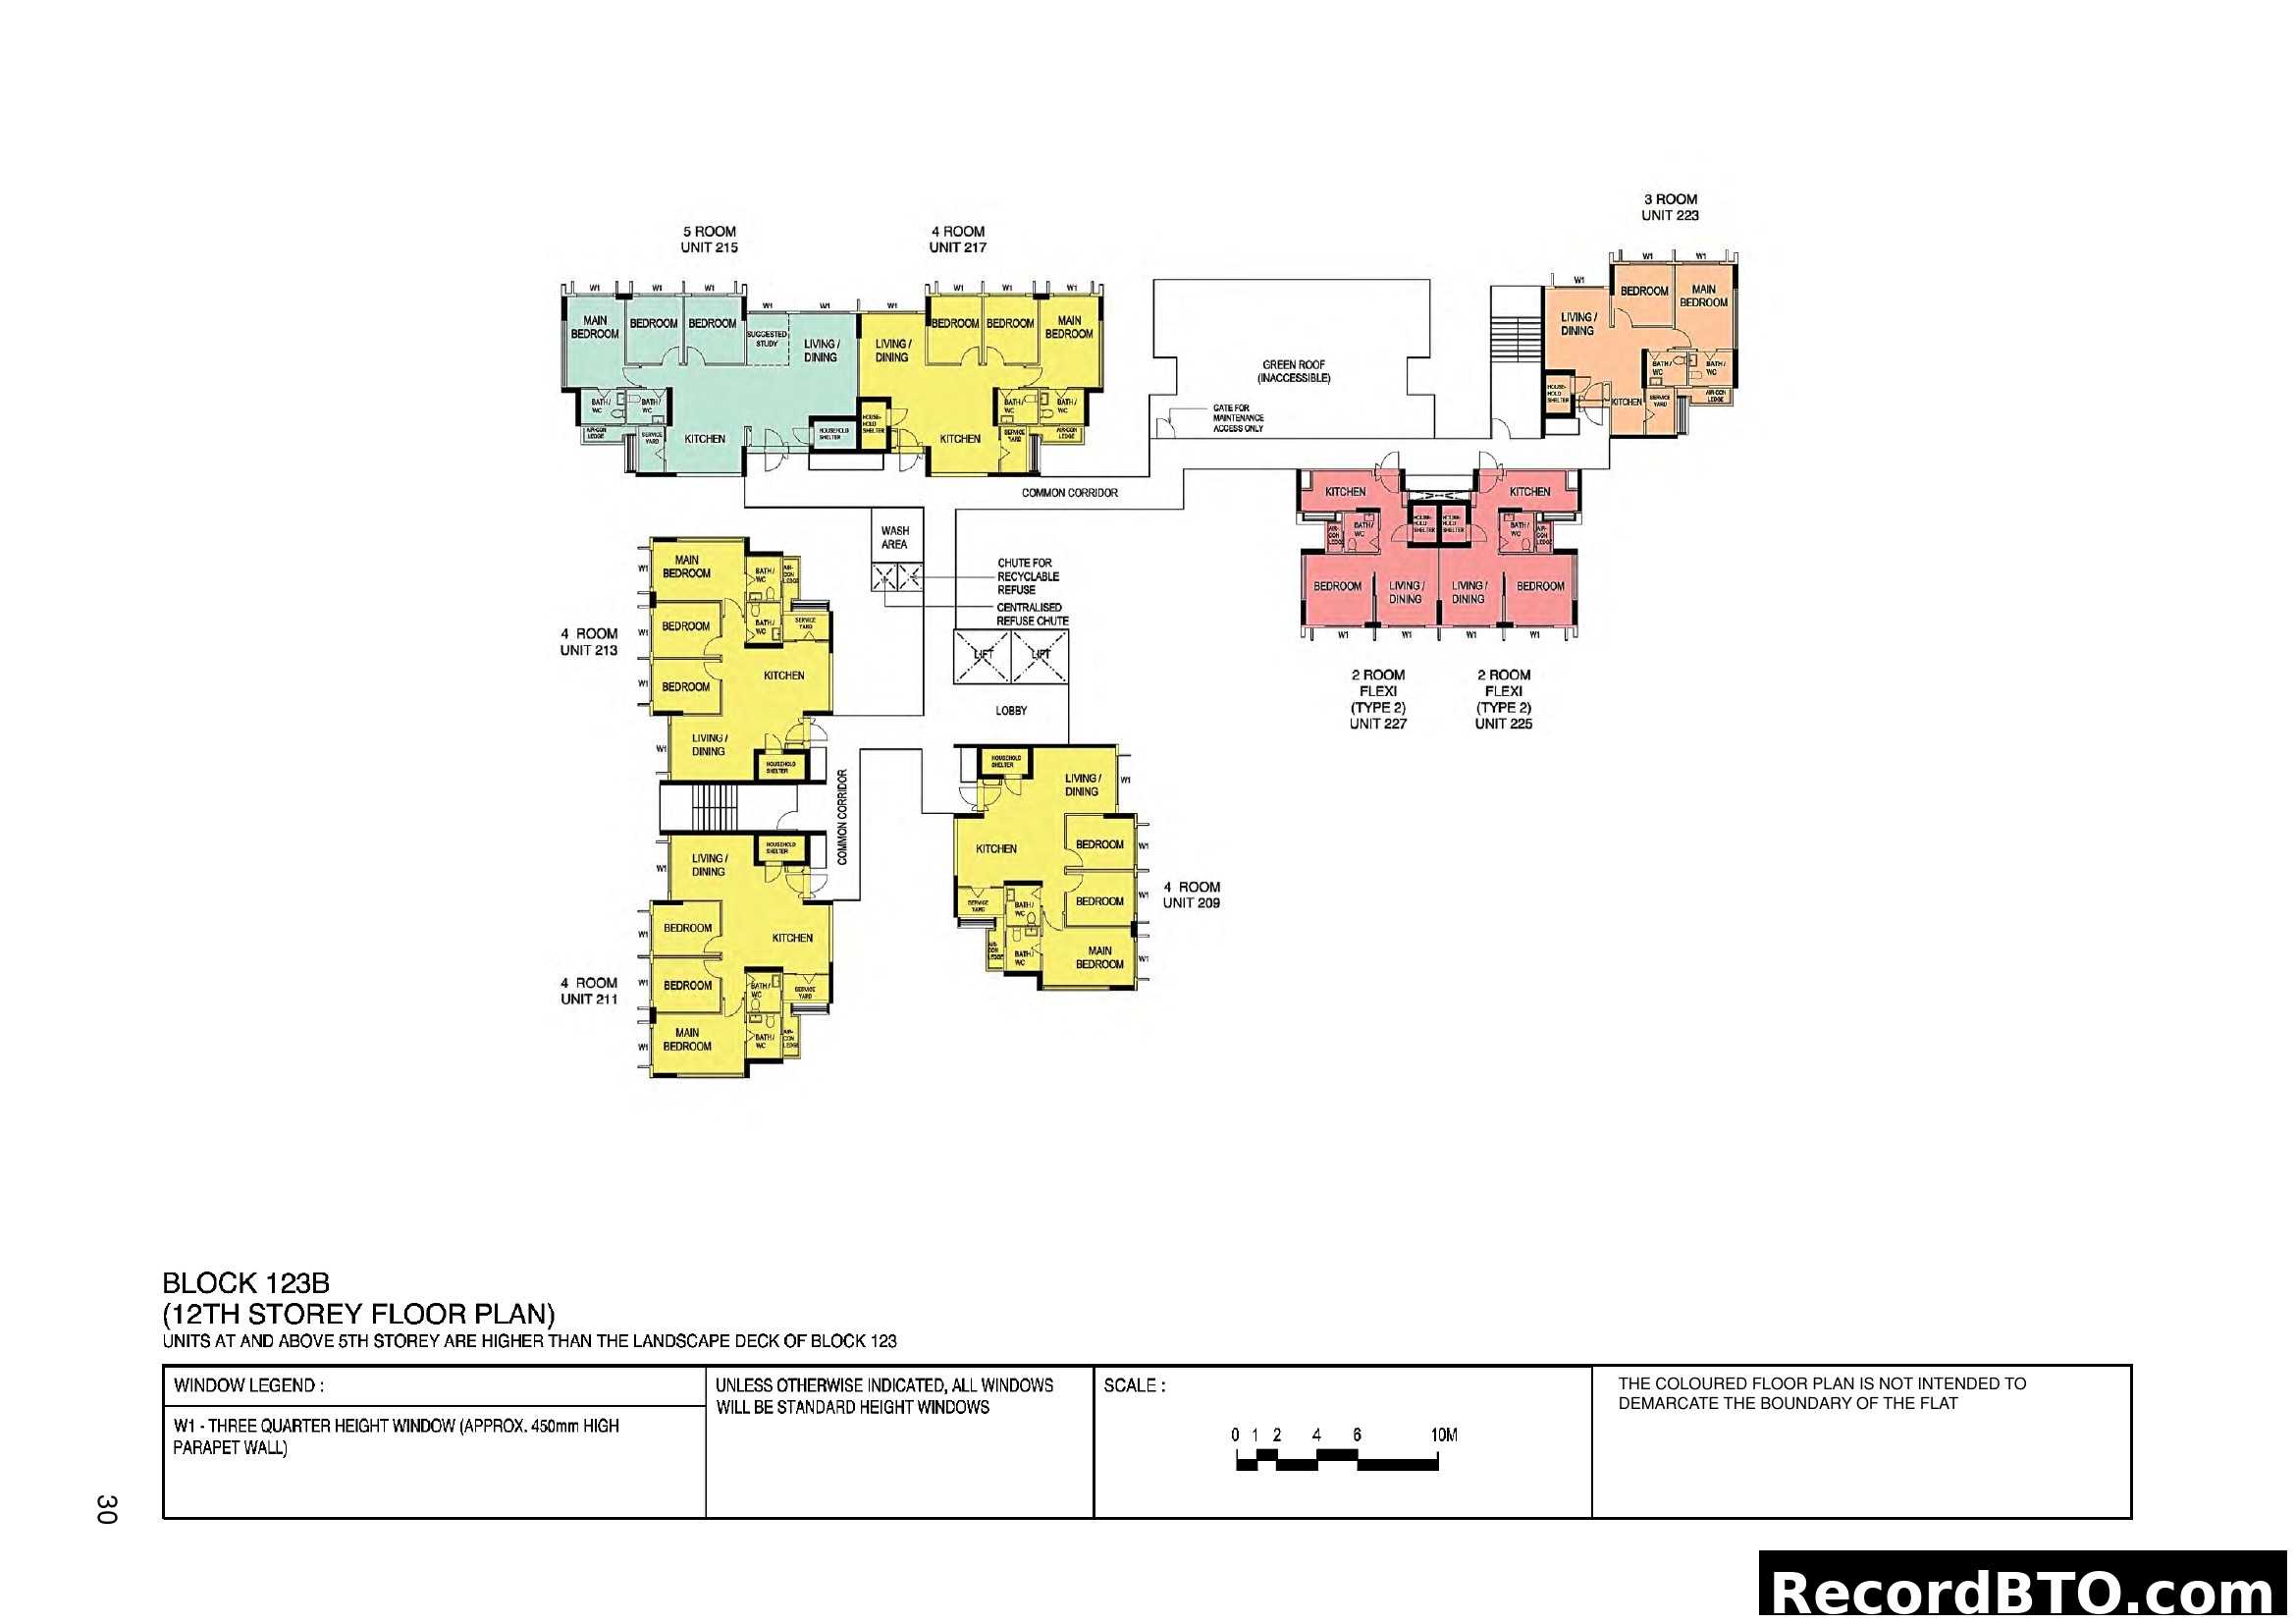
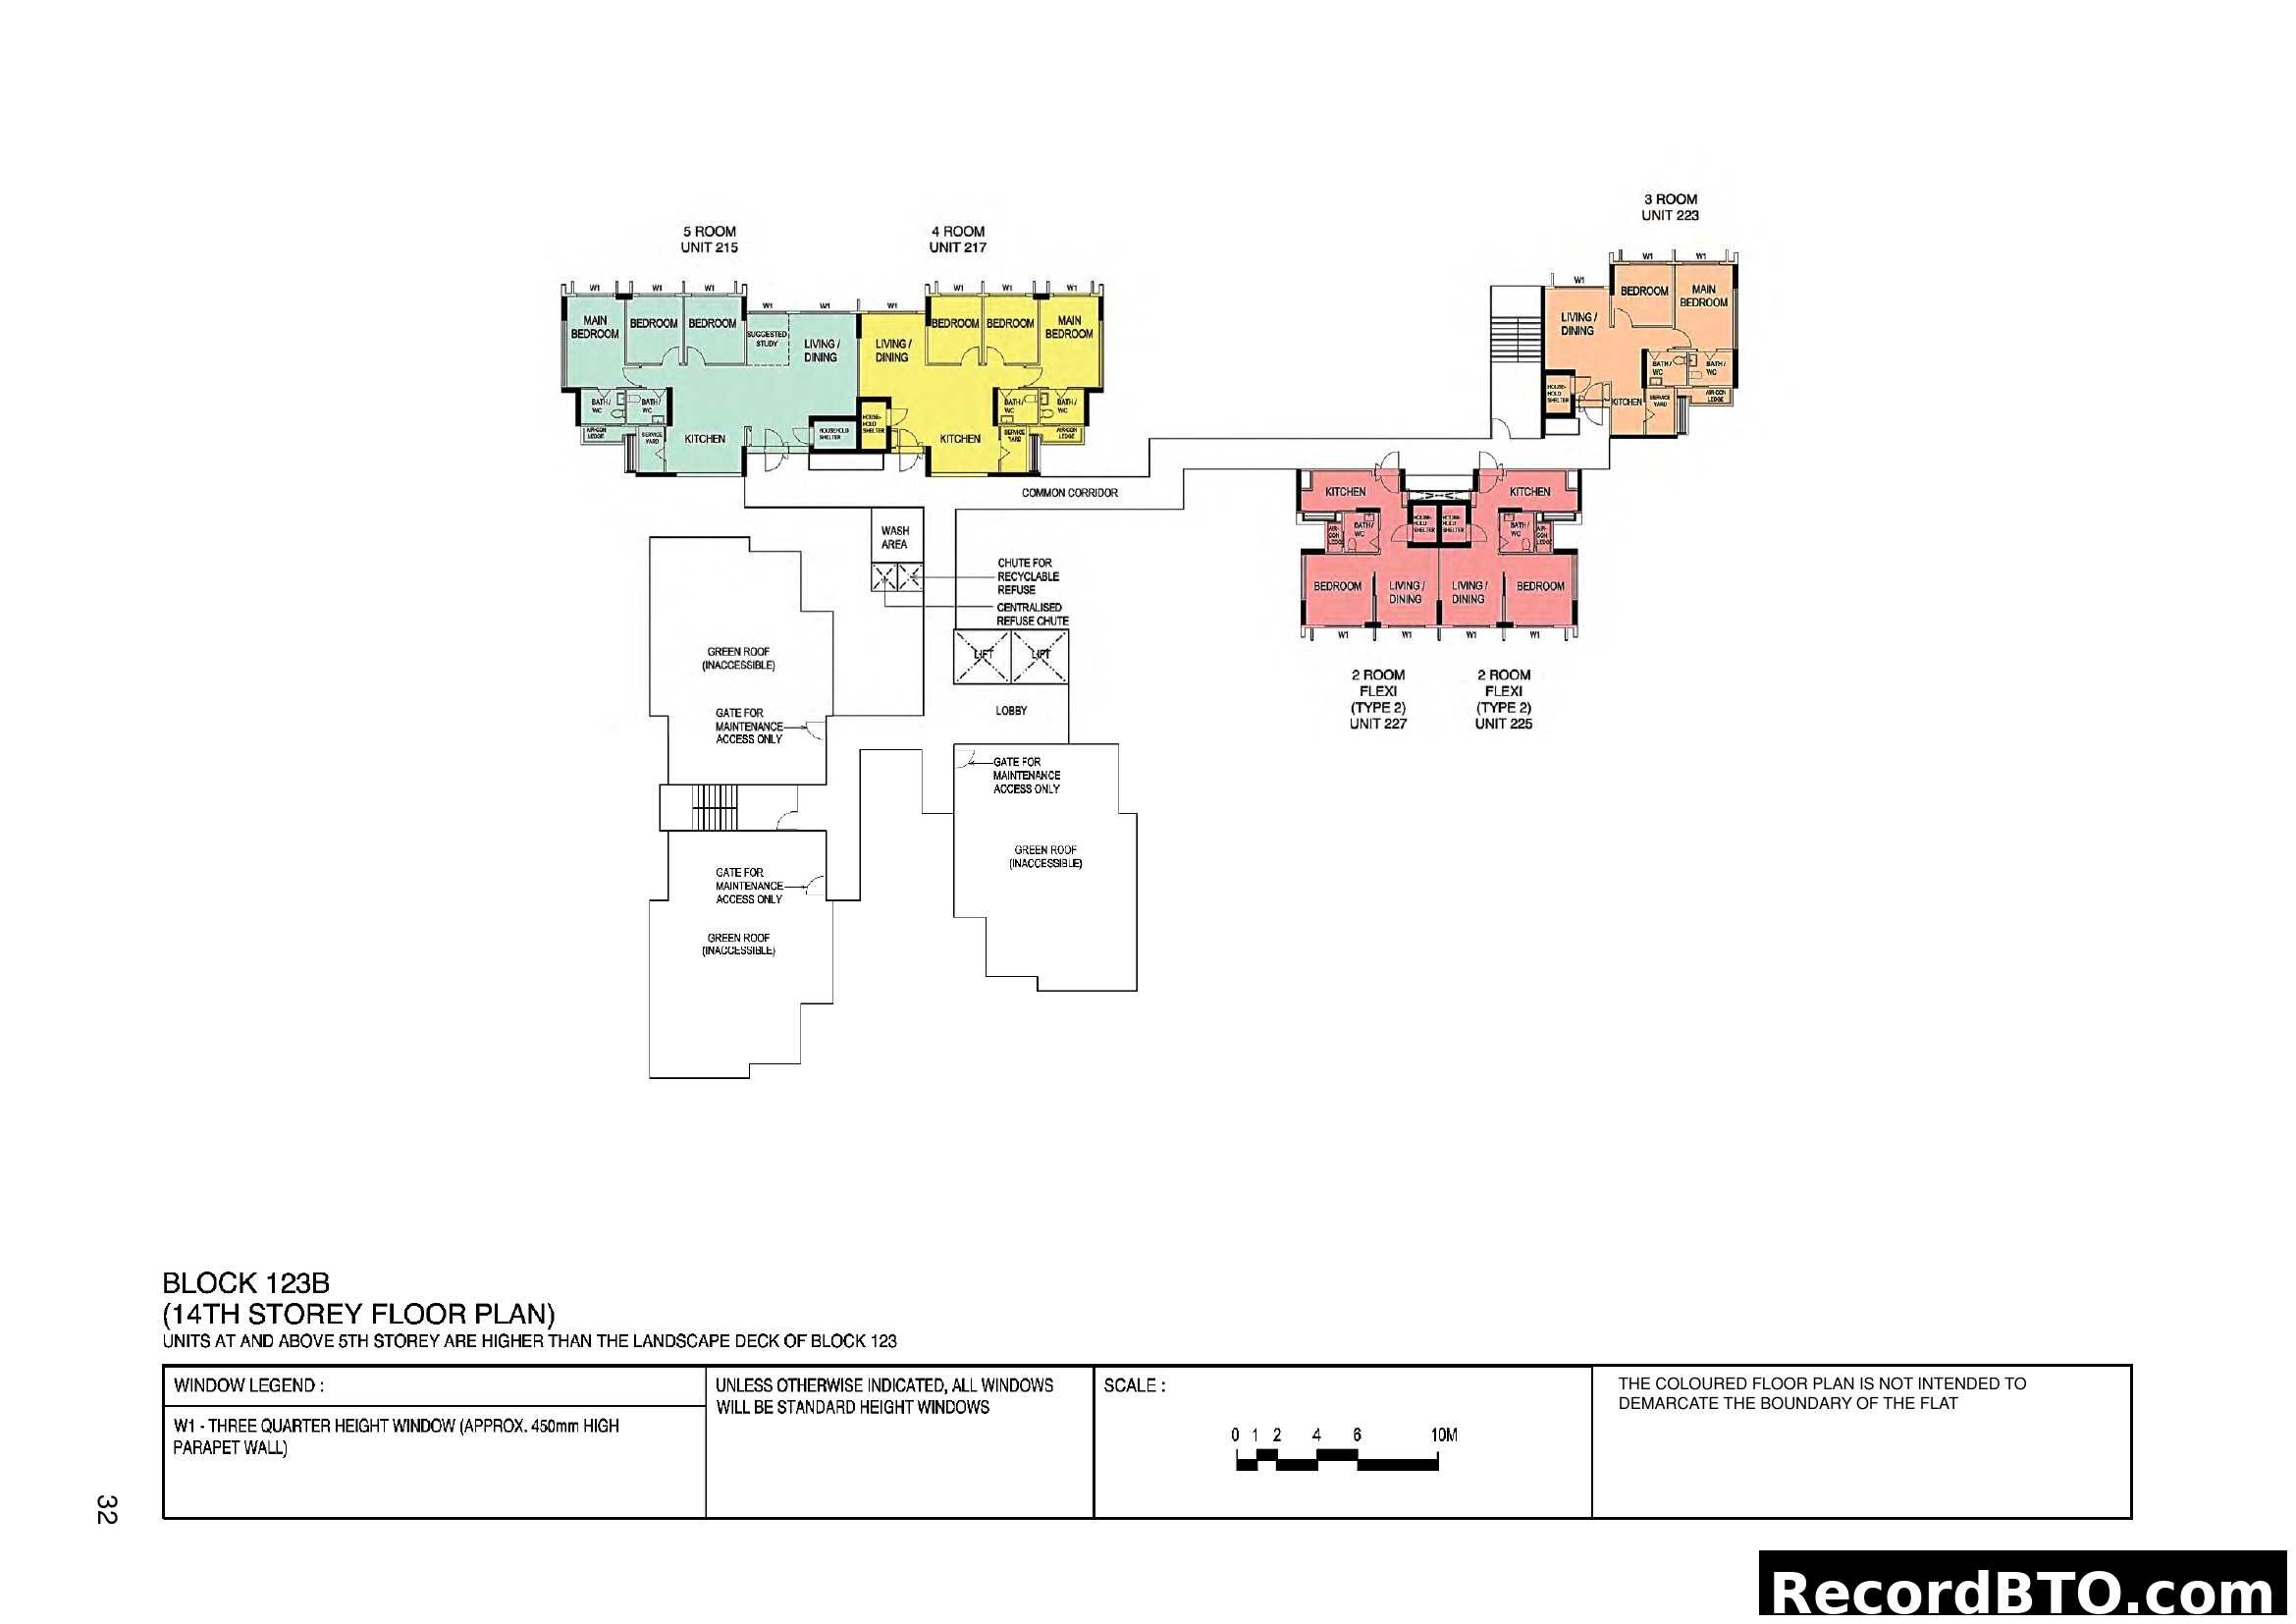
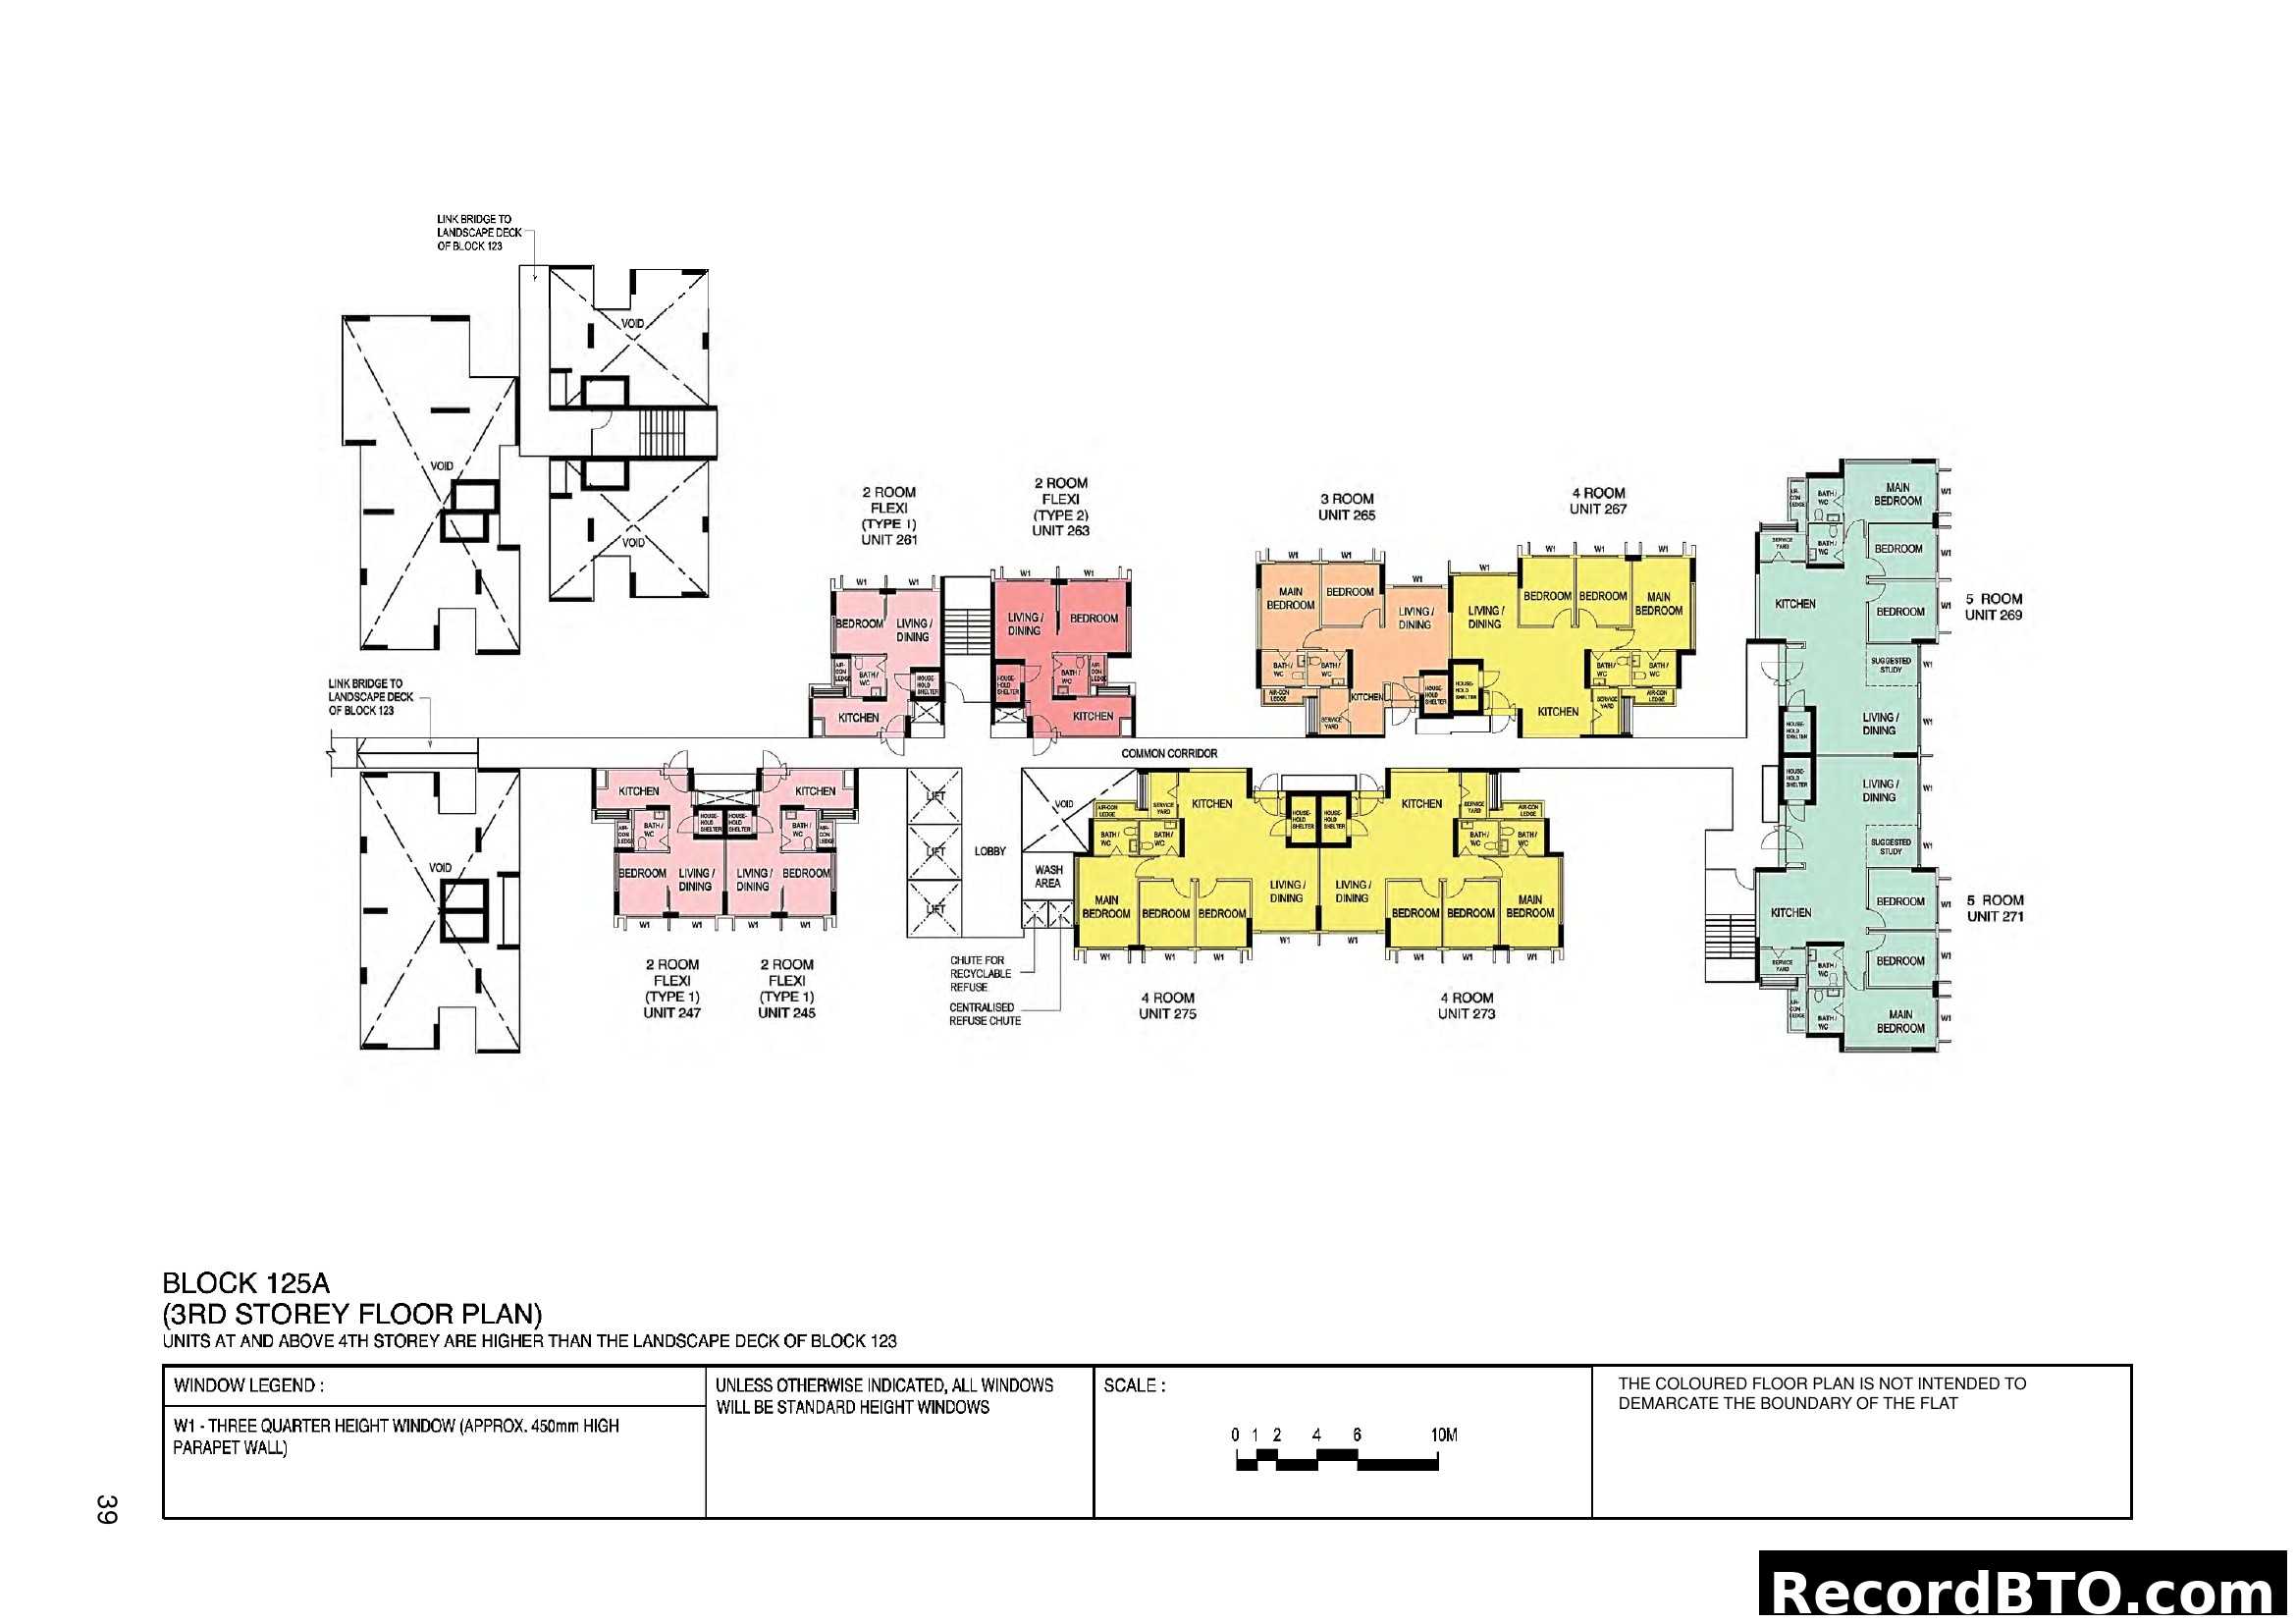
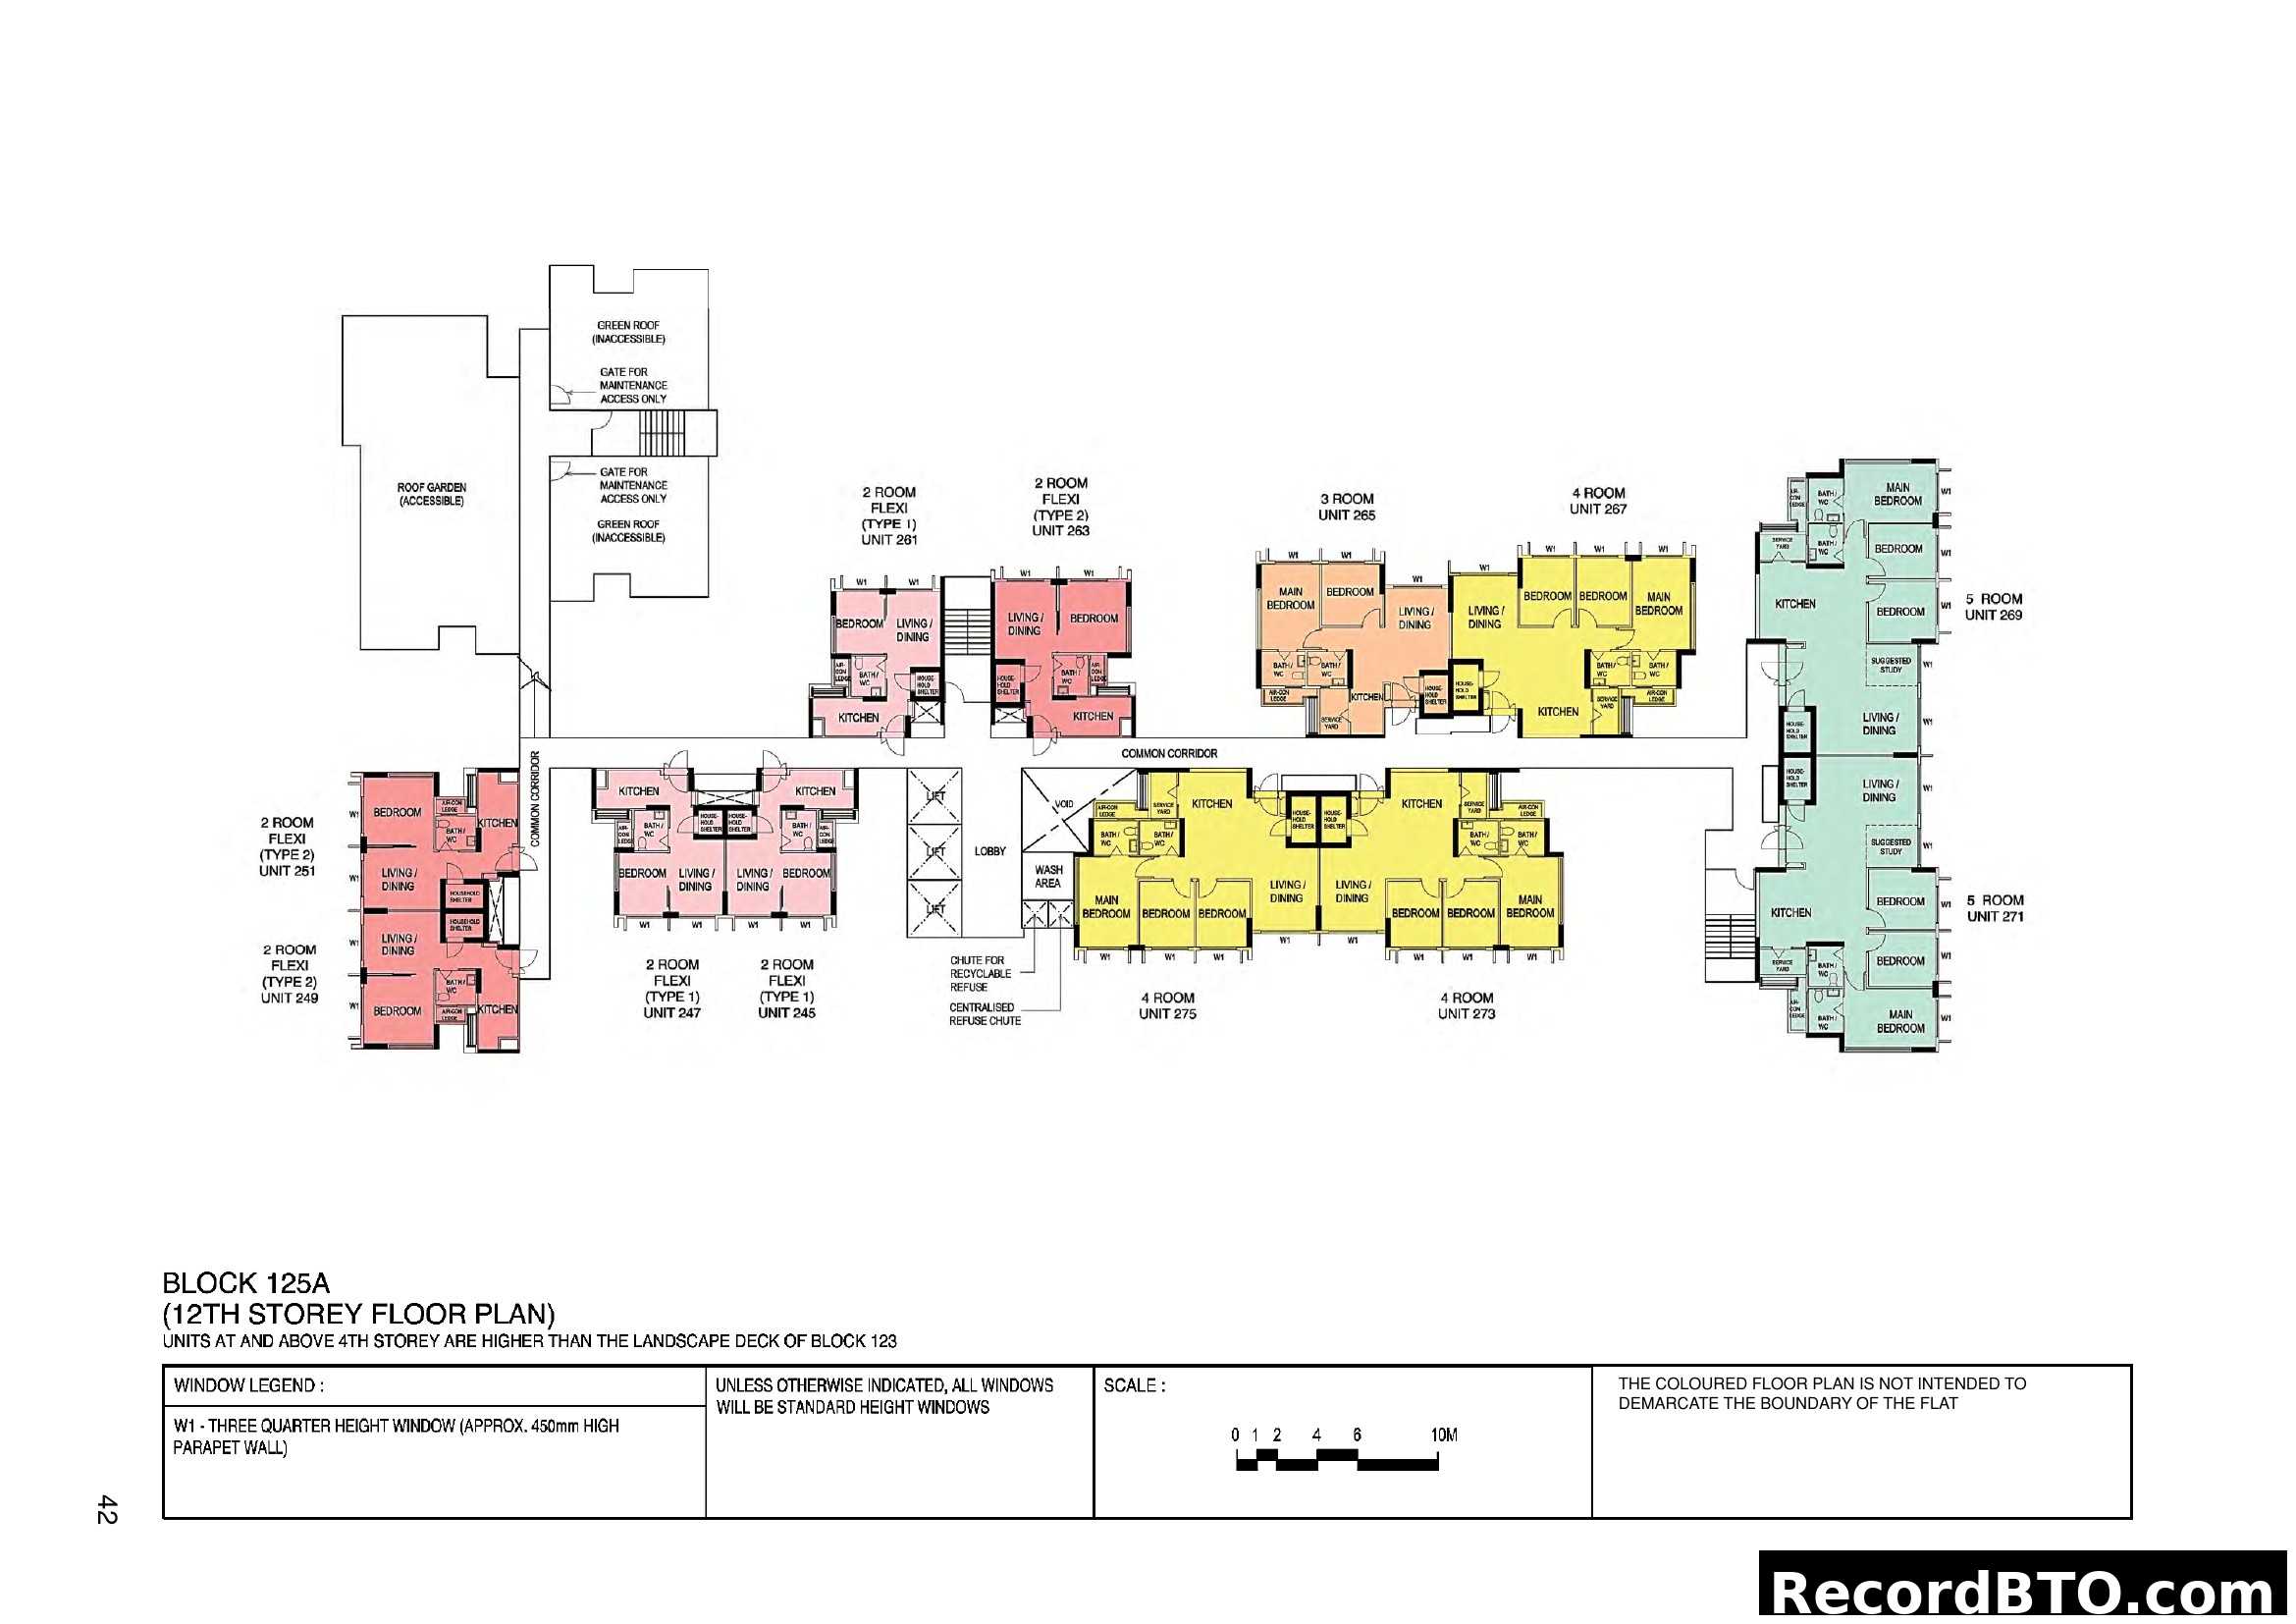
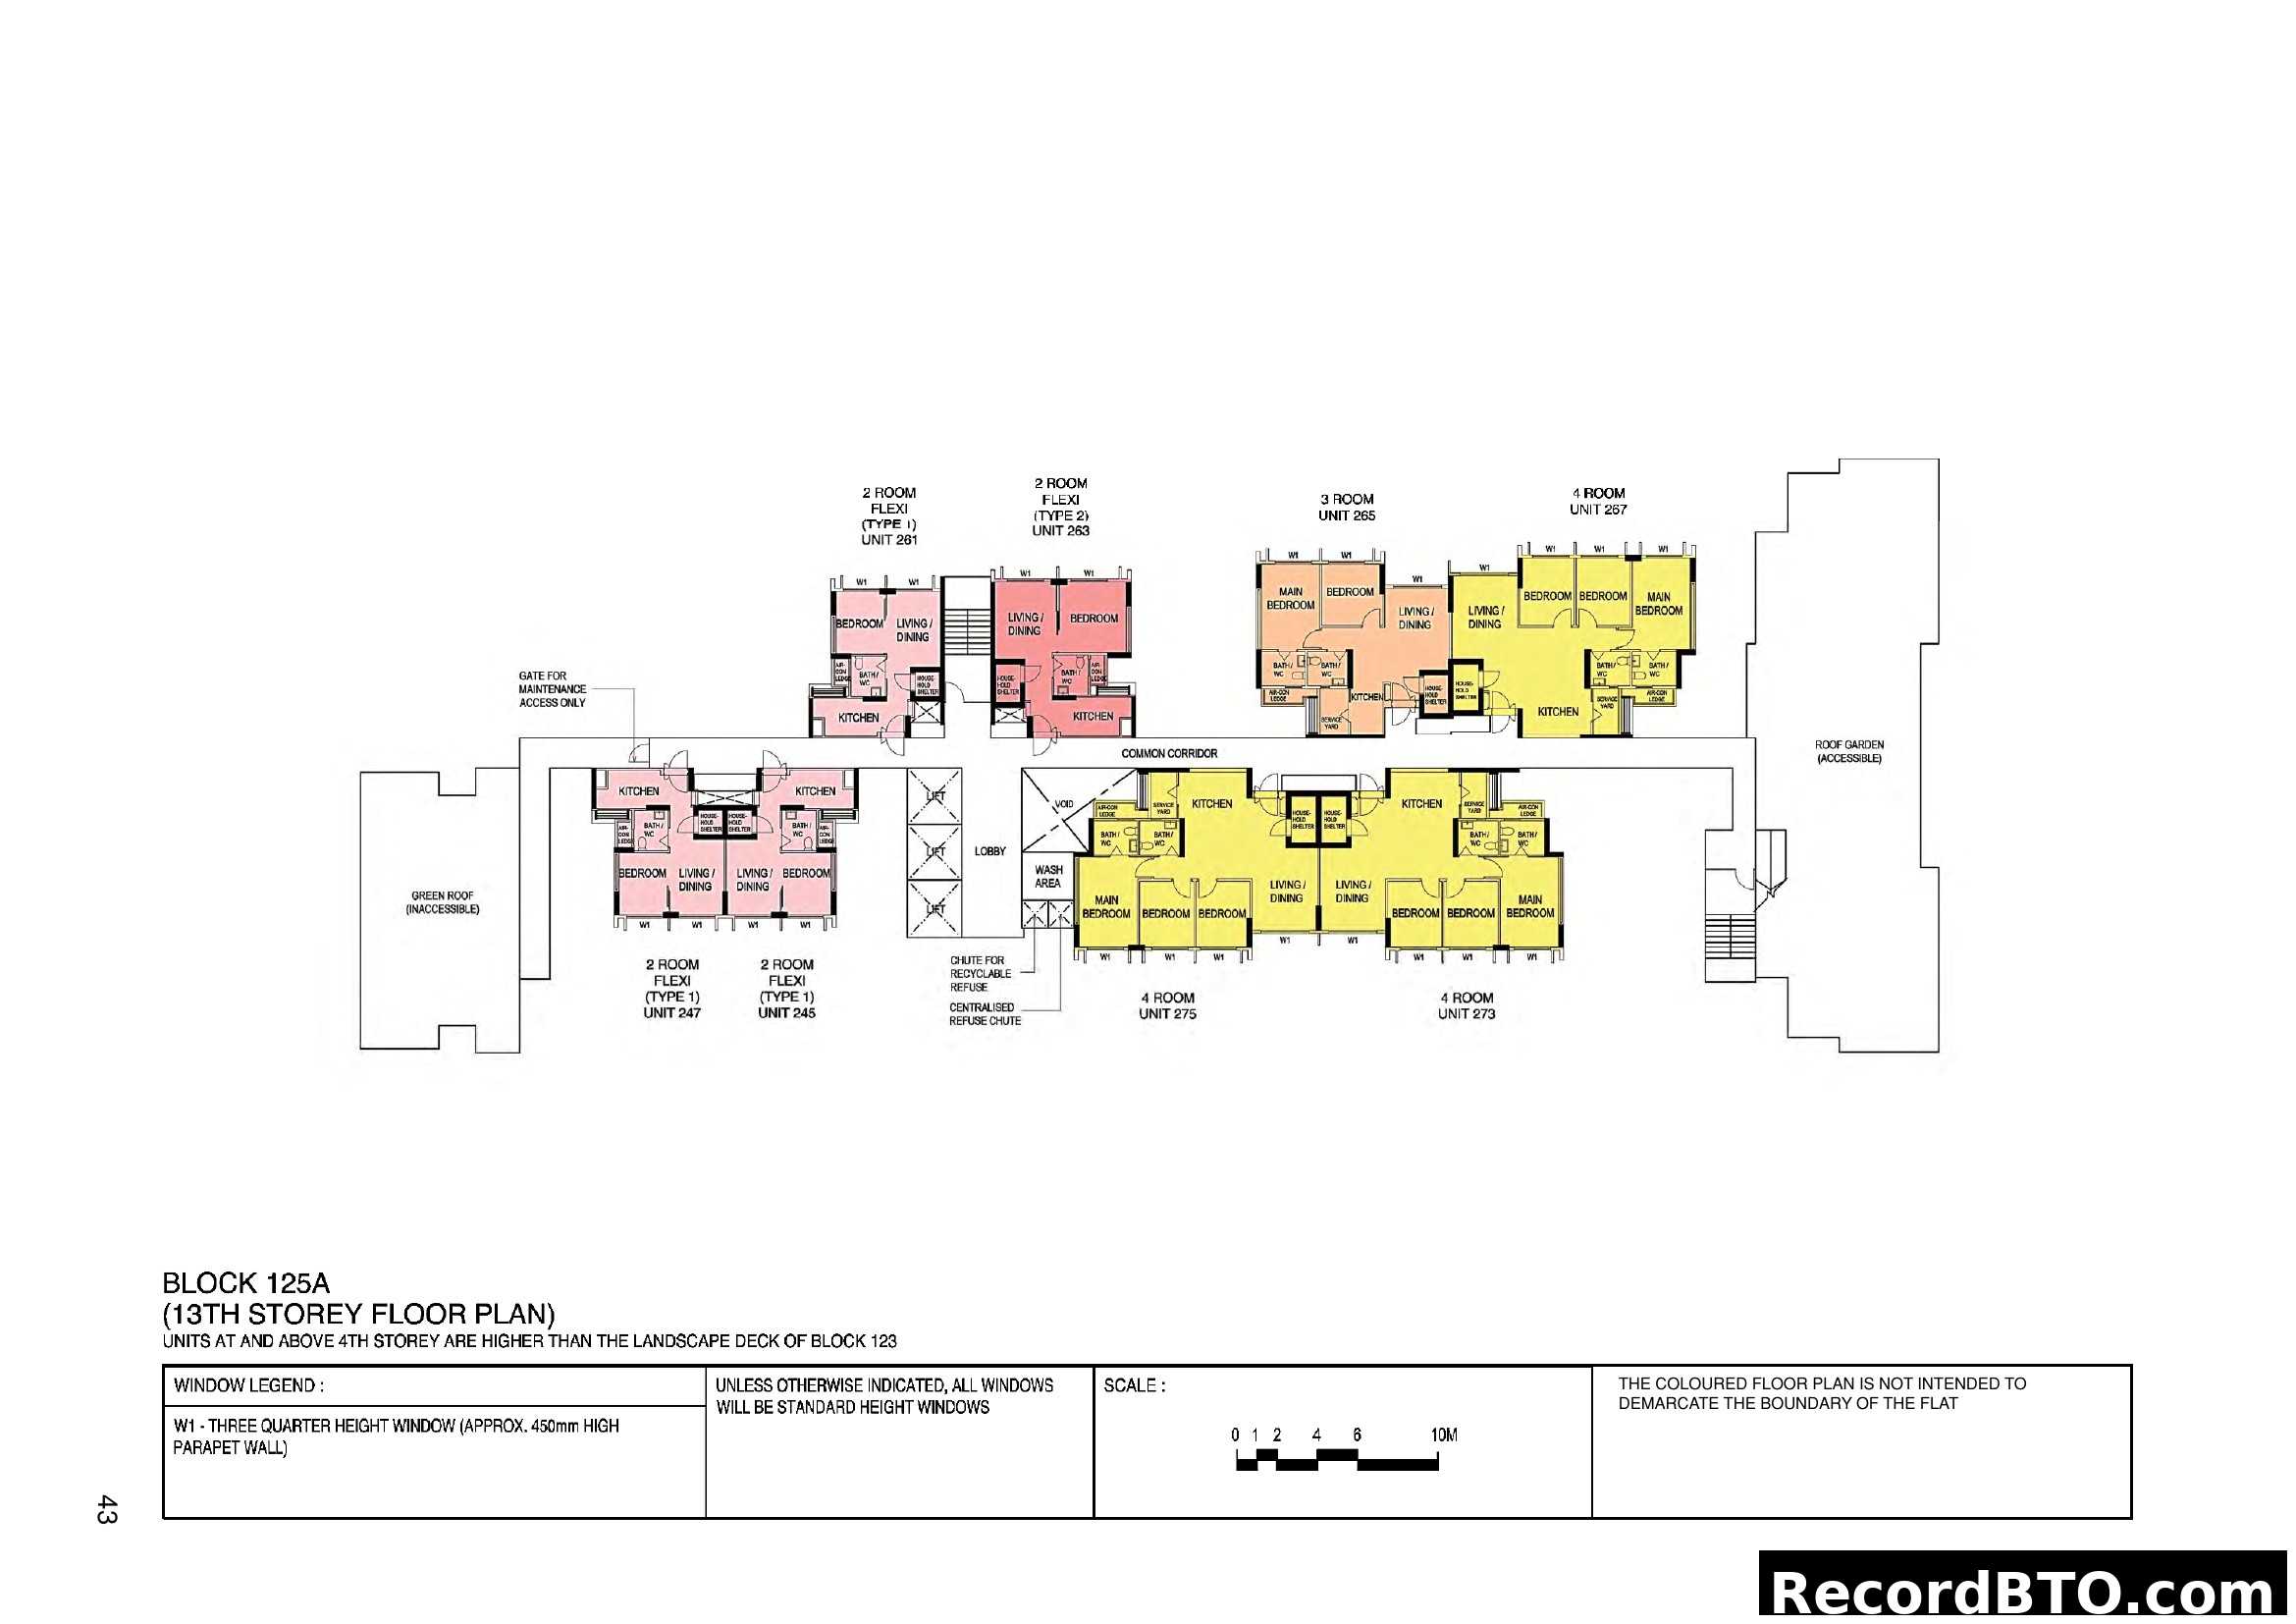
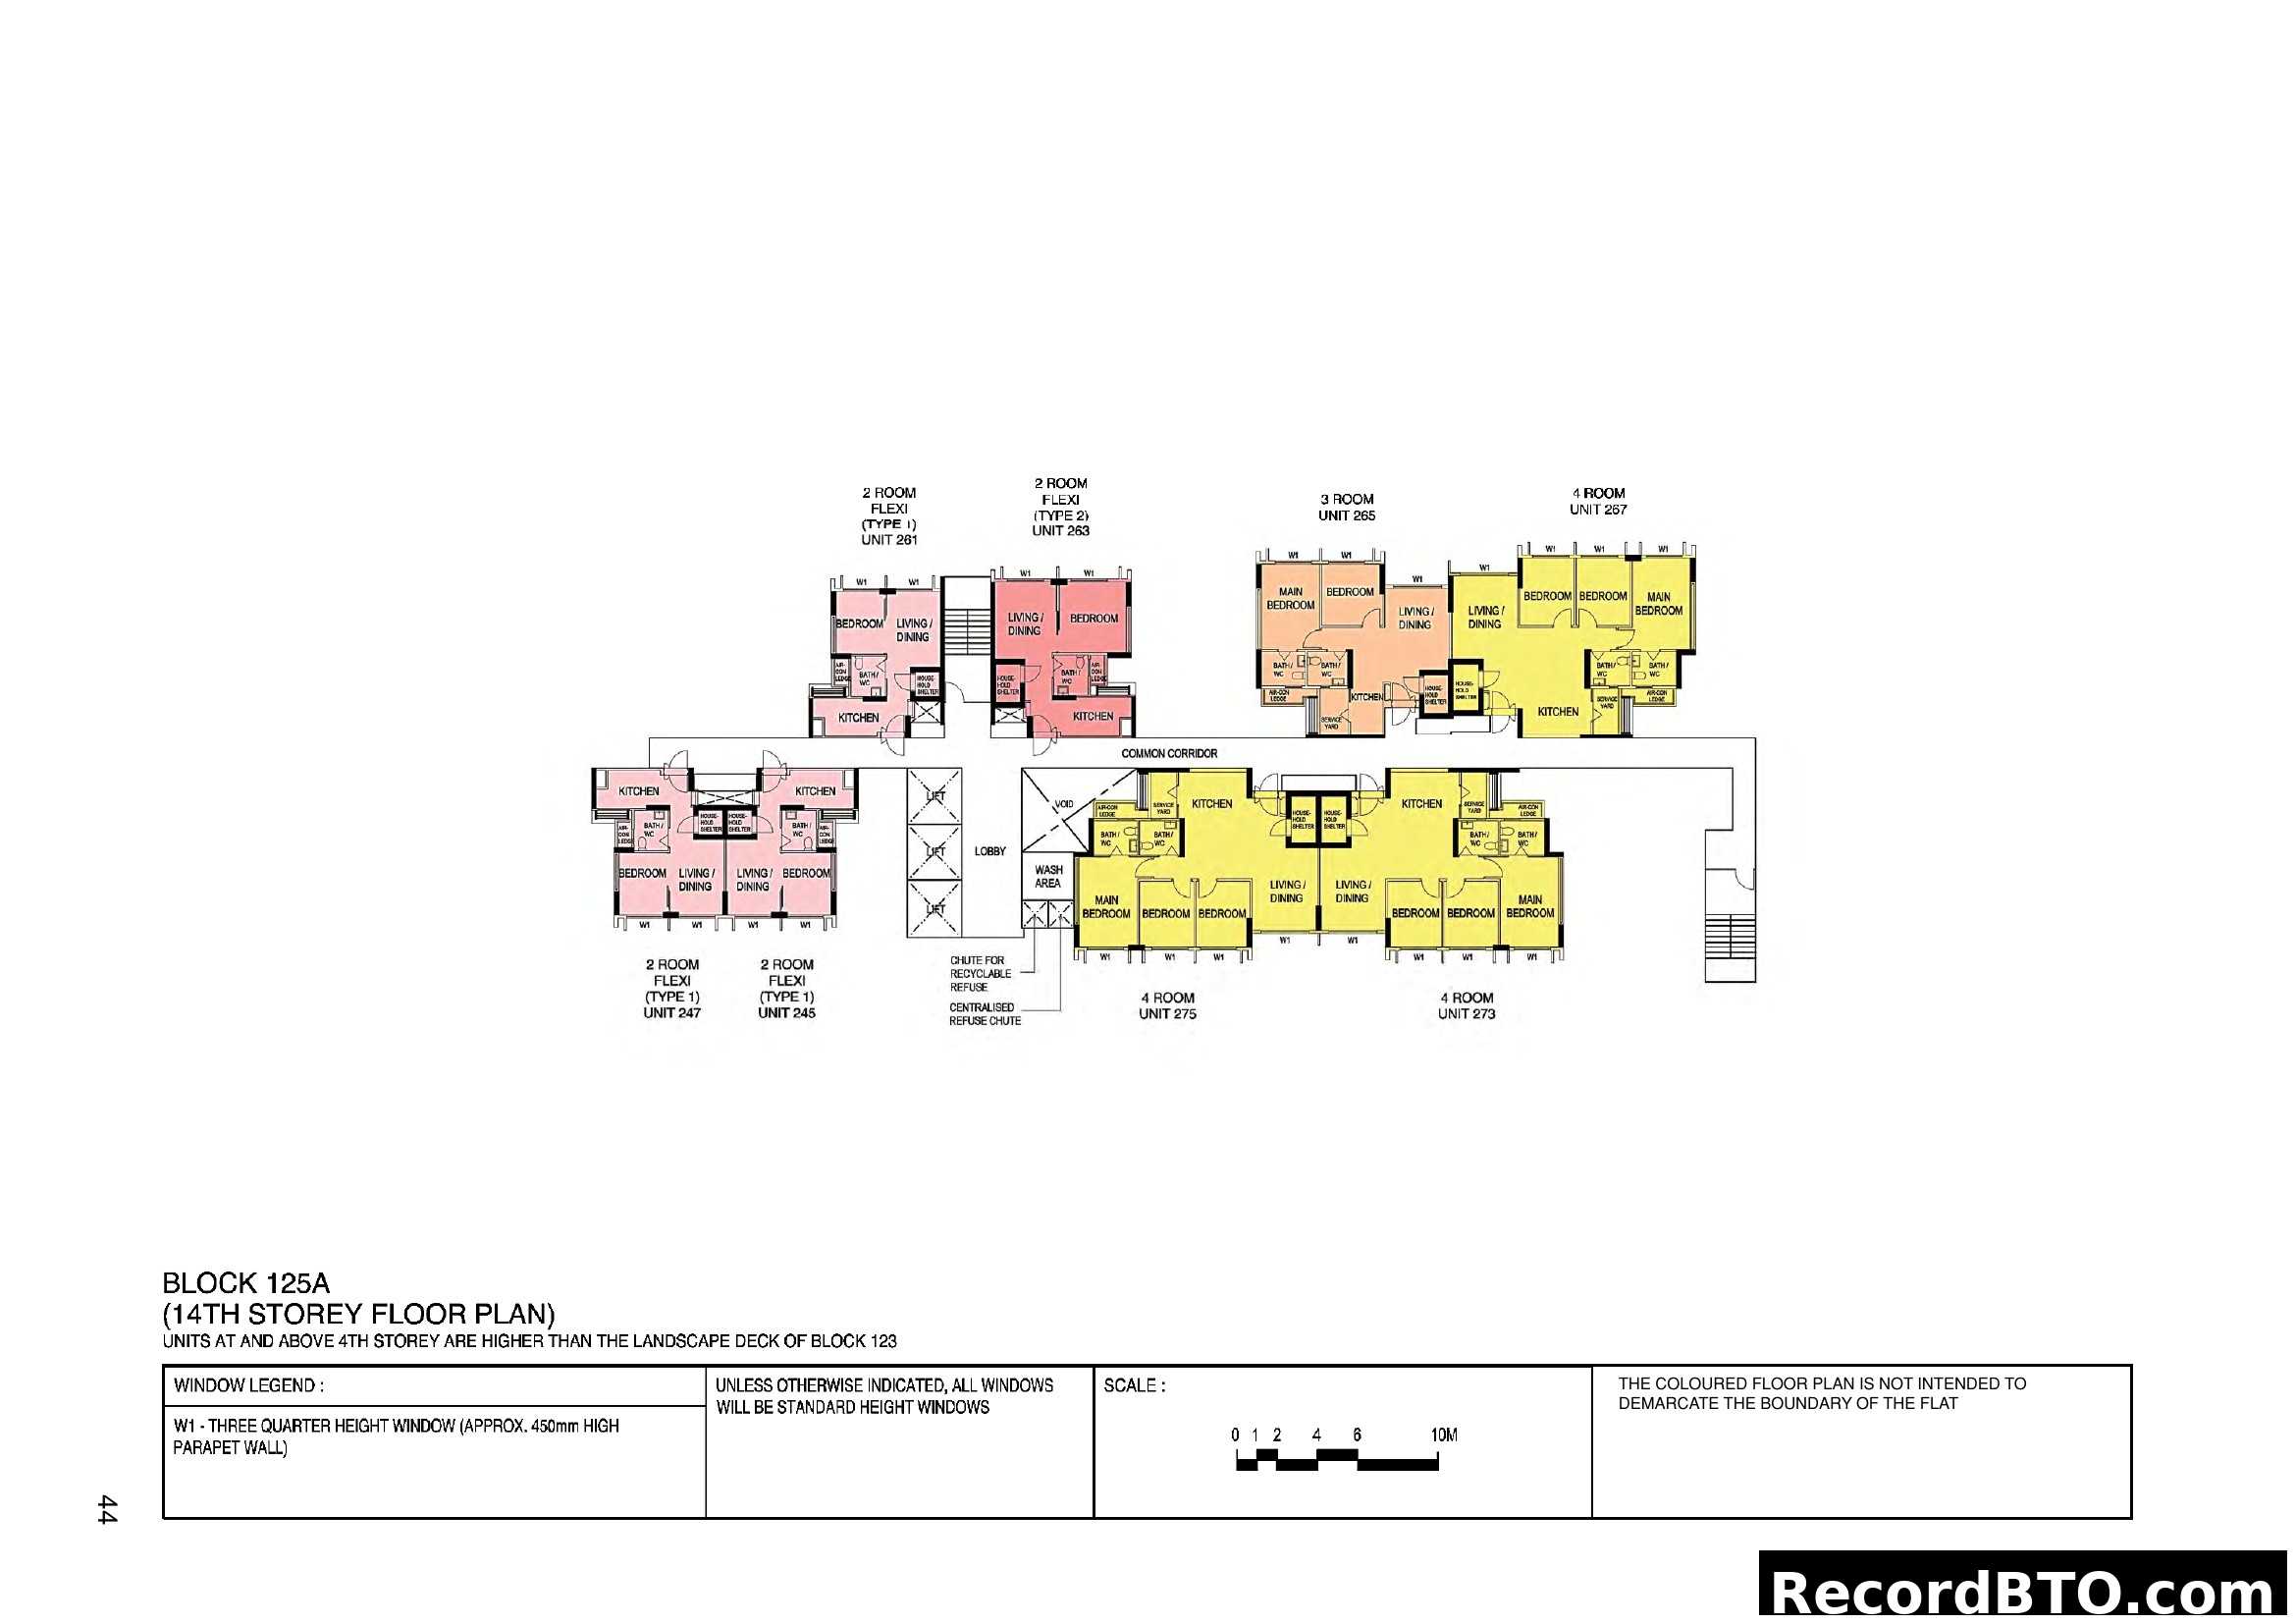
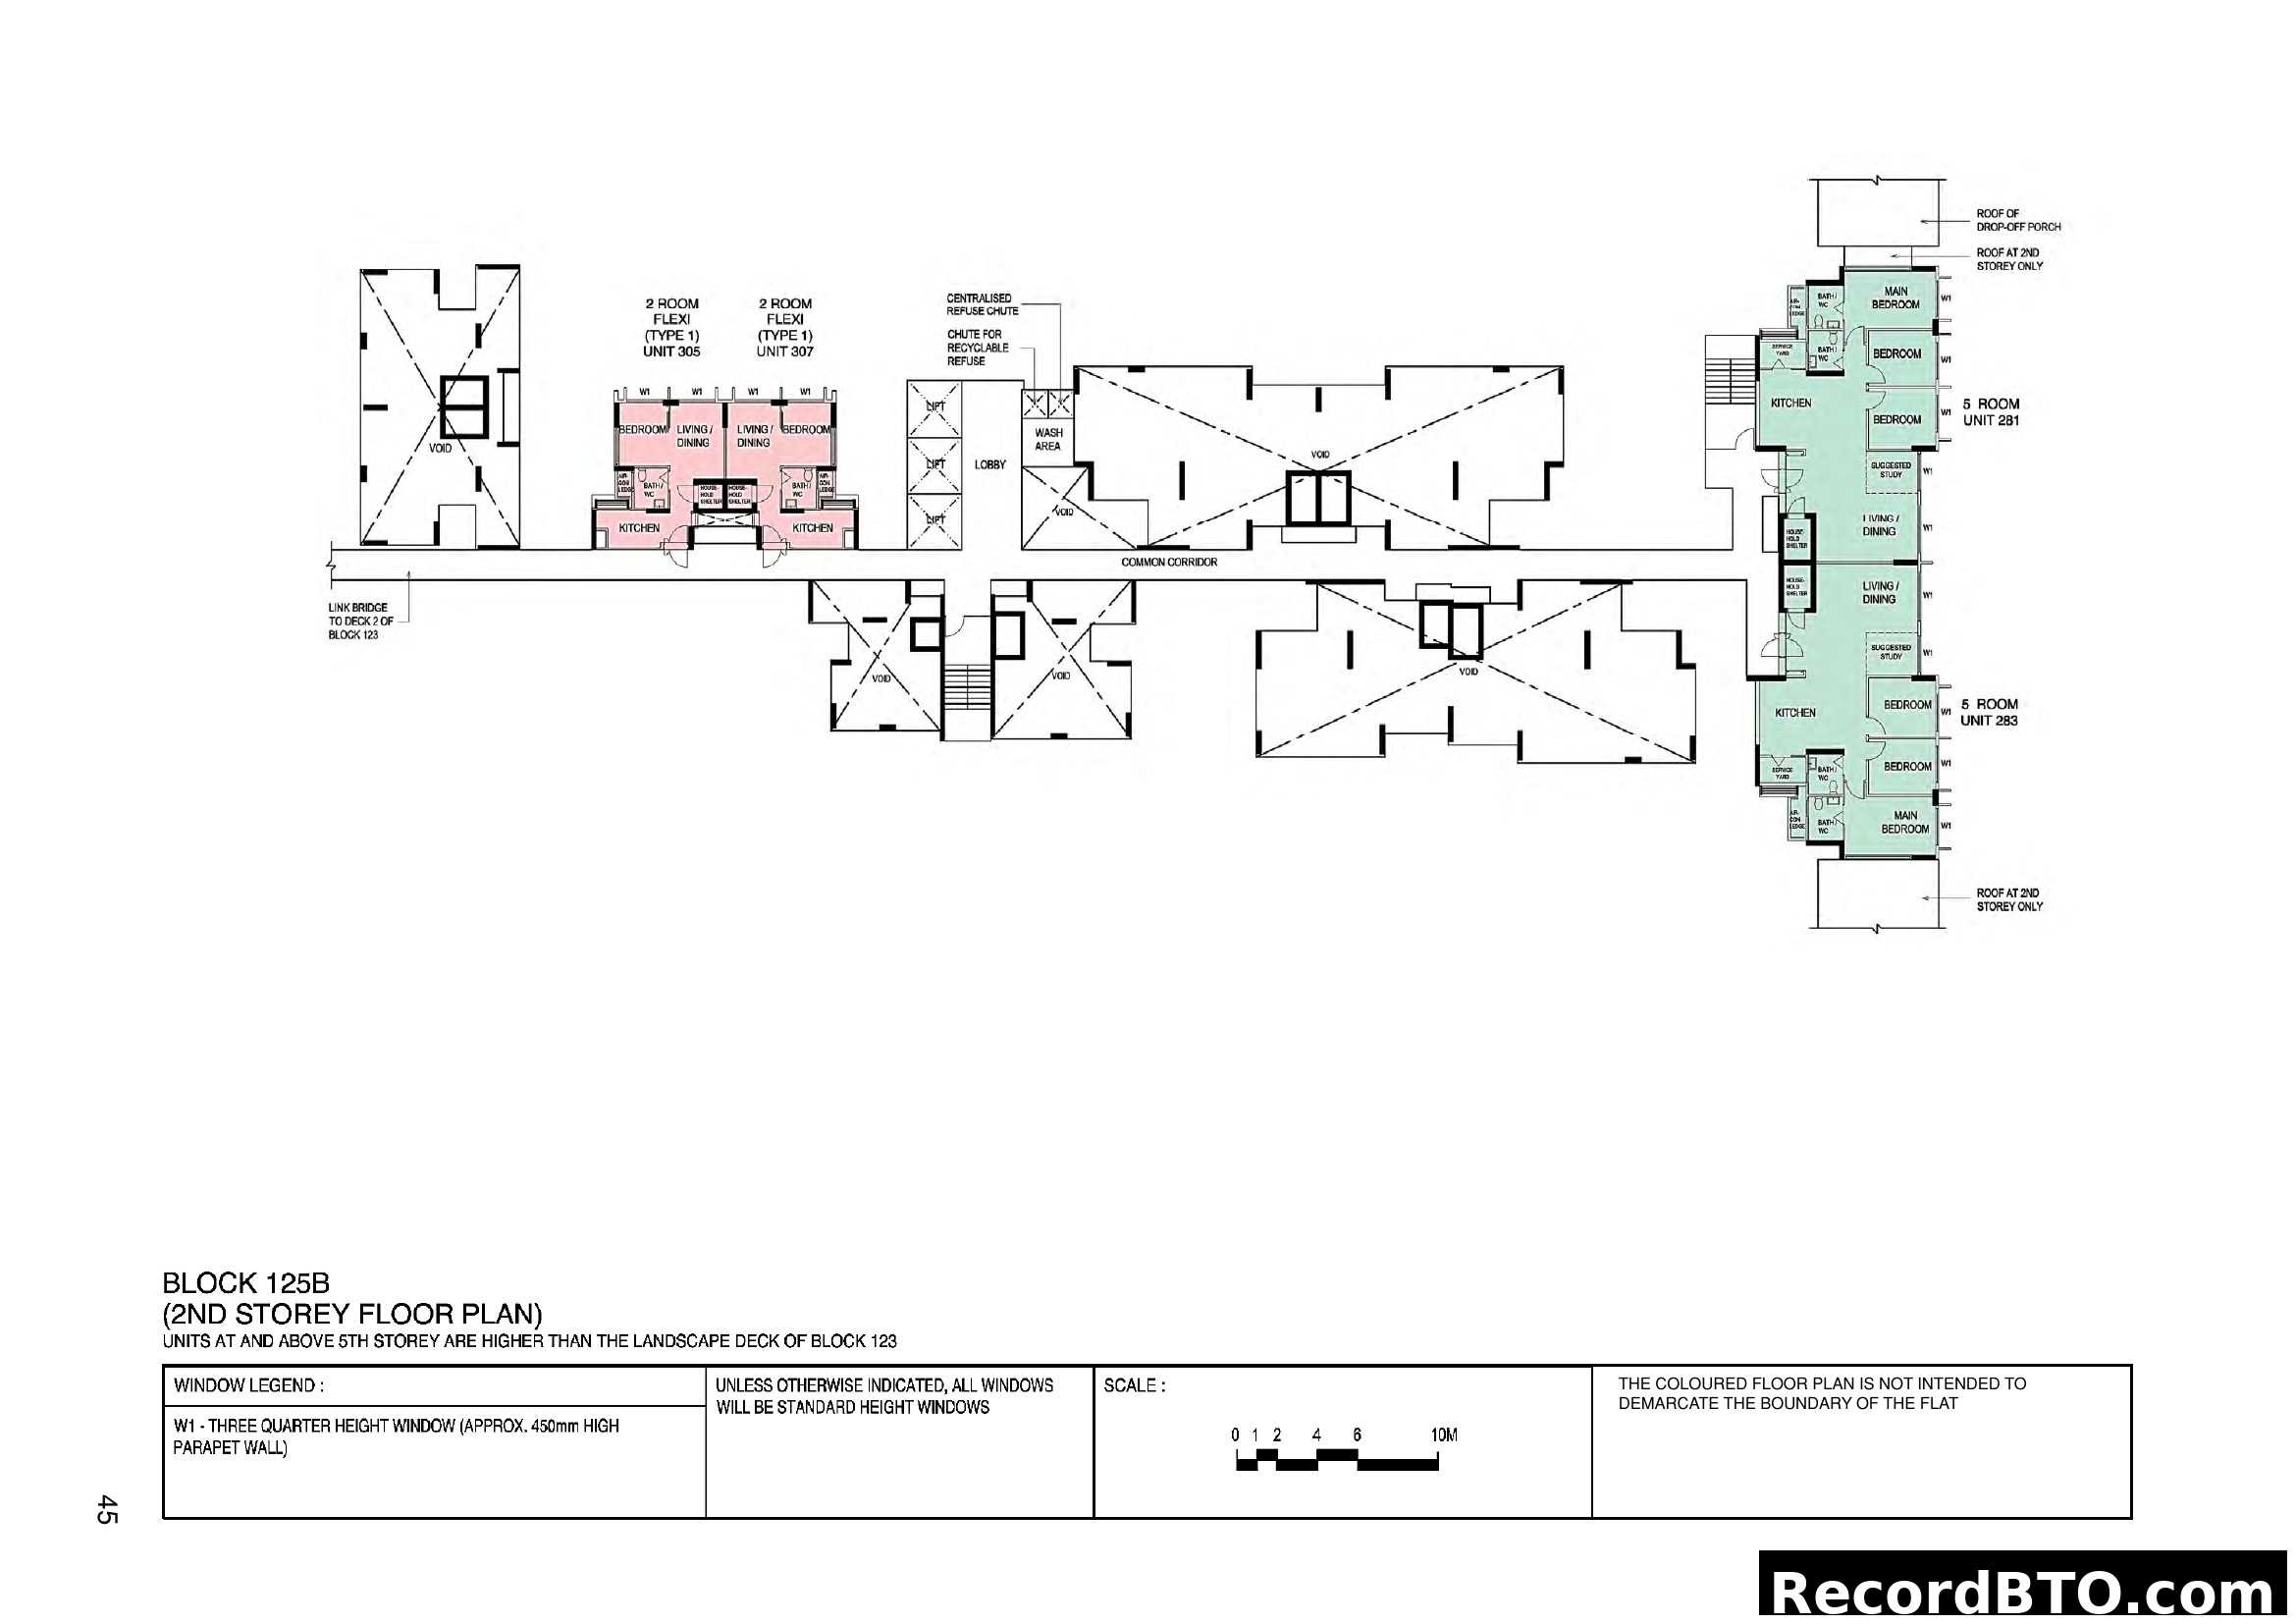
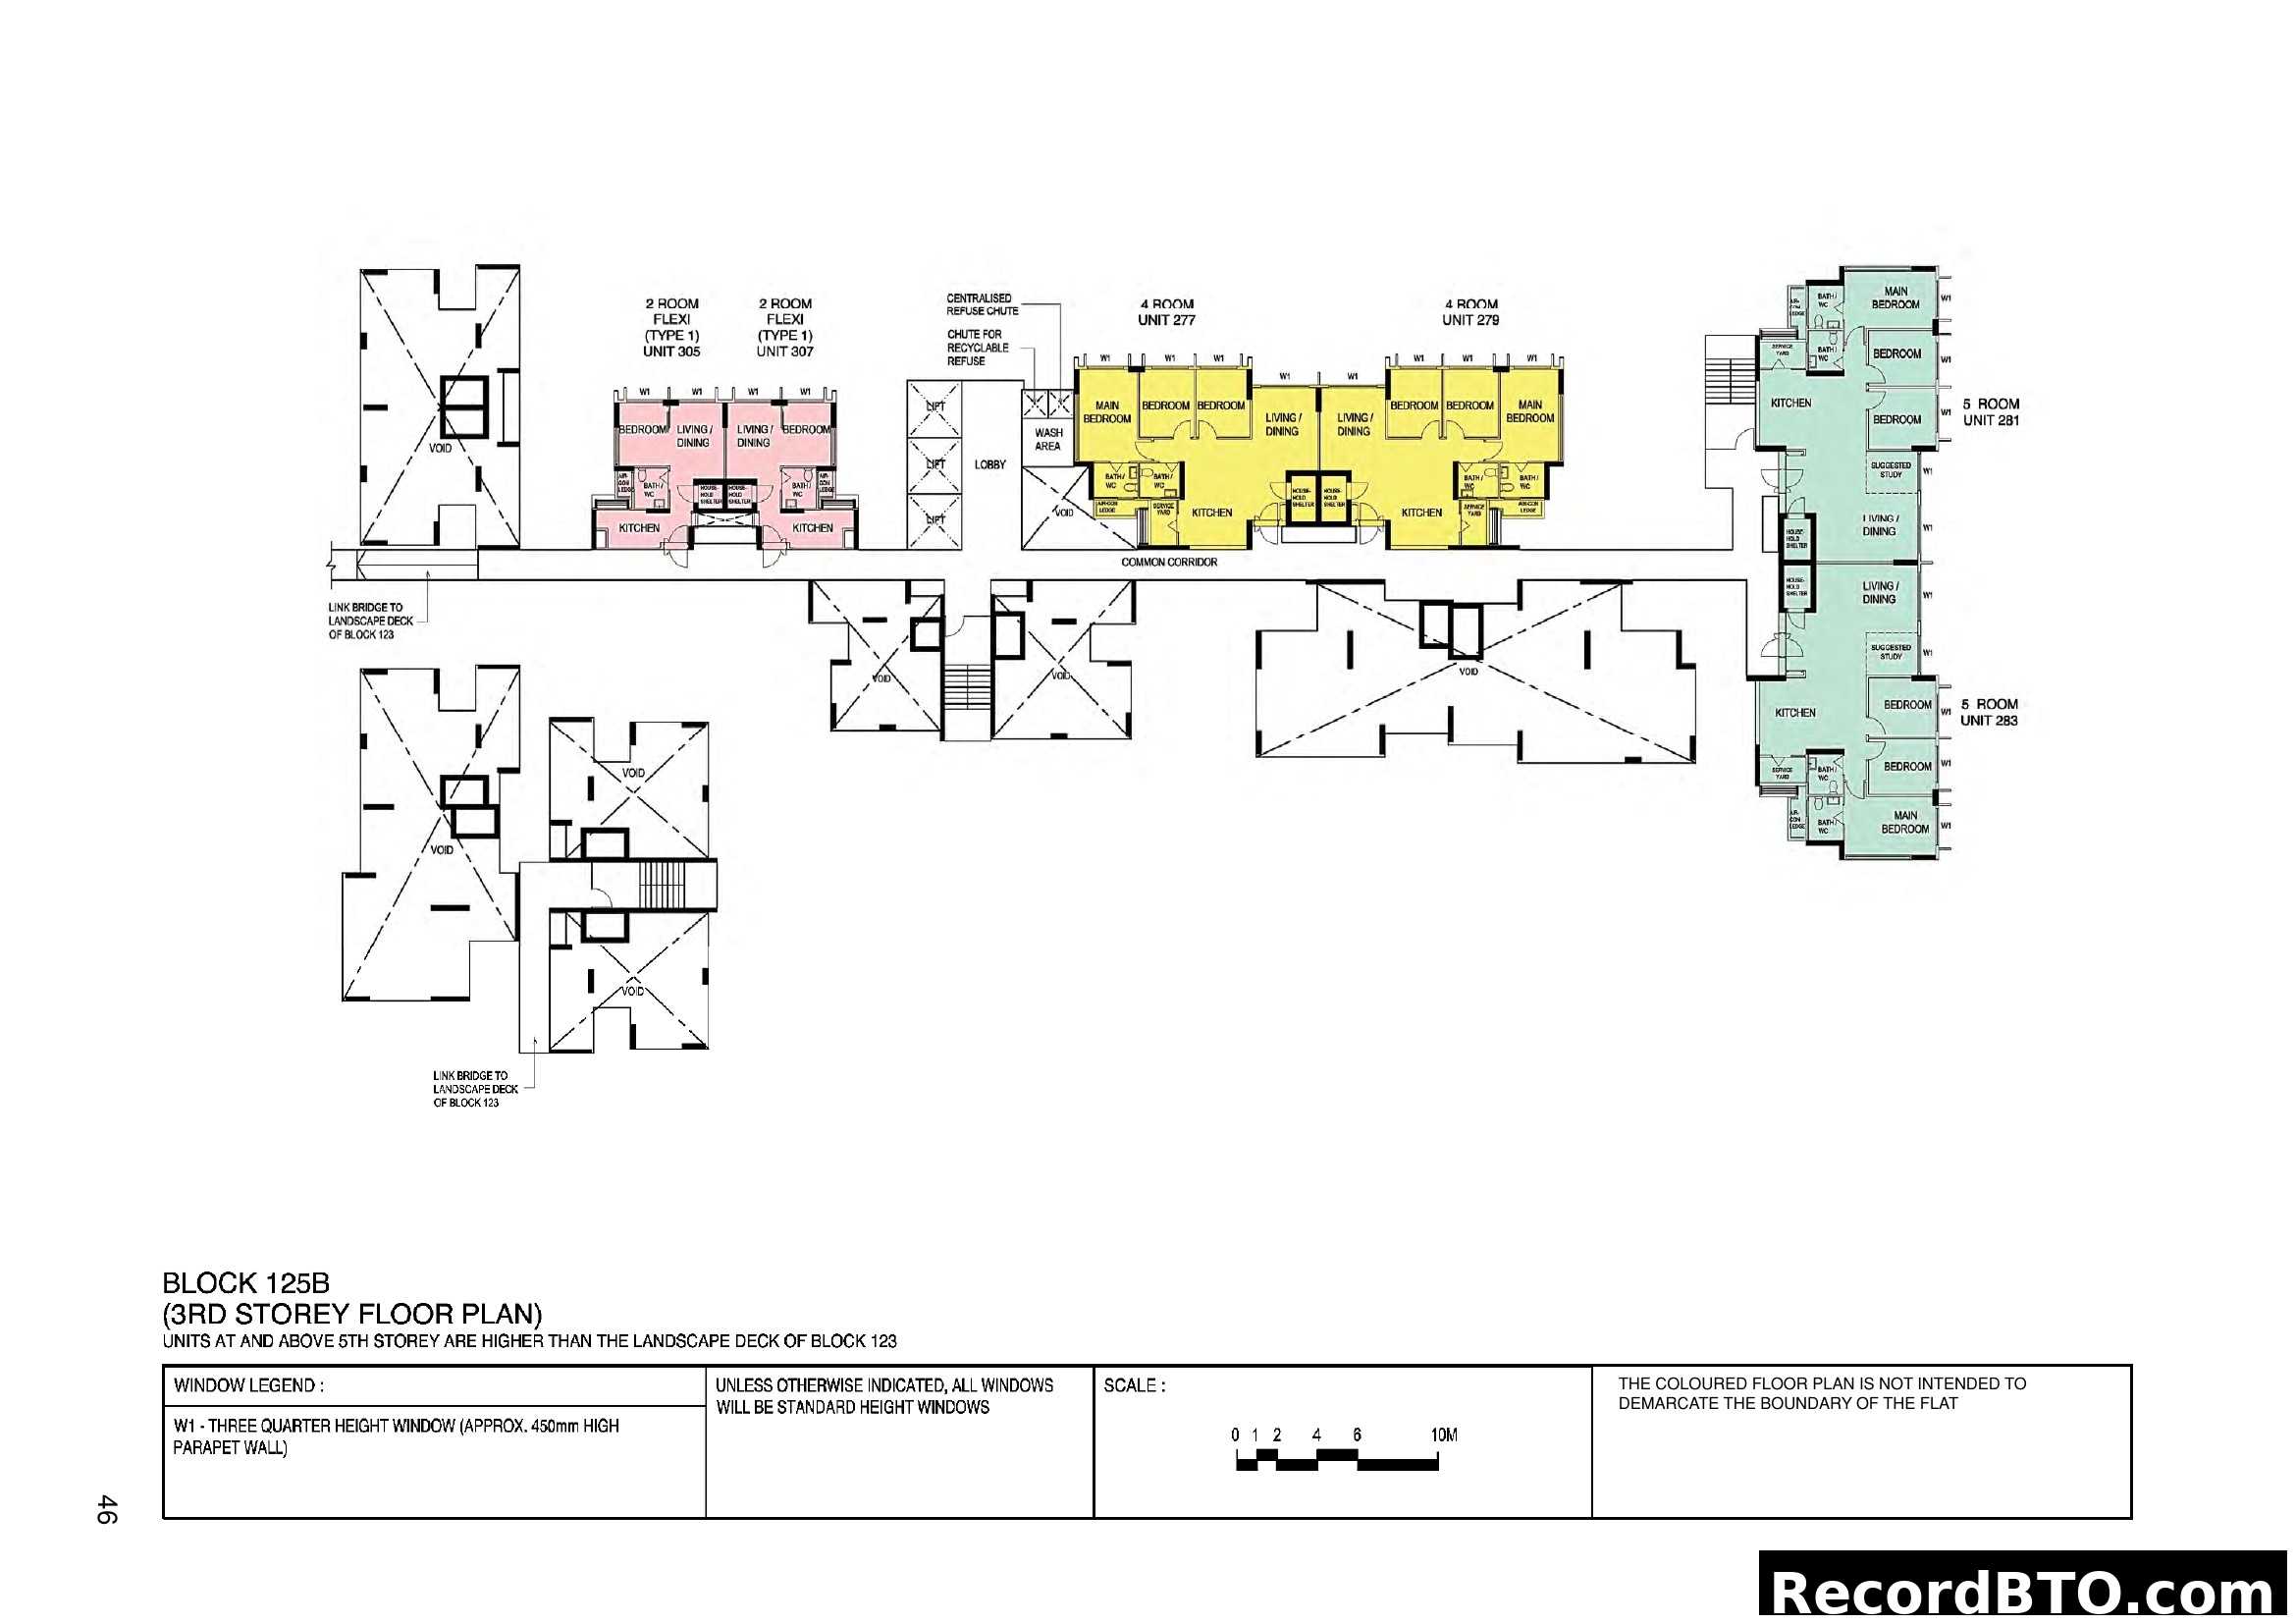
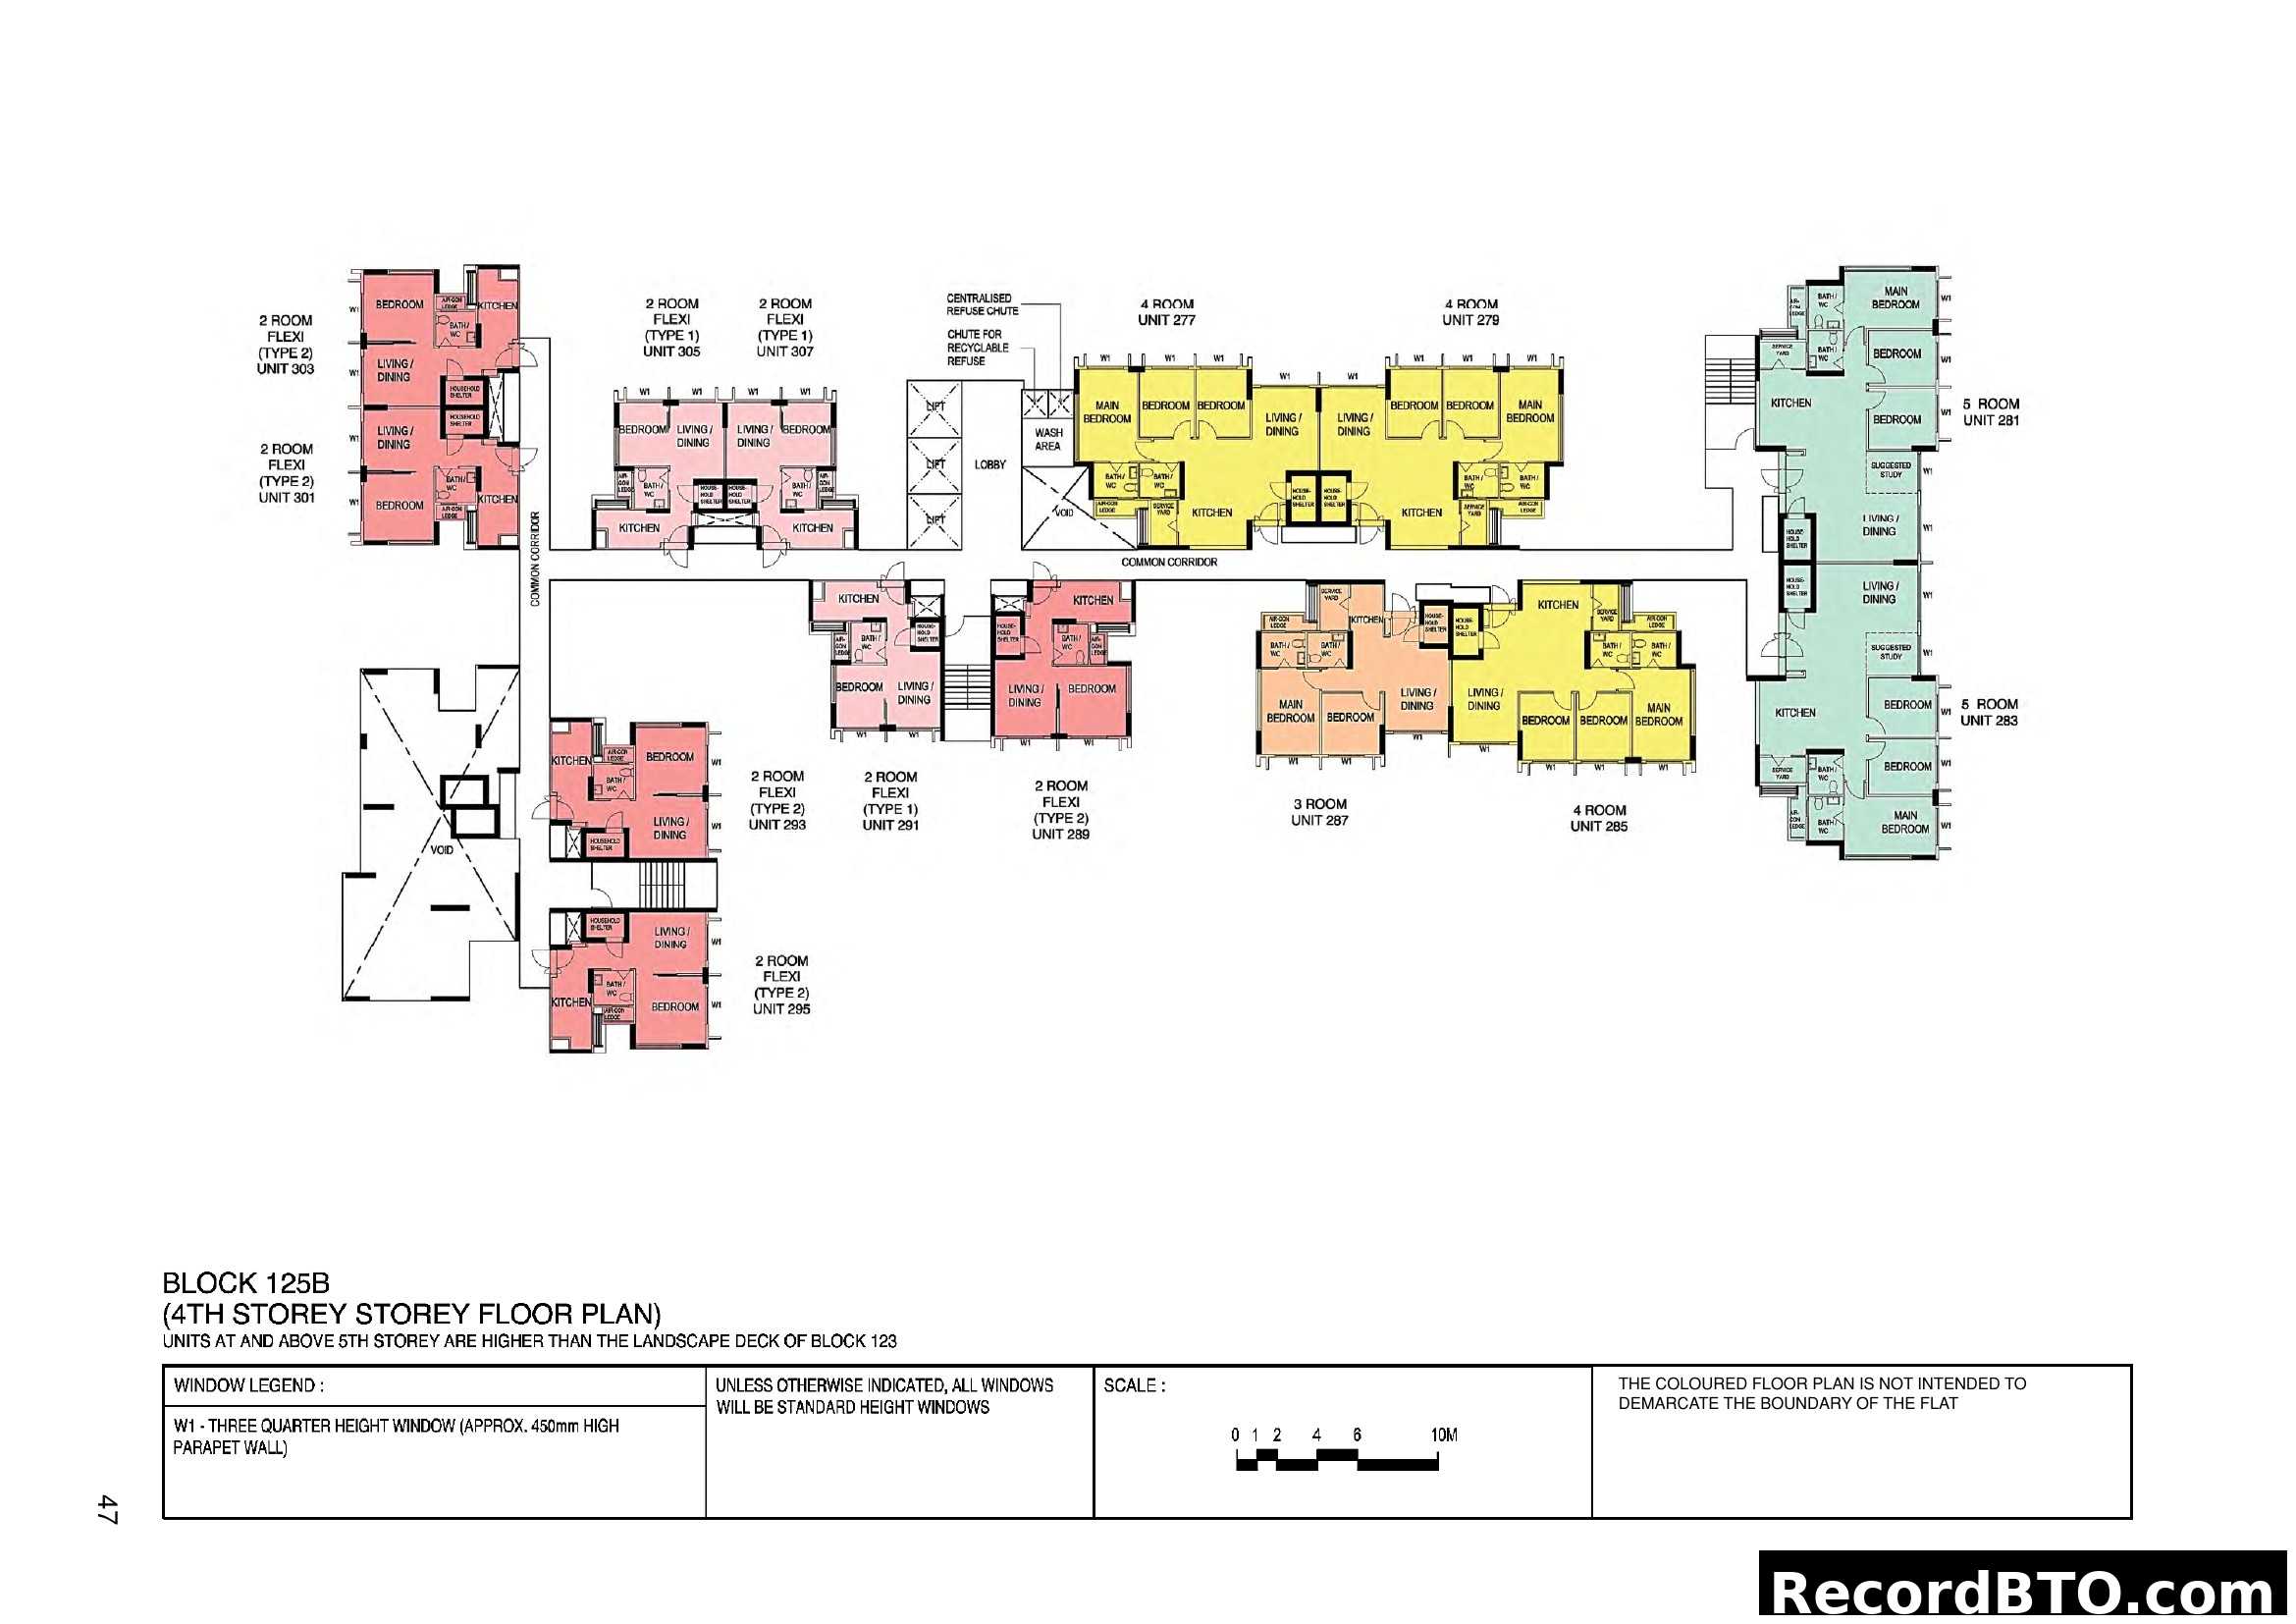
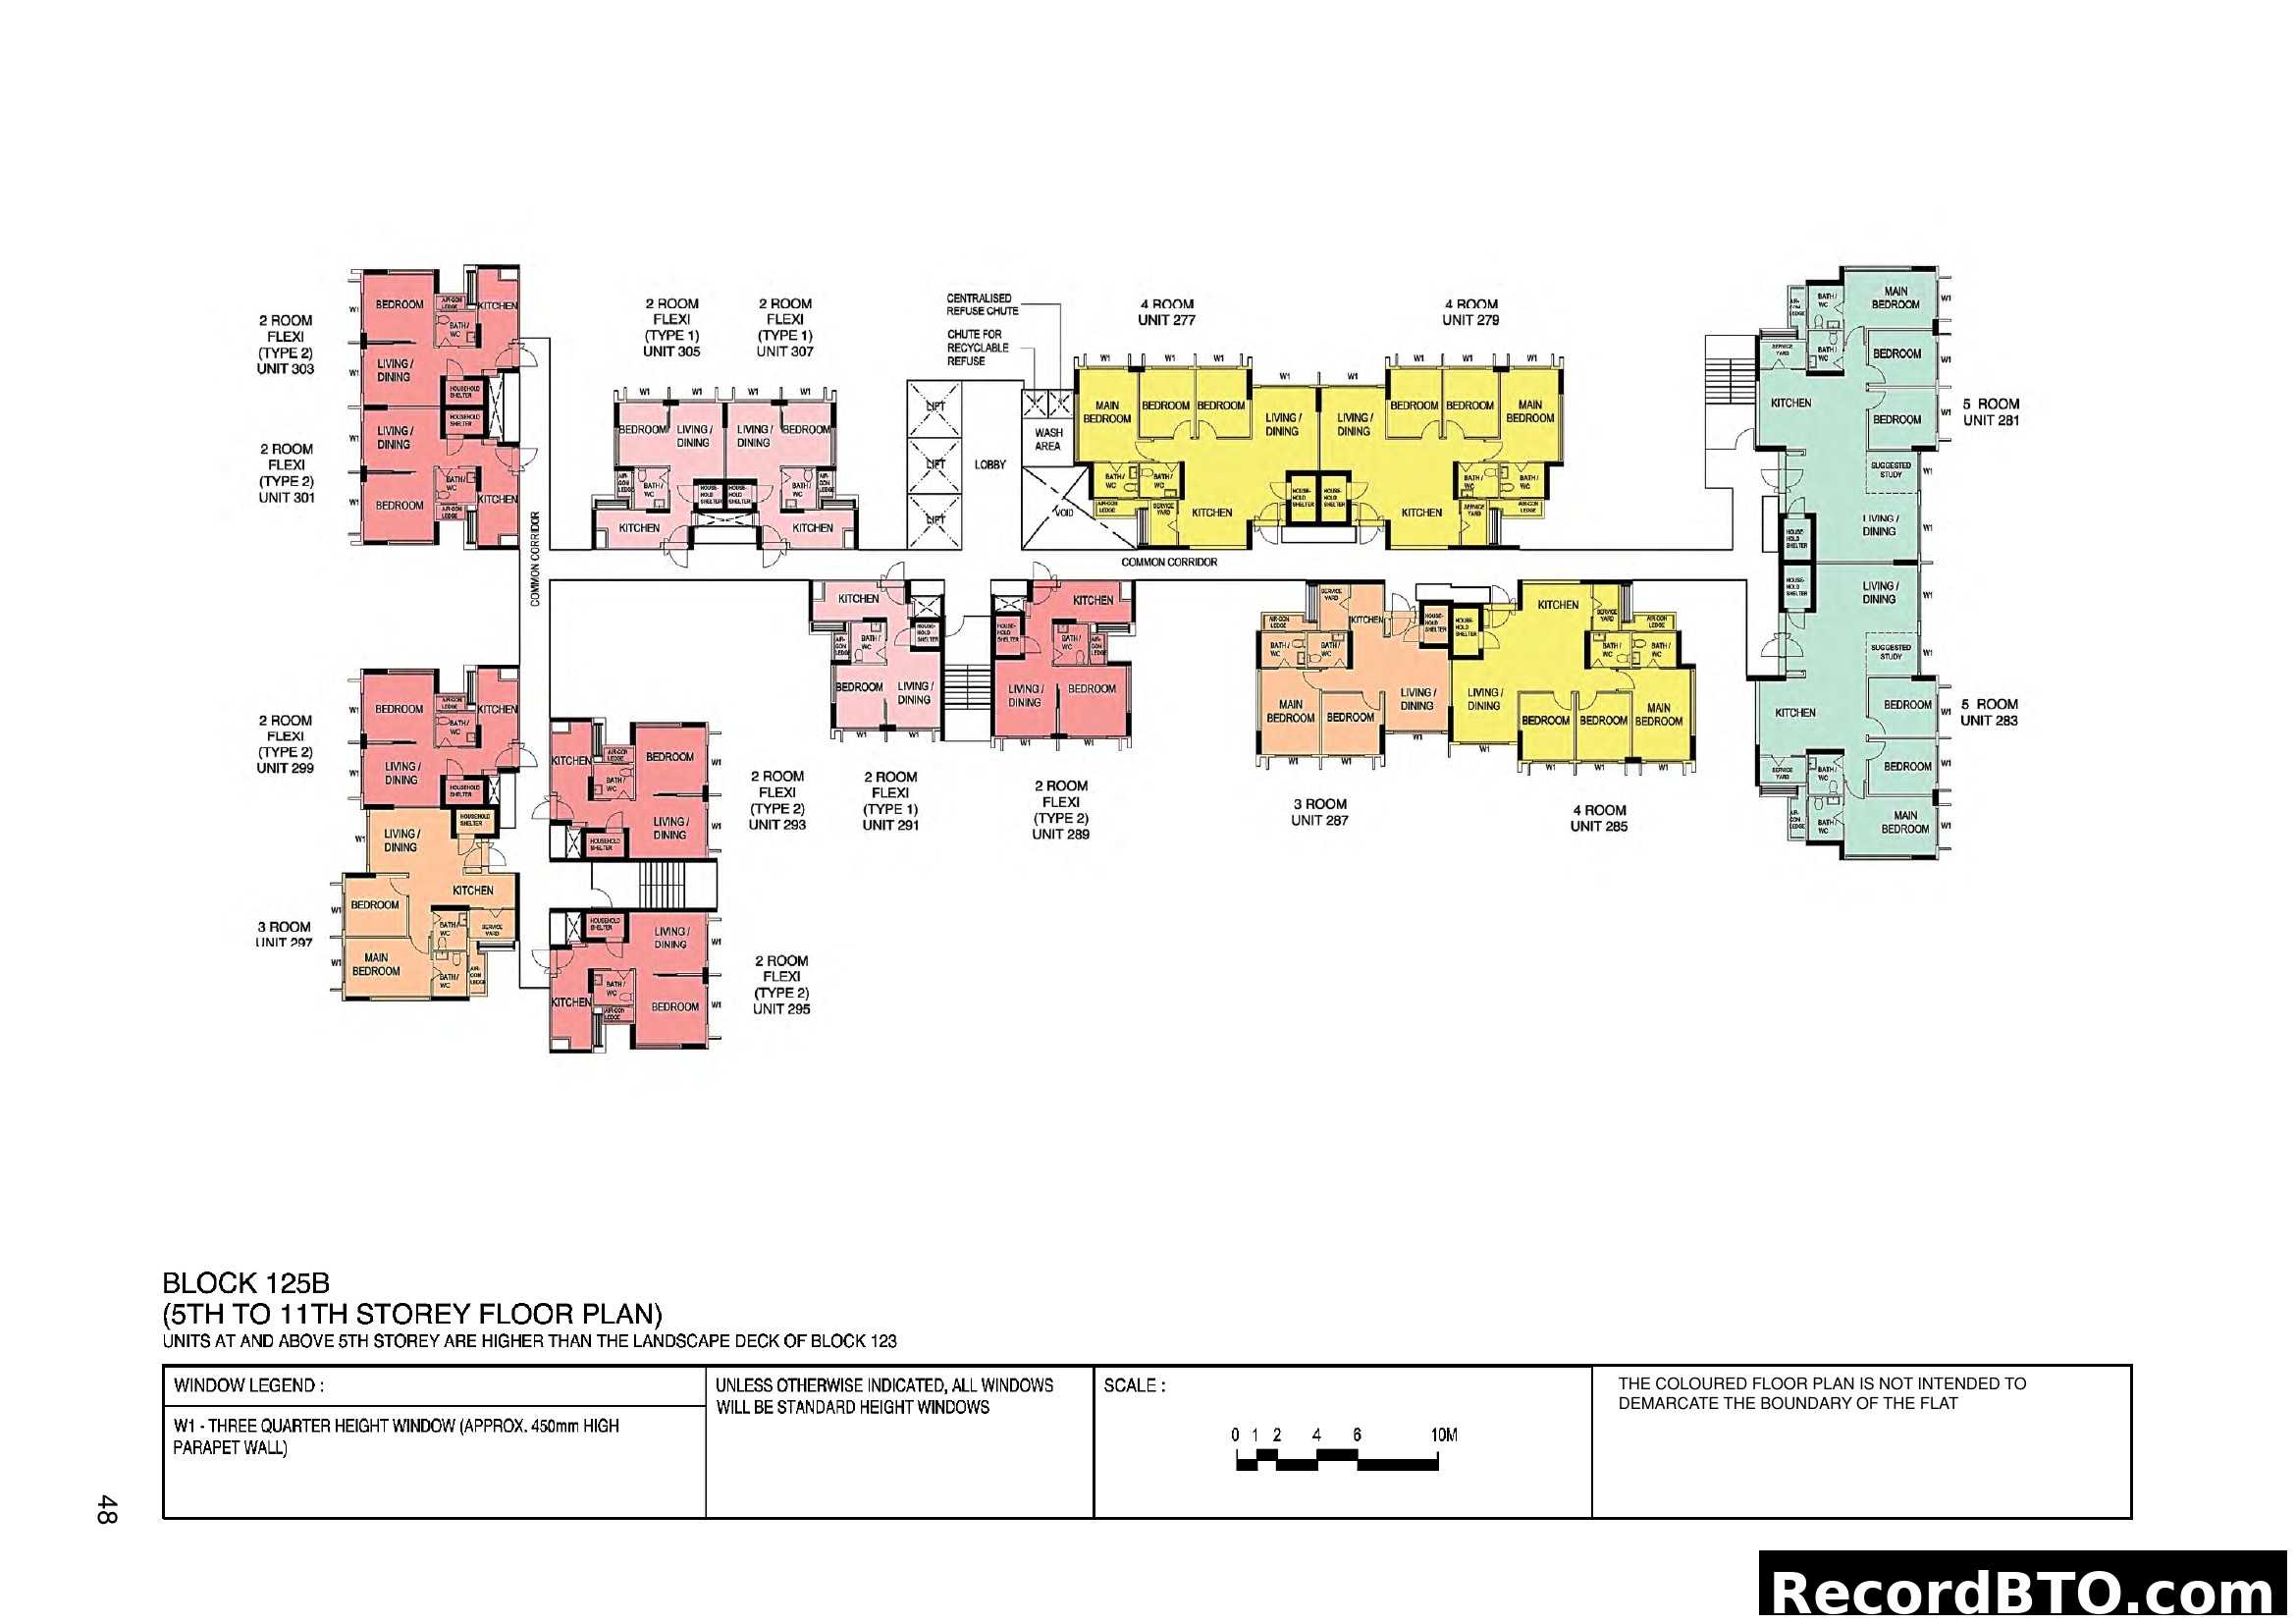
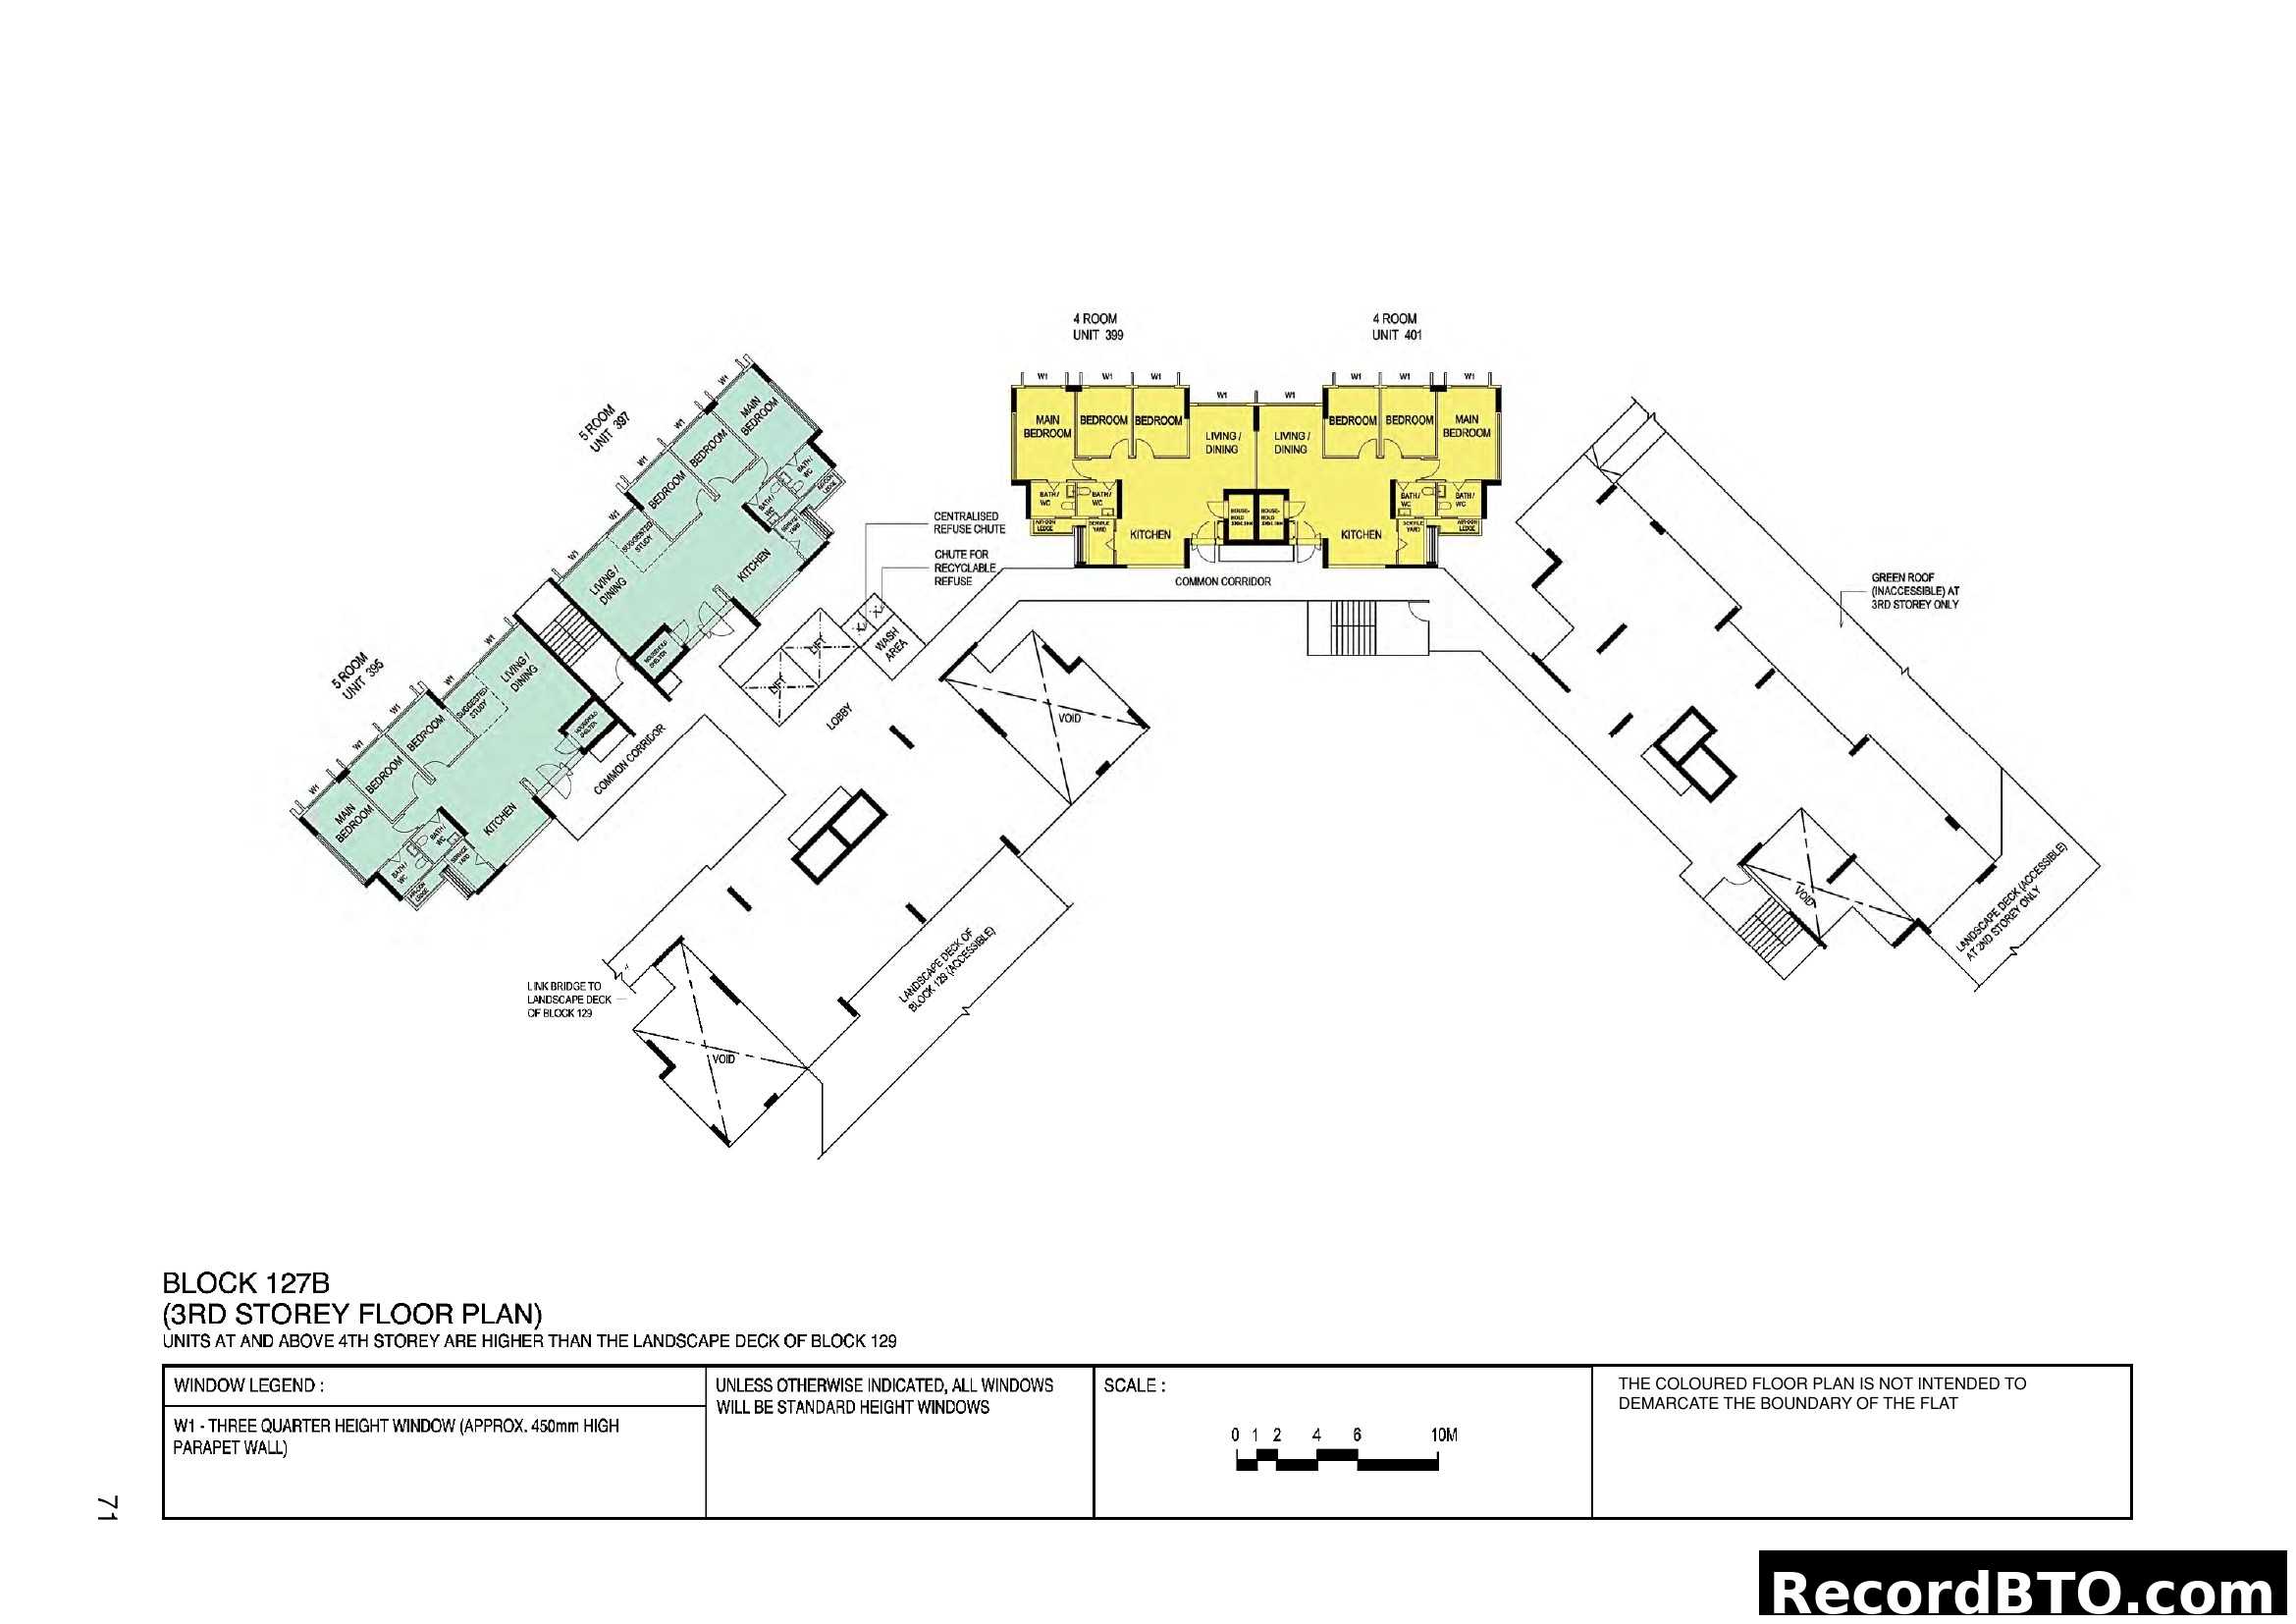
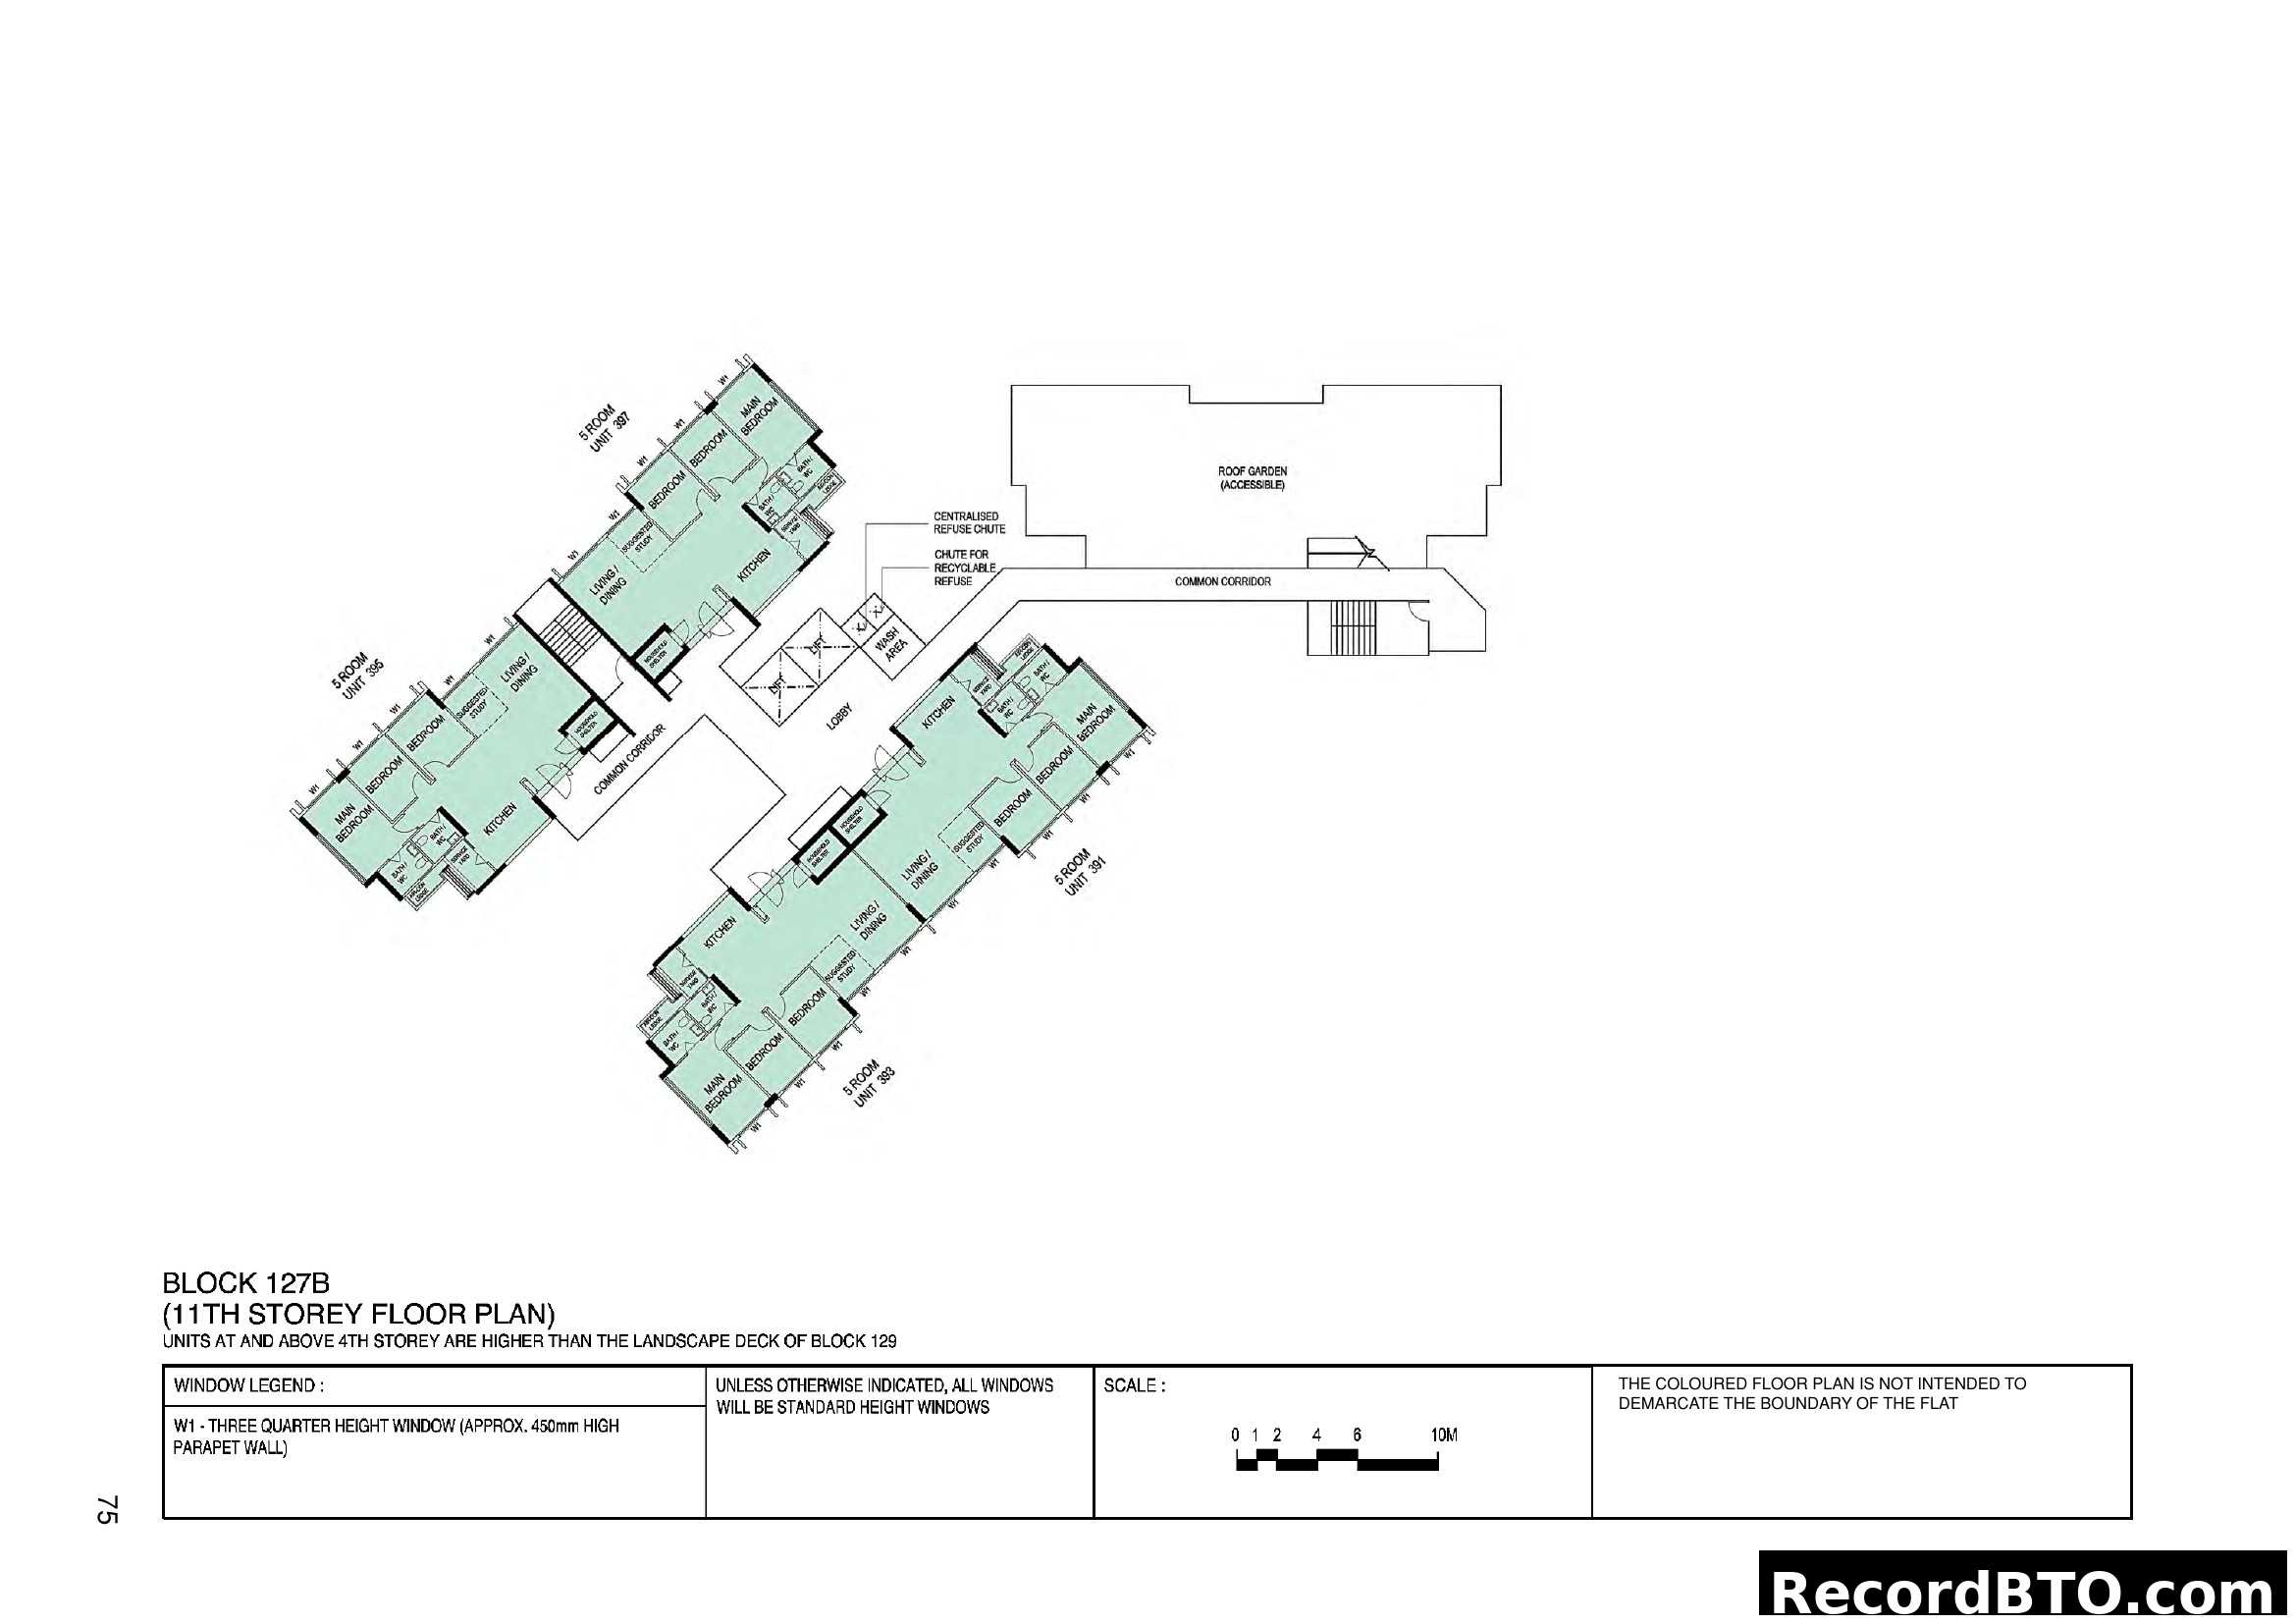
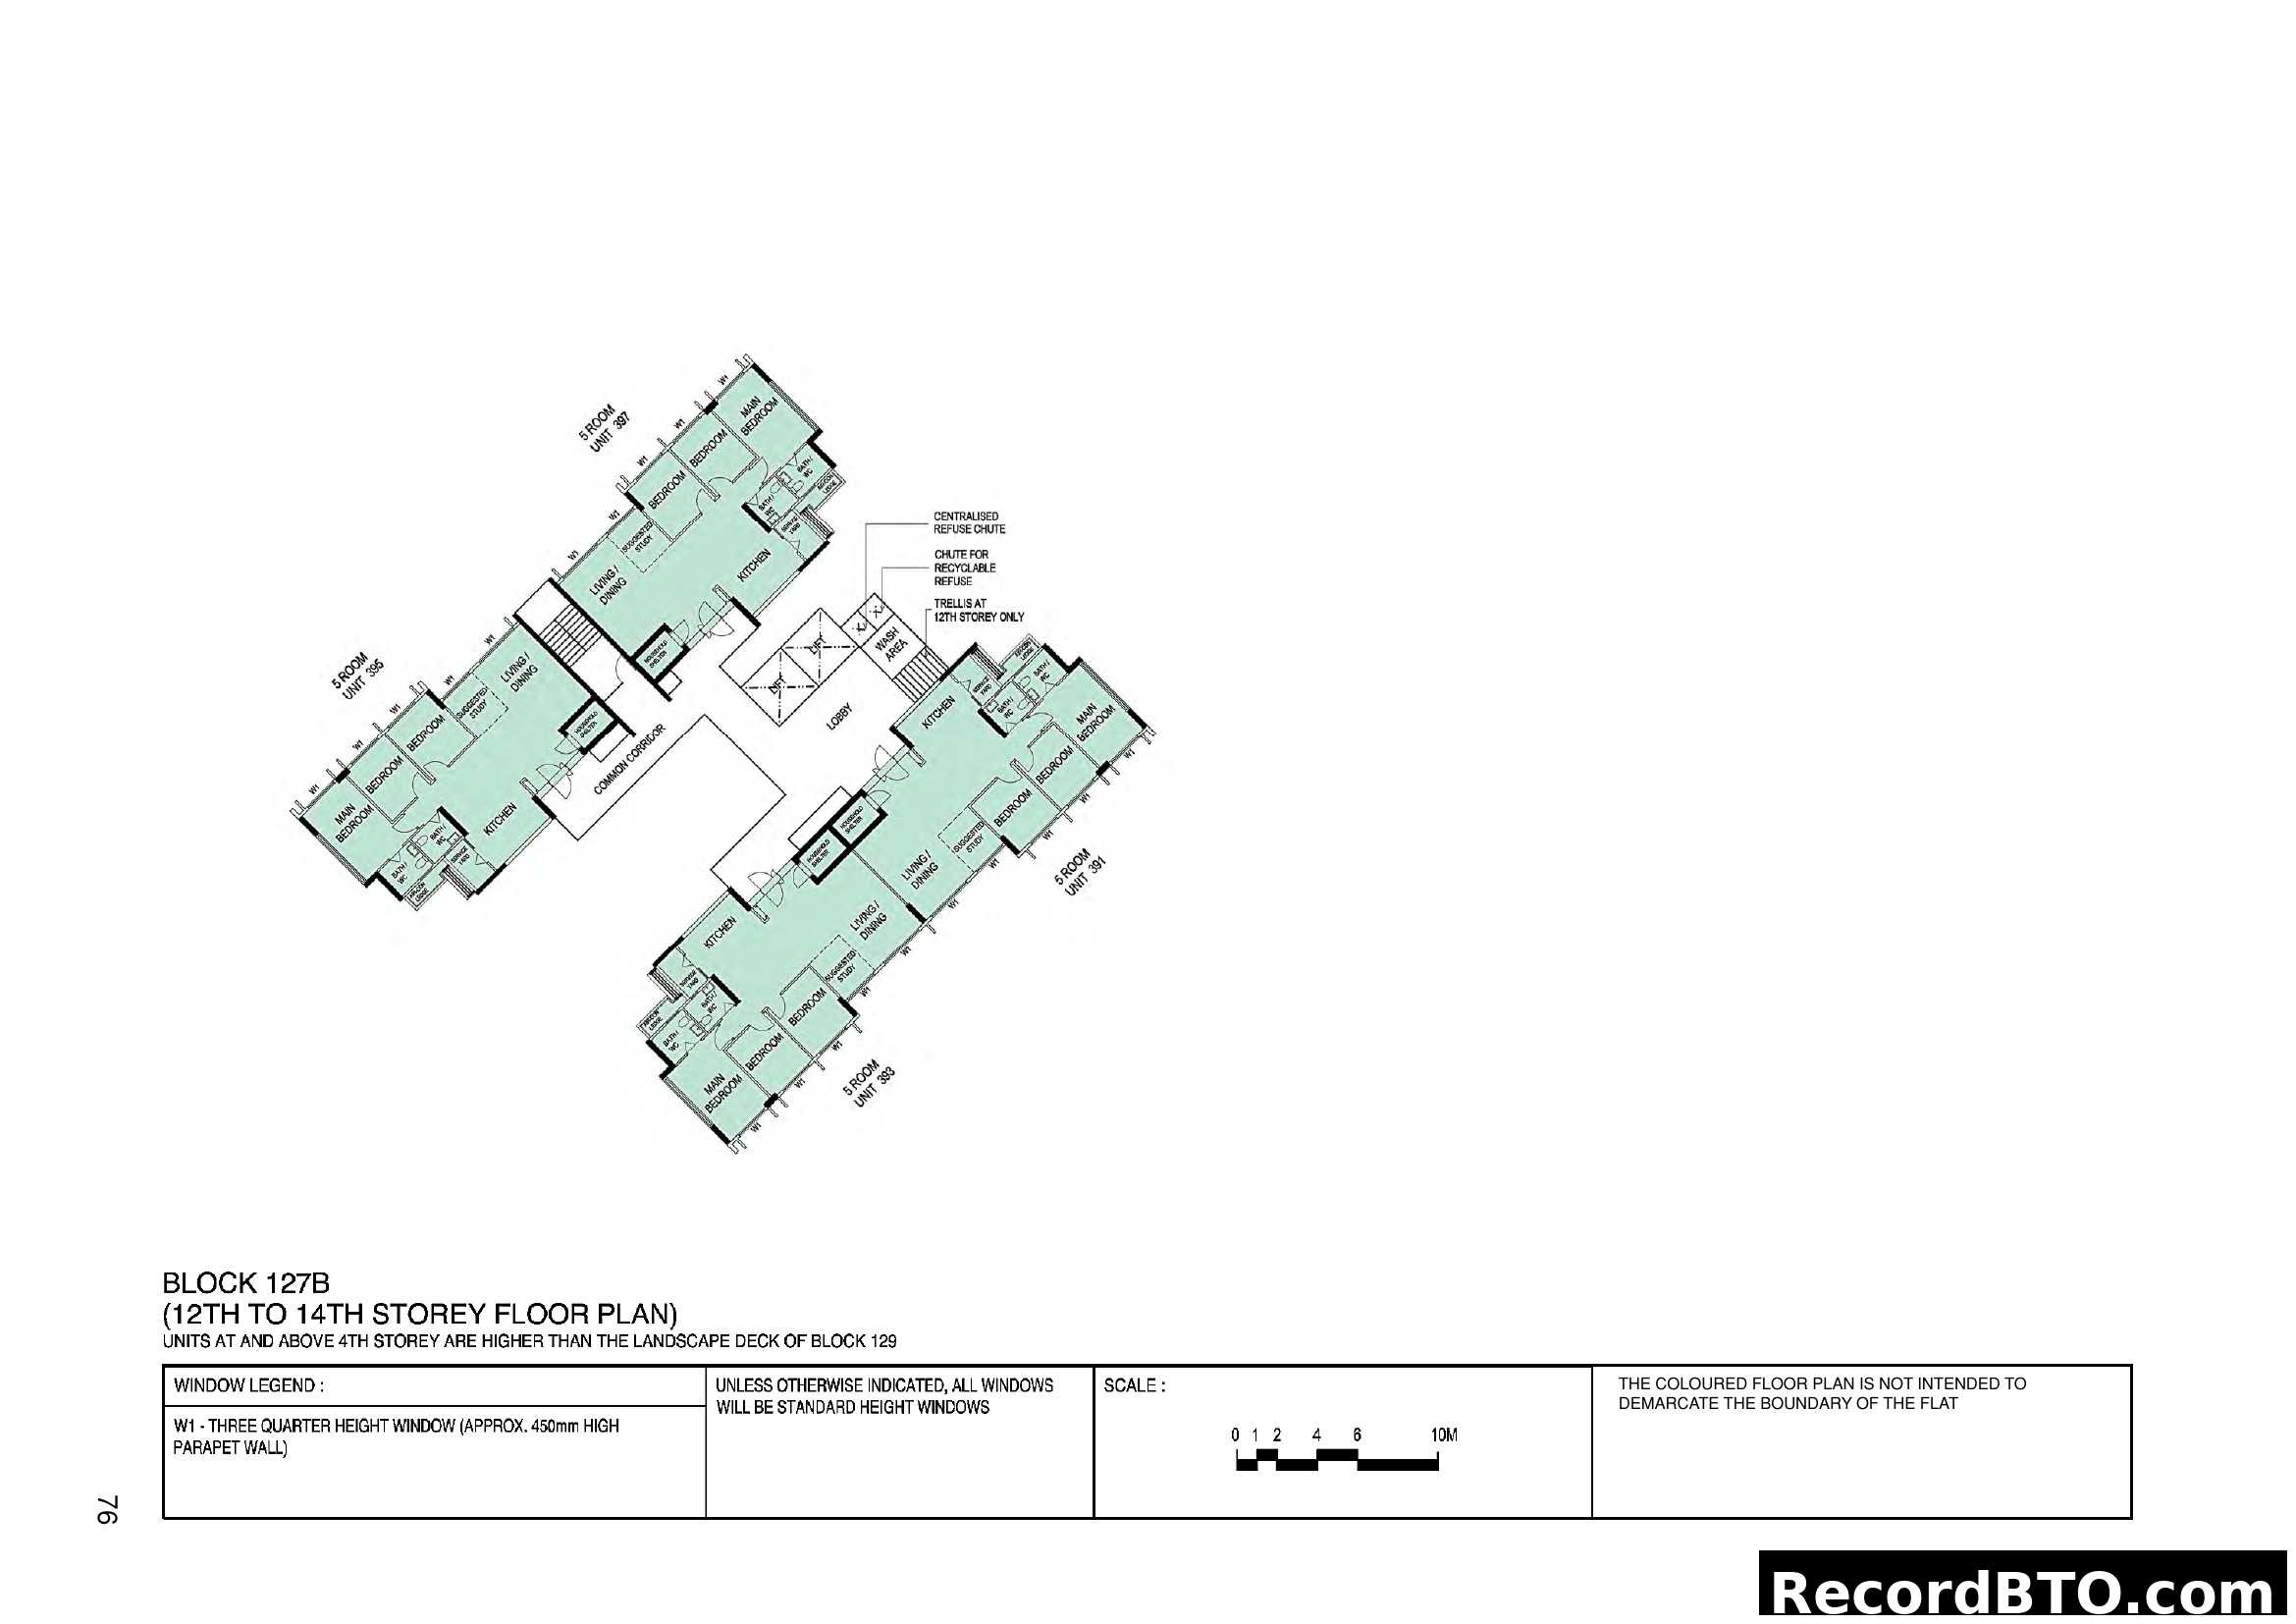
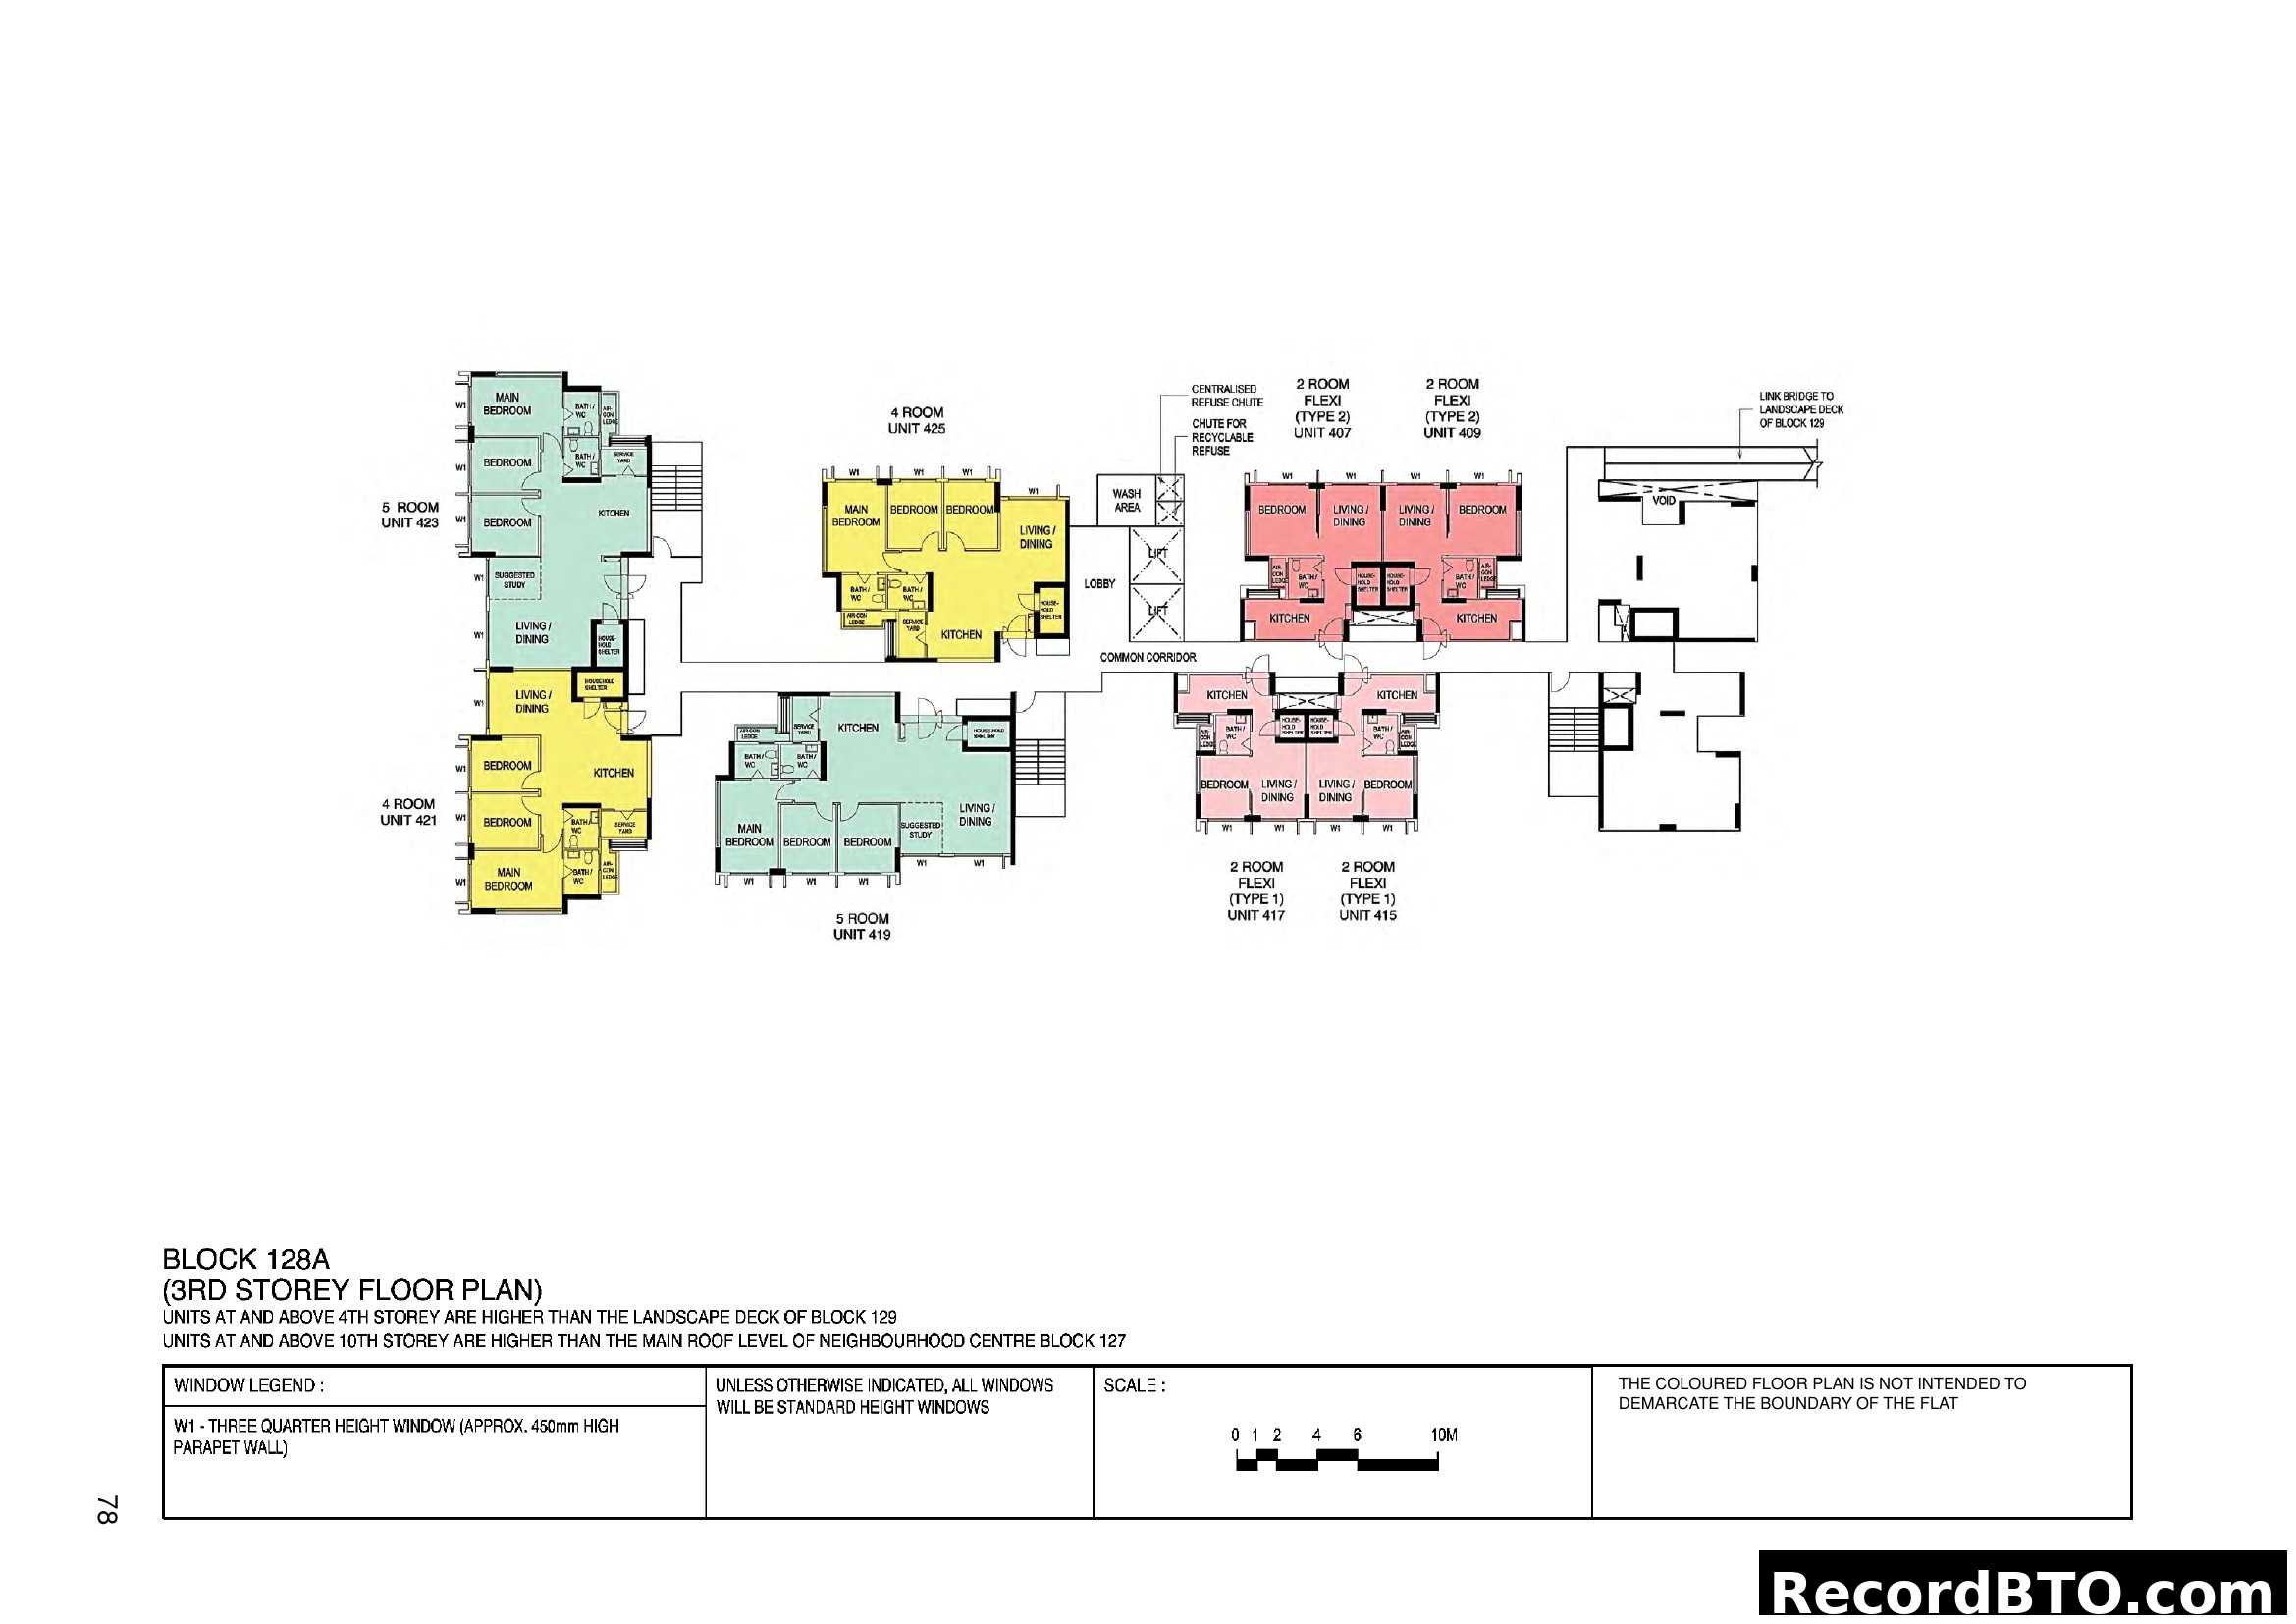
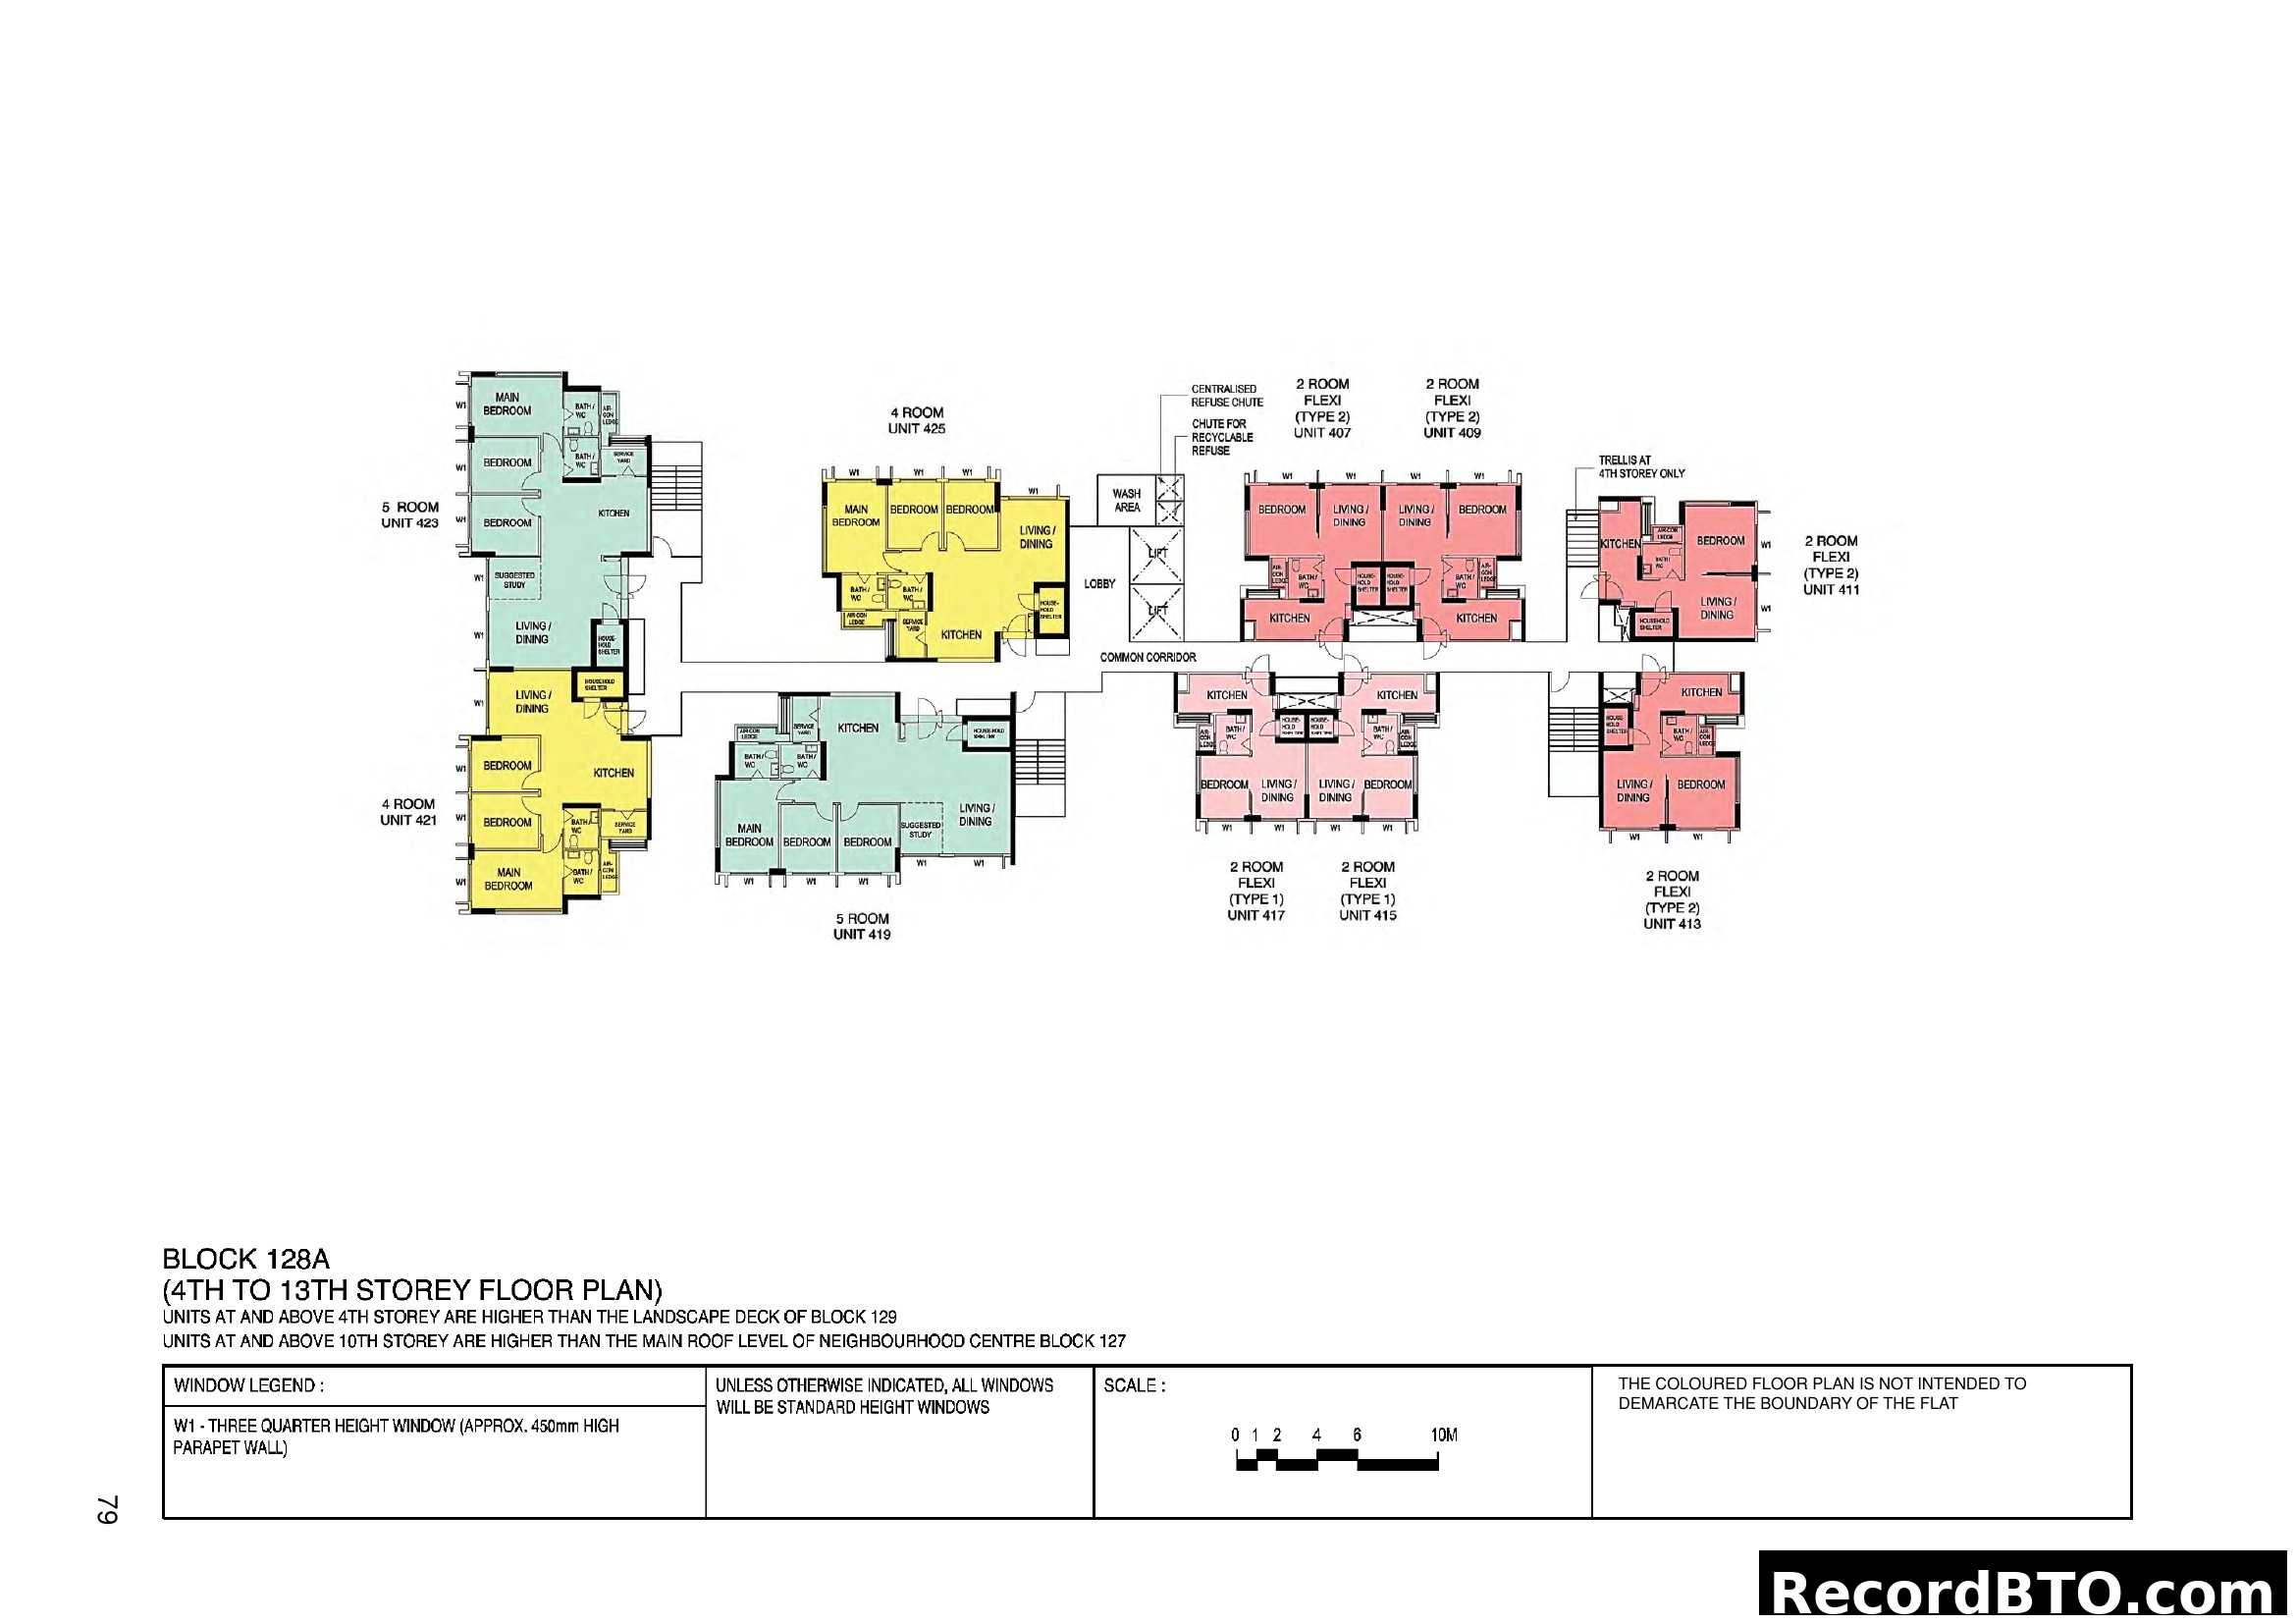
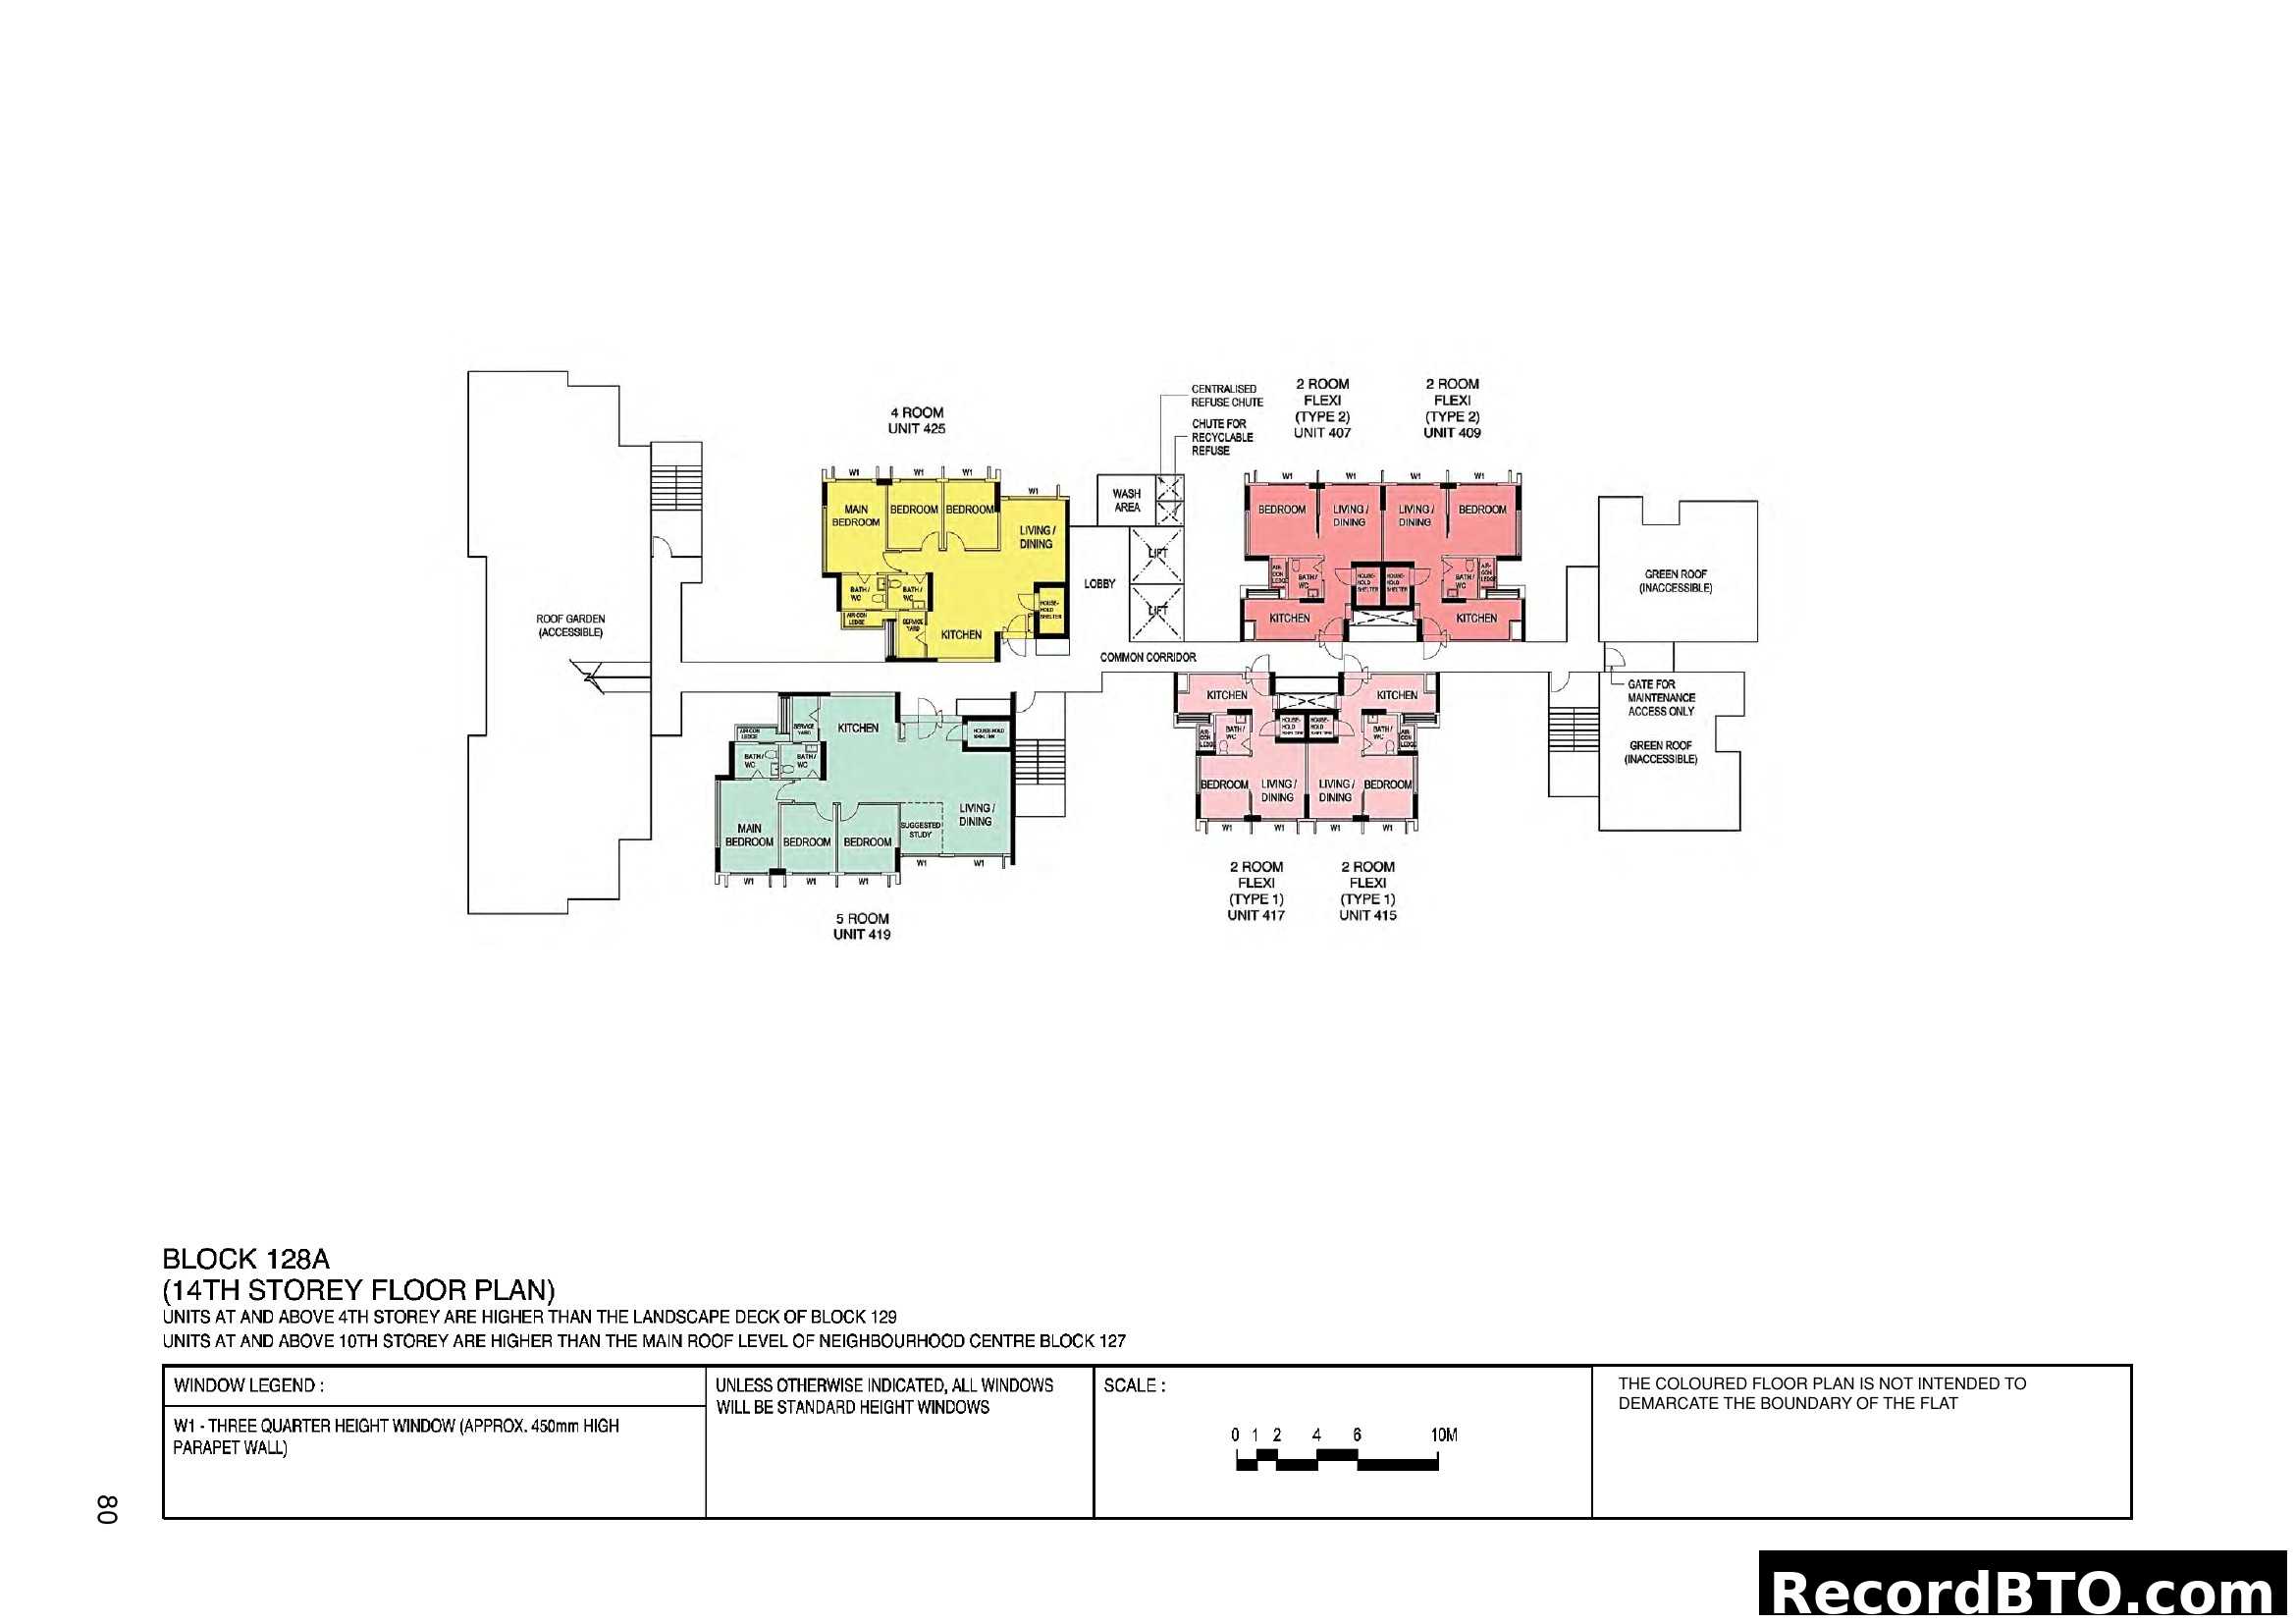
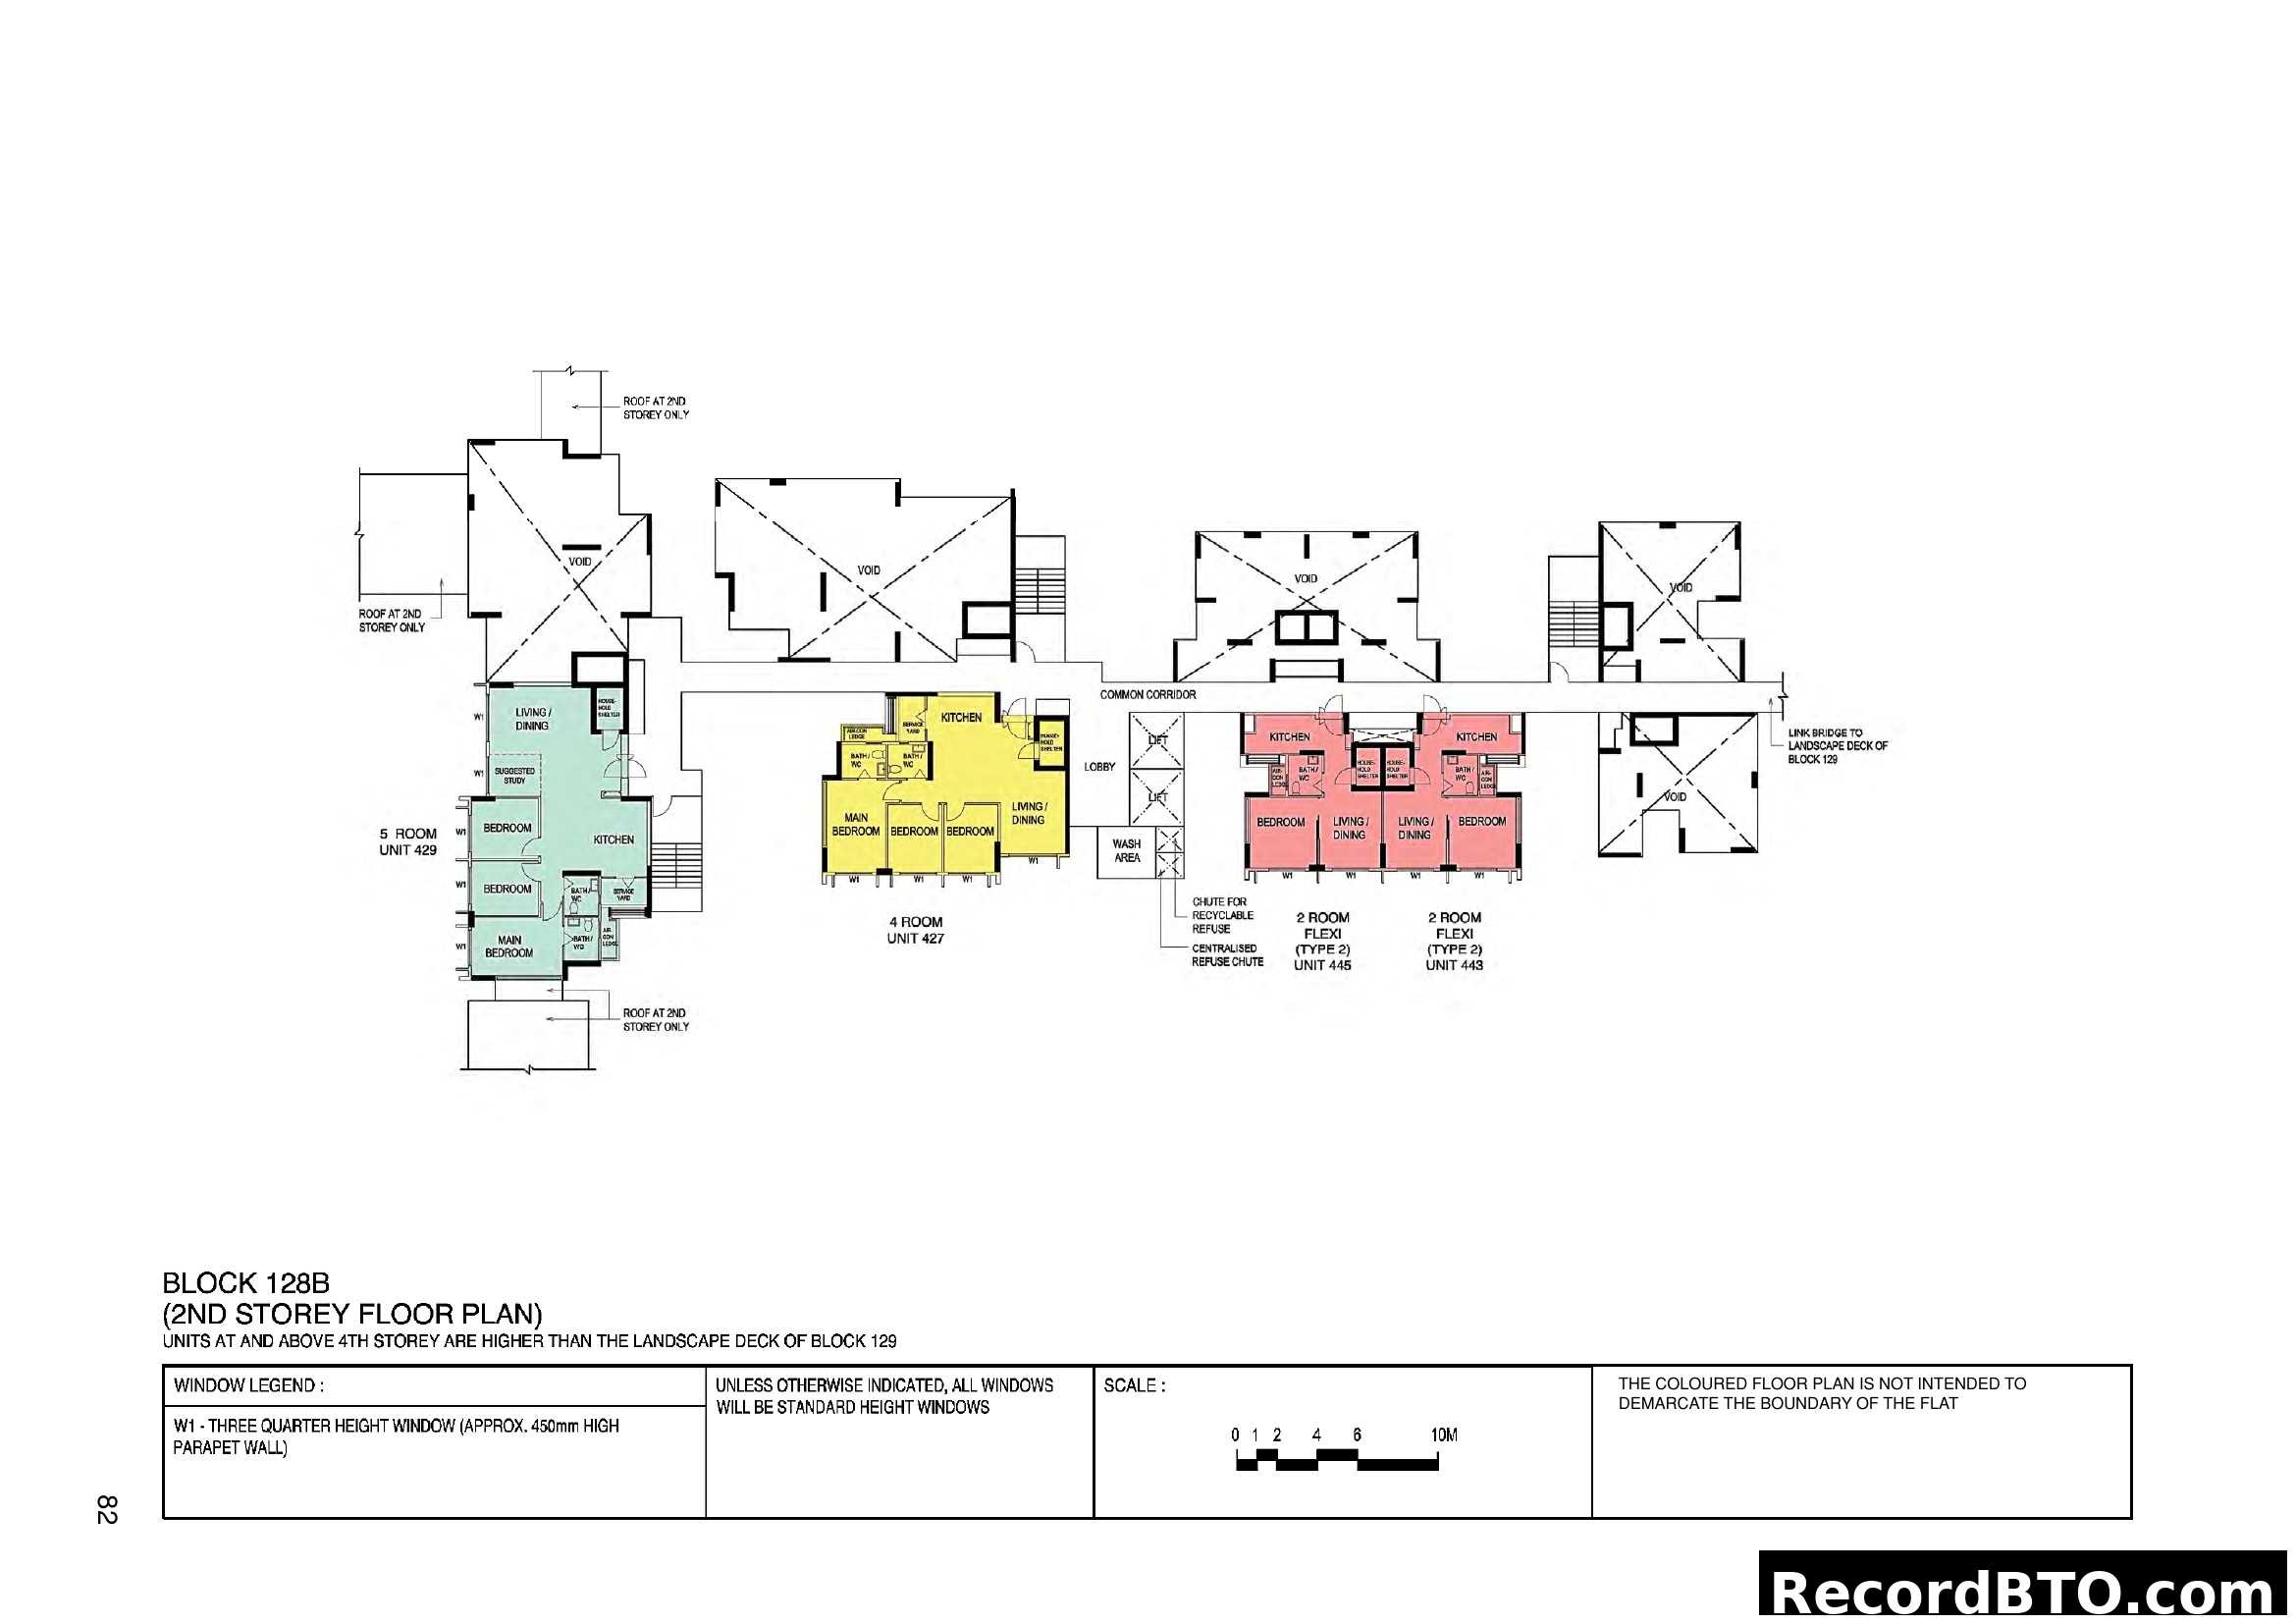
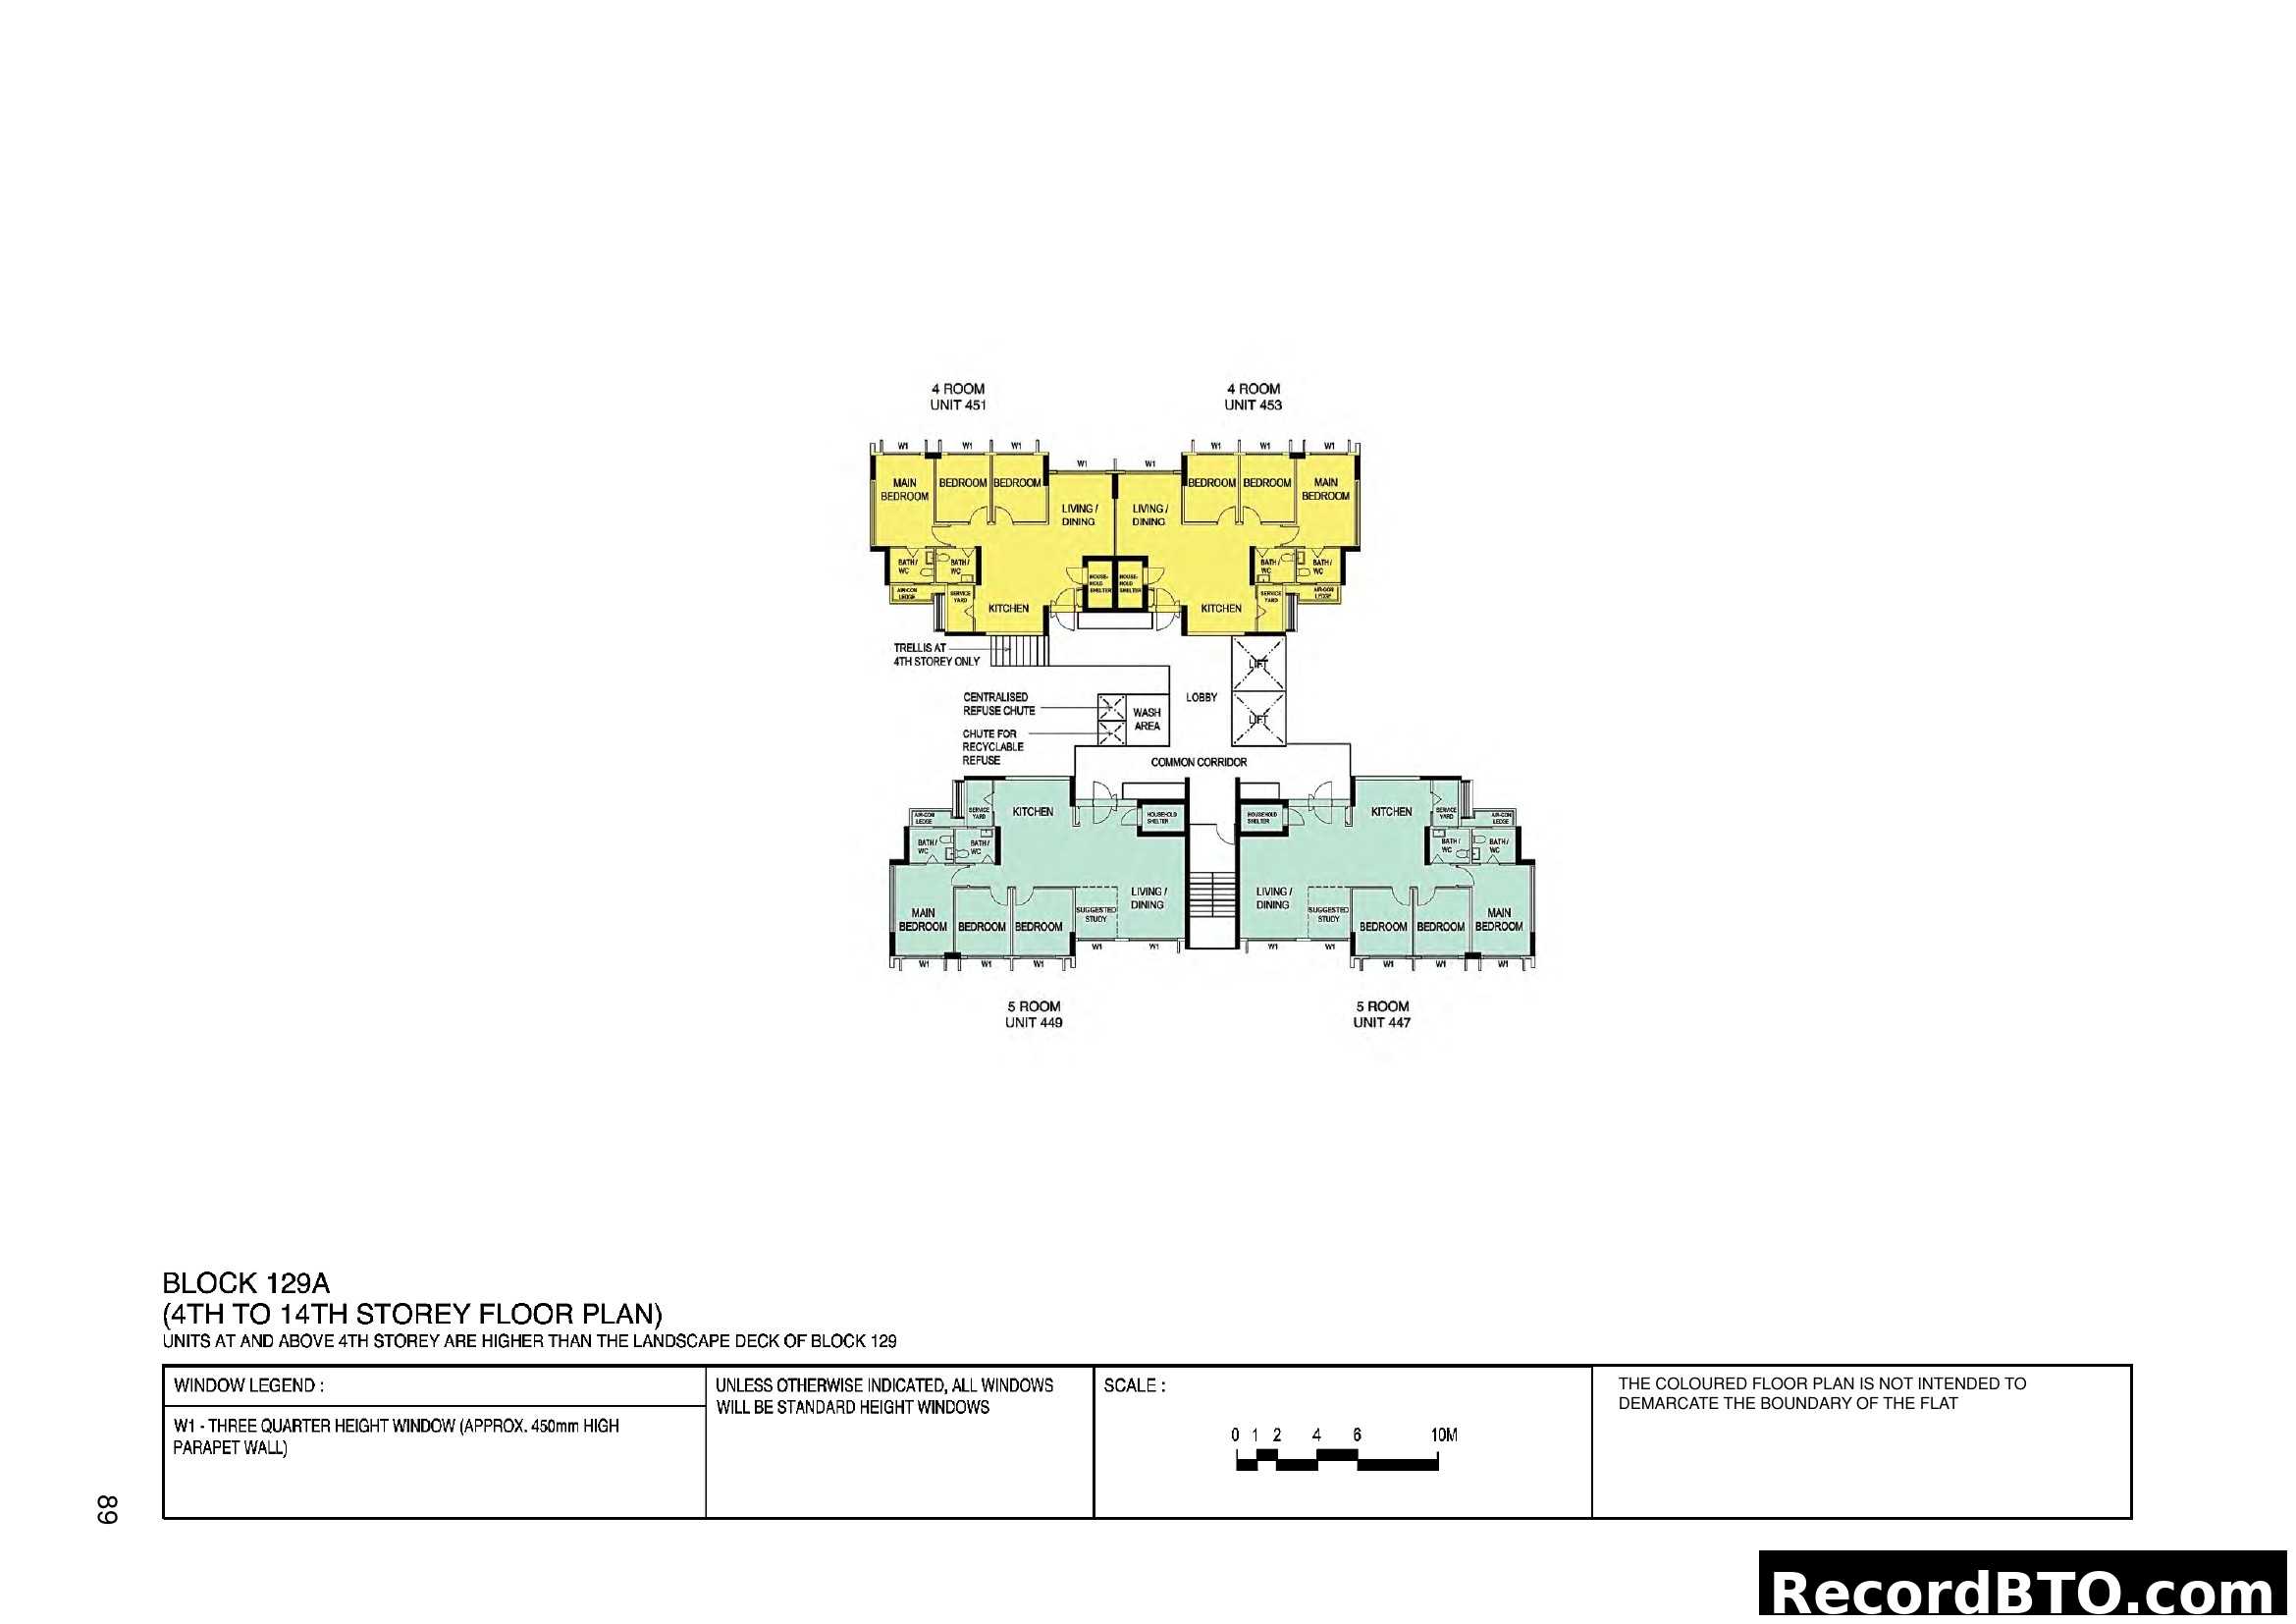
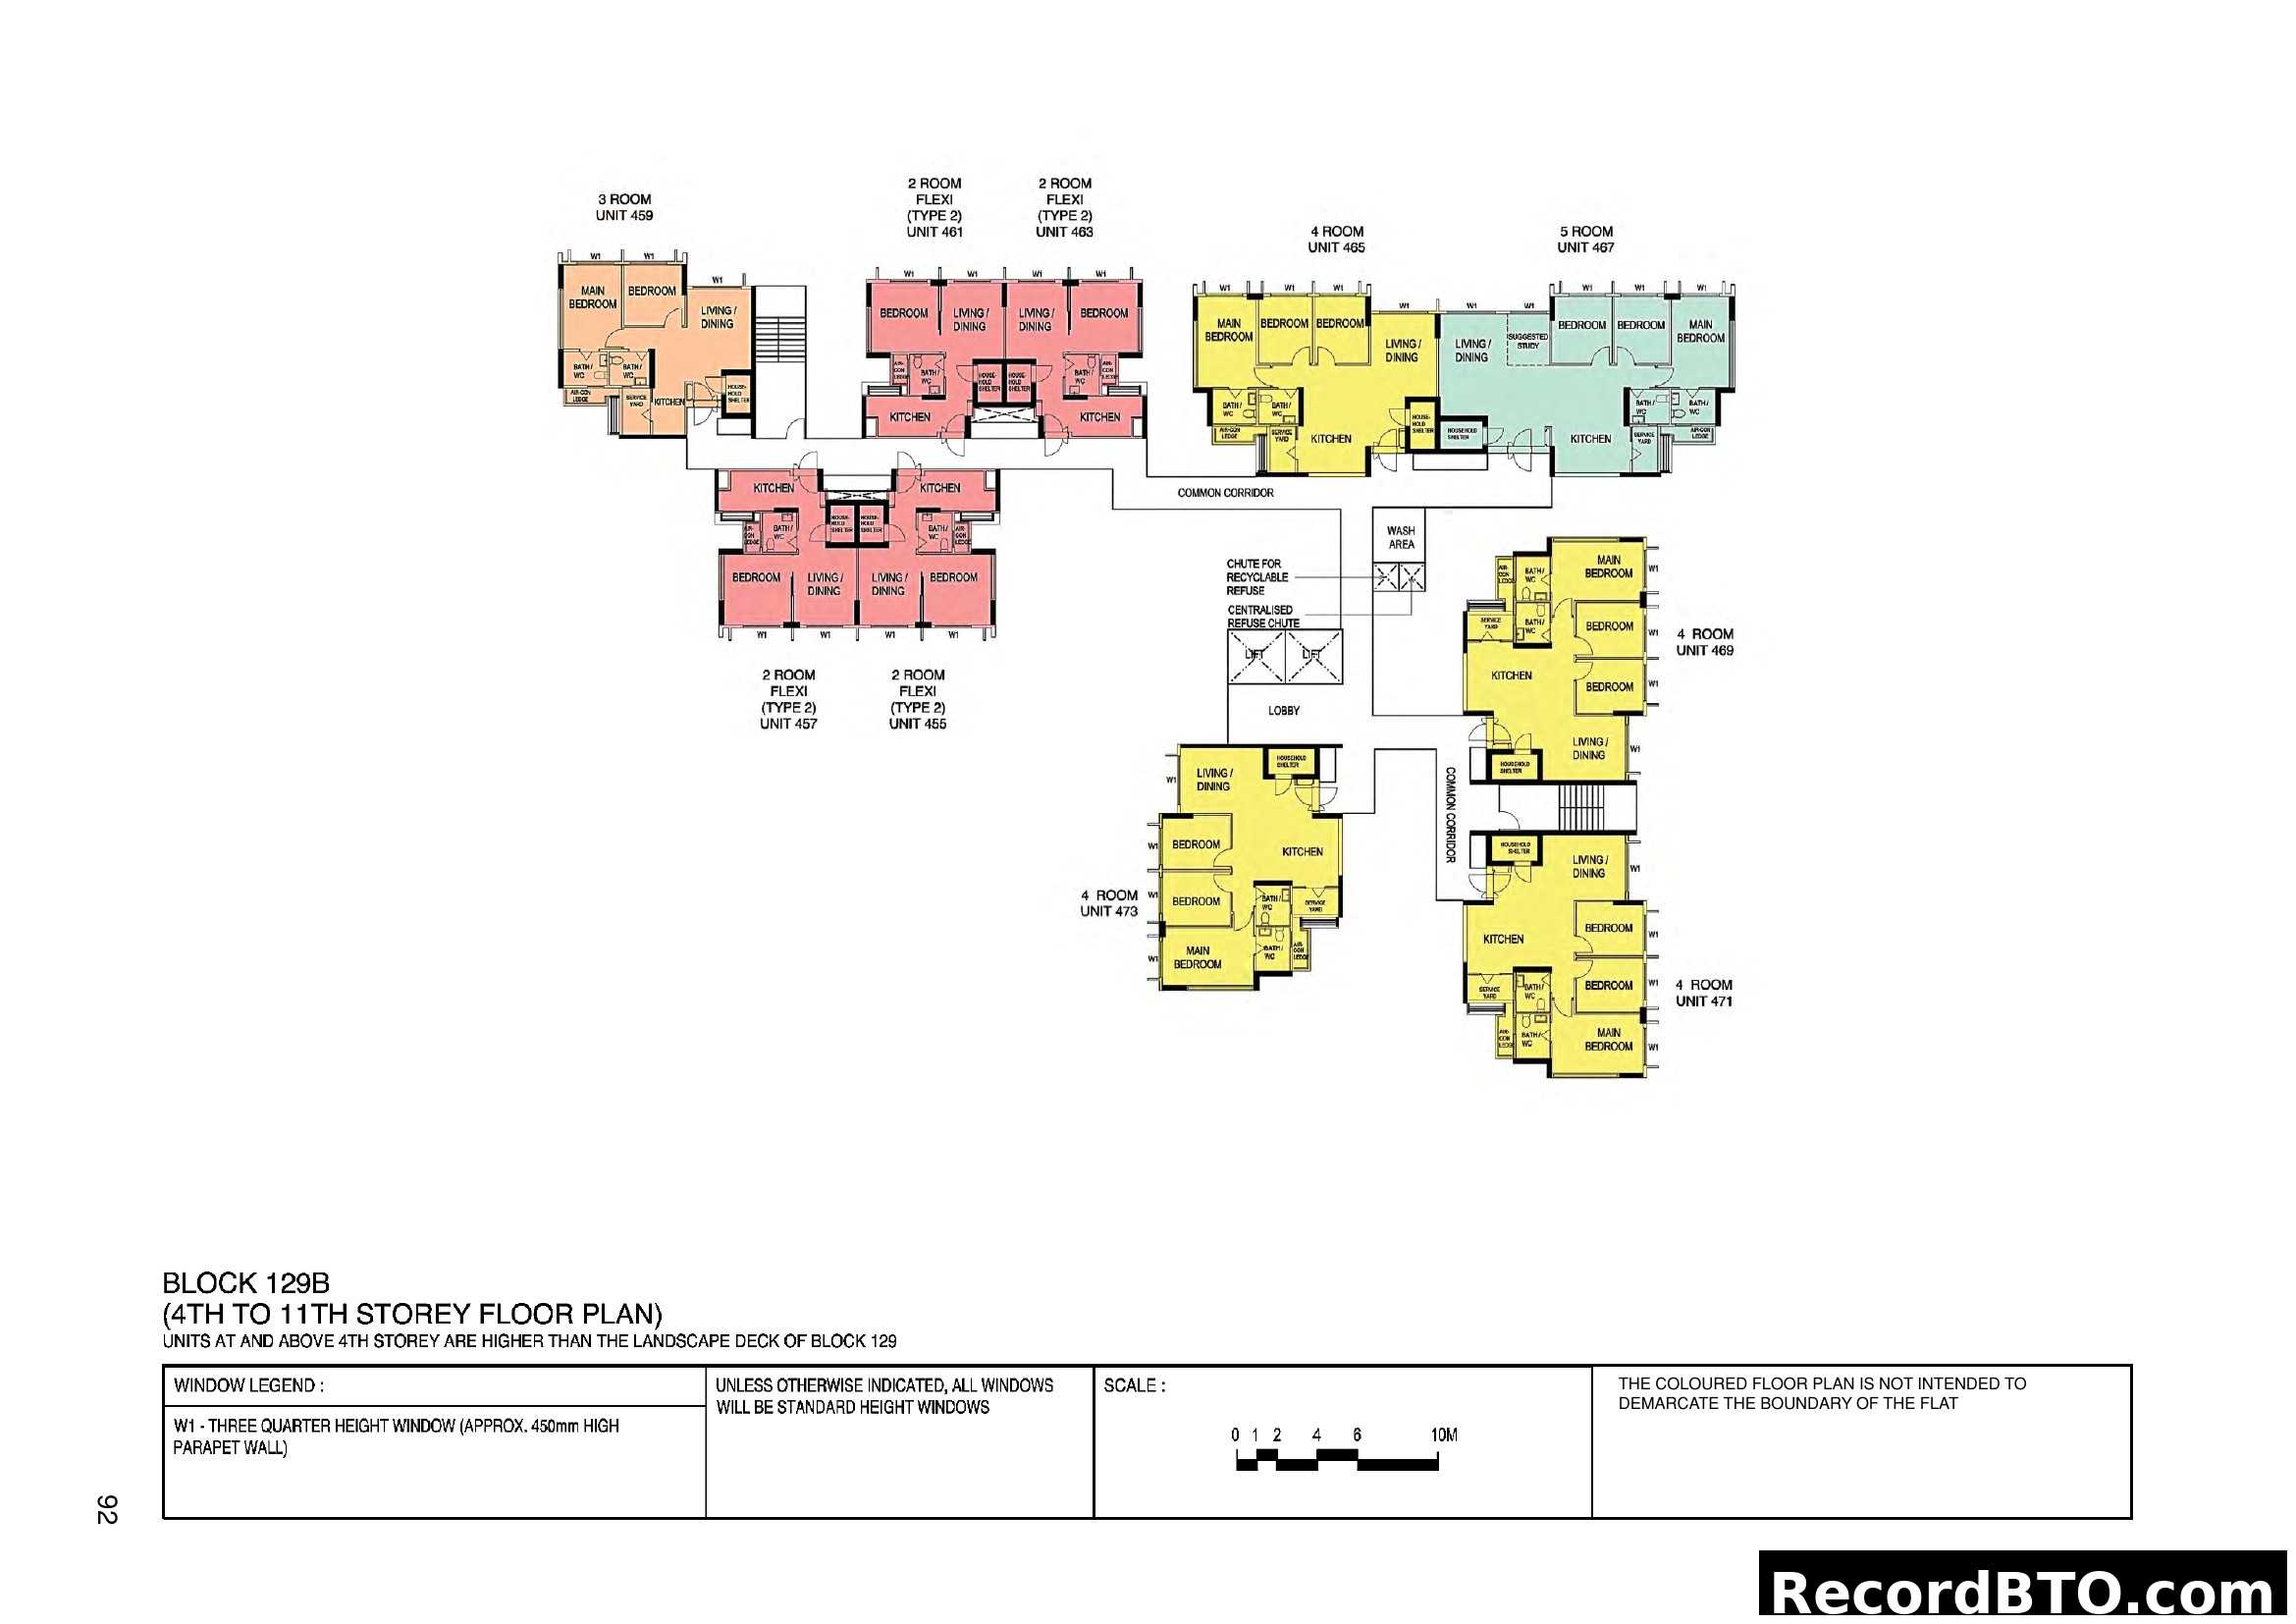
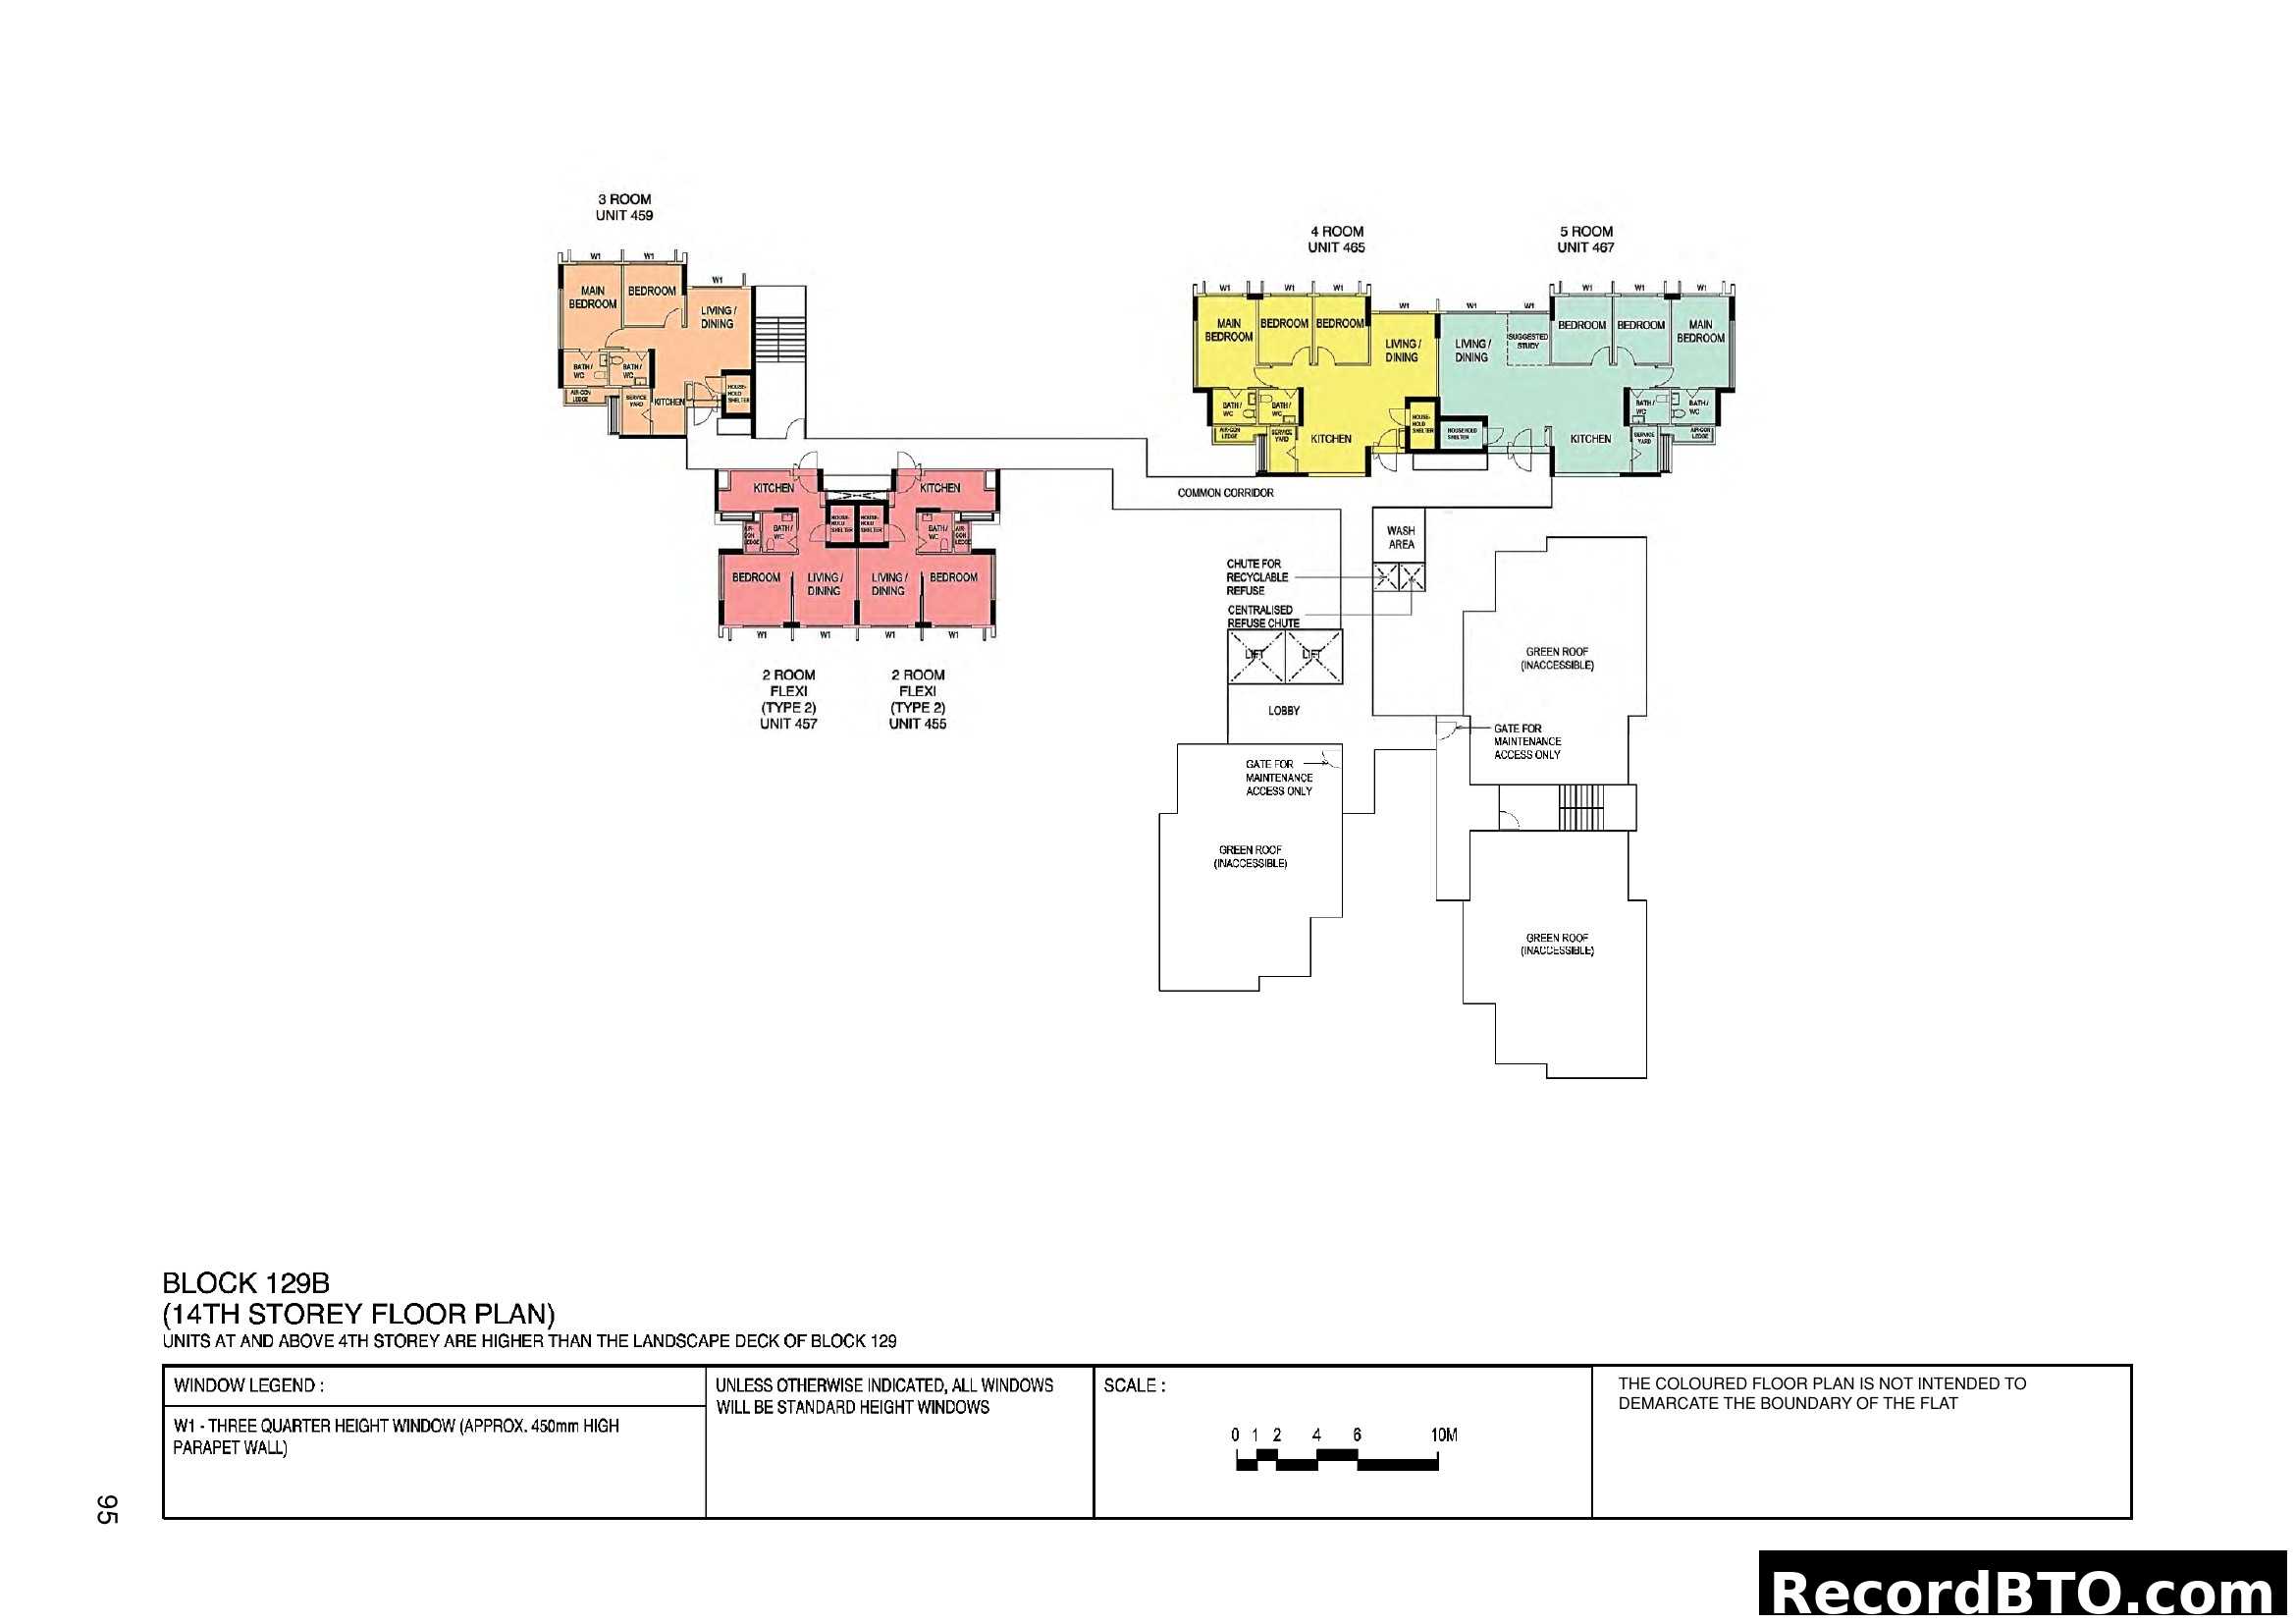
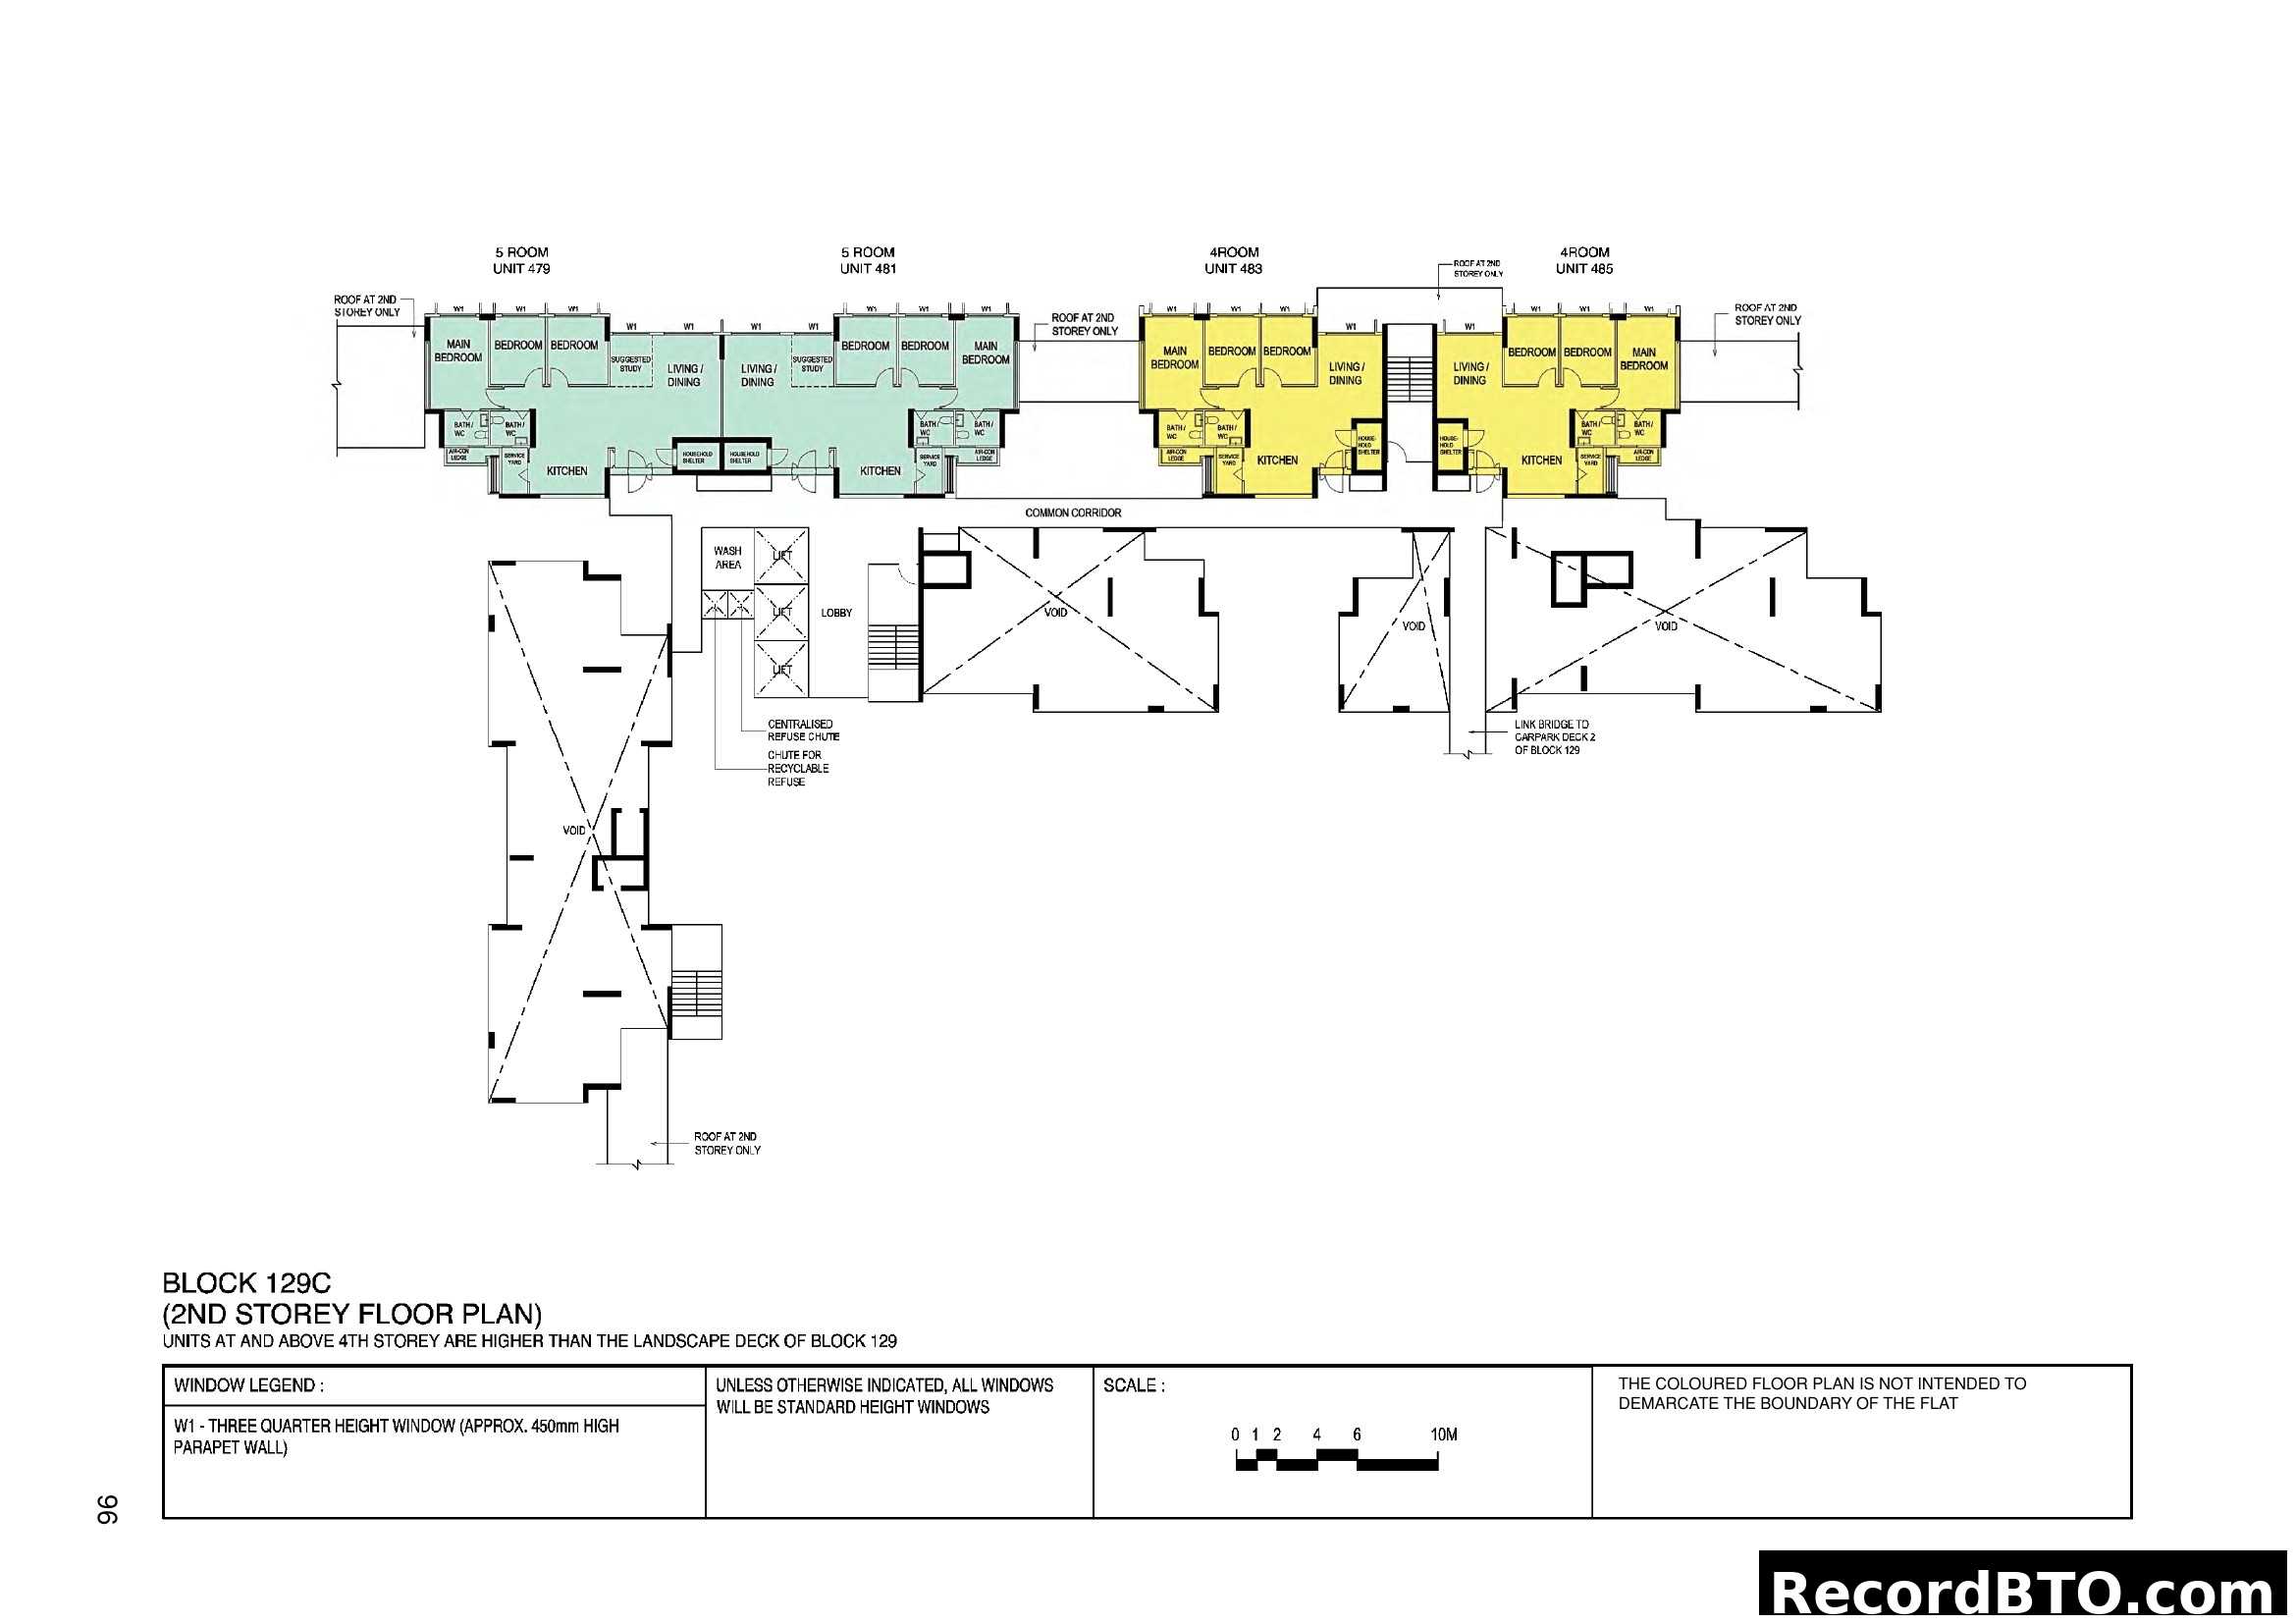
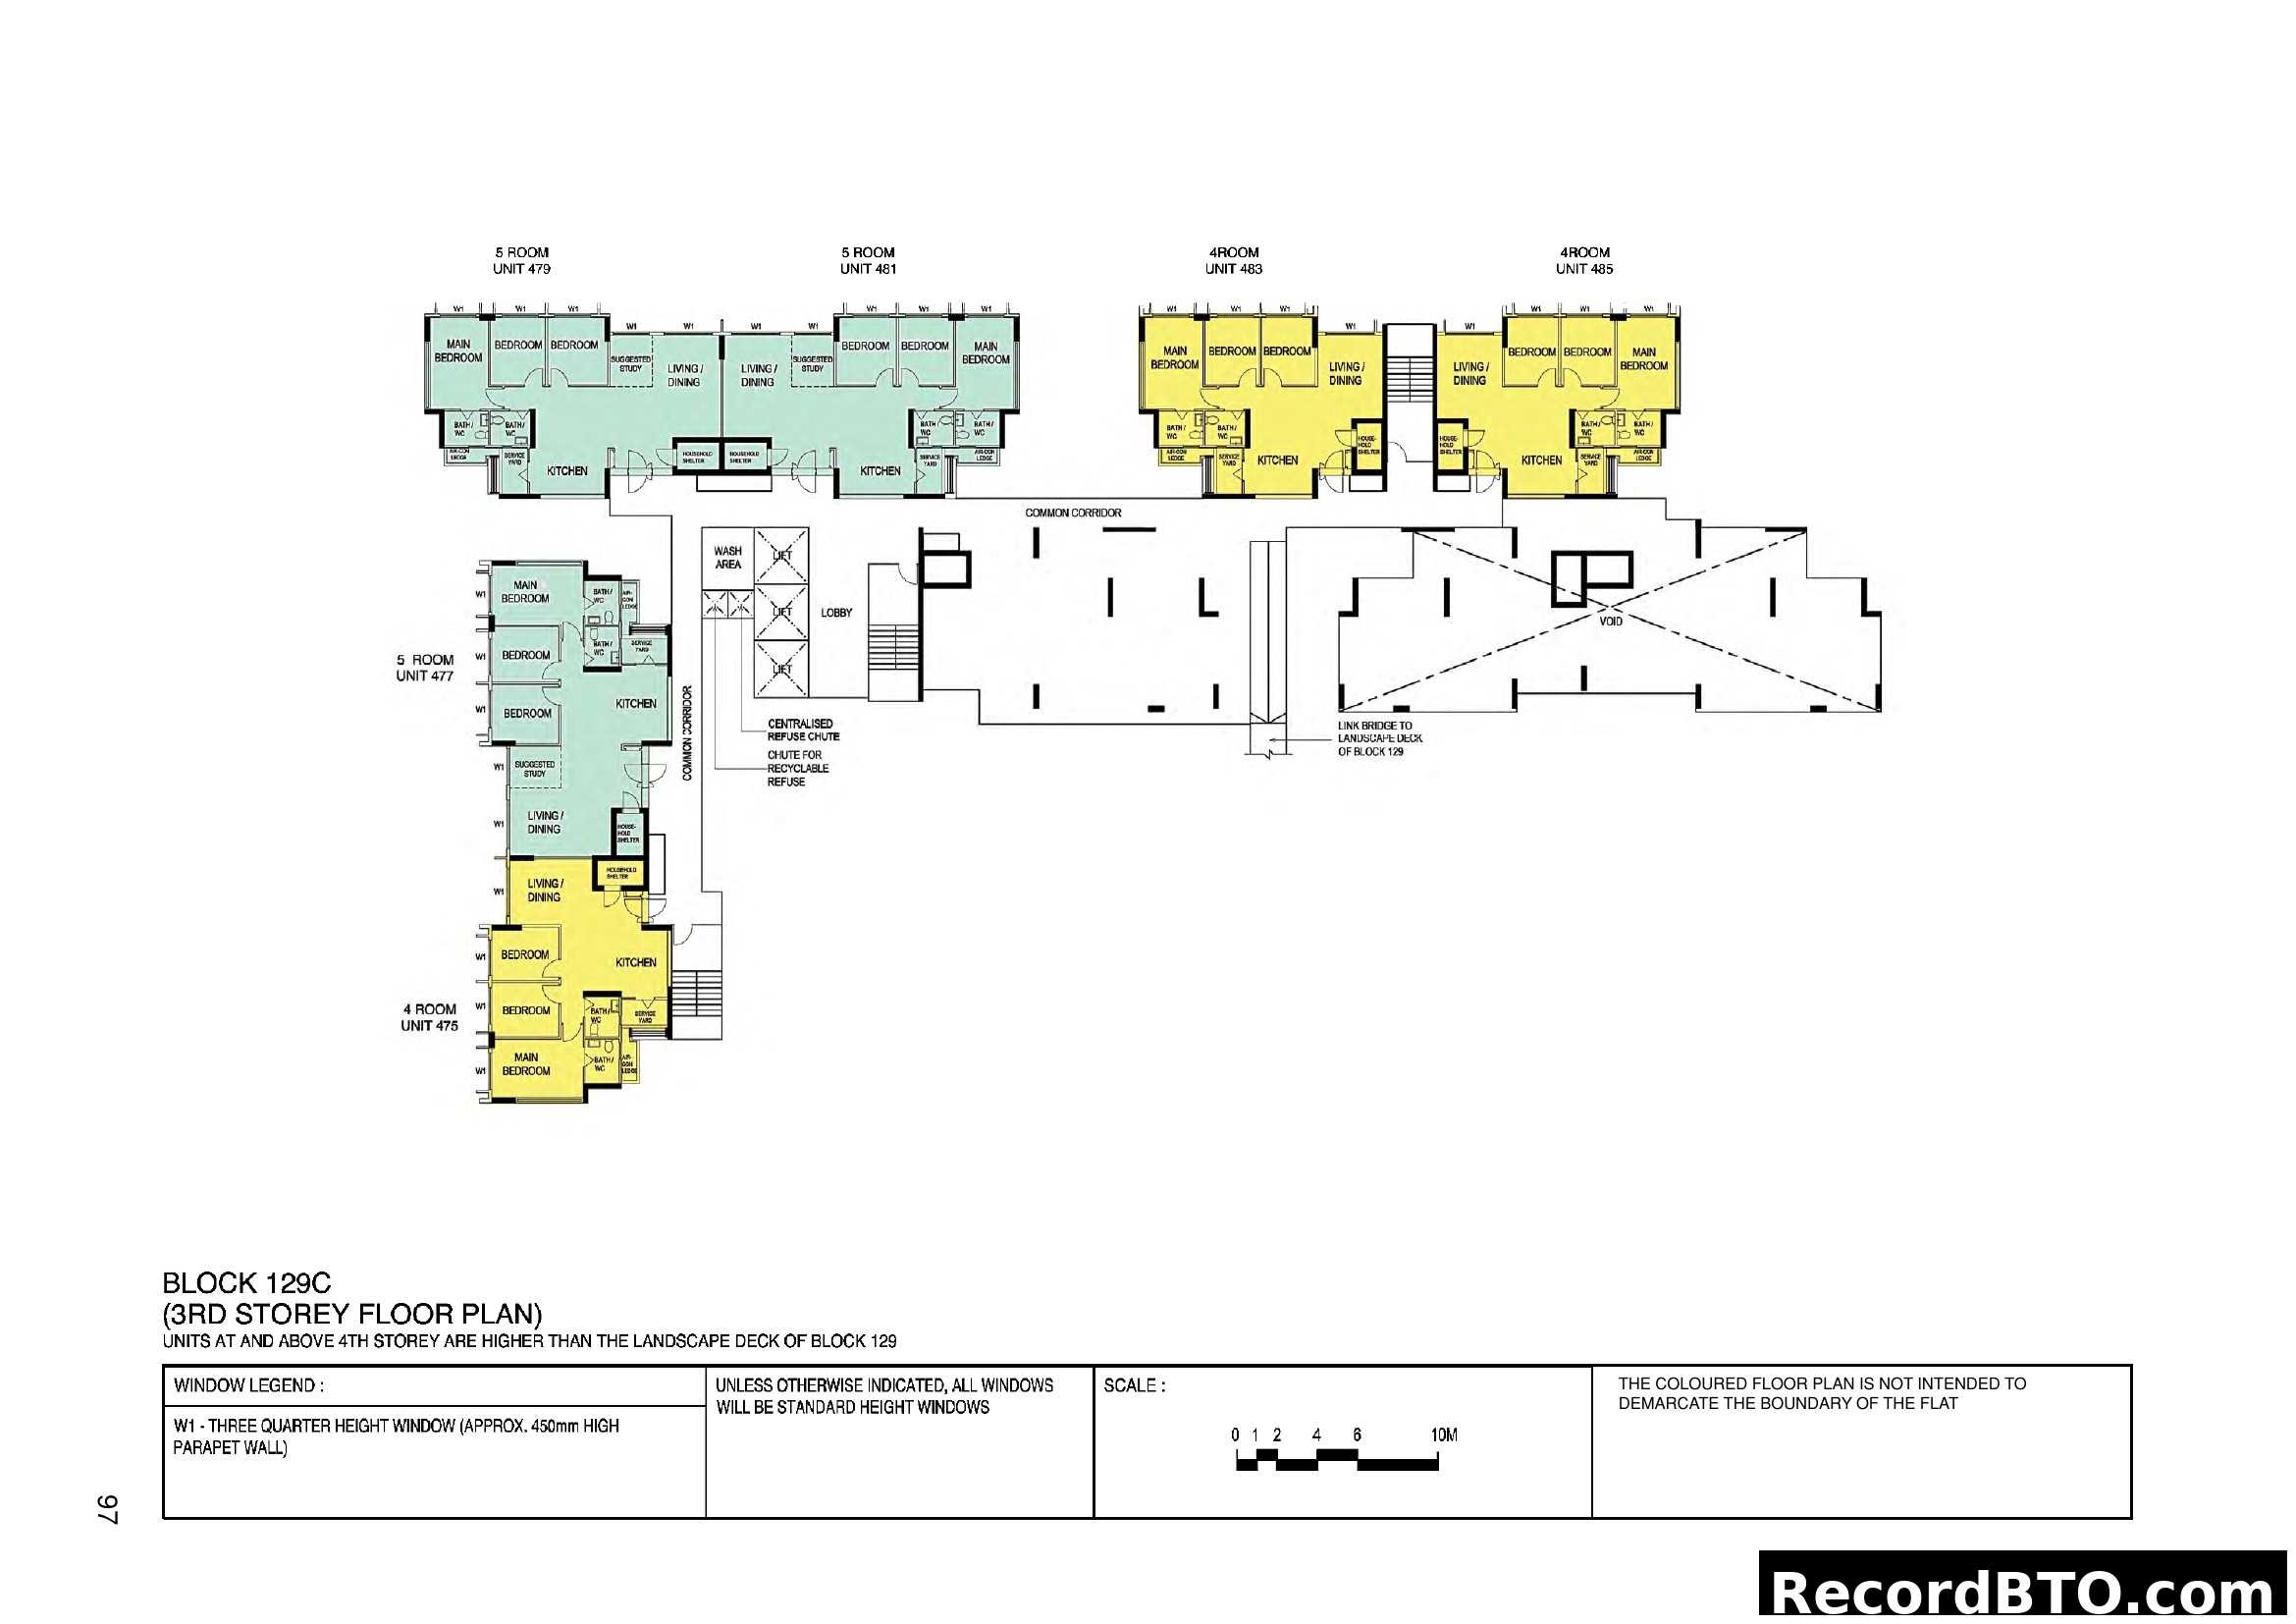
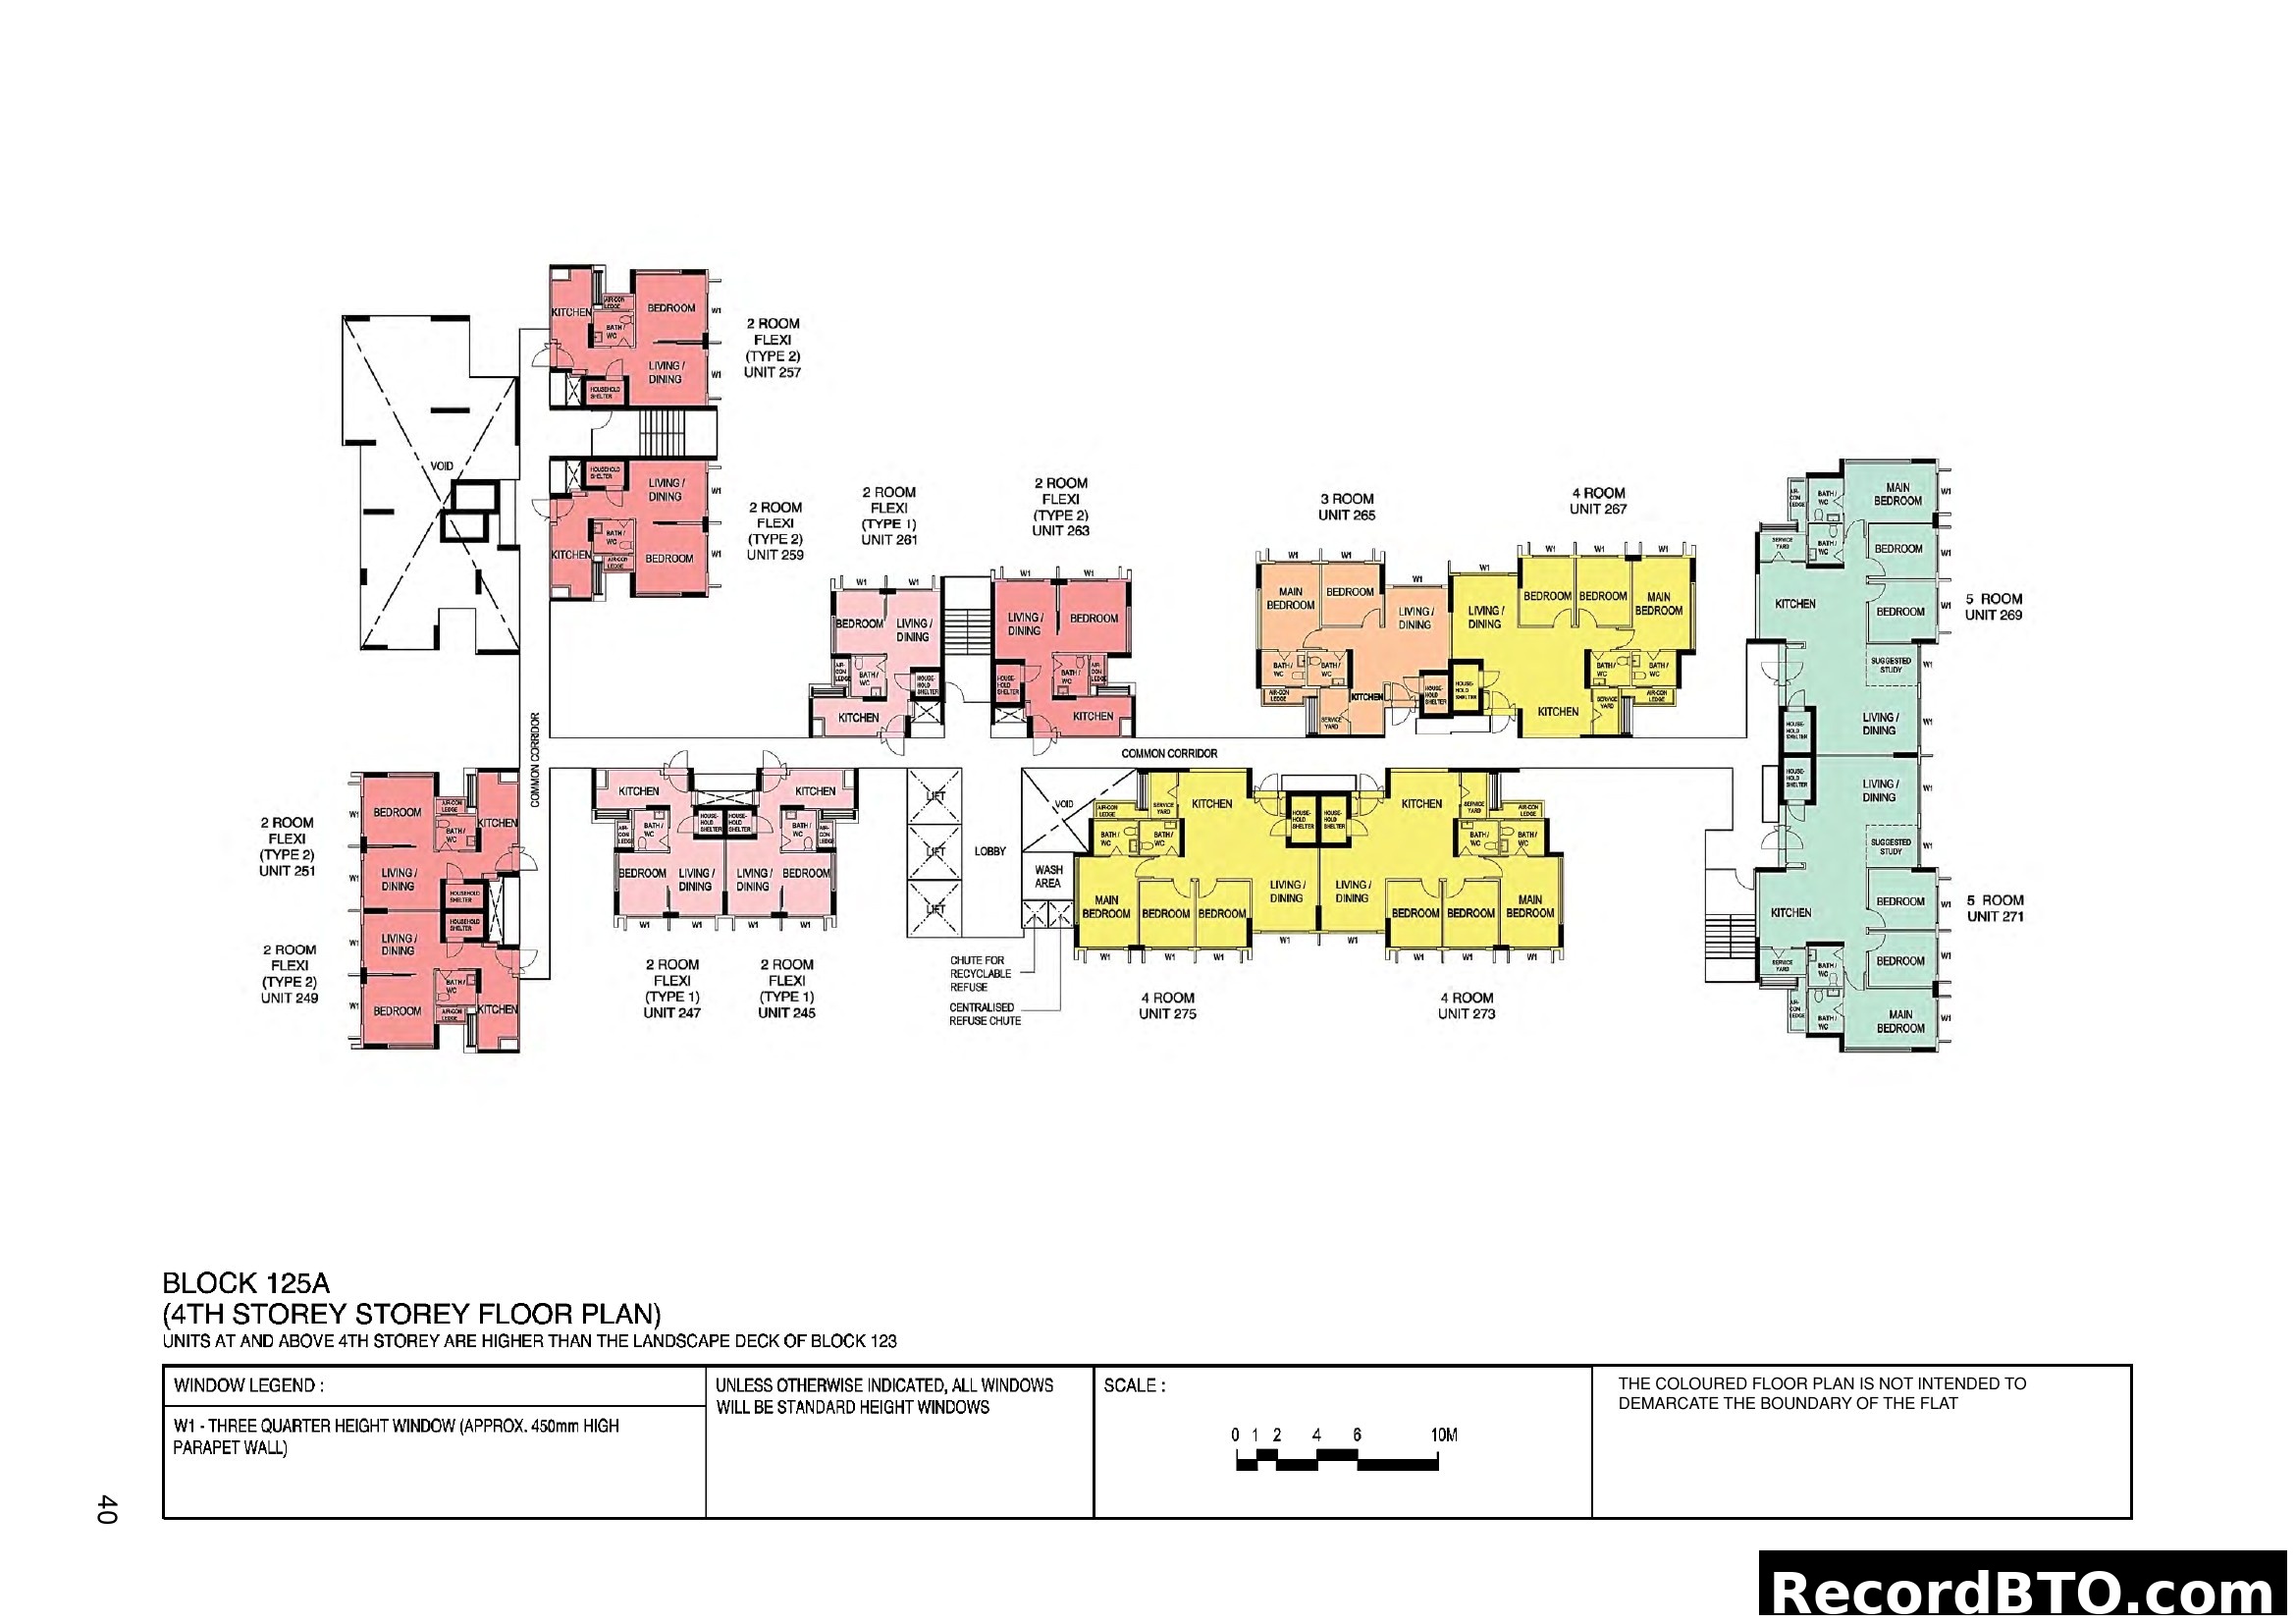
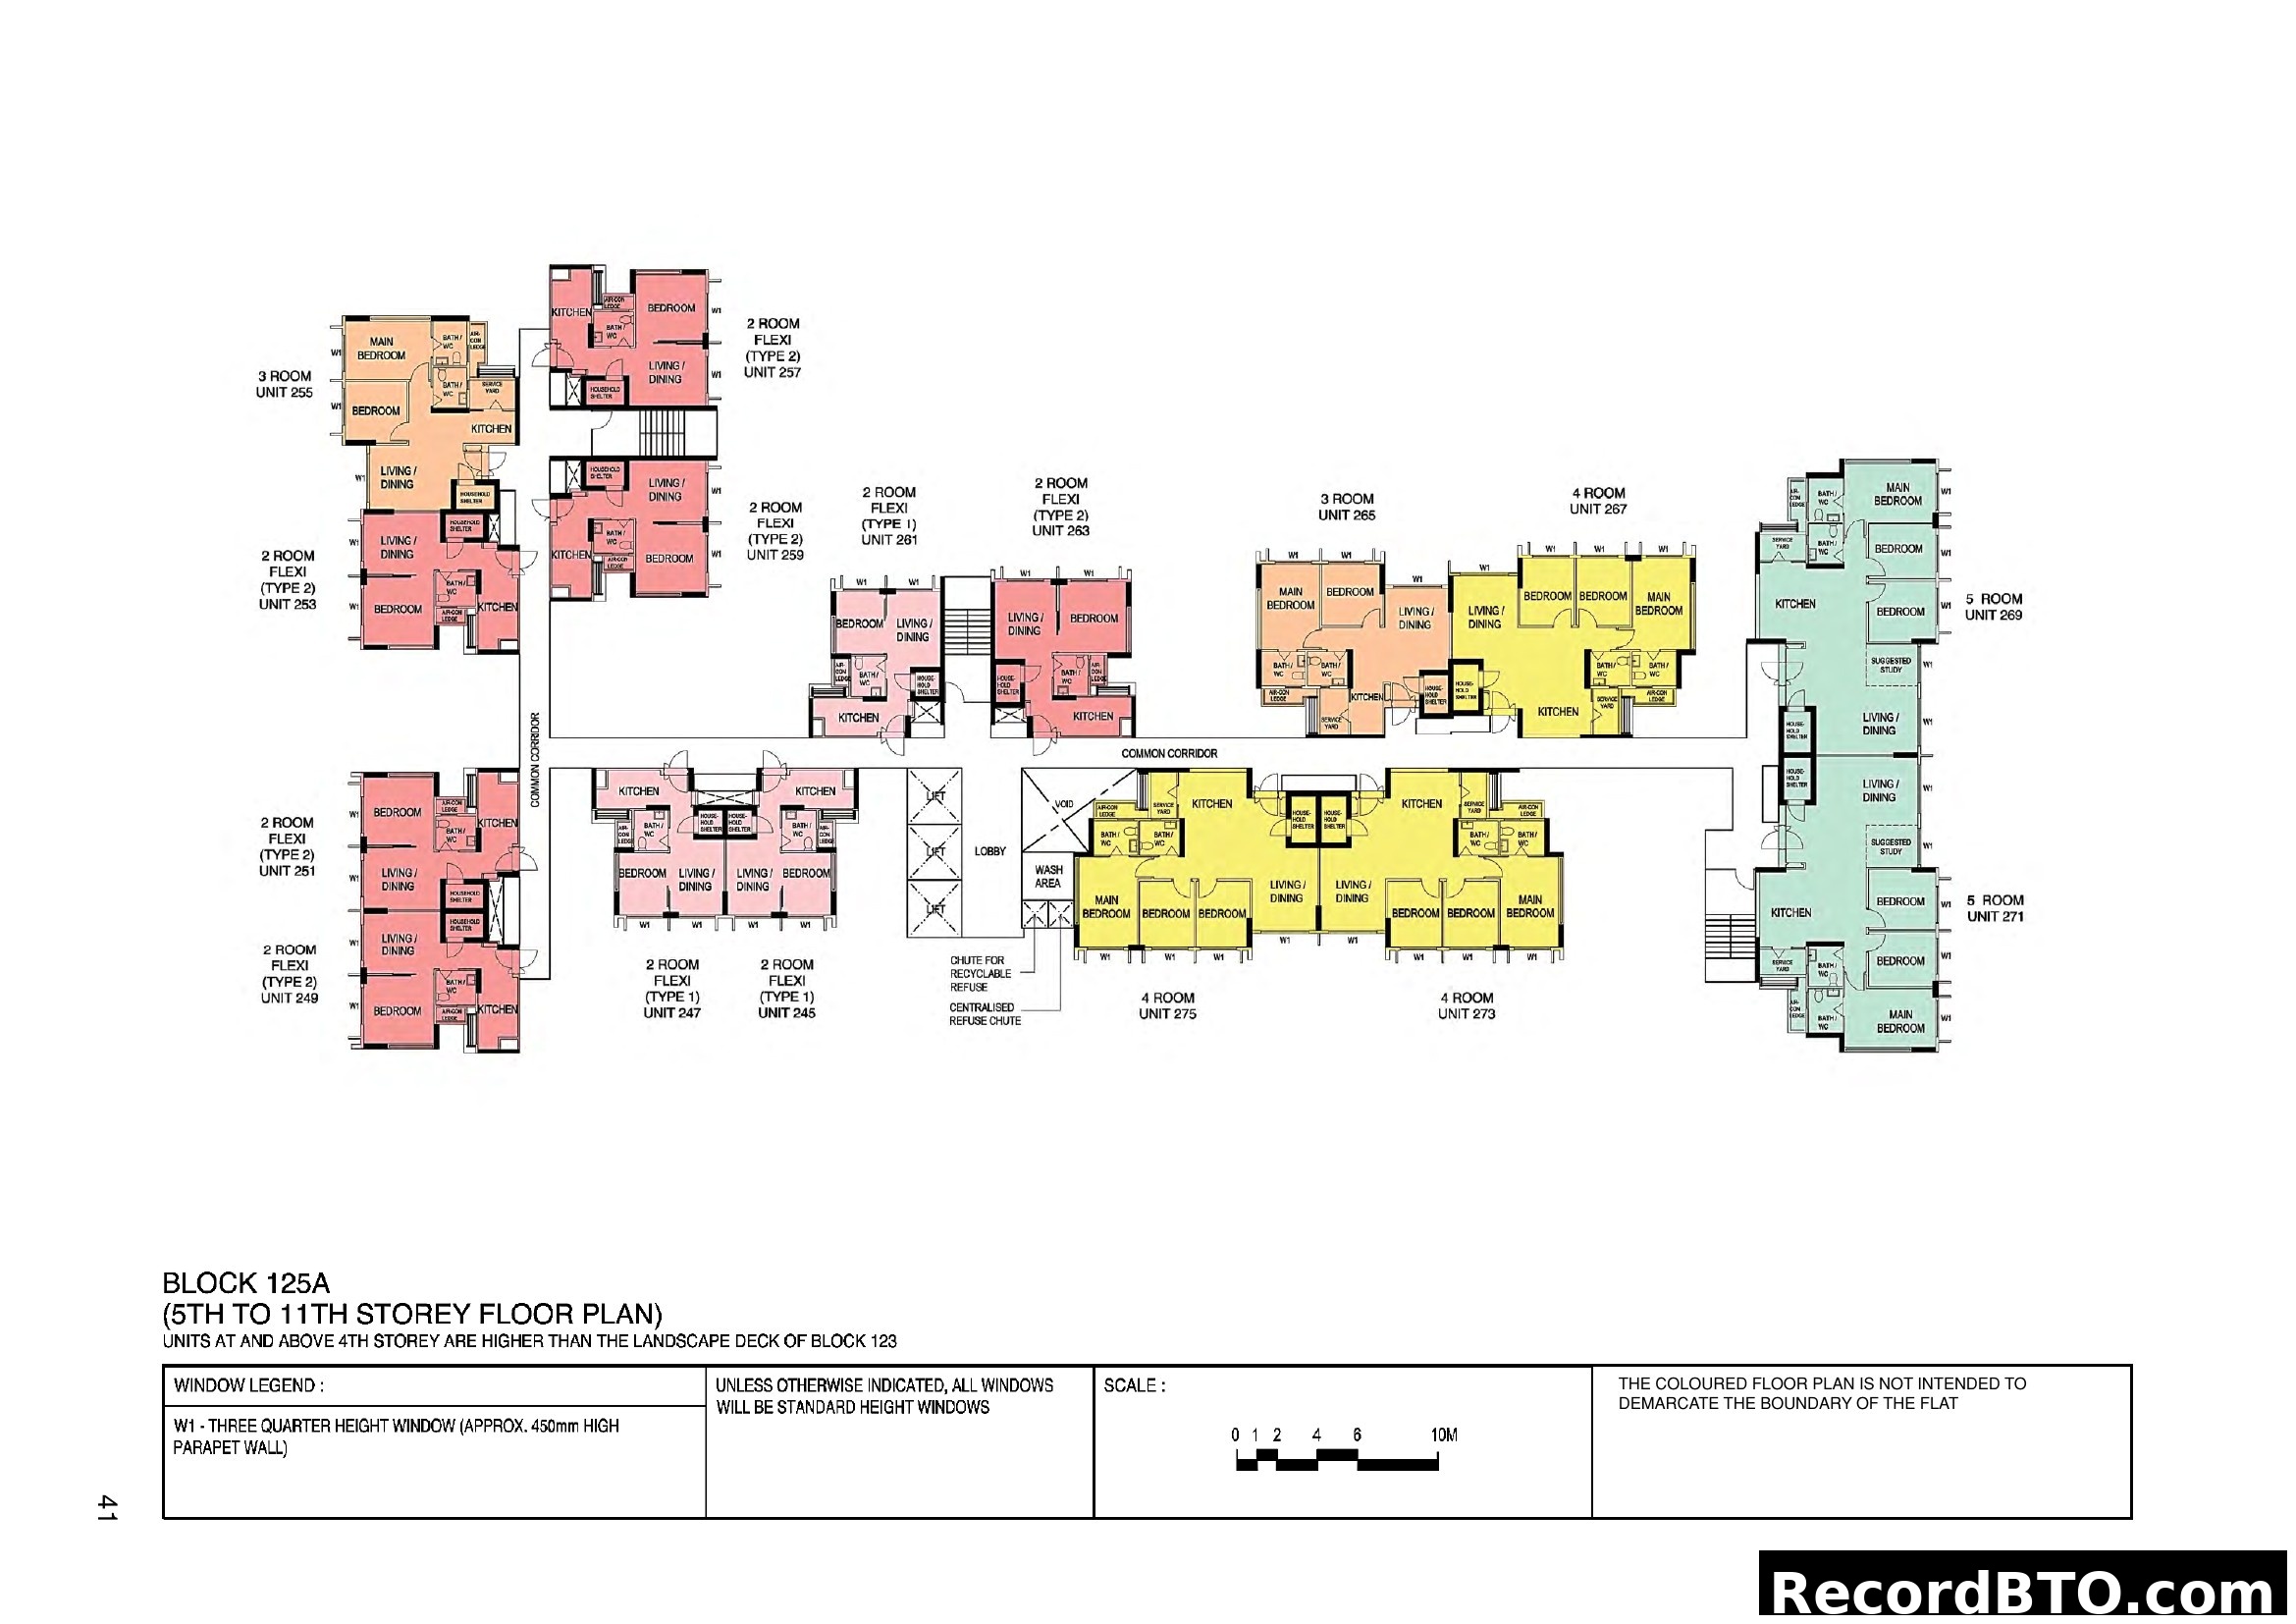
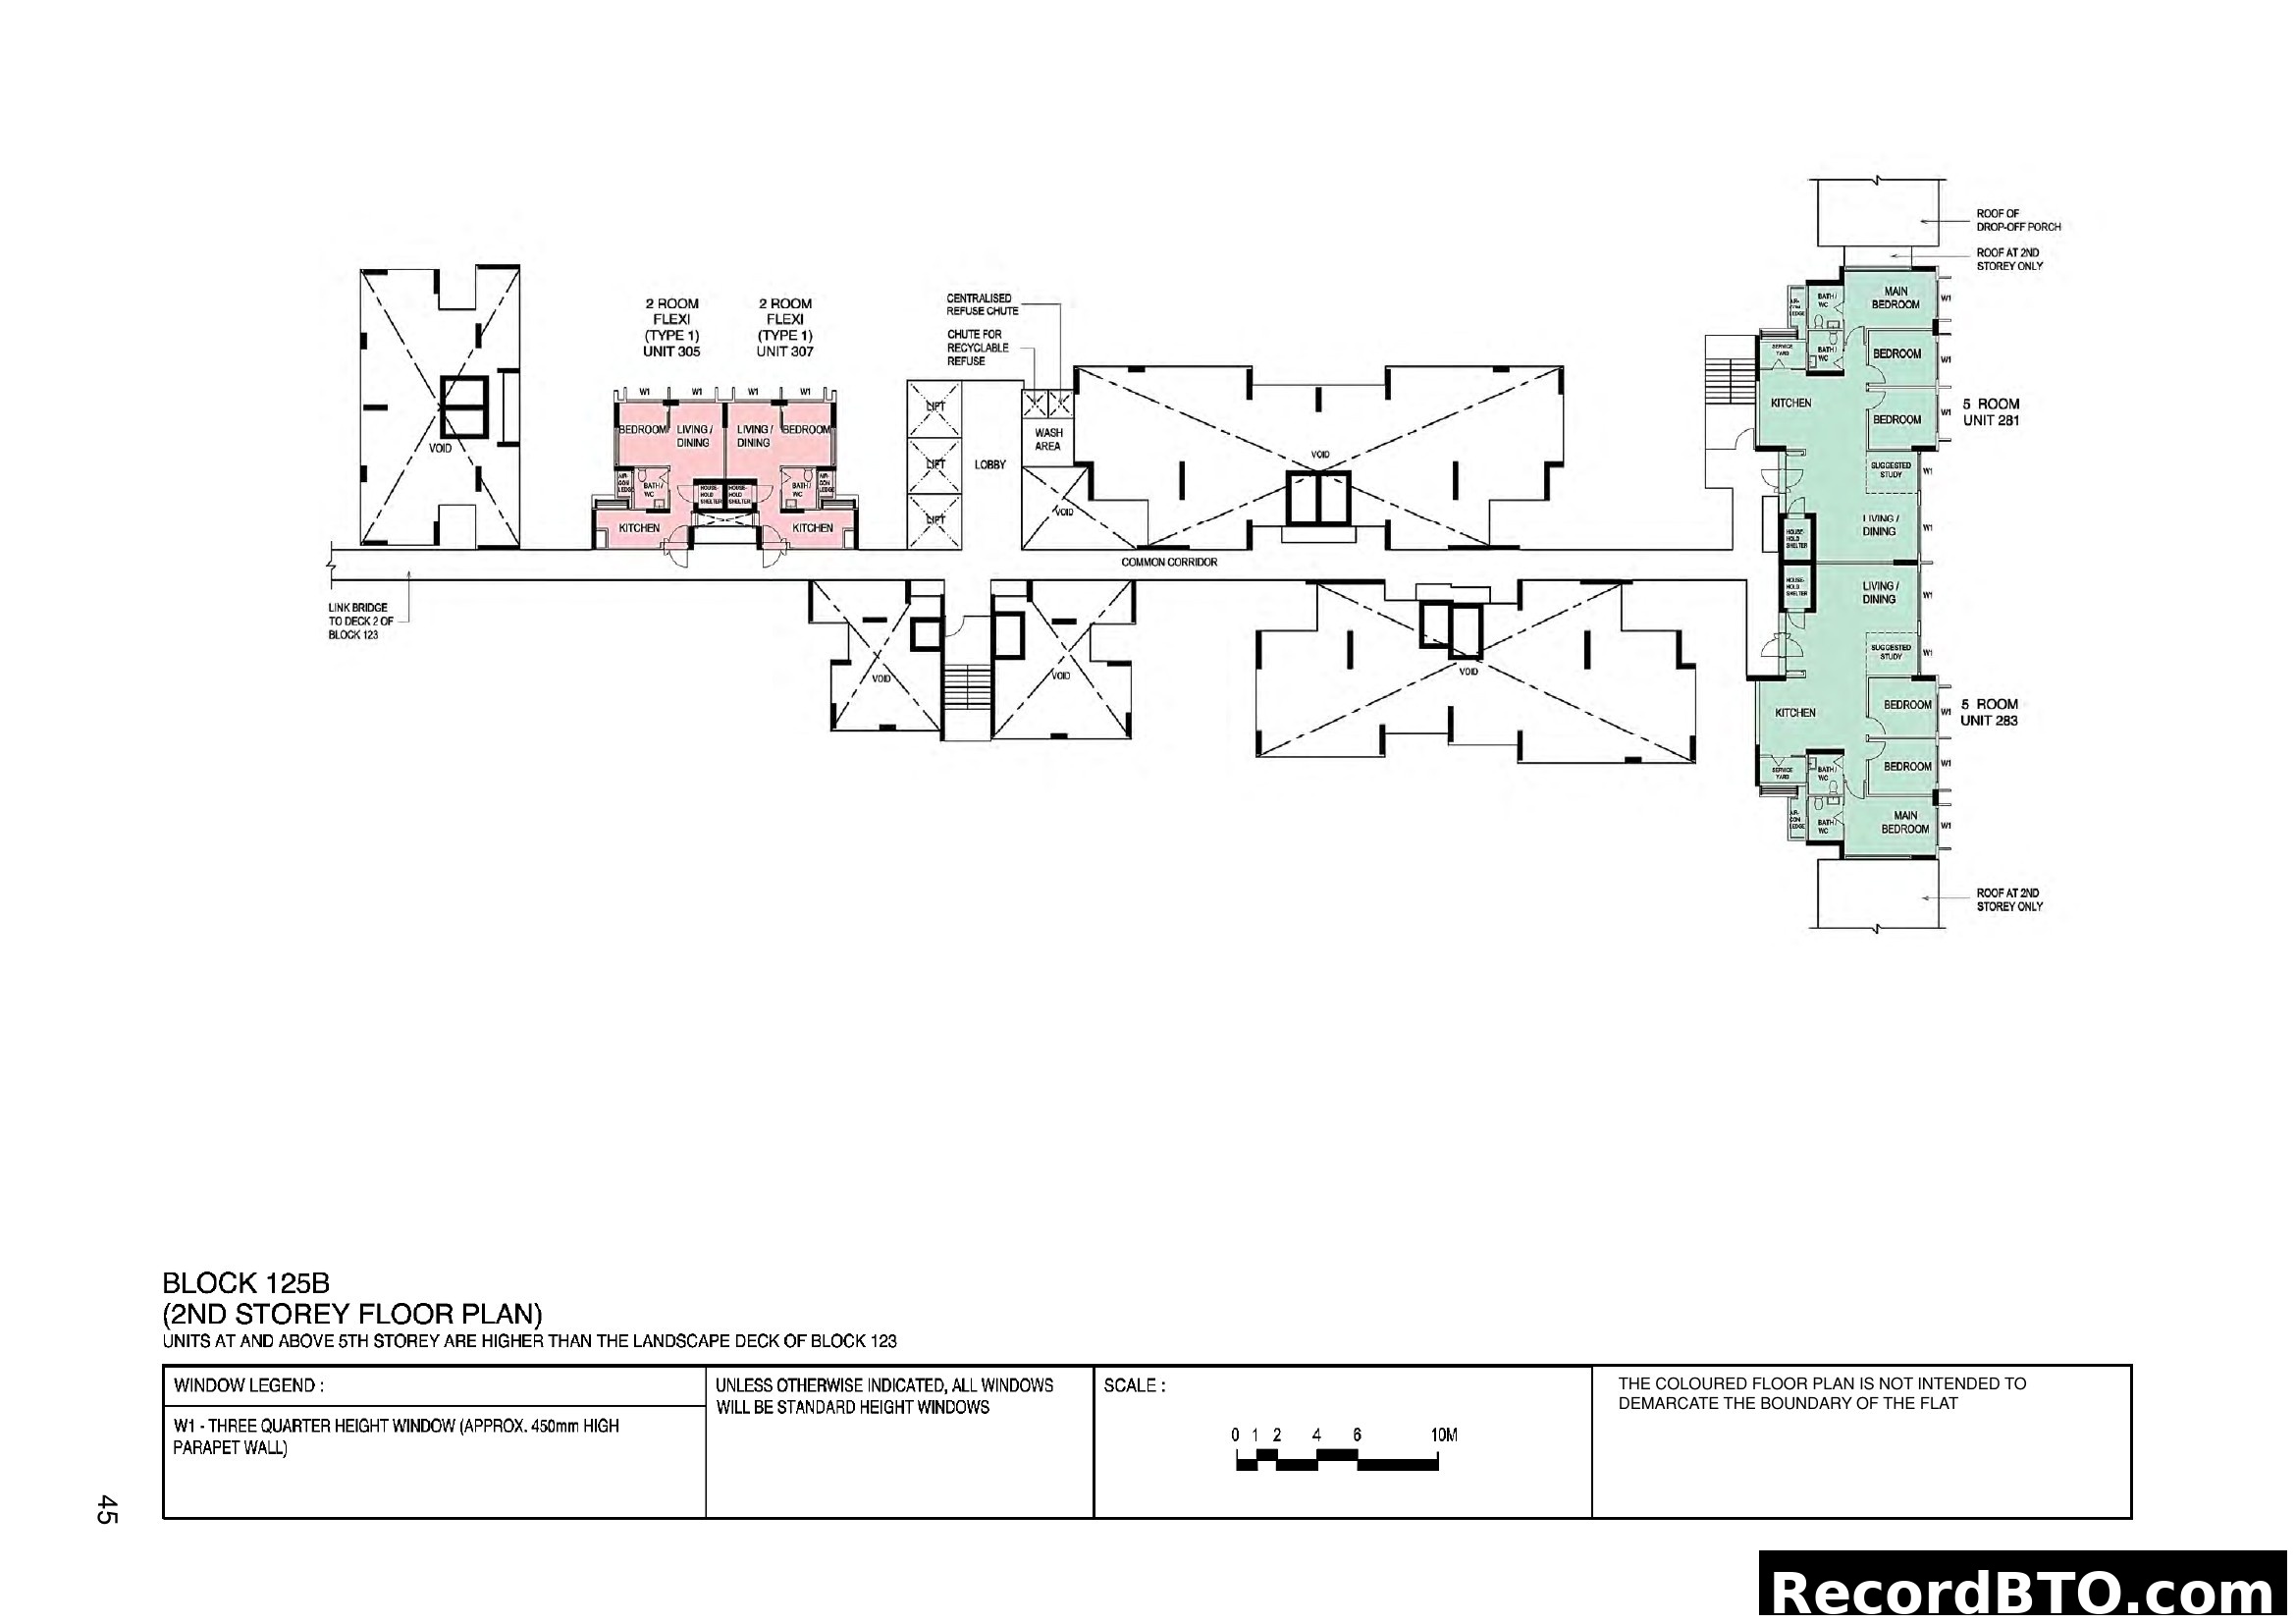
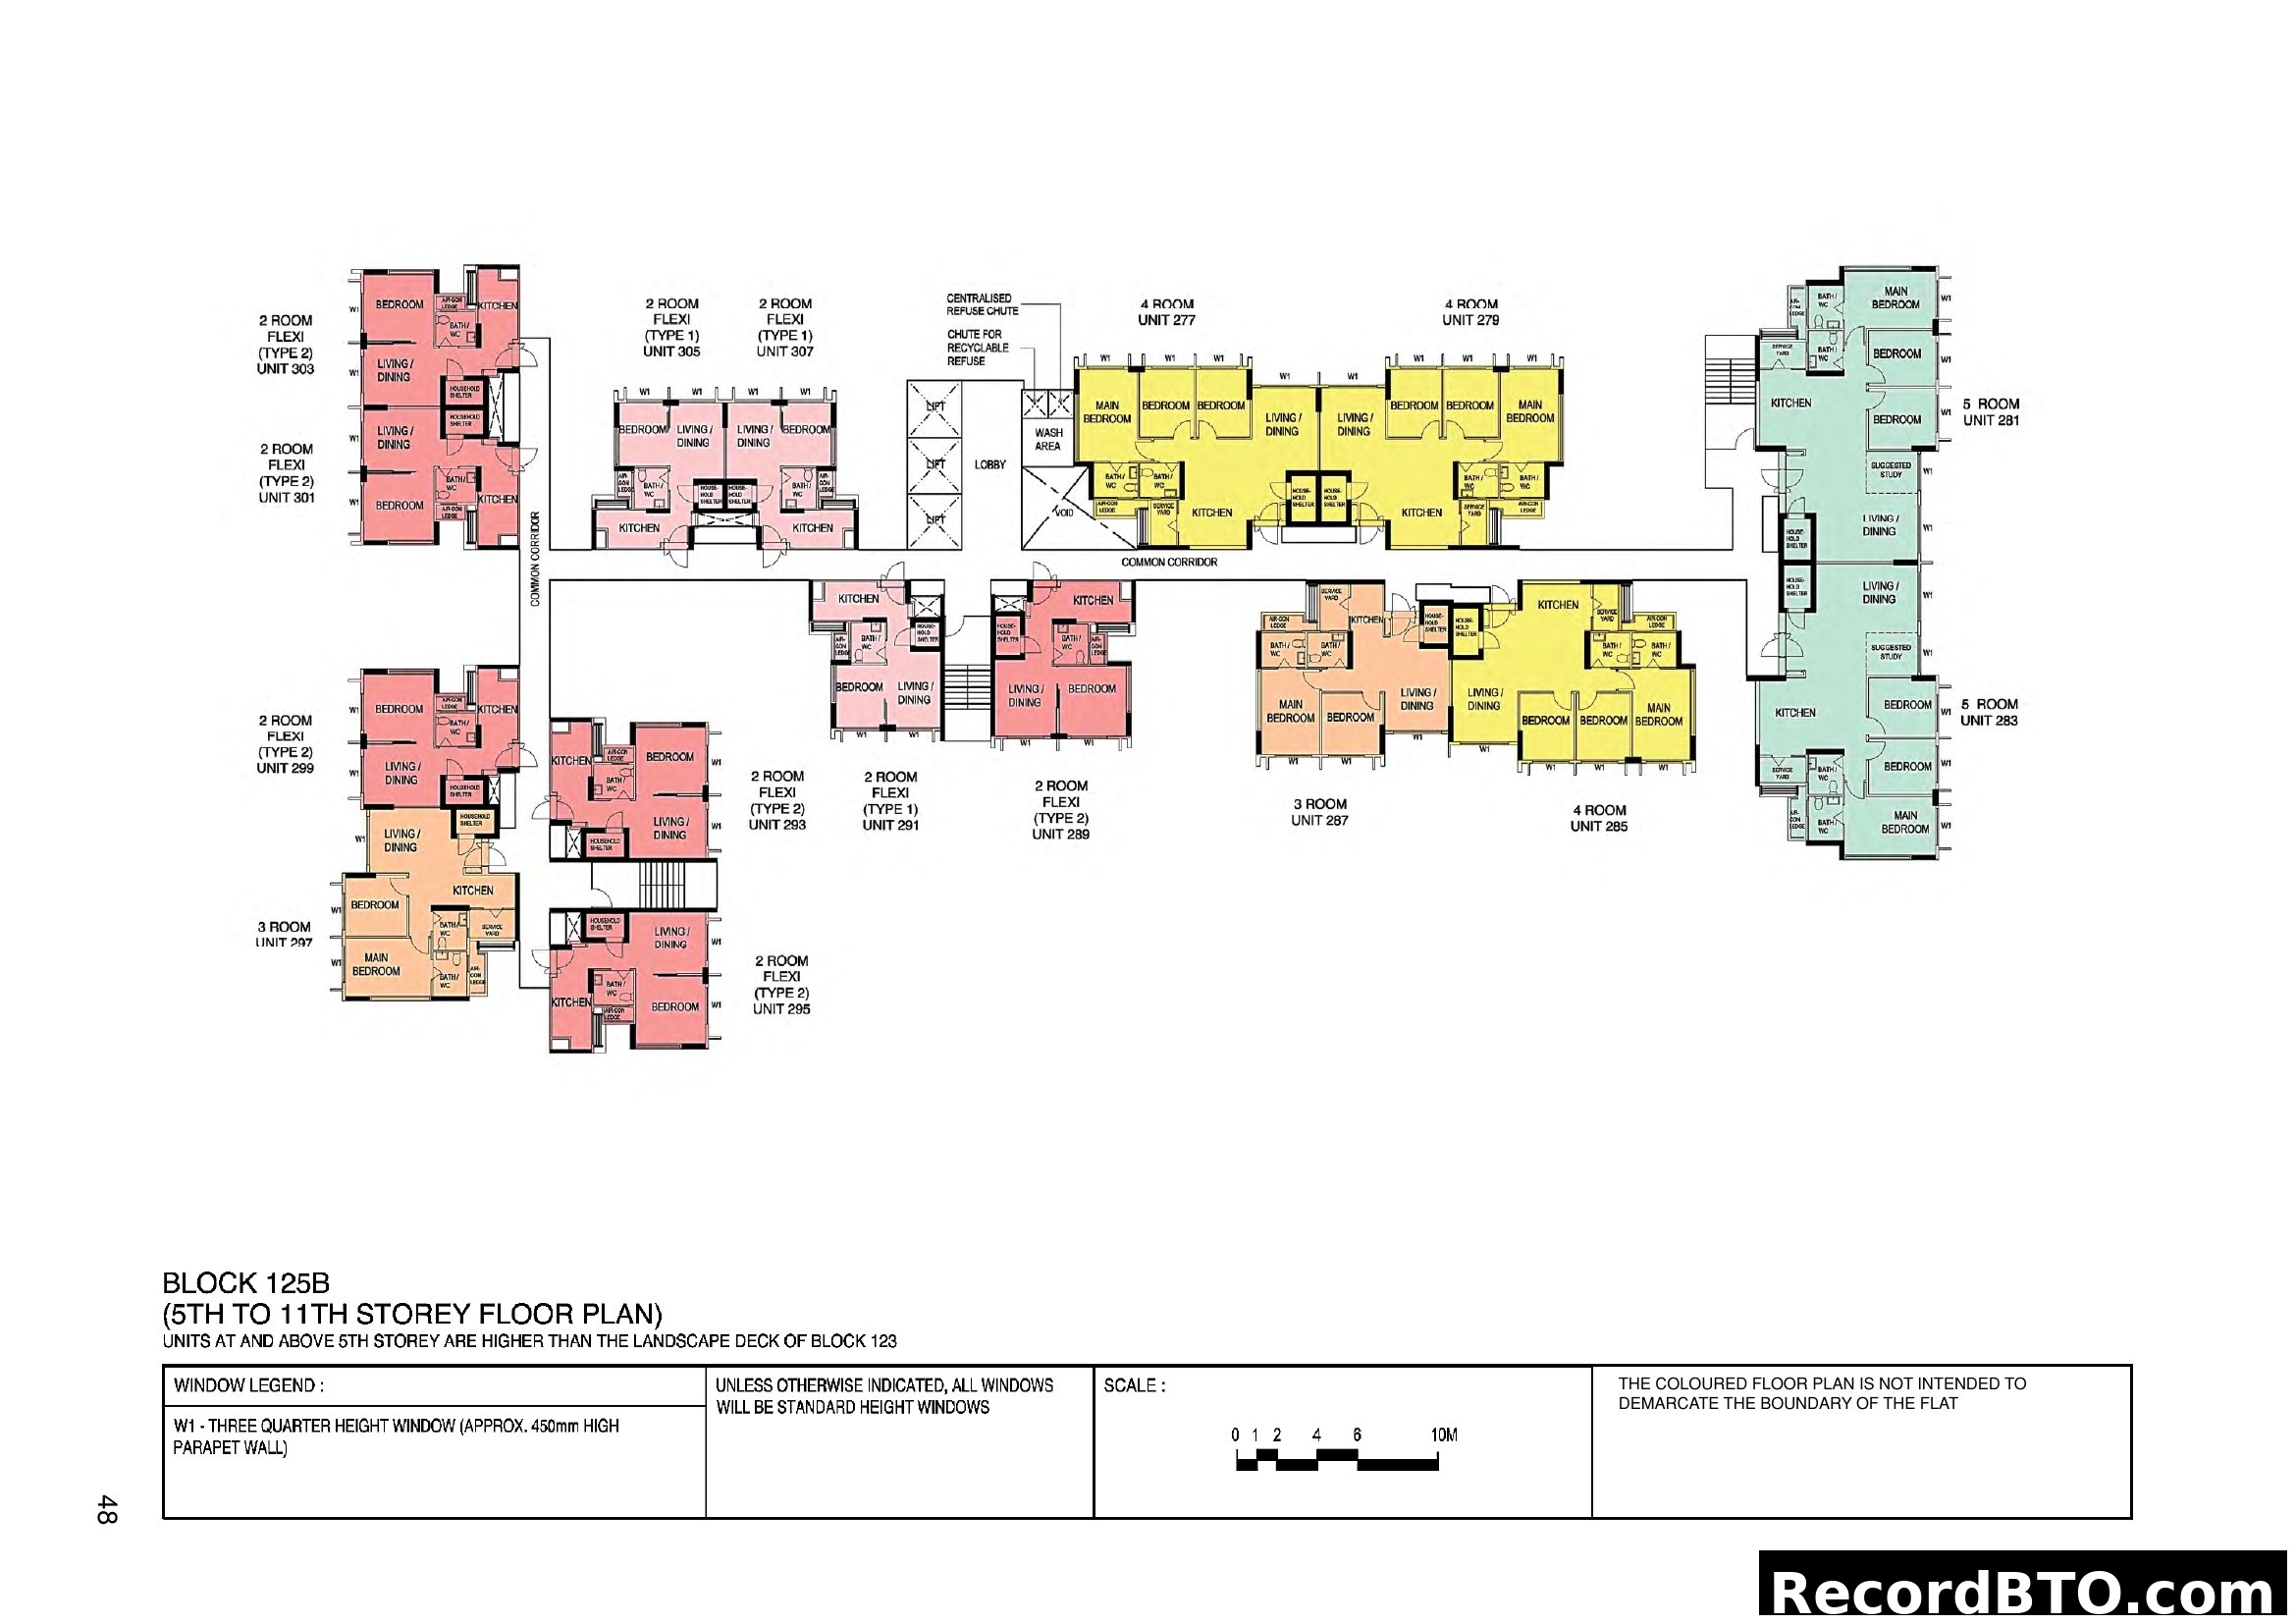
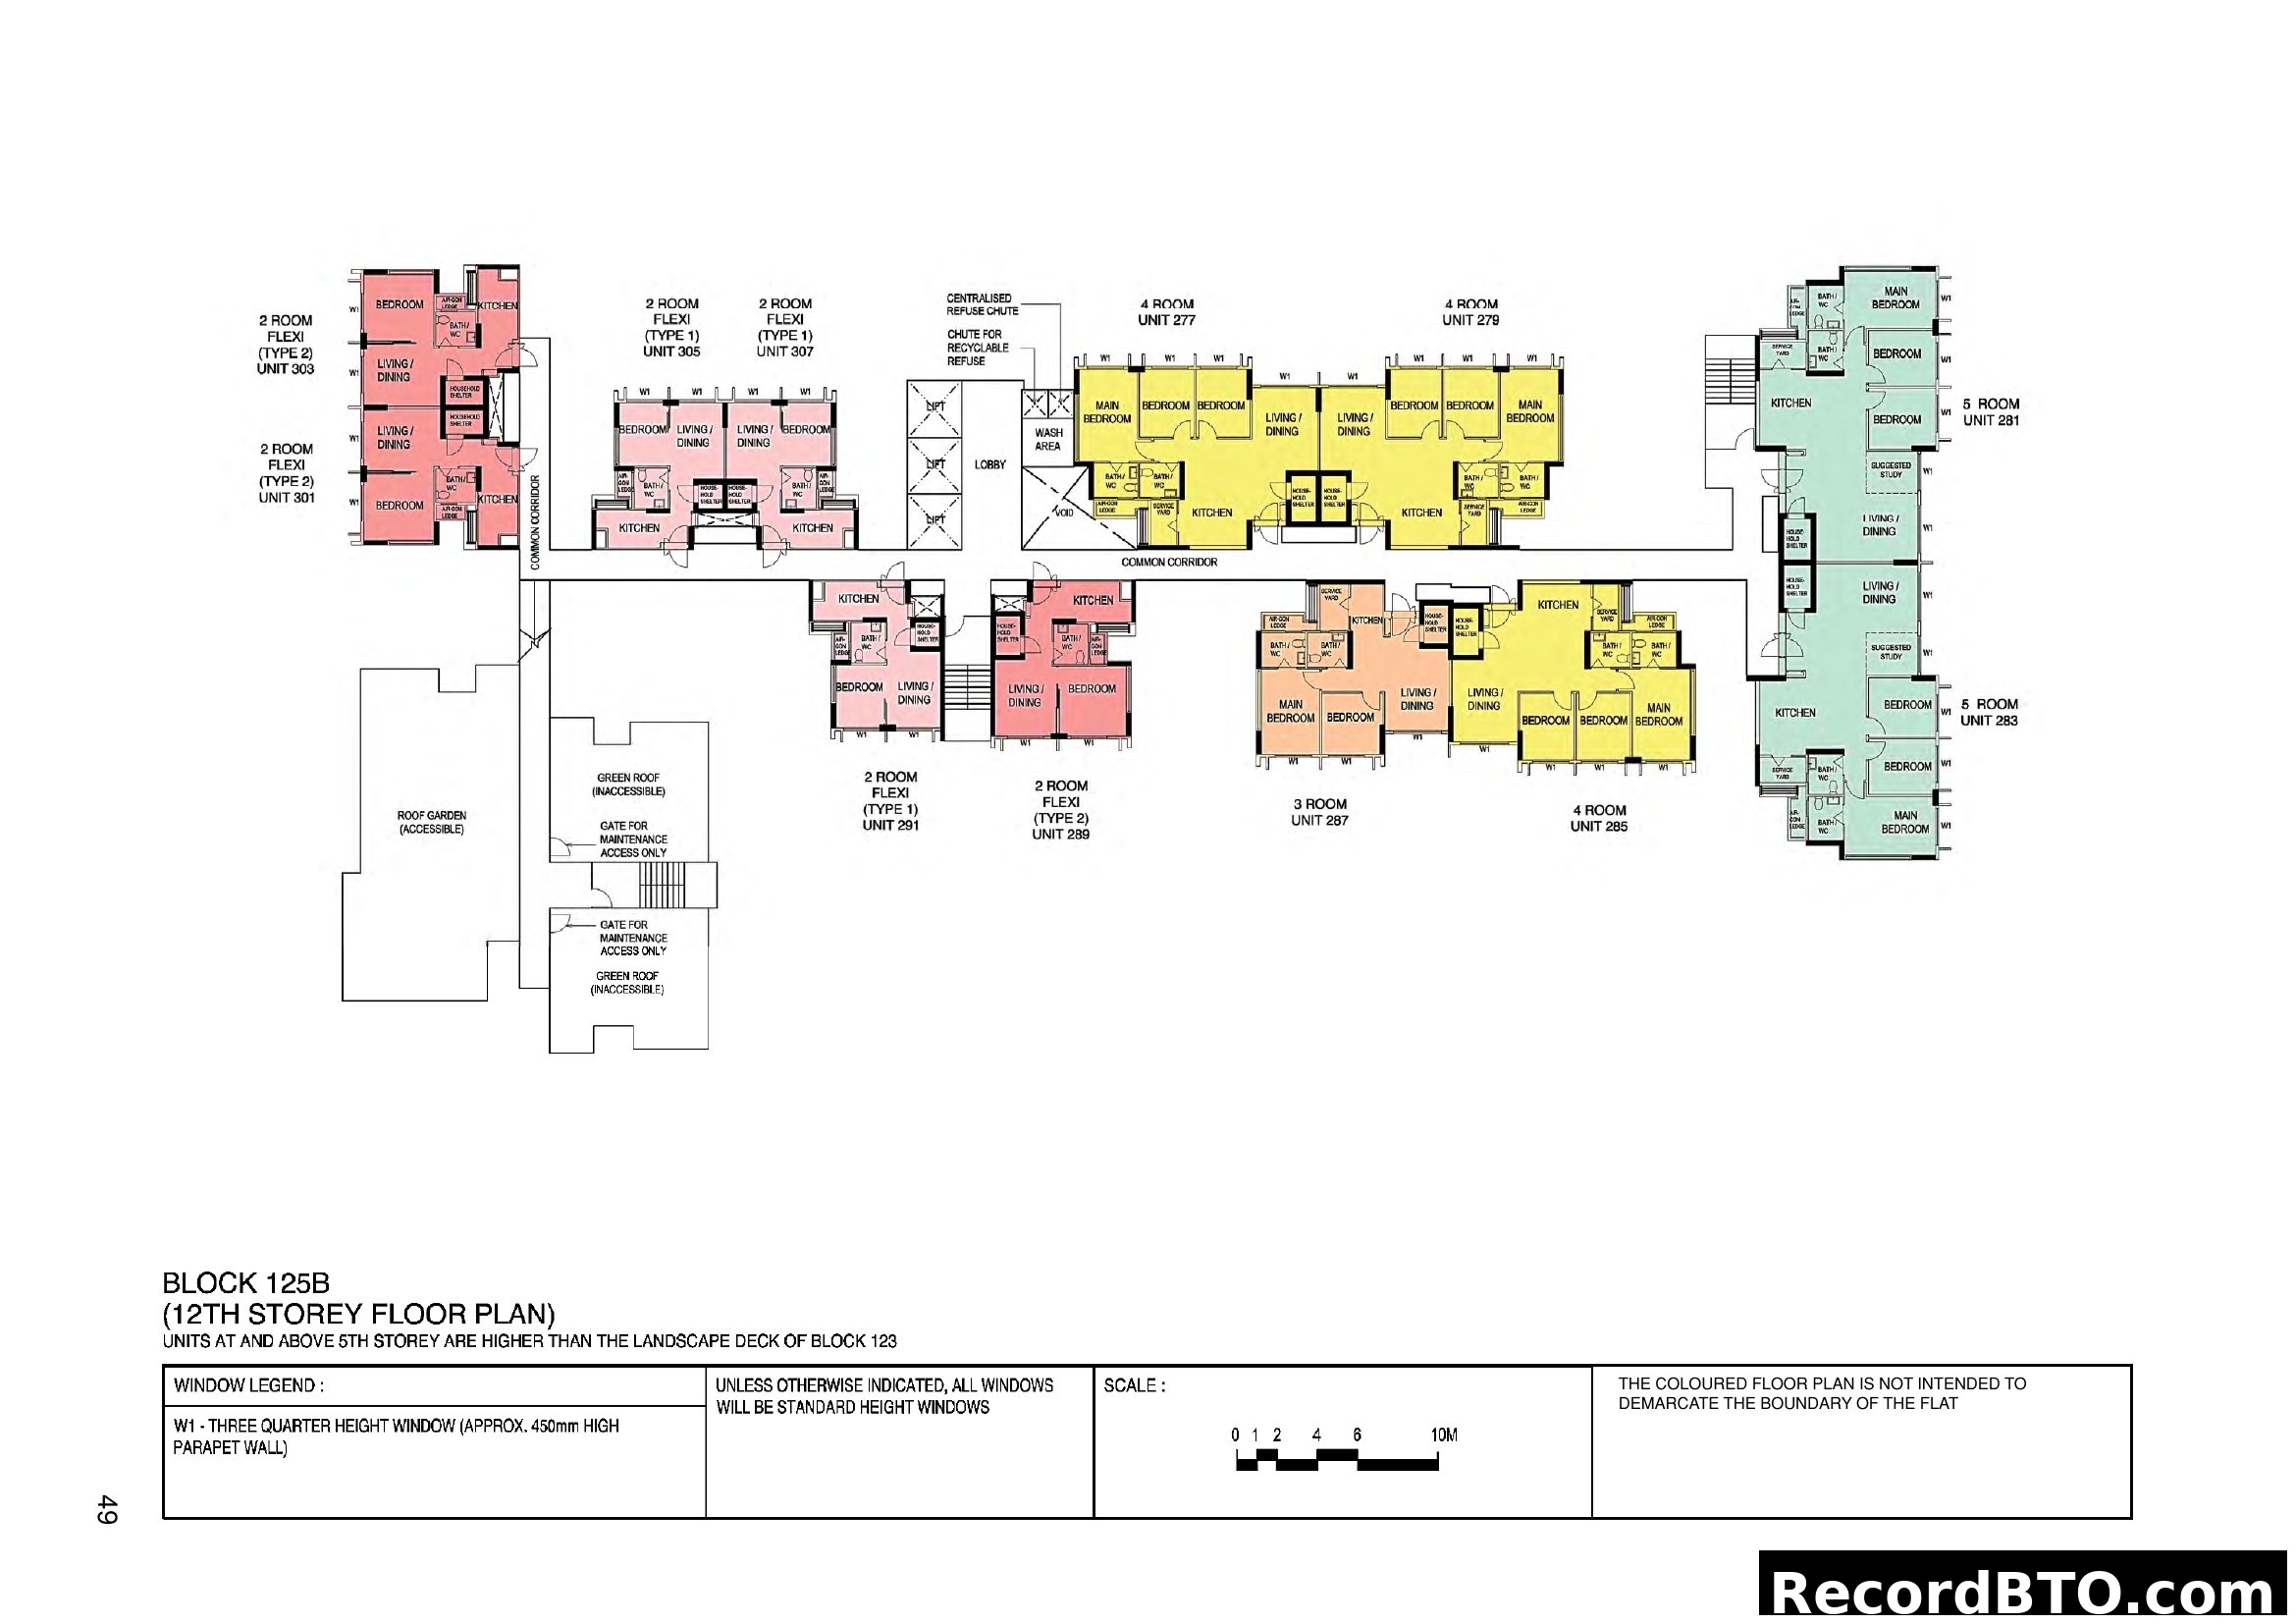
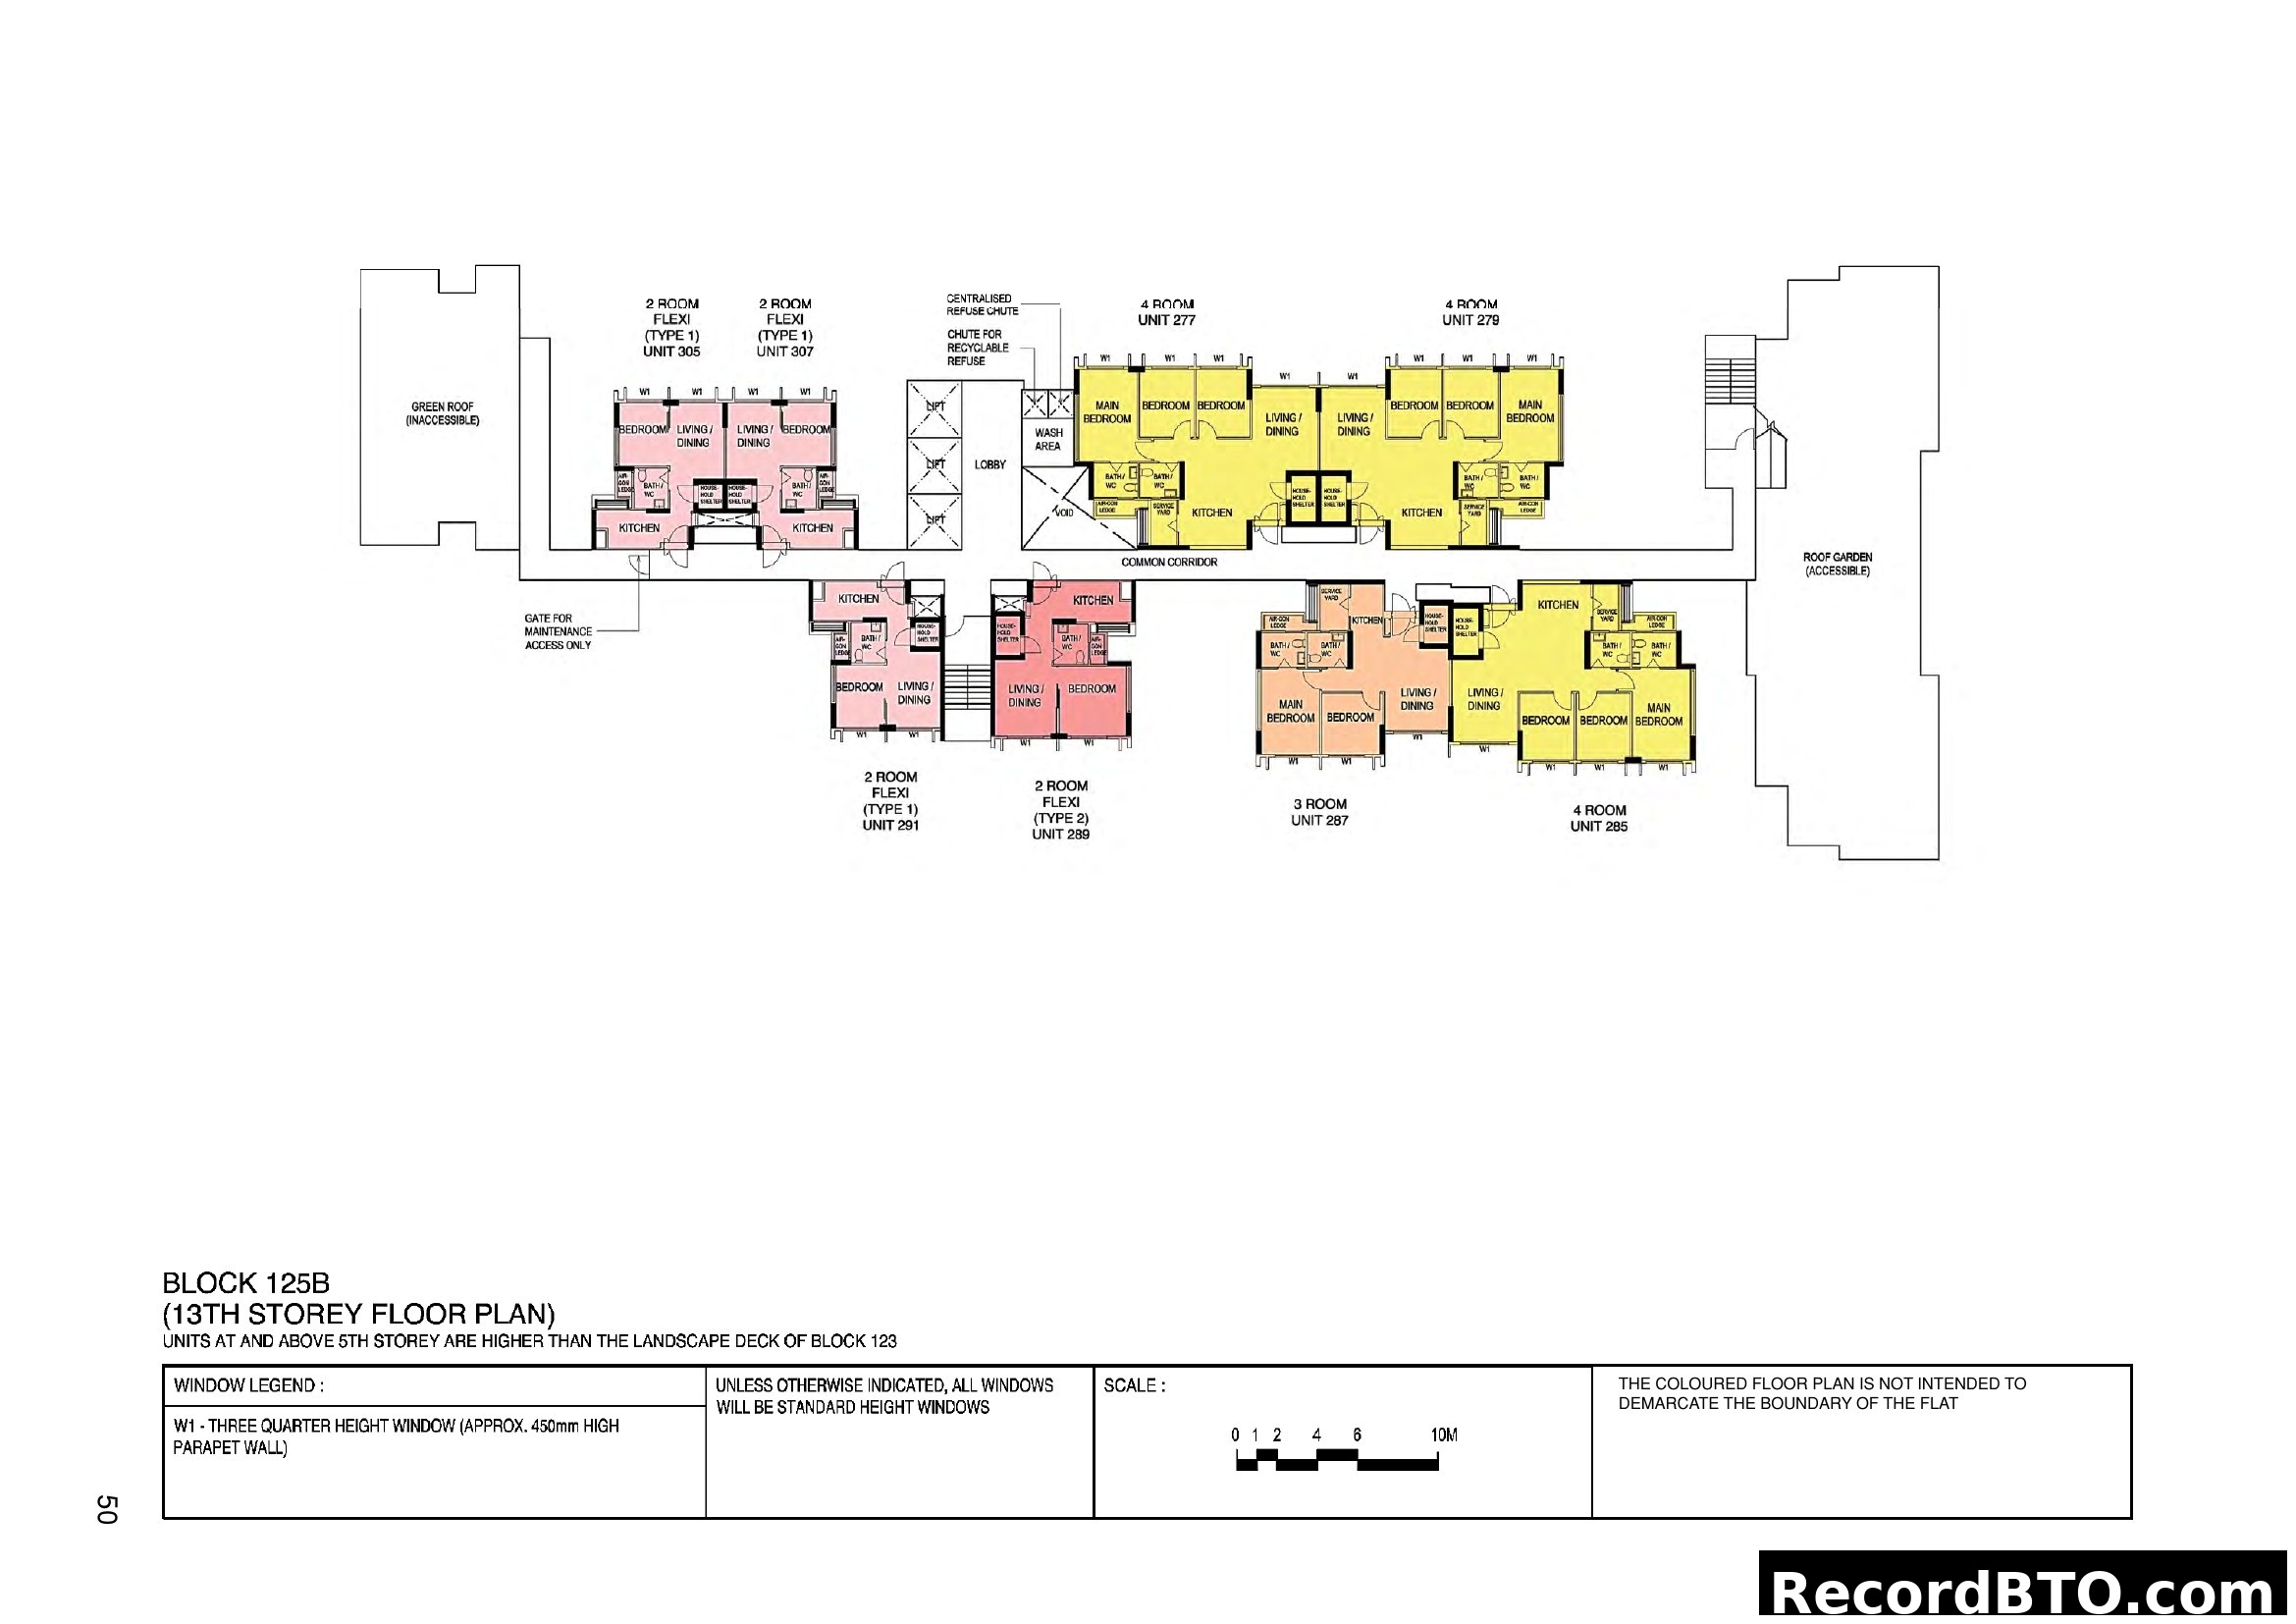
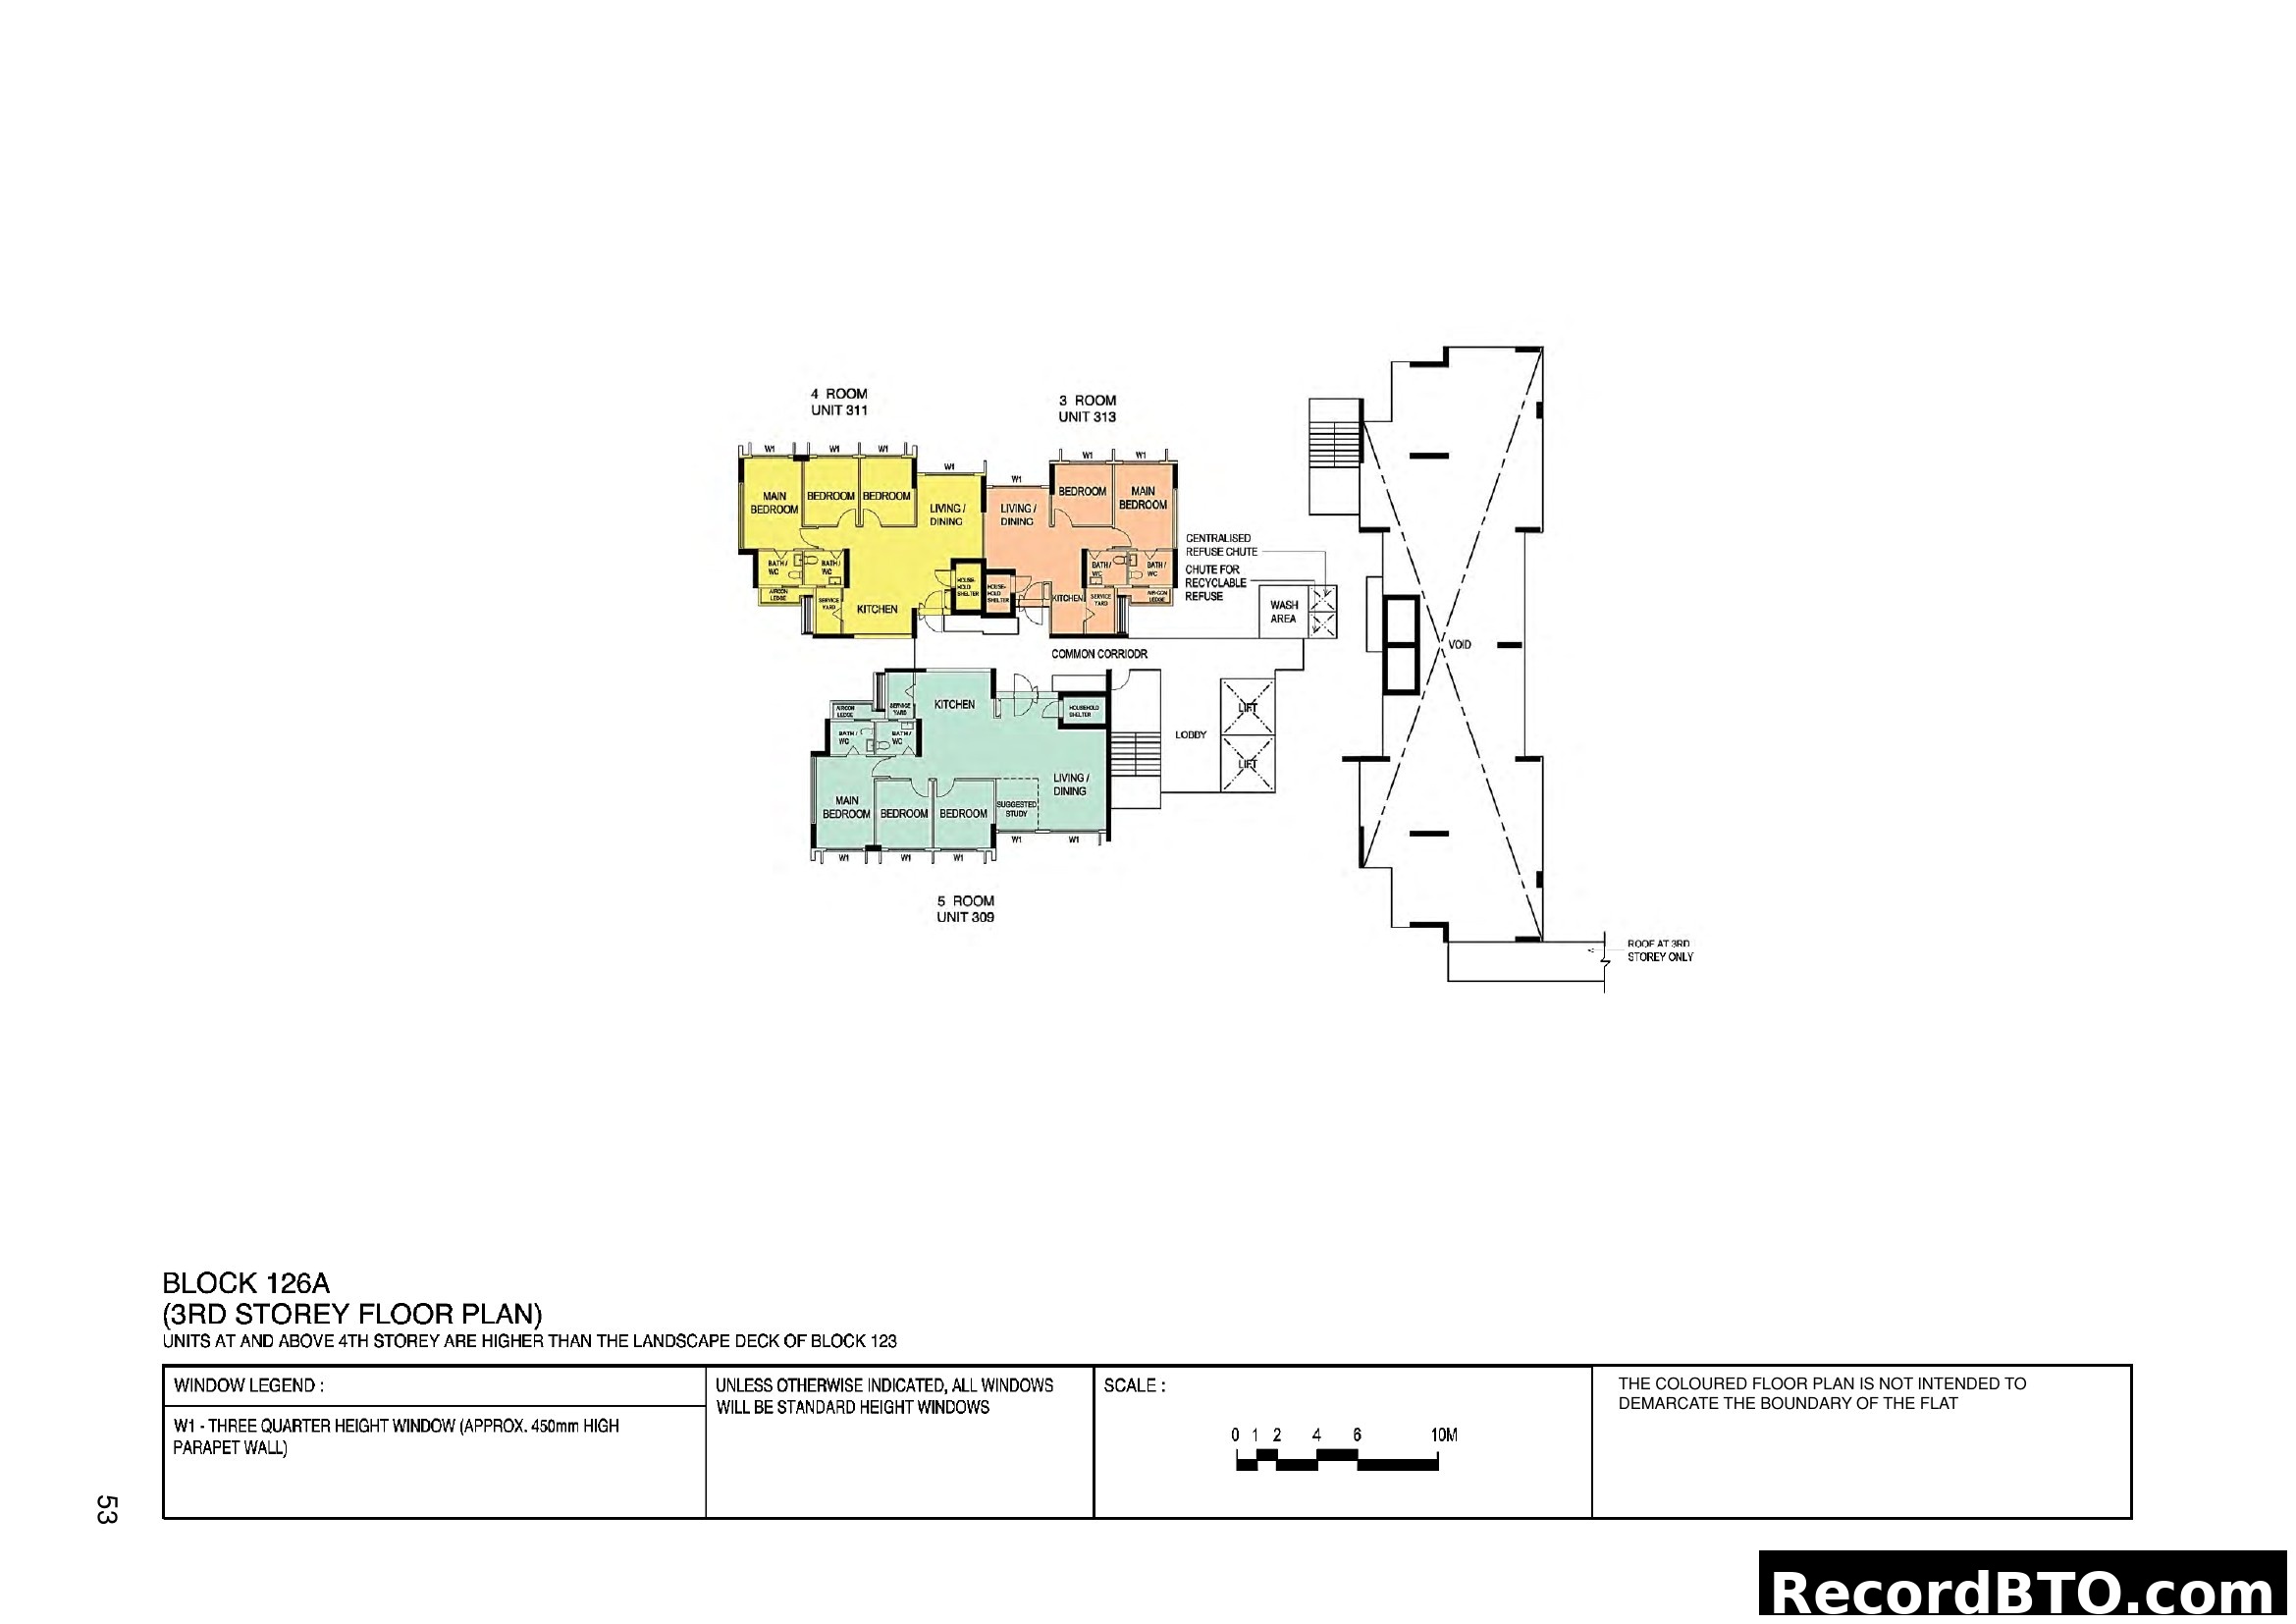
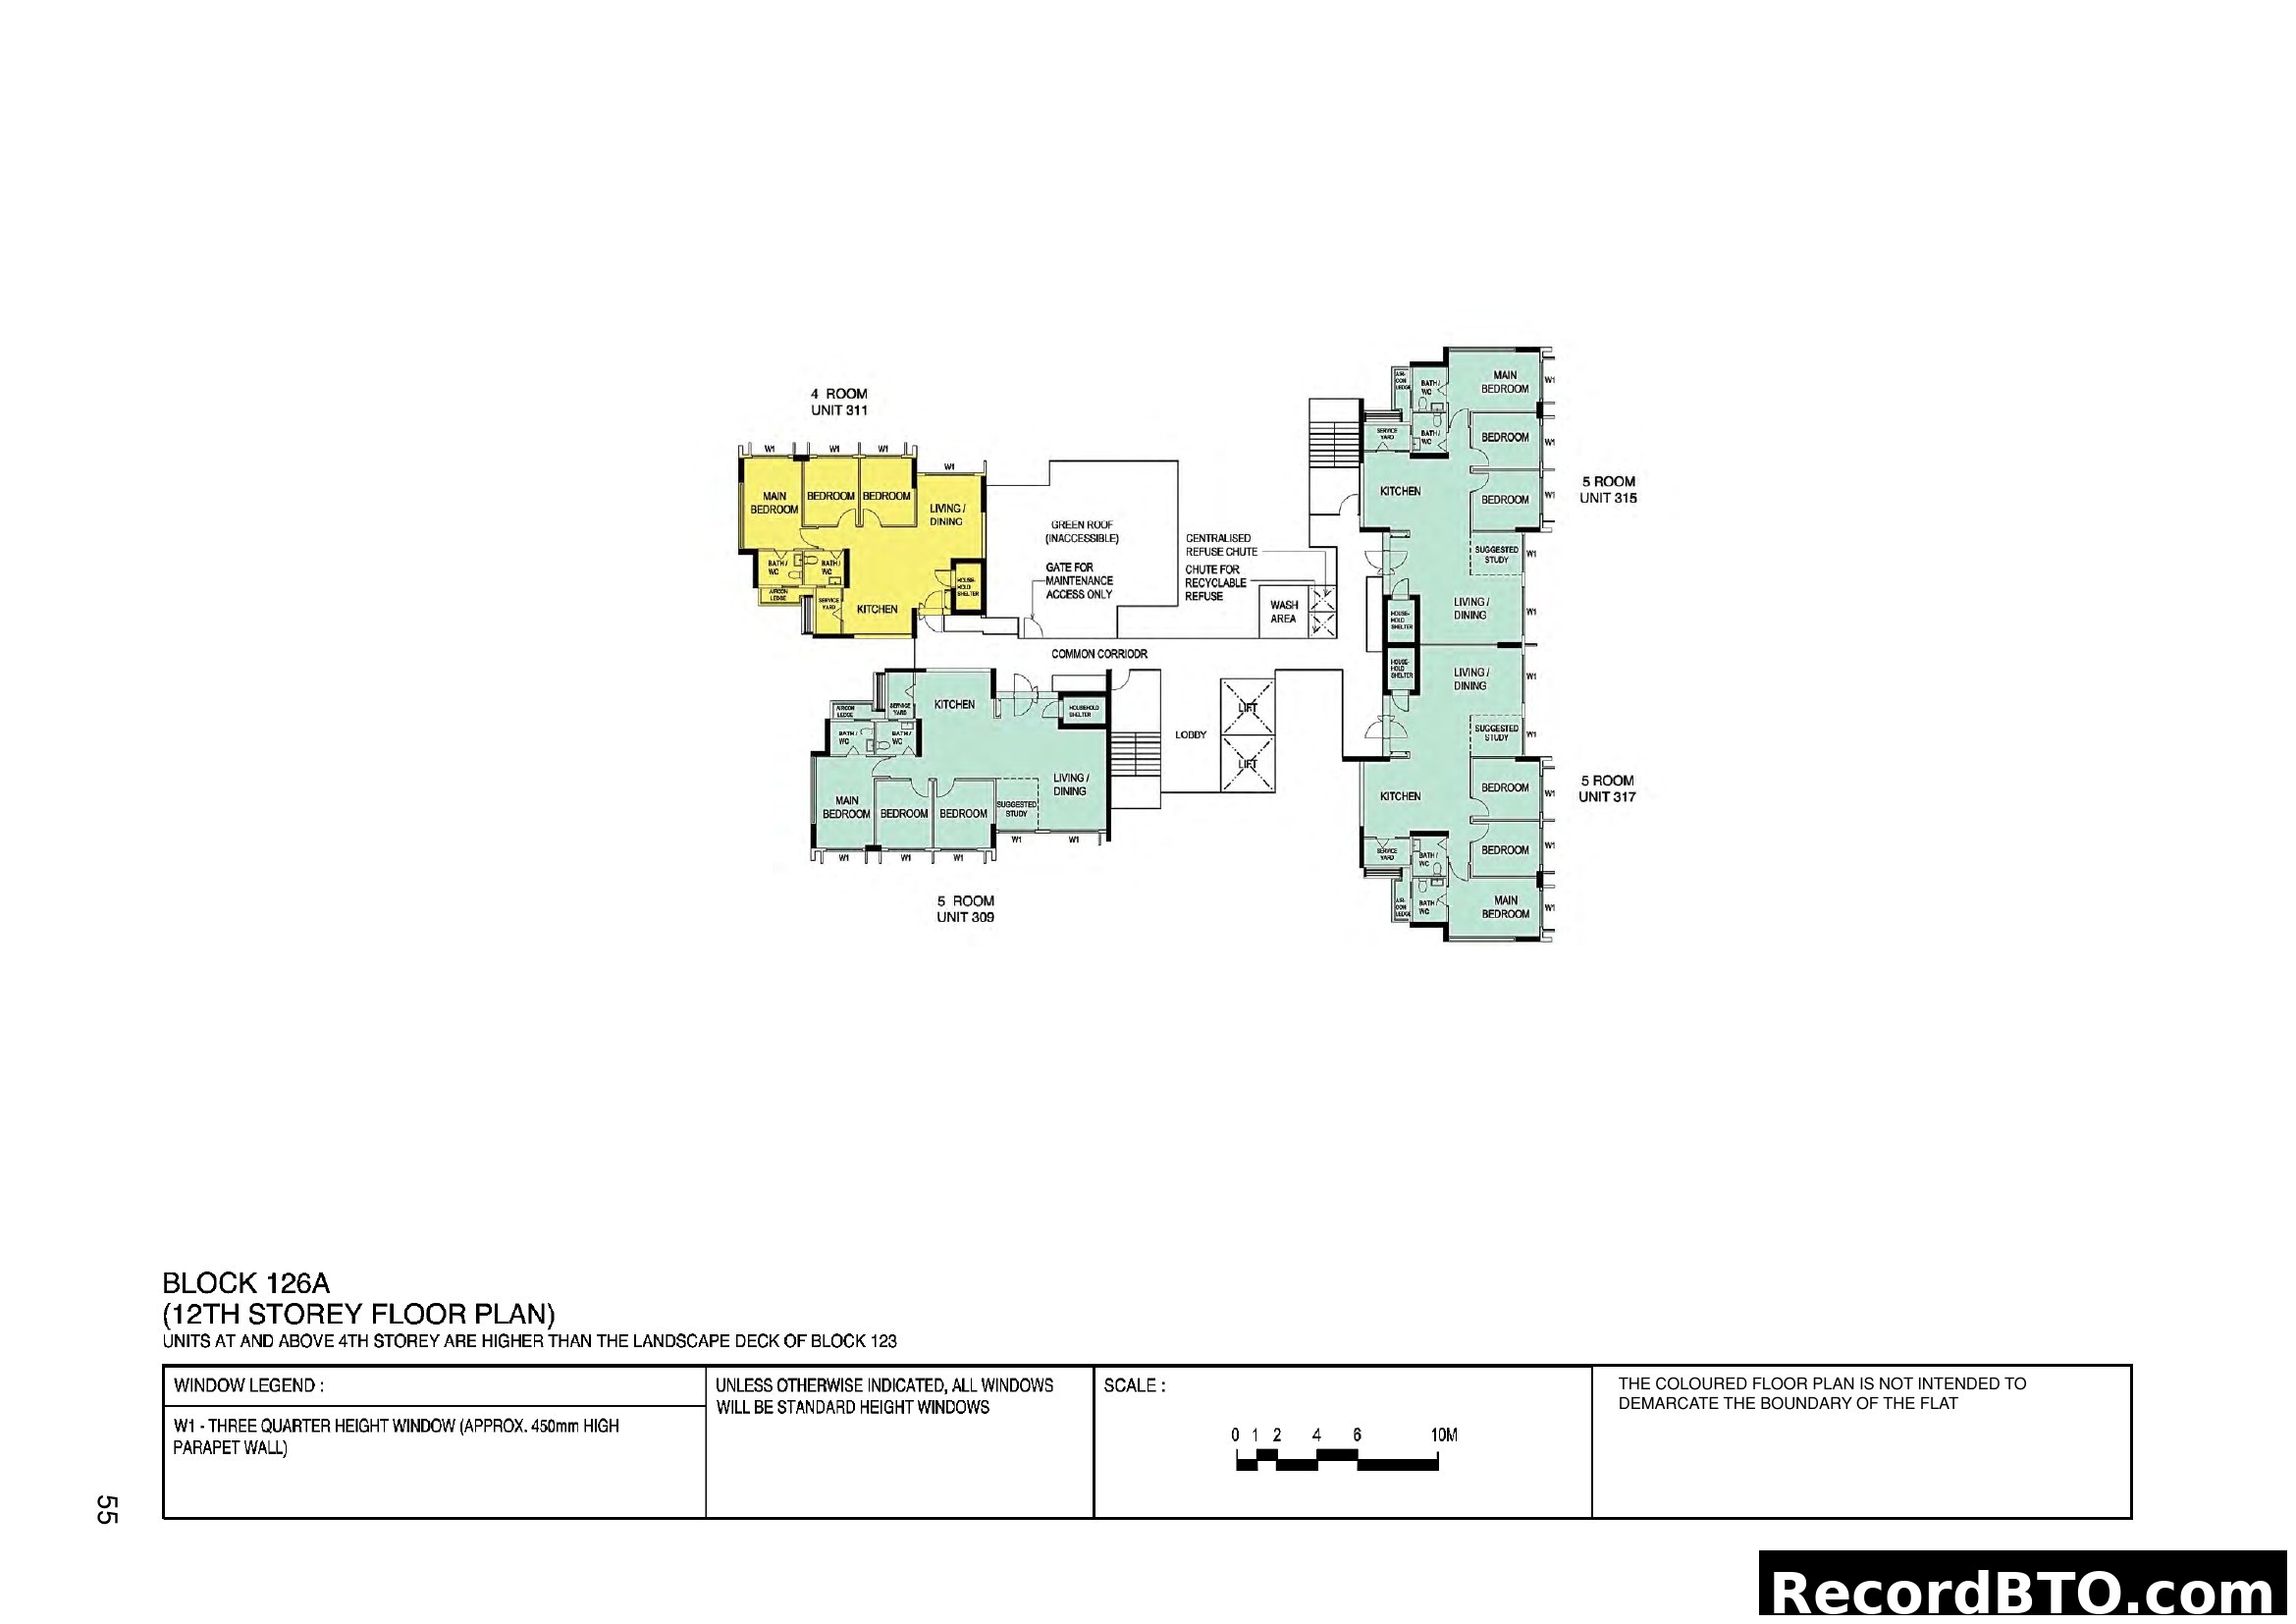
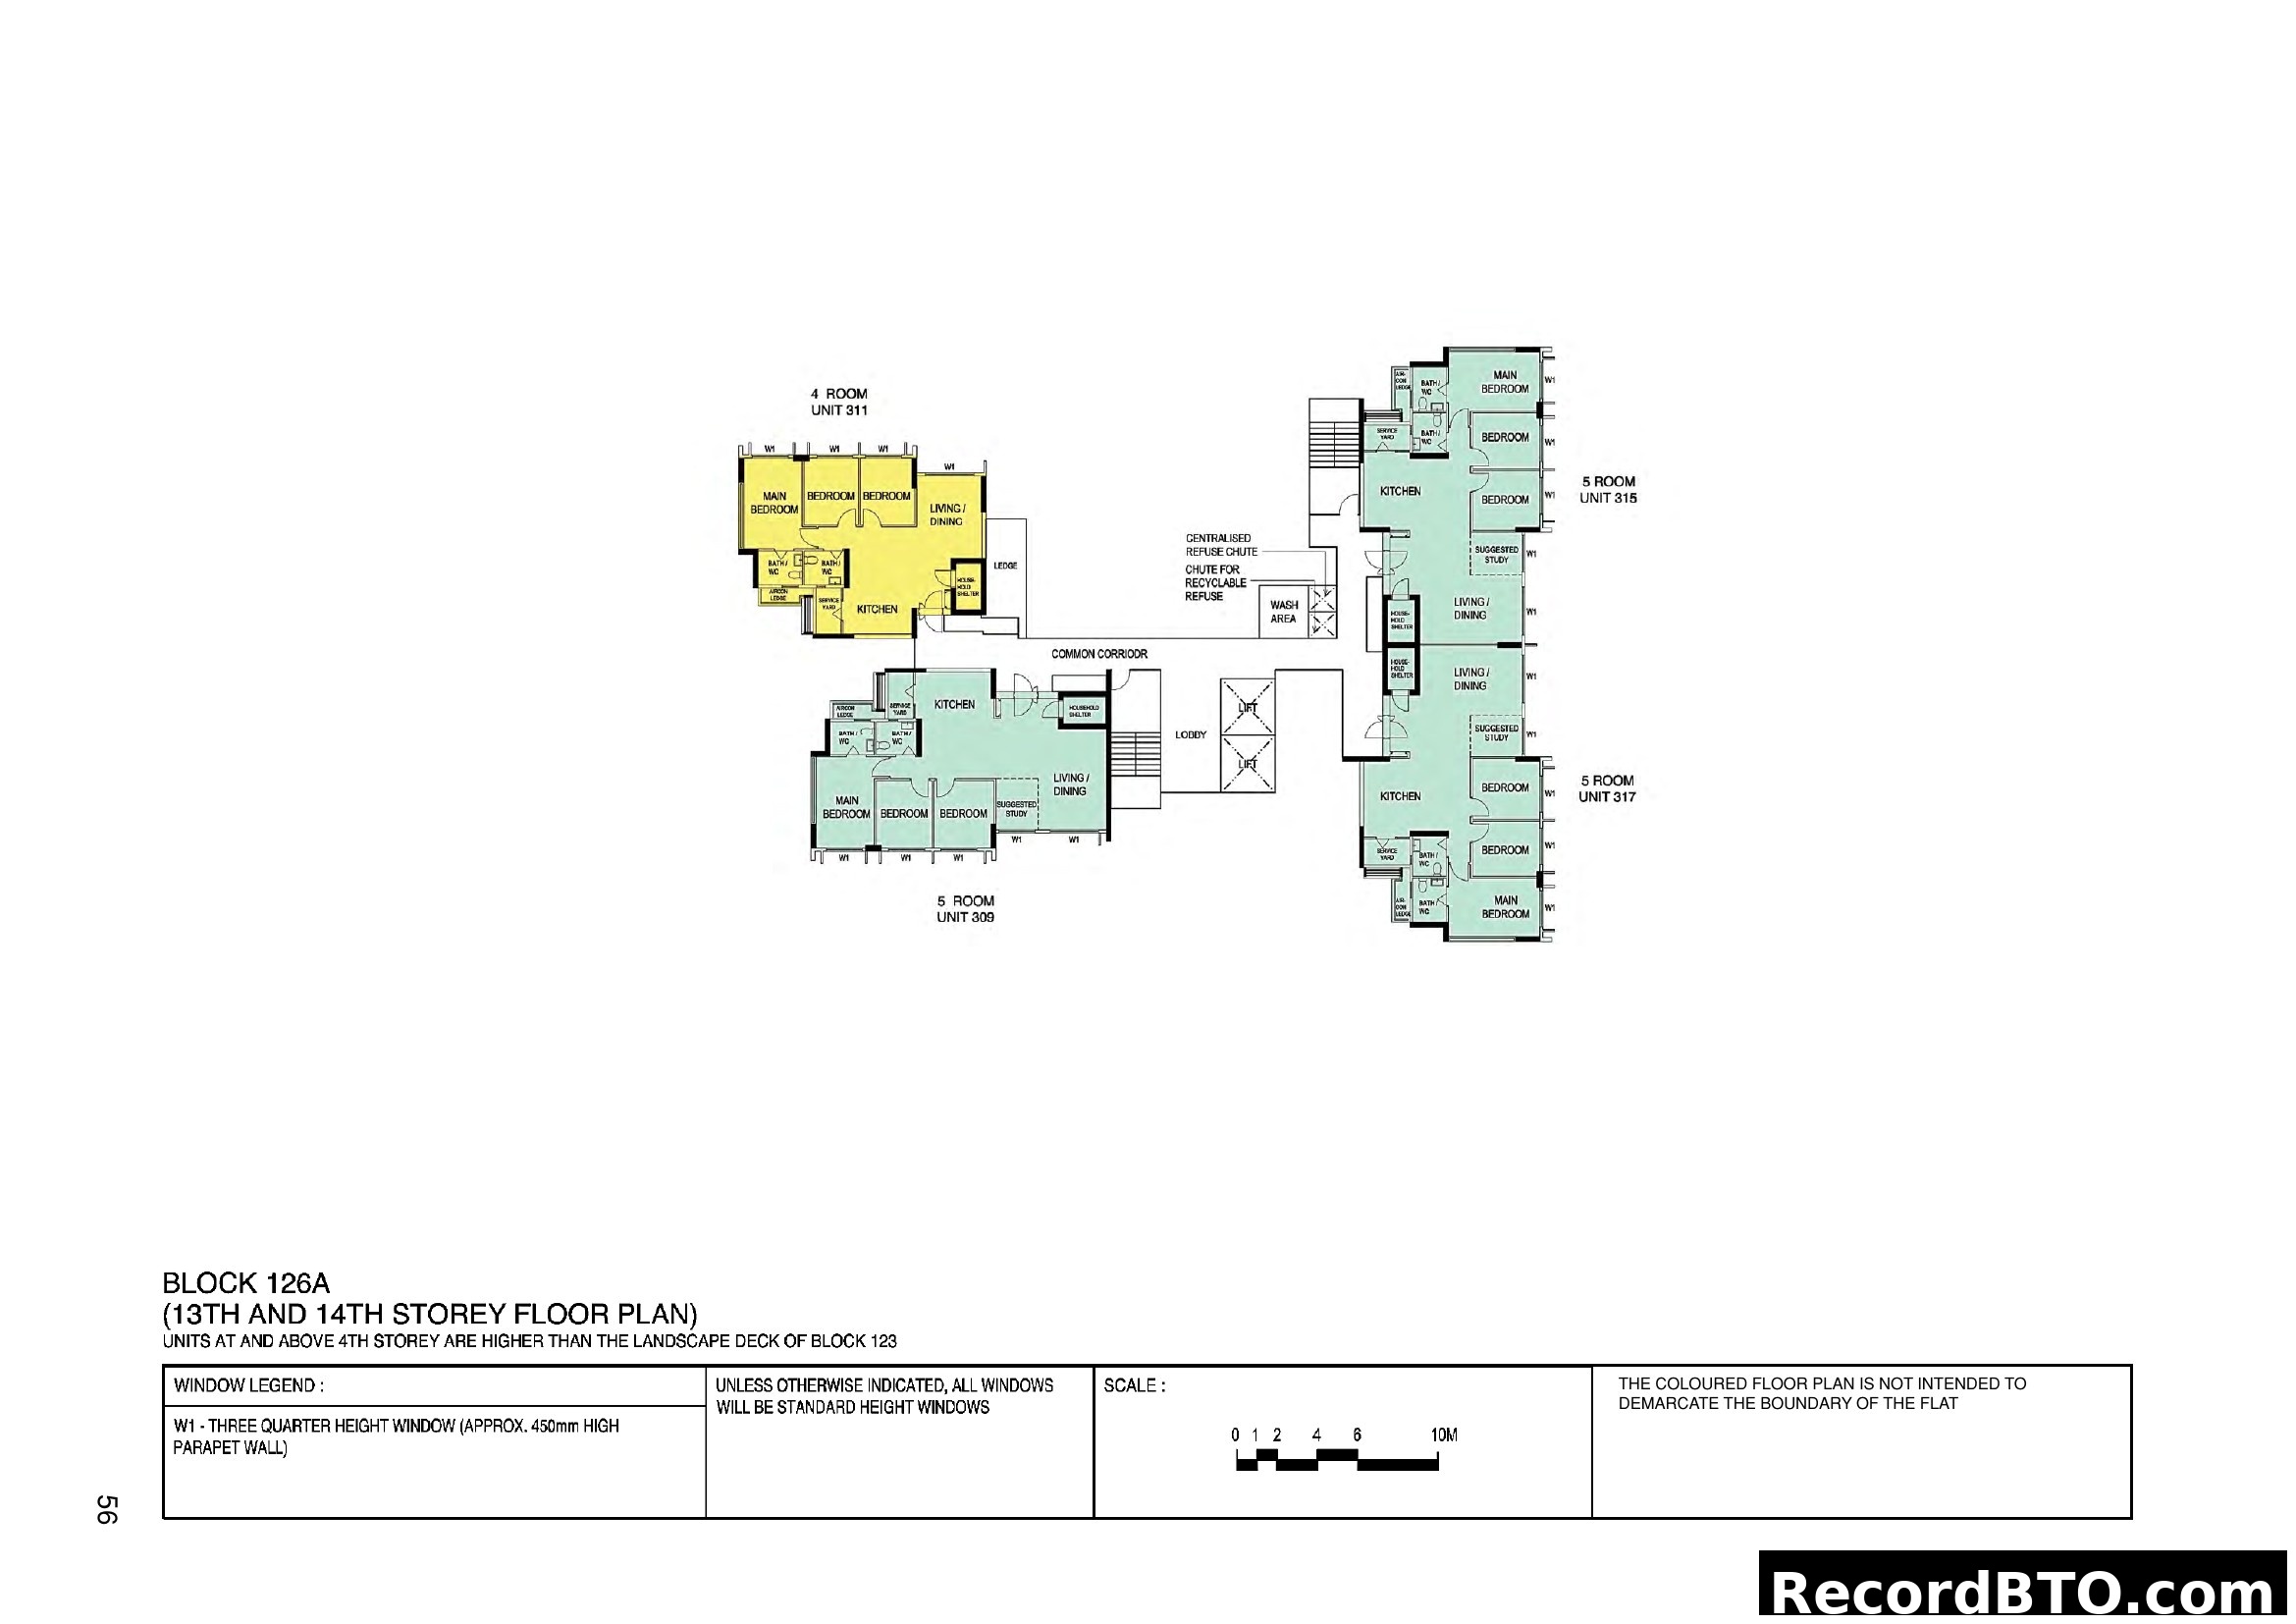
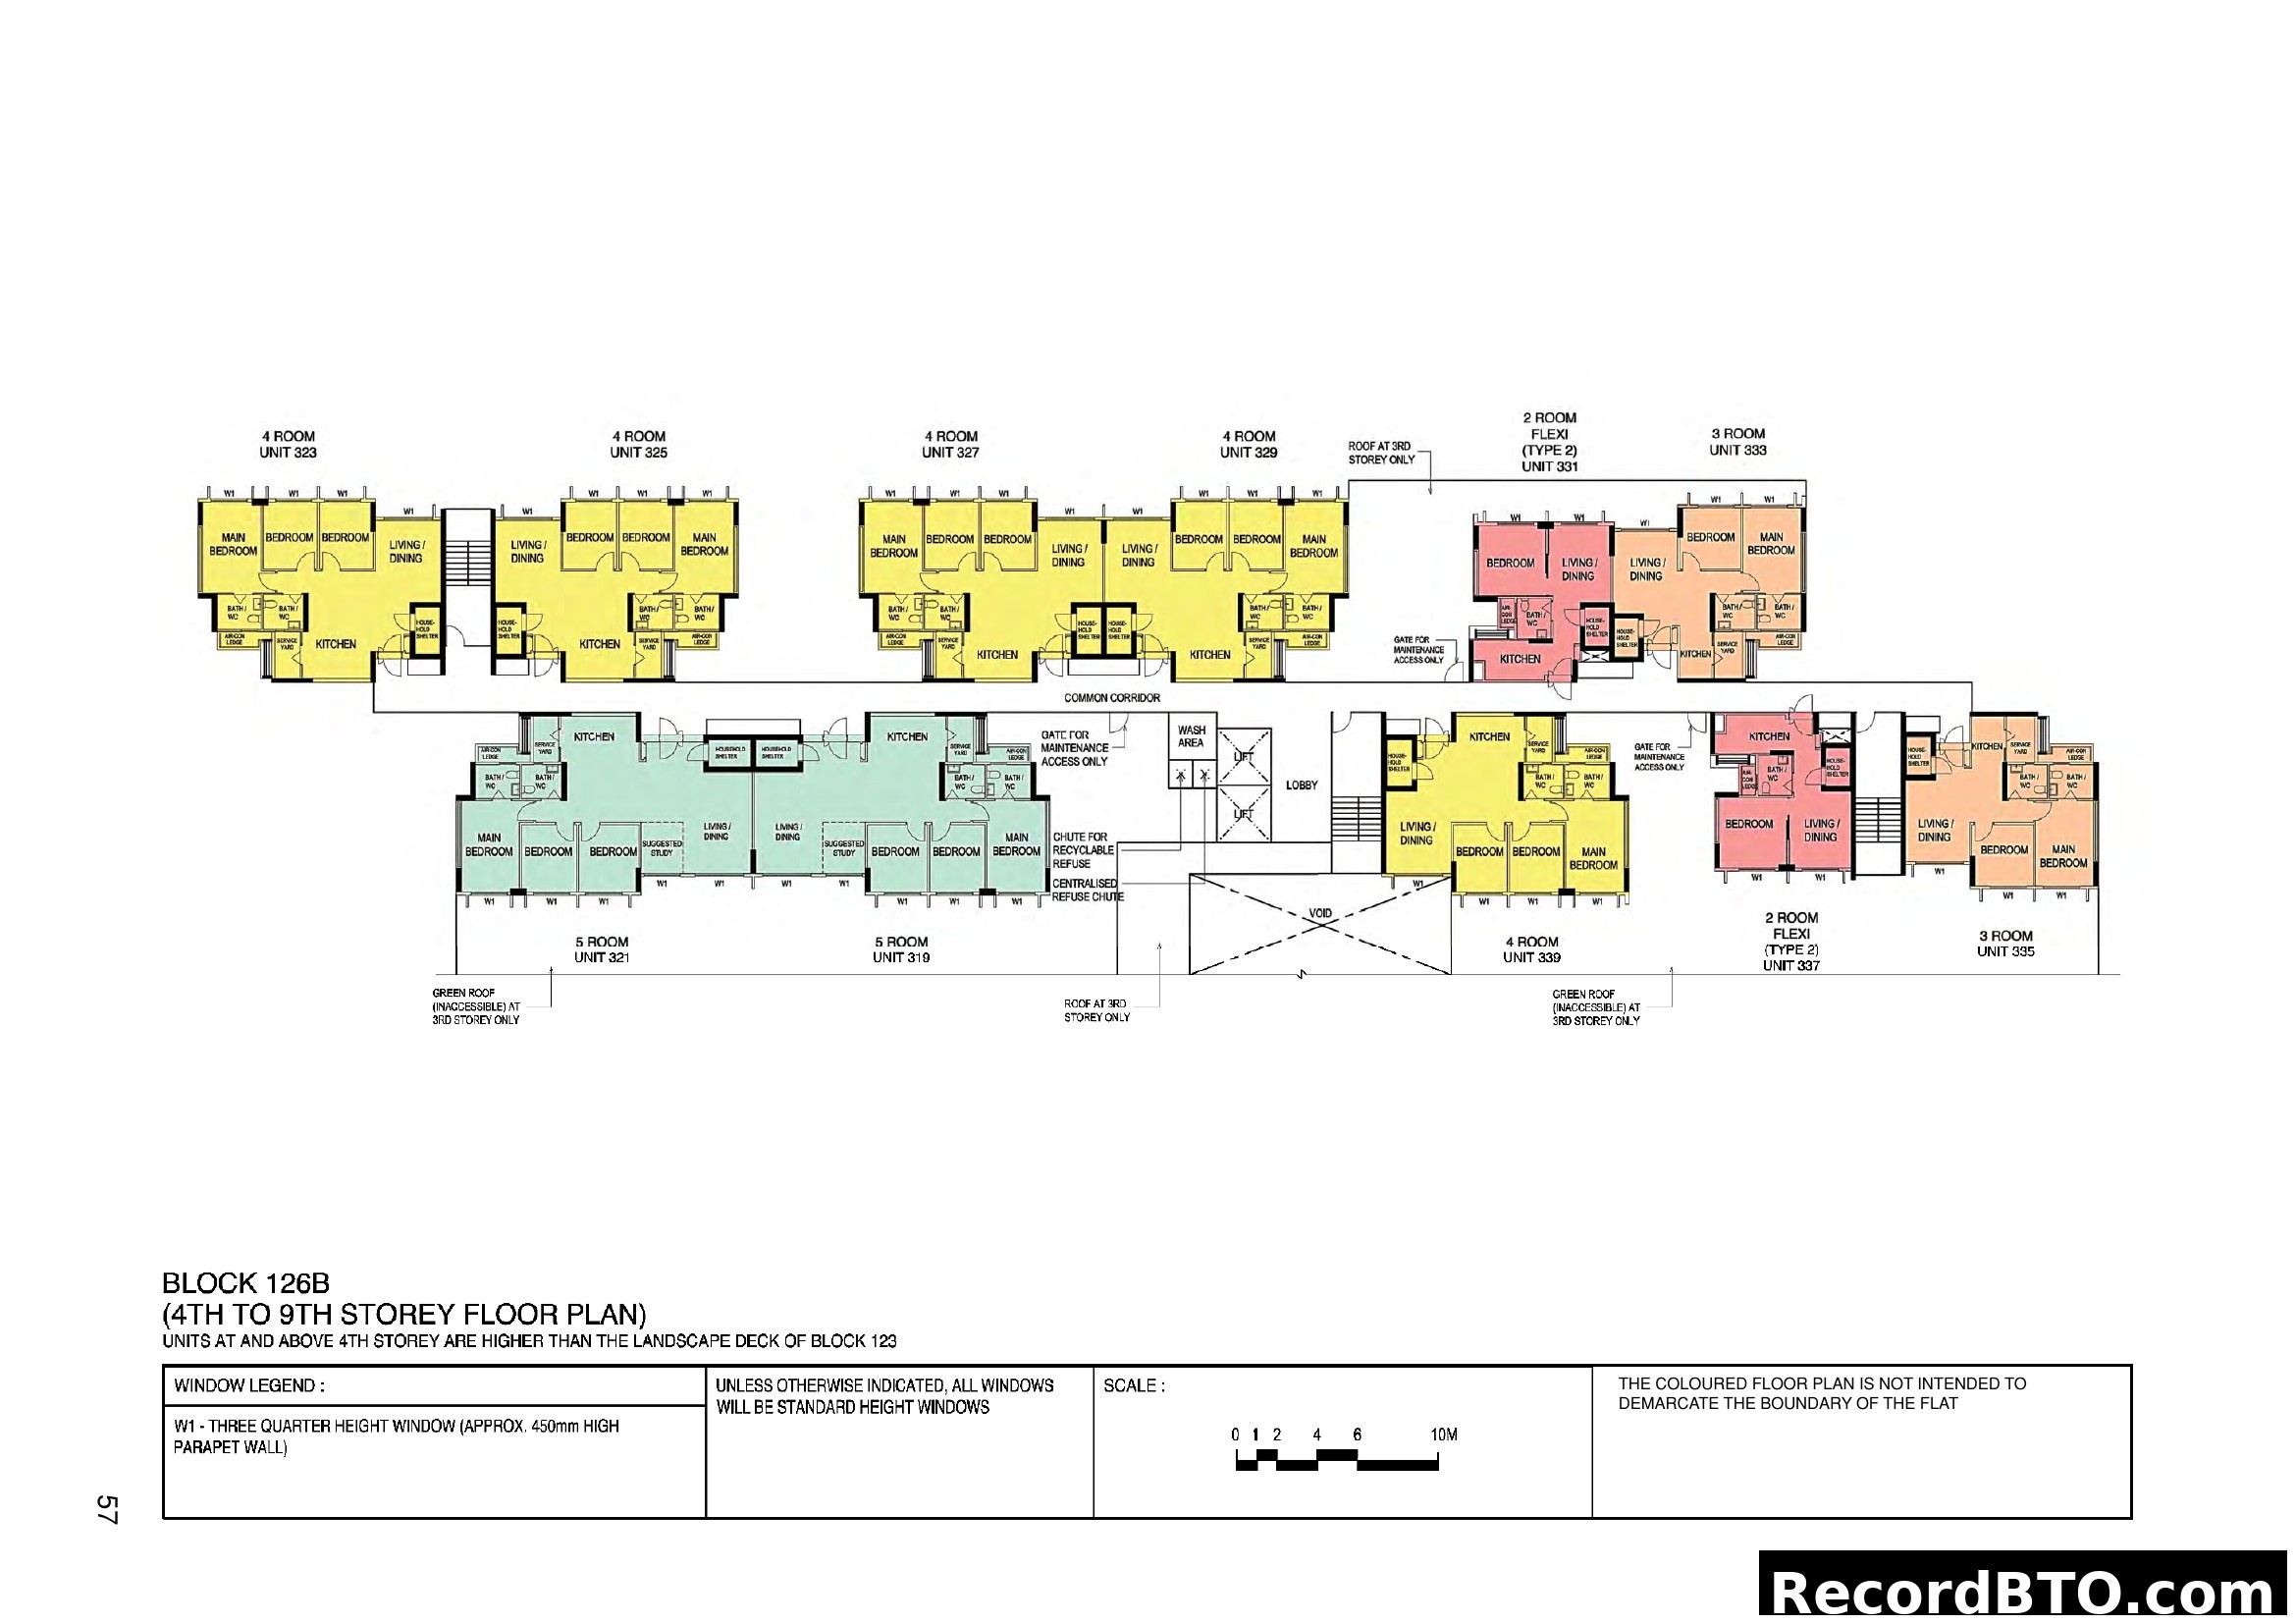
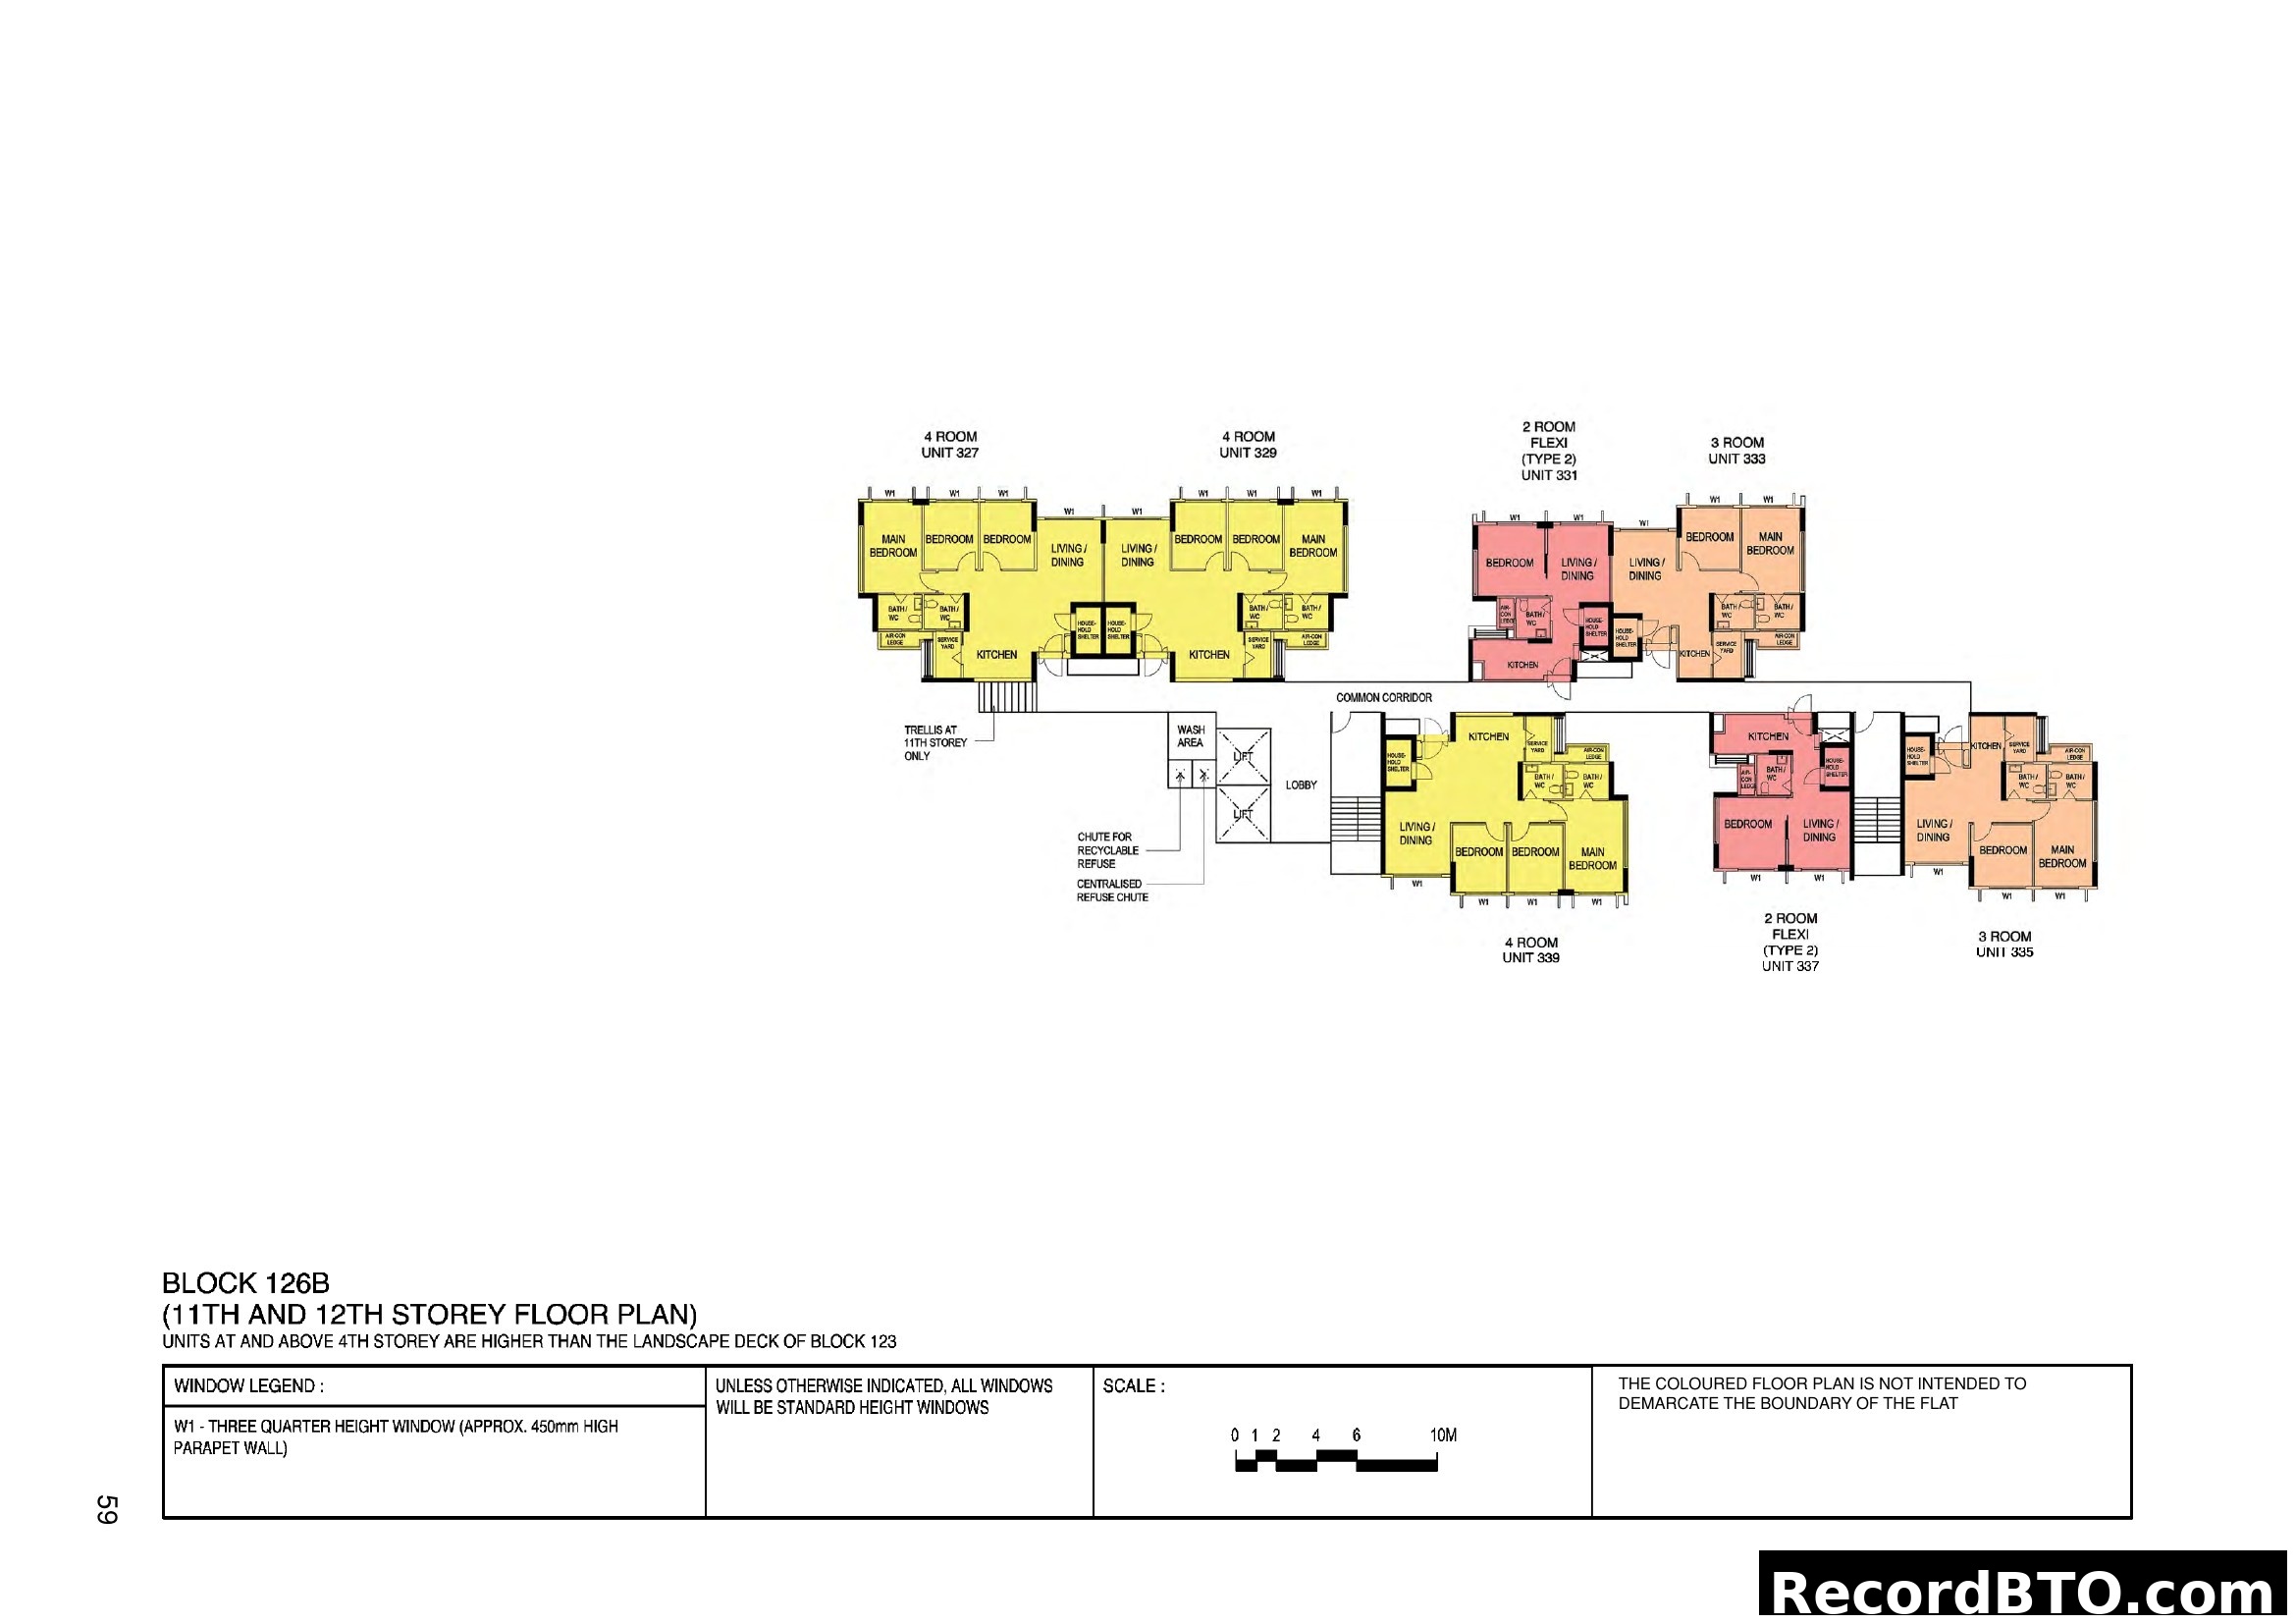
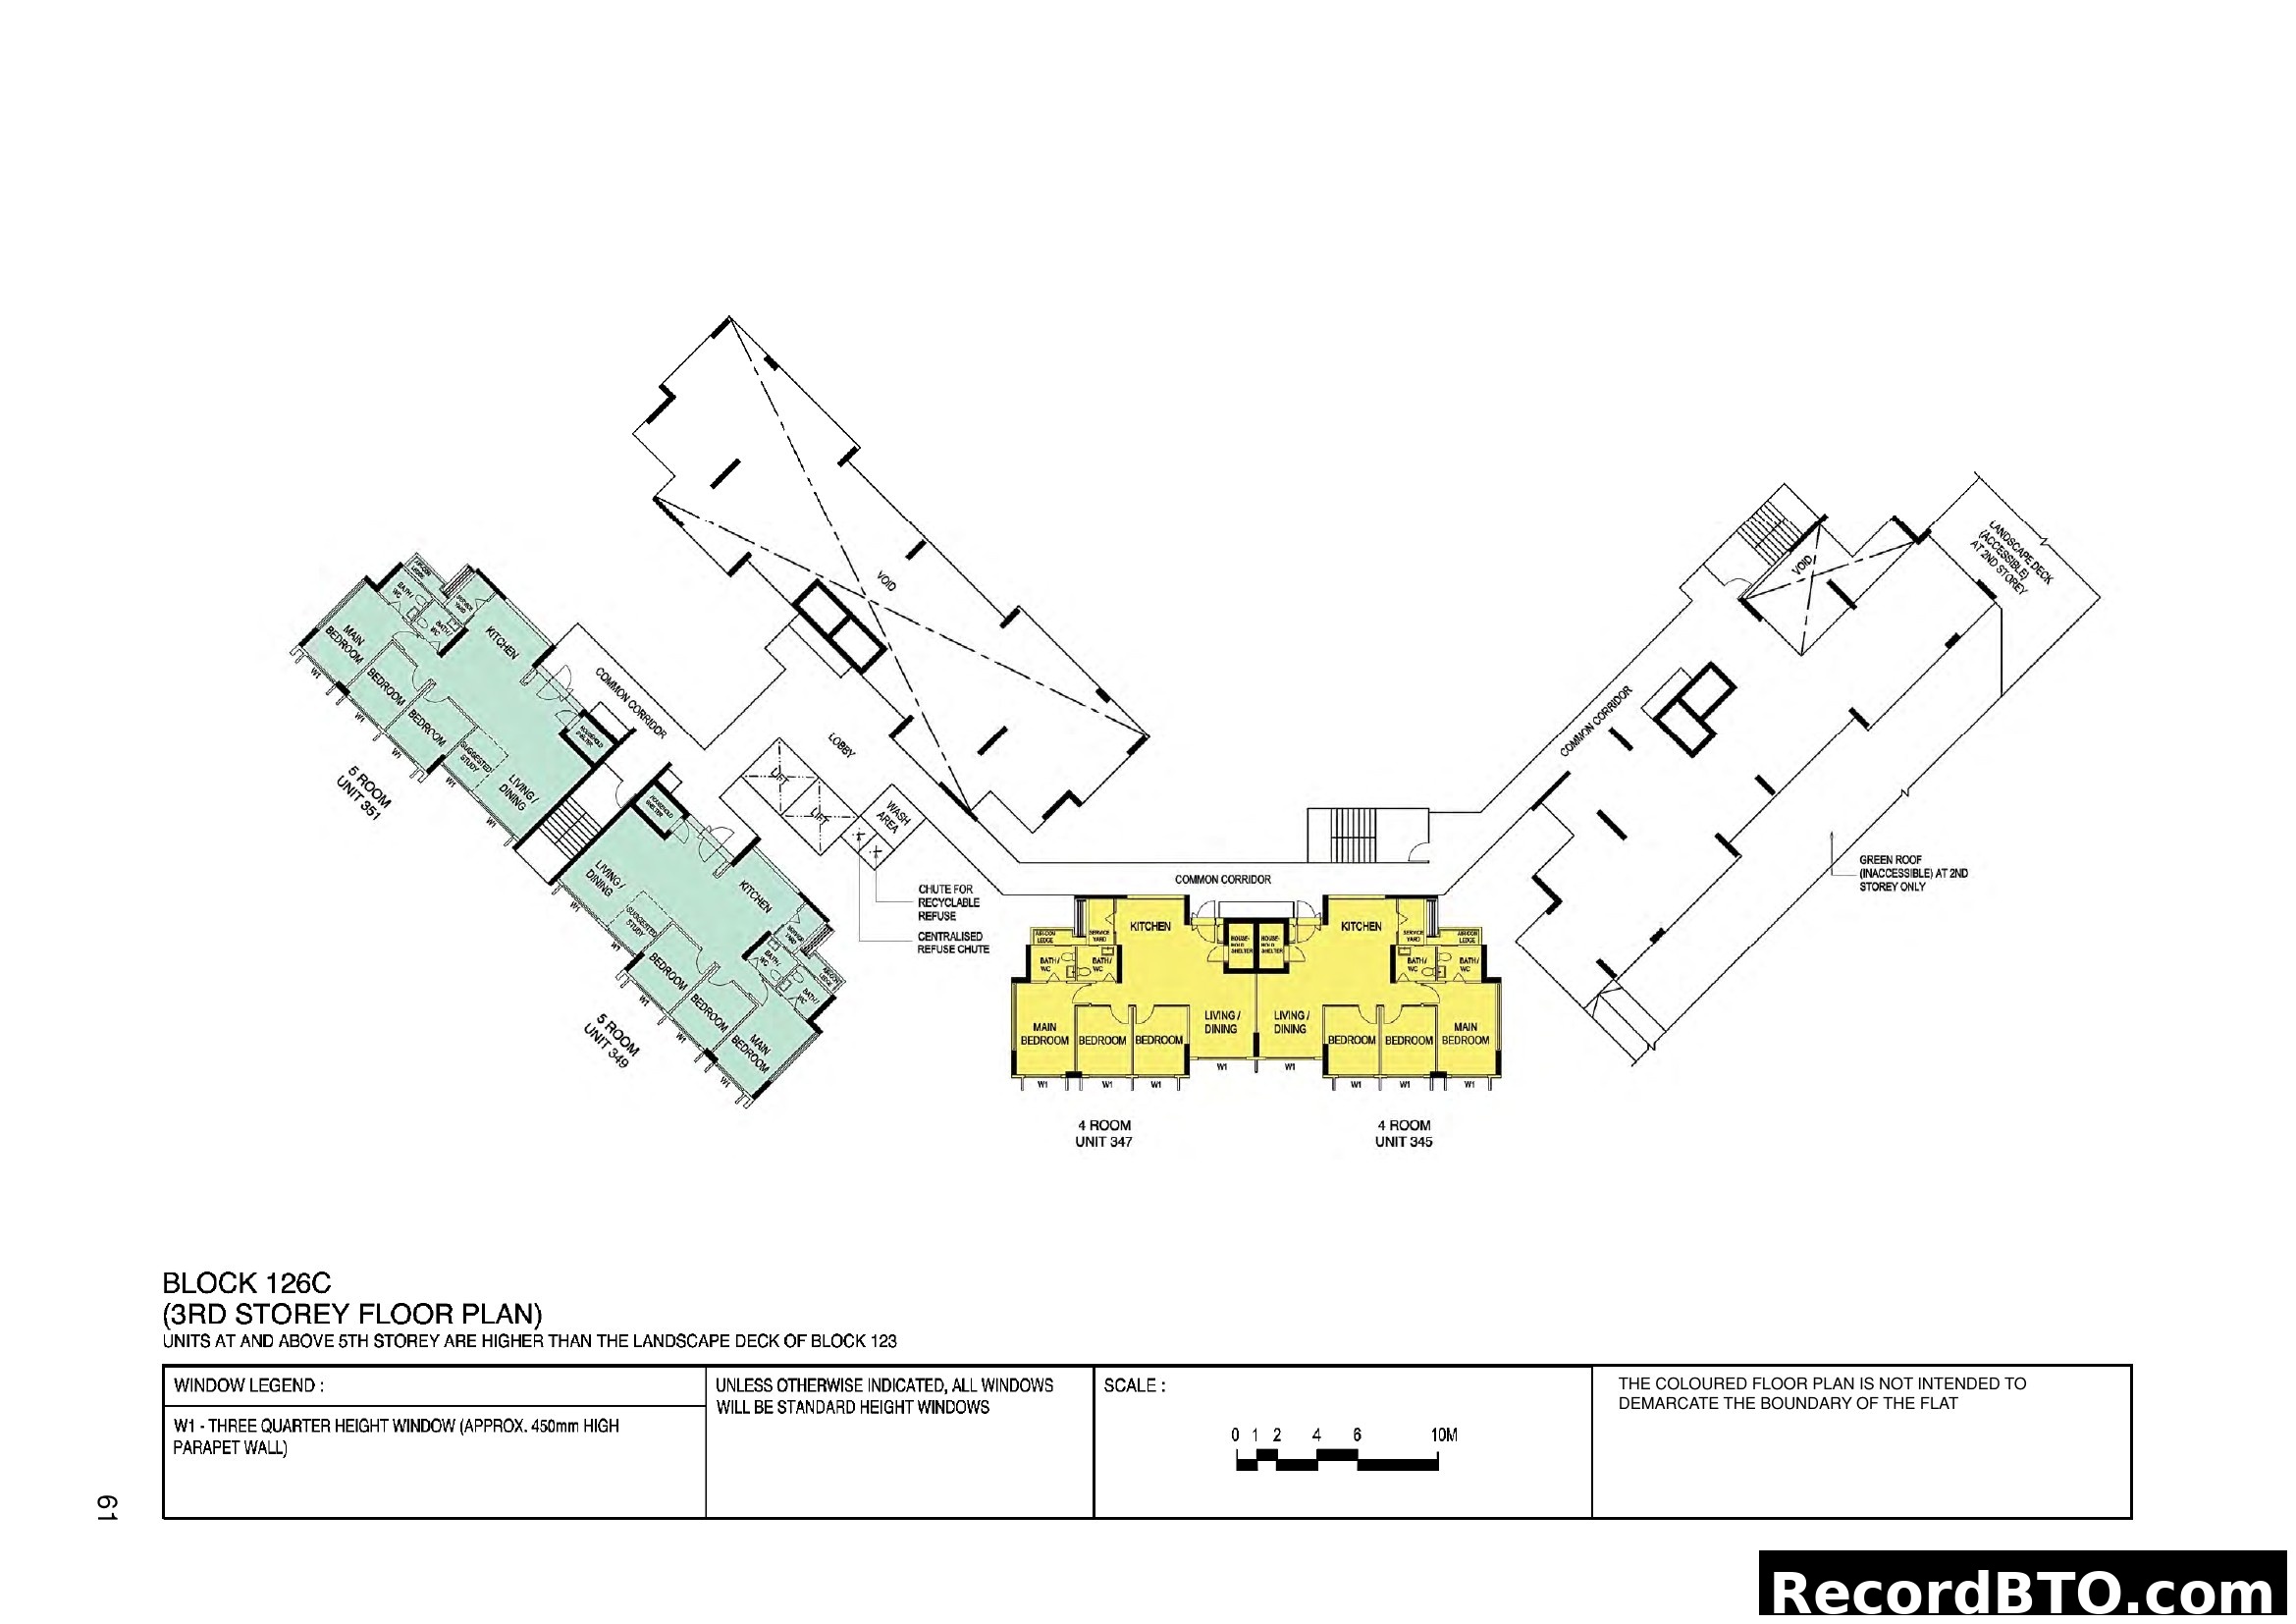
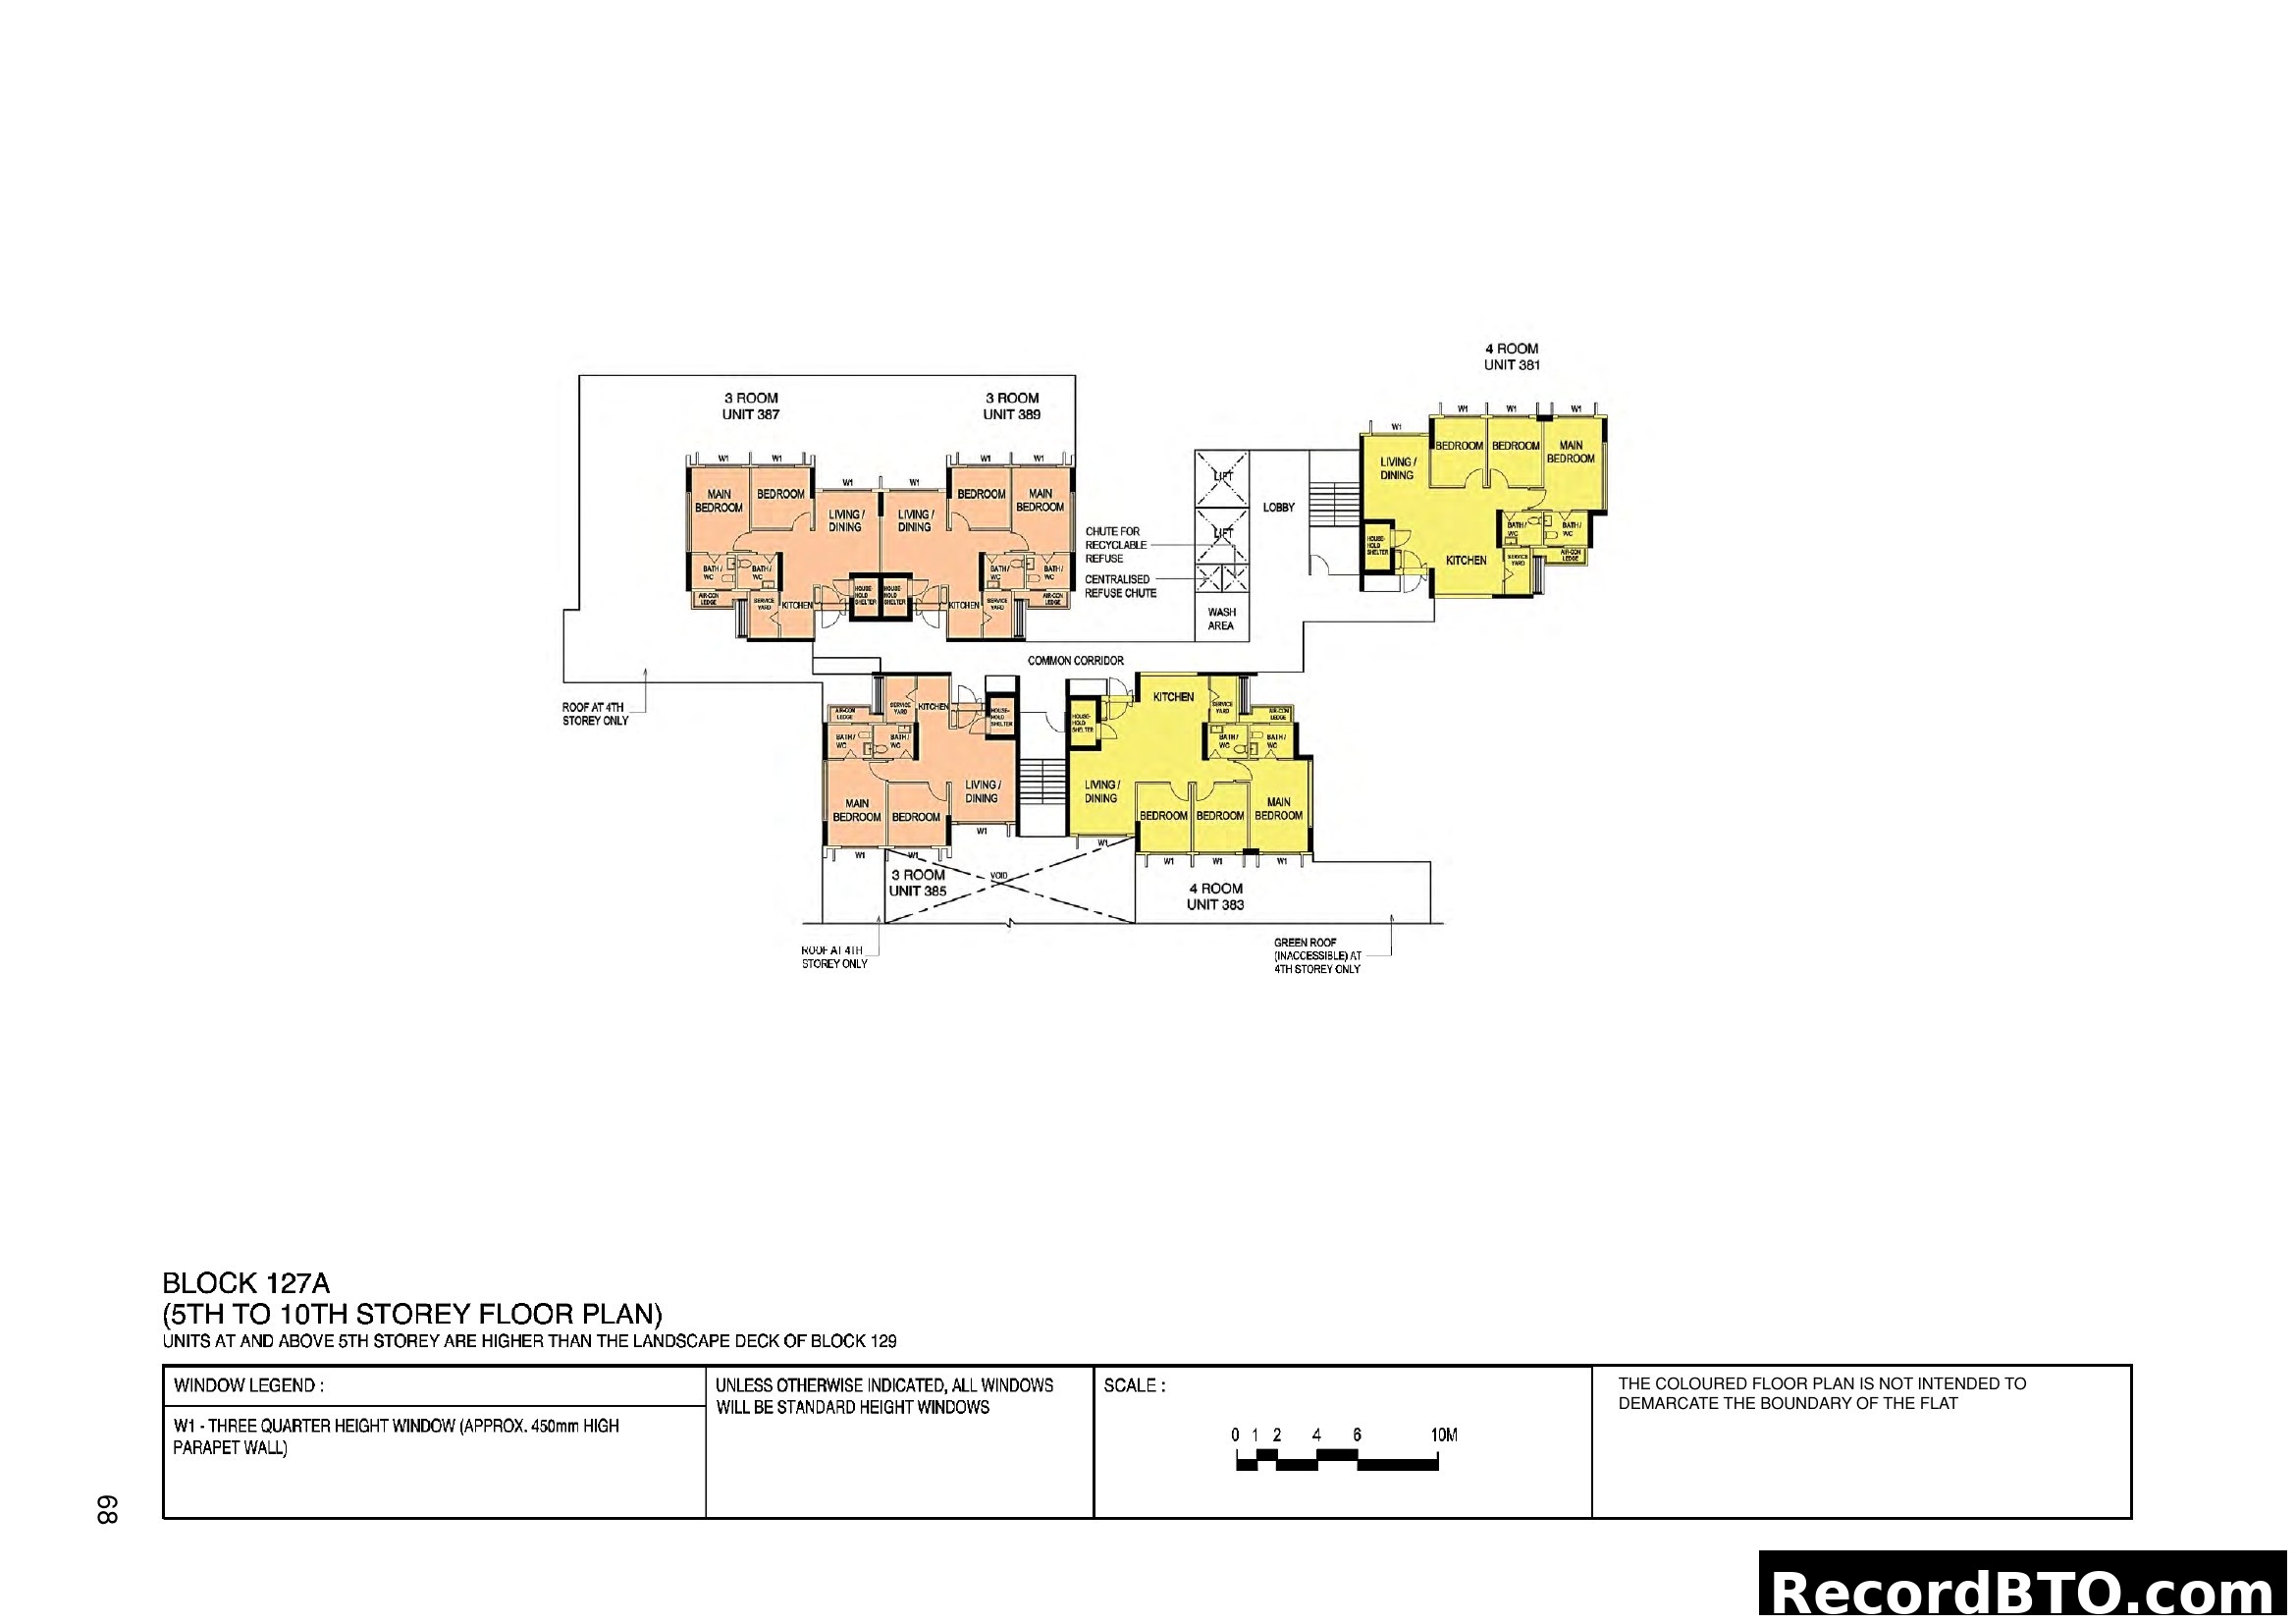
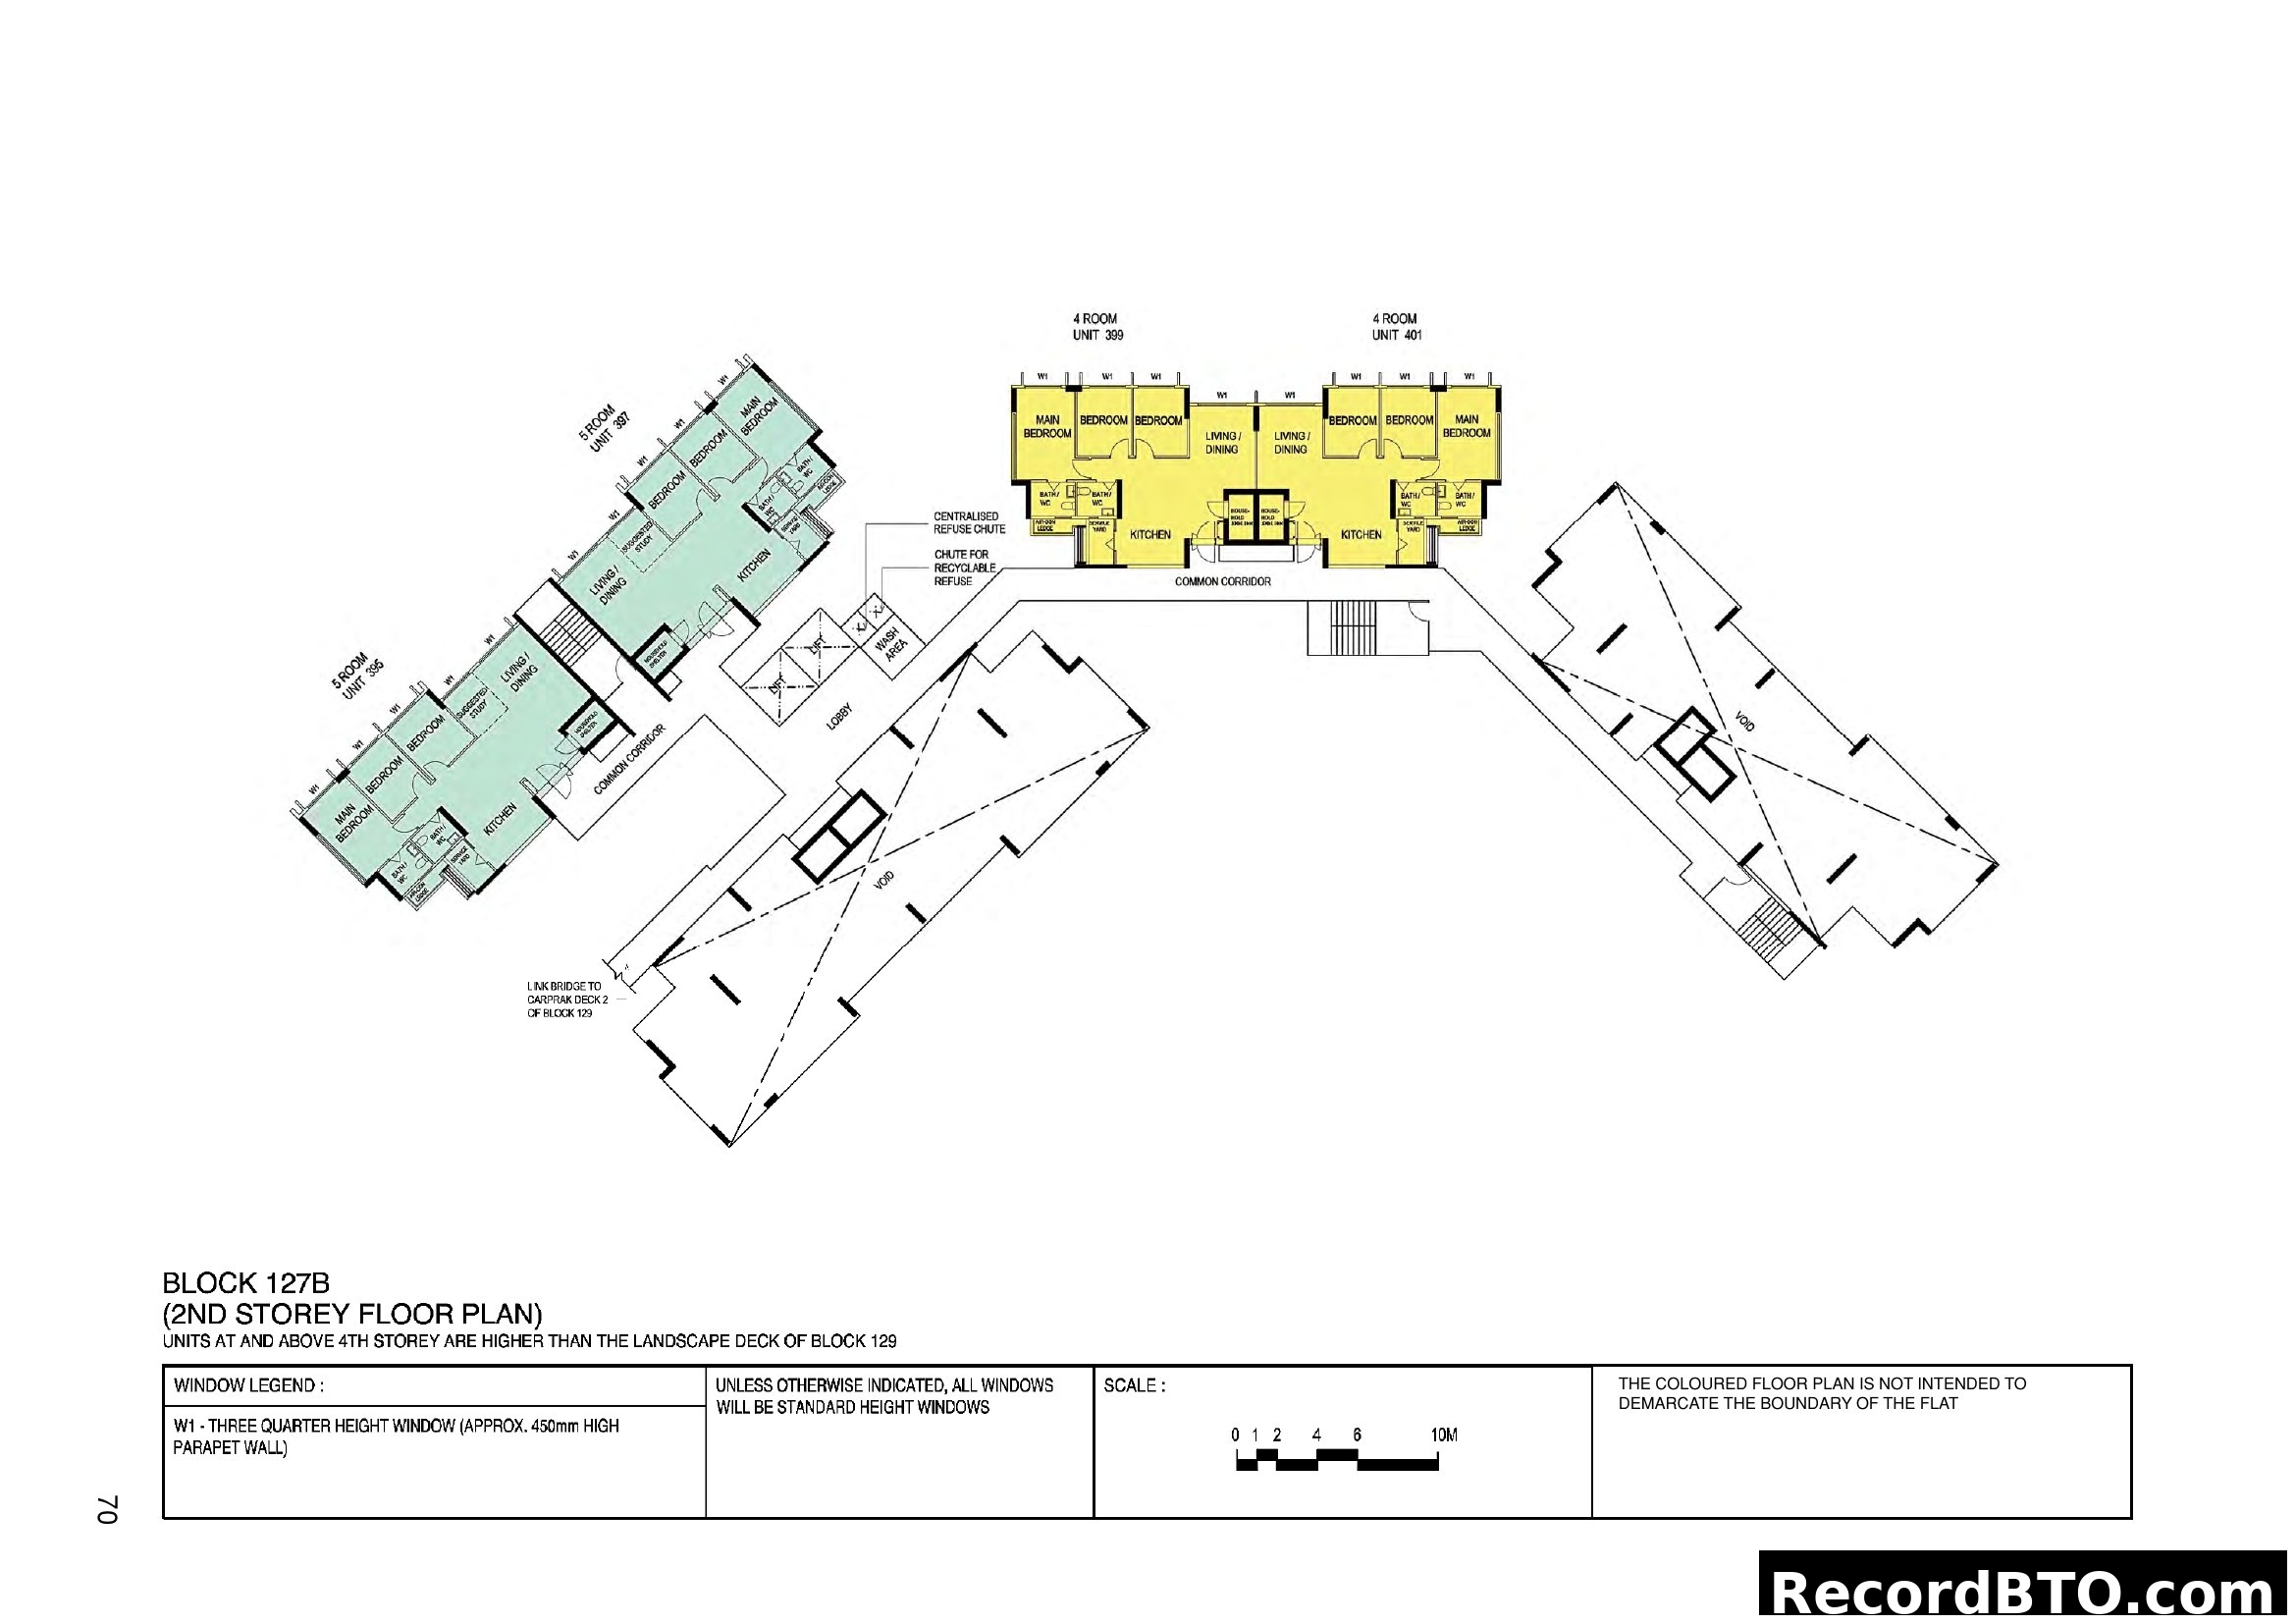
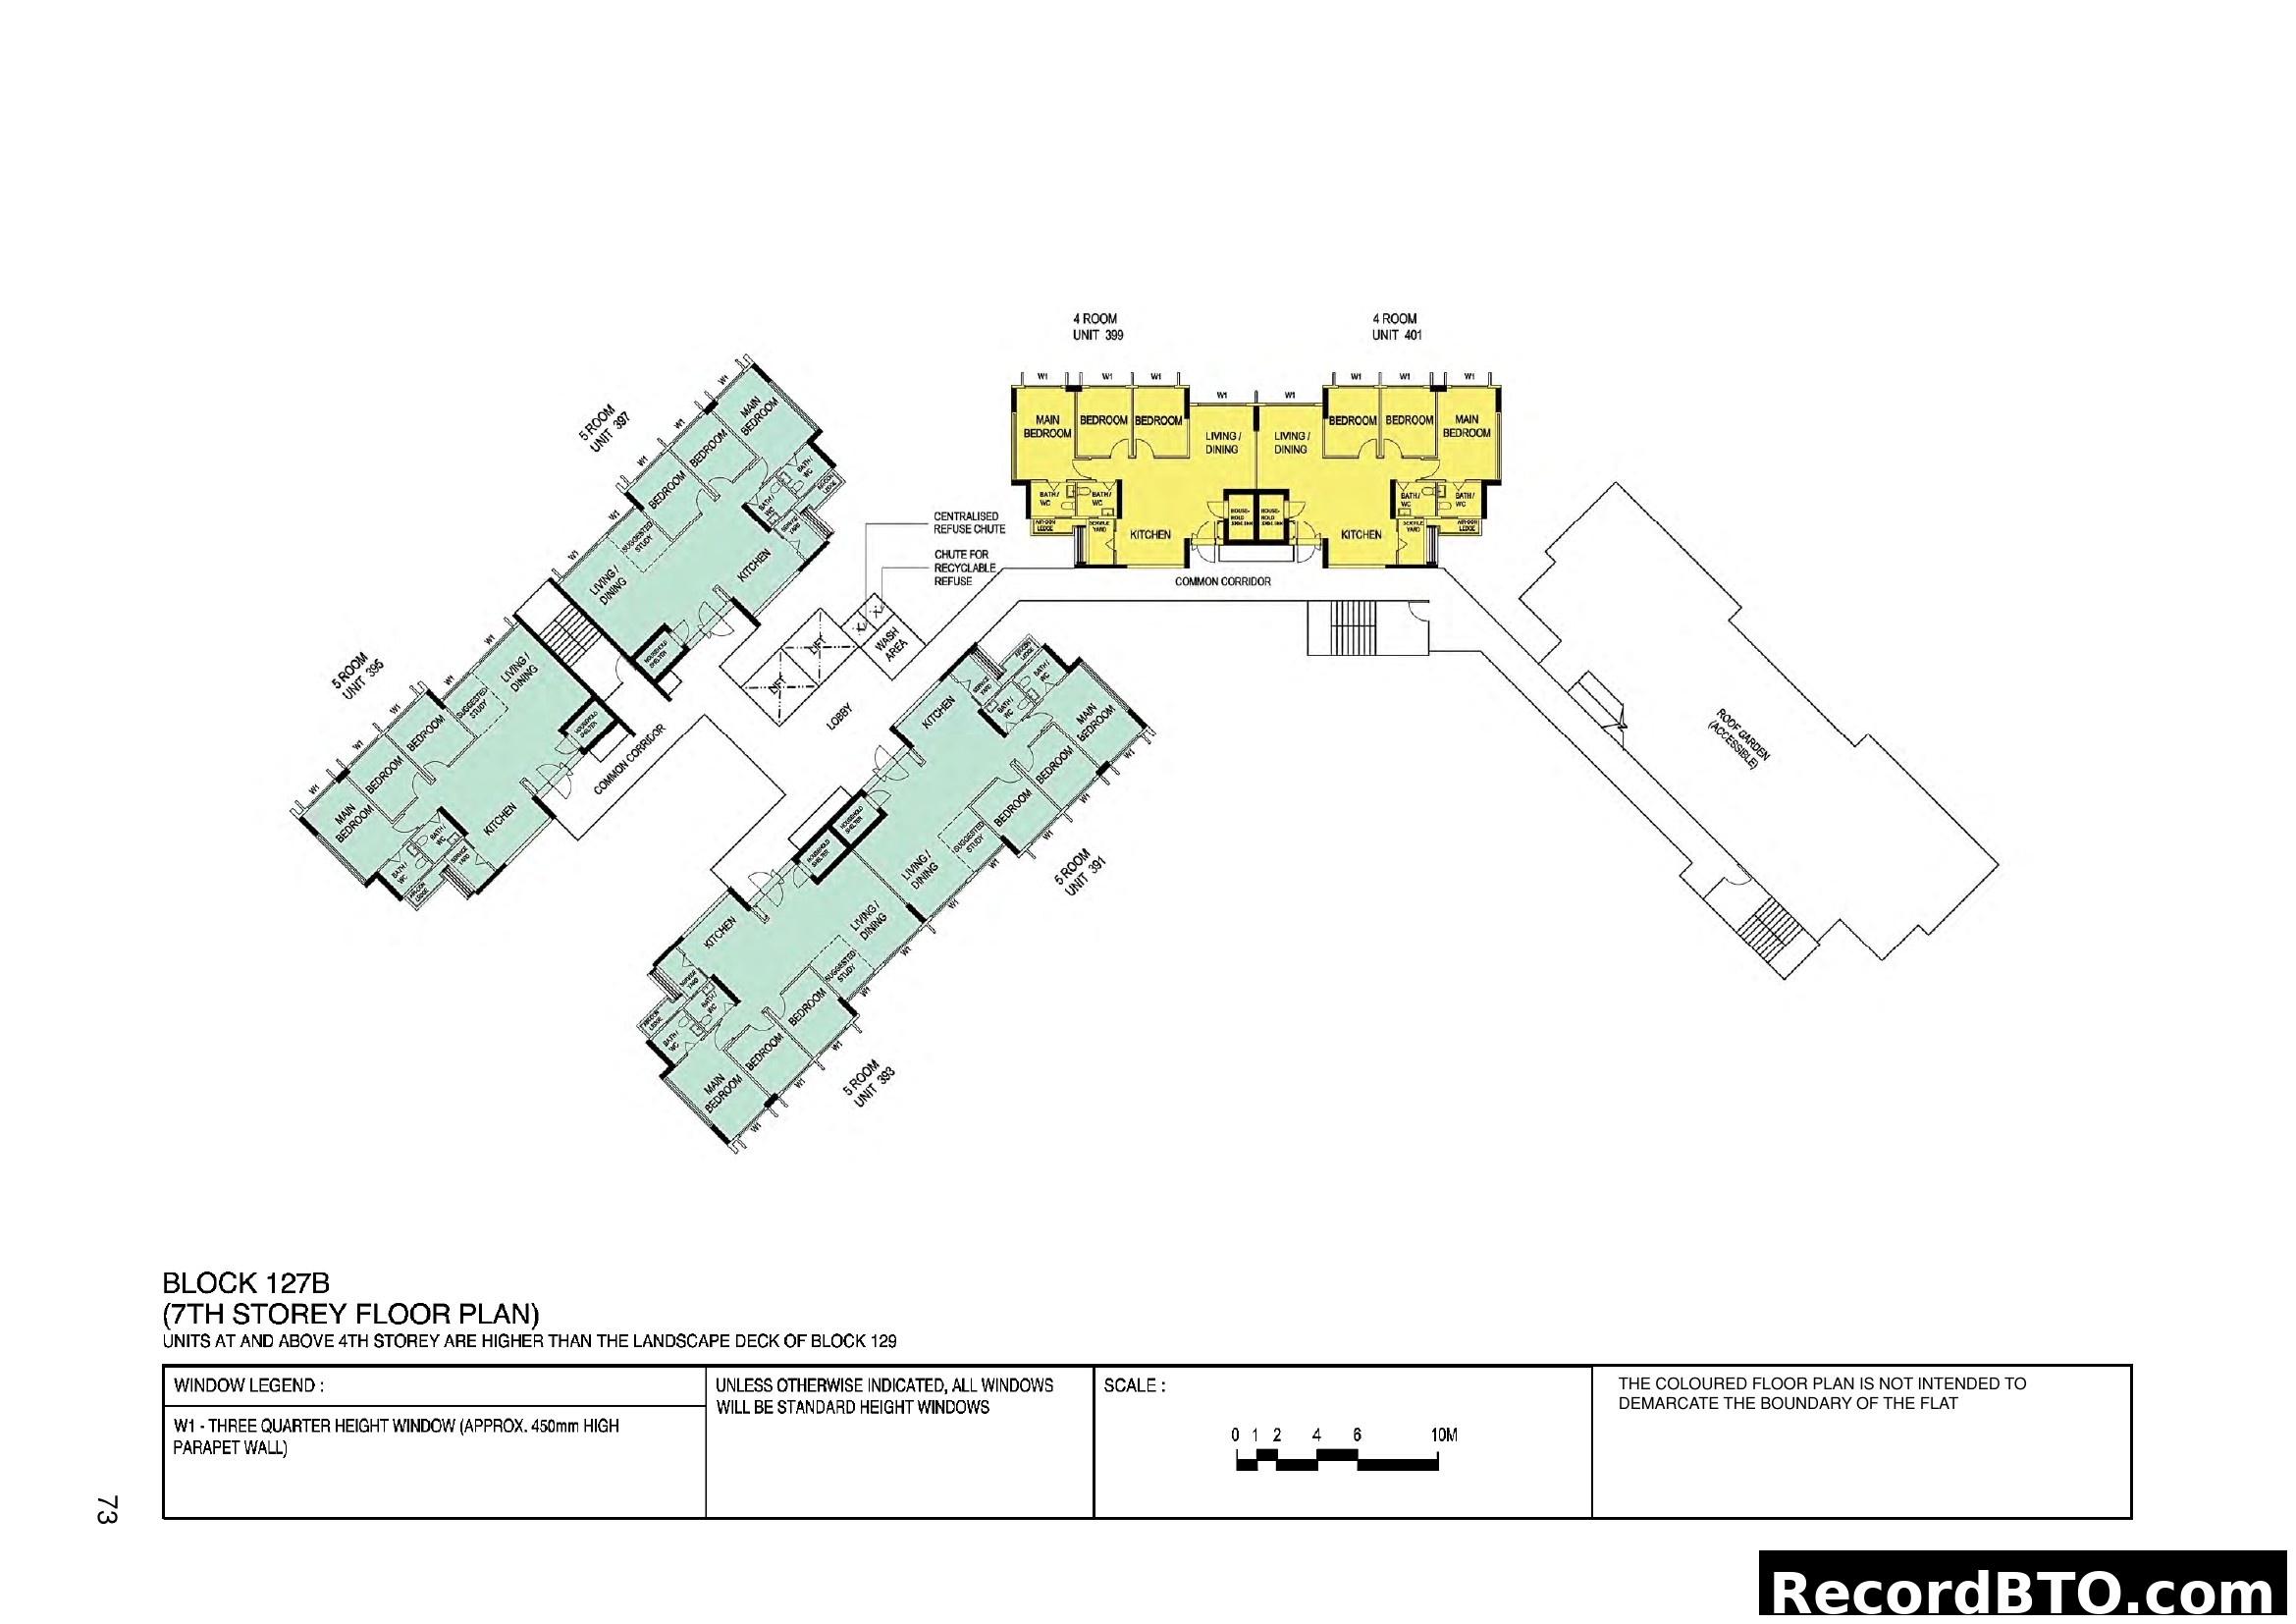
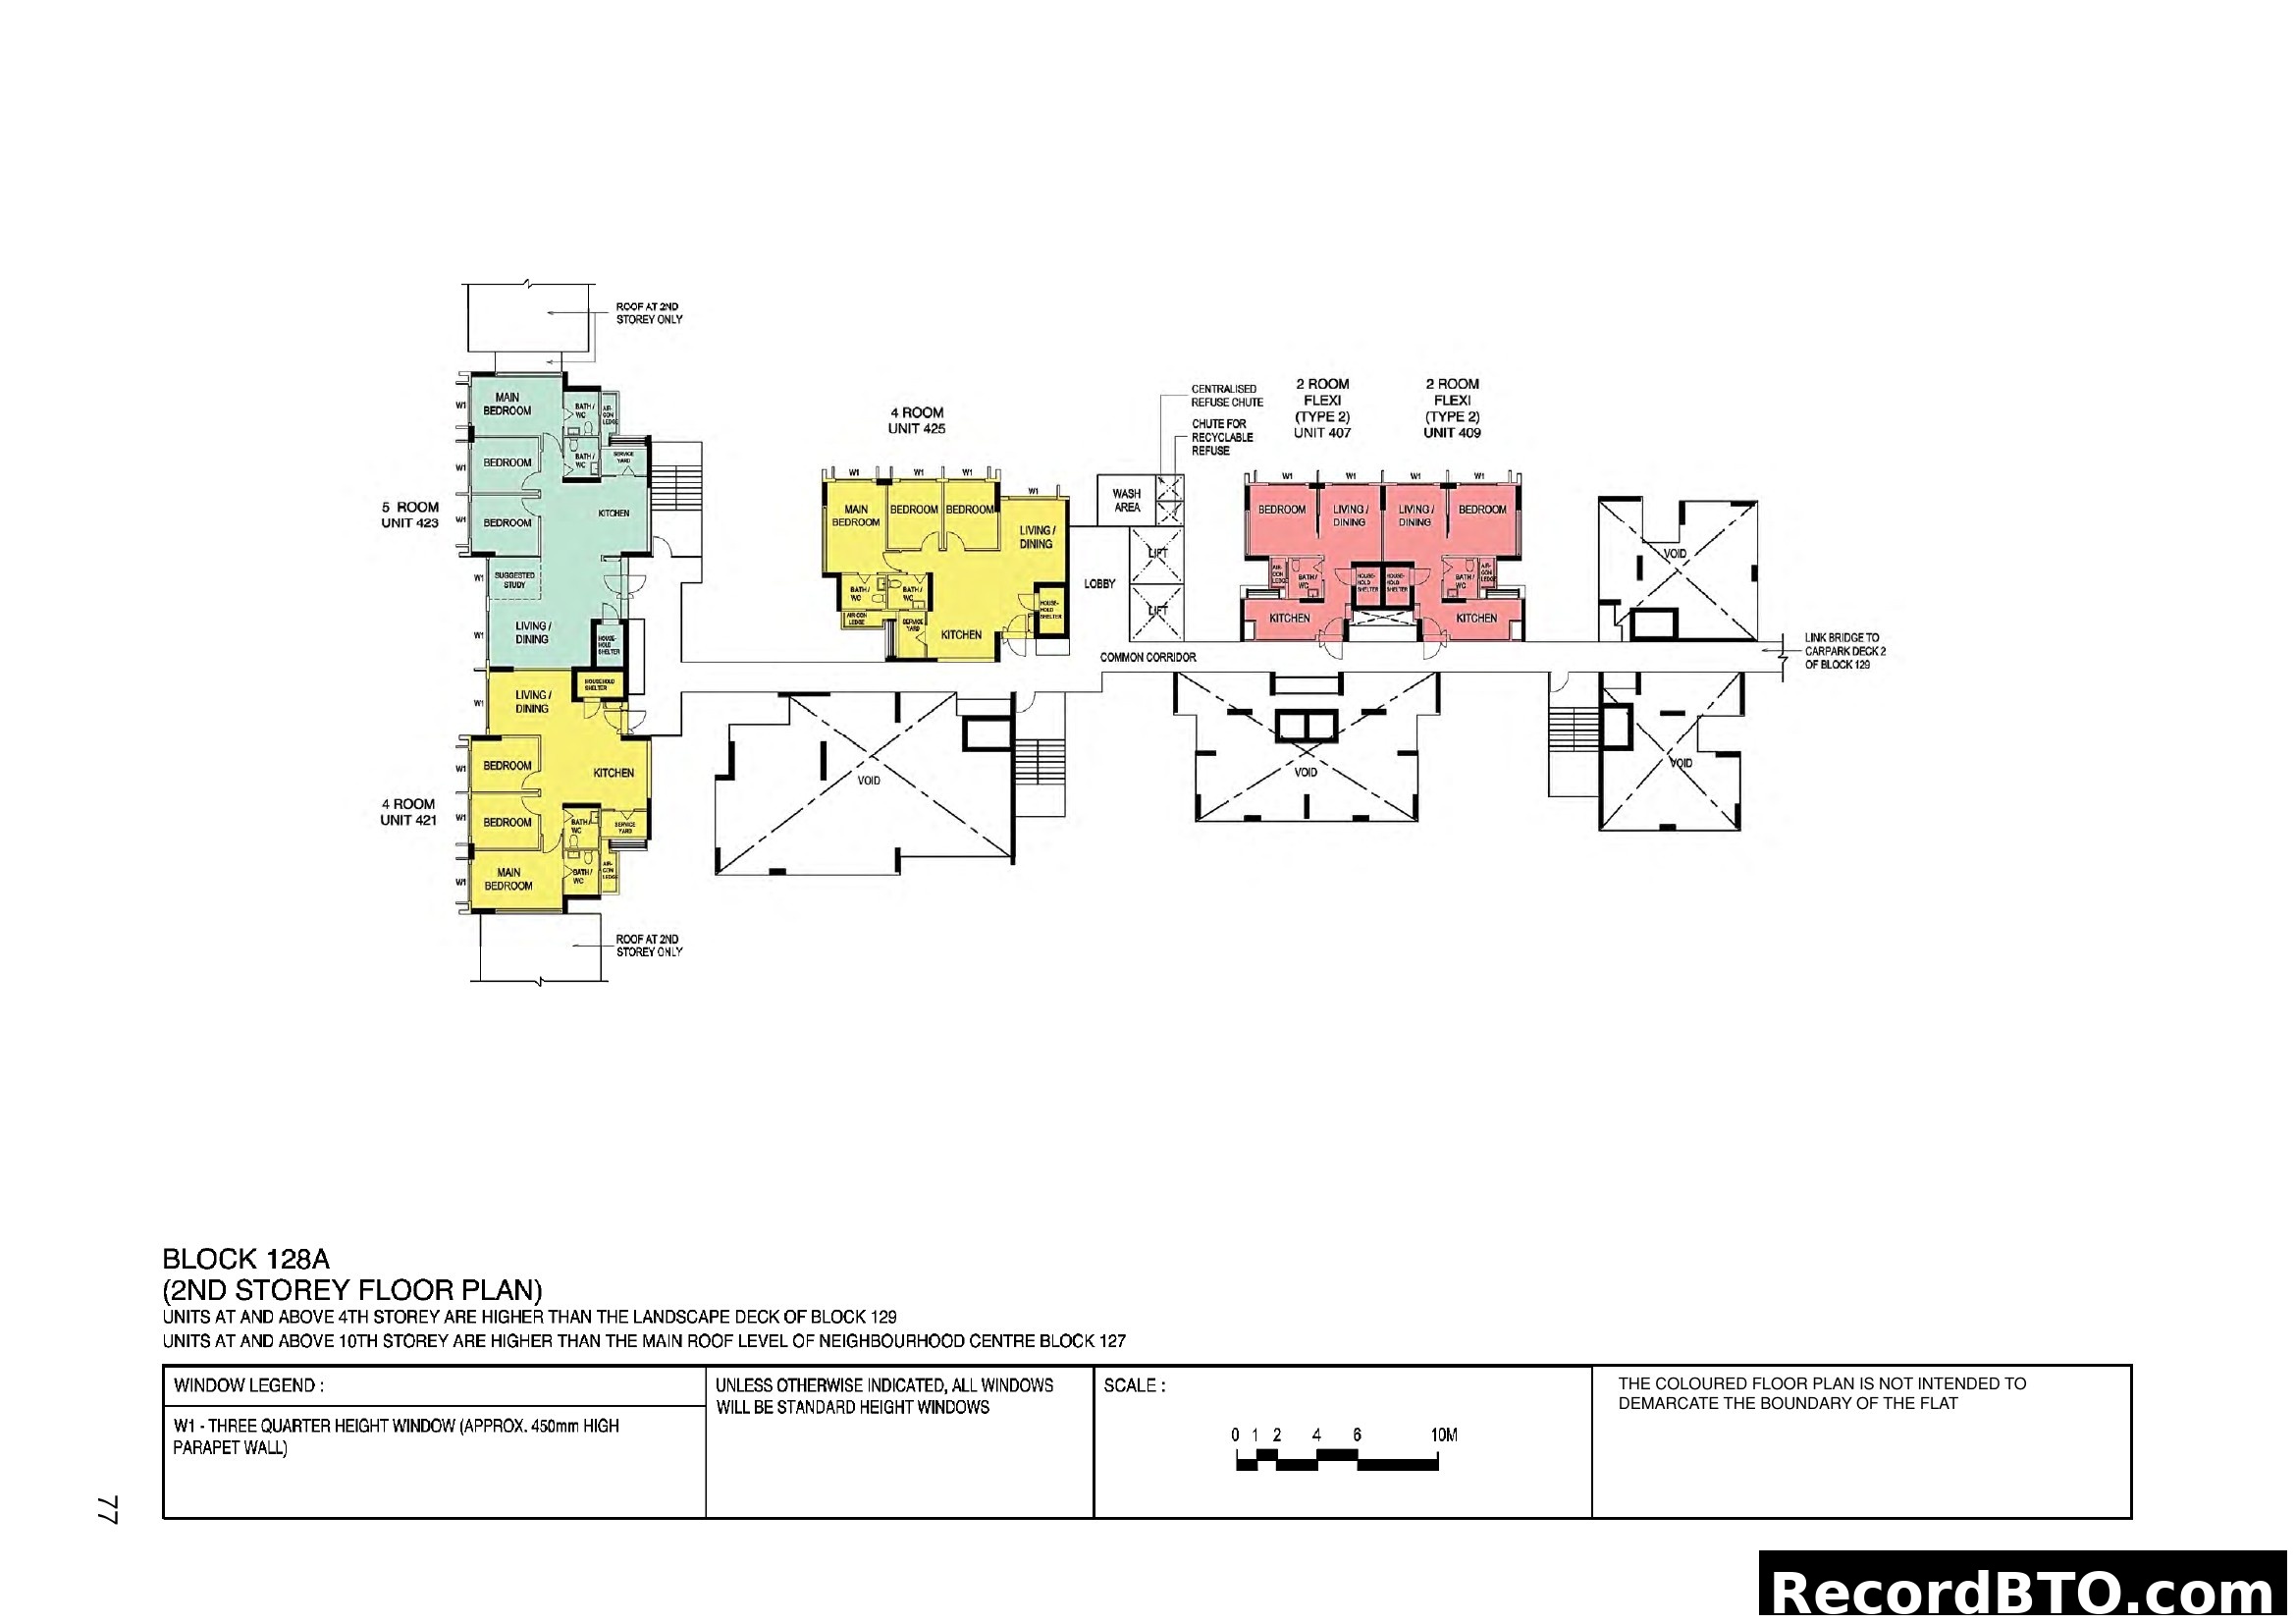
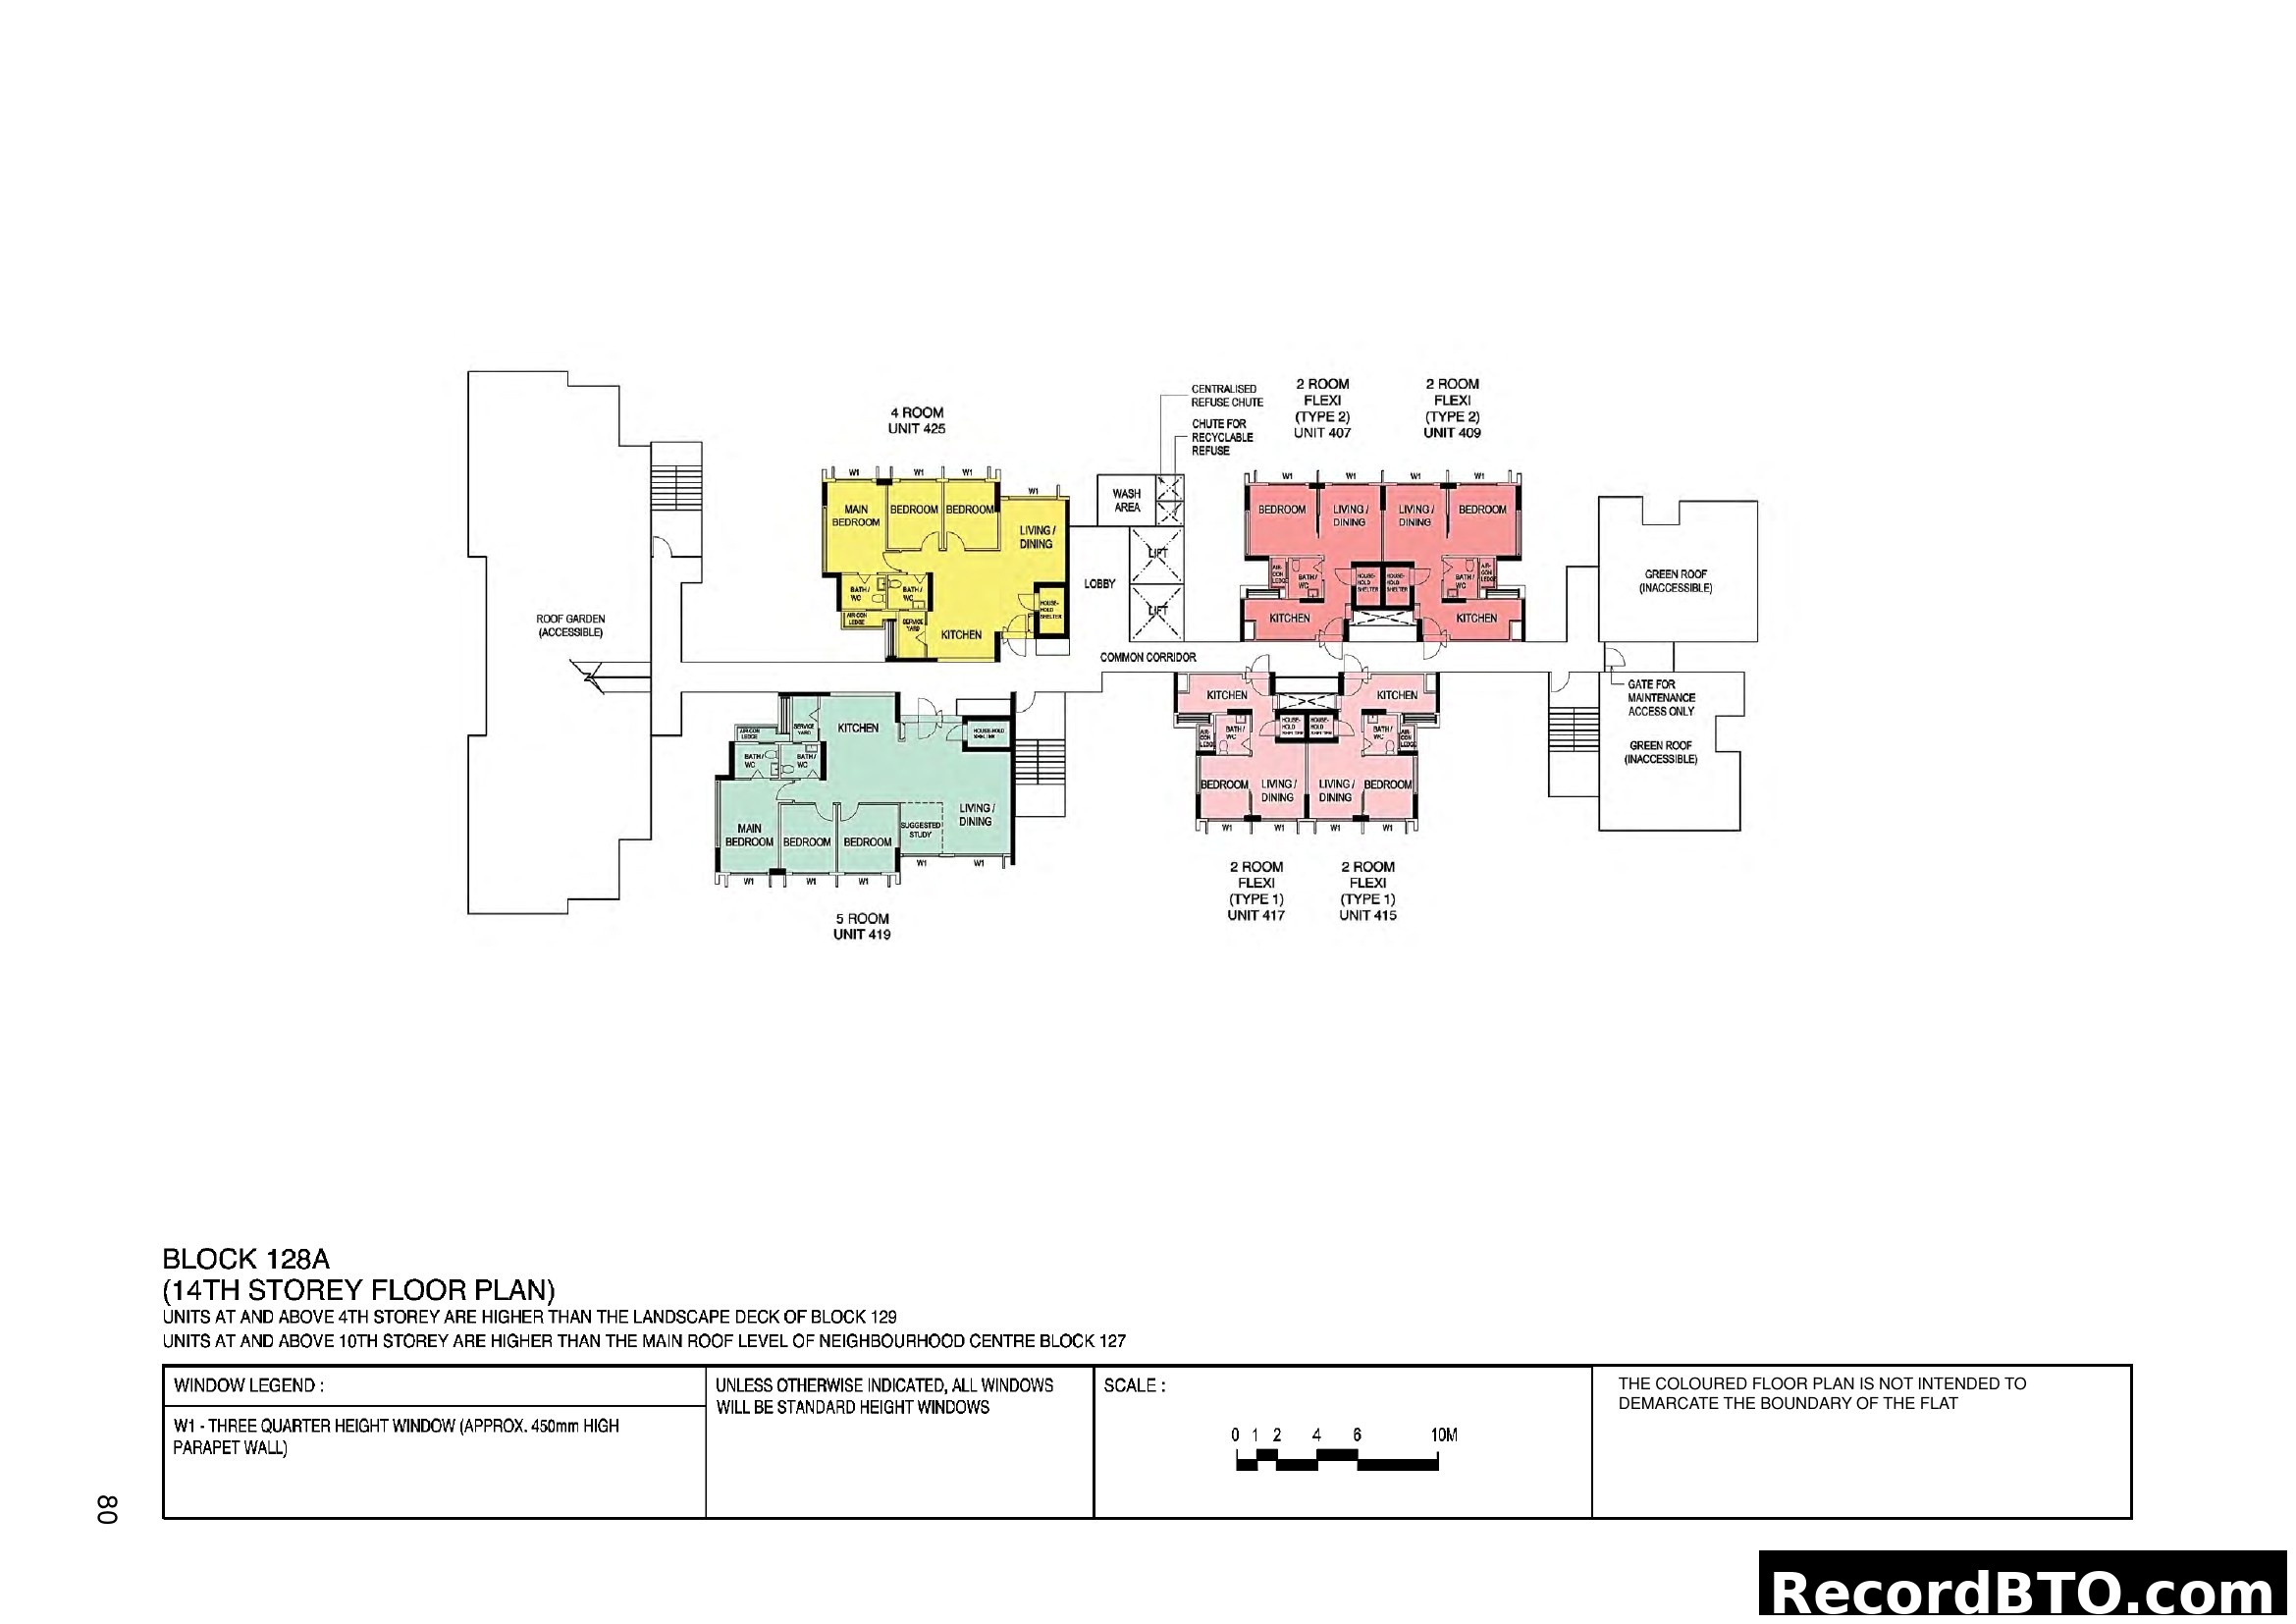
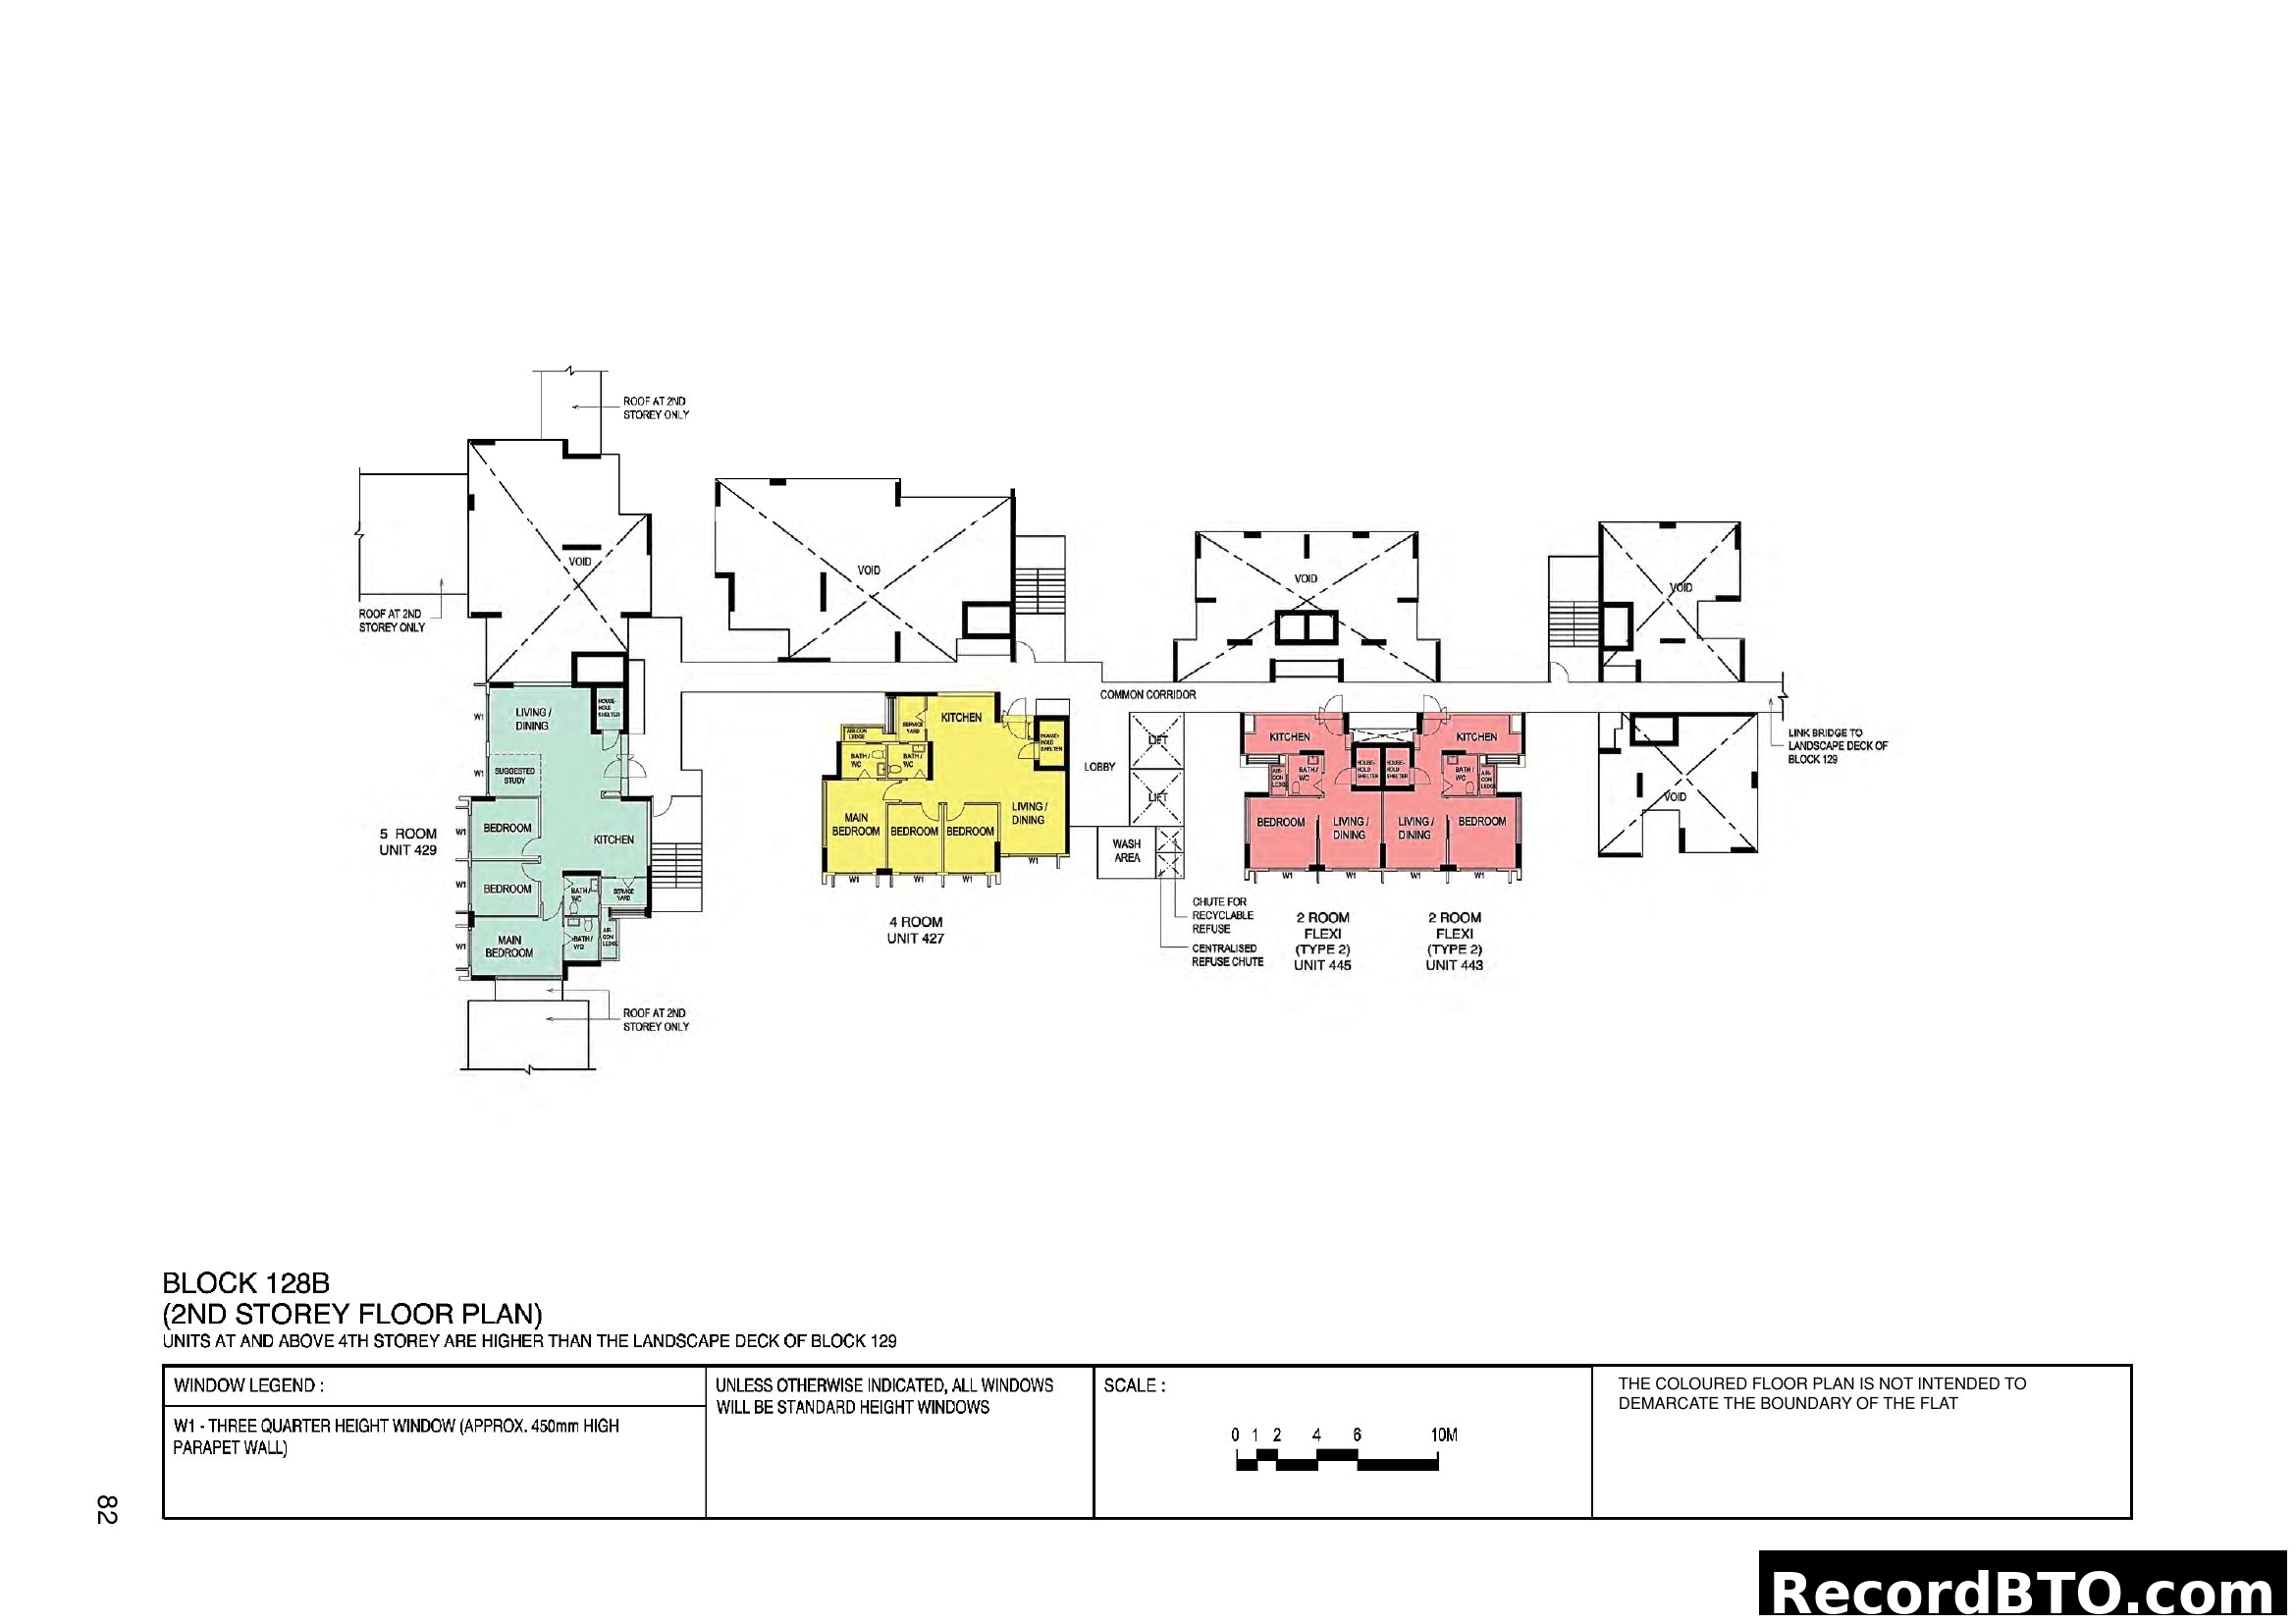
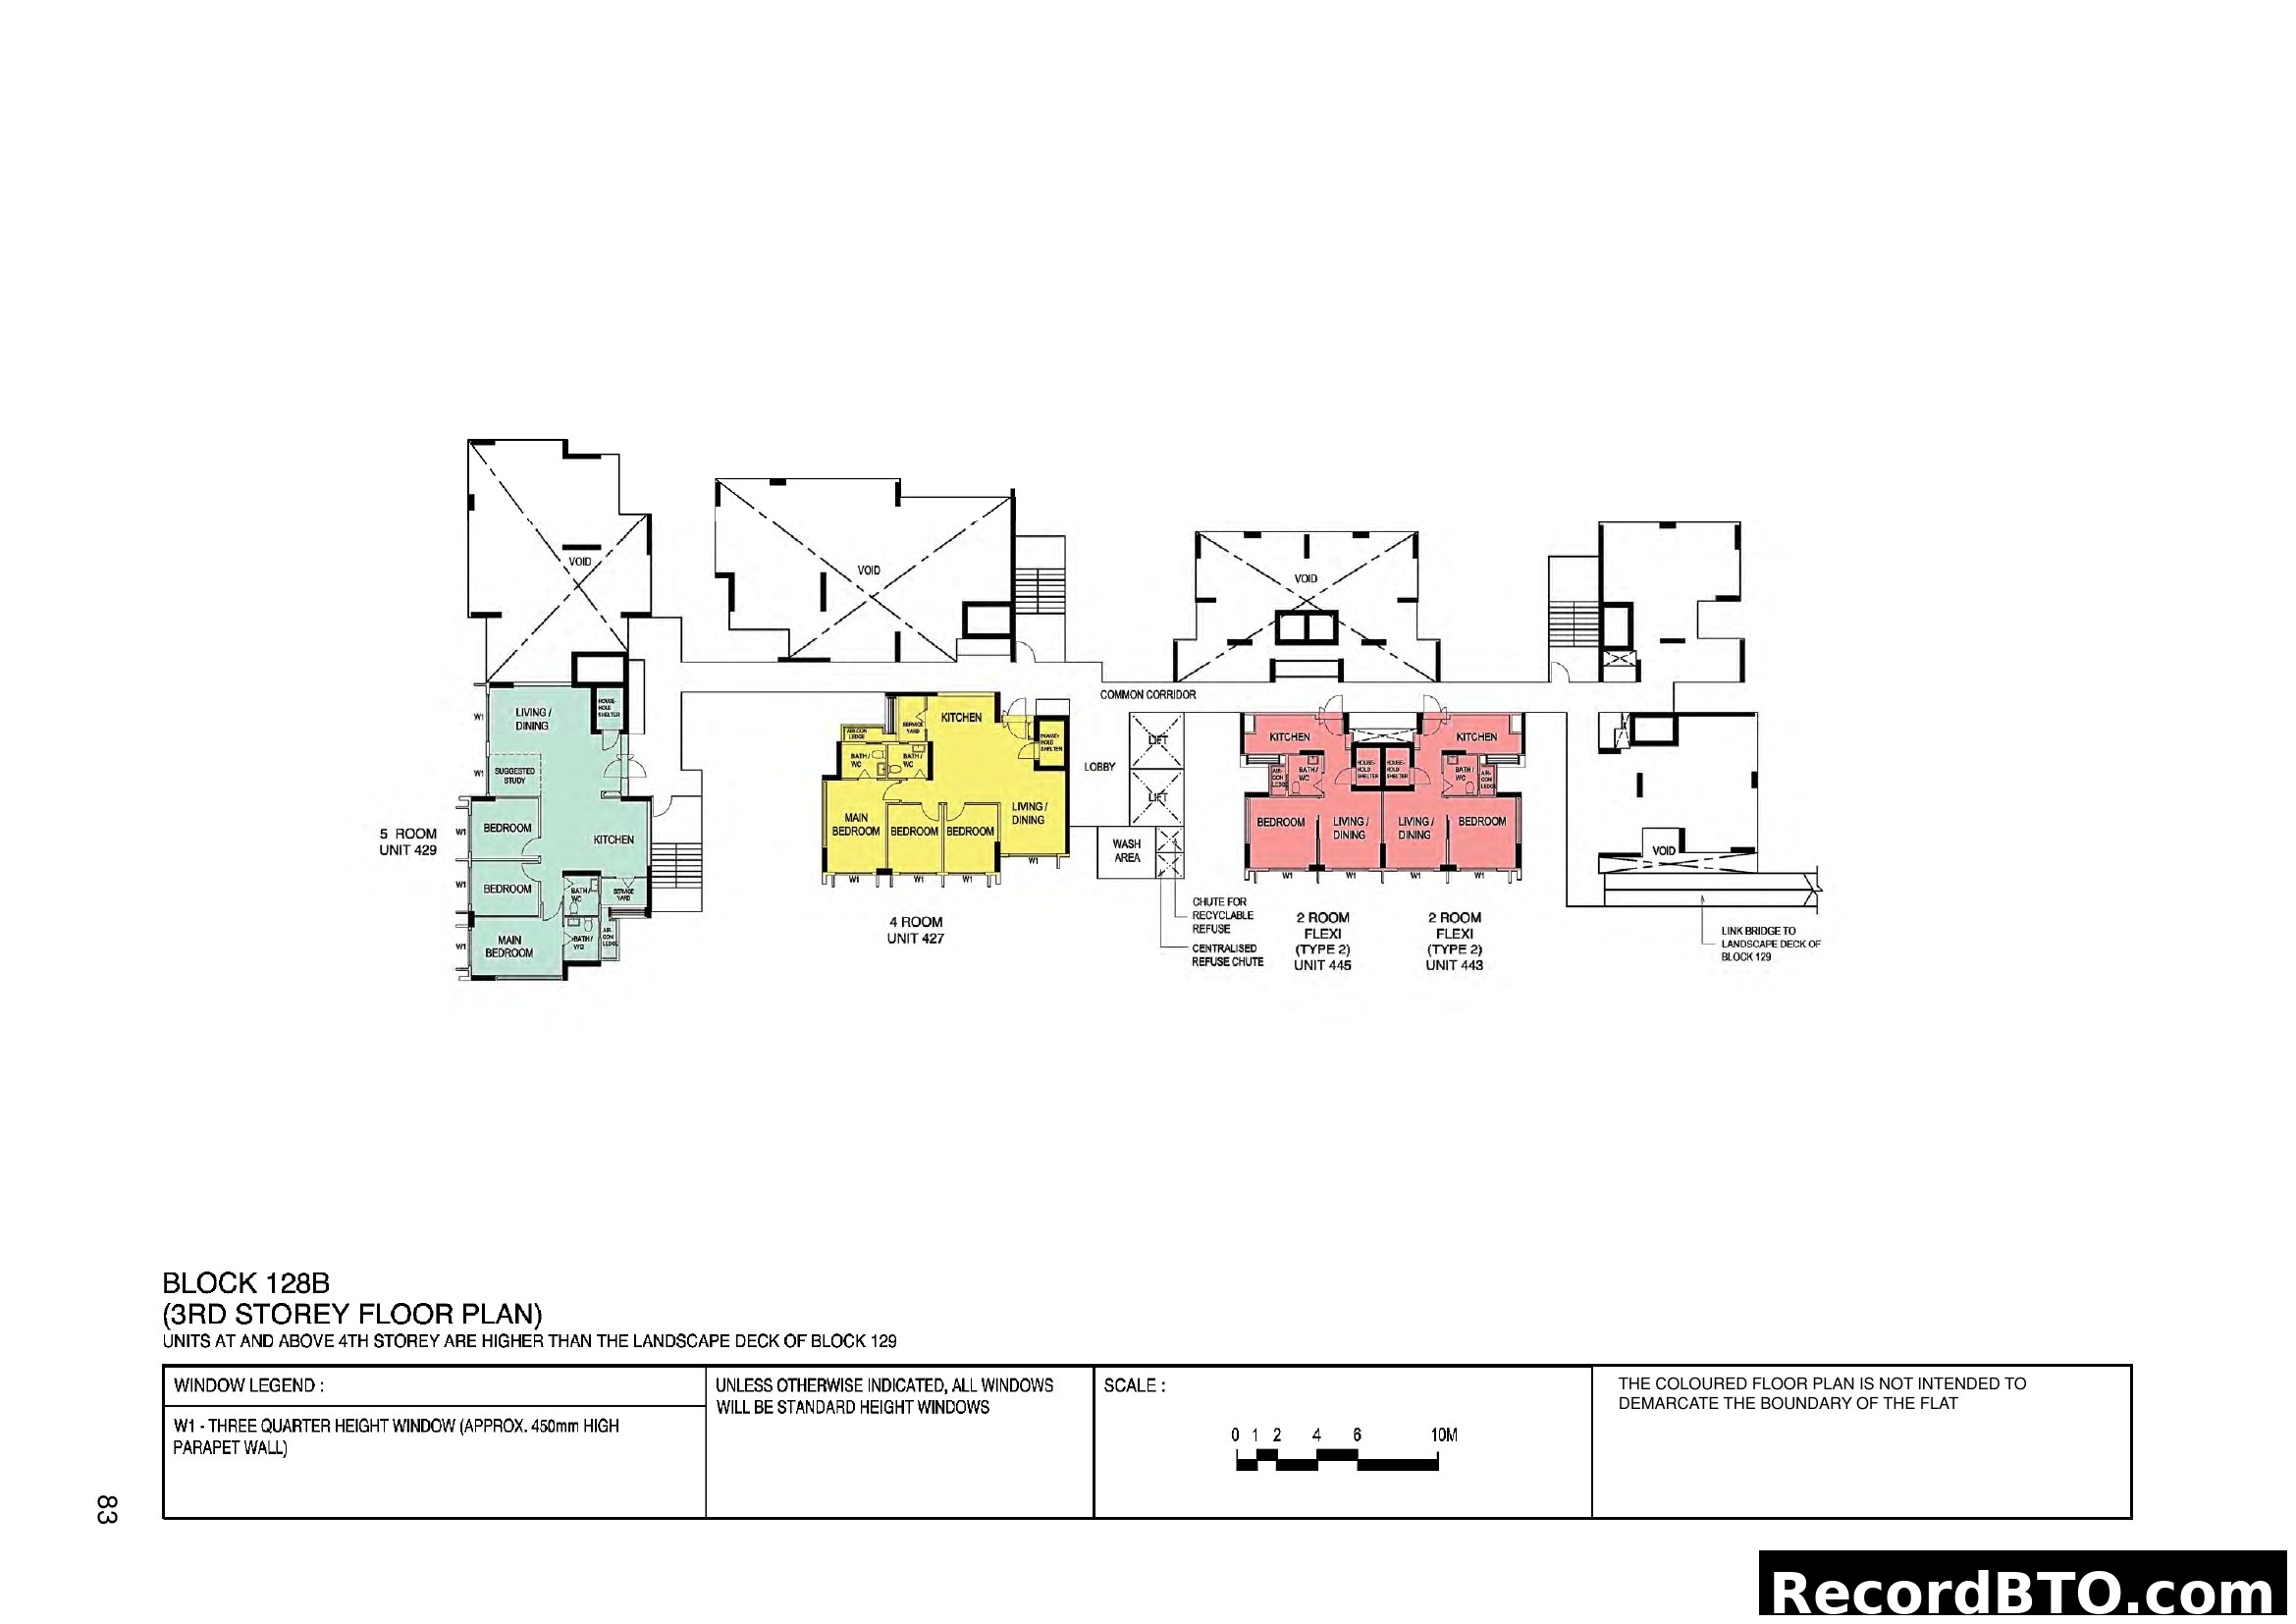
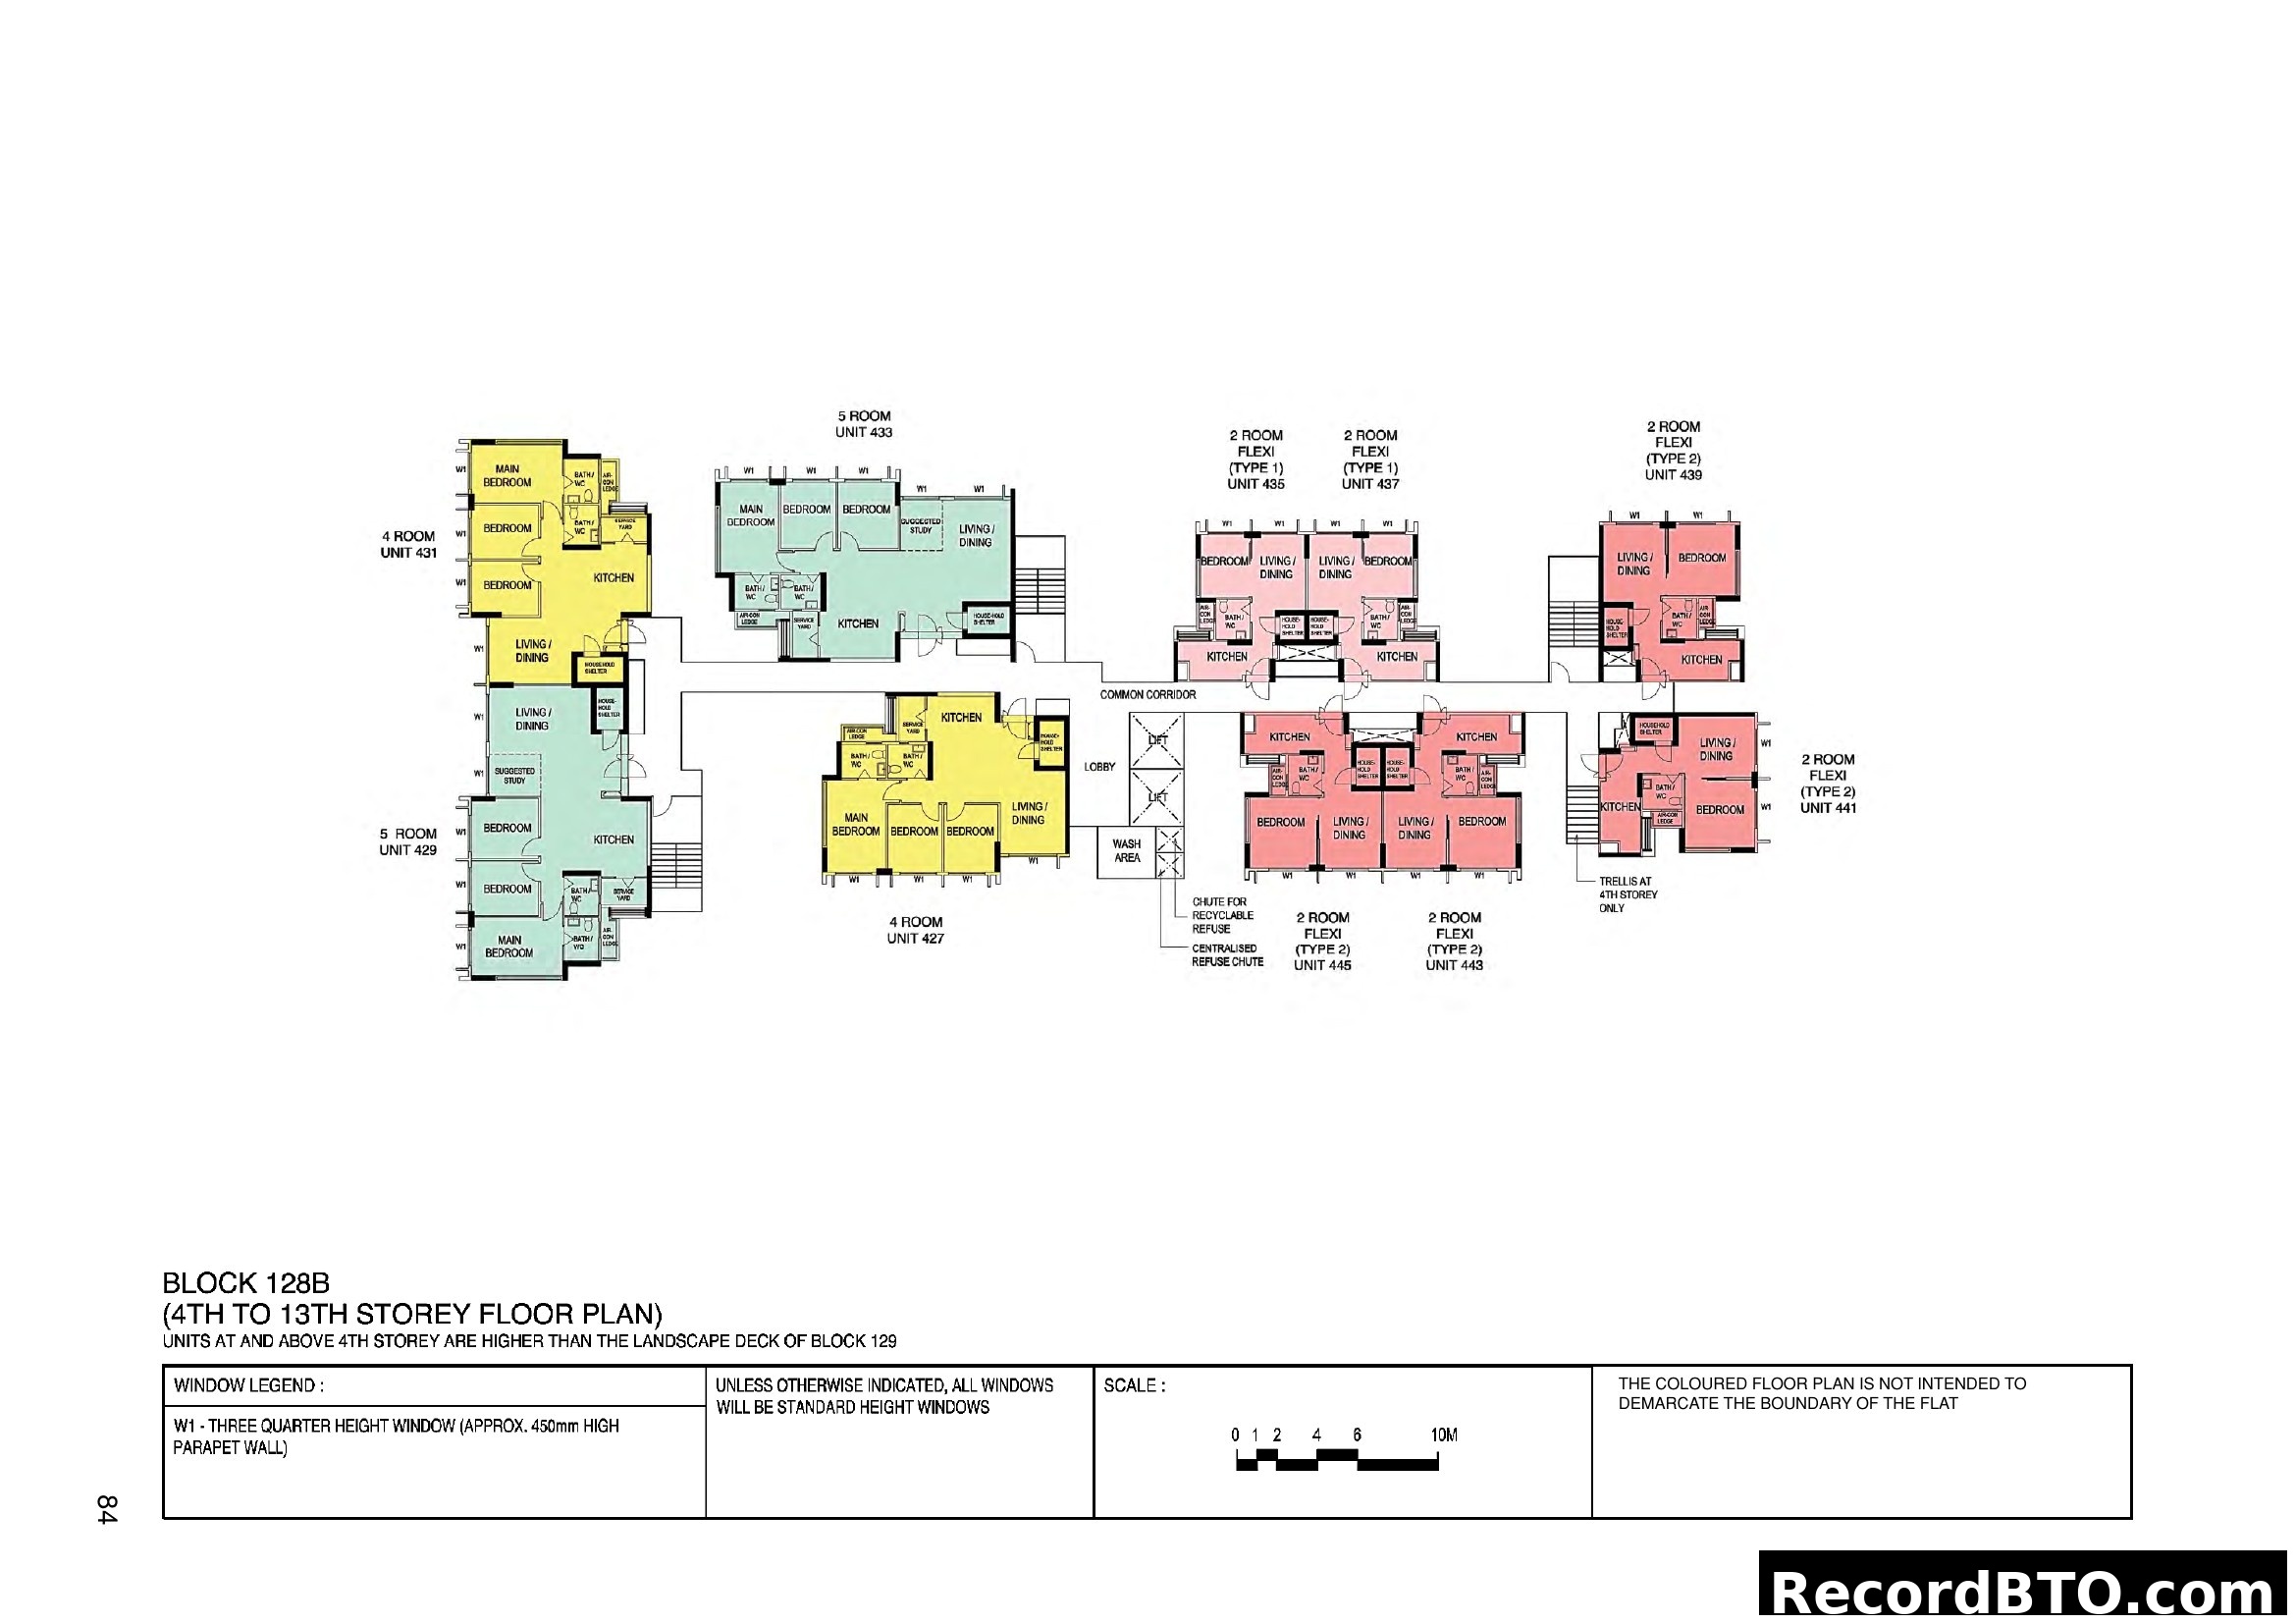
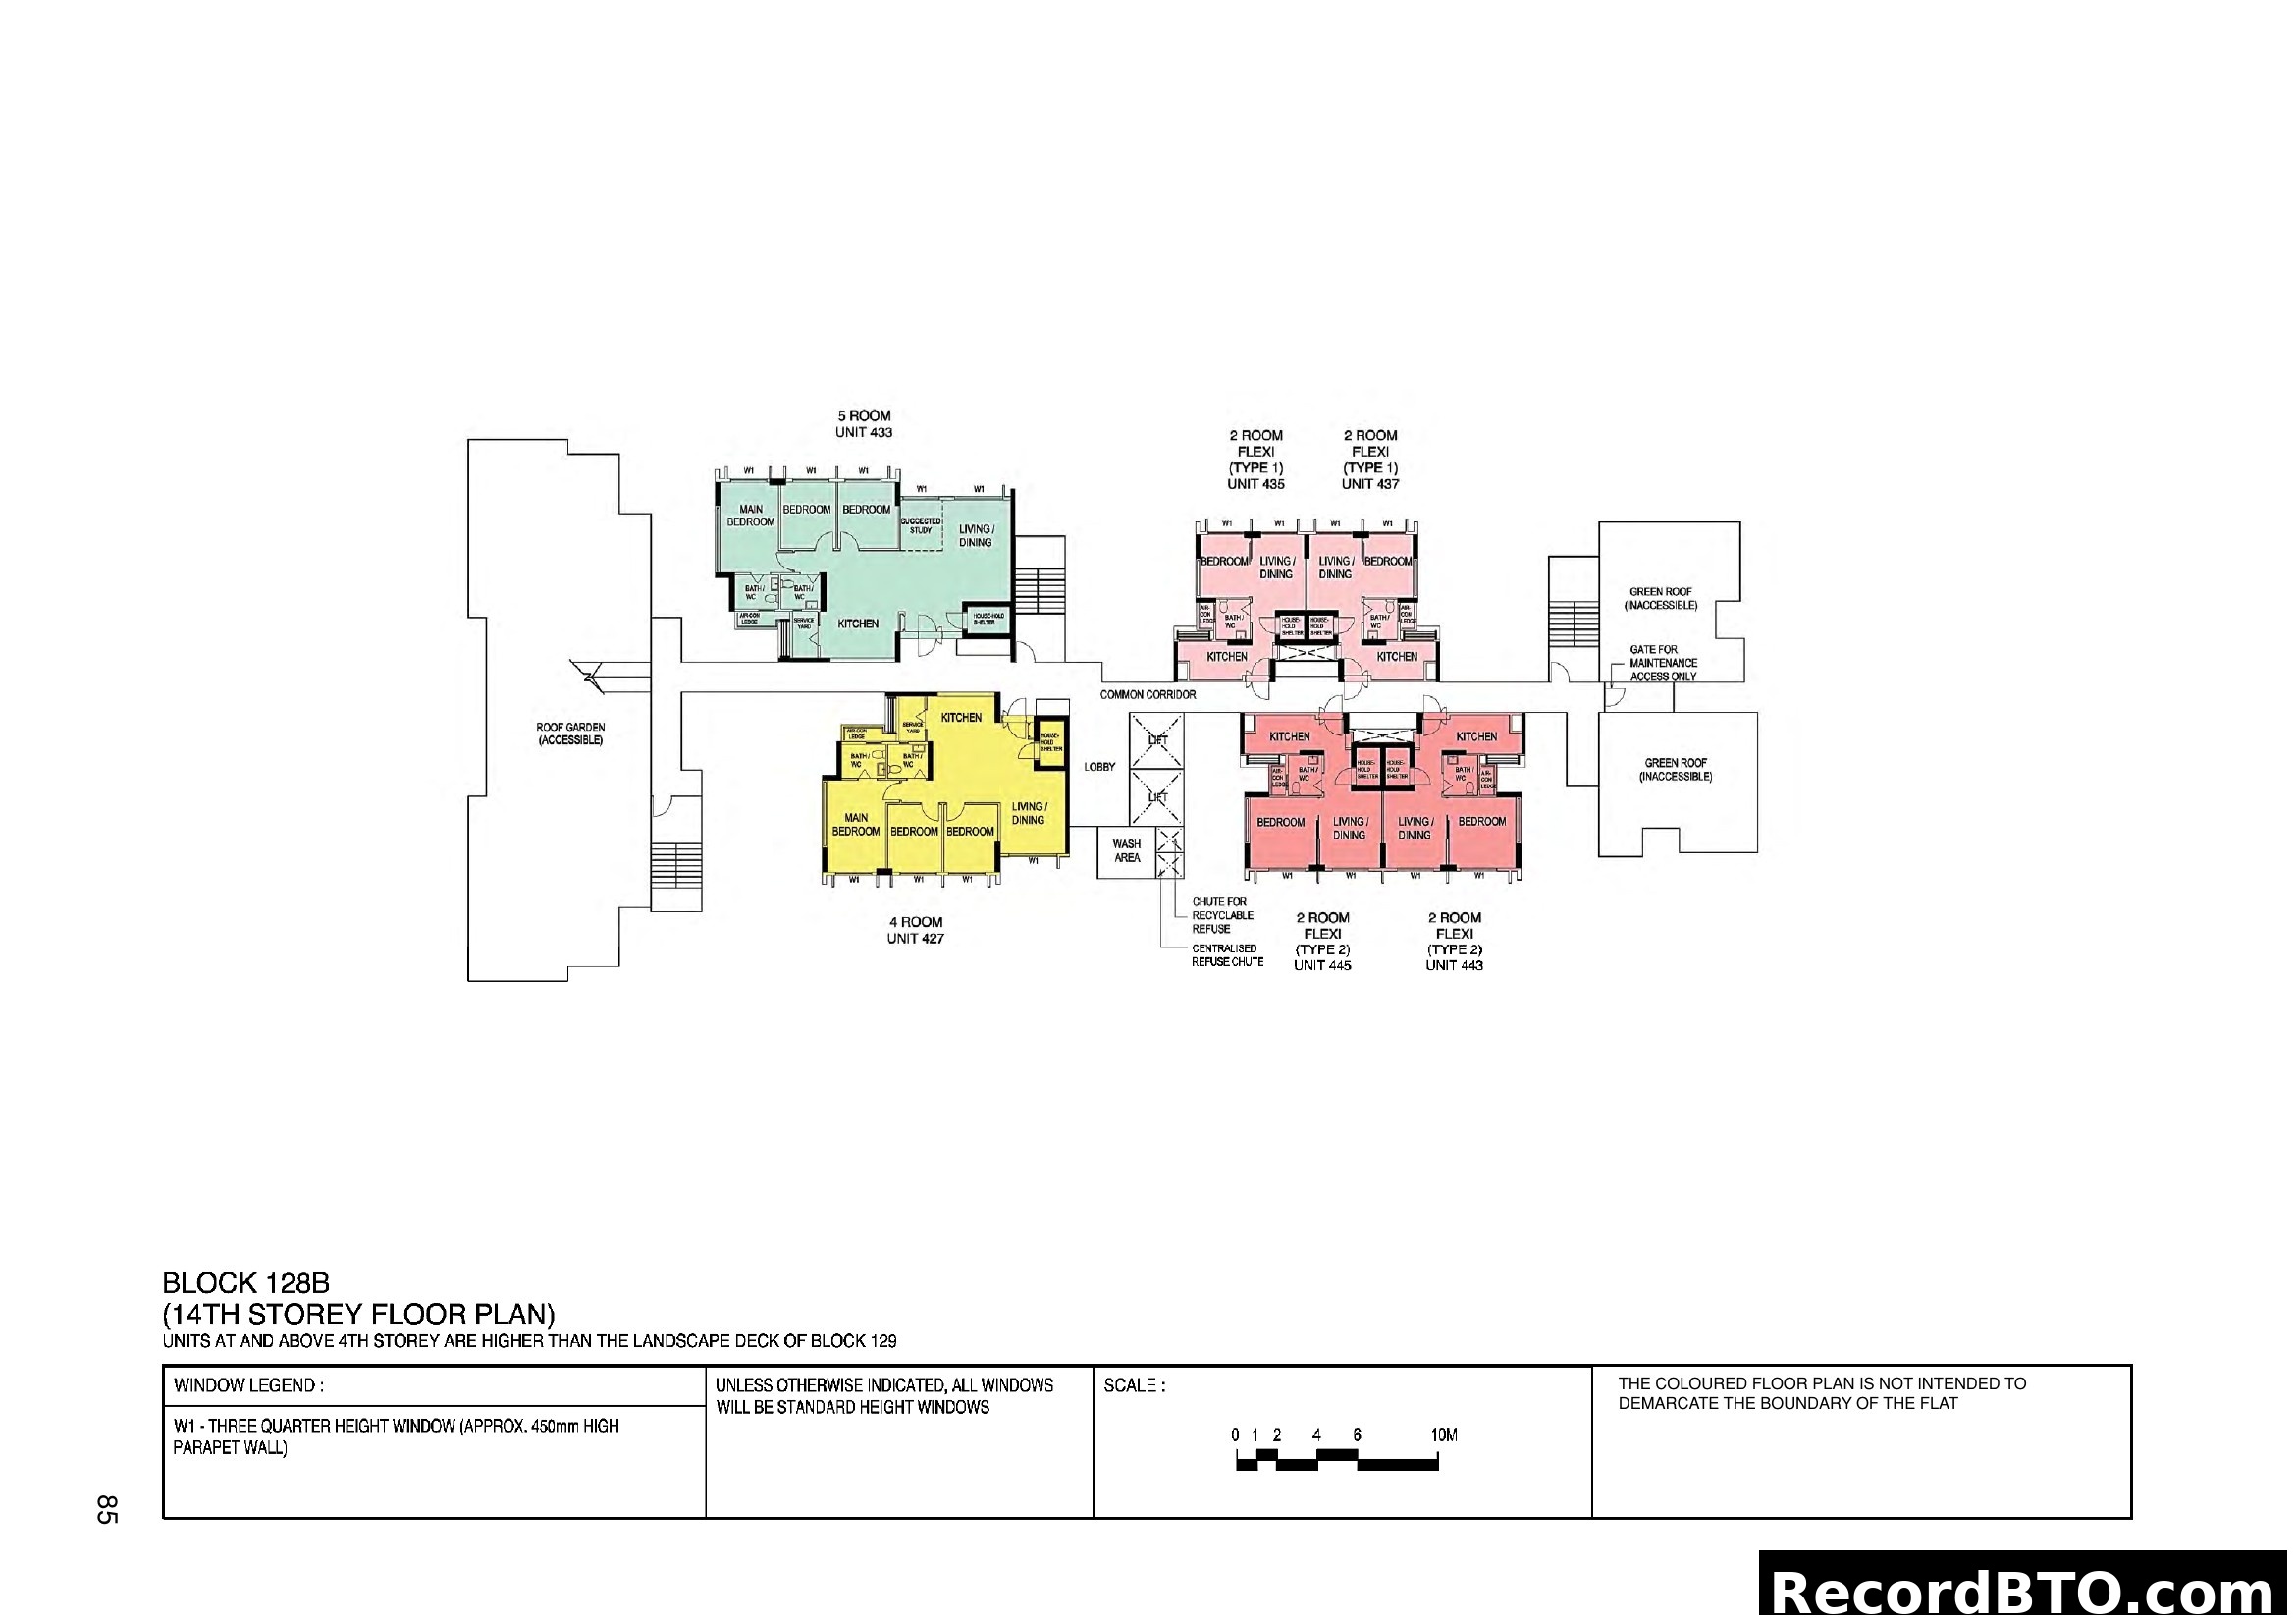
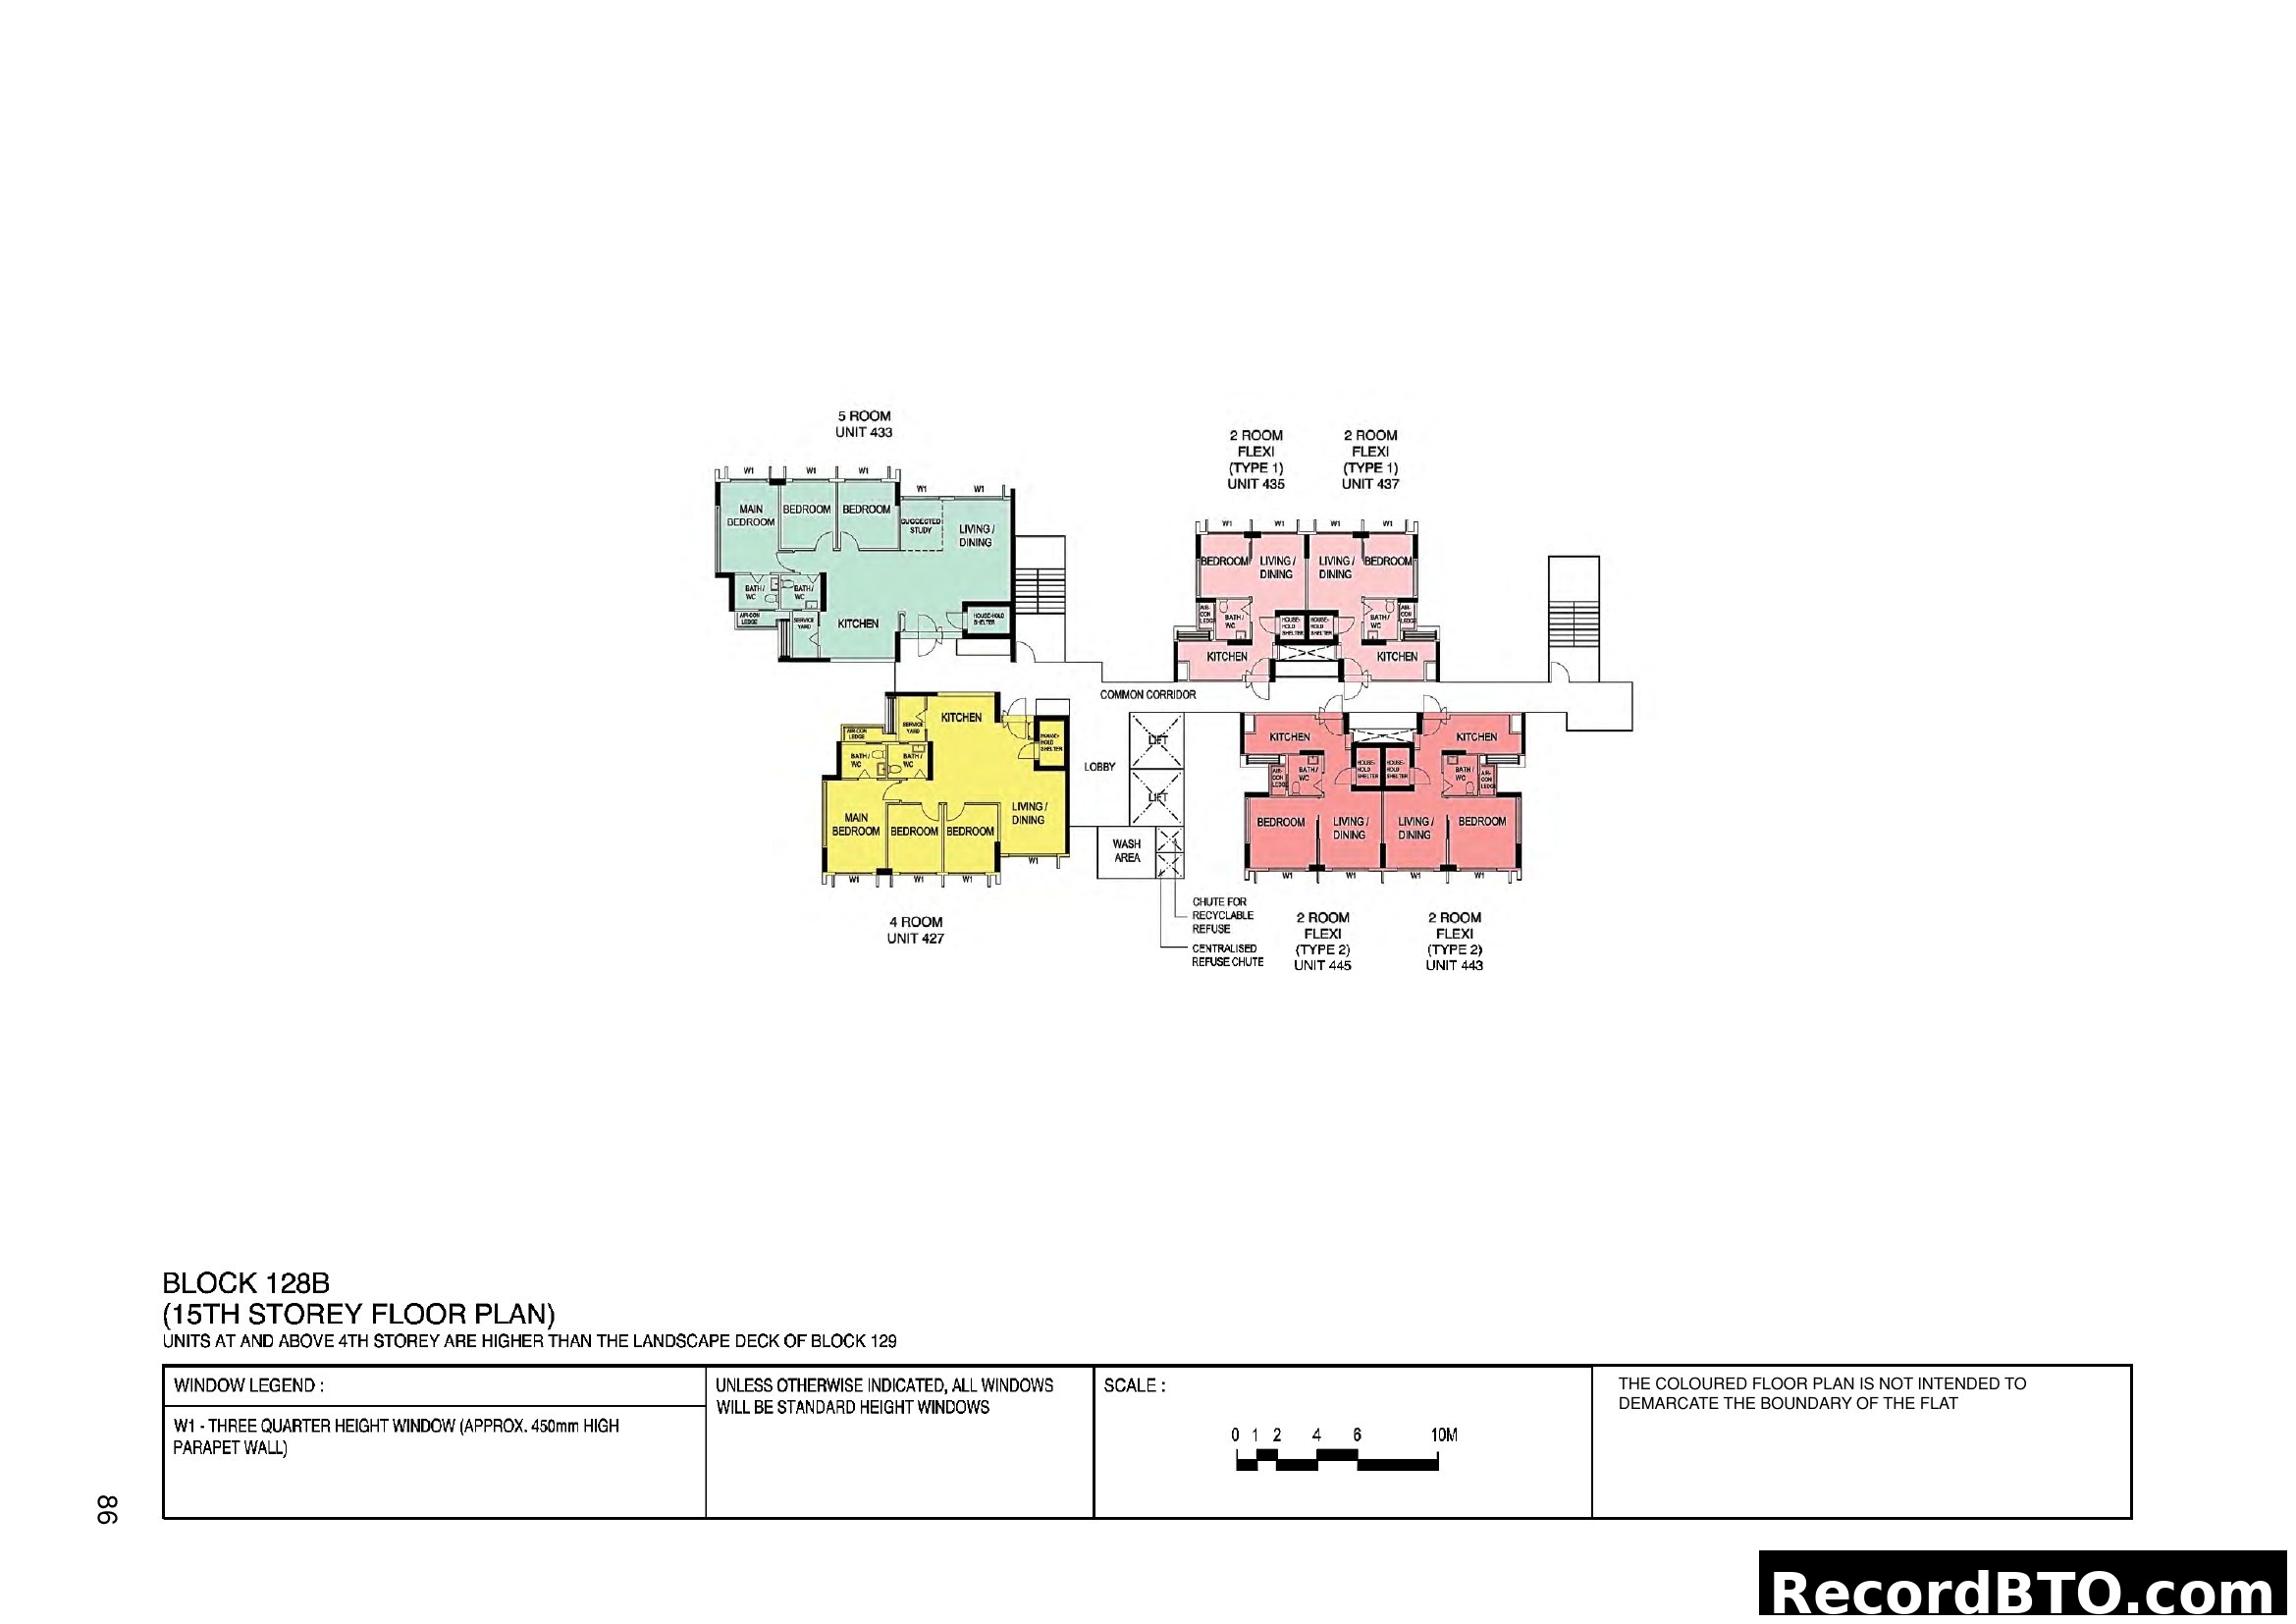
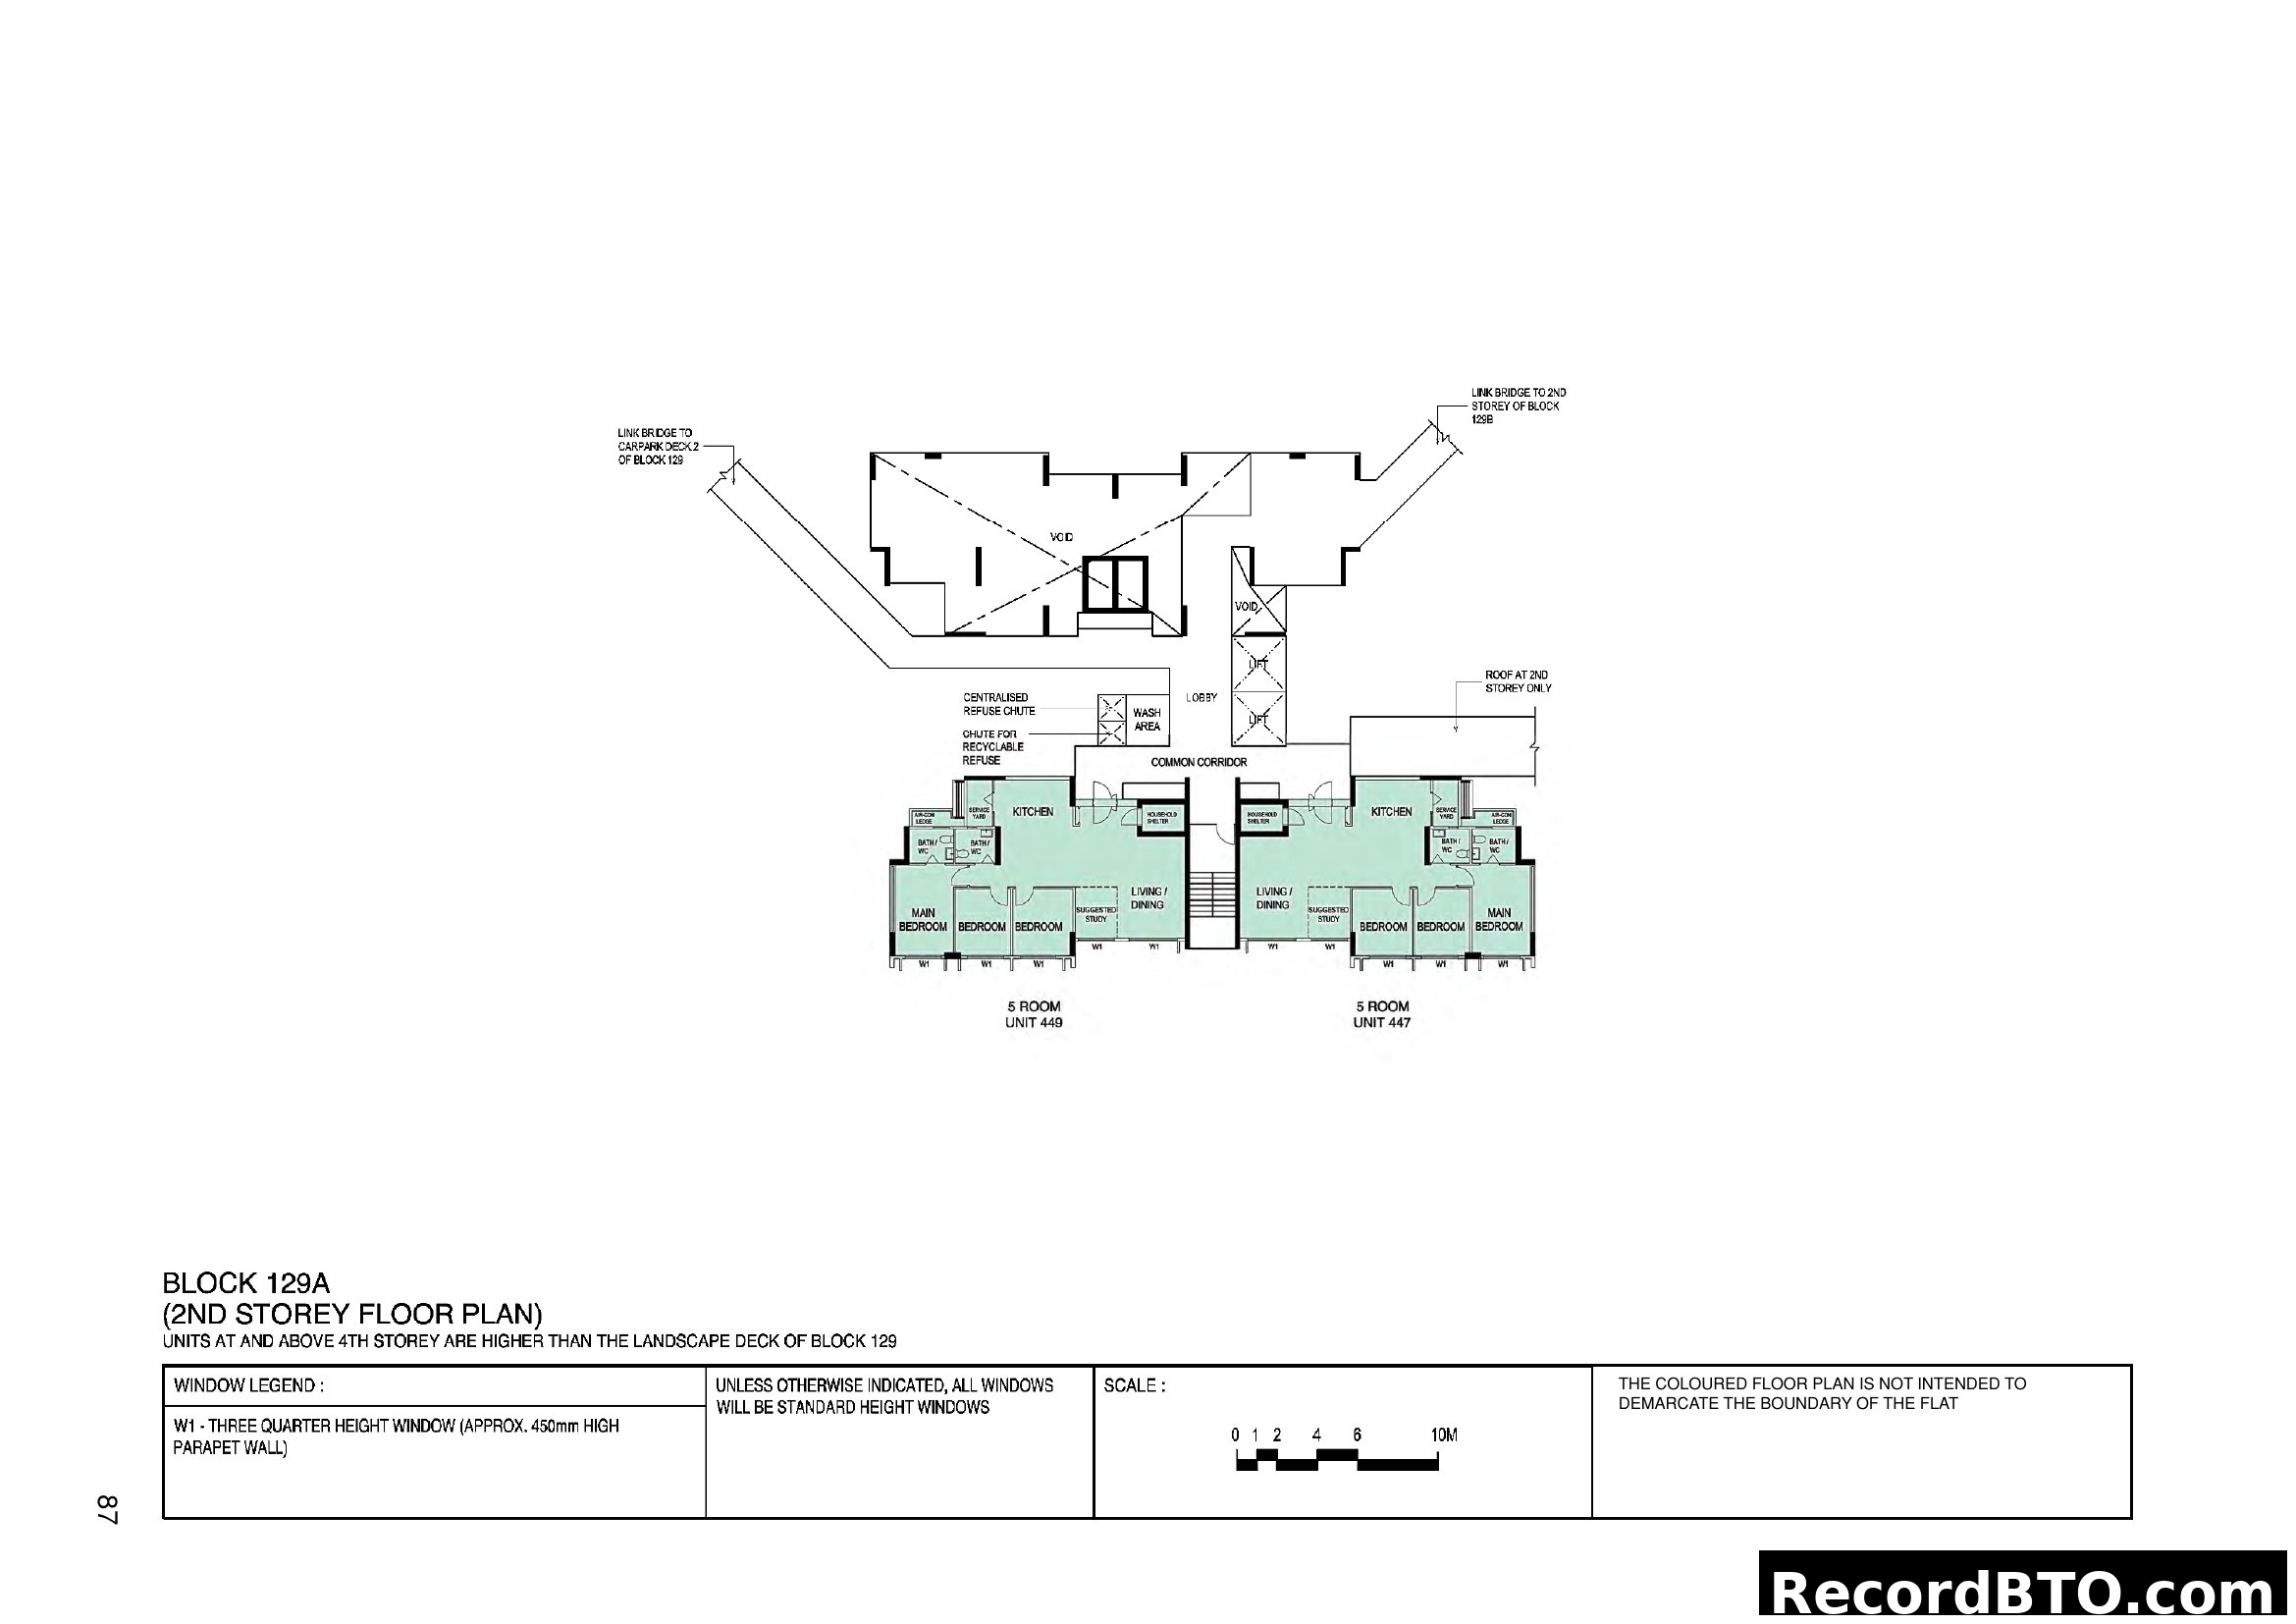
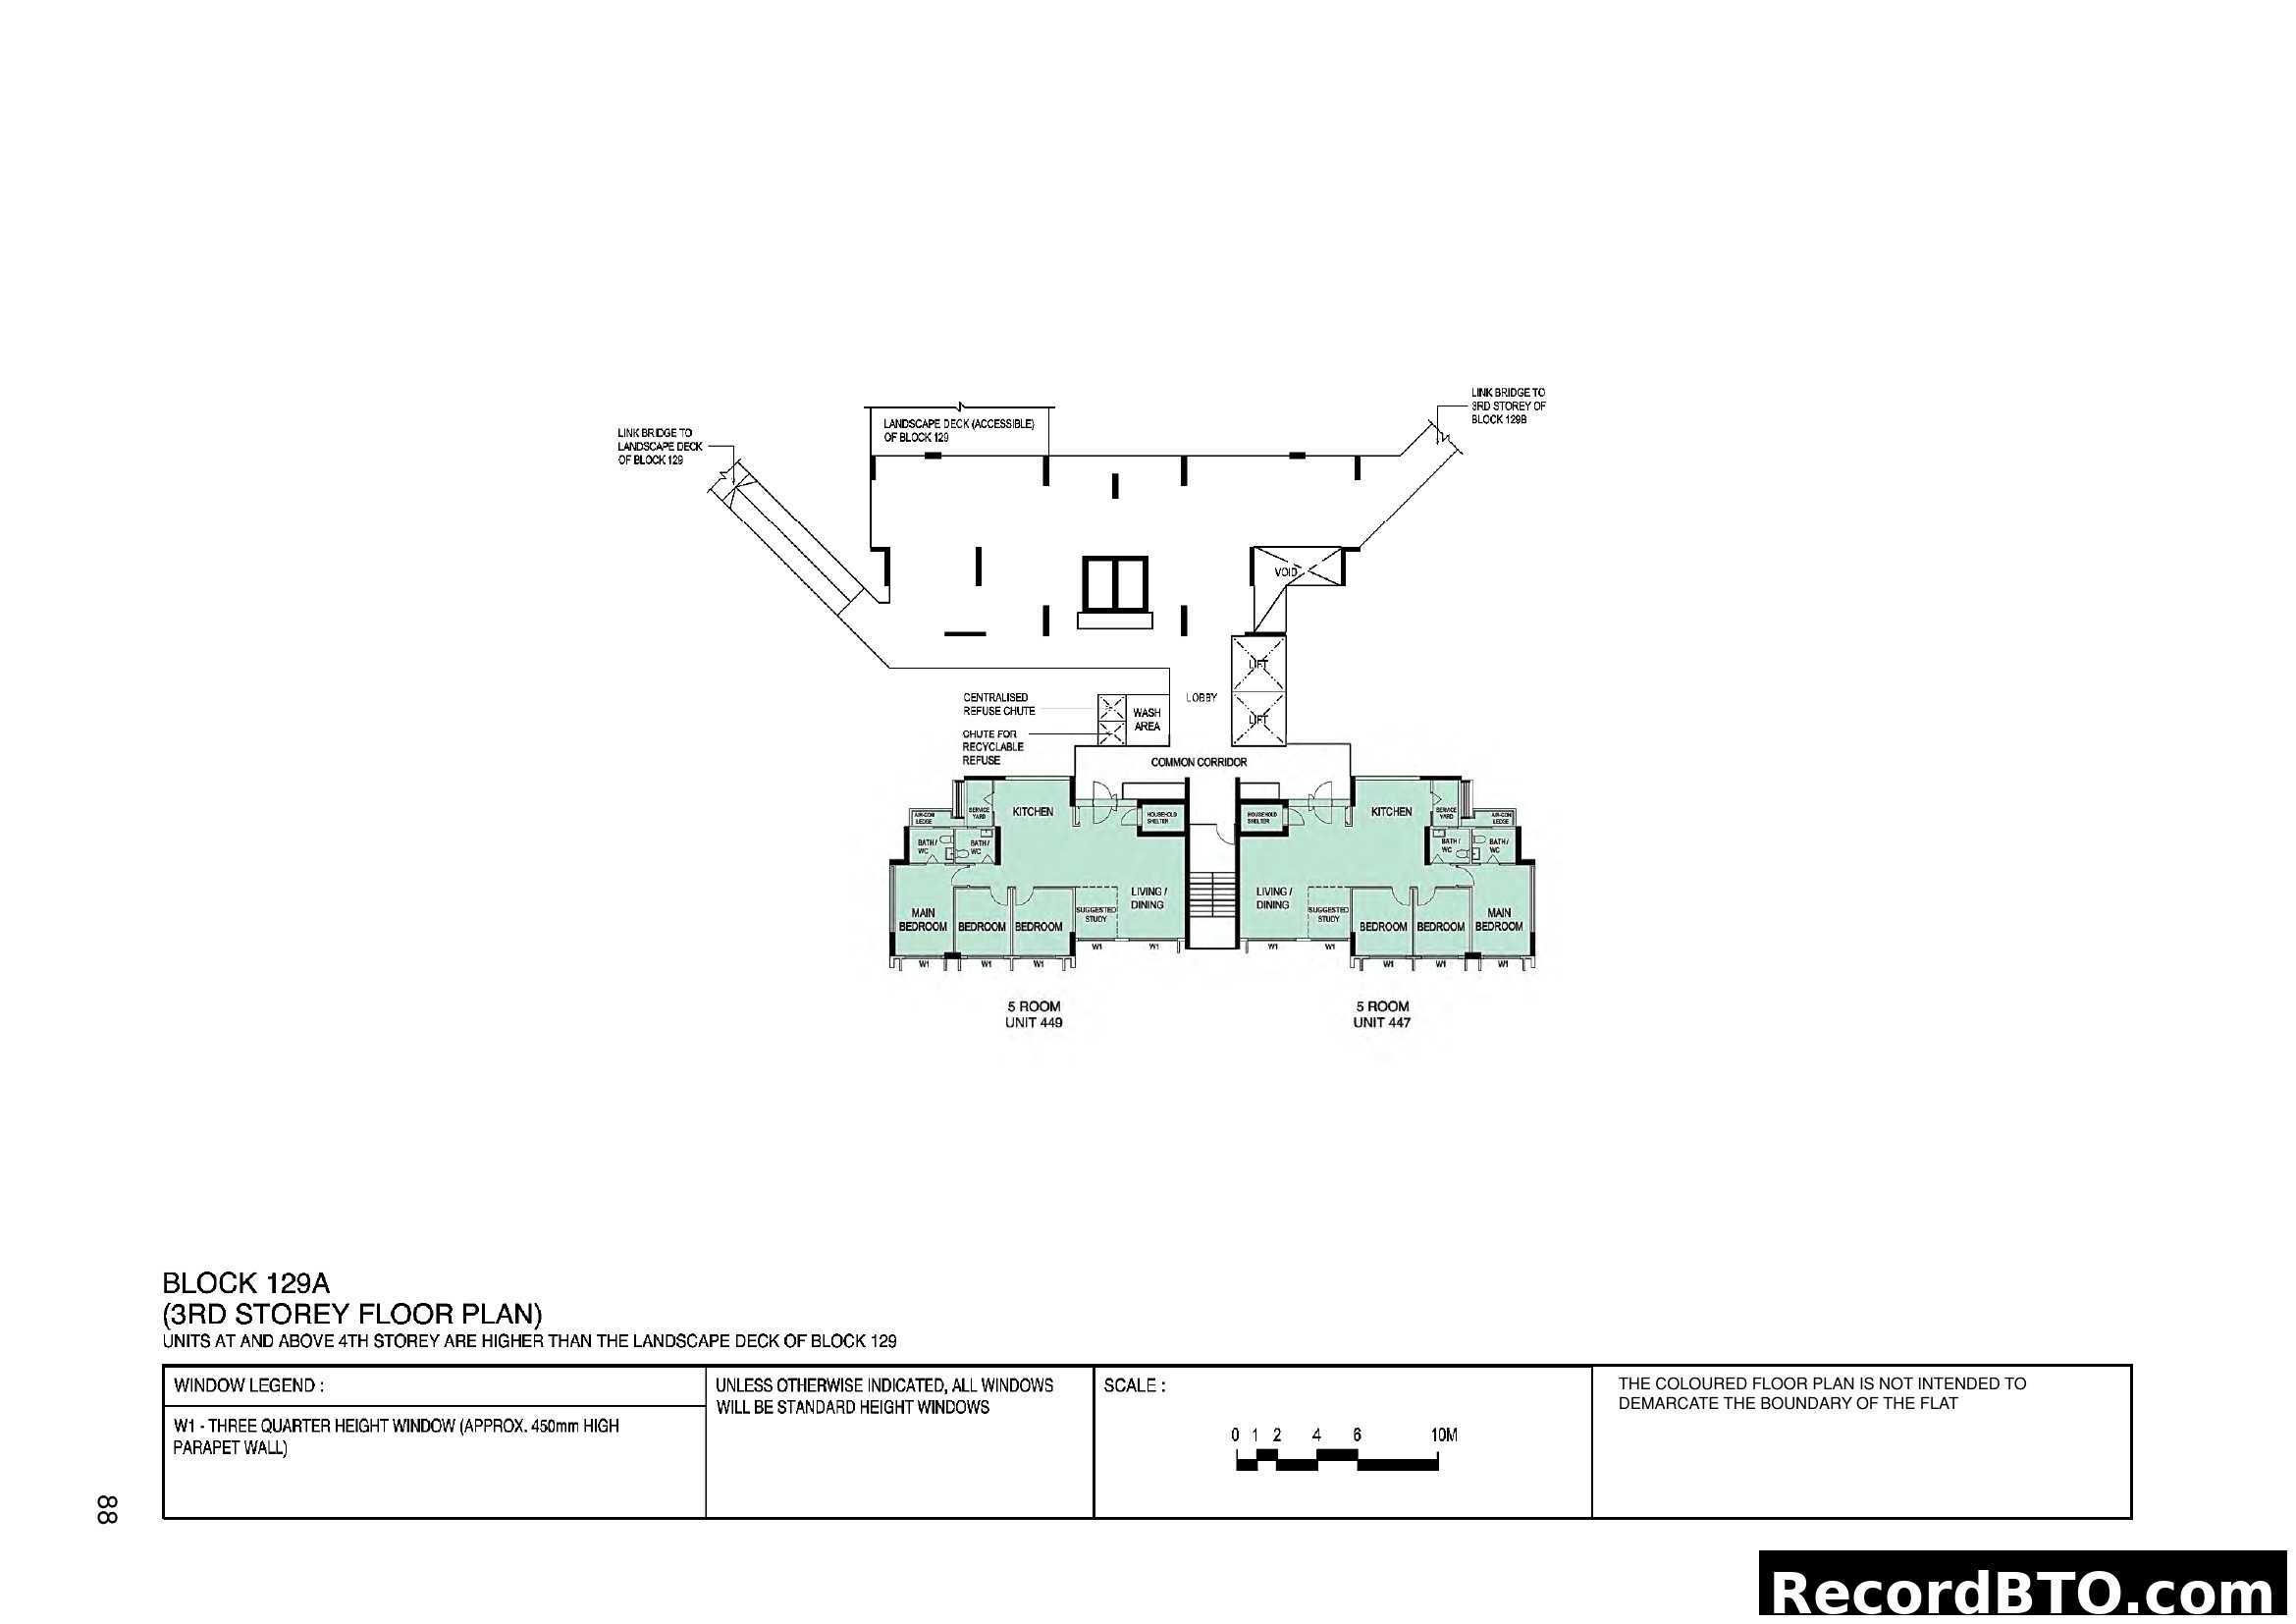
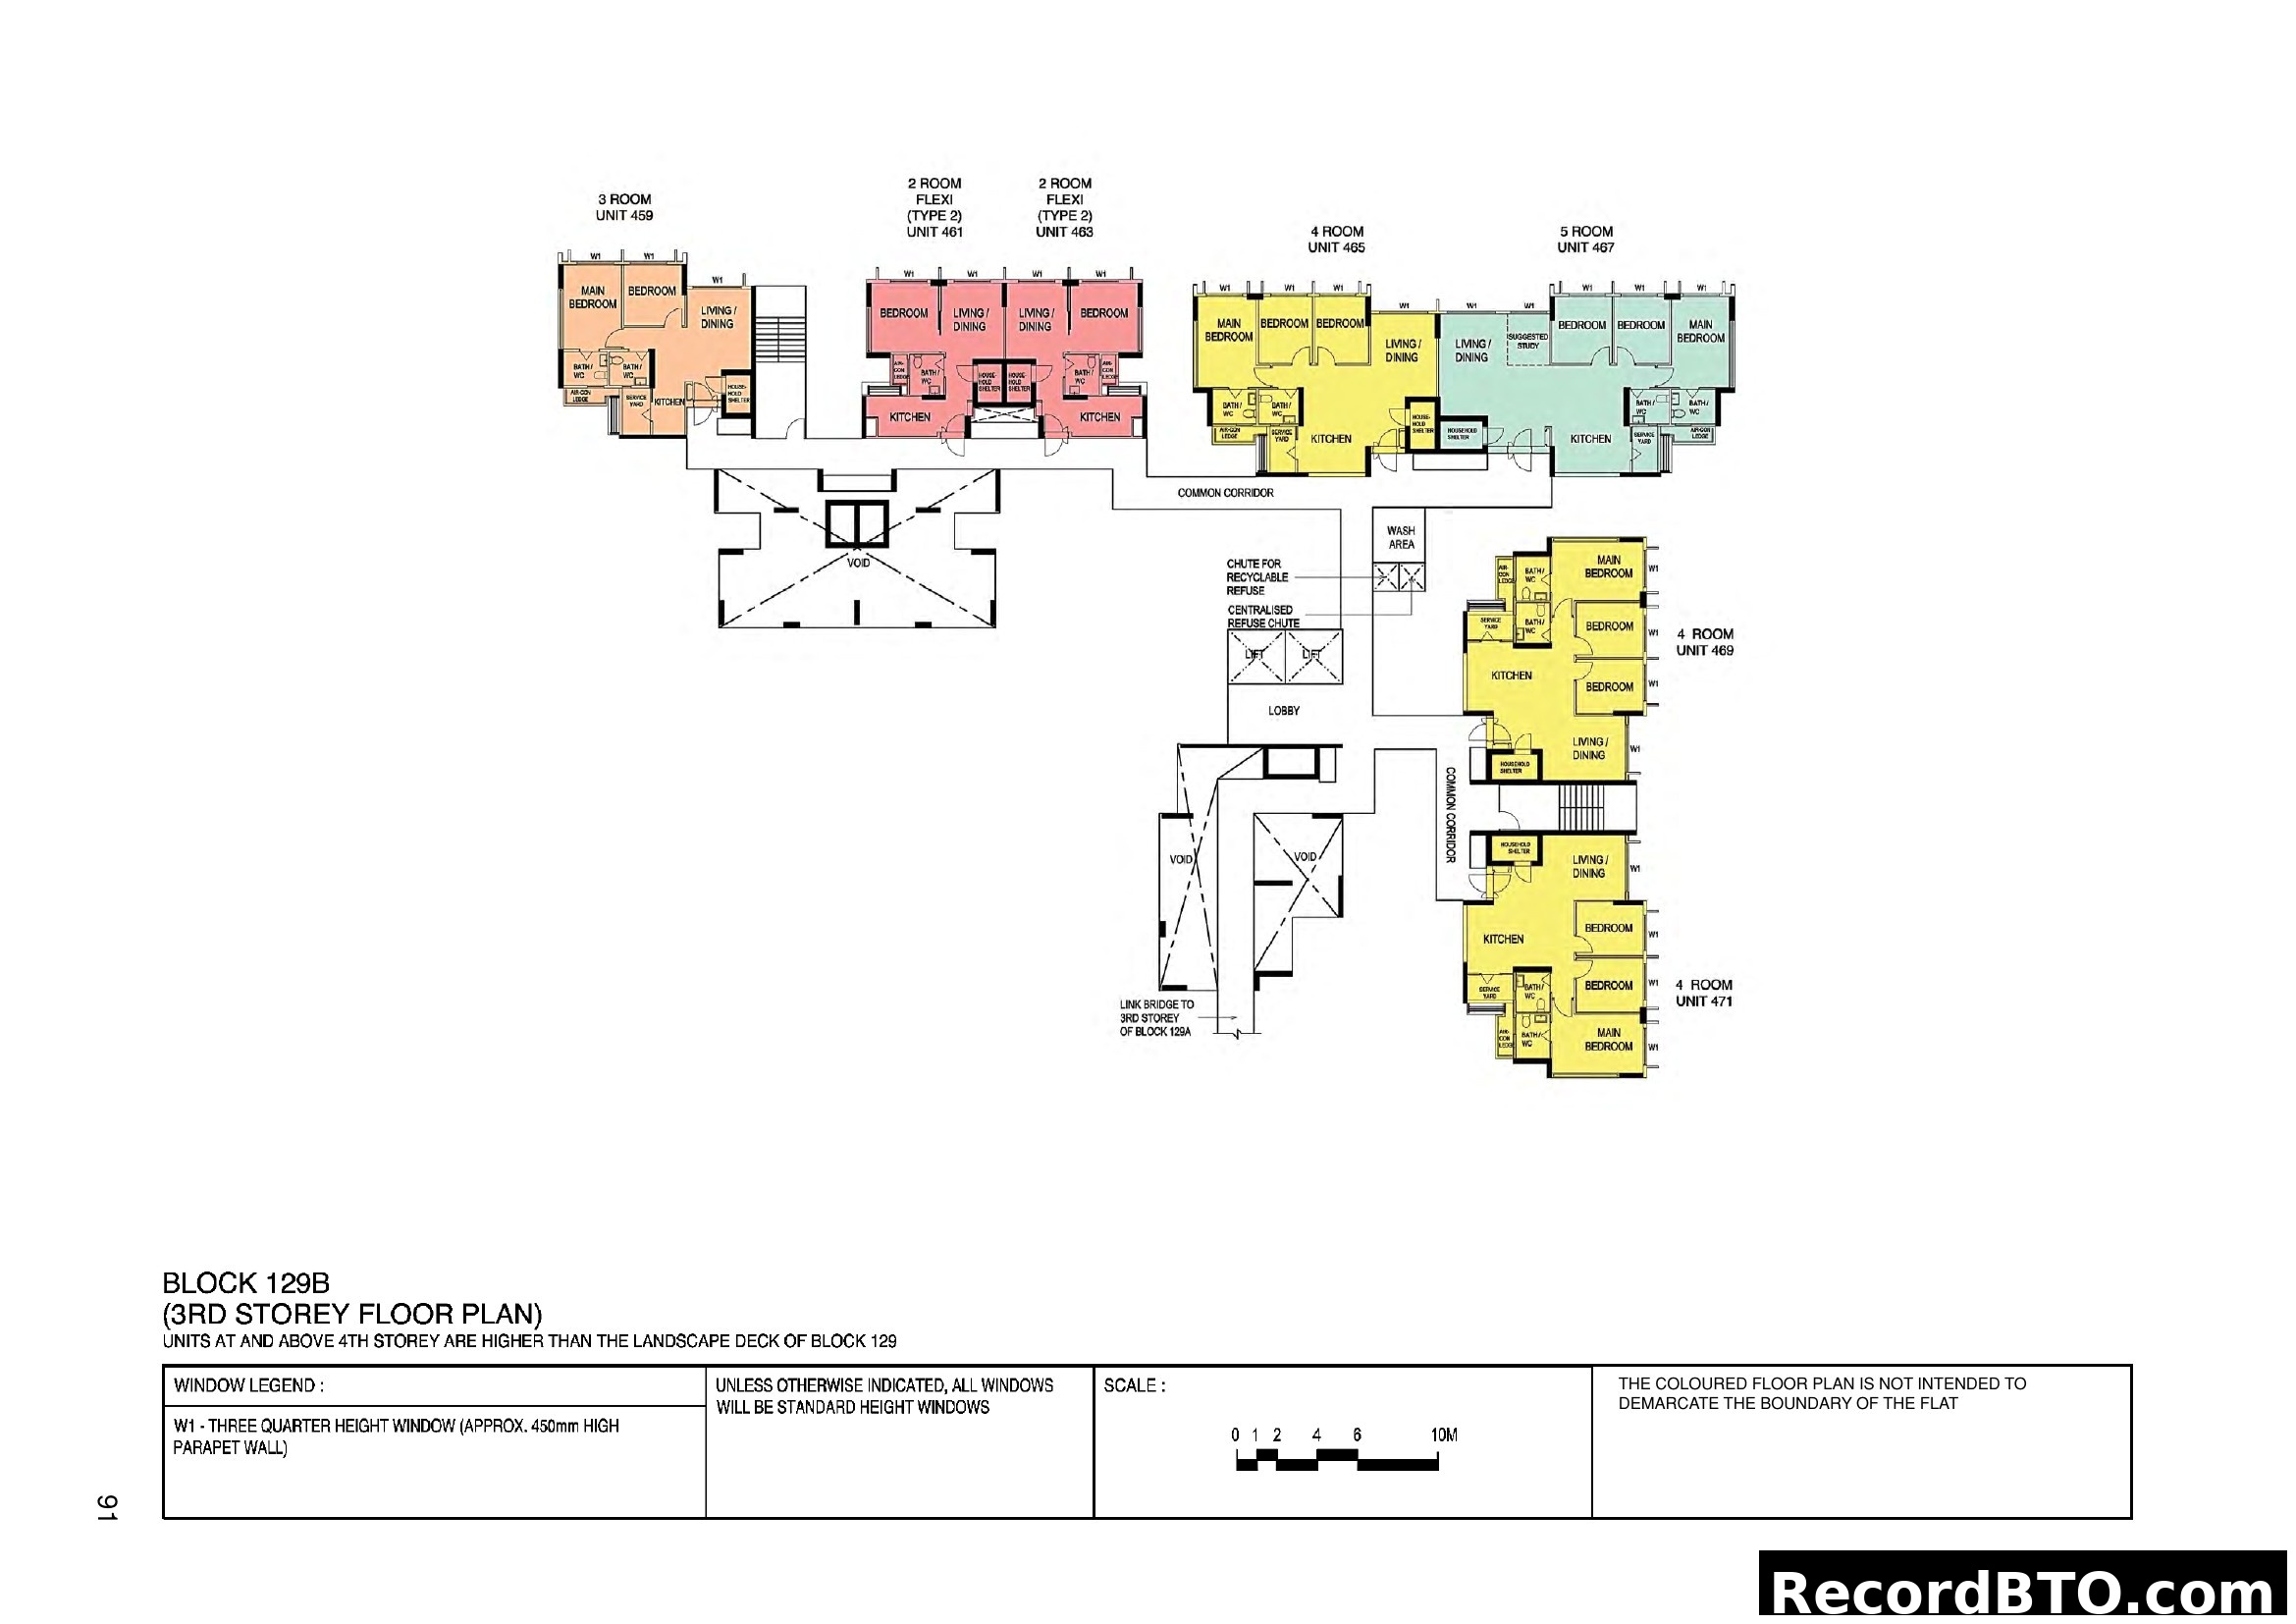
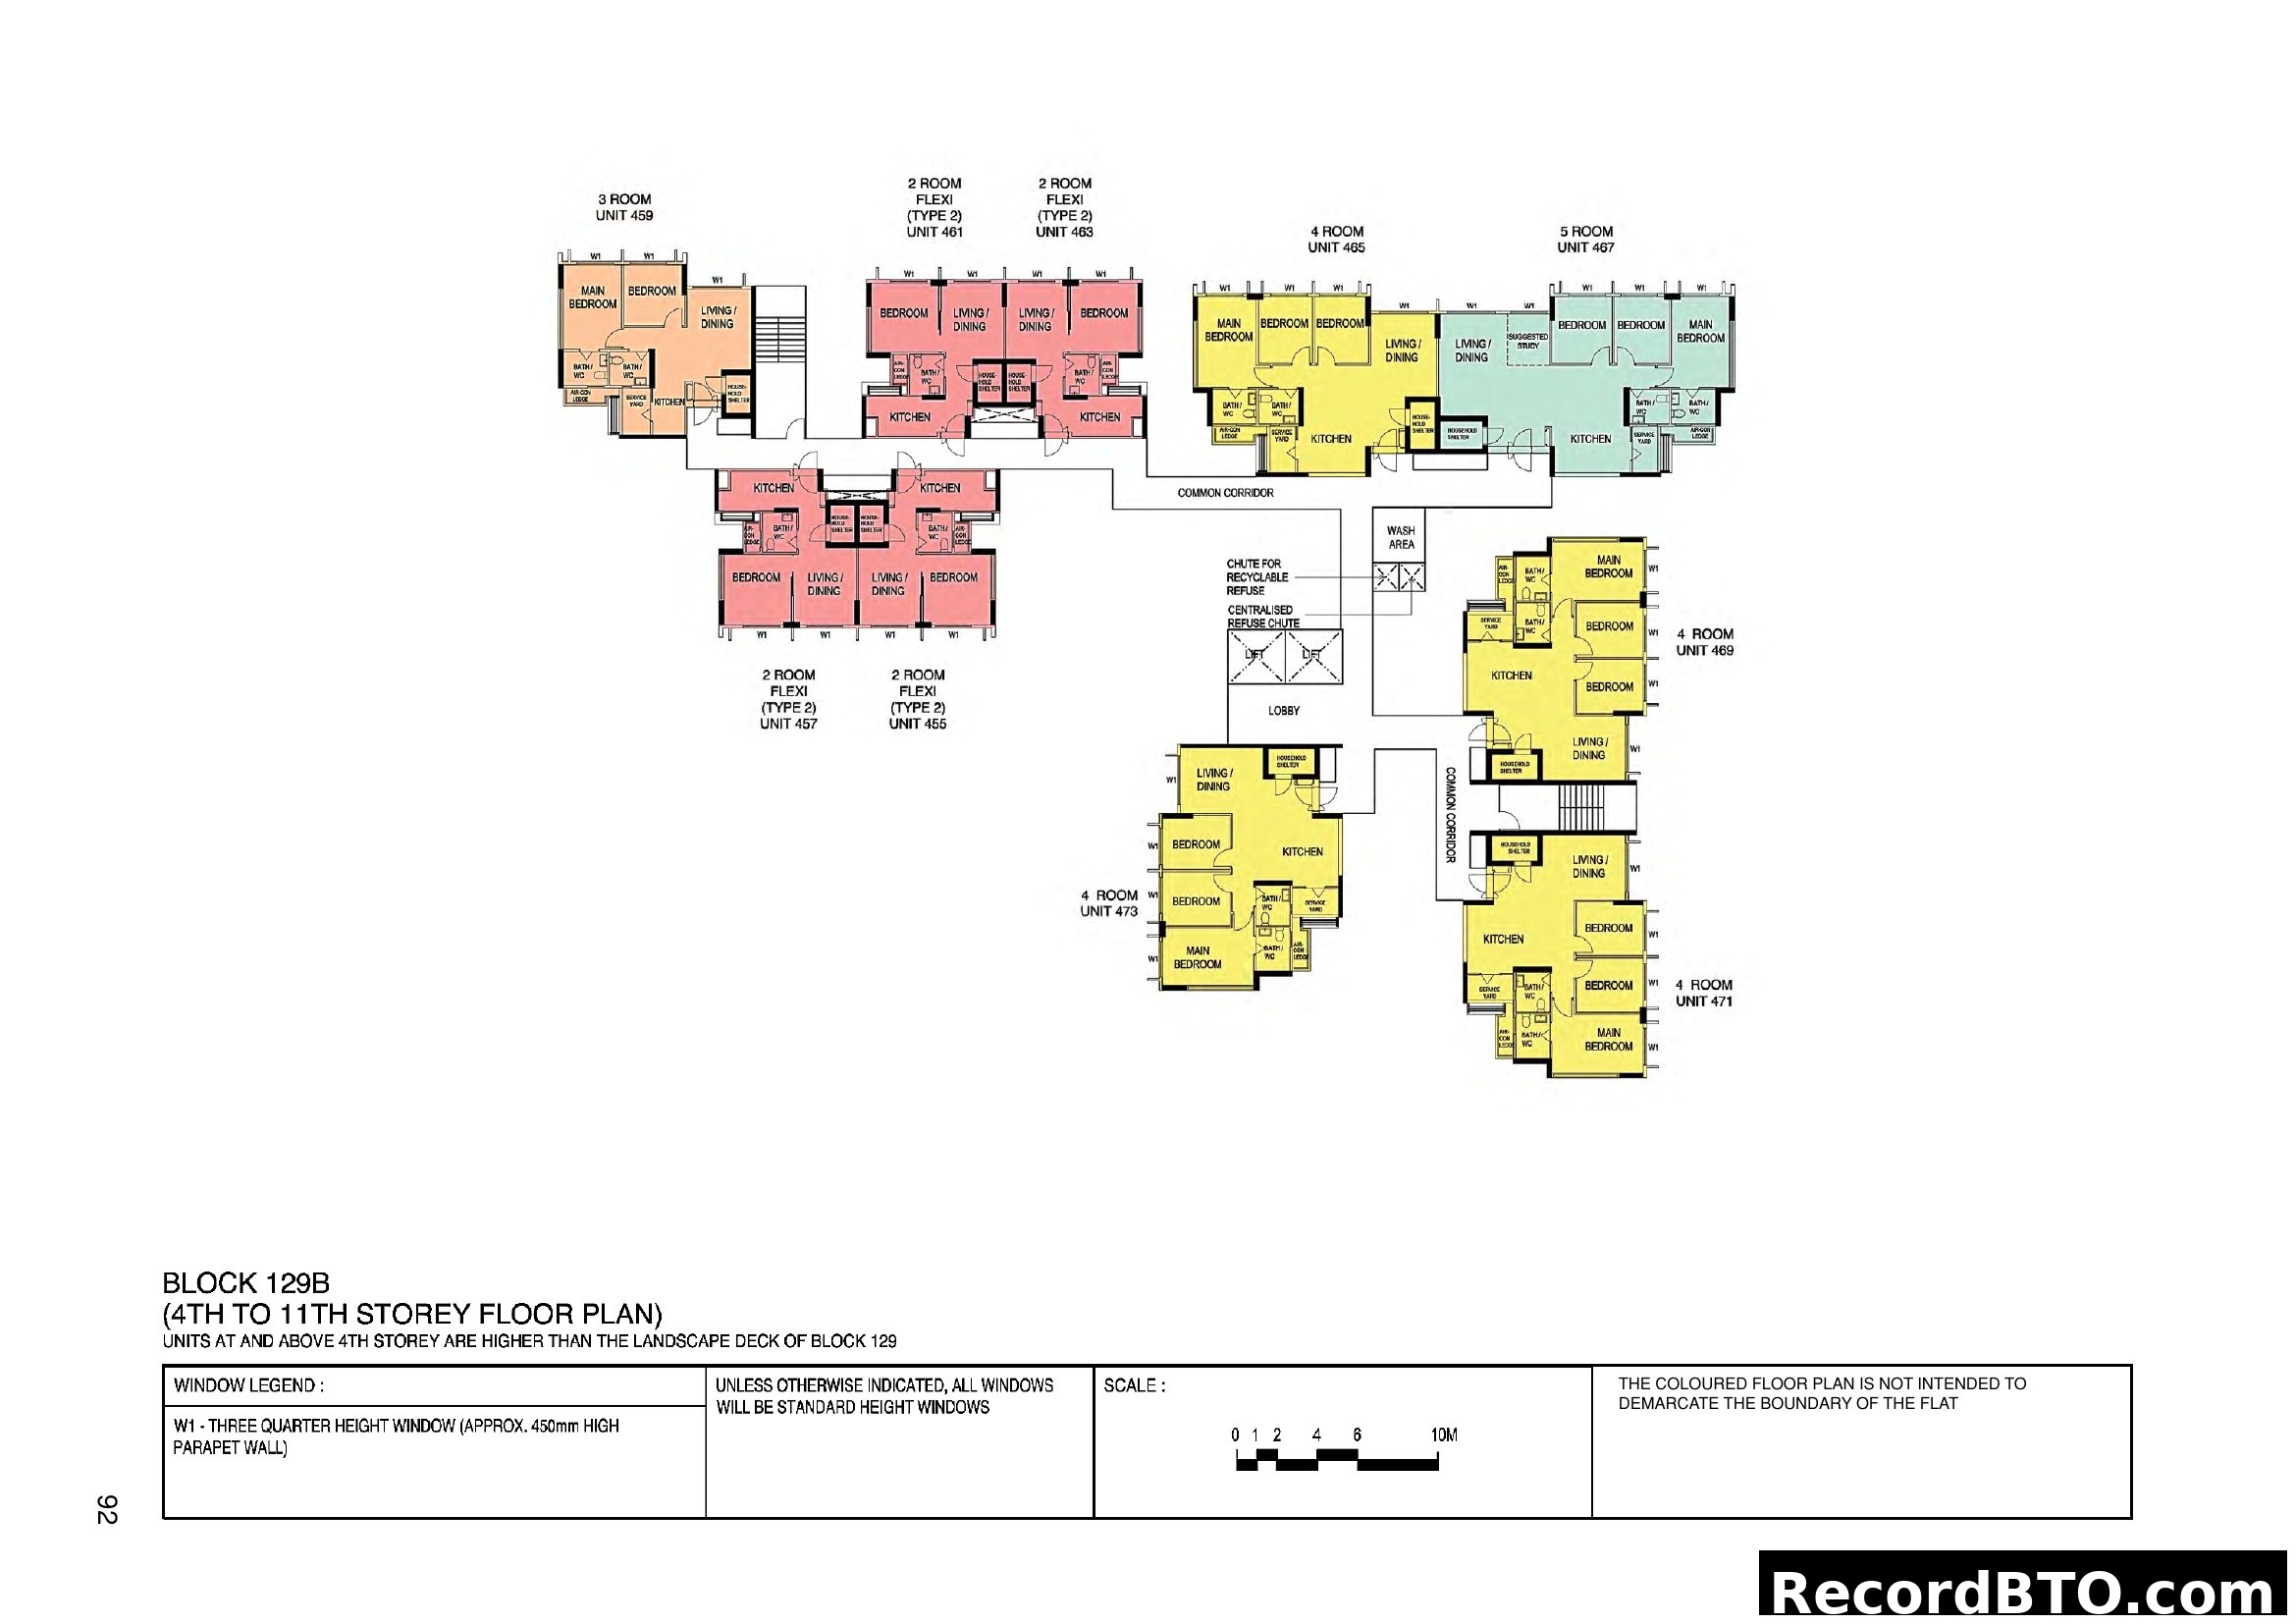
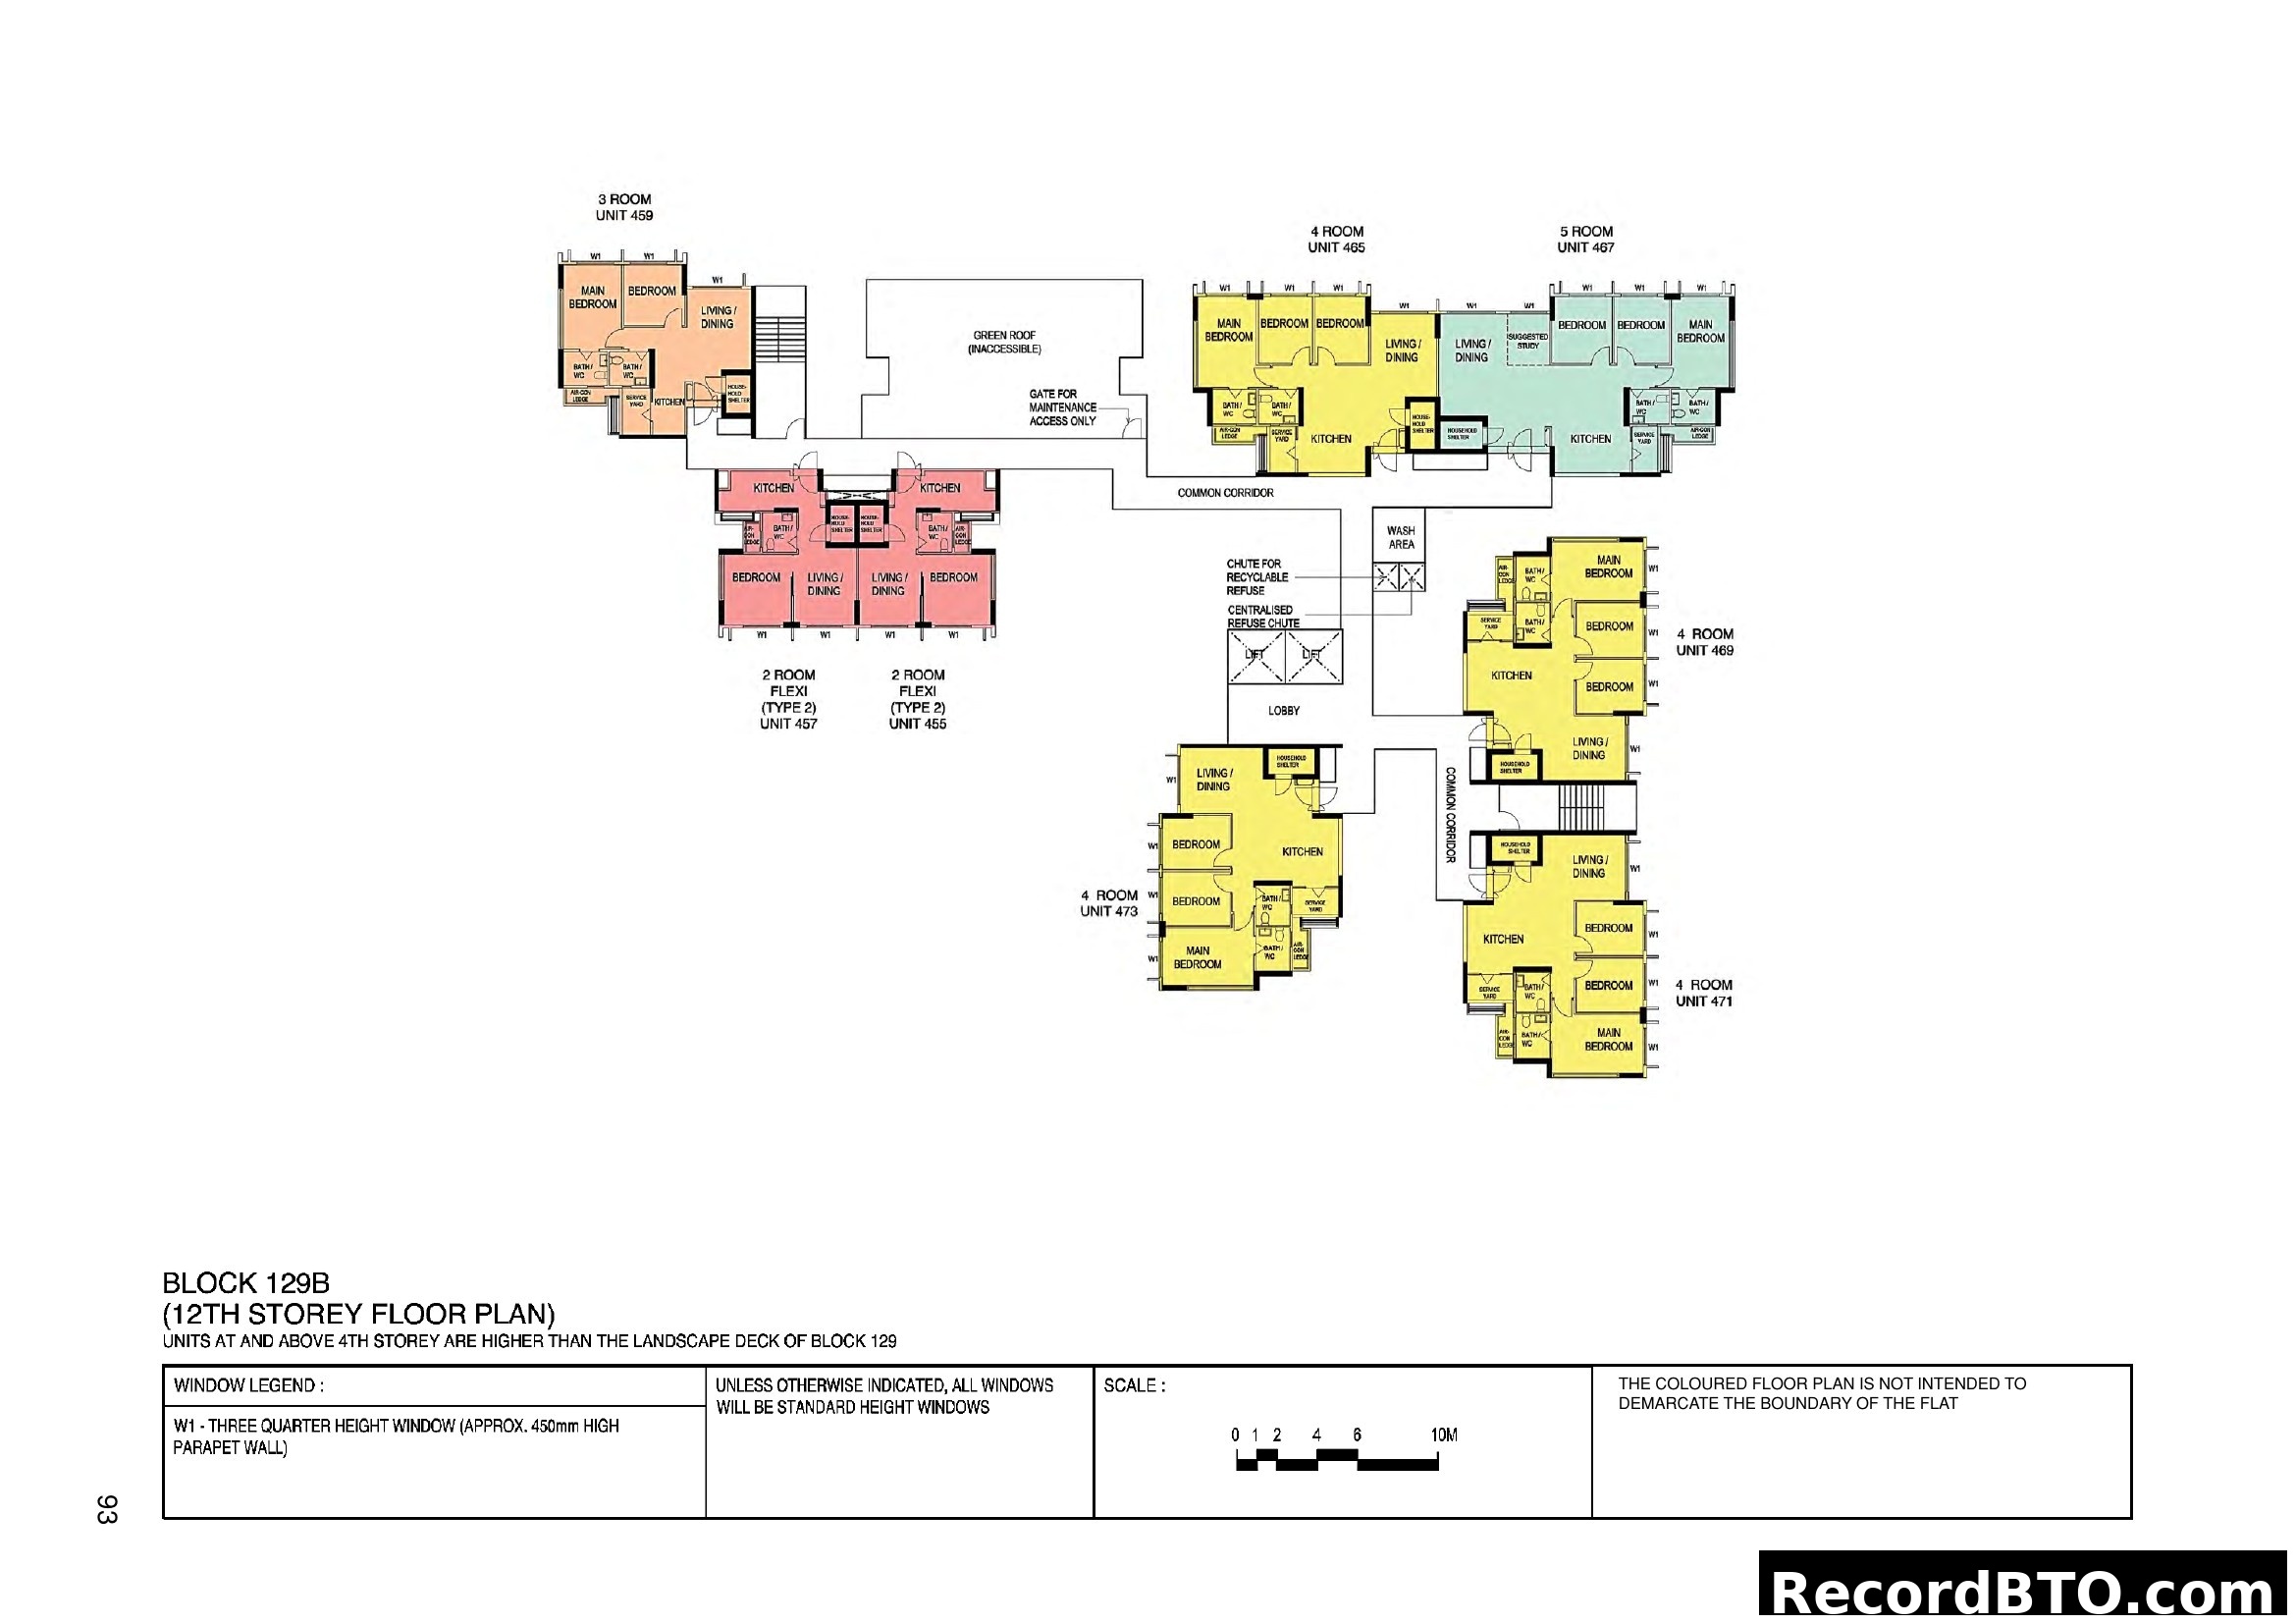
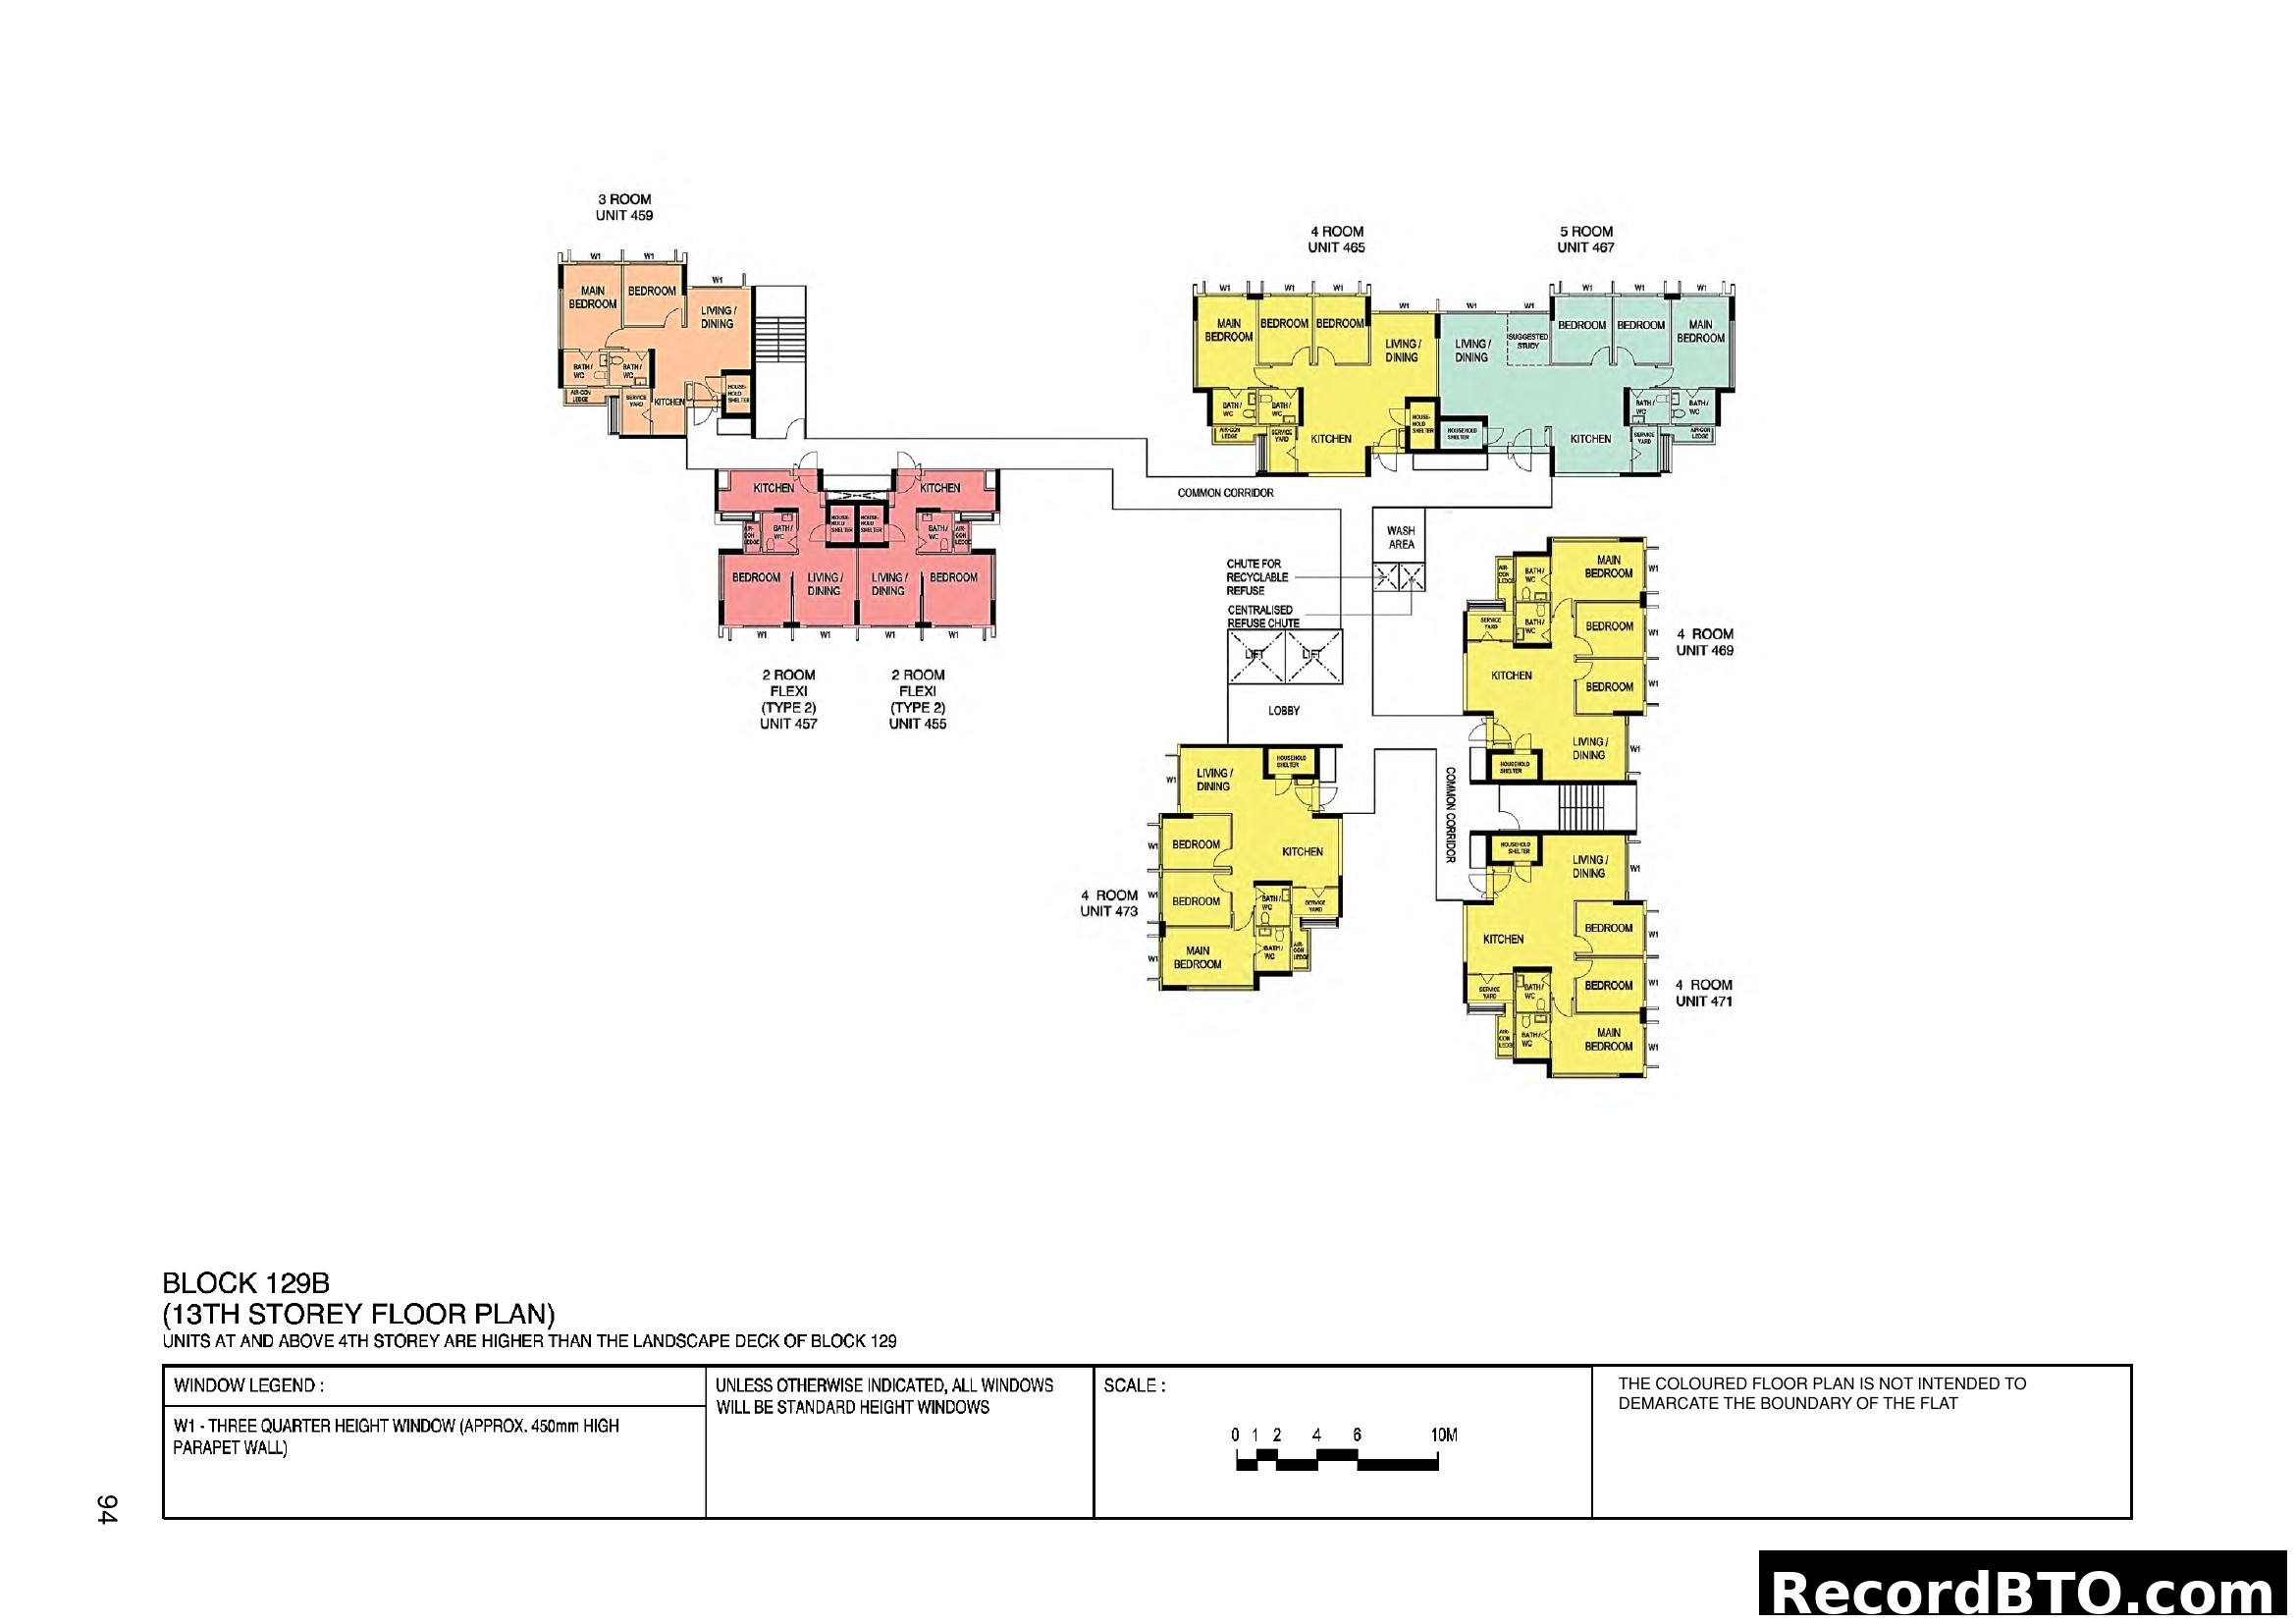
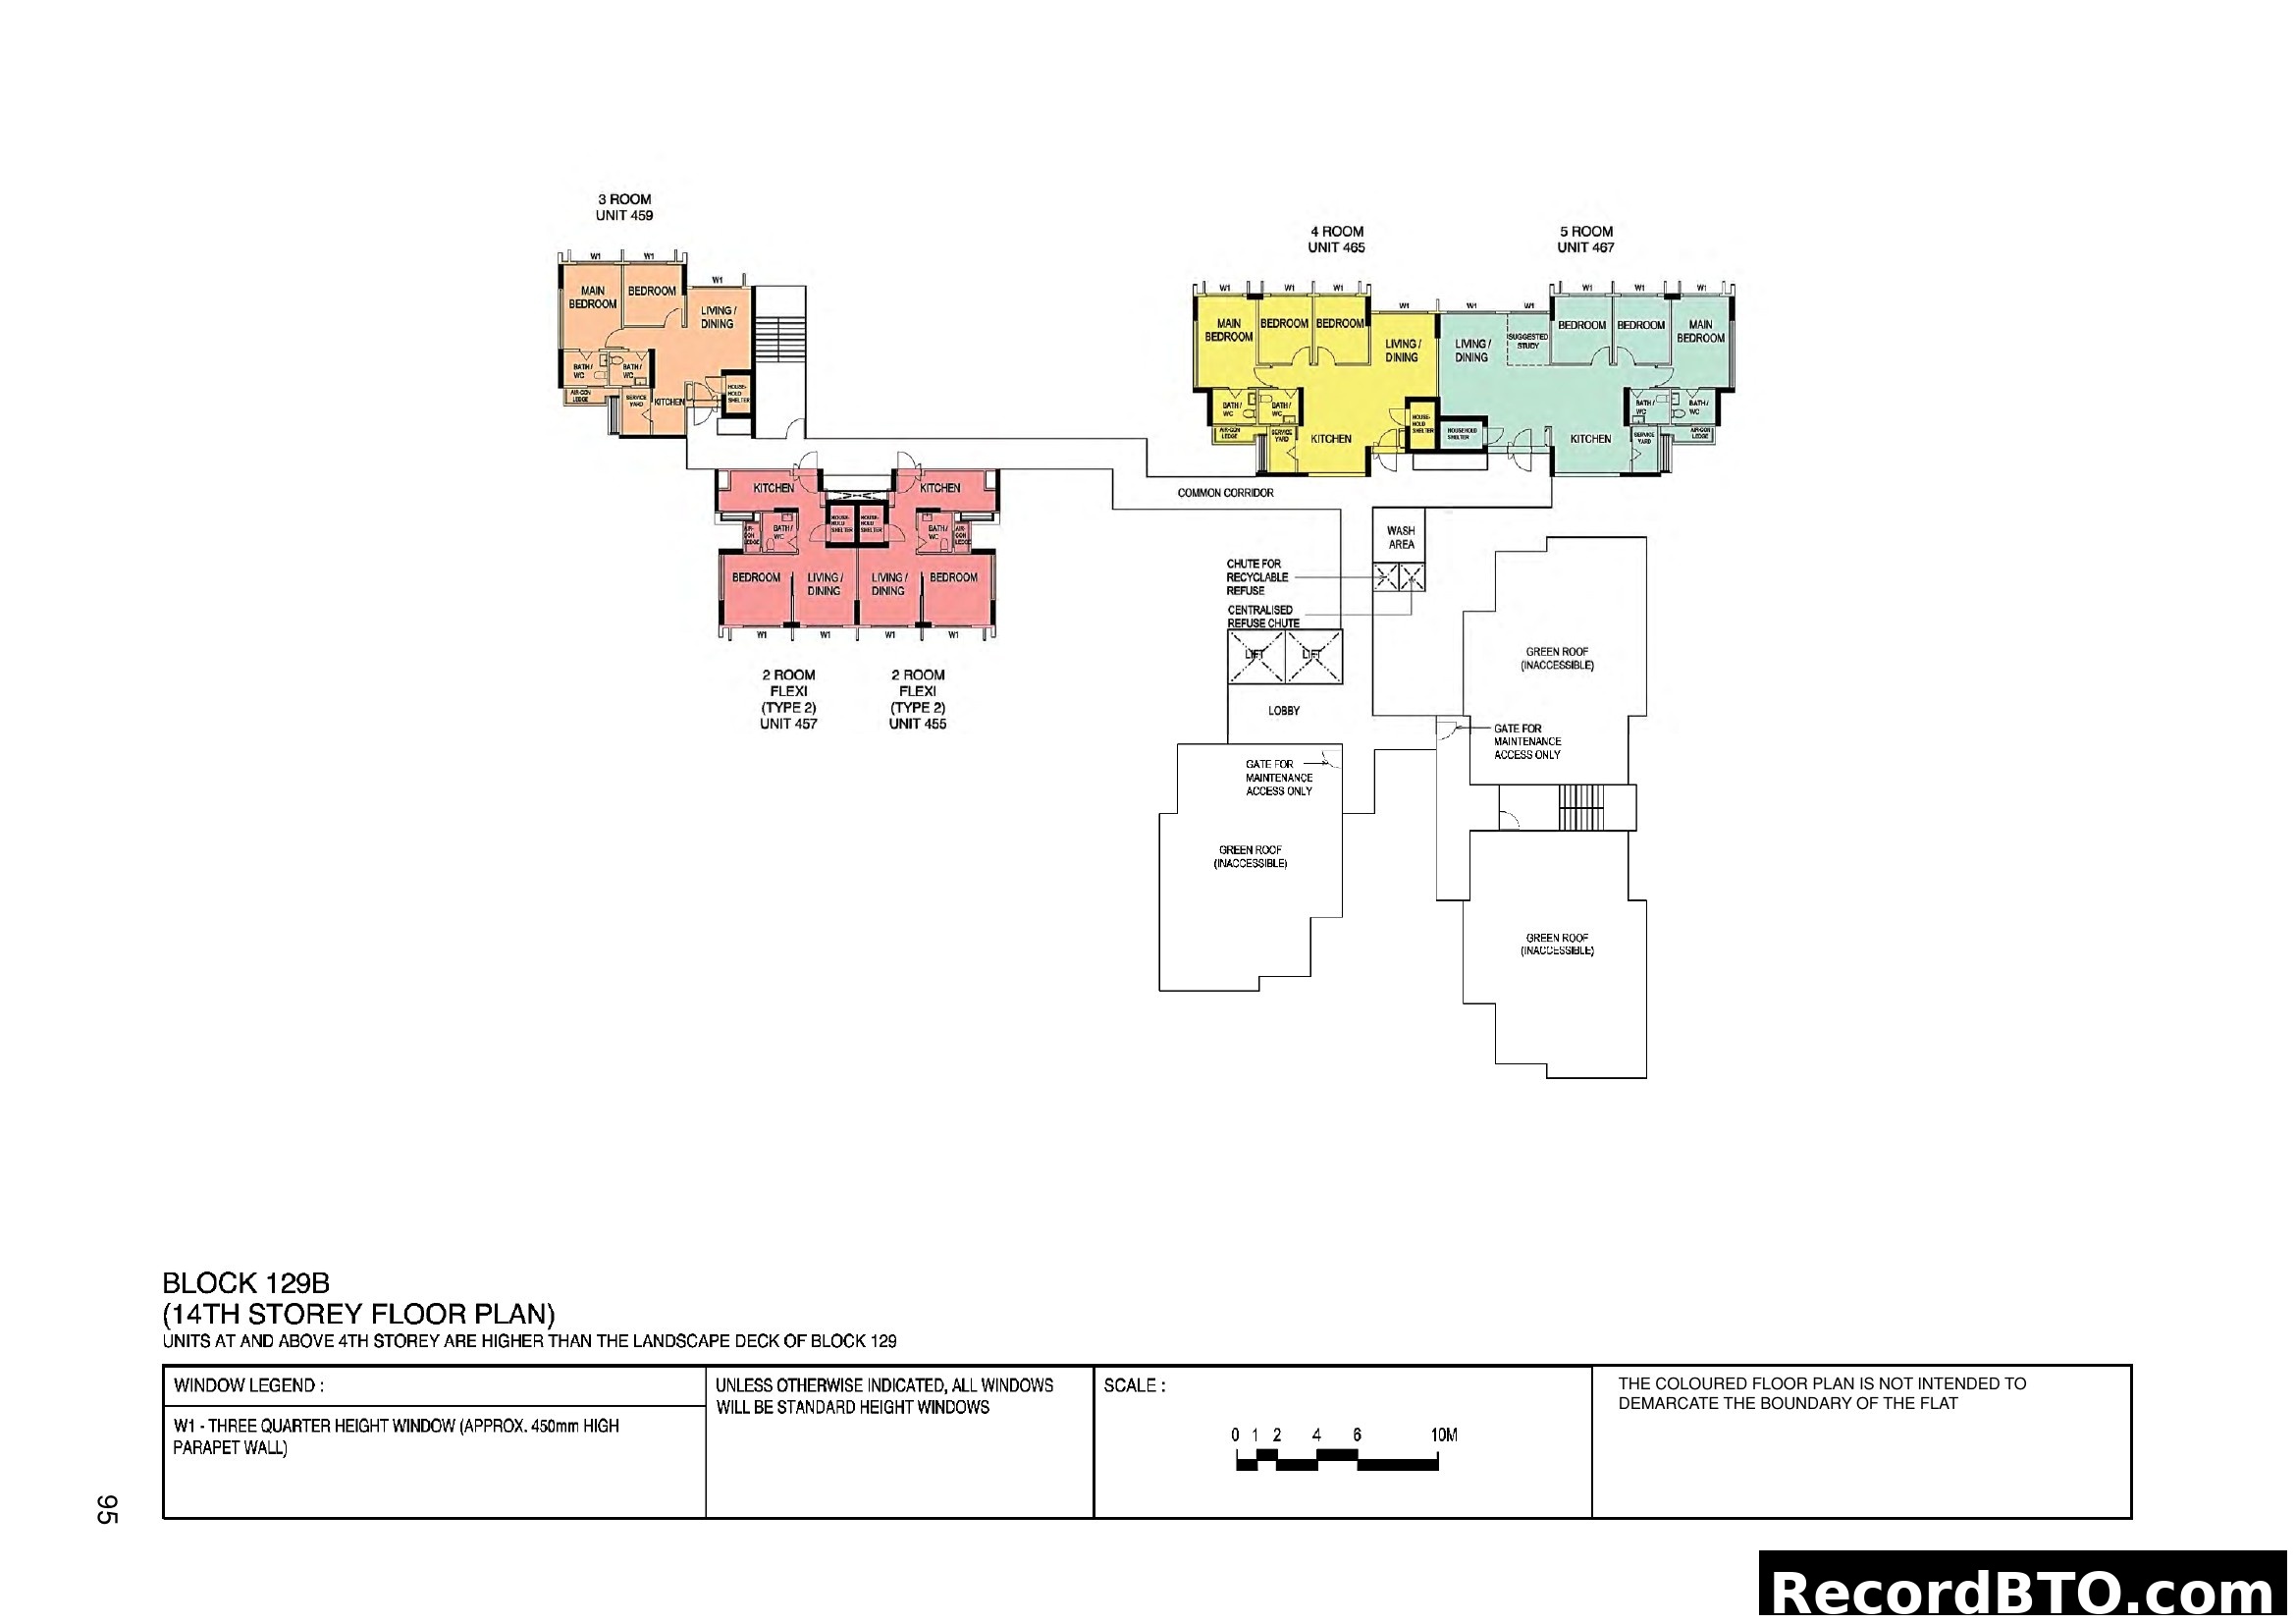
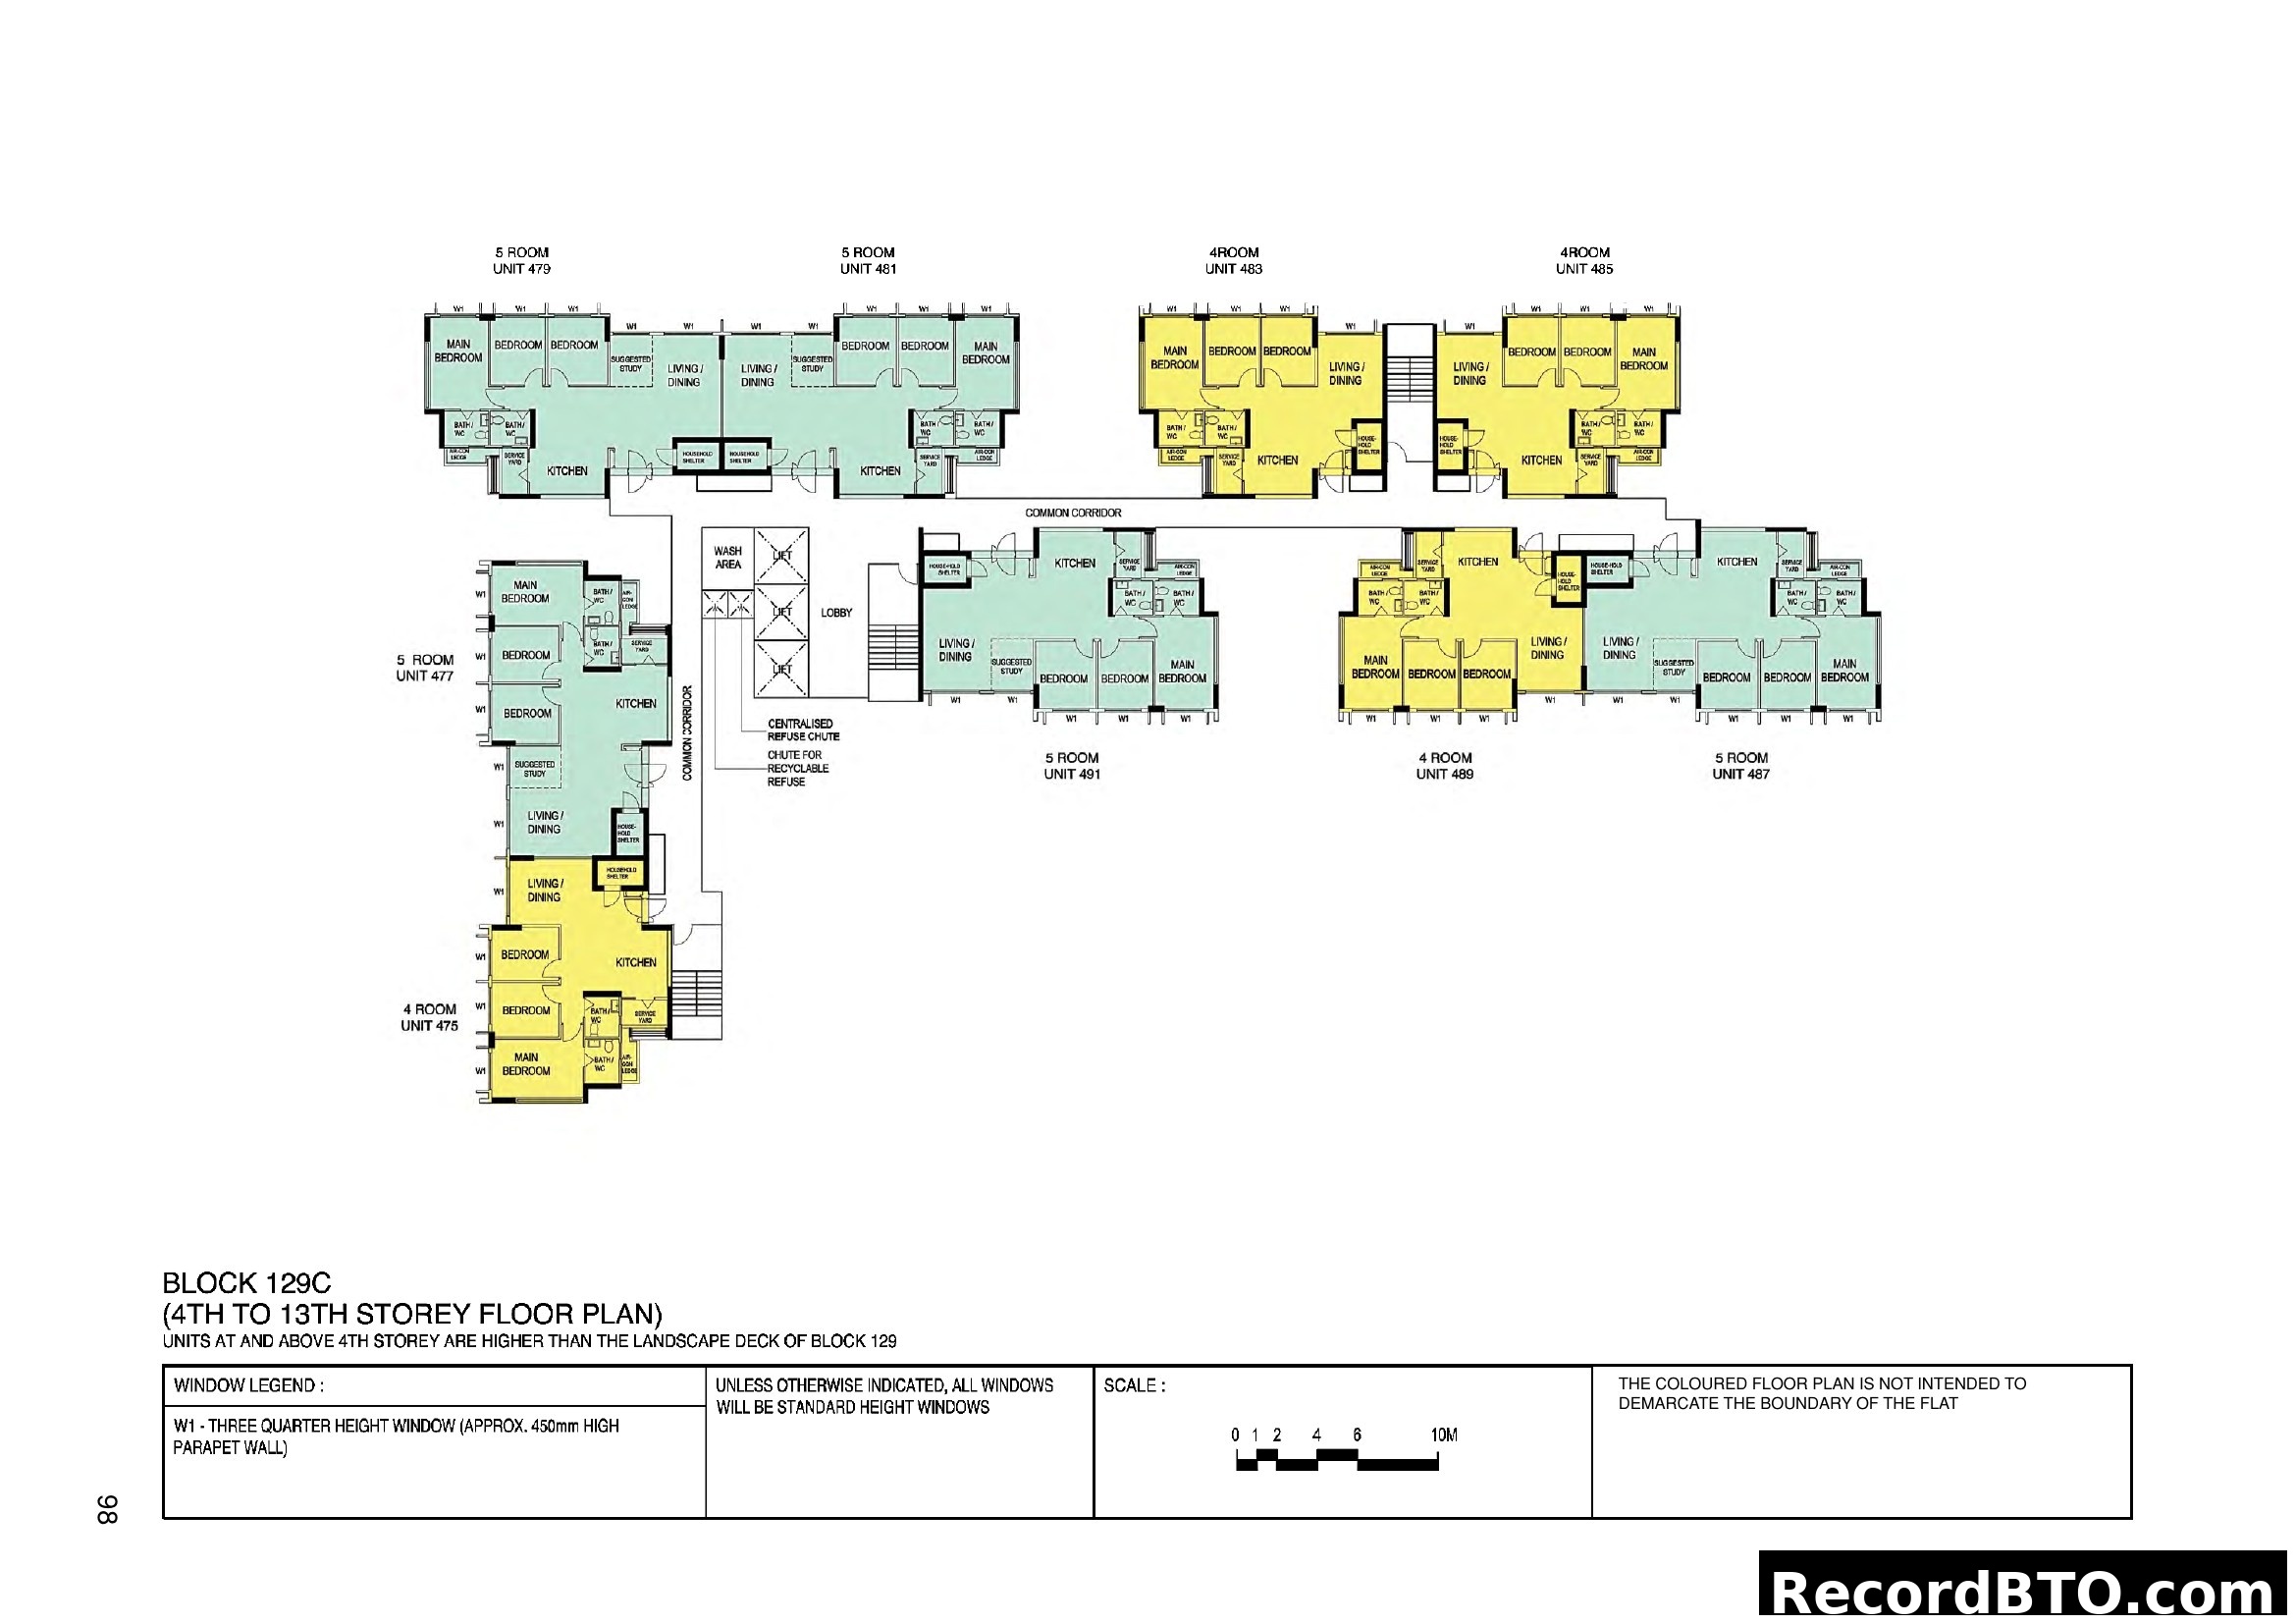
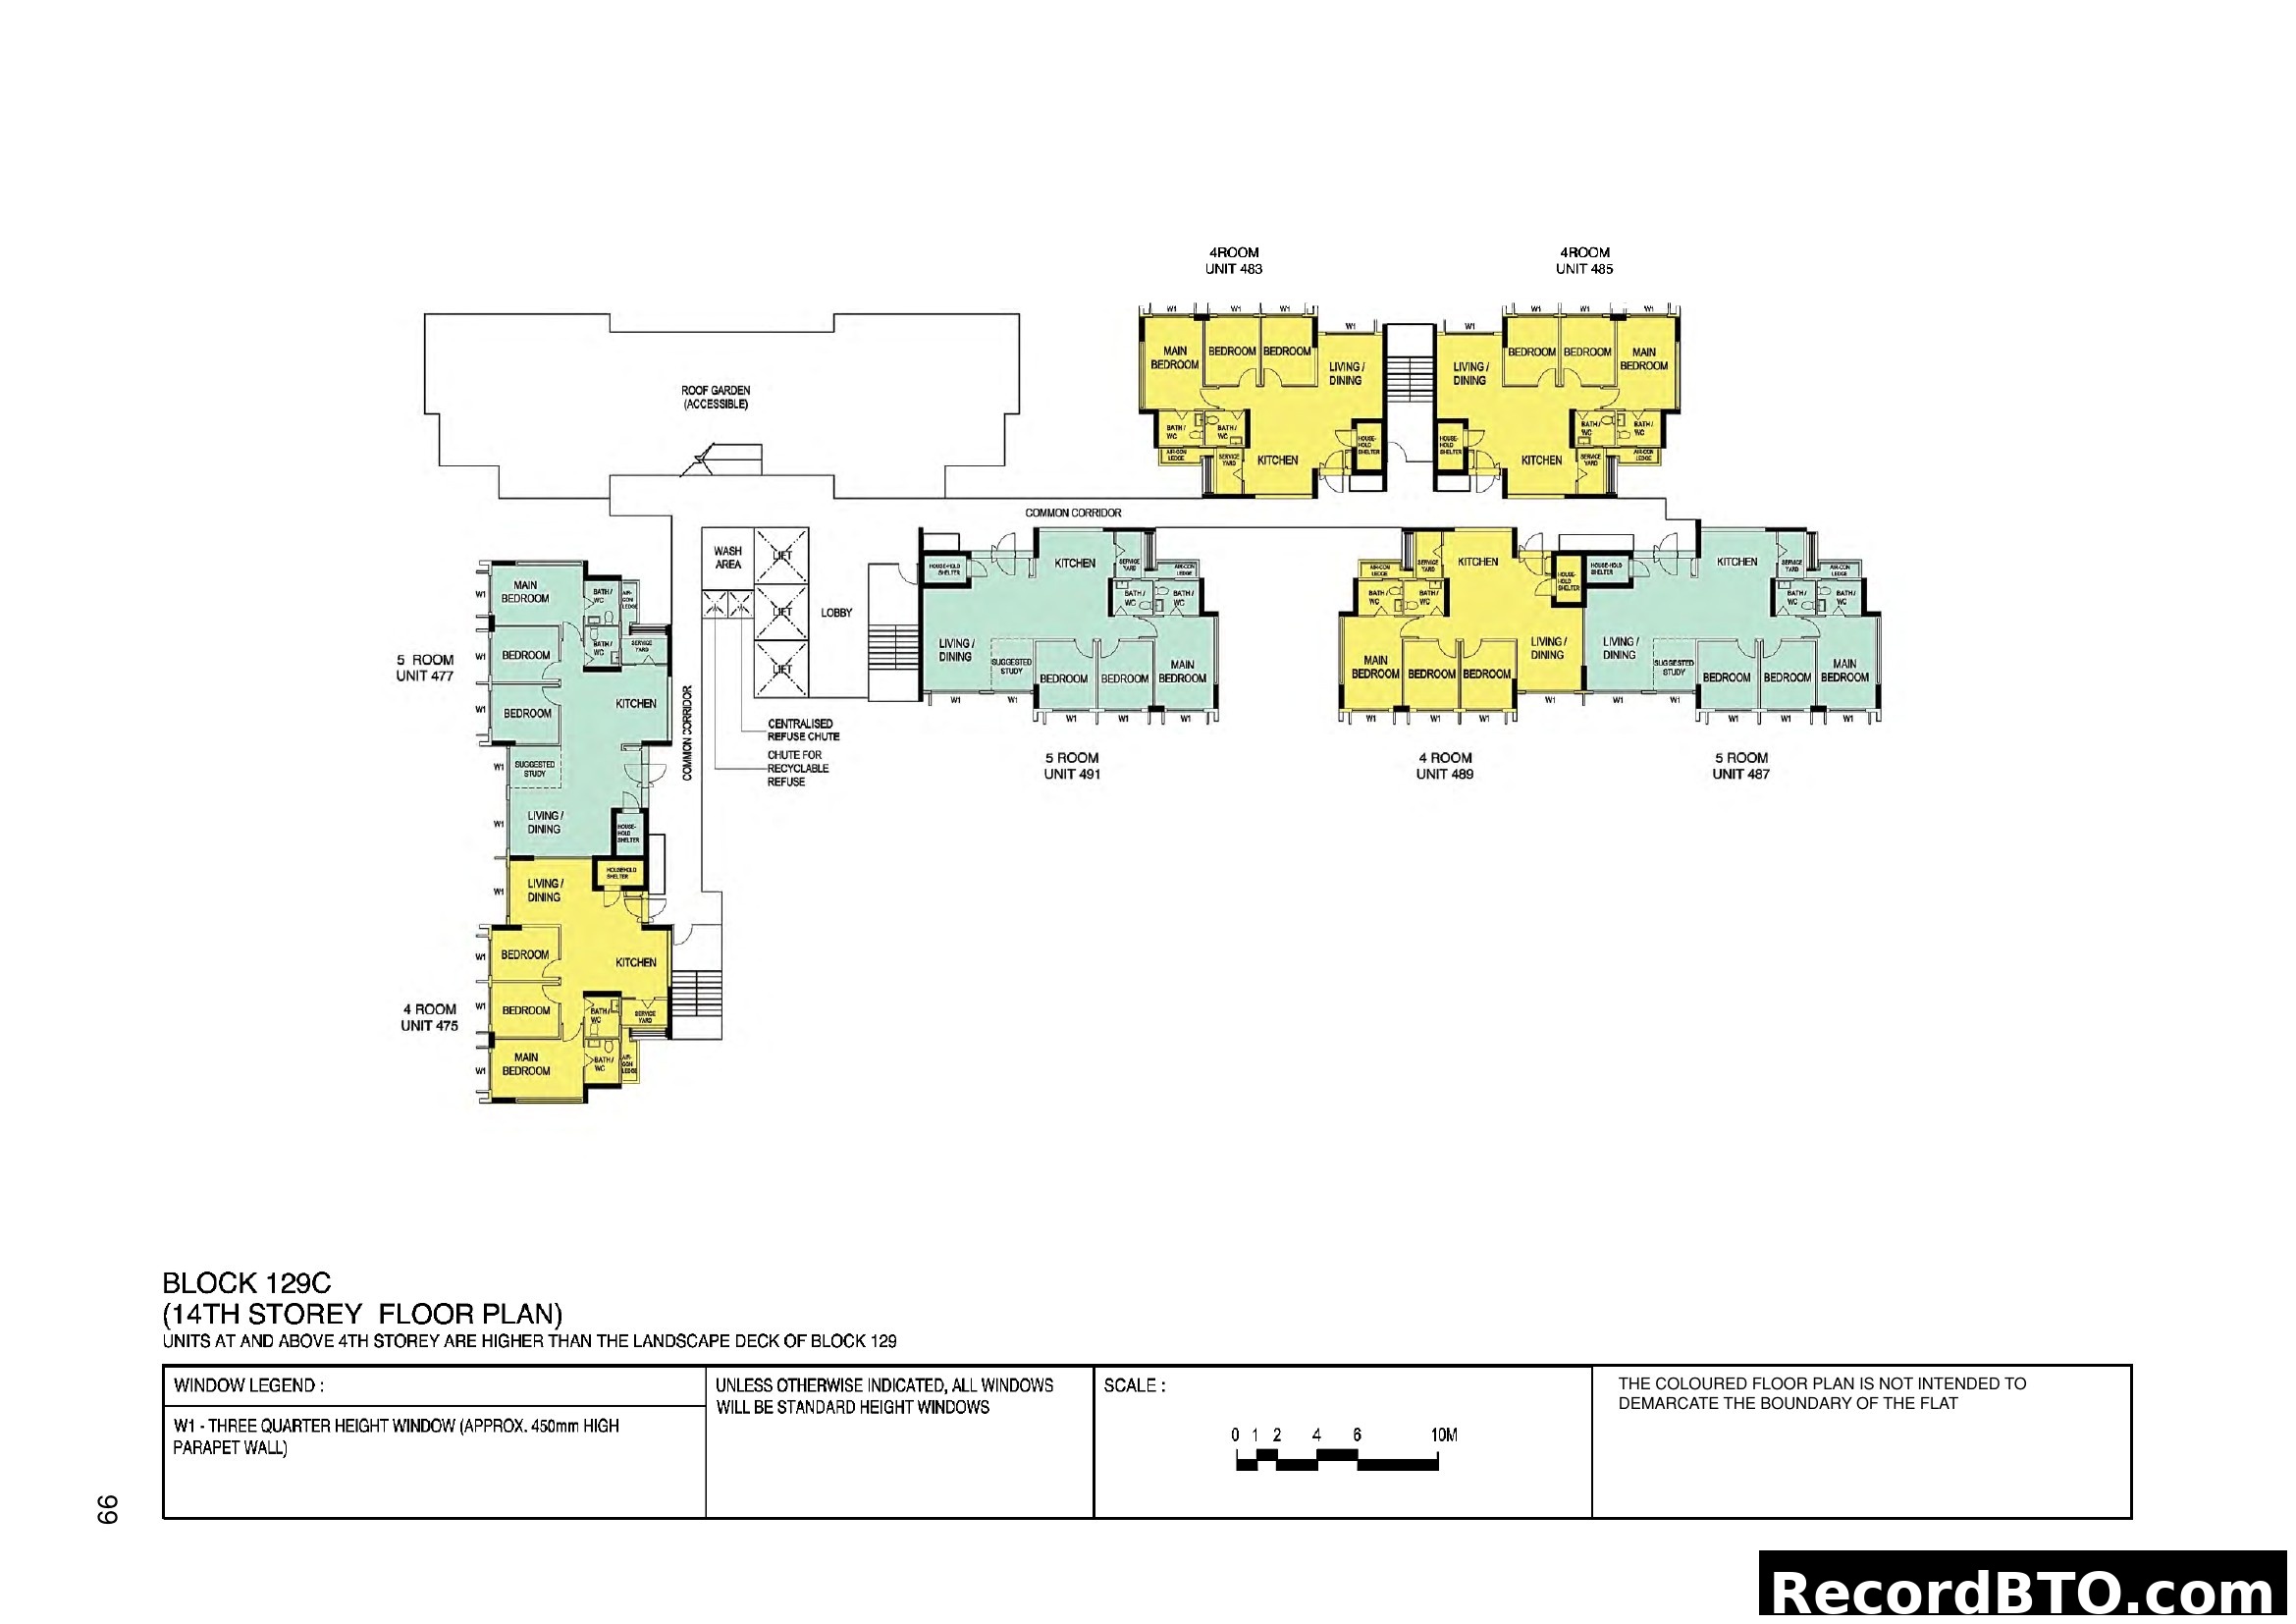
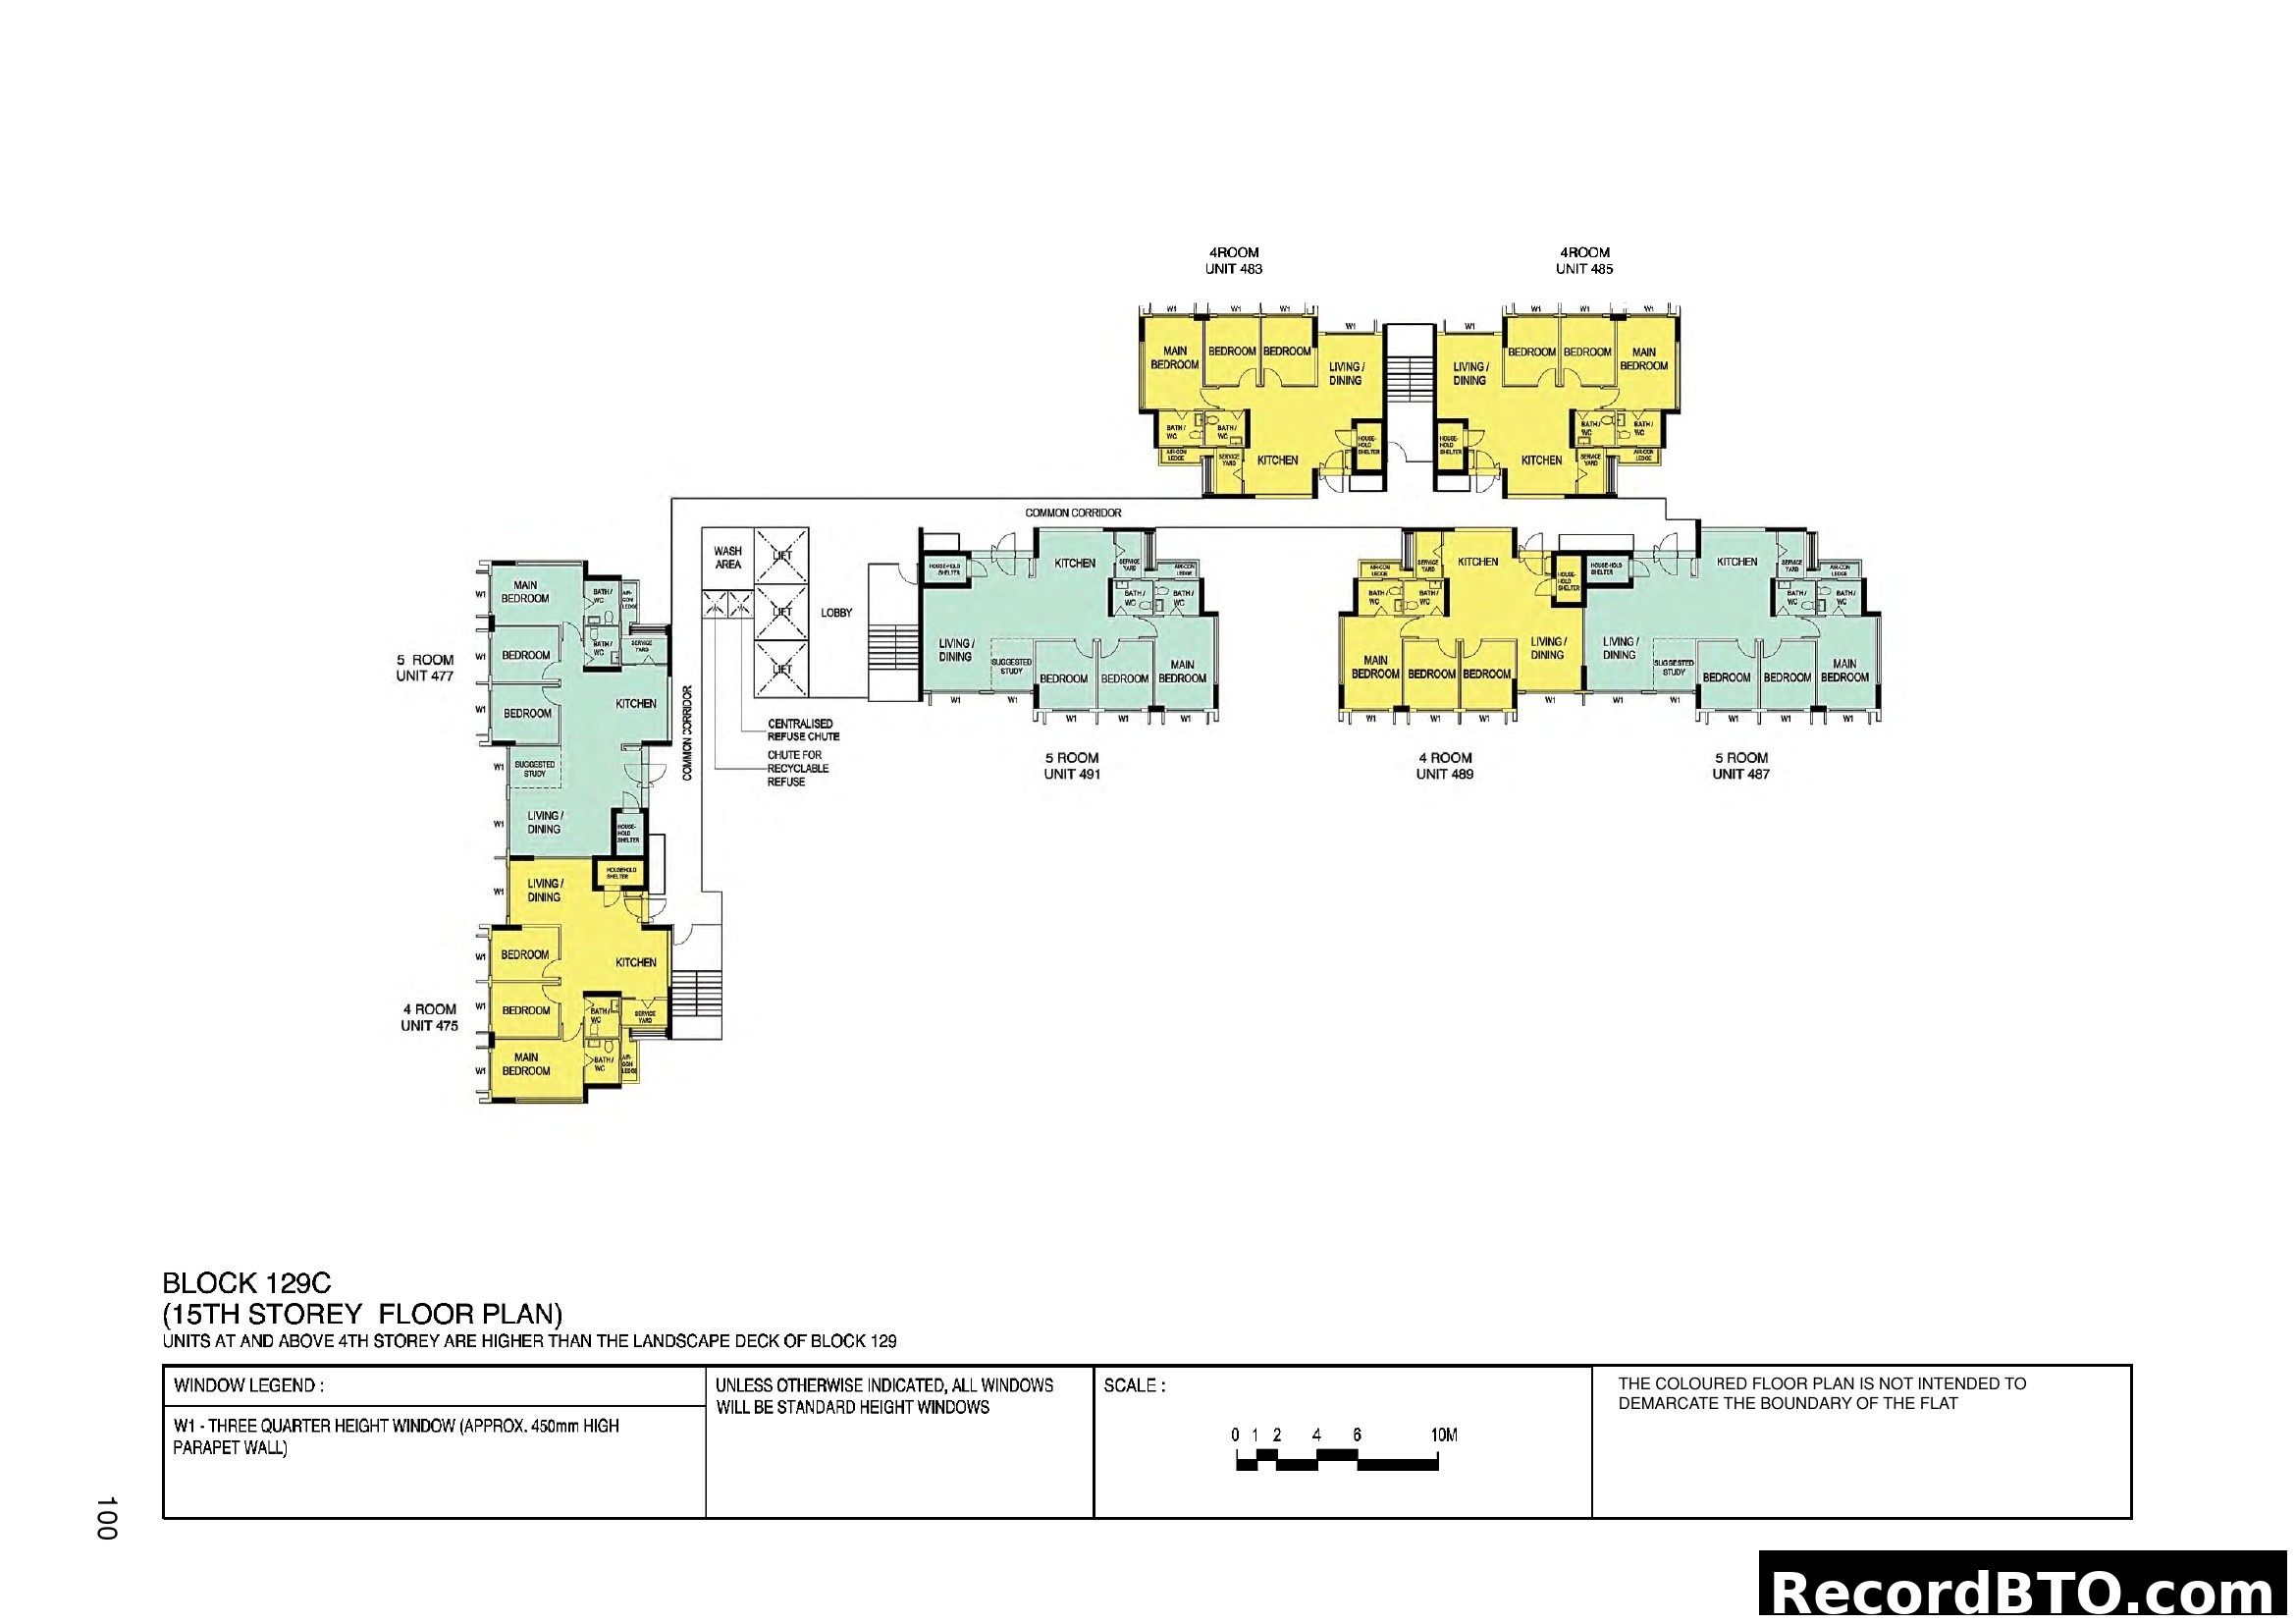
Floor Plans
Unit layouts and configurations
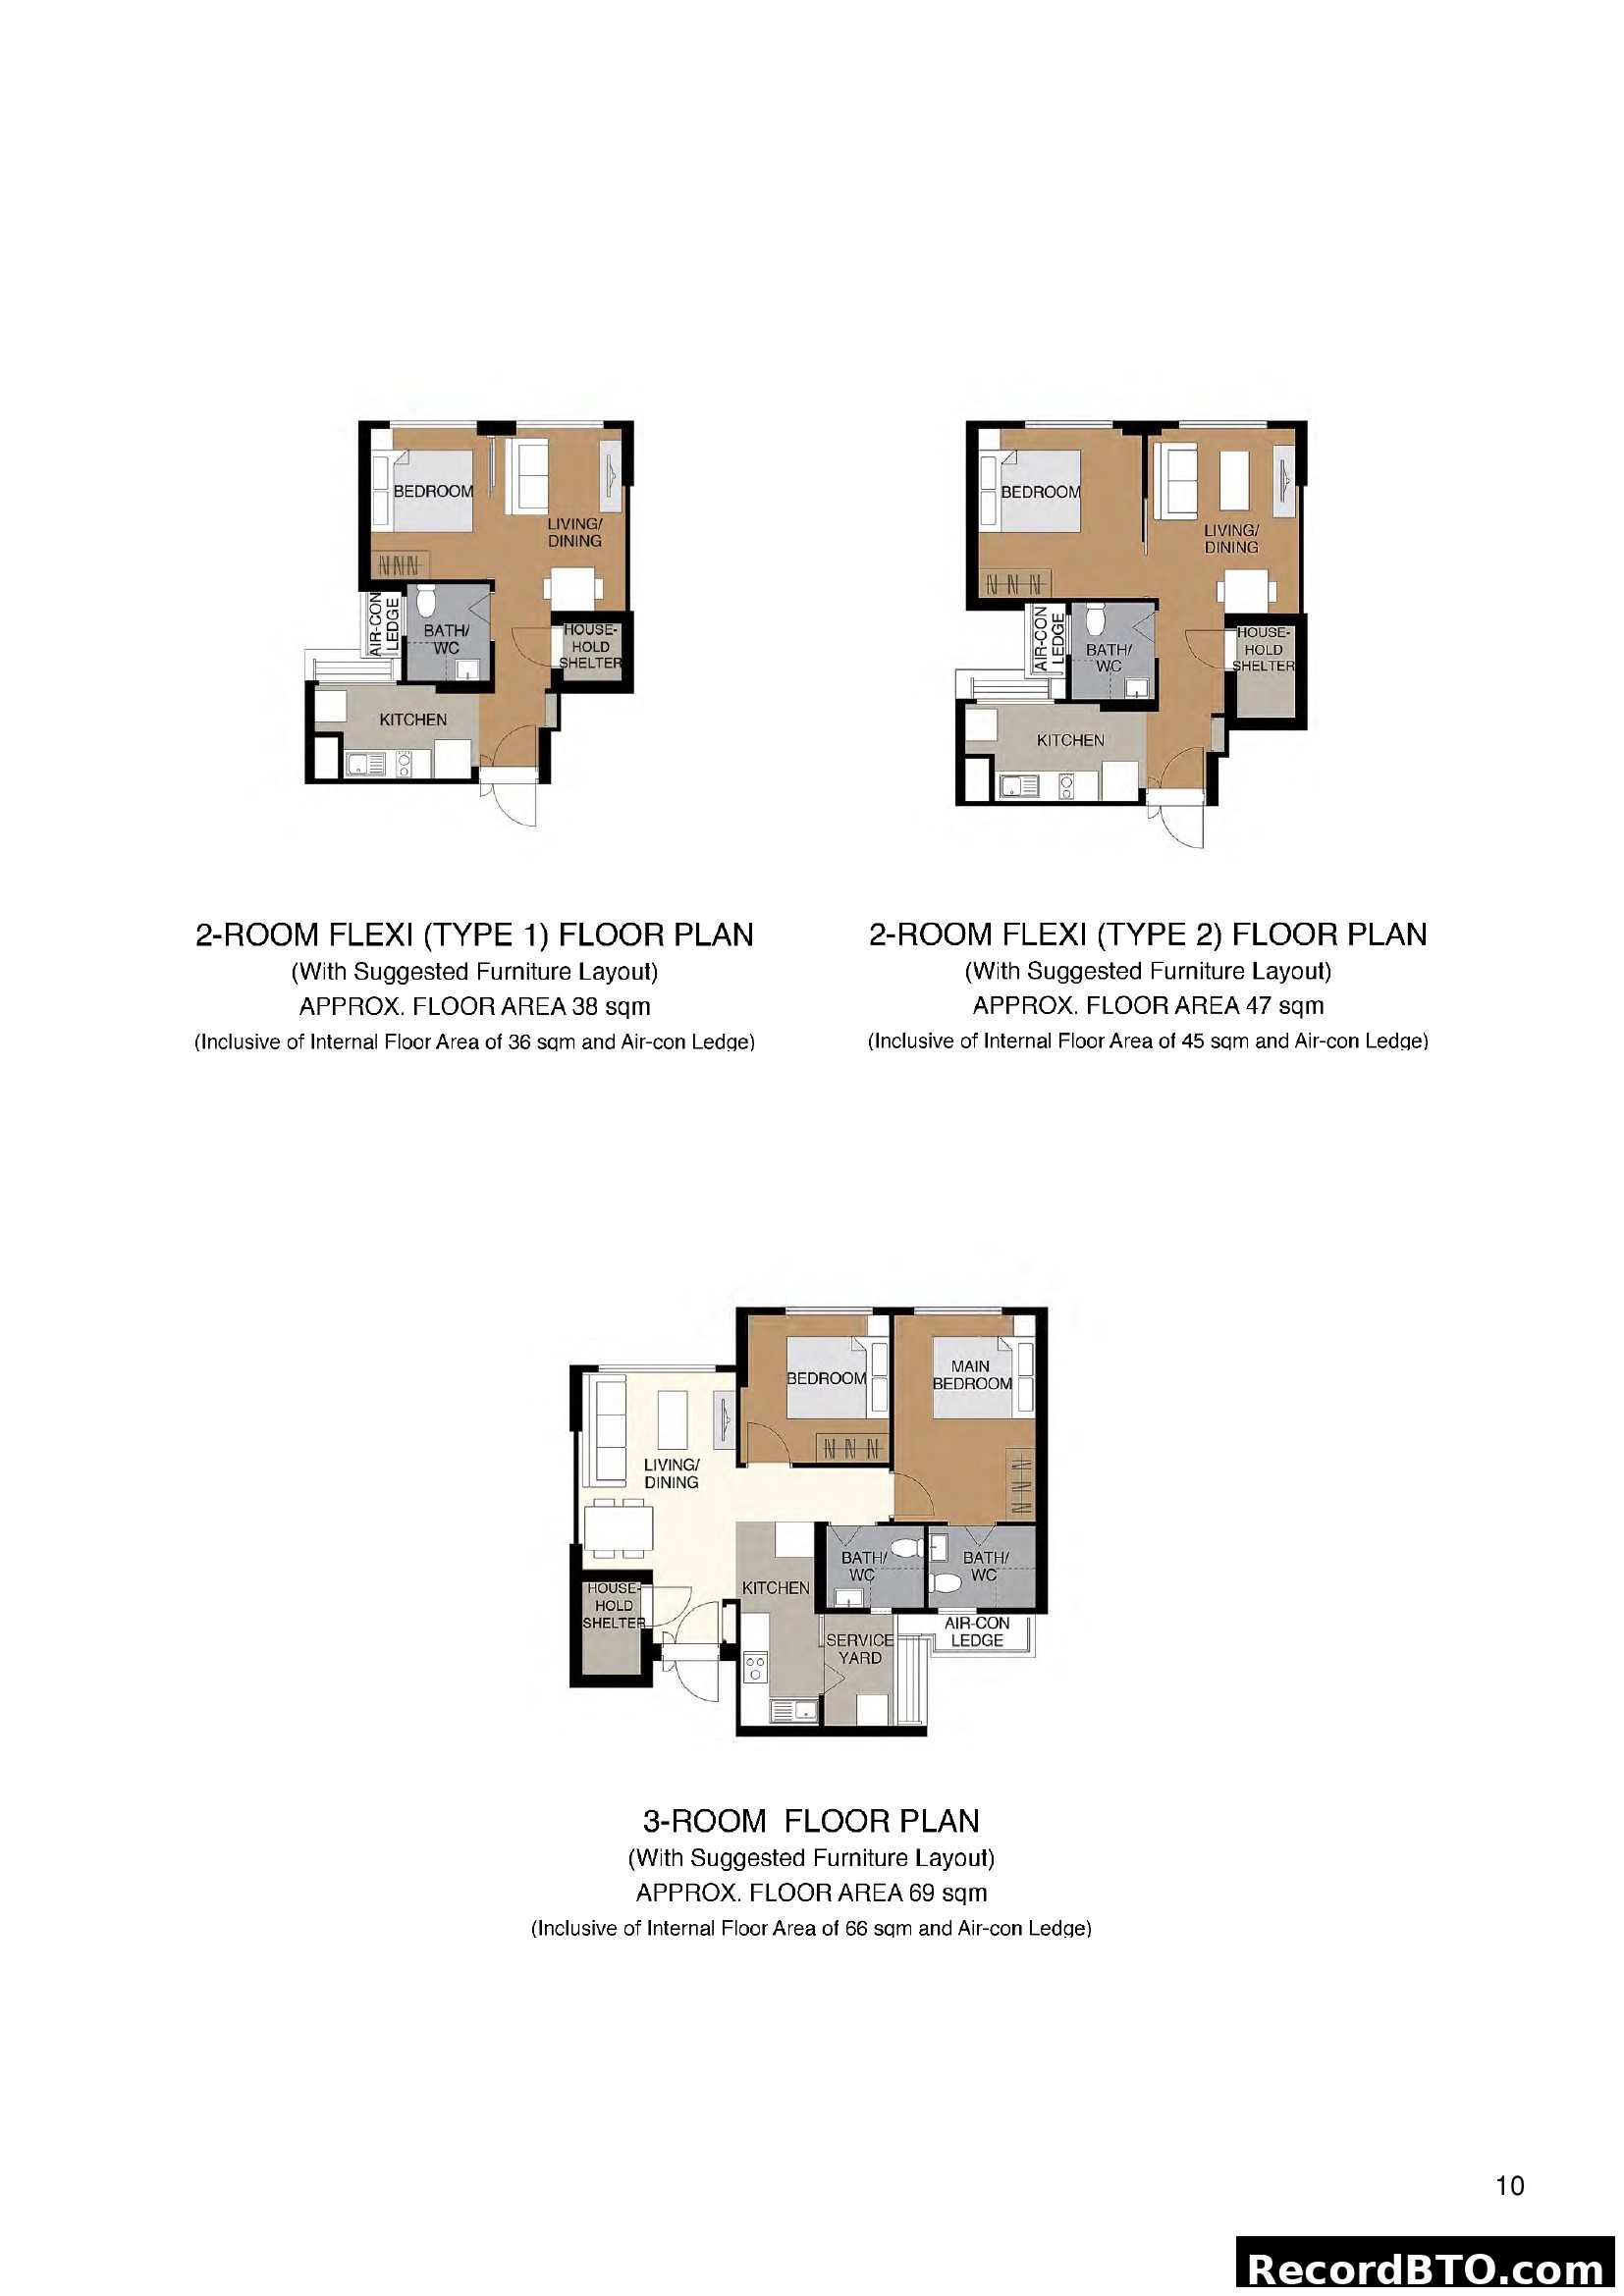
HDB BTO Flexi 2-Room & 3-Room Floor Plans
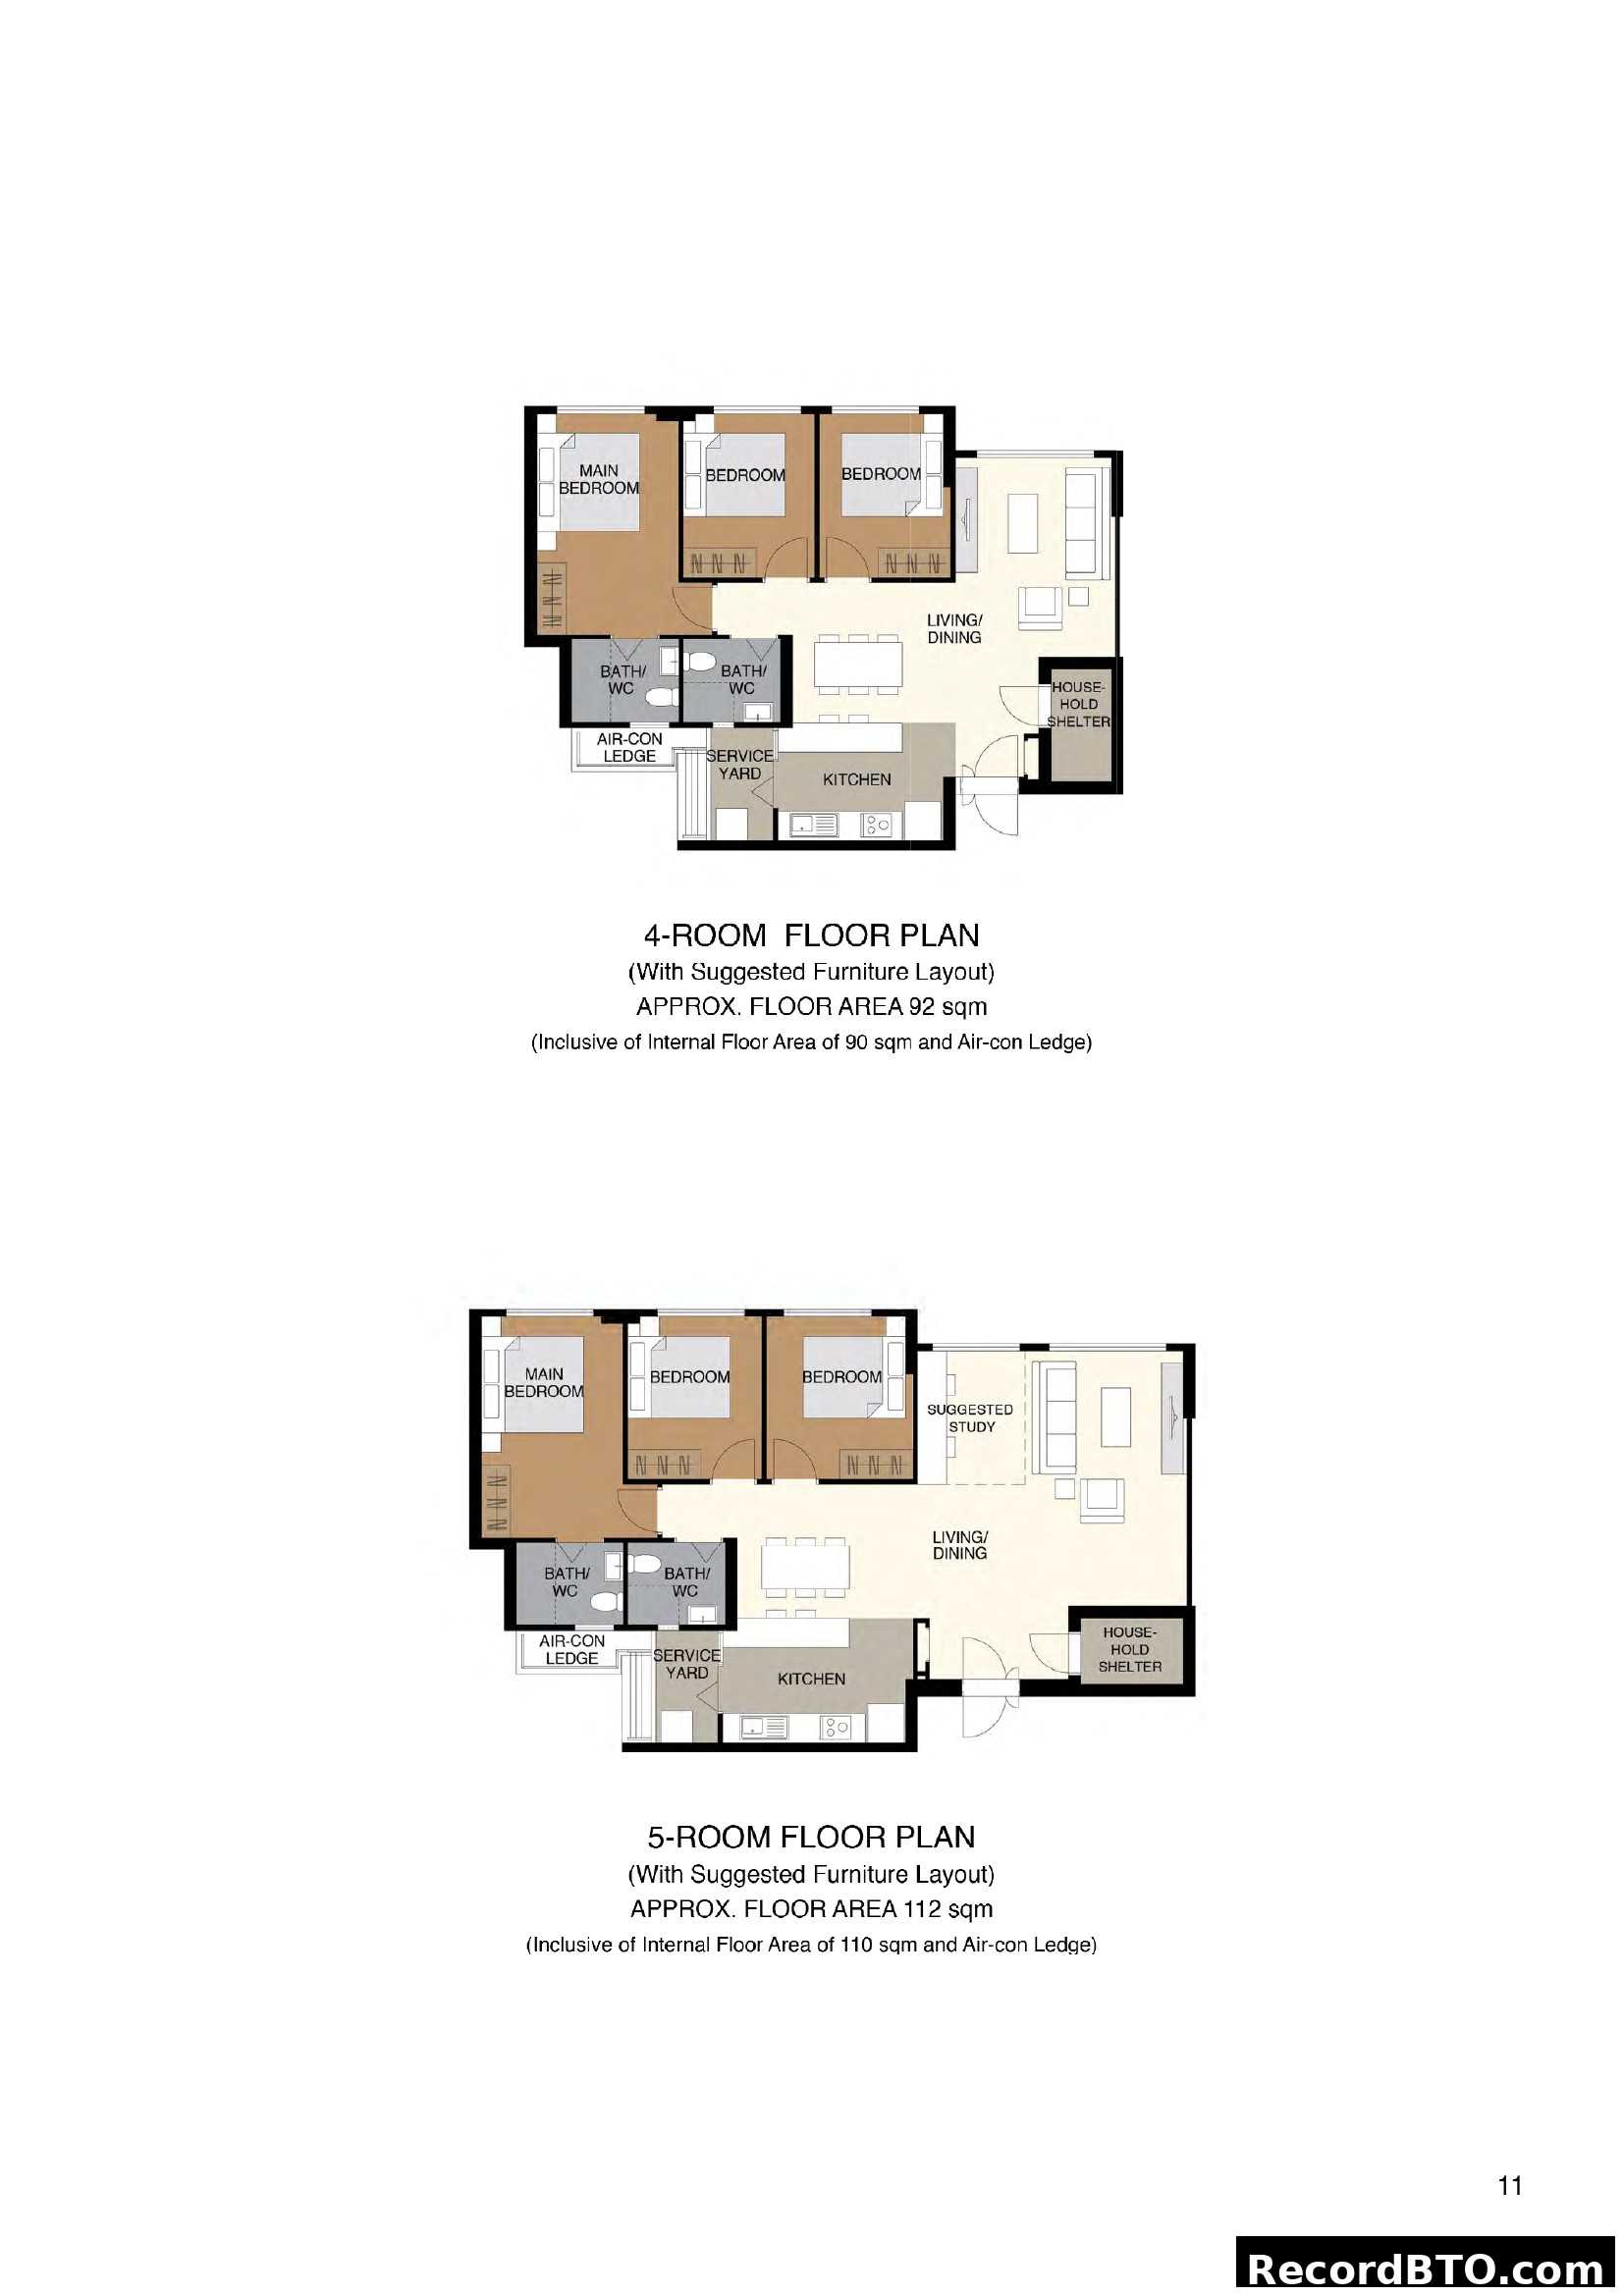
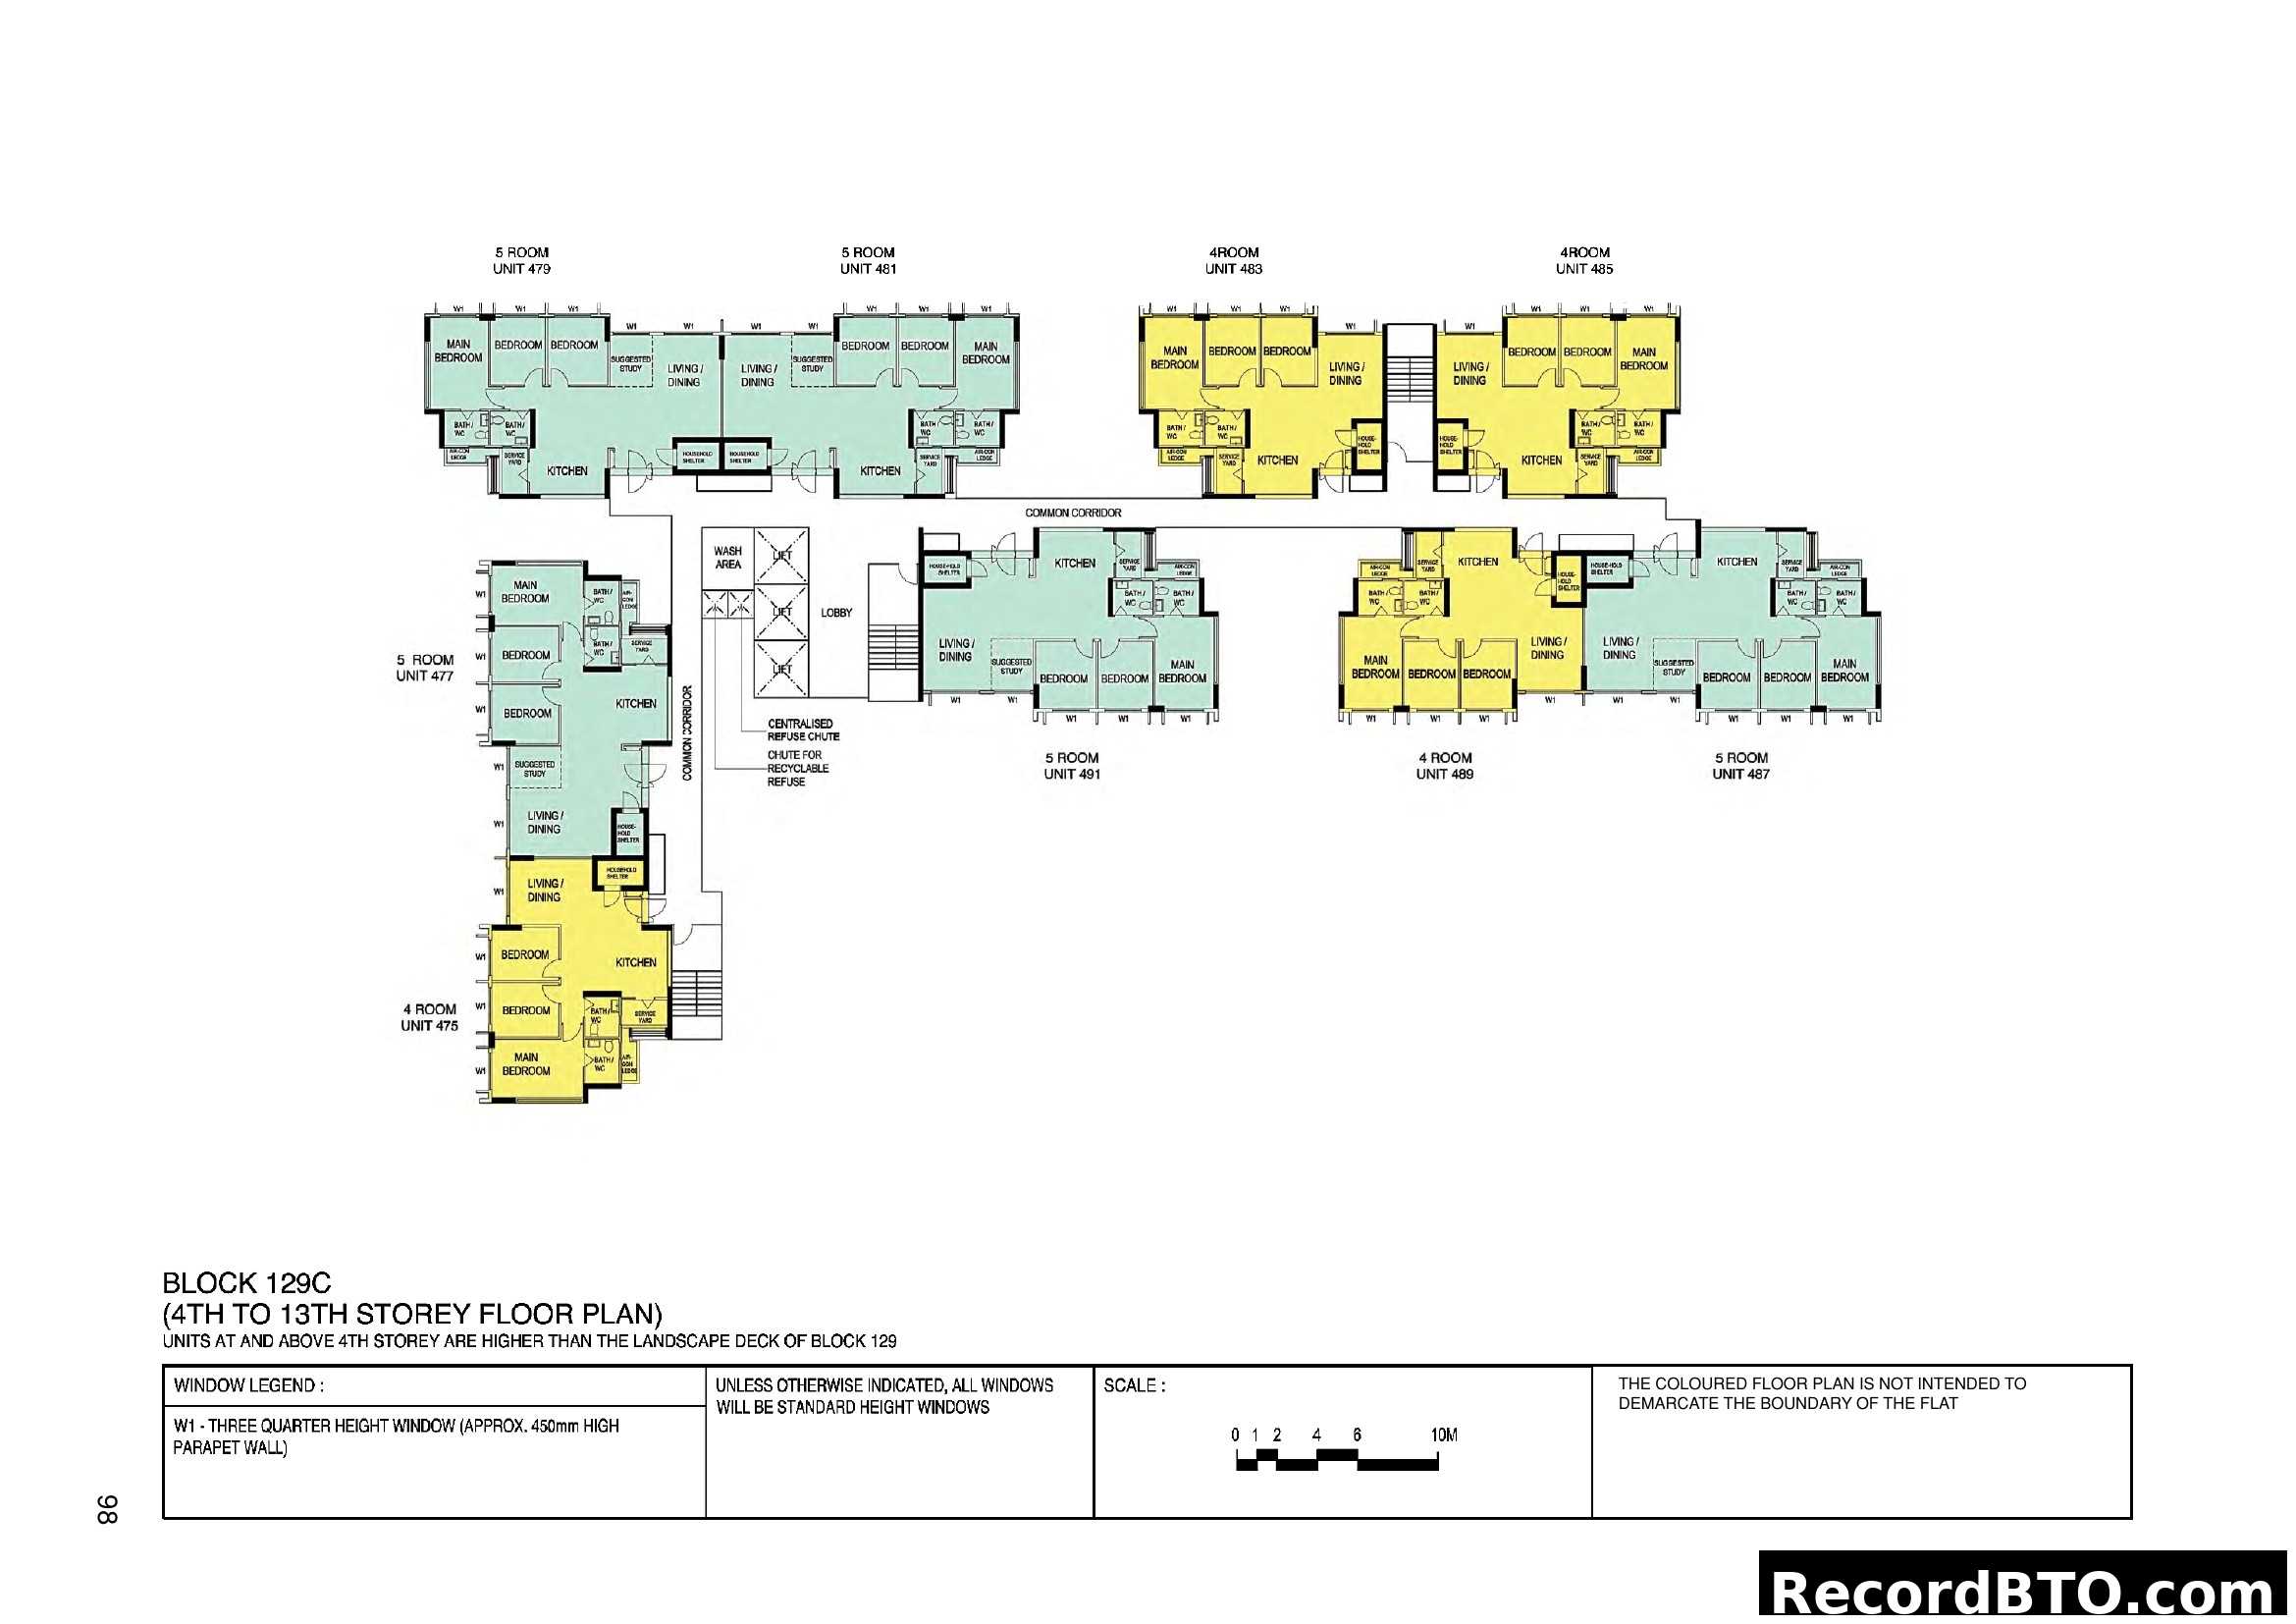
HDB BTO 4-Room and 5-Room Floor Plans
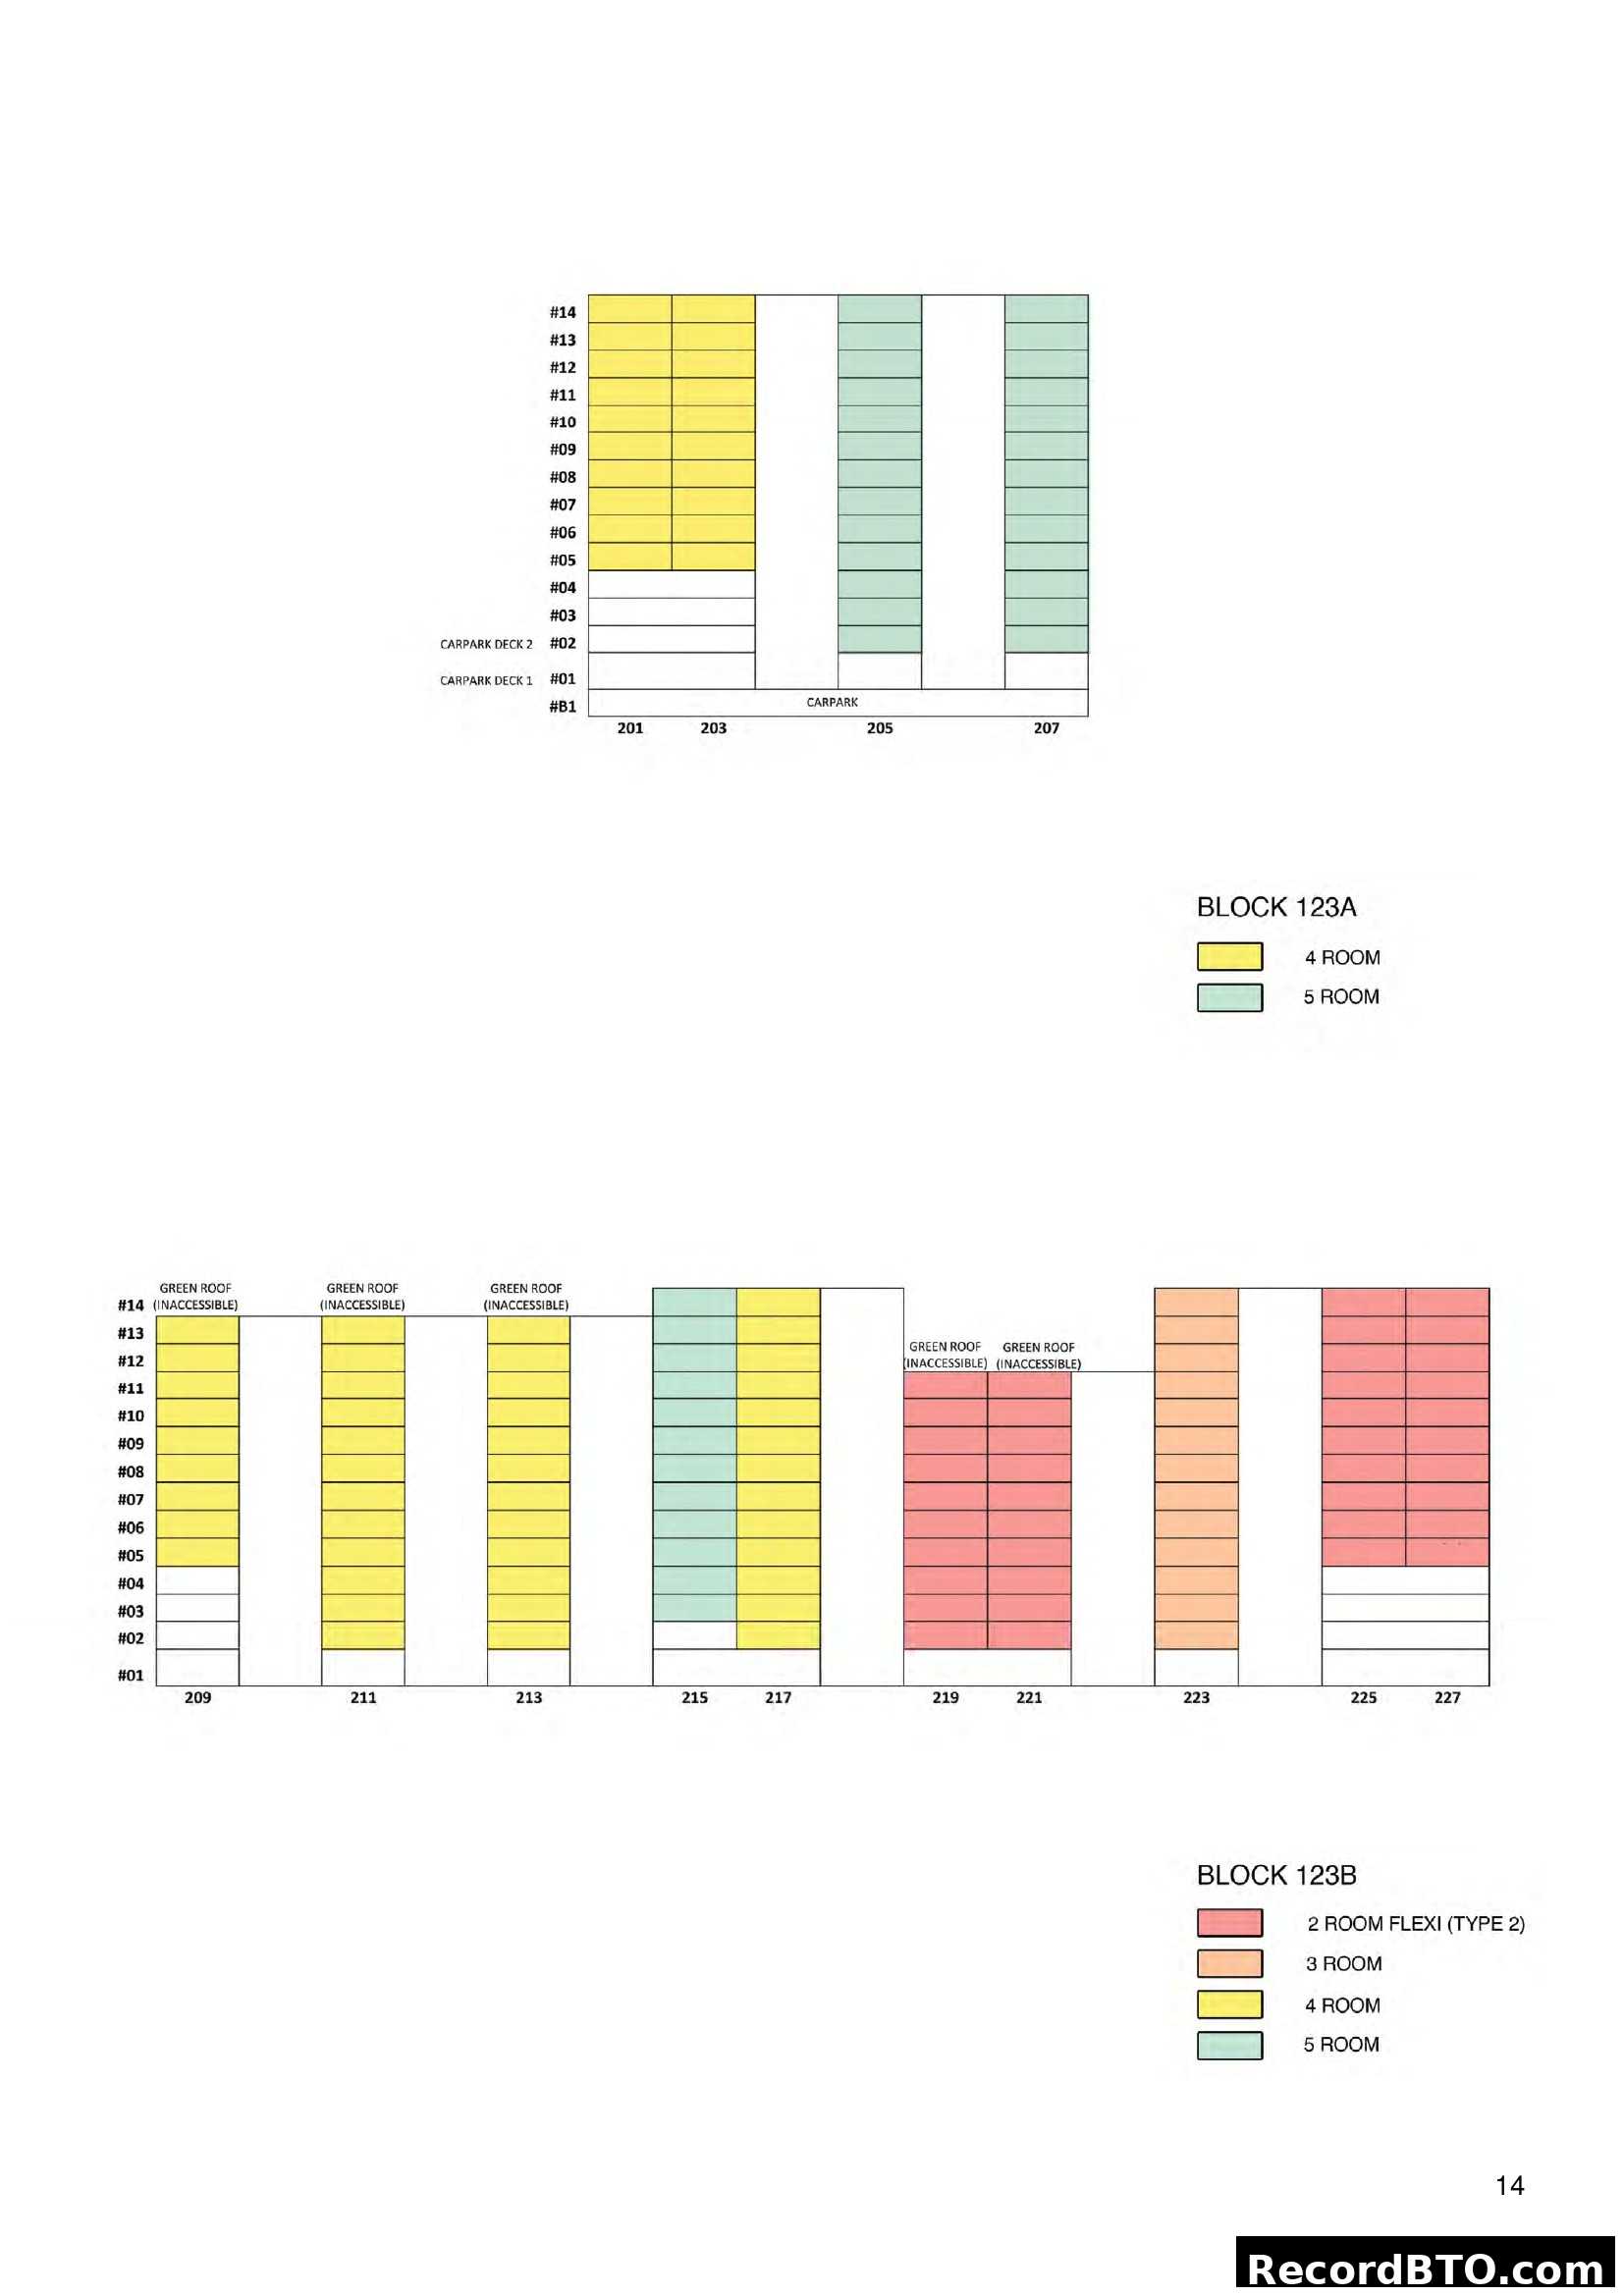
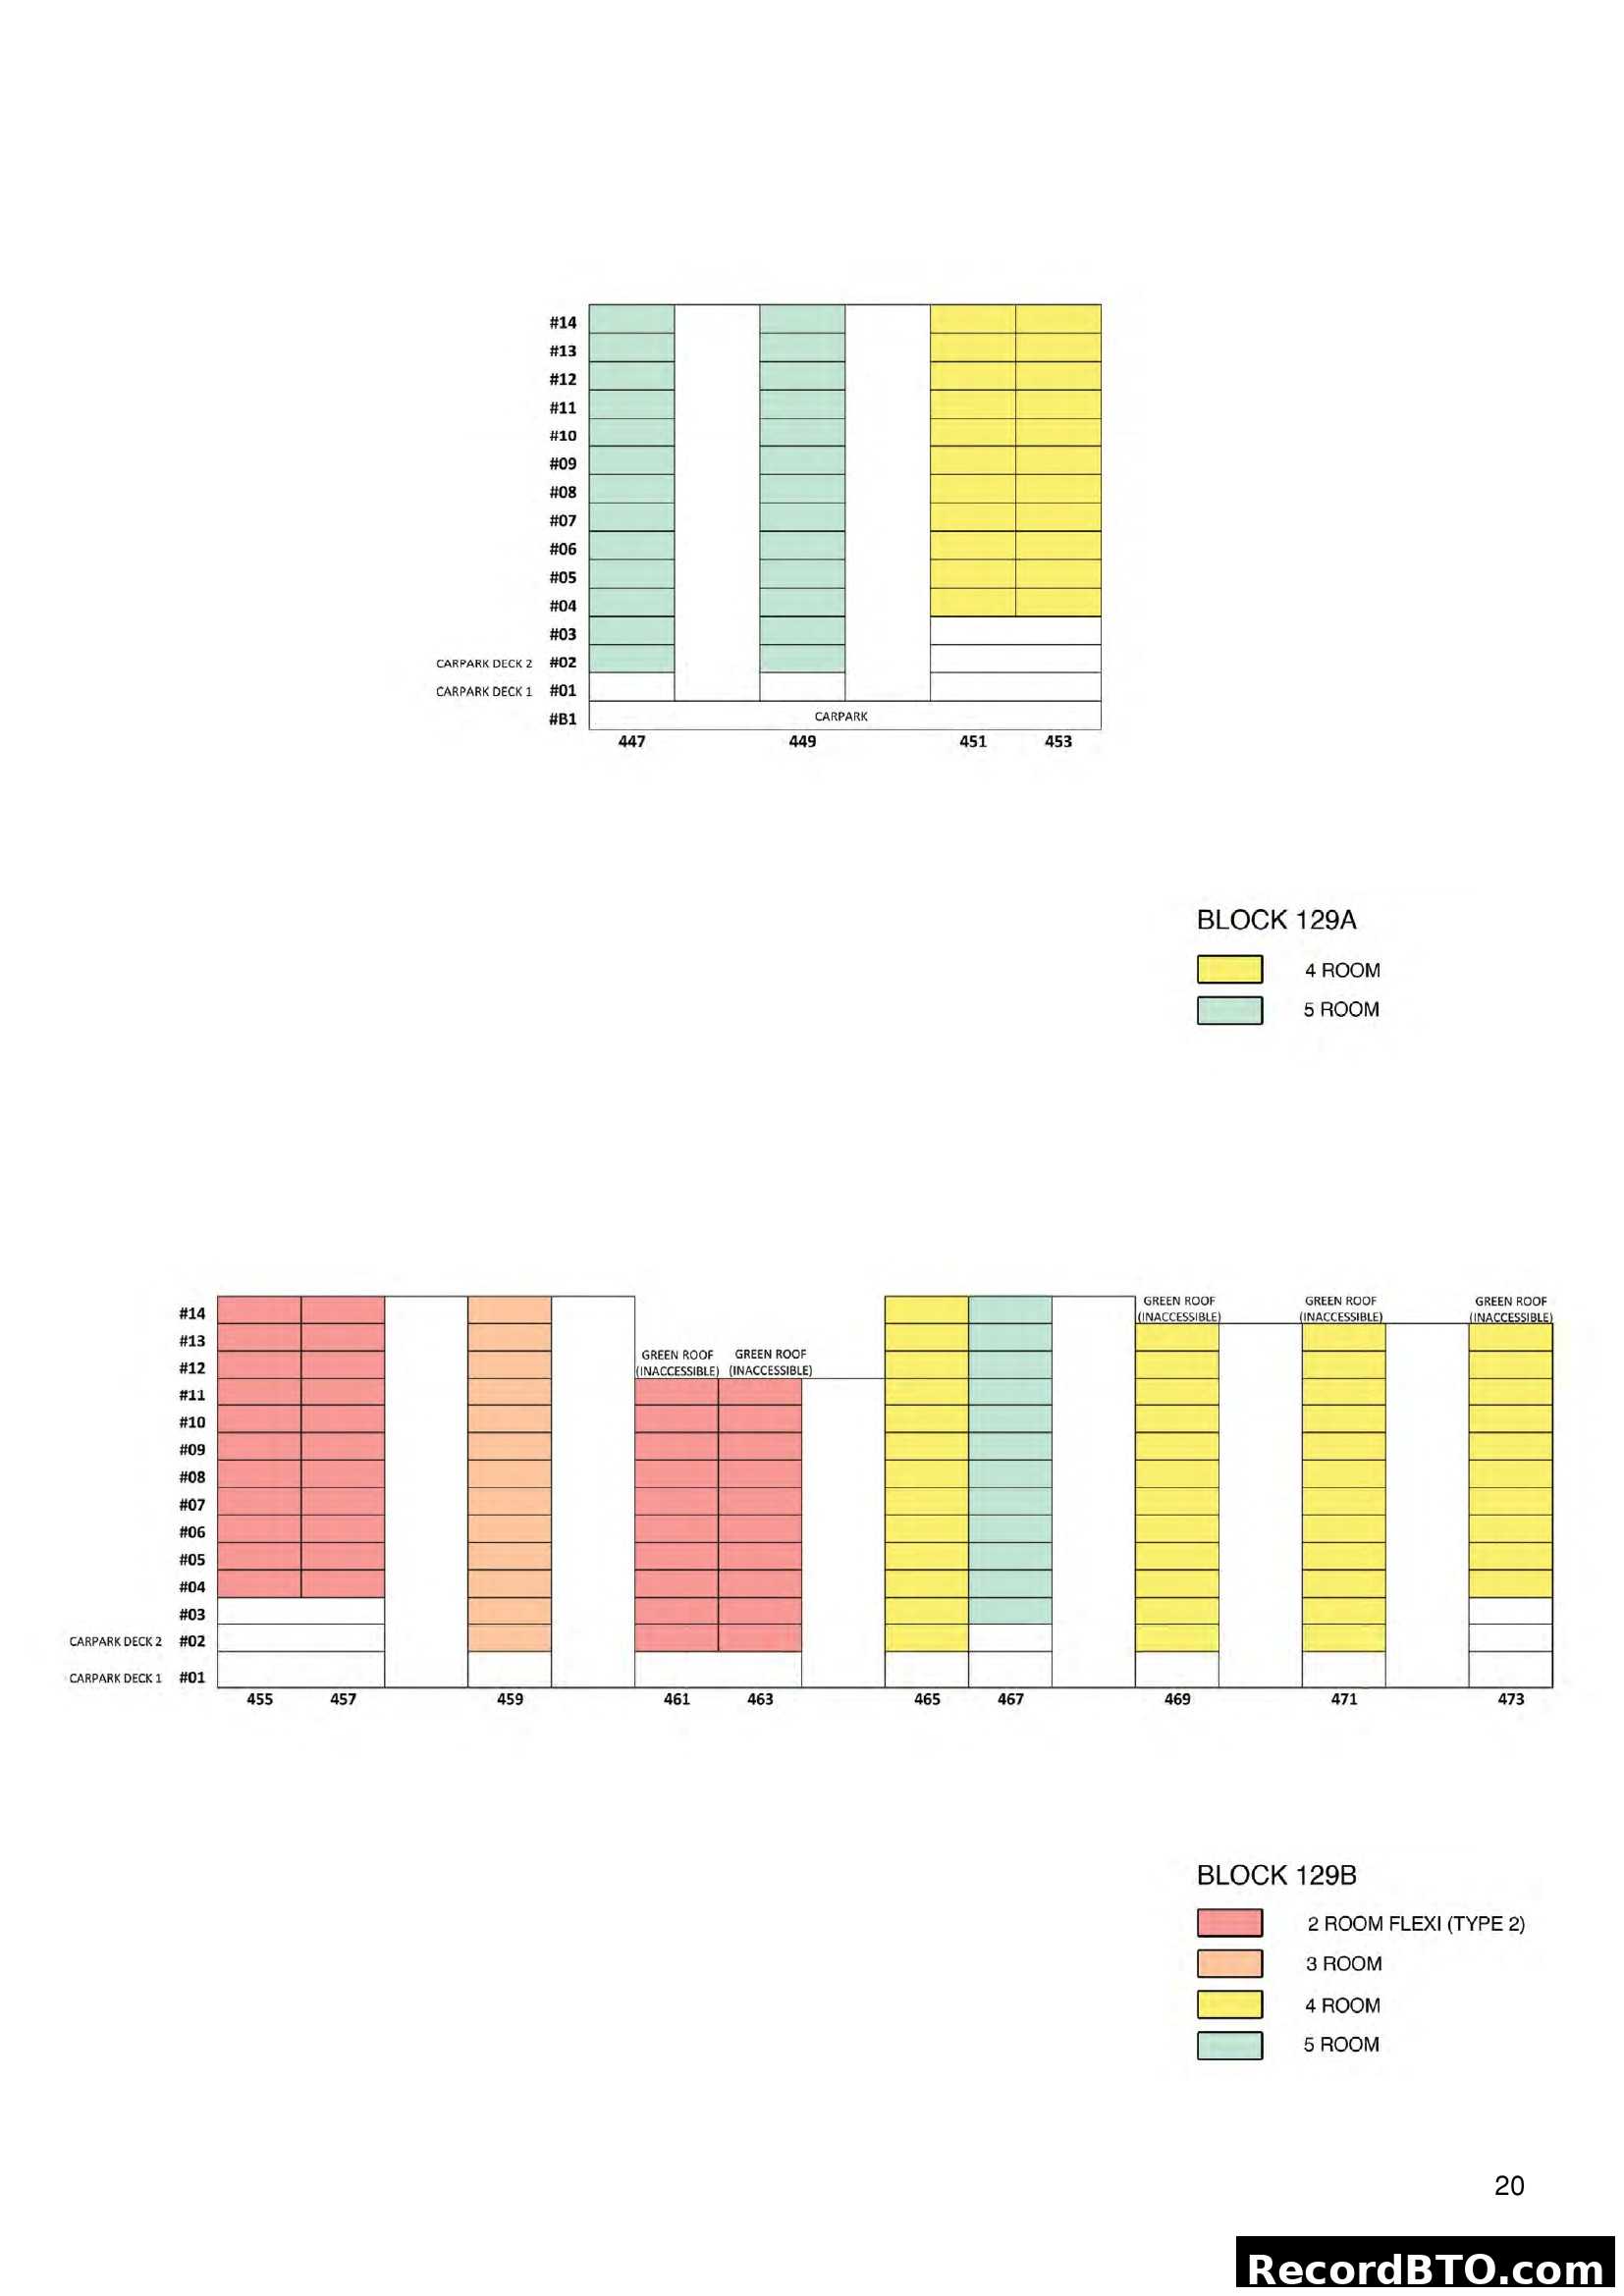
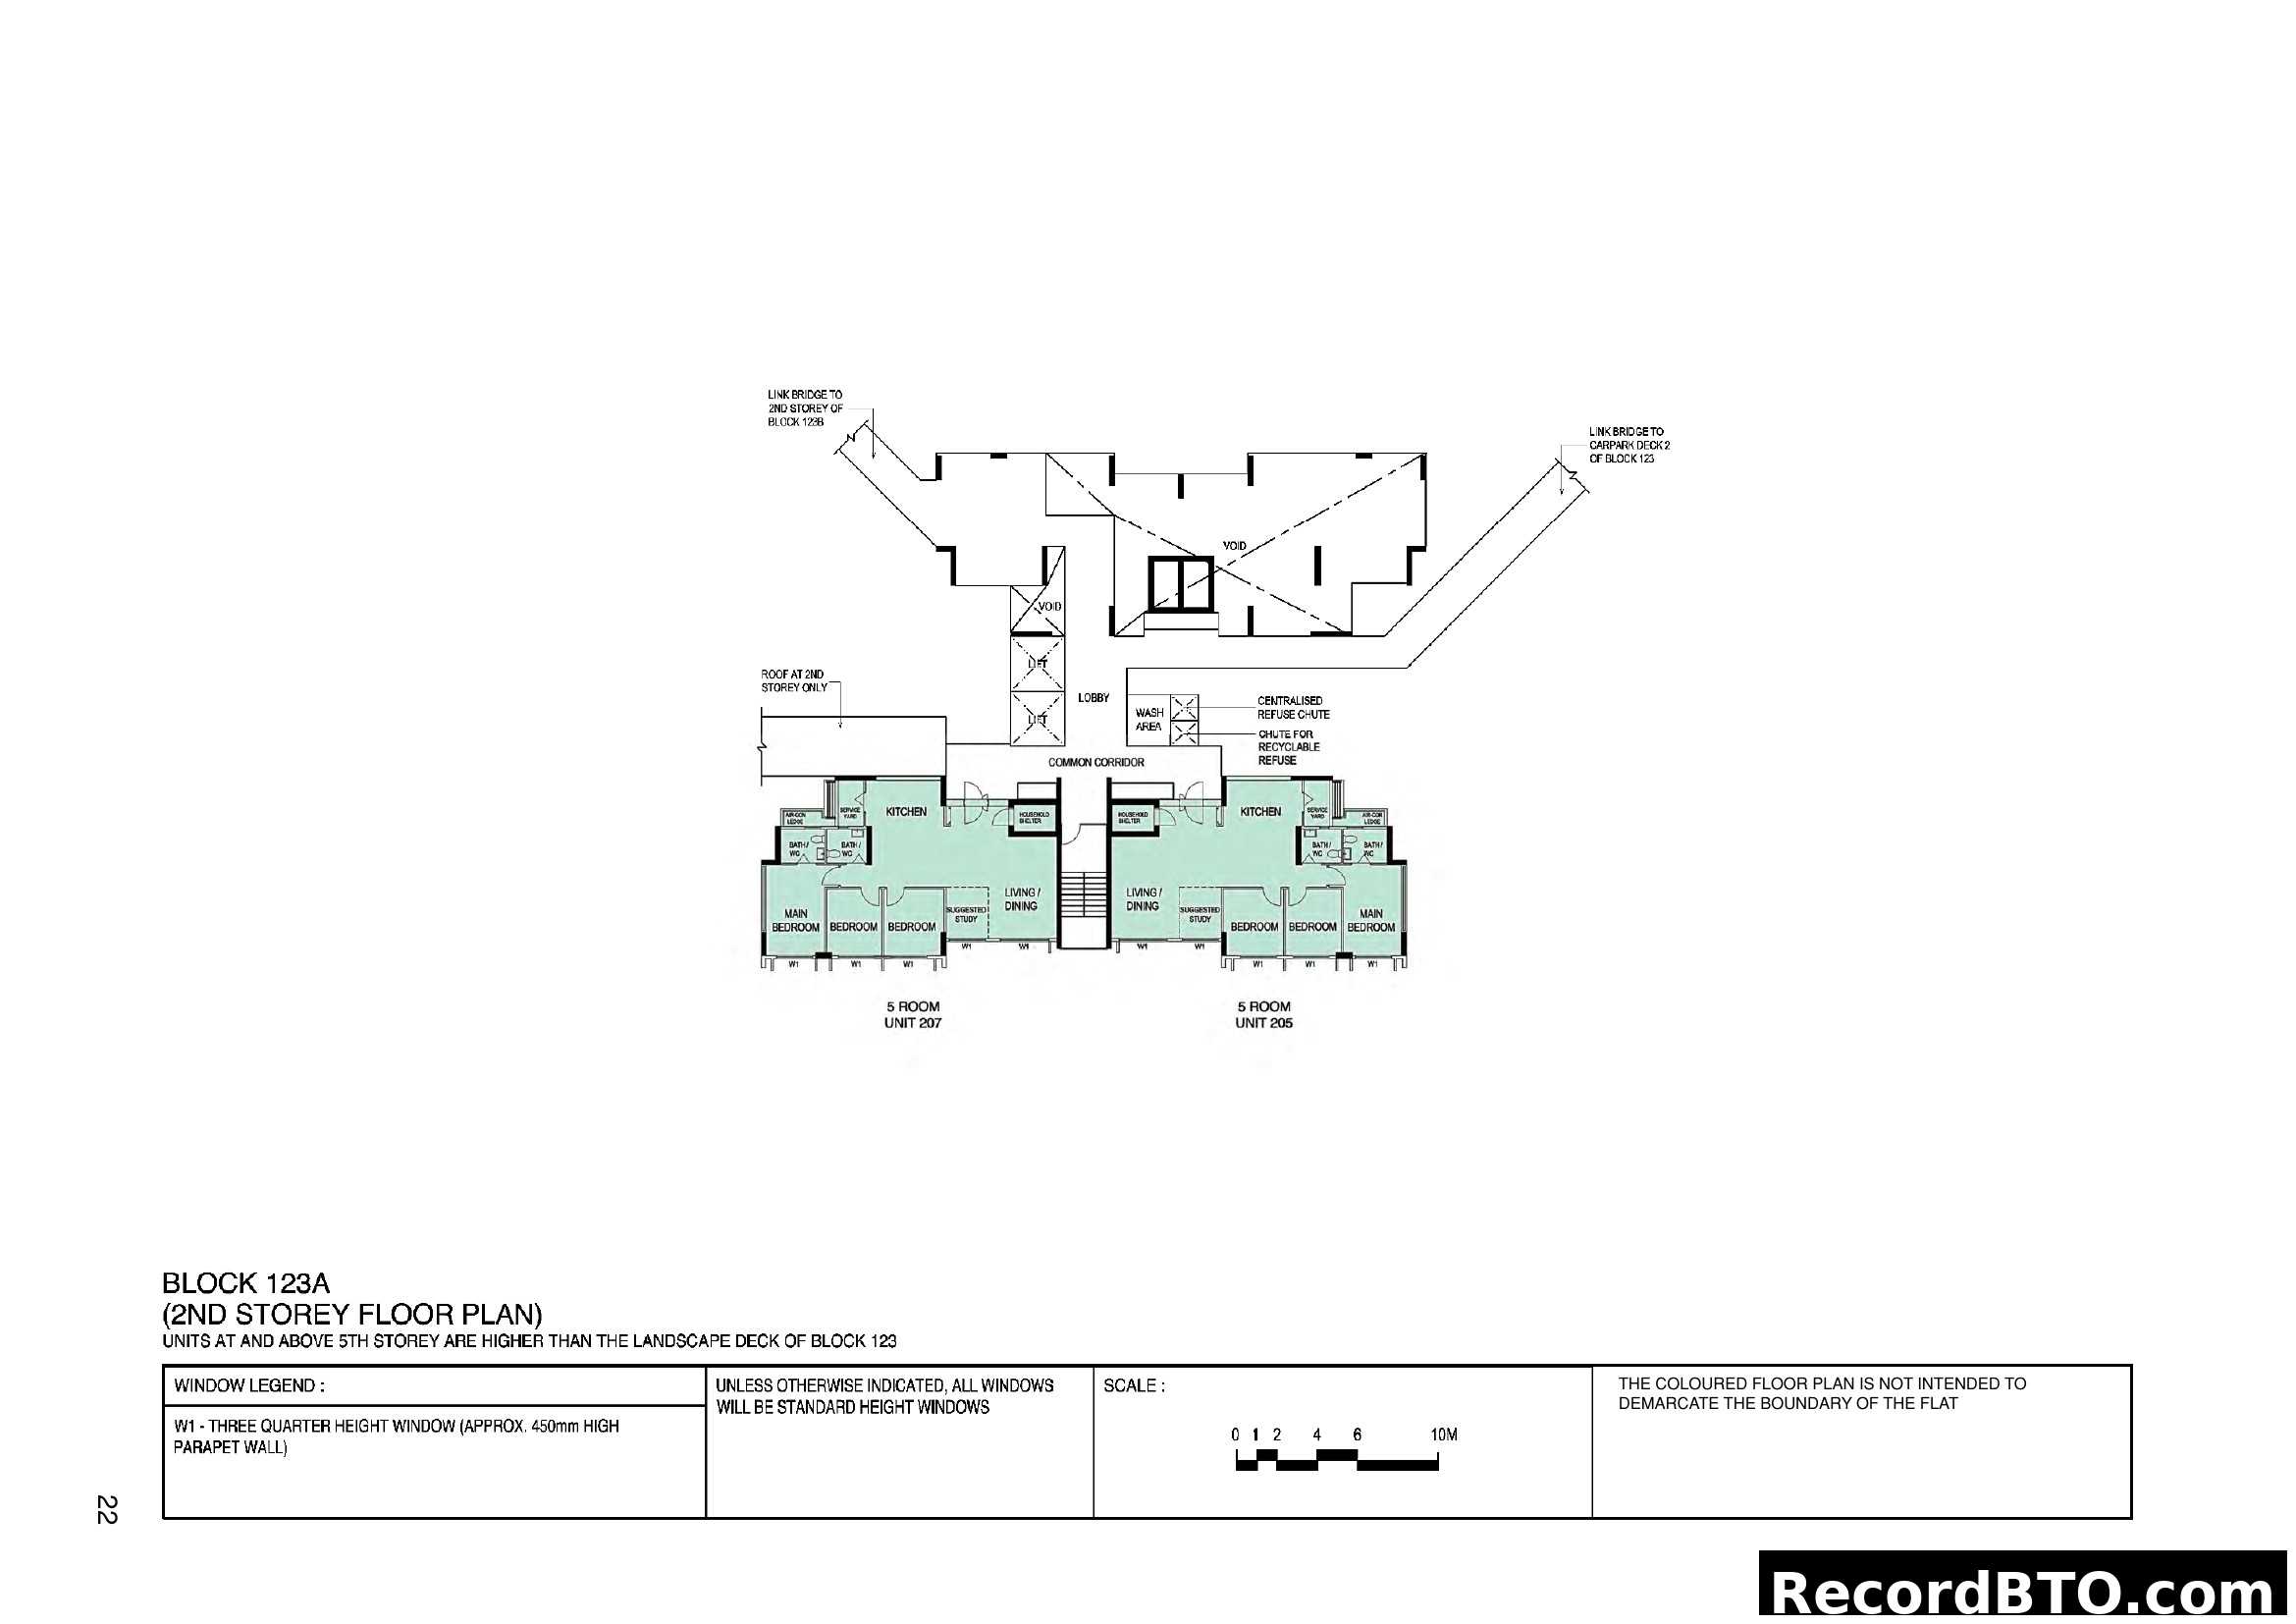
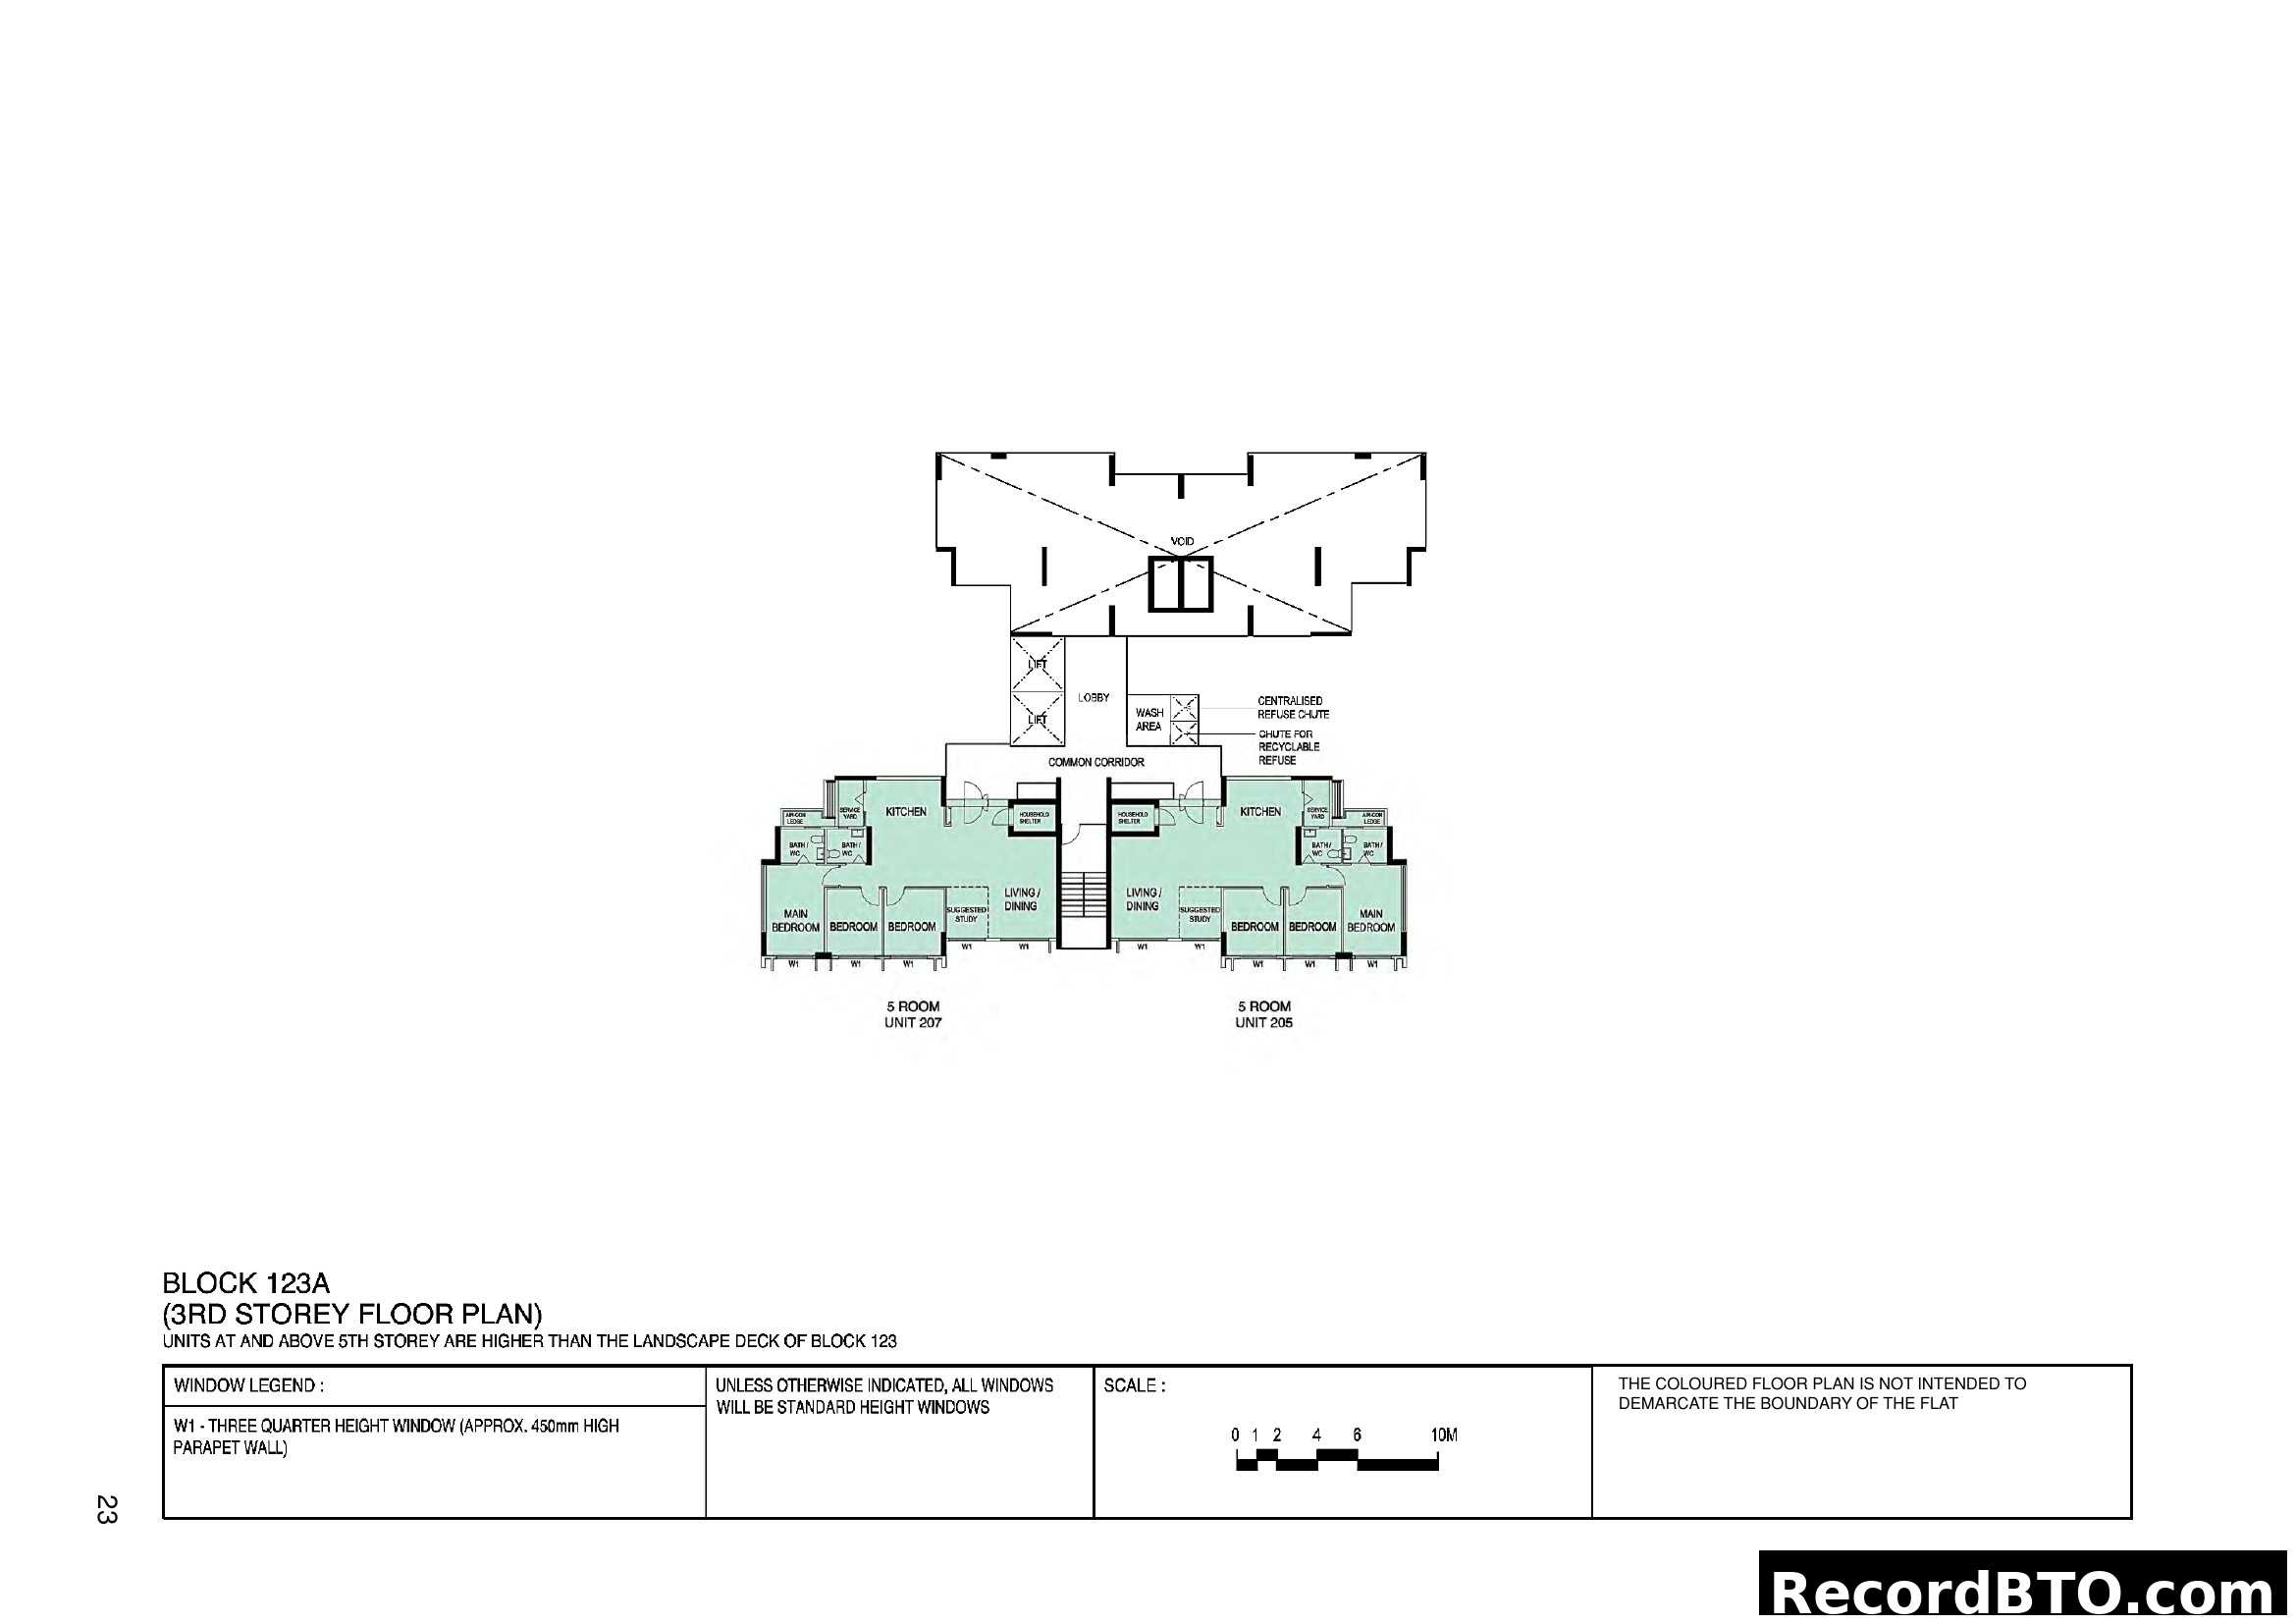
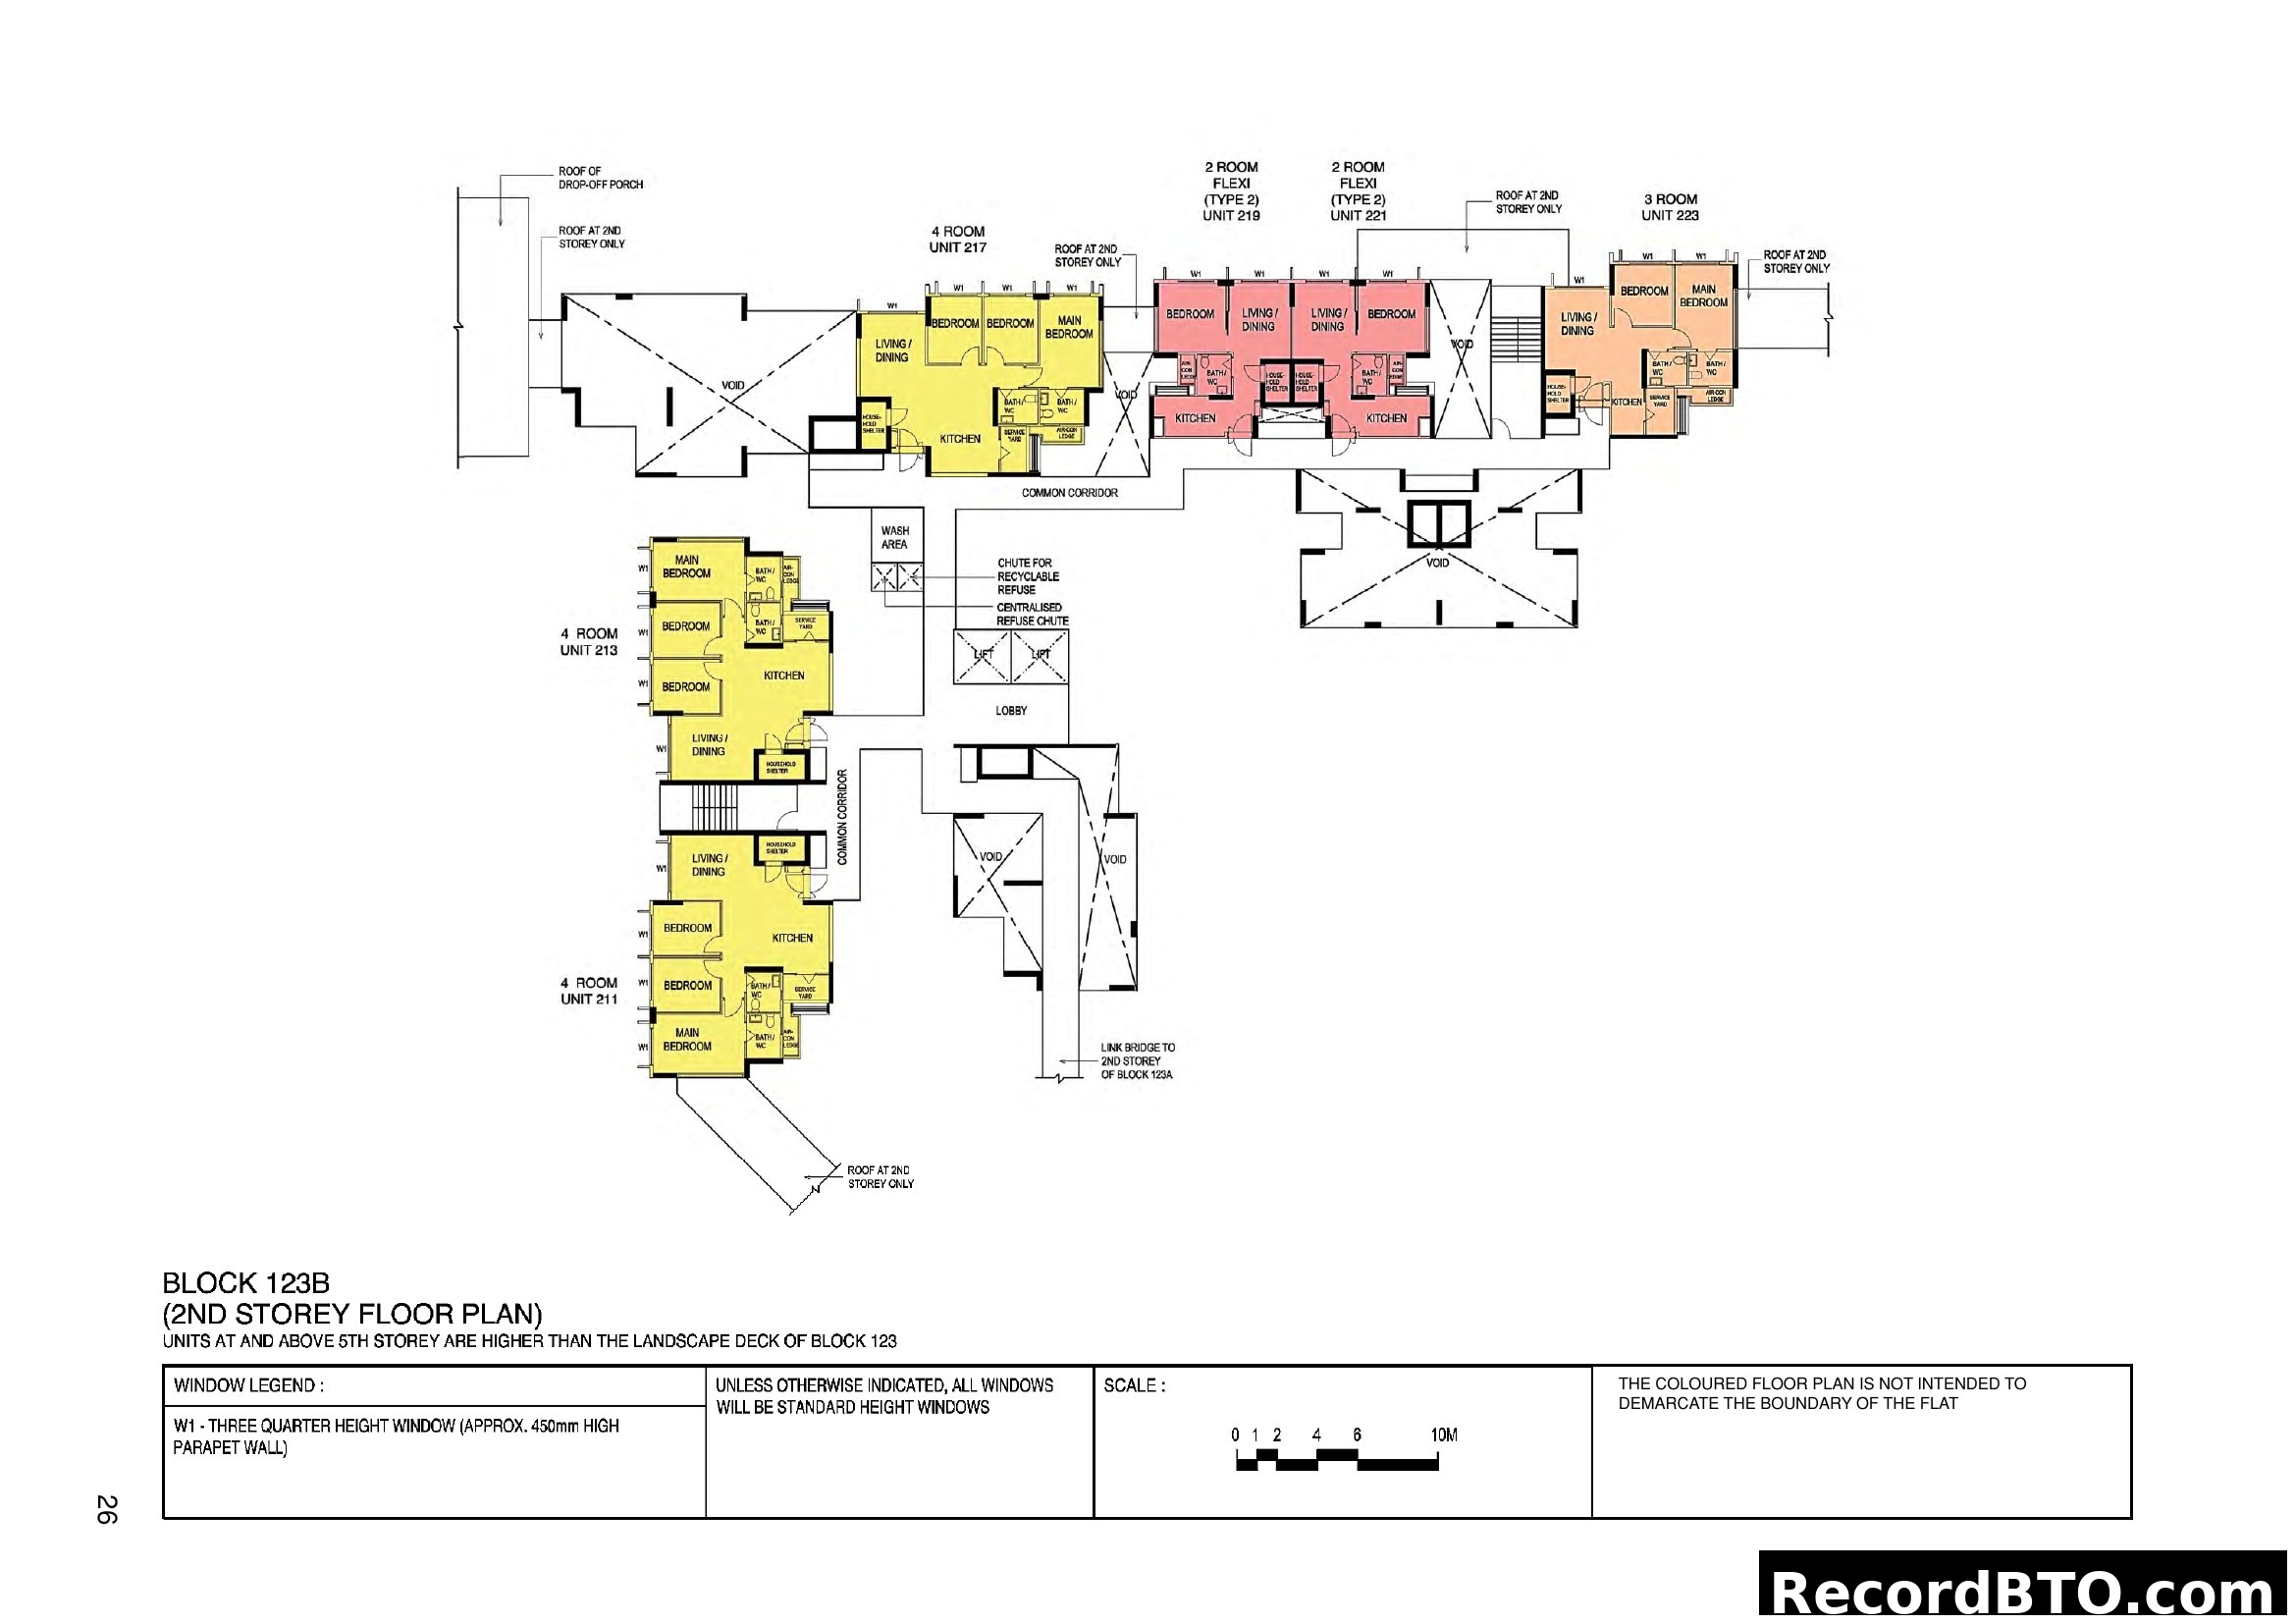
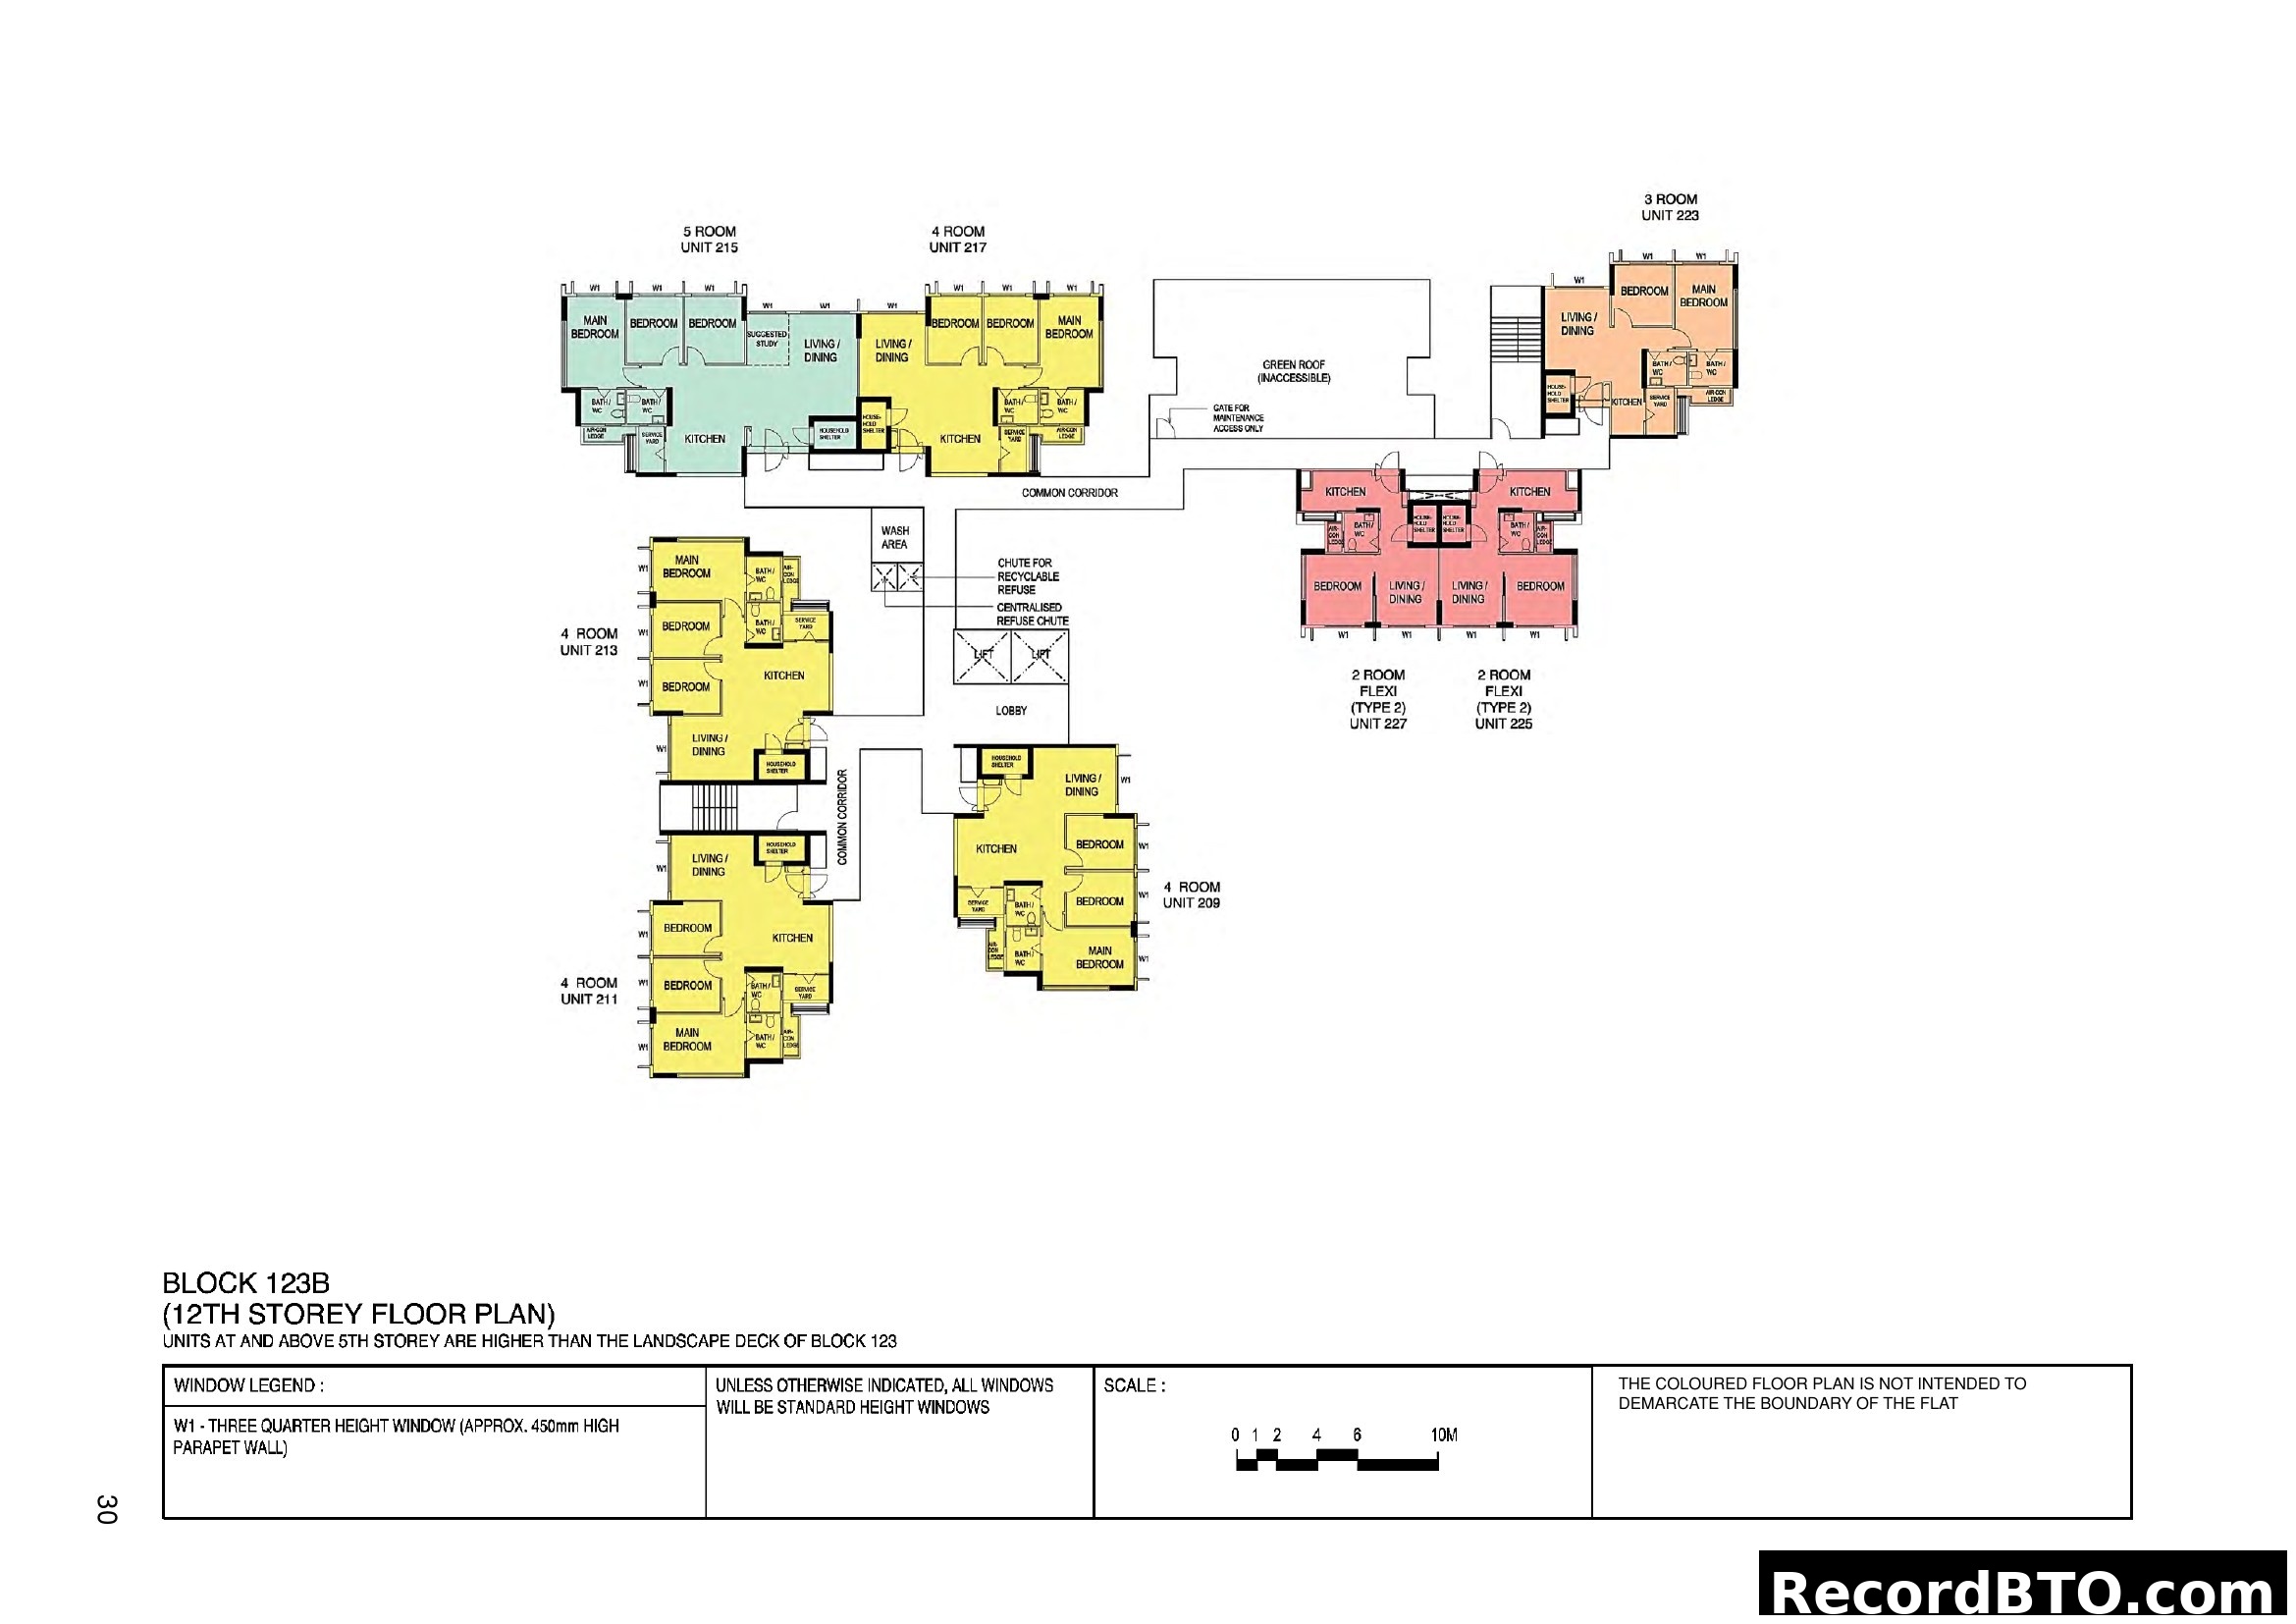
Block 123A & 123B Stacking Plan

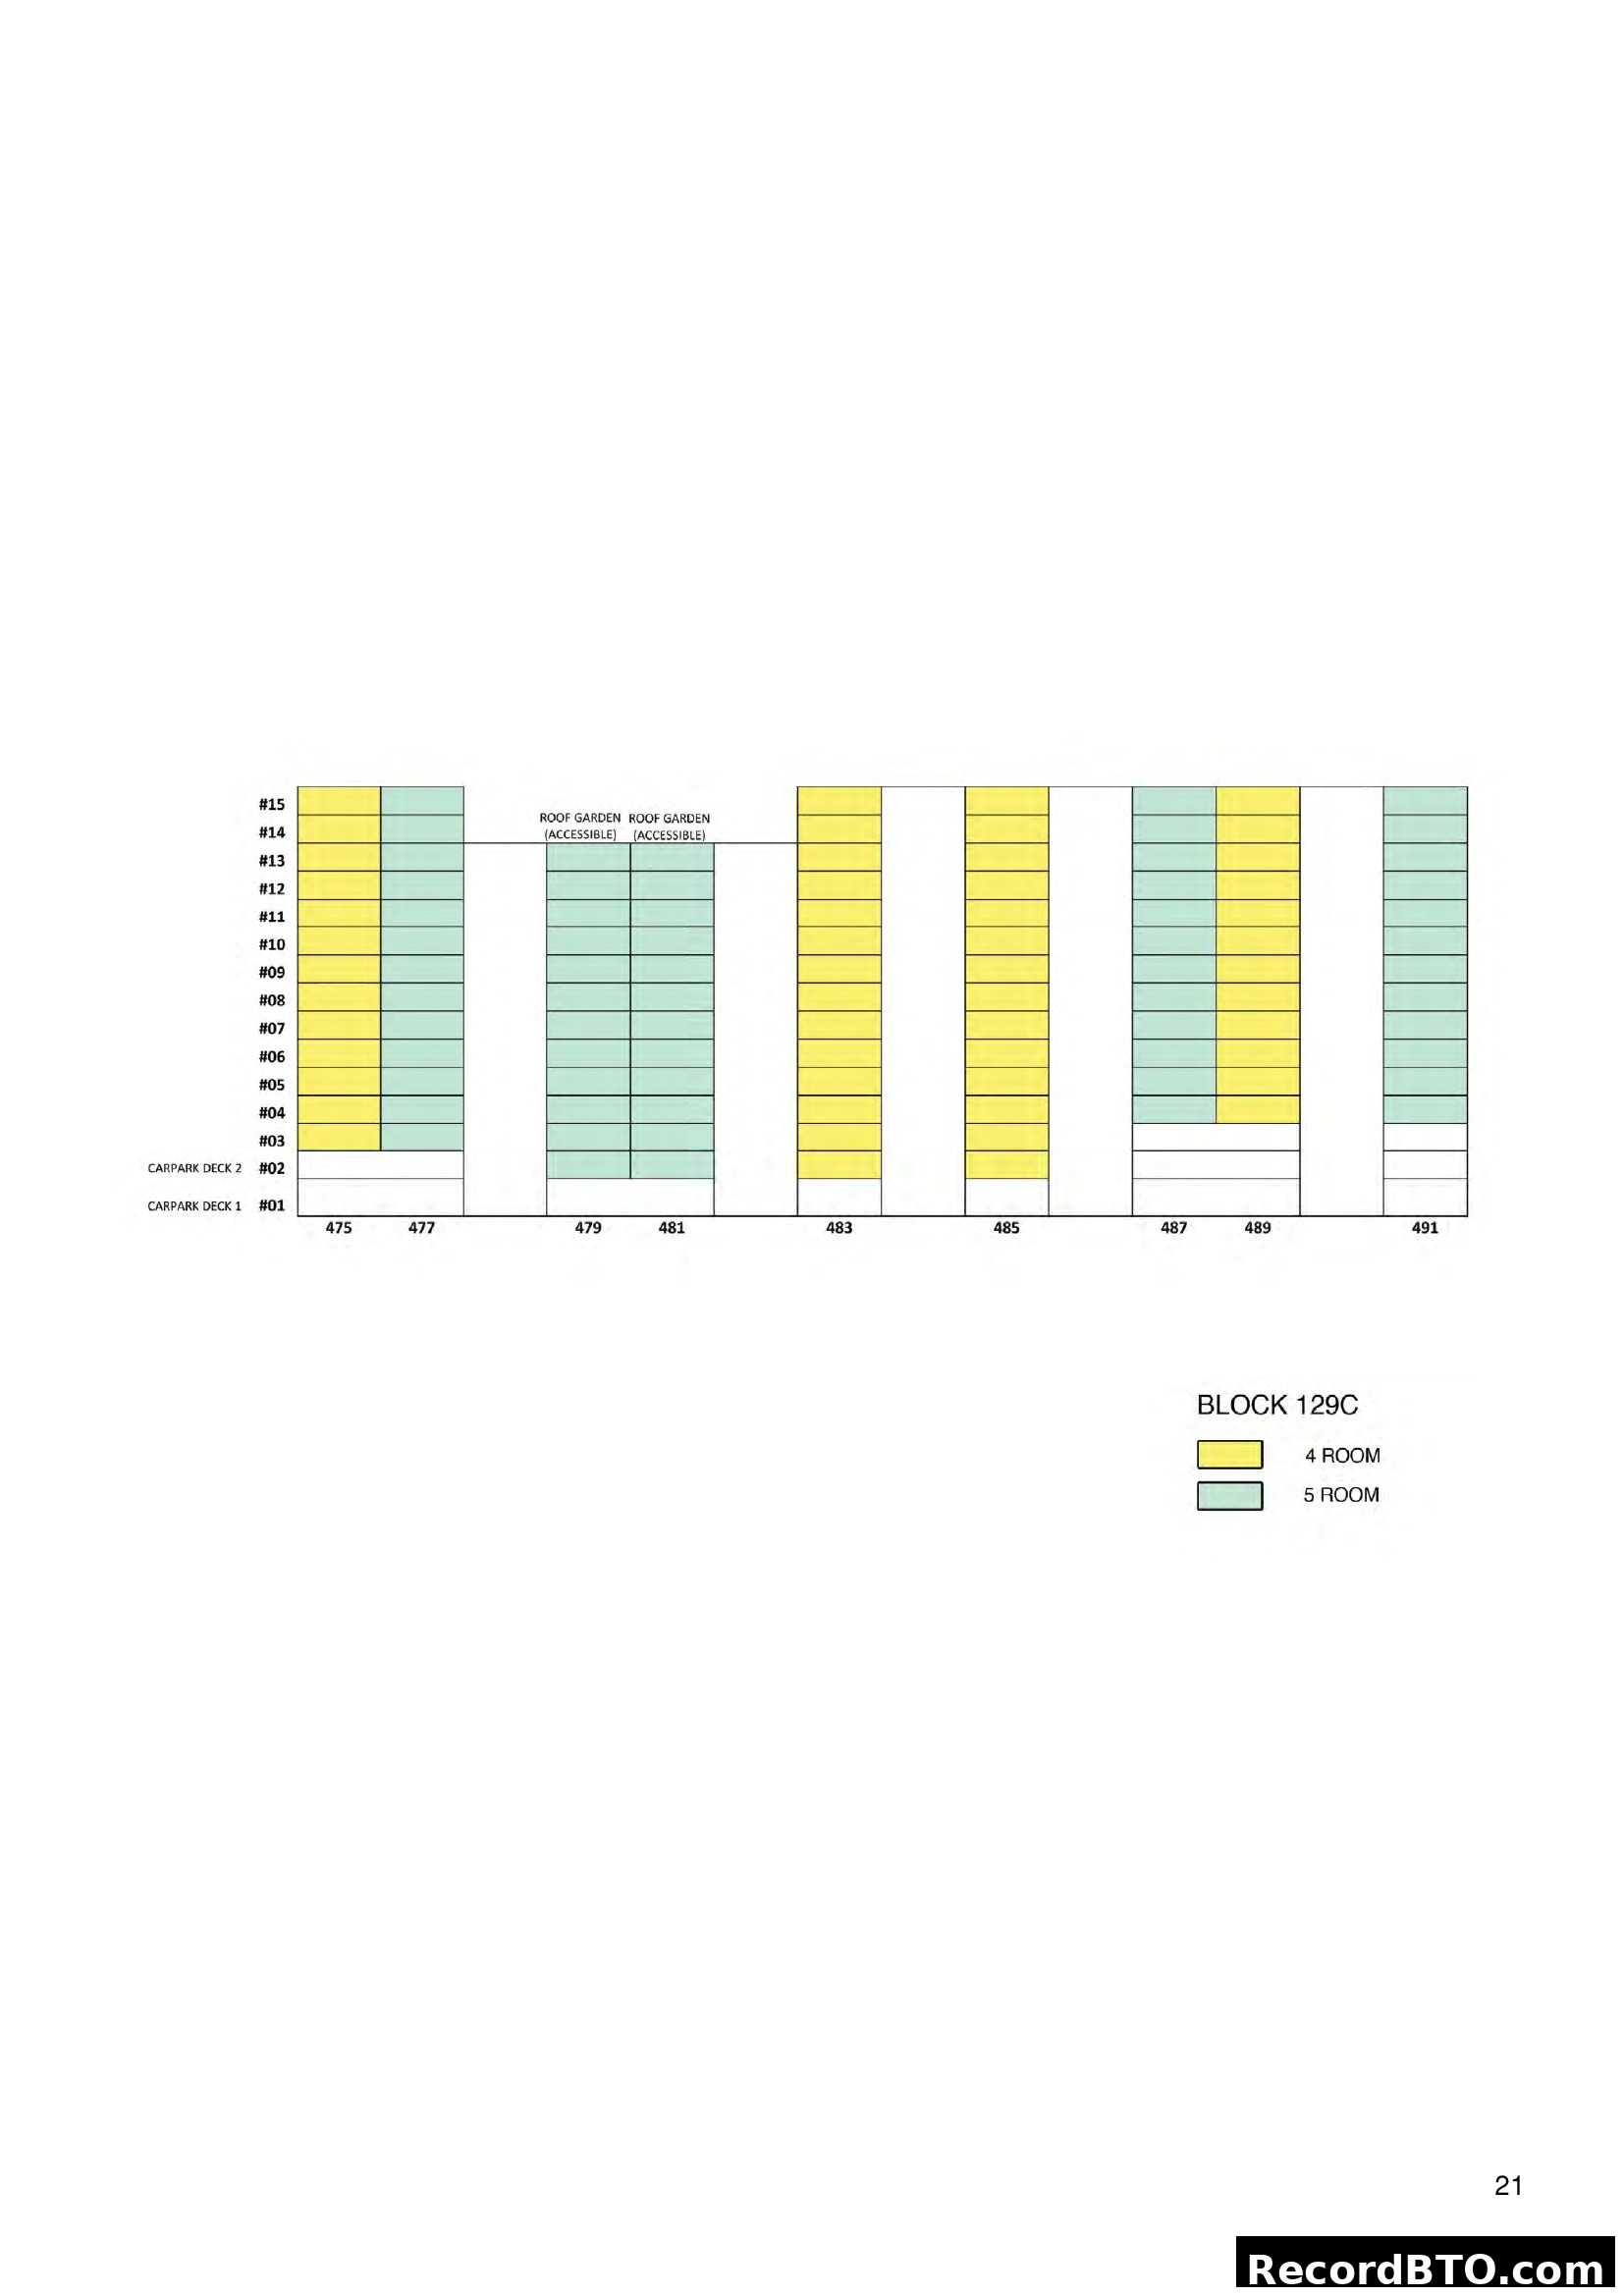
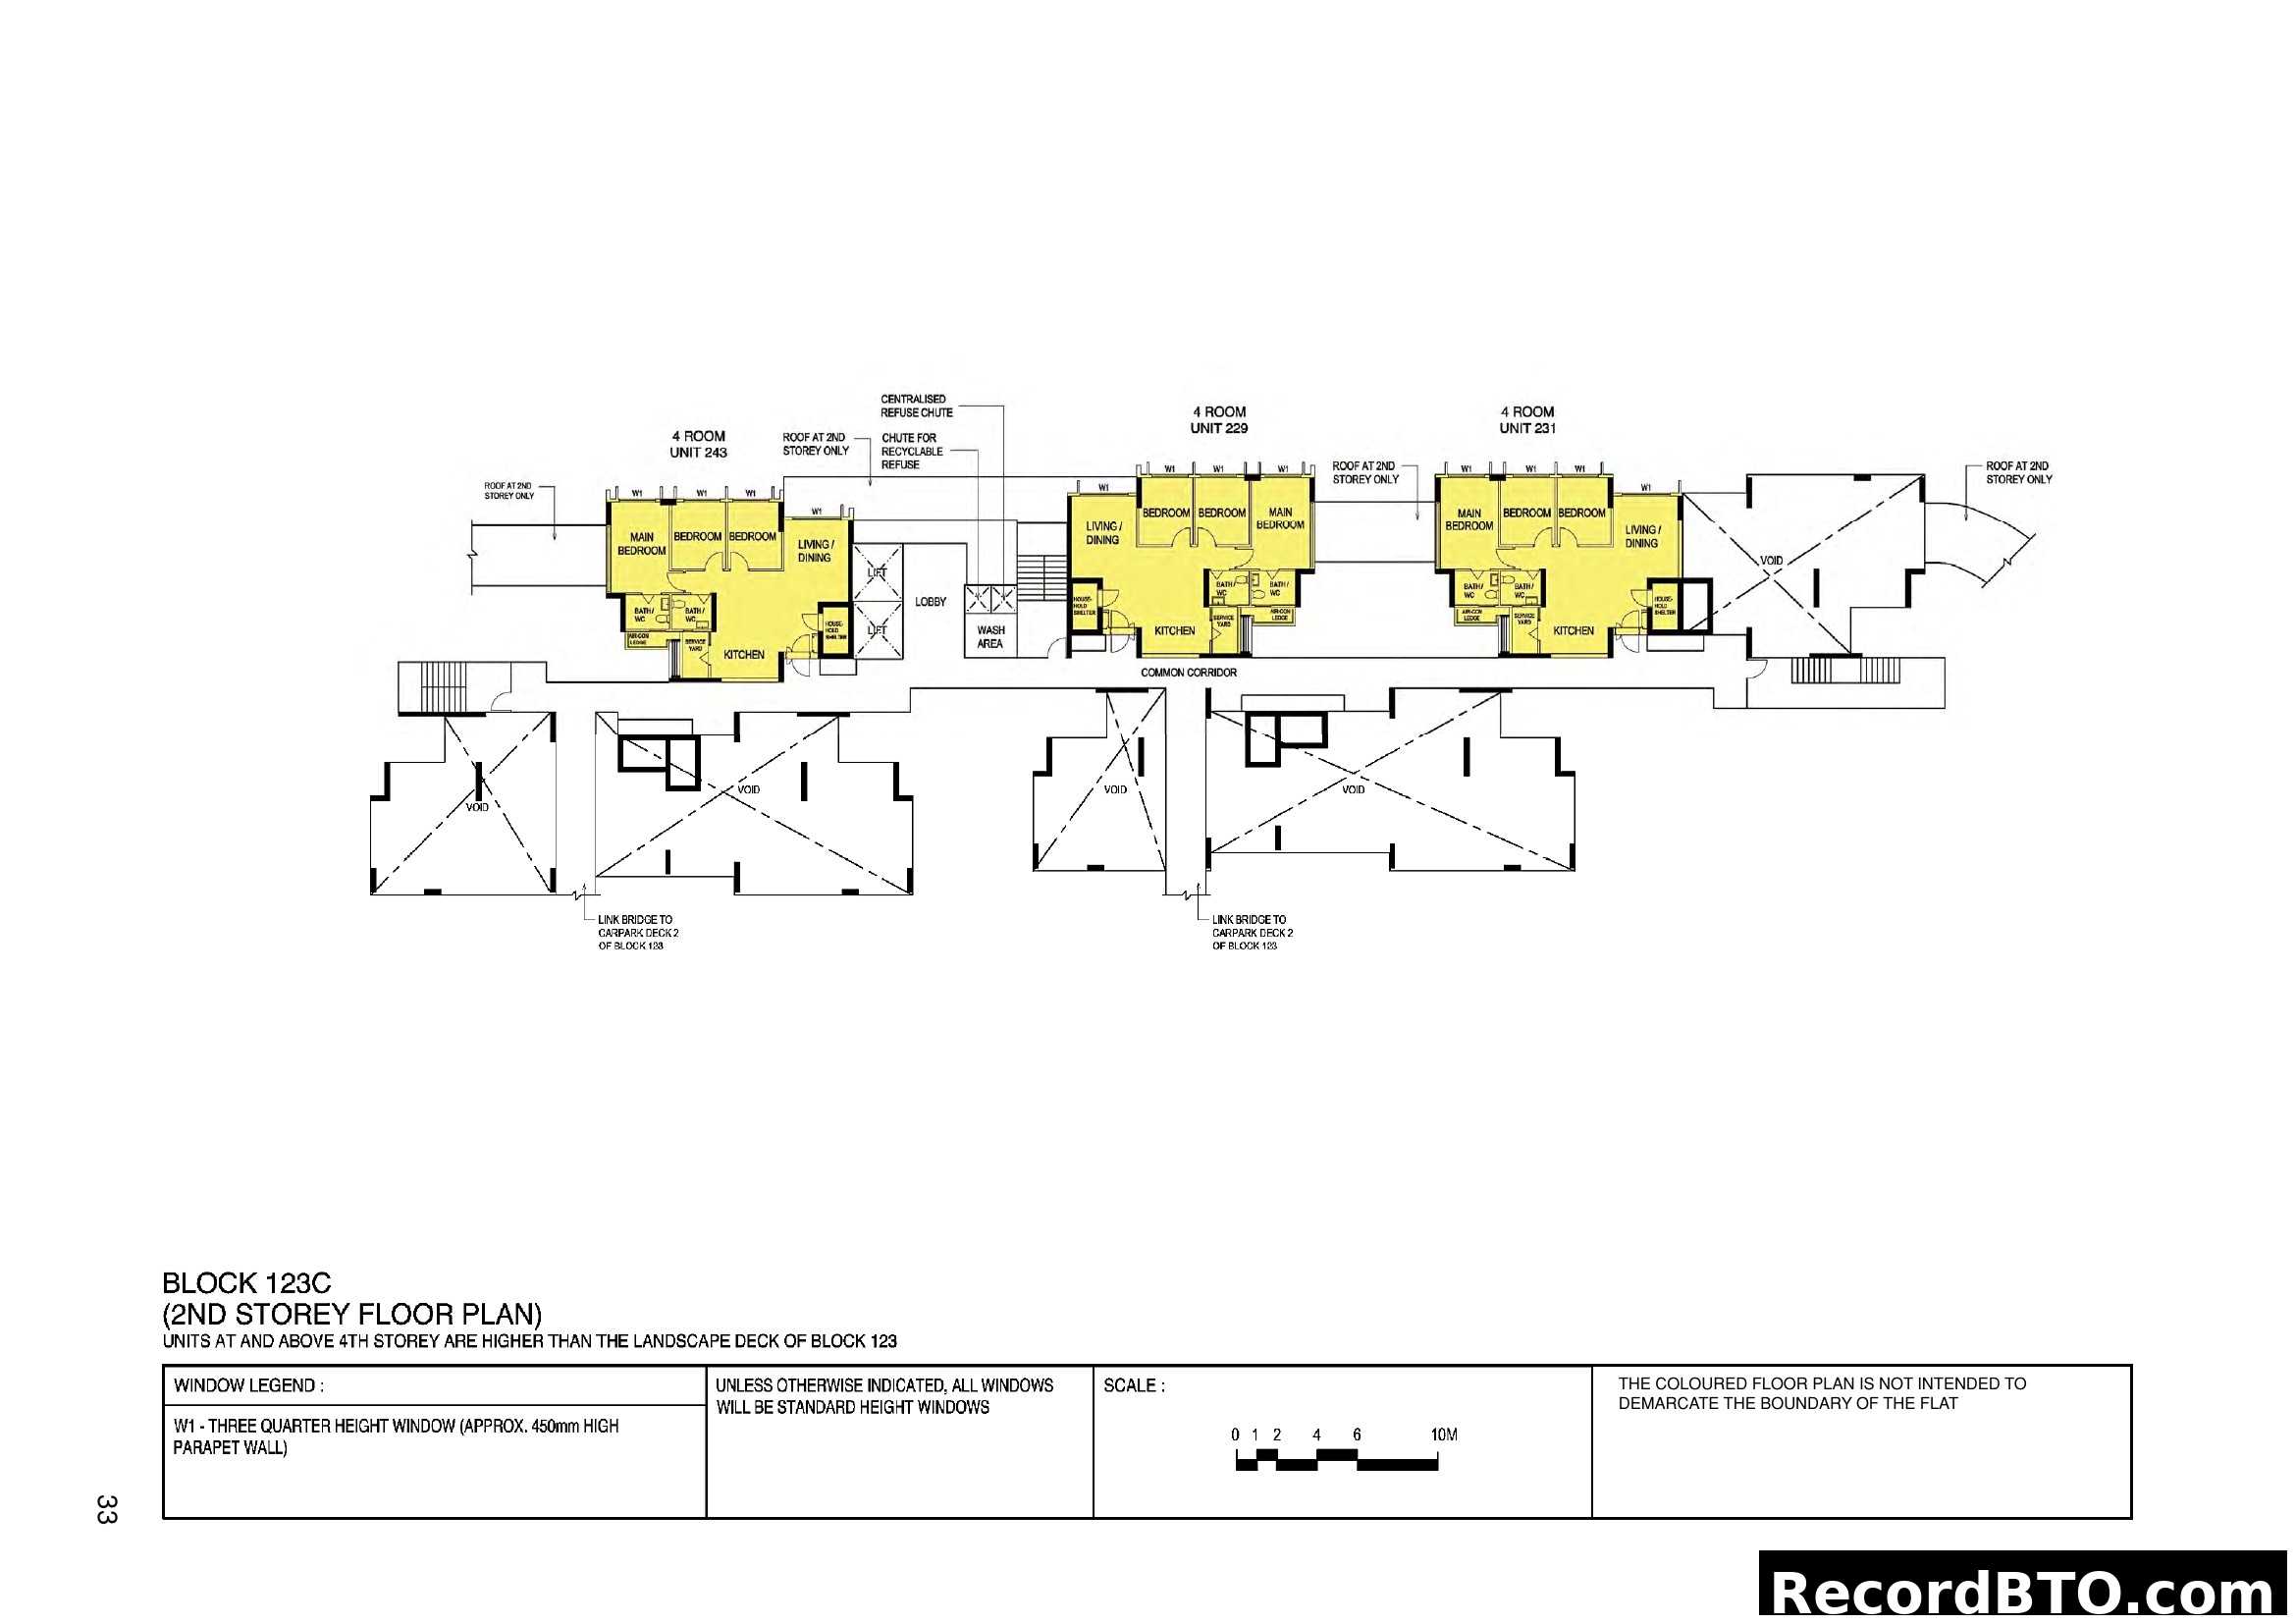
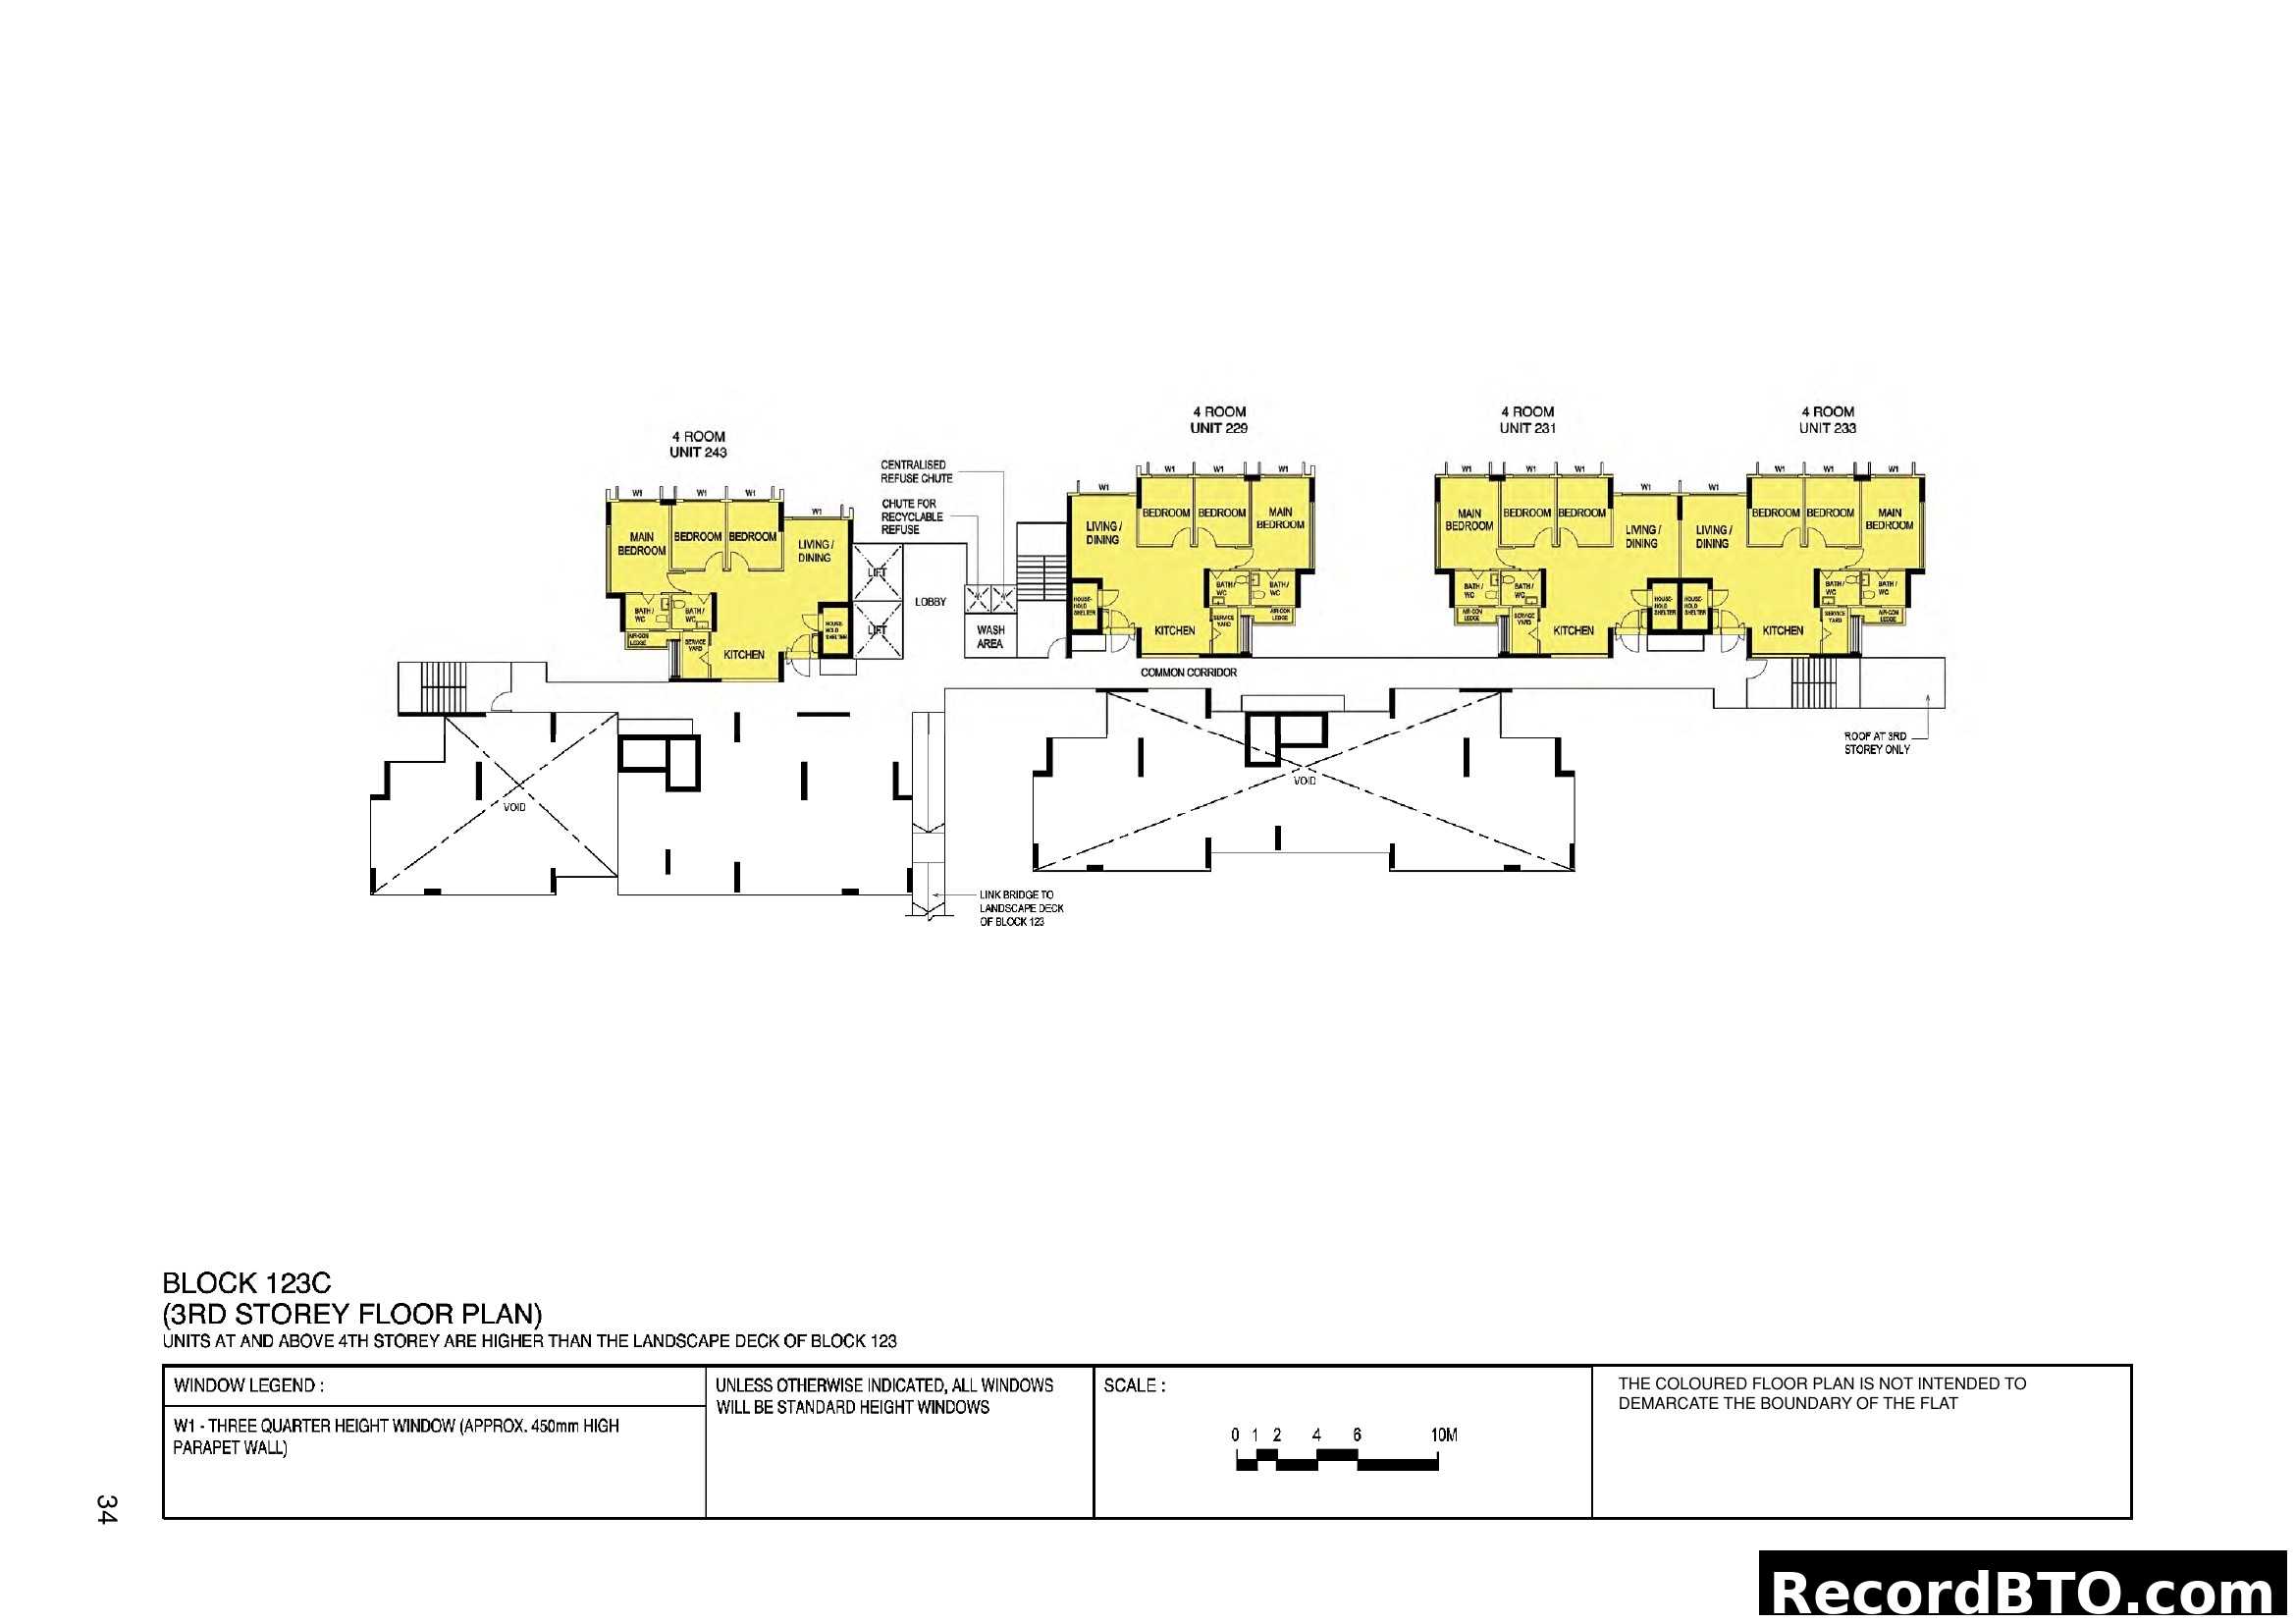
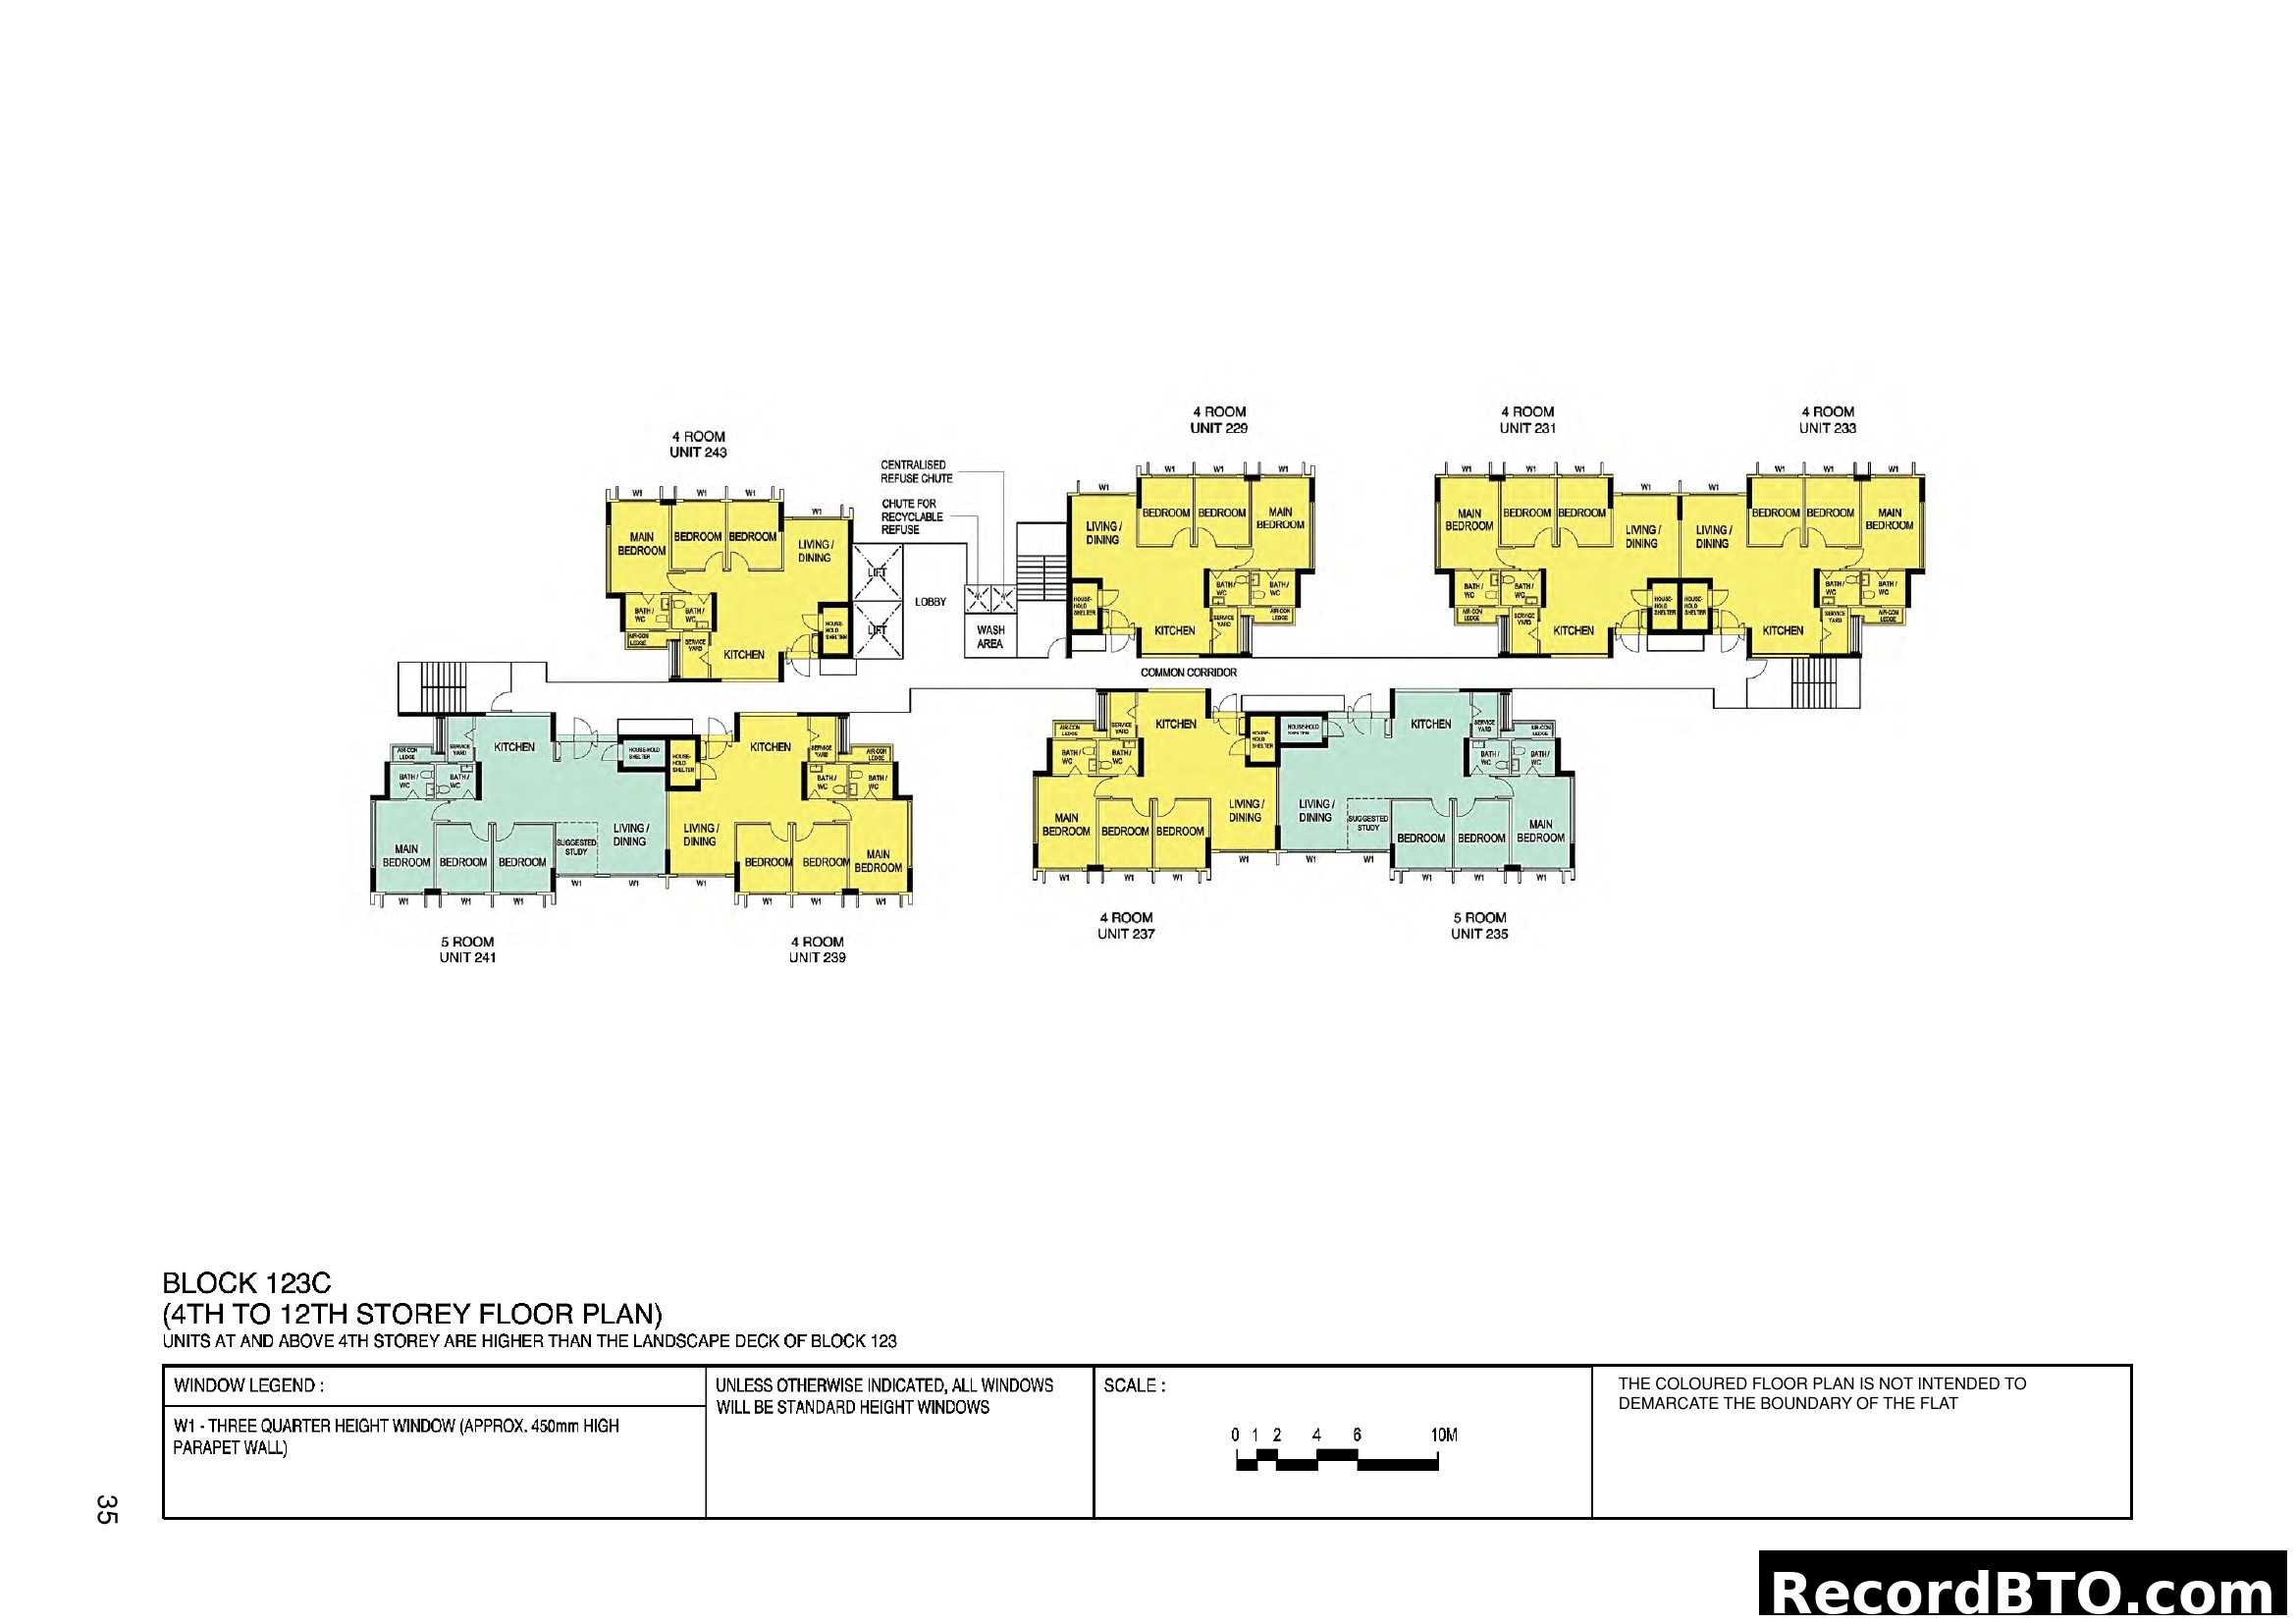
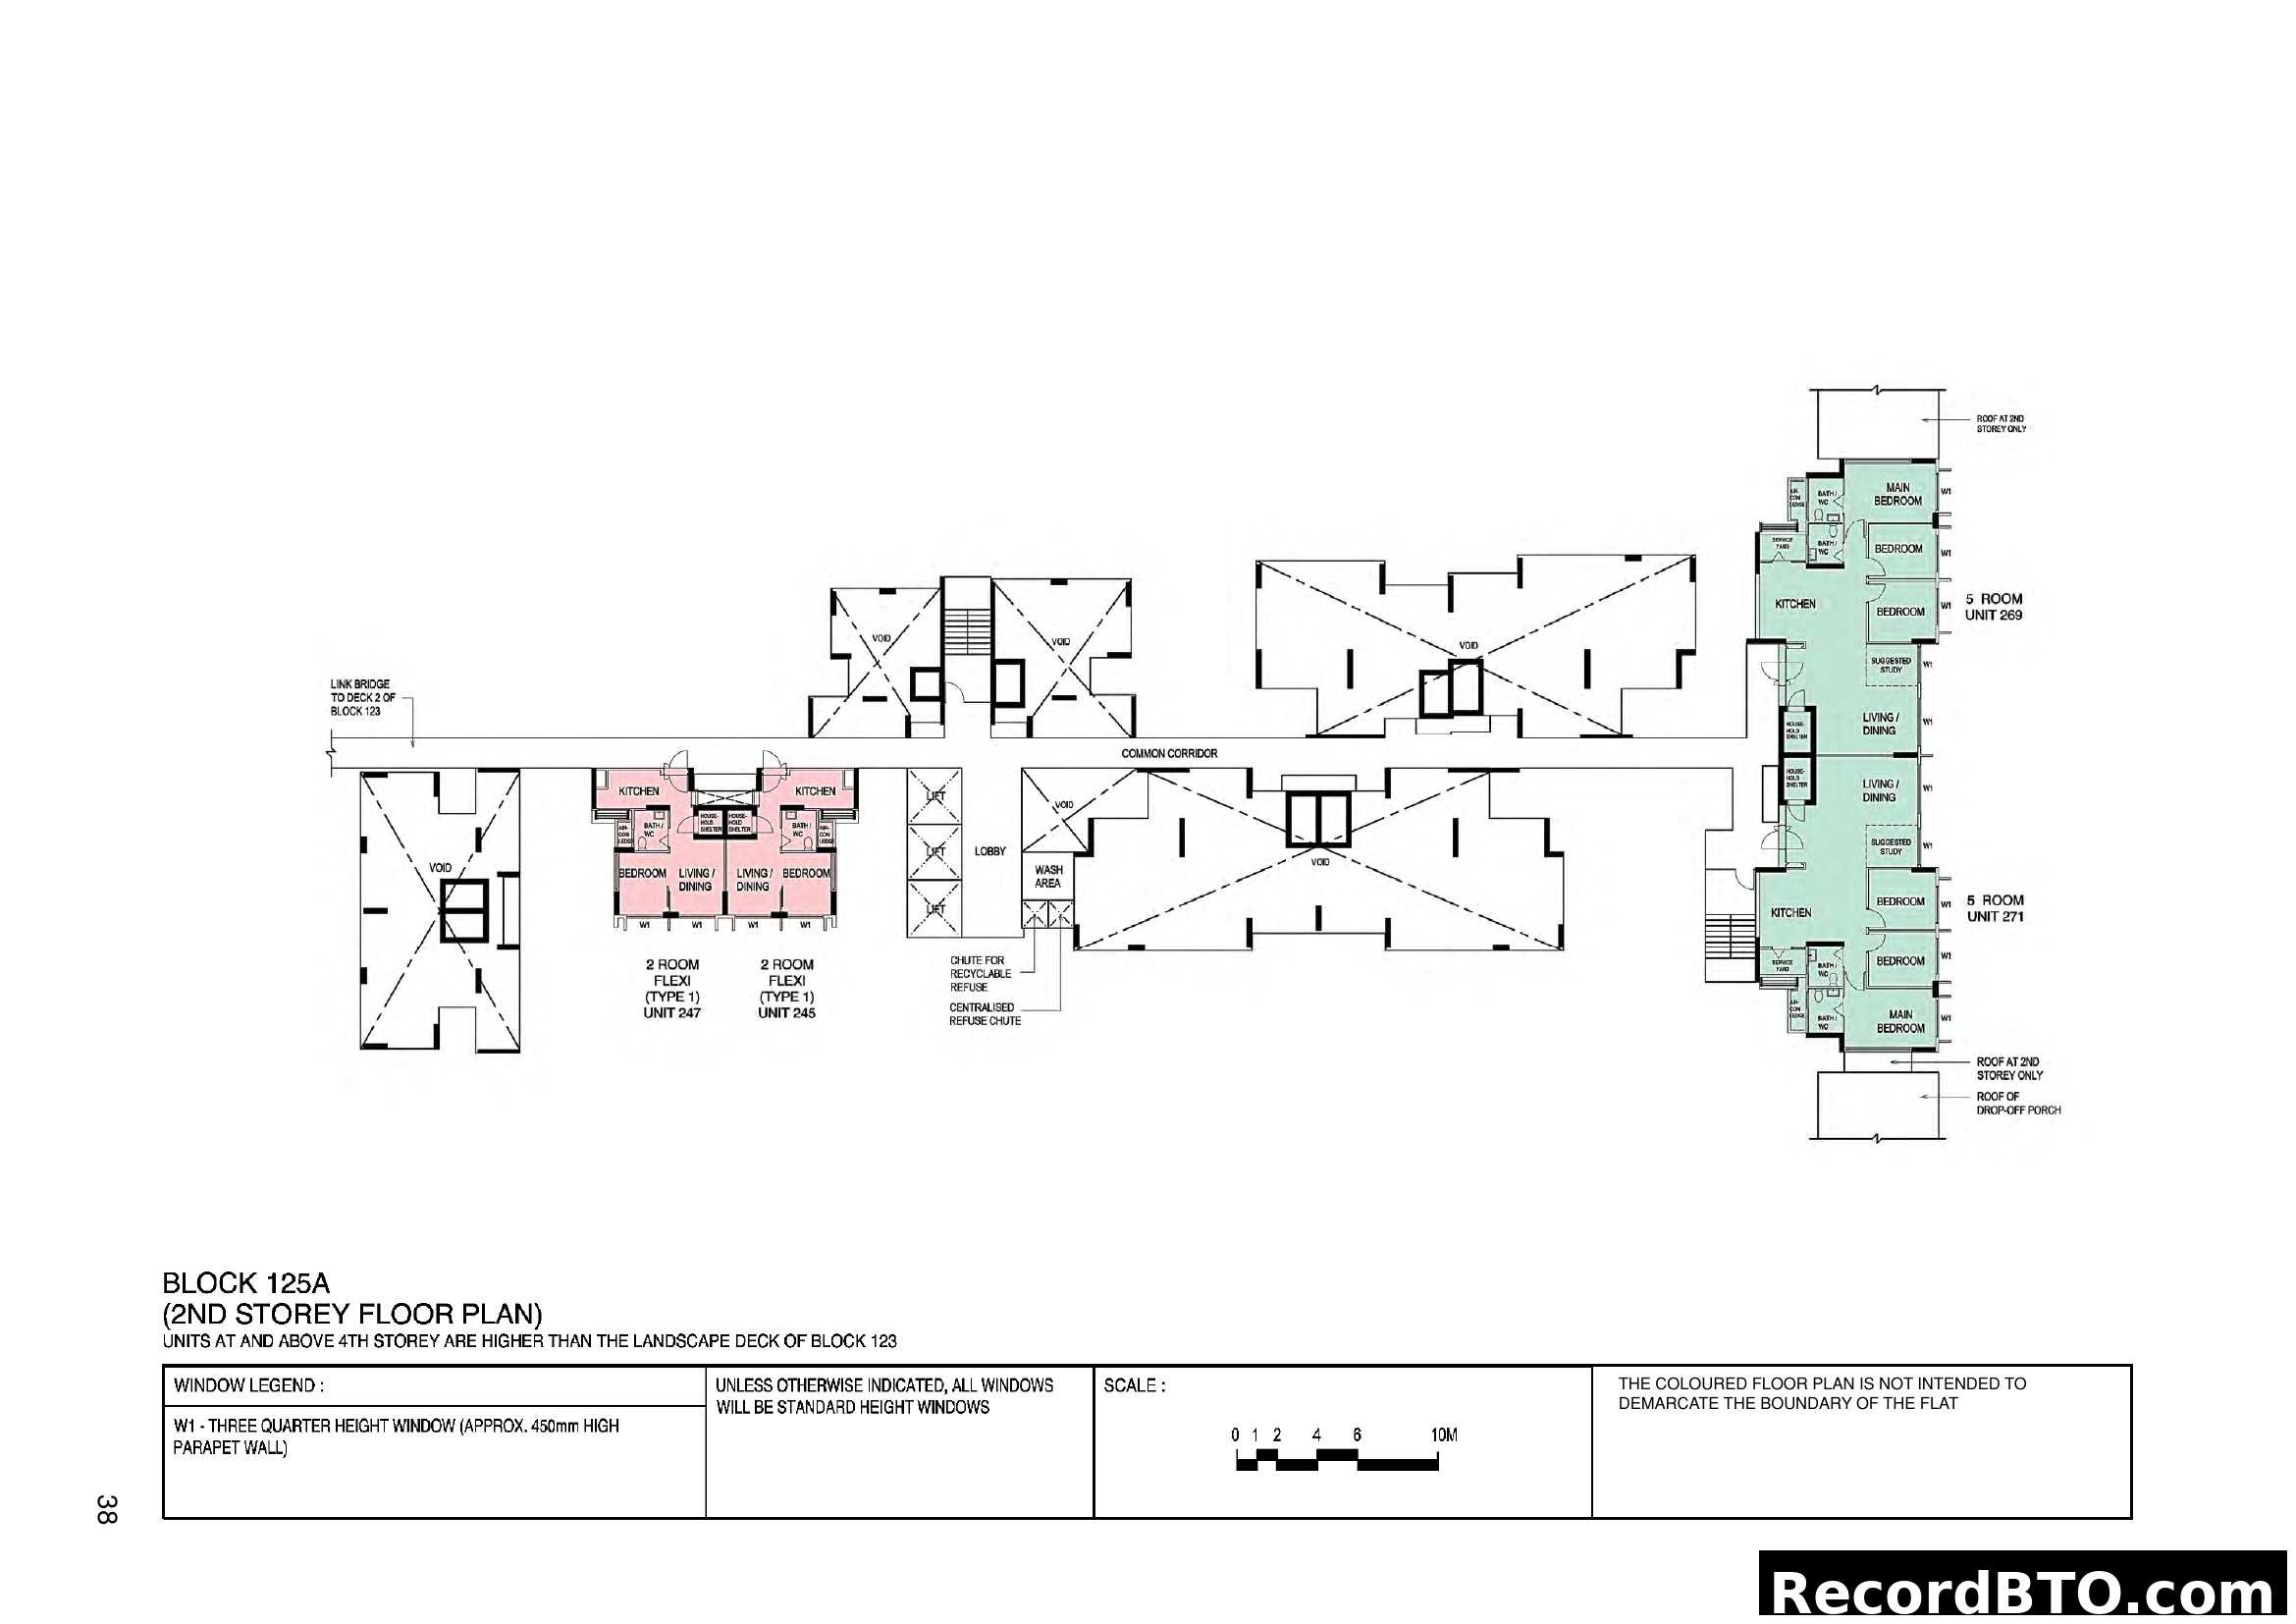
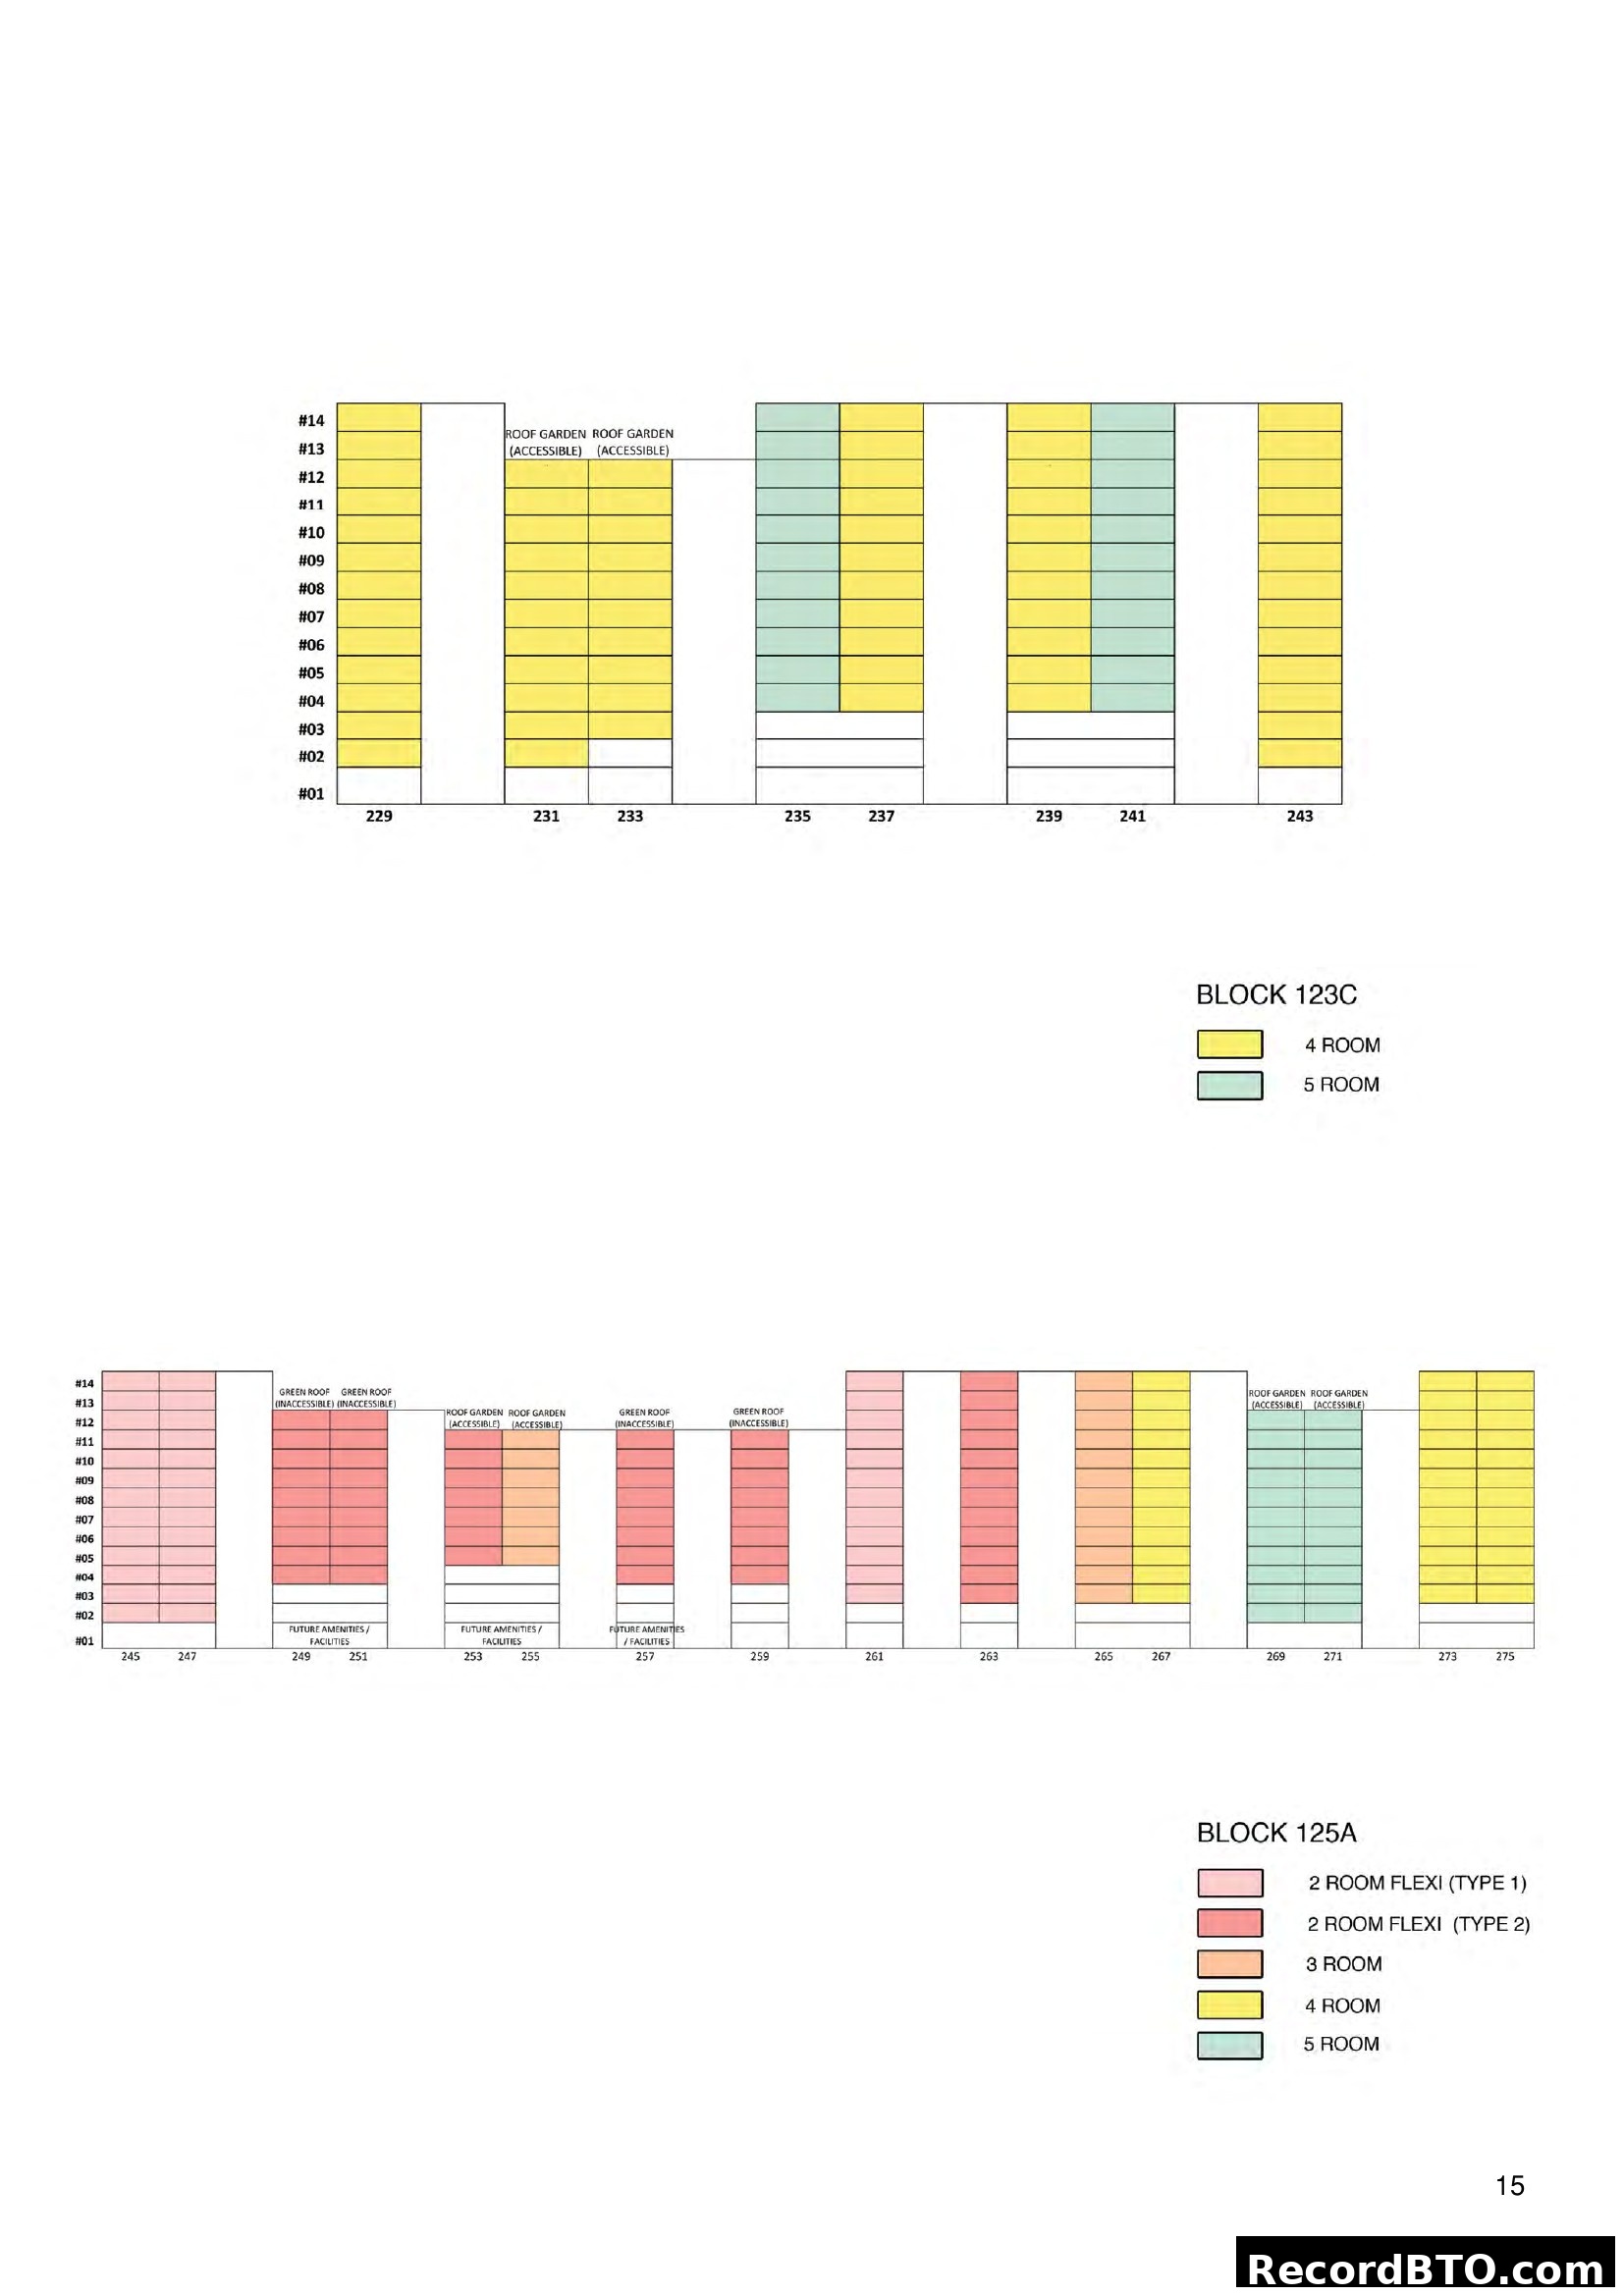
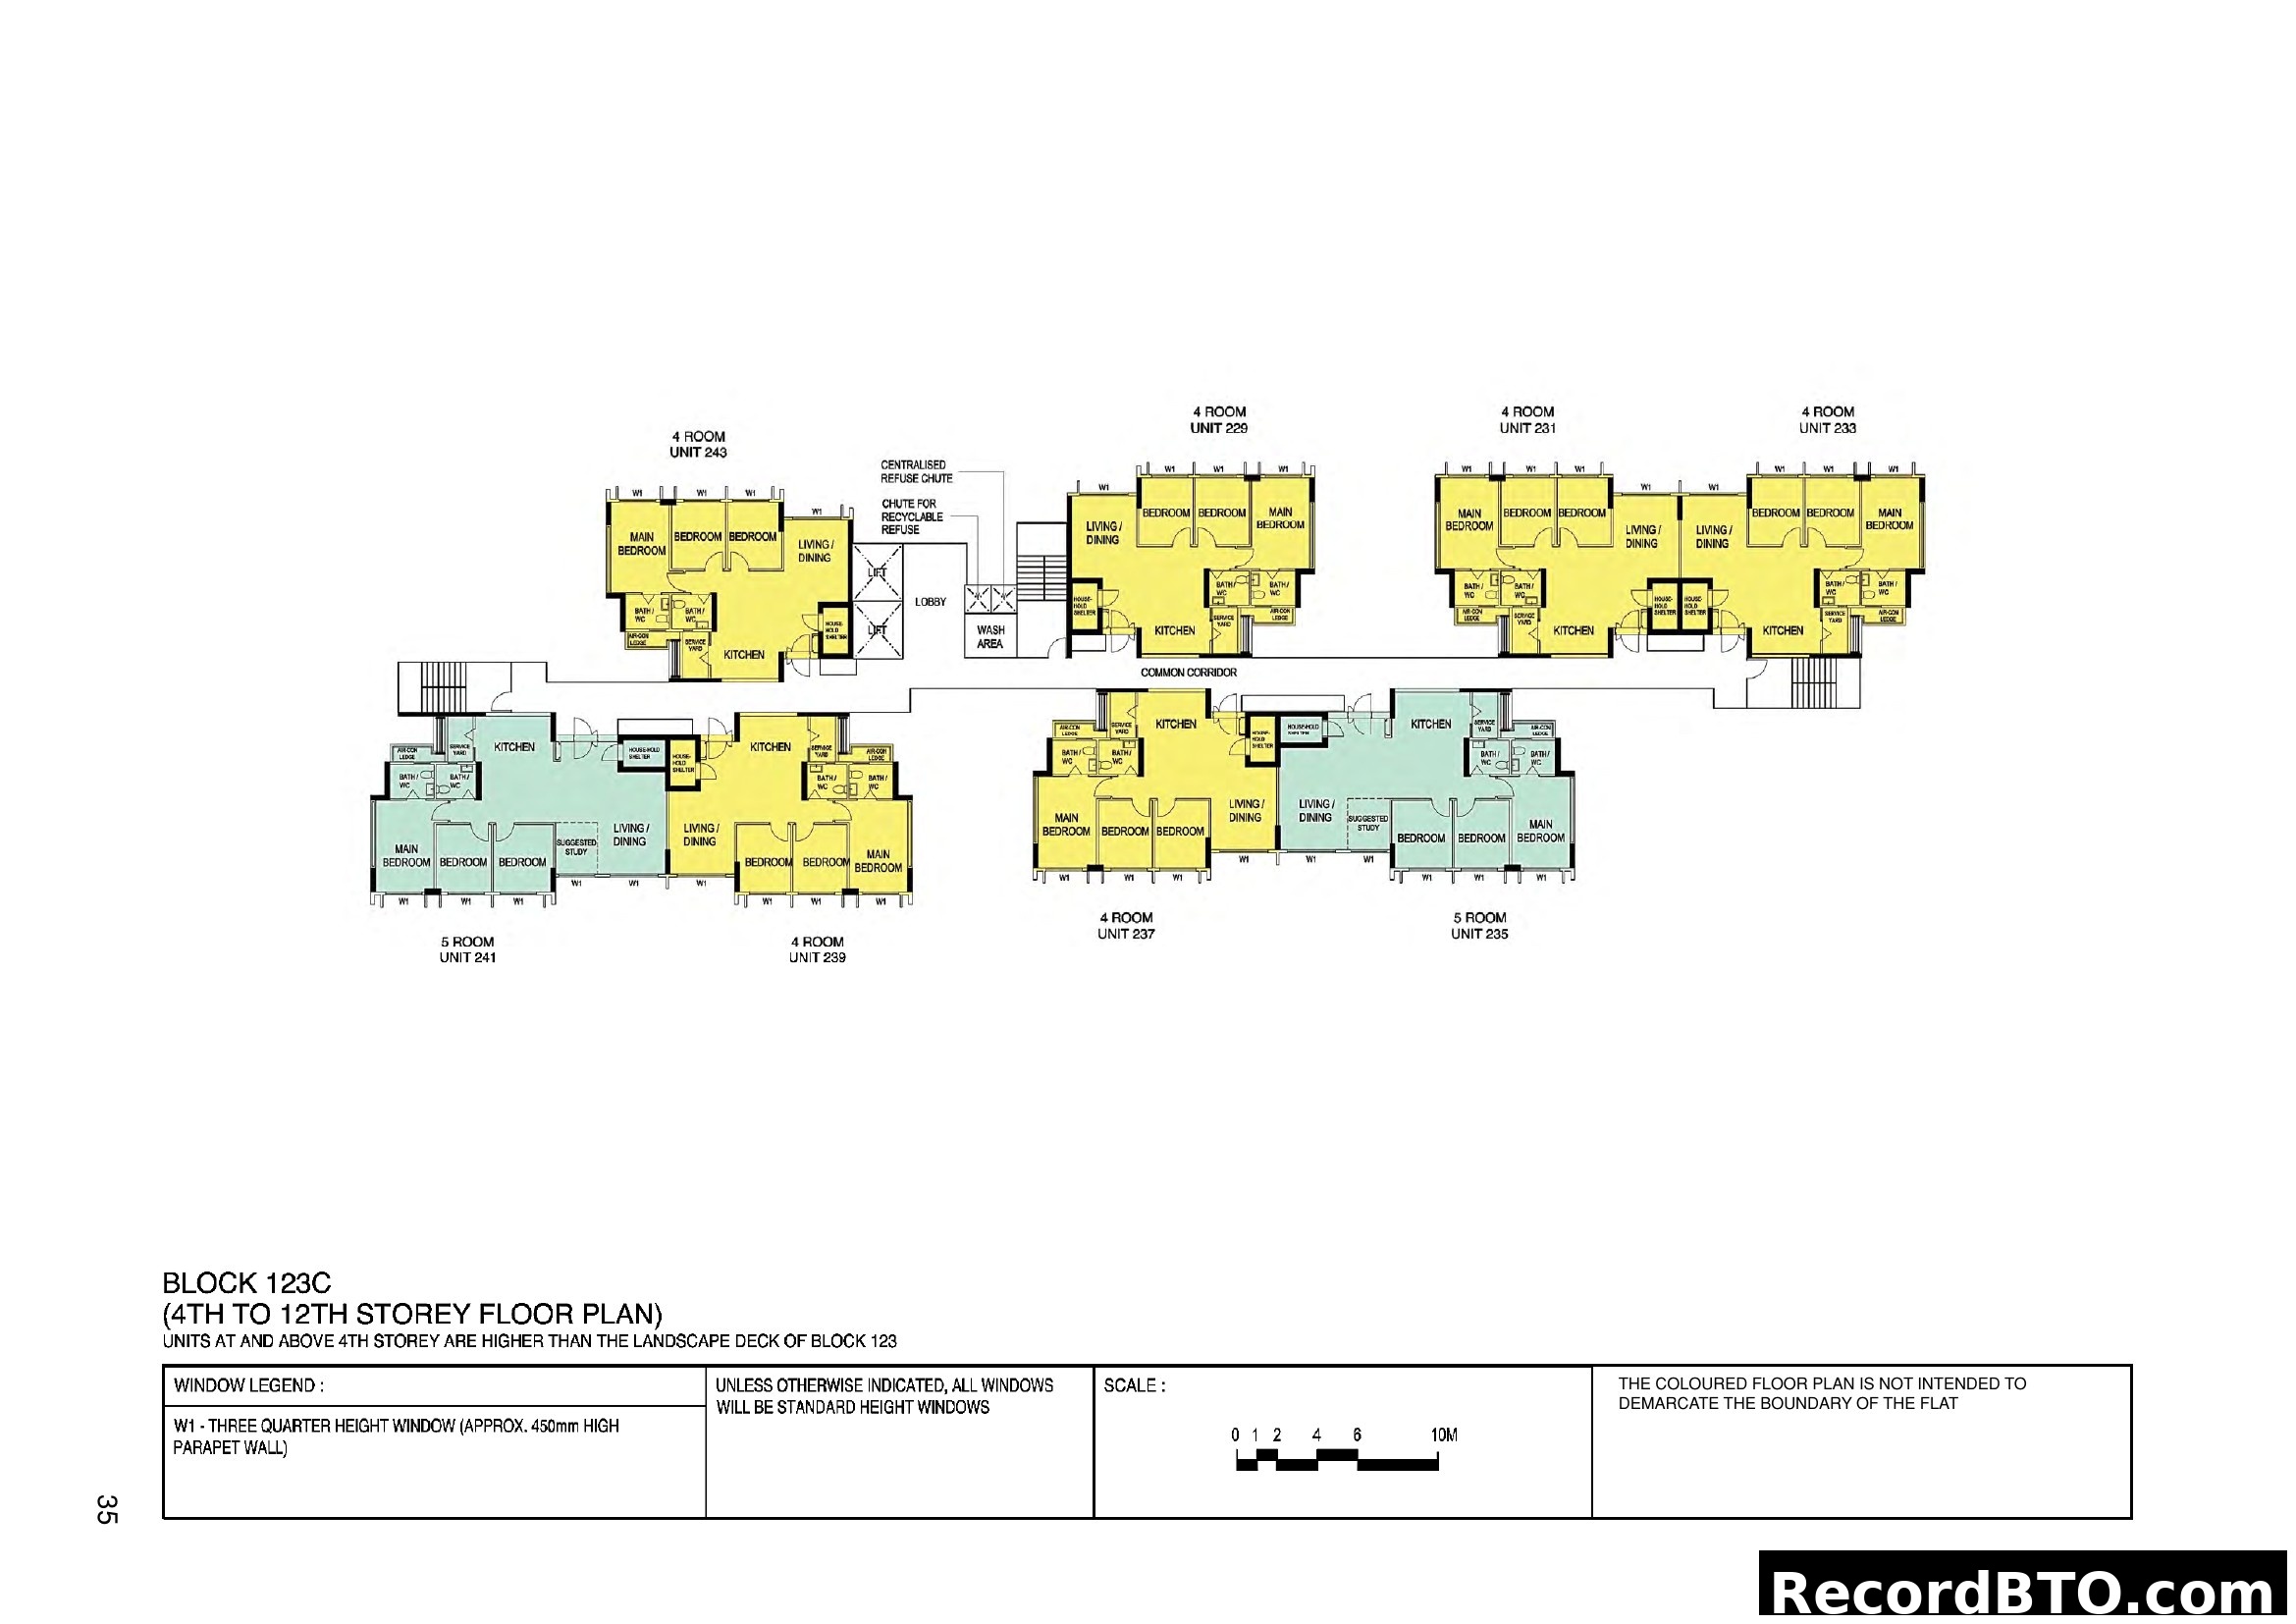
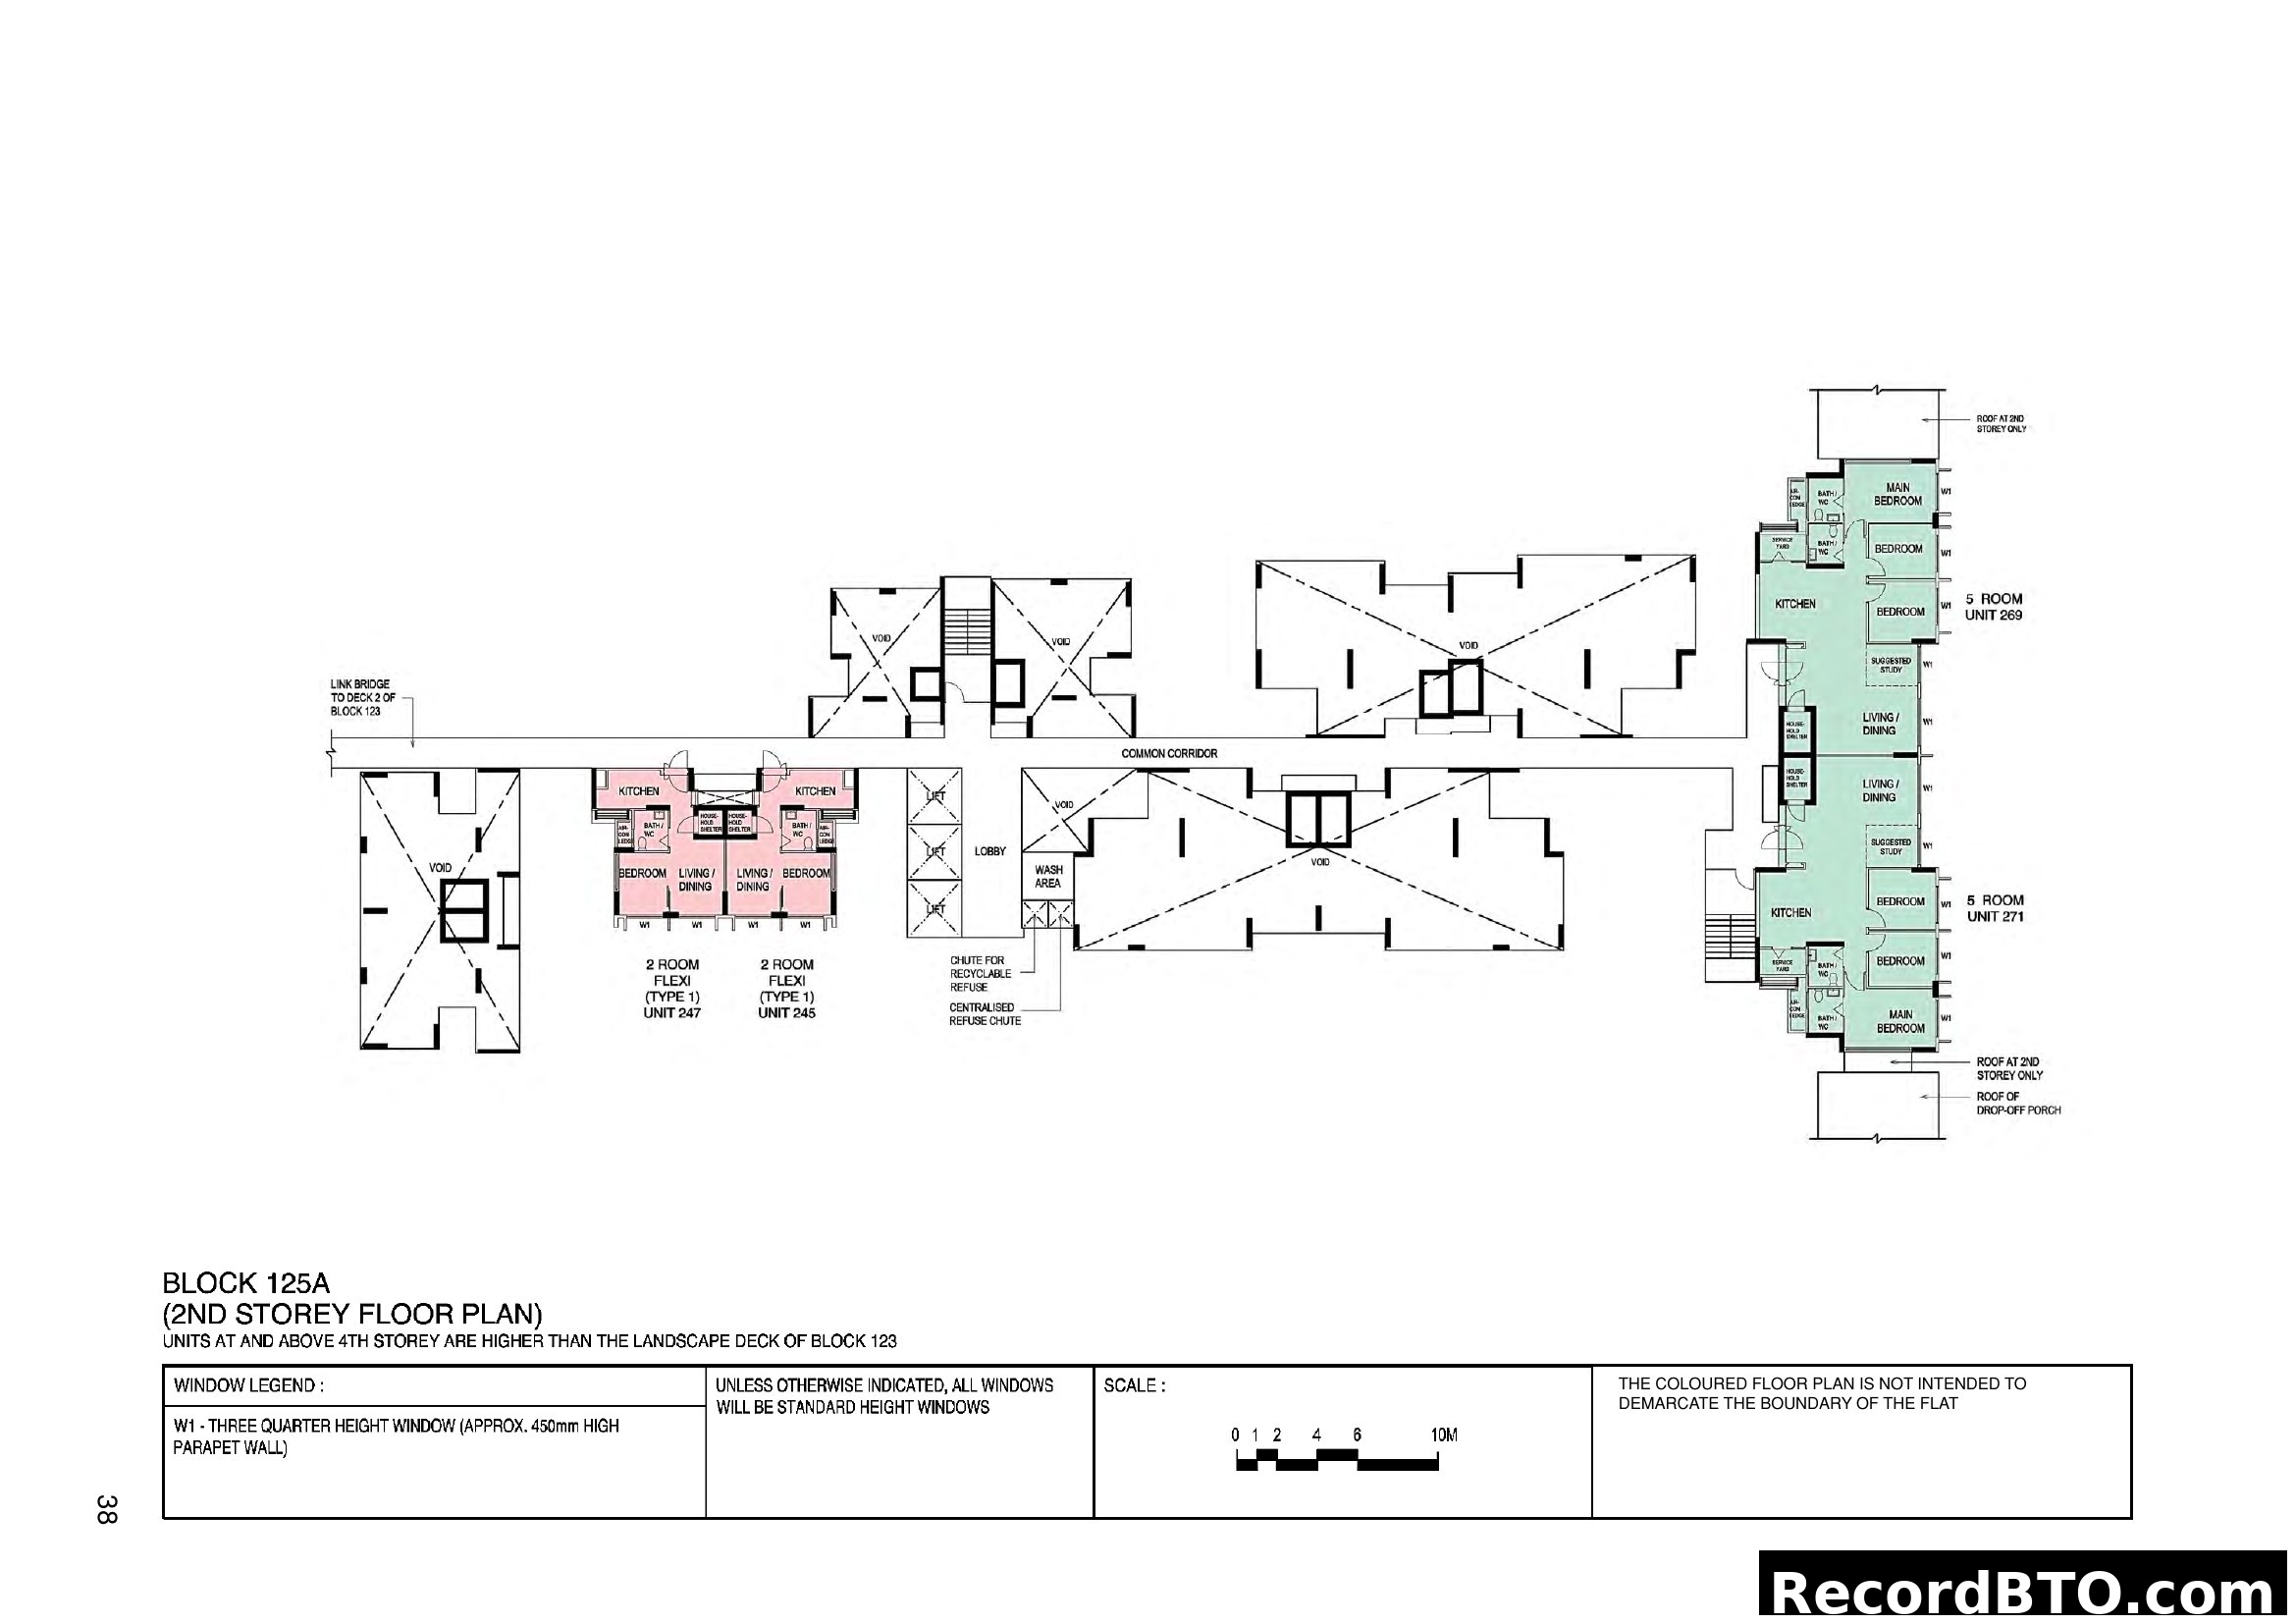
HDB BTO Stacking Plan for Blocks 123C and 125A
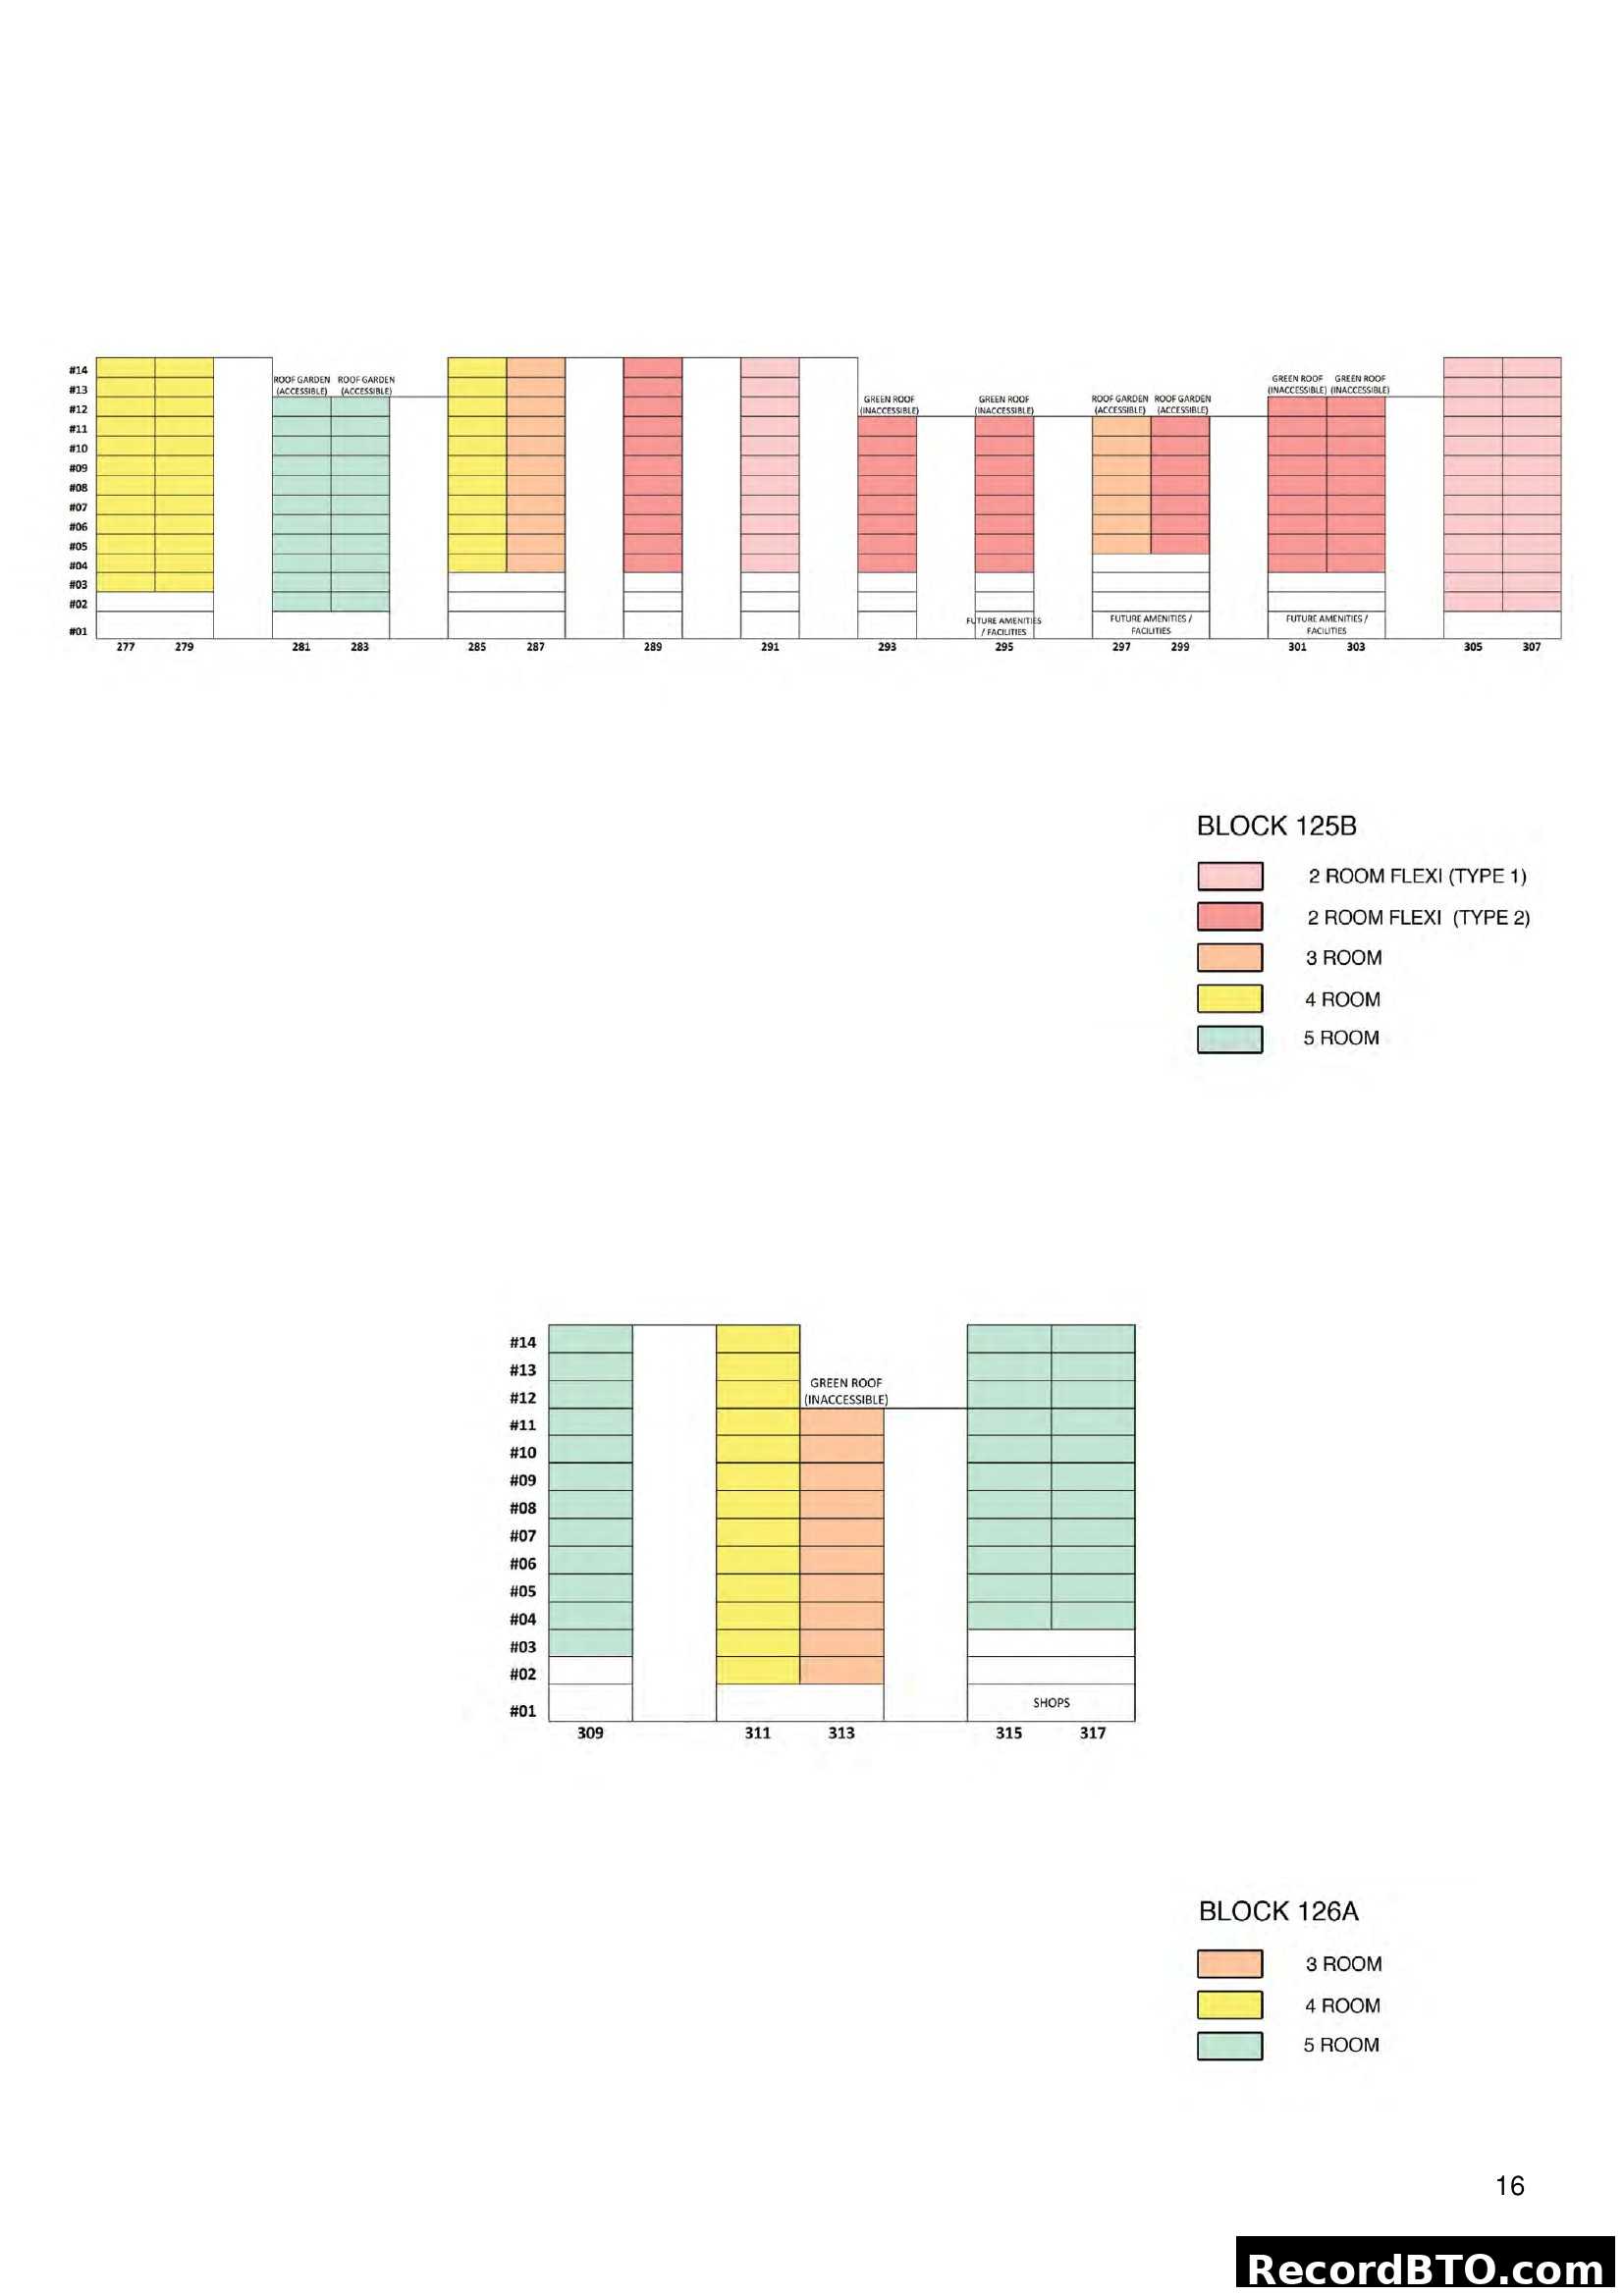
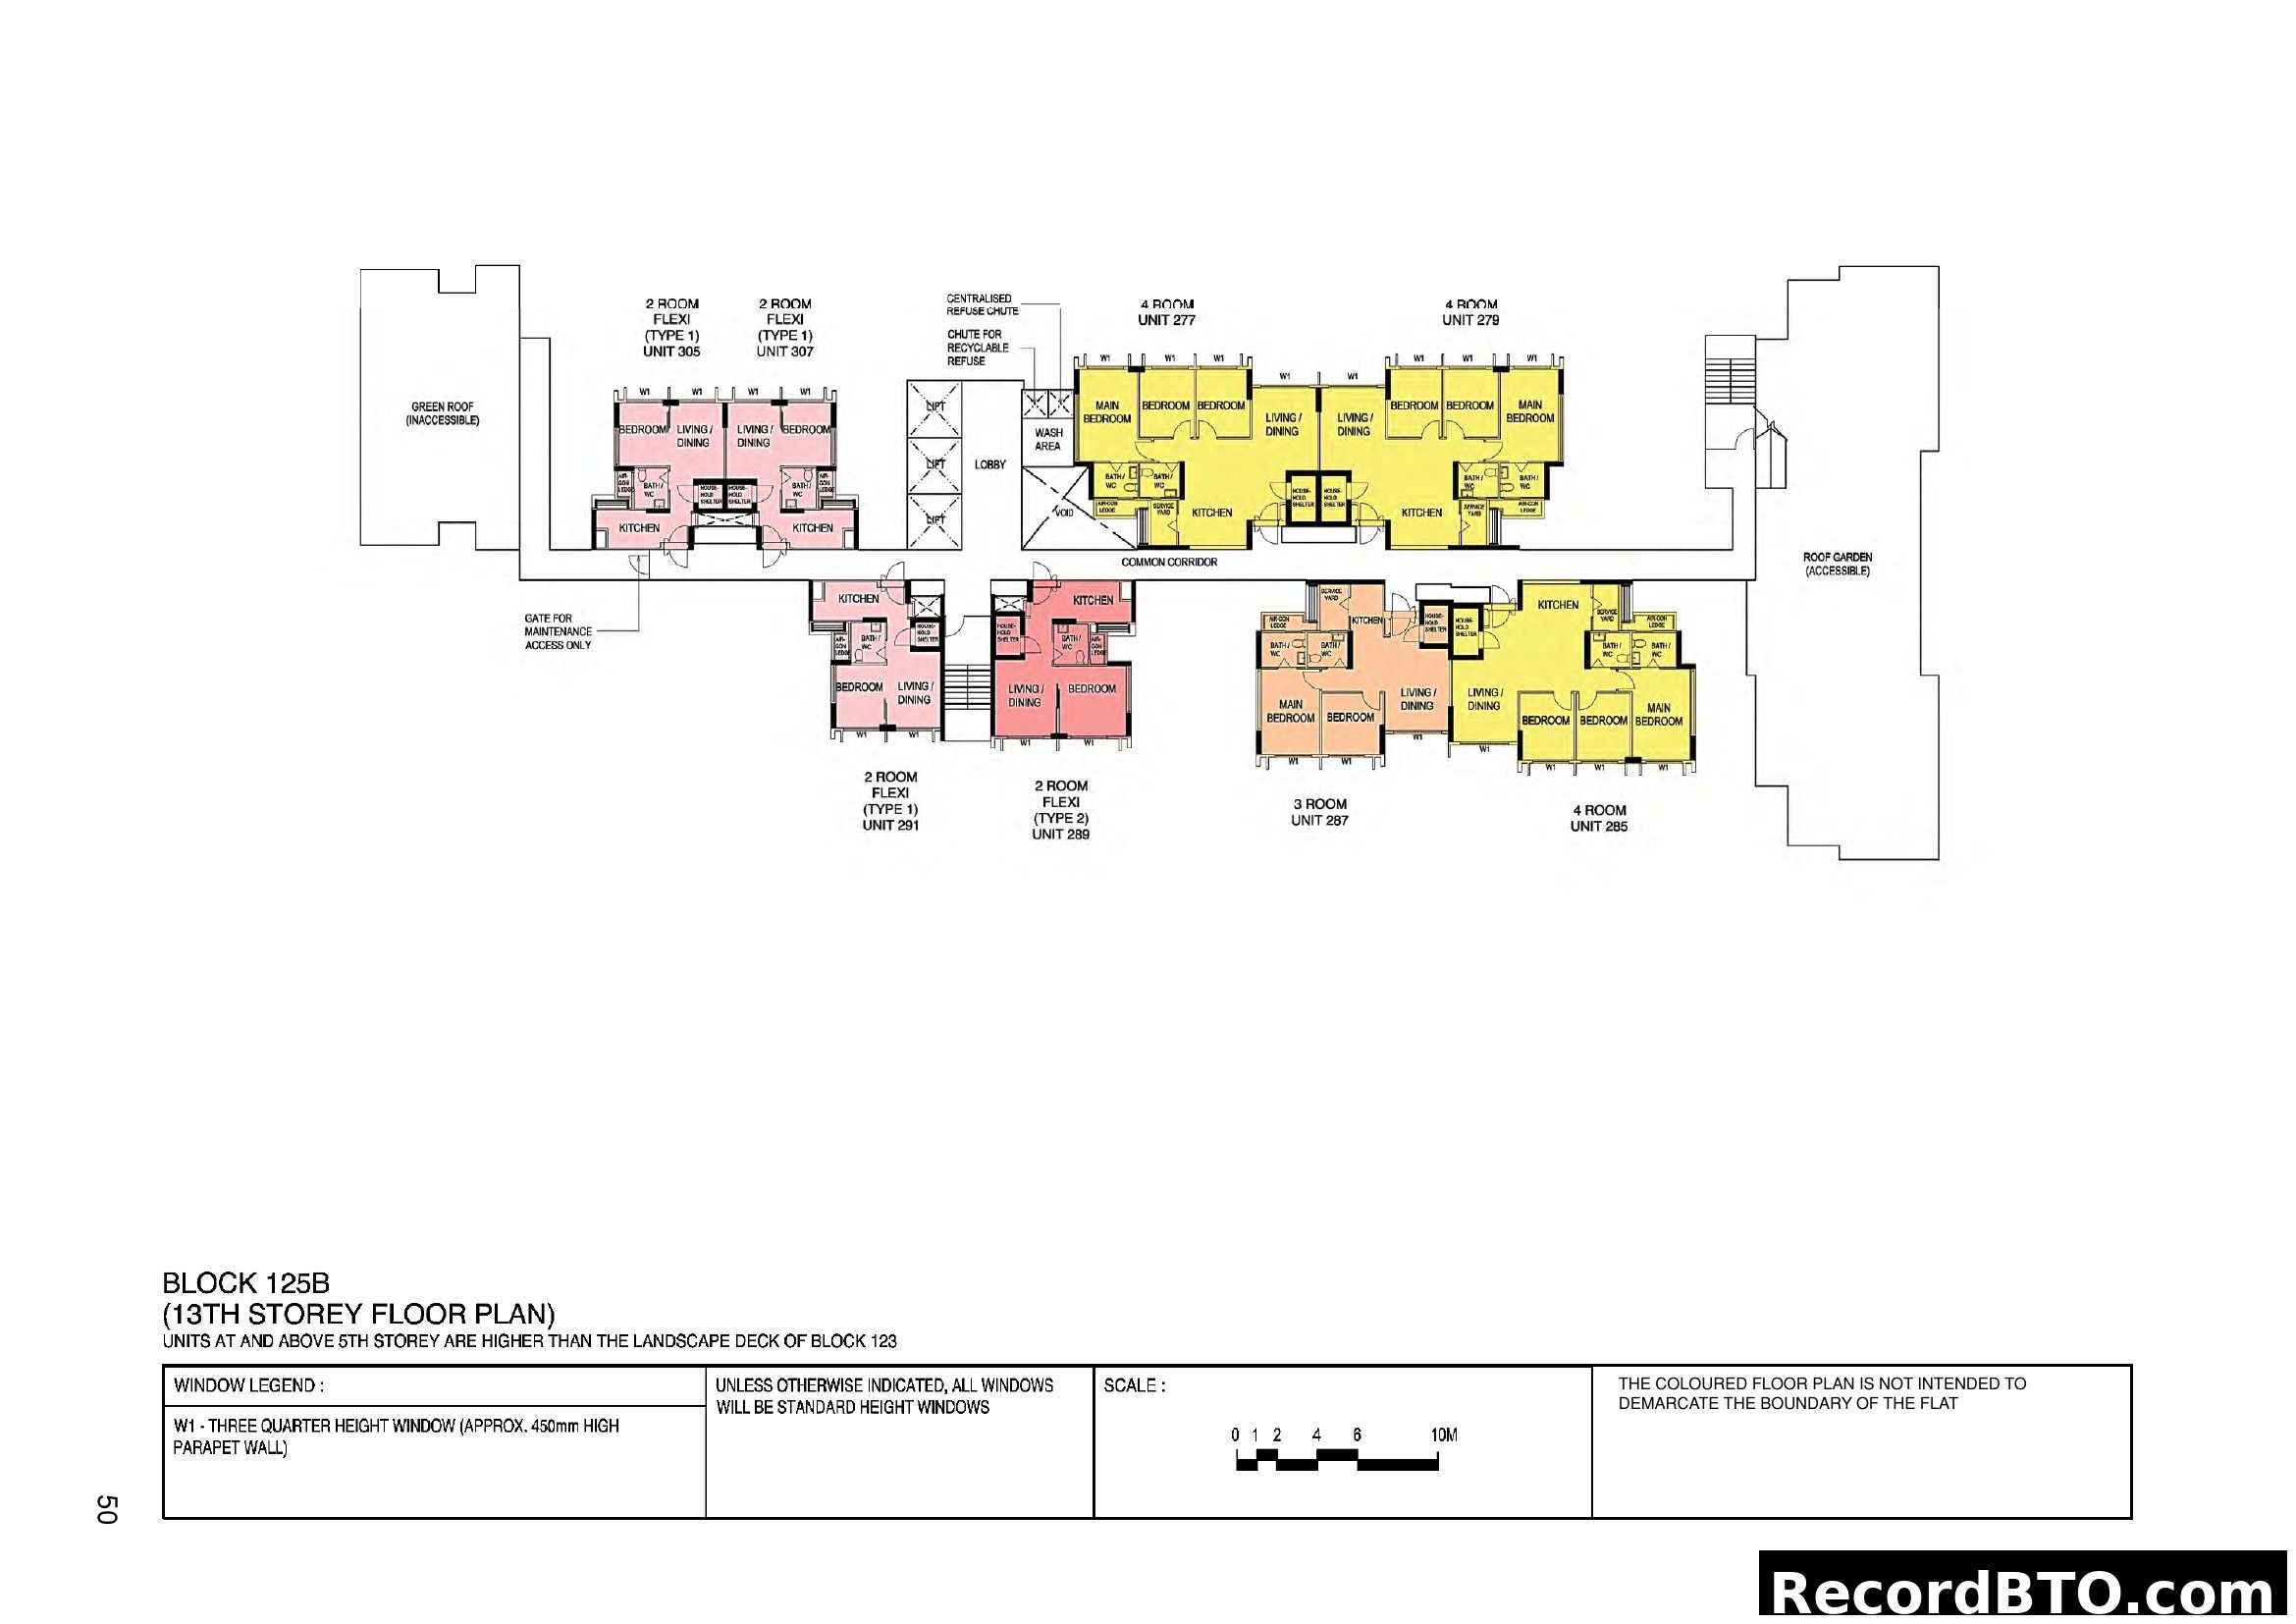
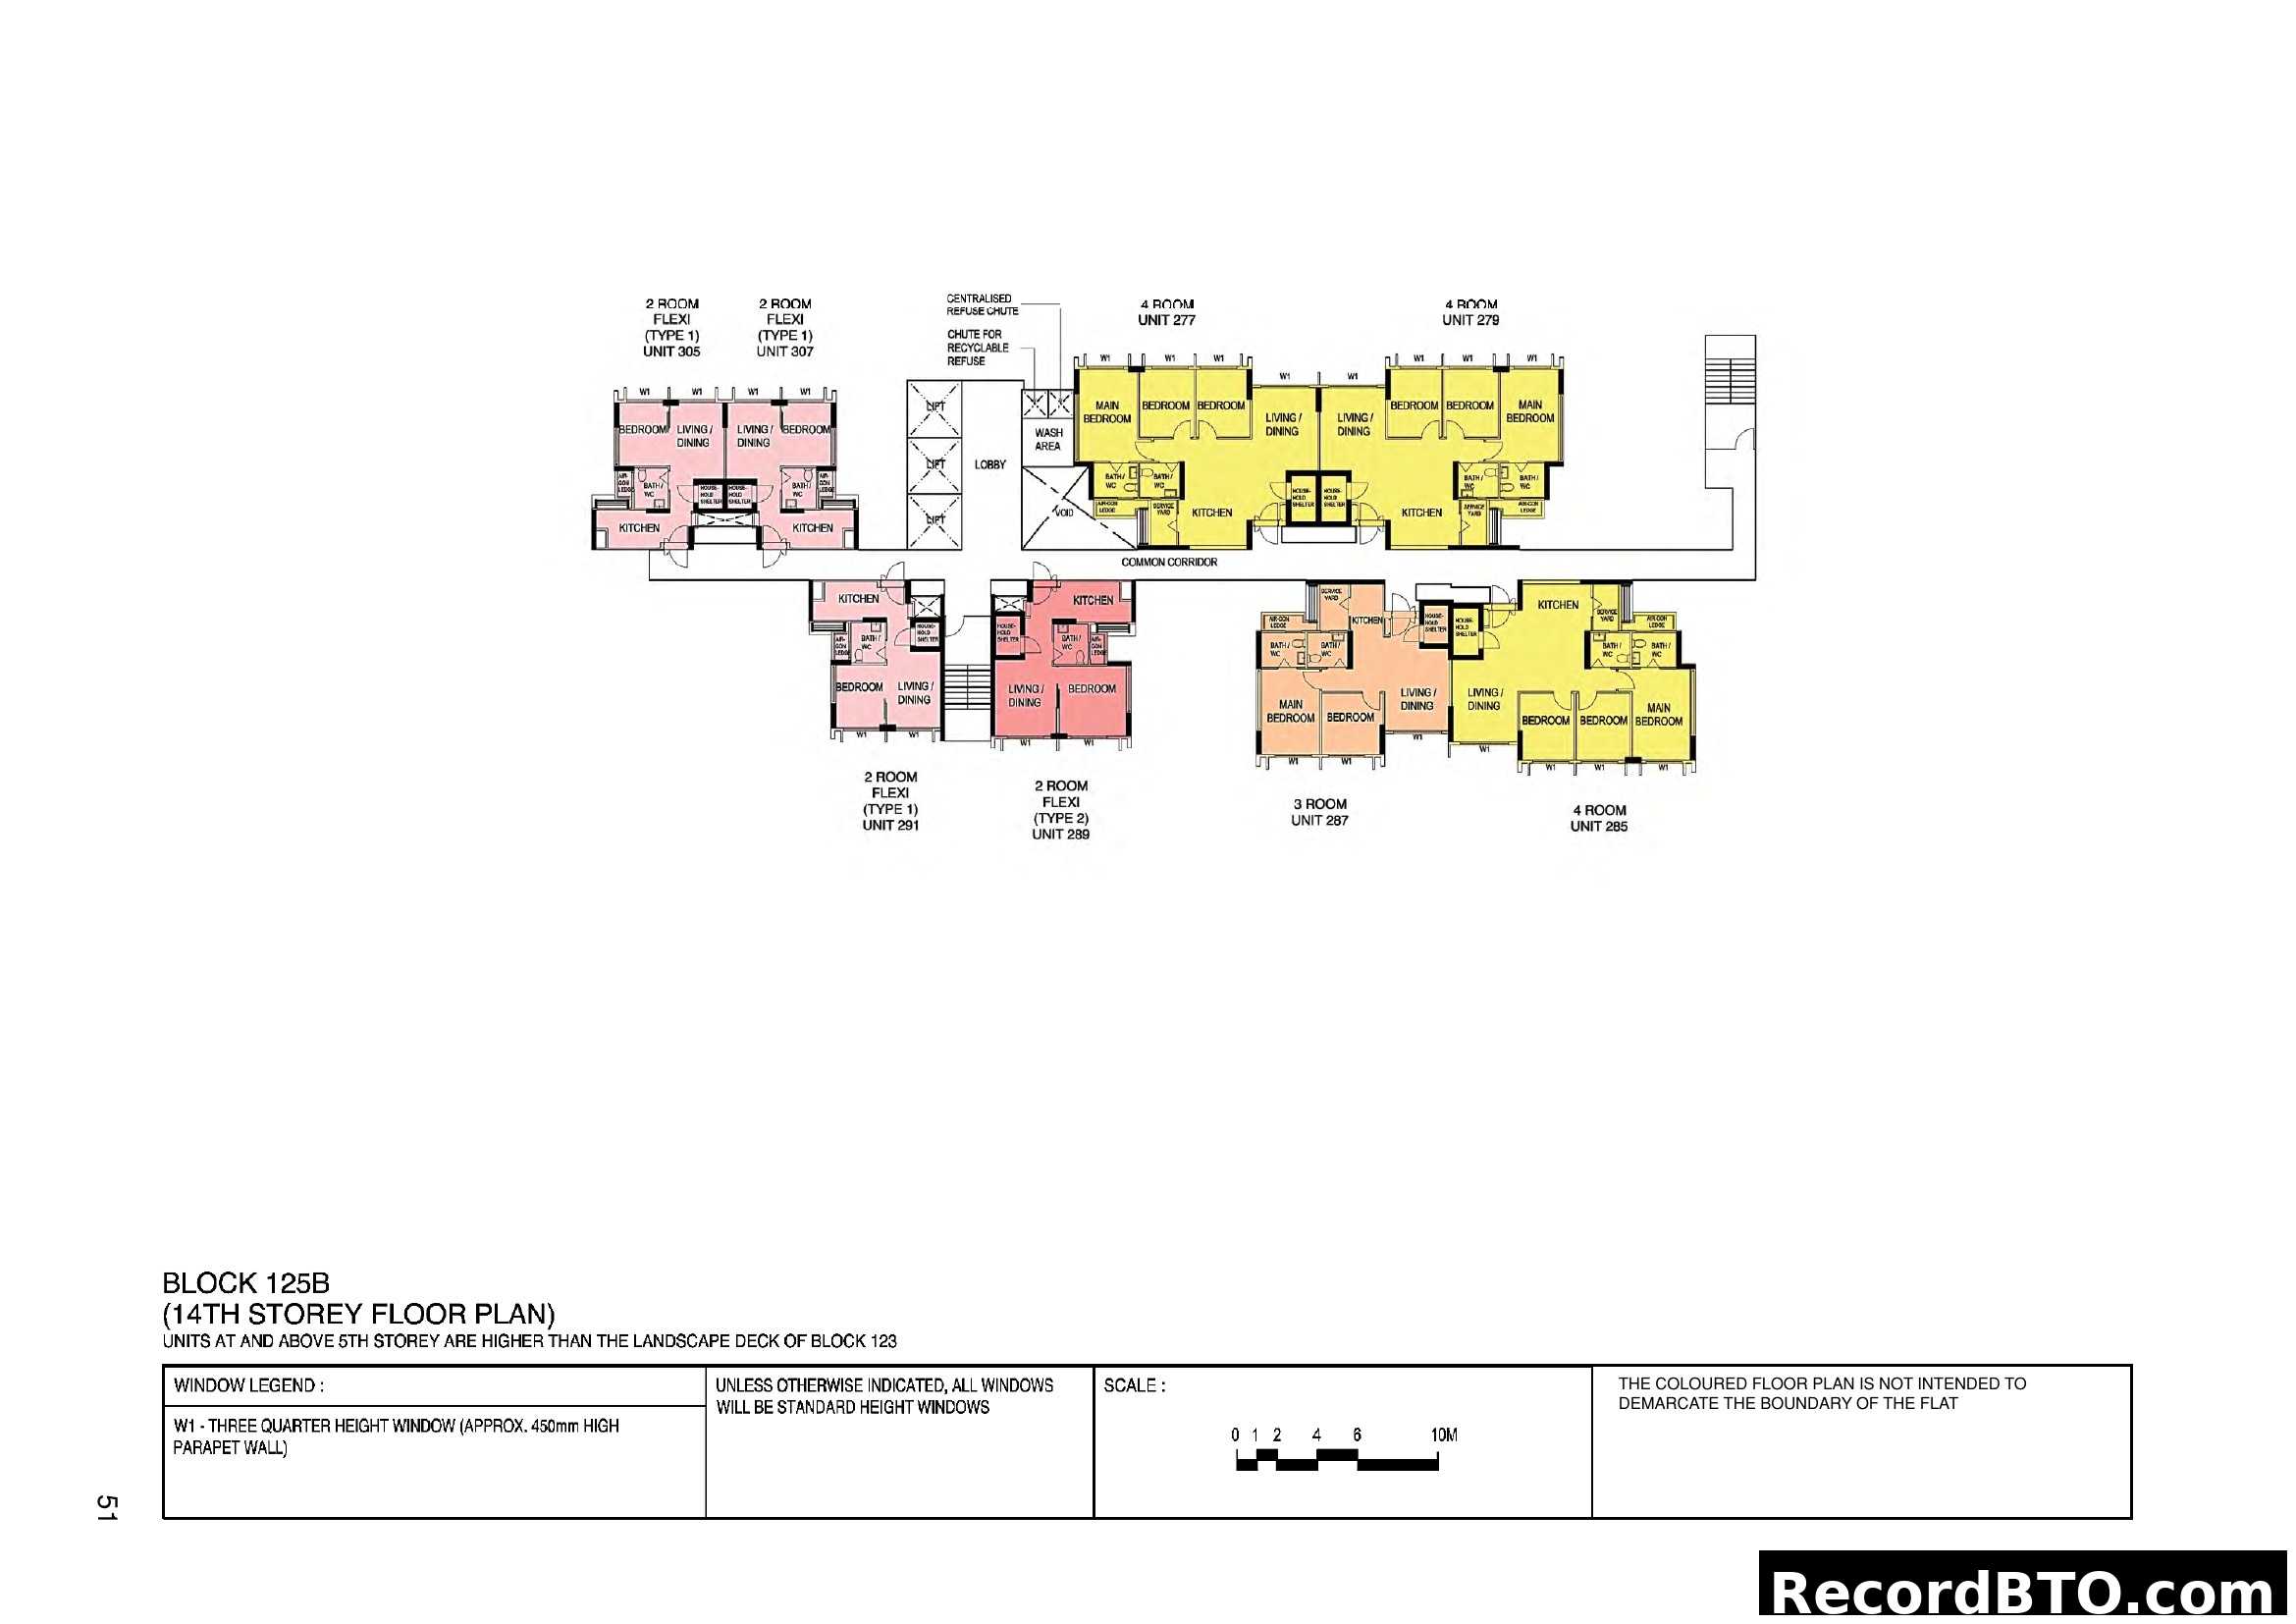
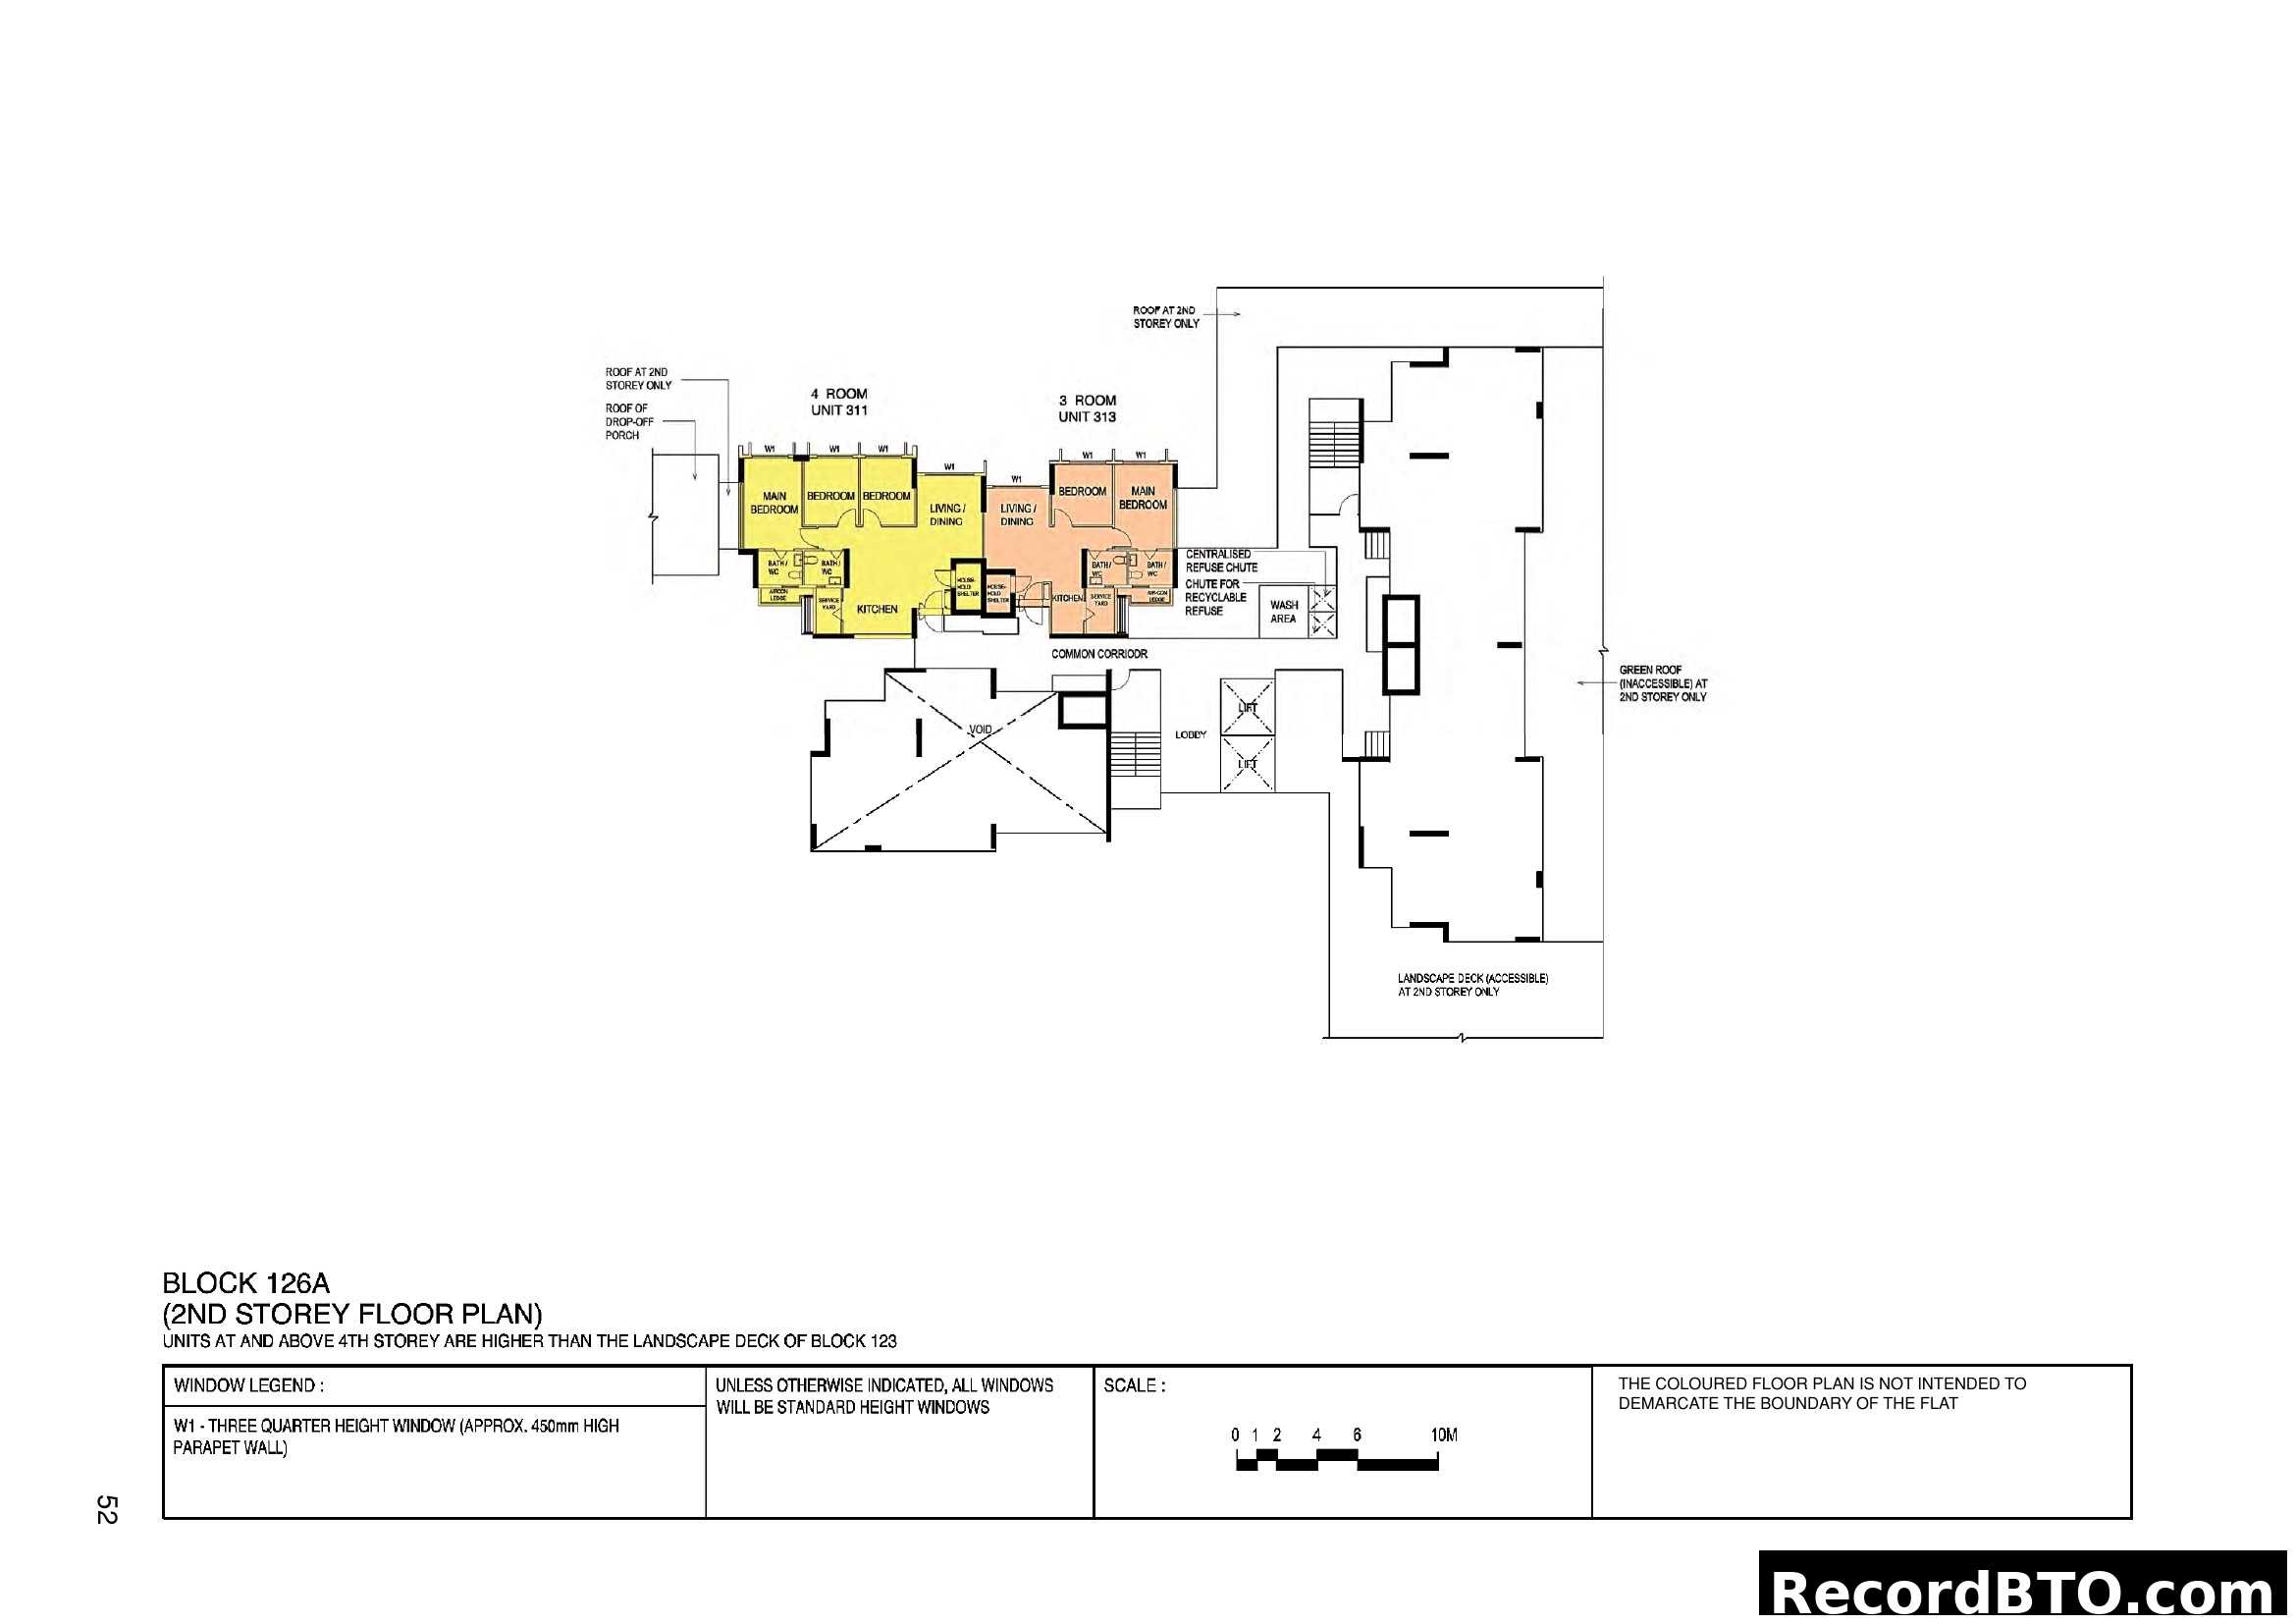
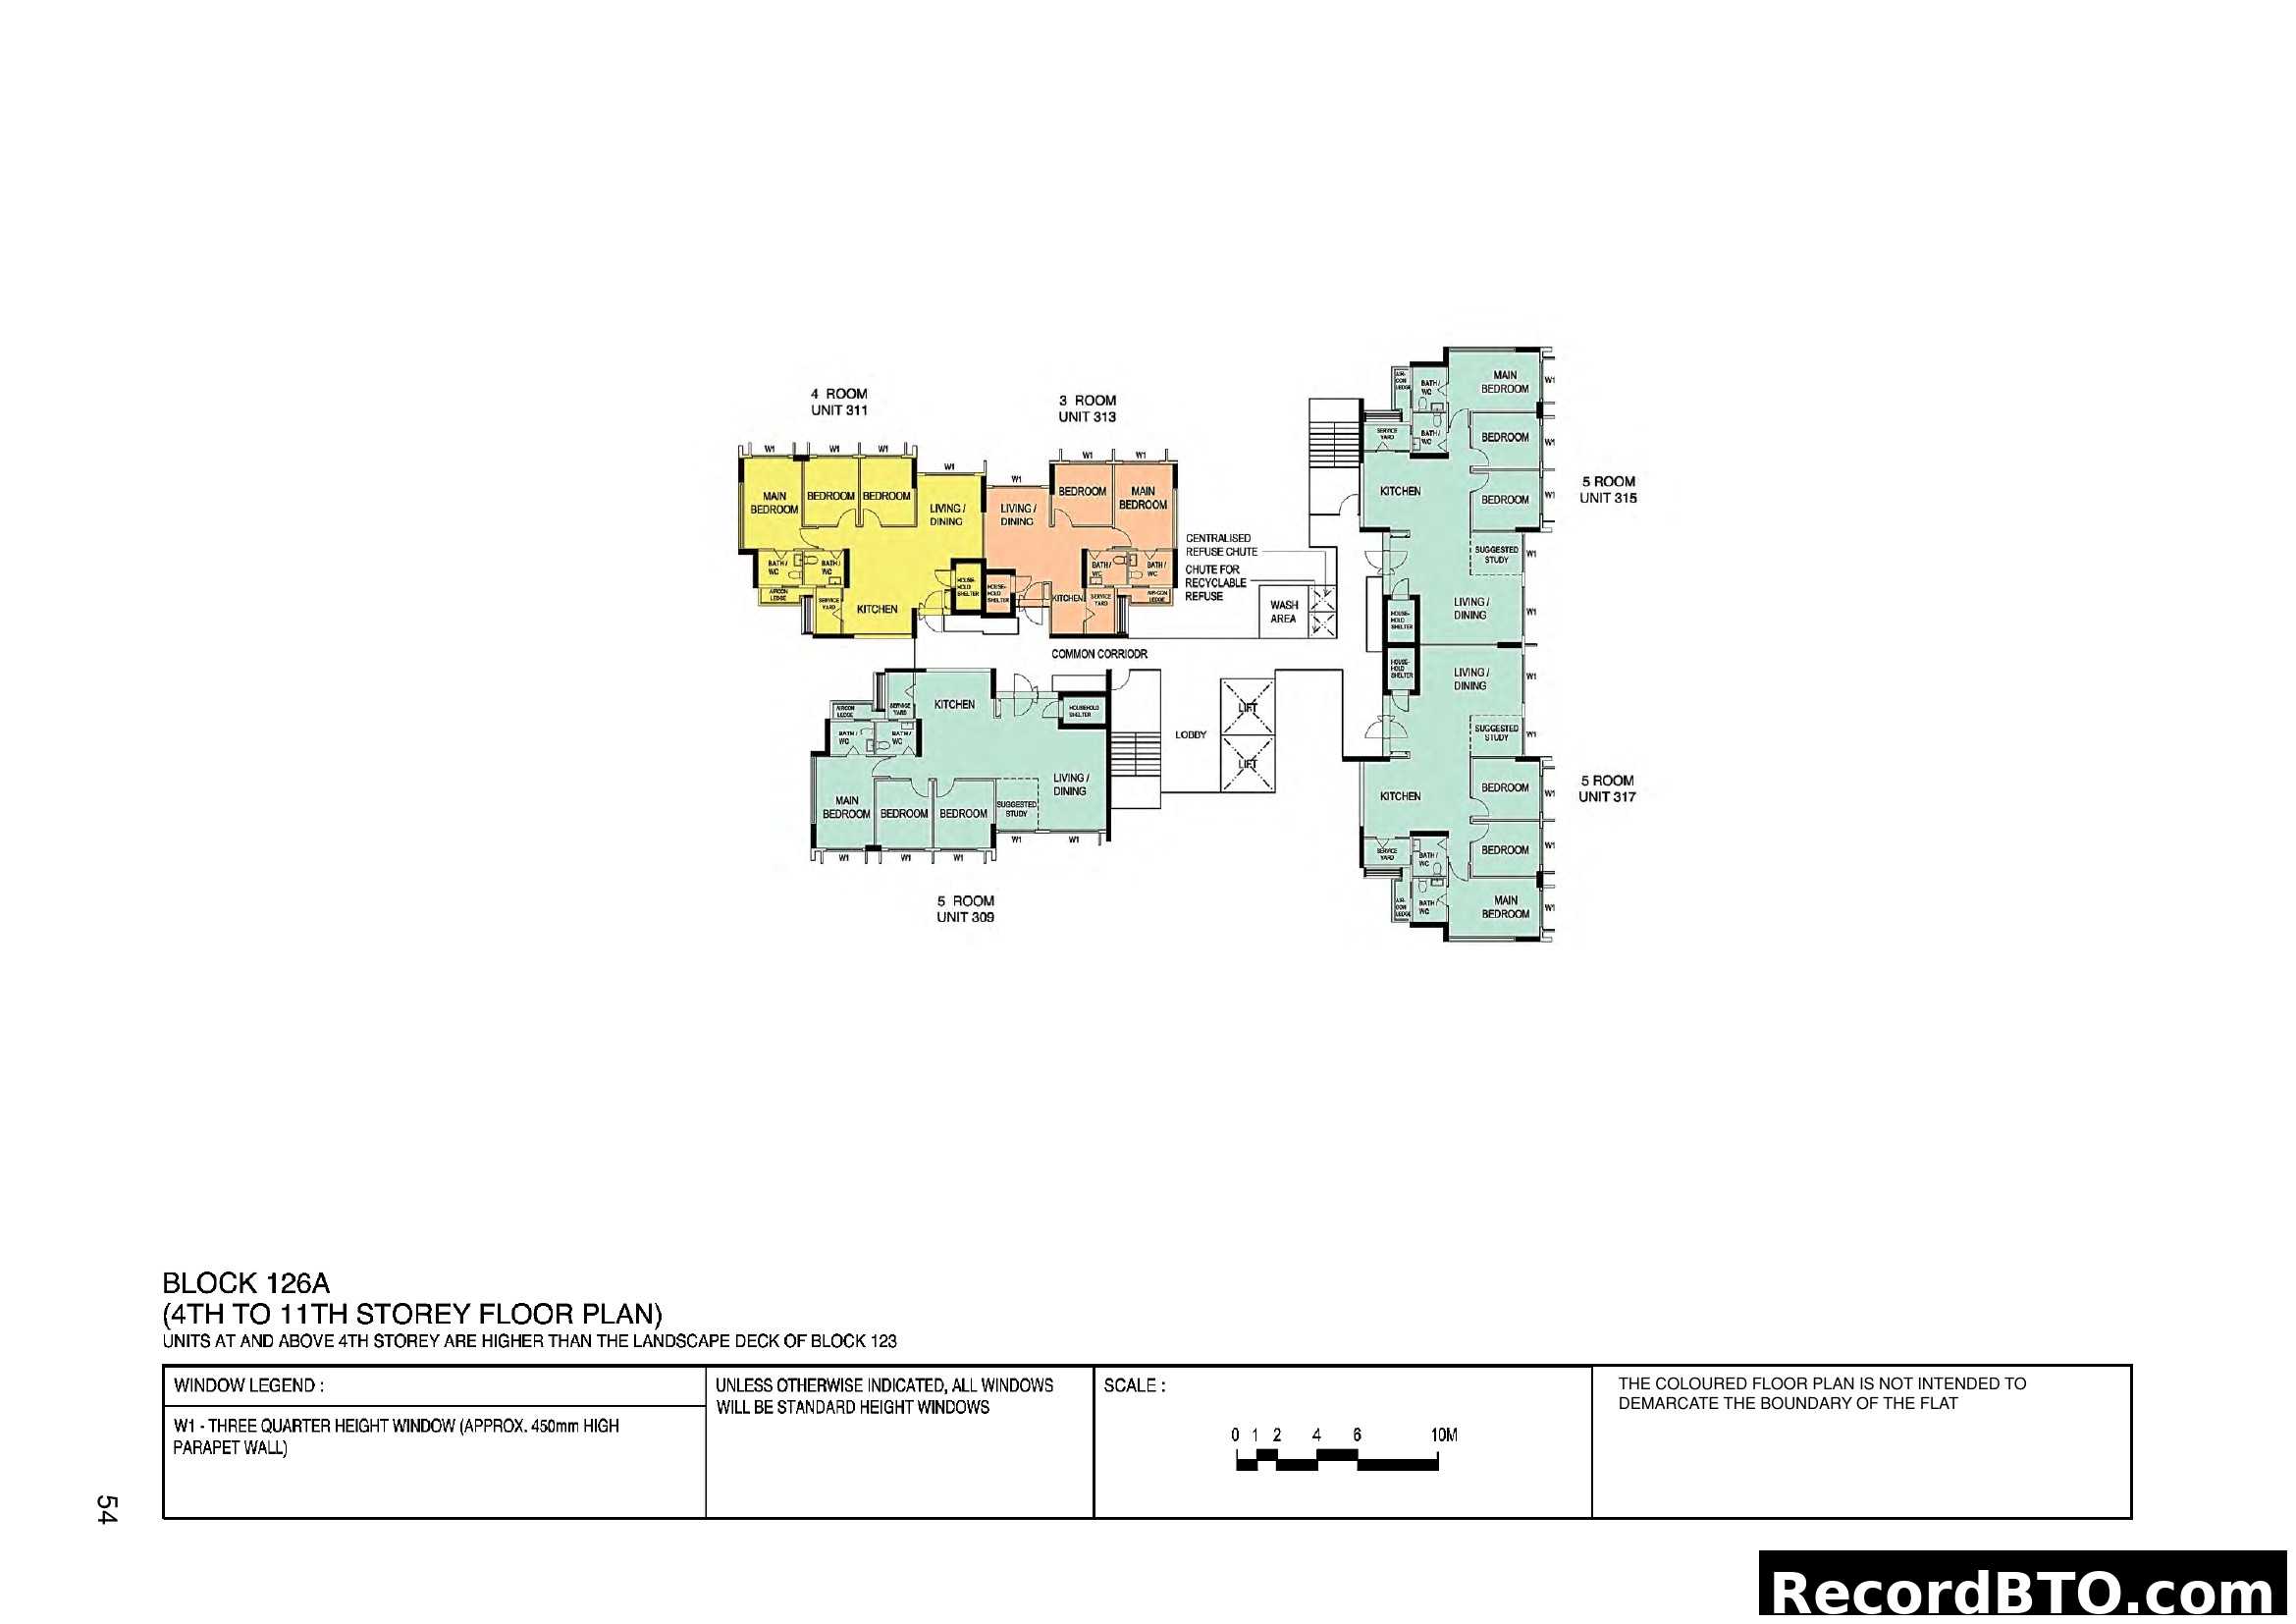
HDB BTO Block 125B & 126A Stacking Plans with Unit Types

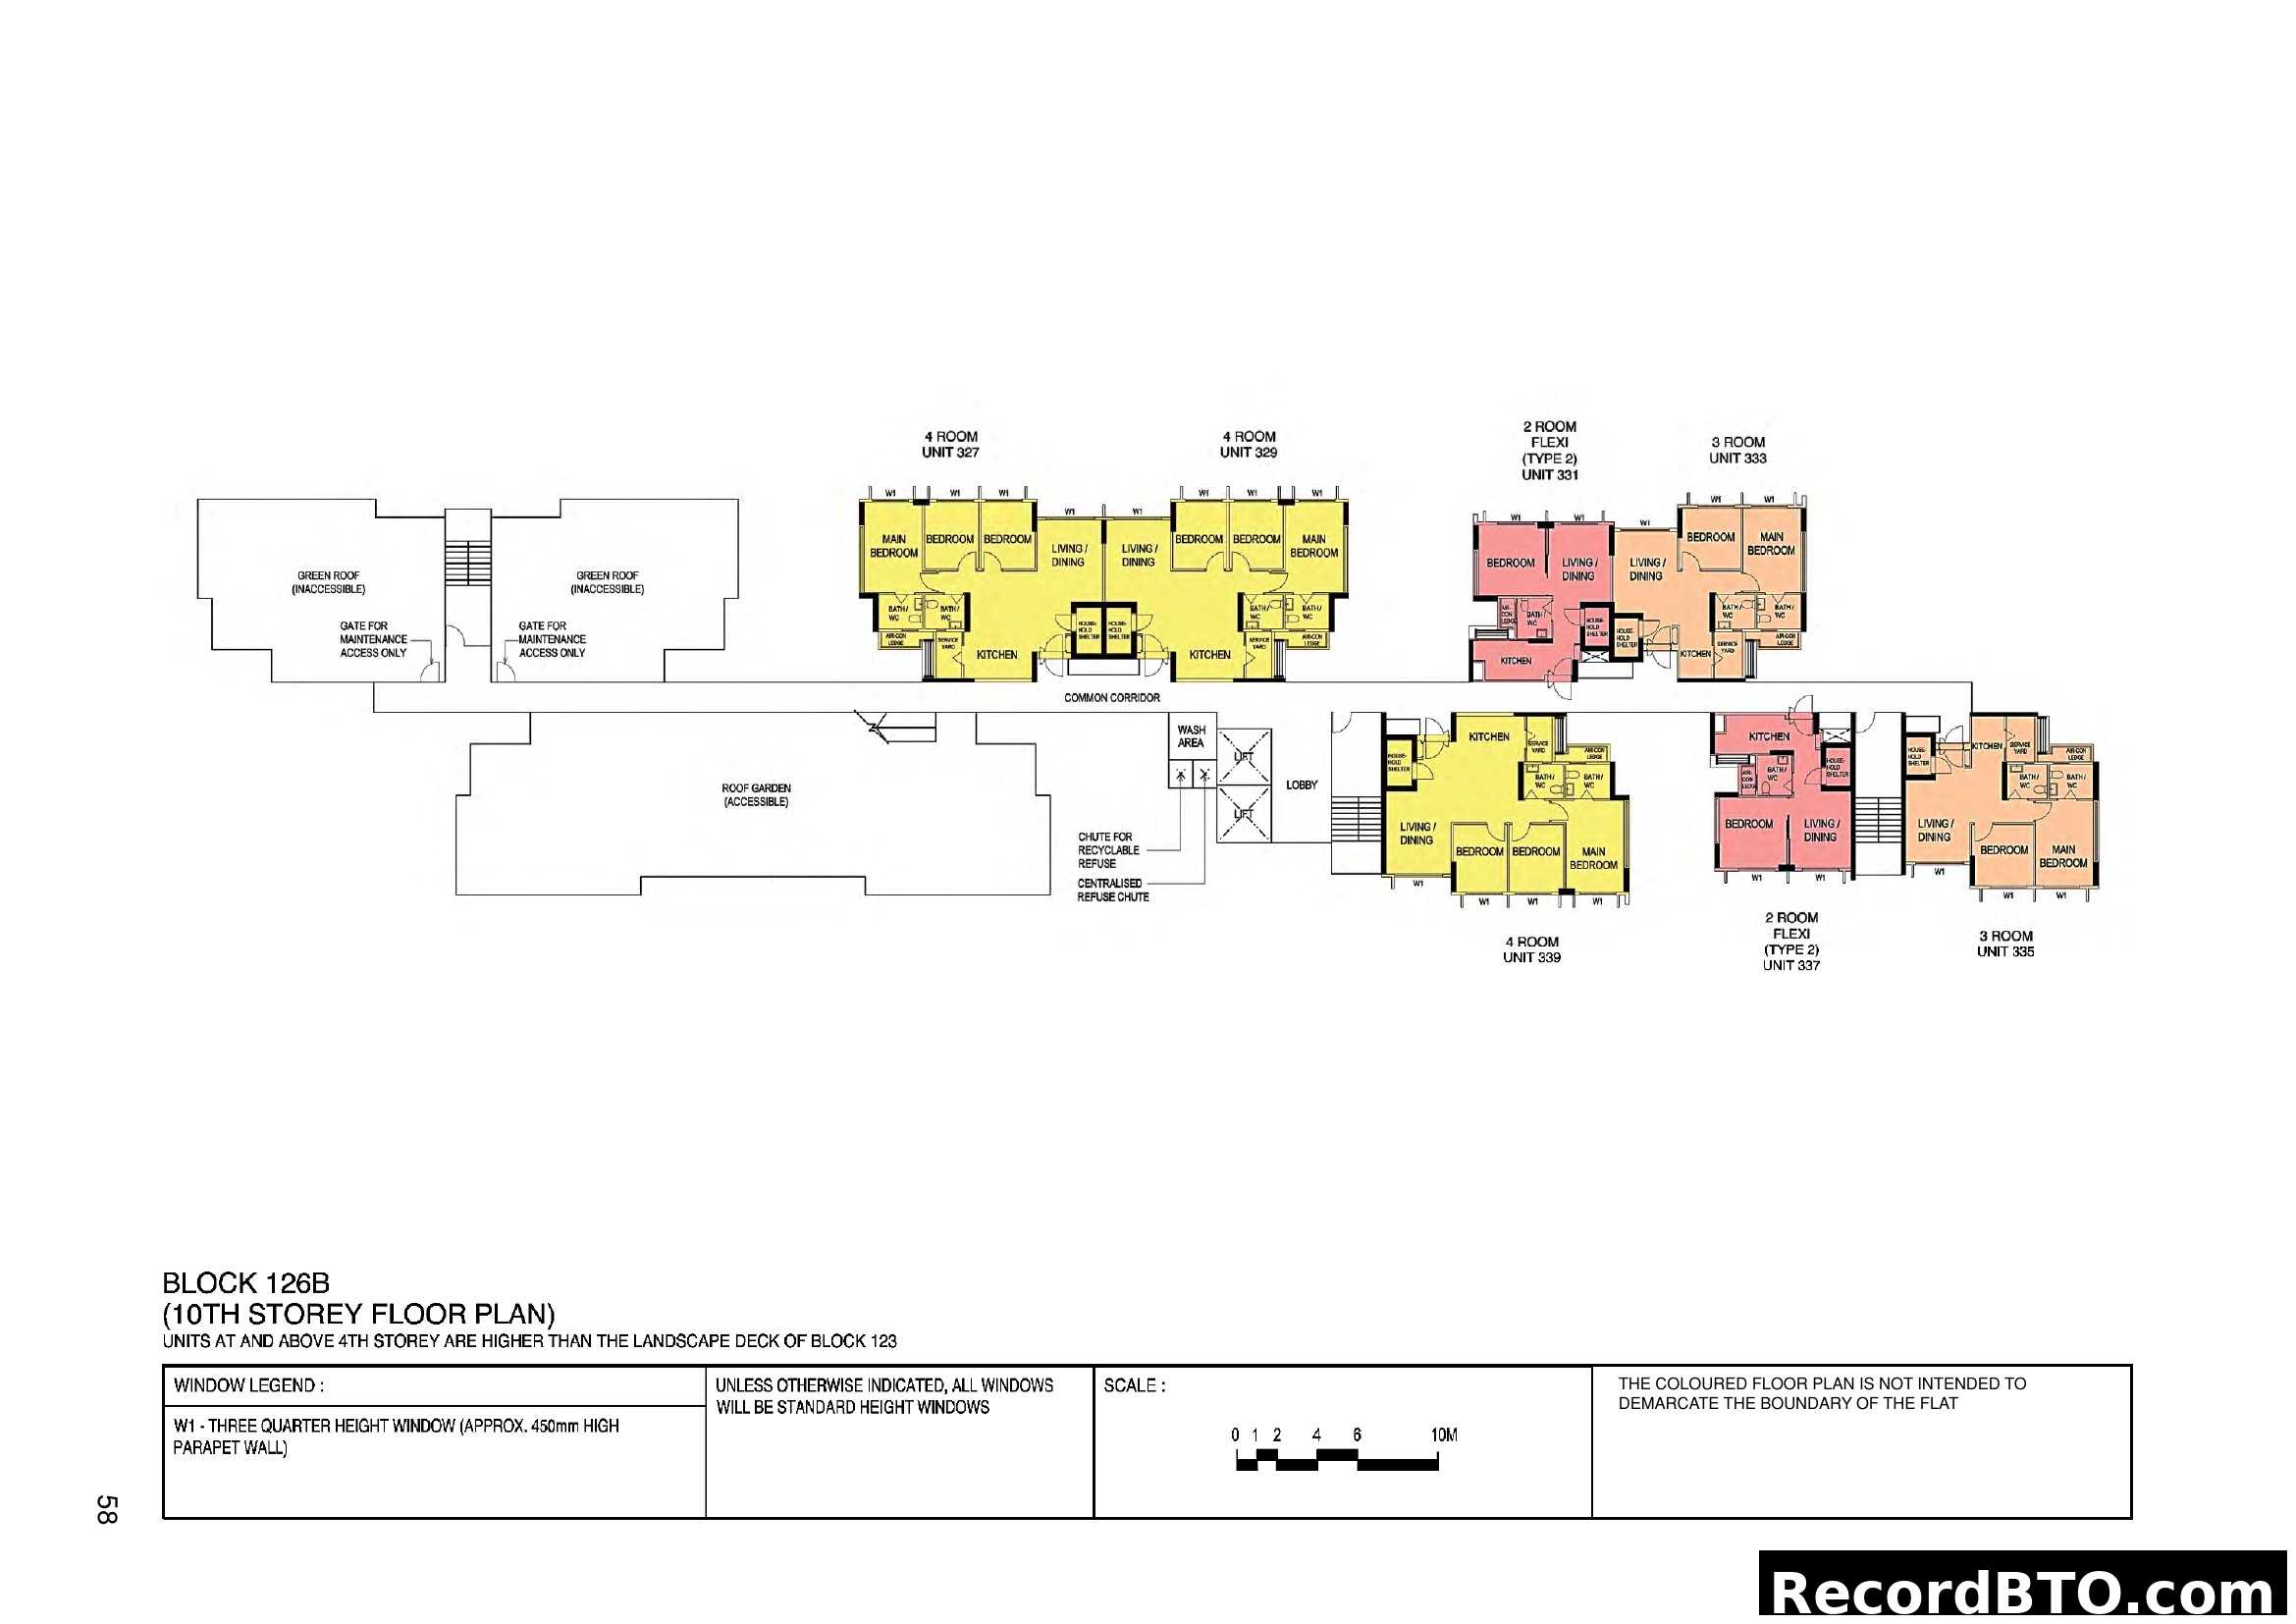
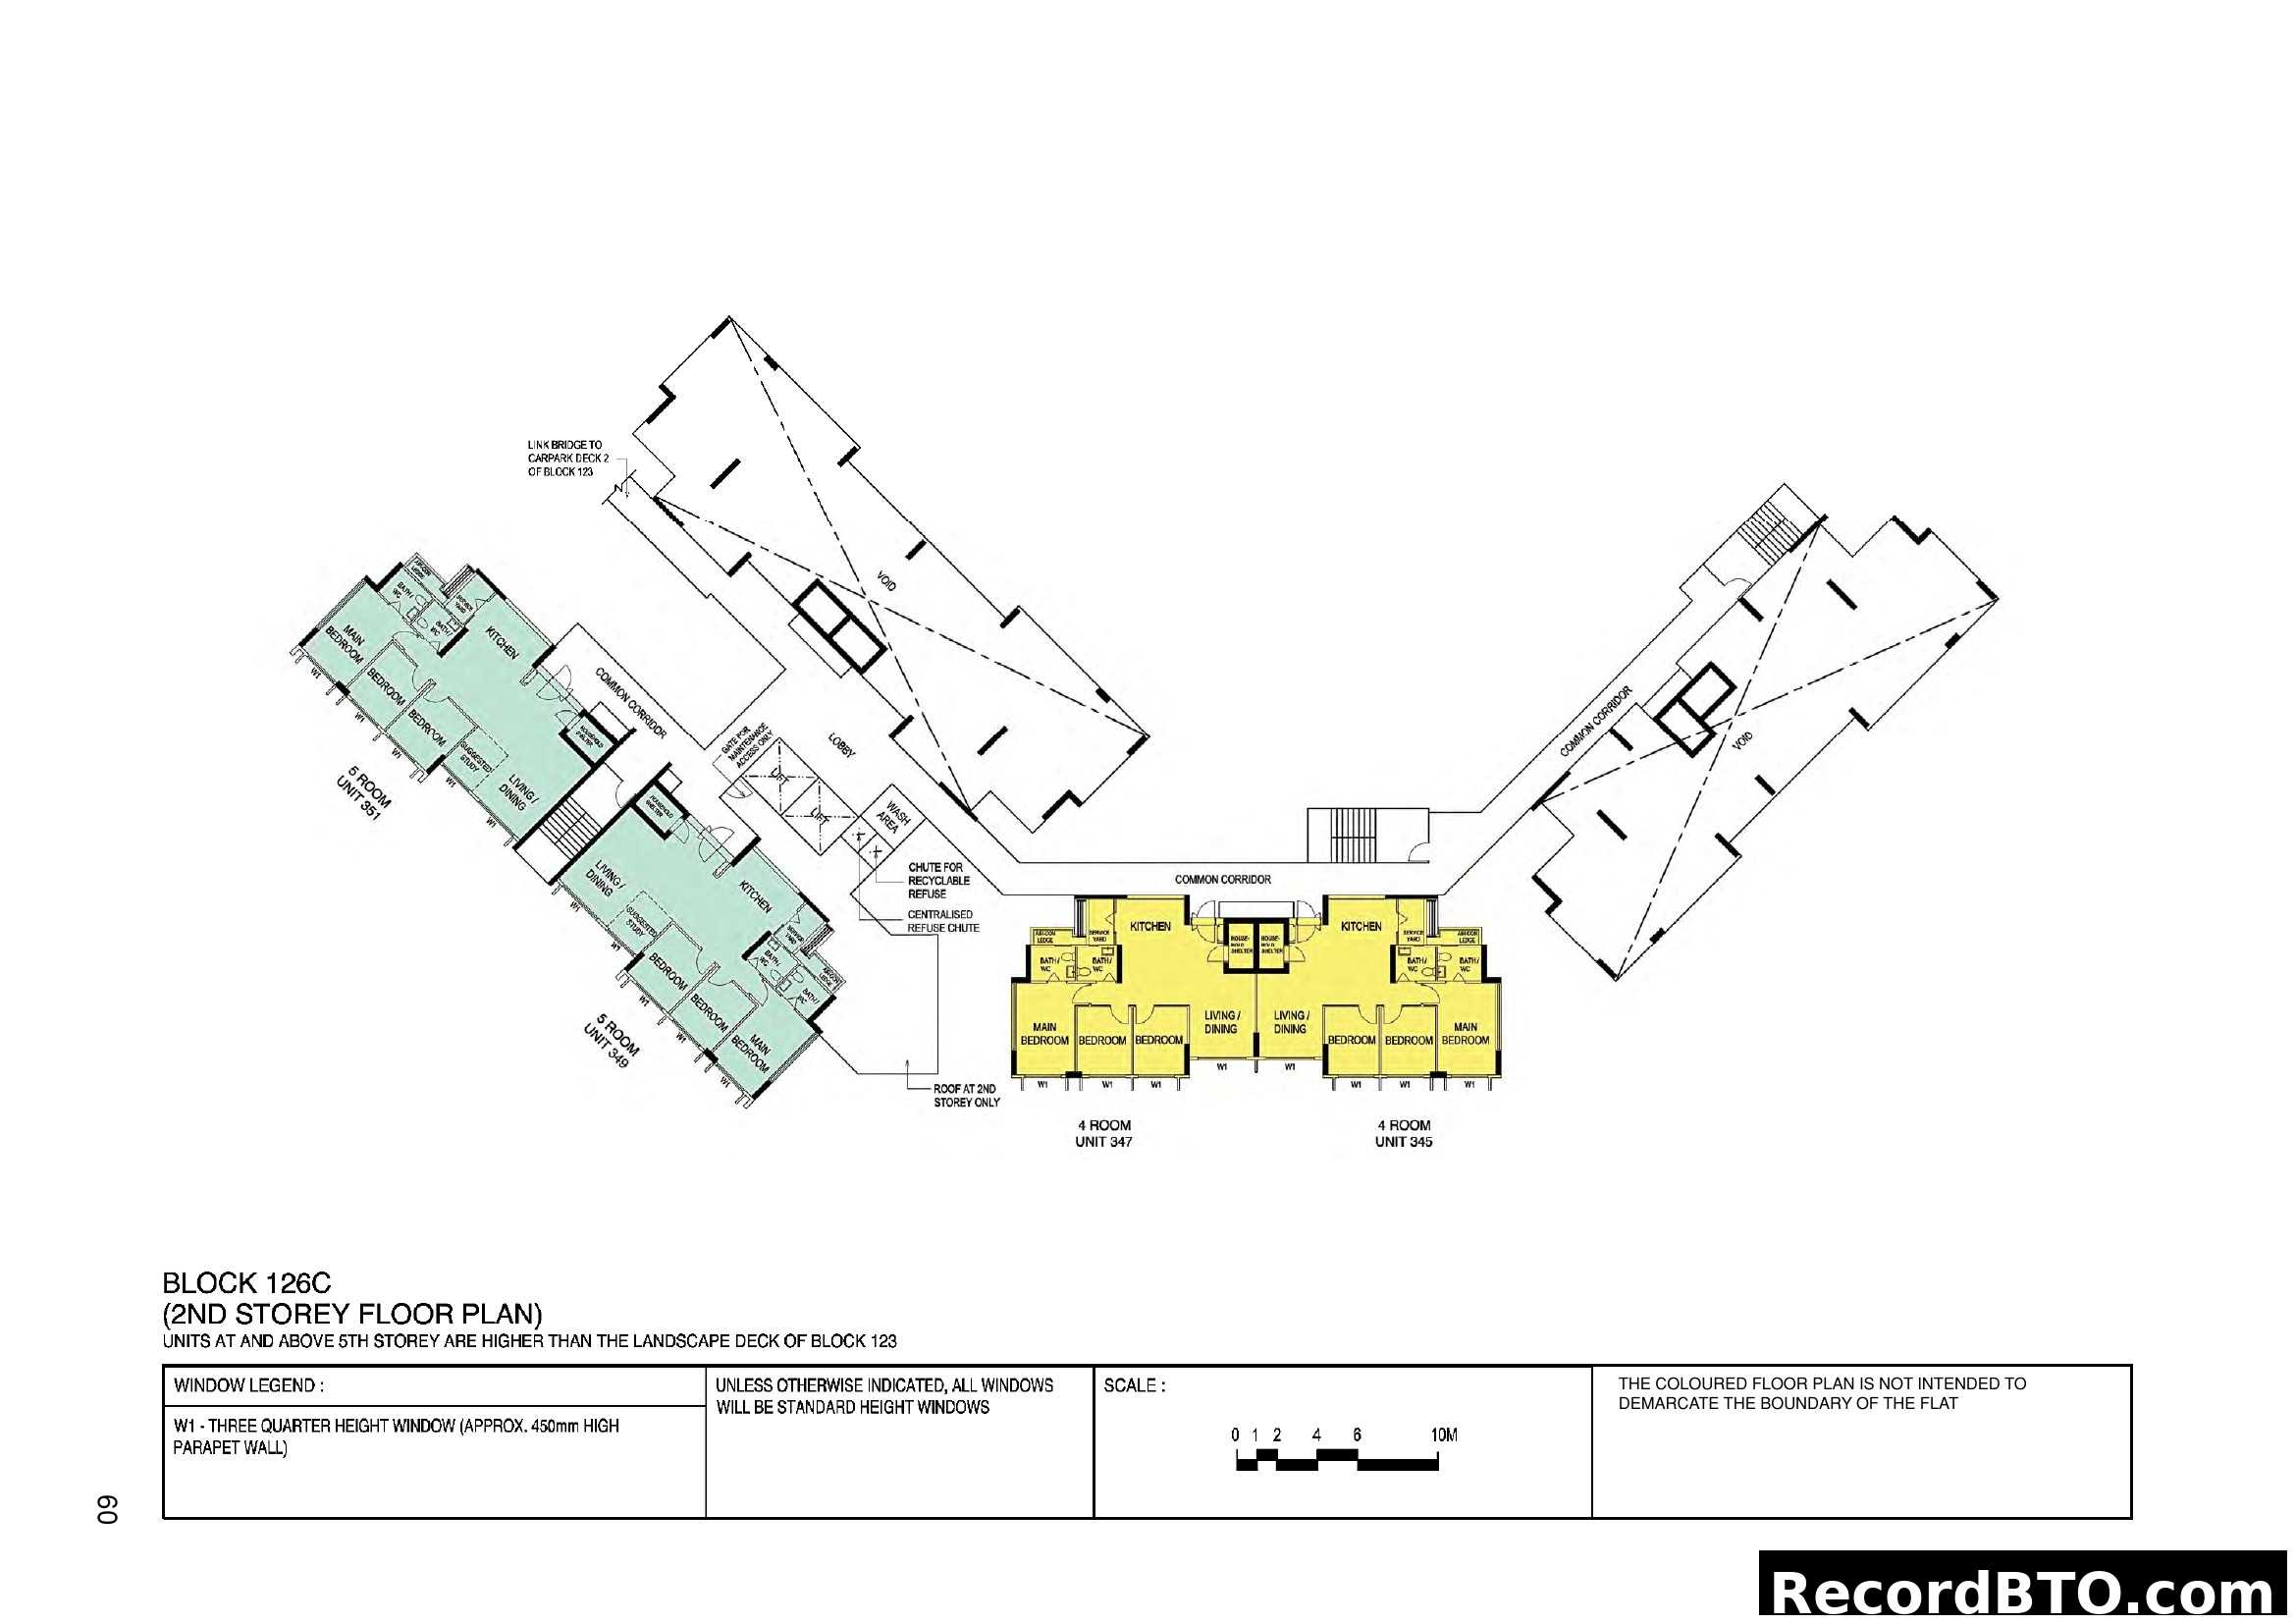
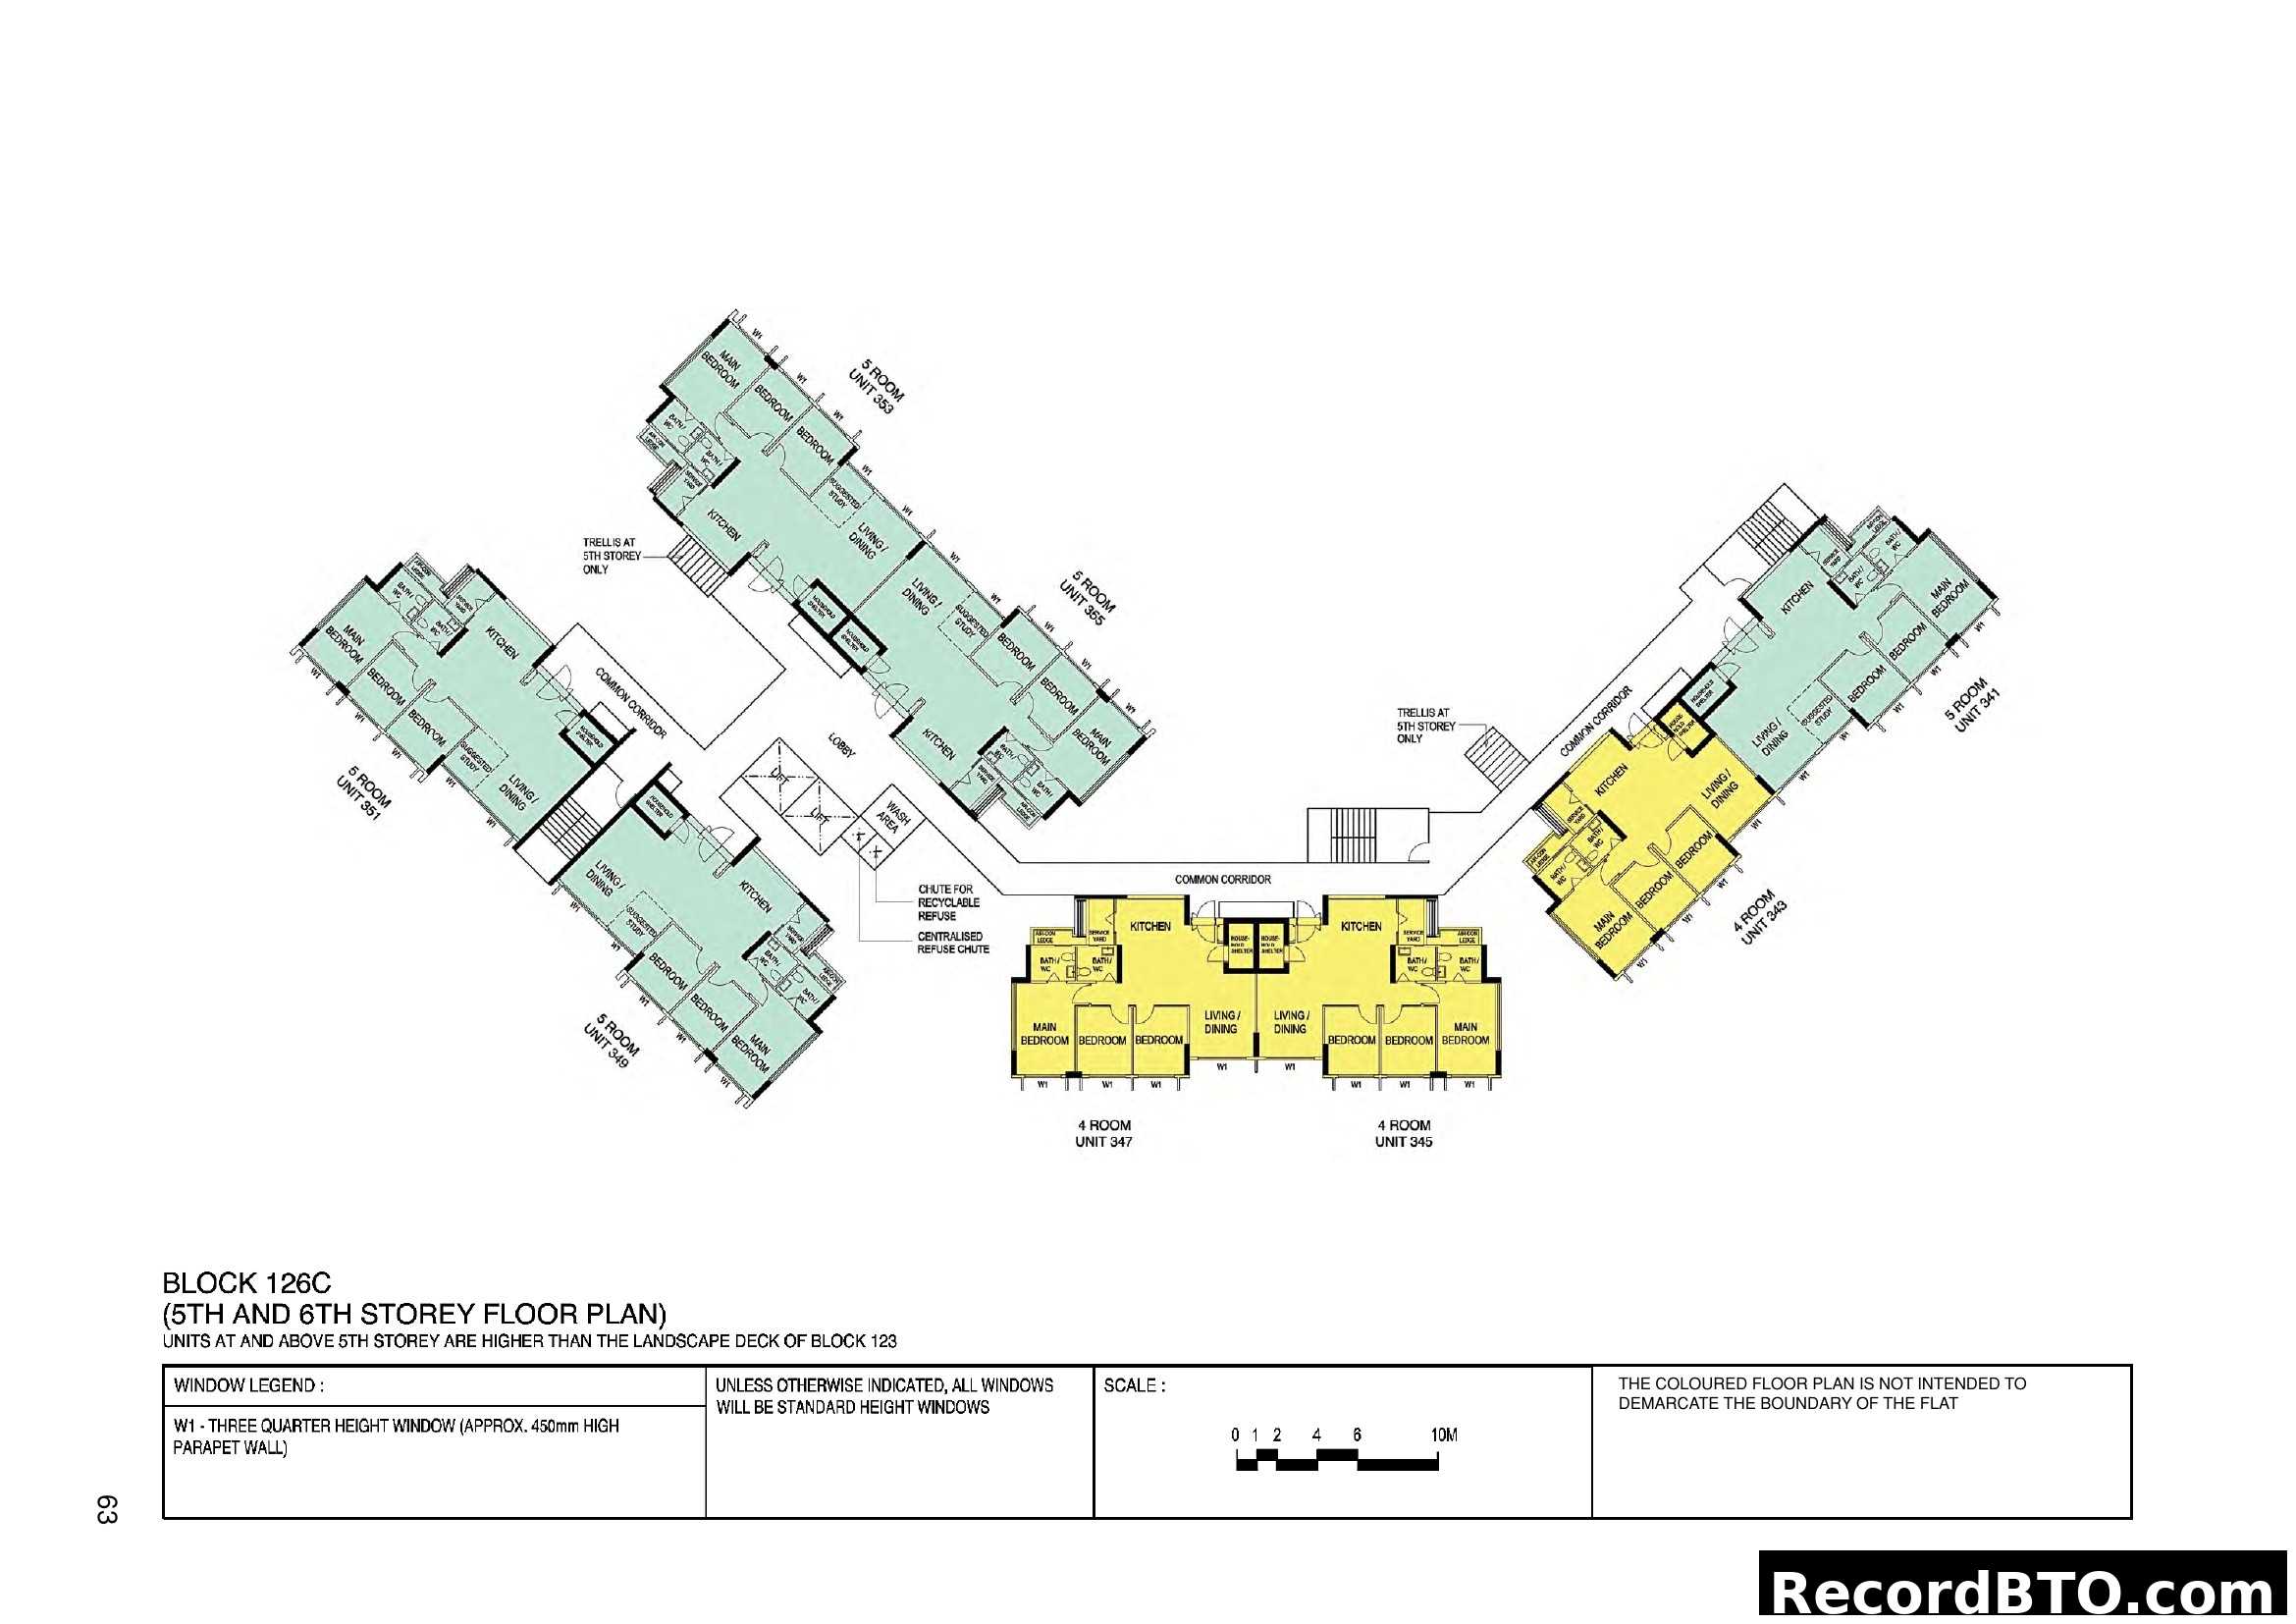
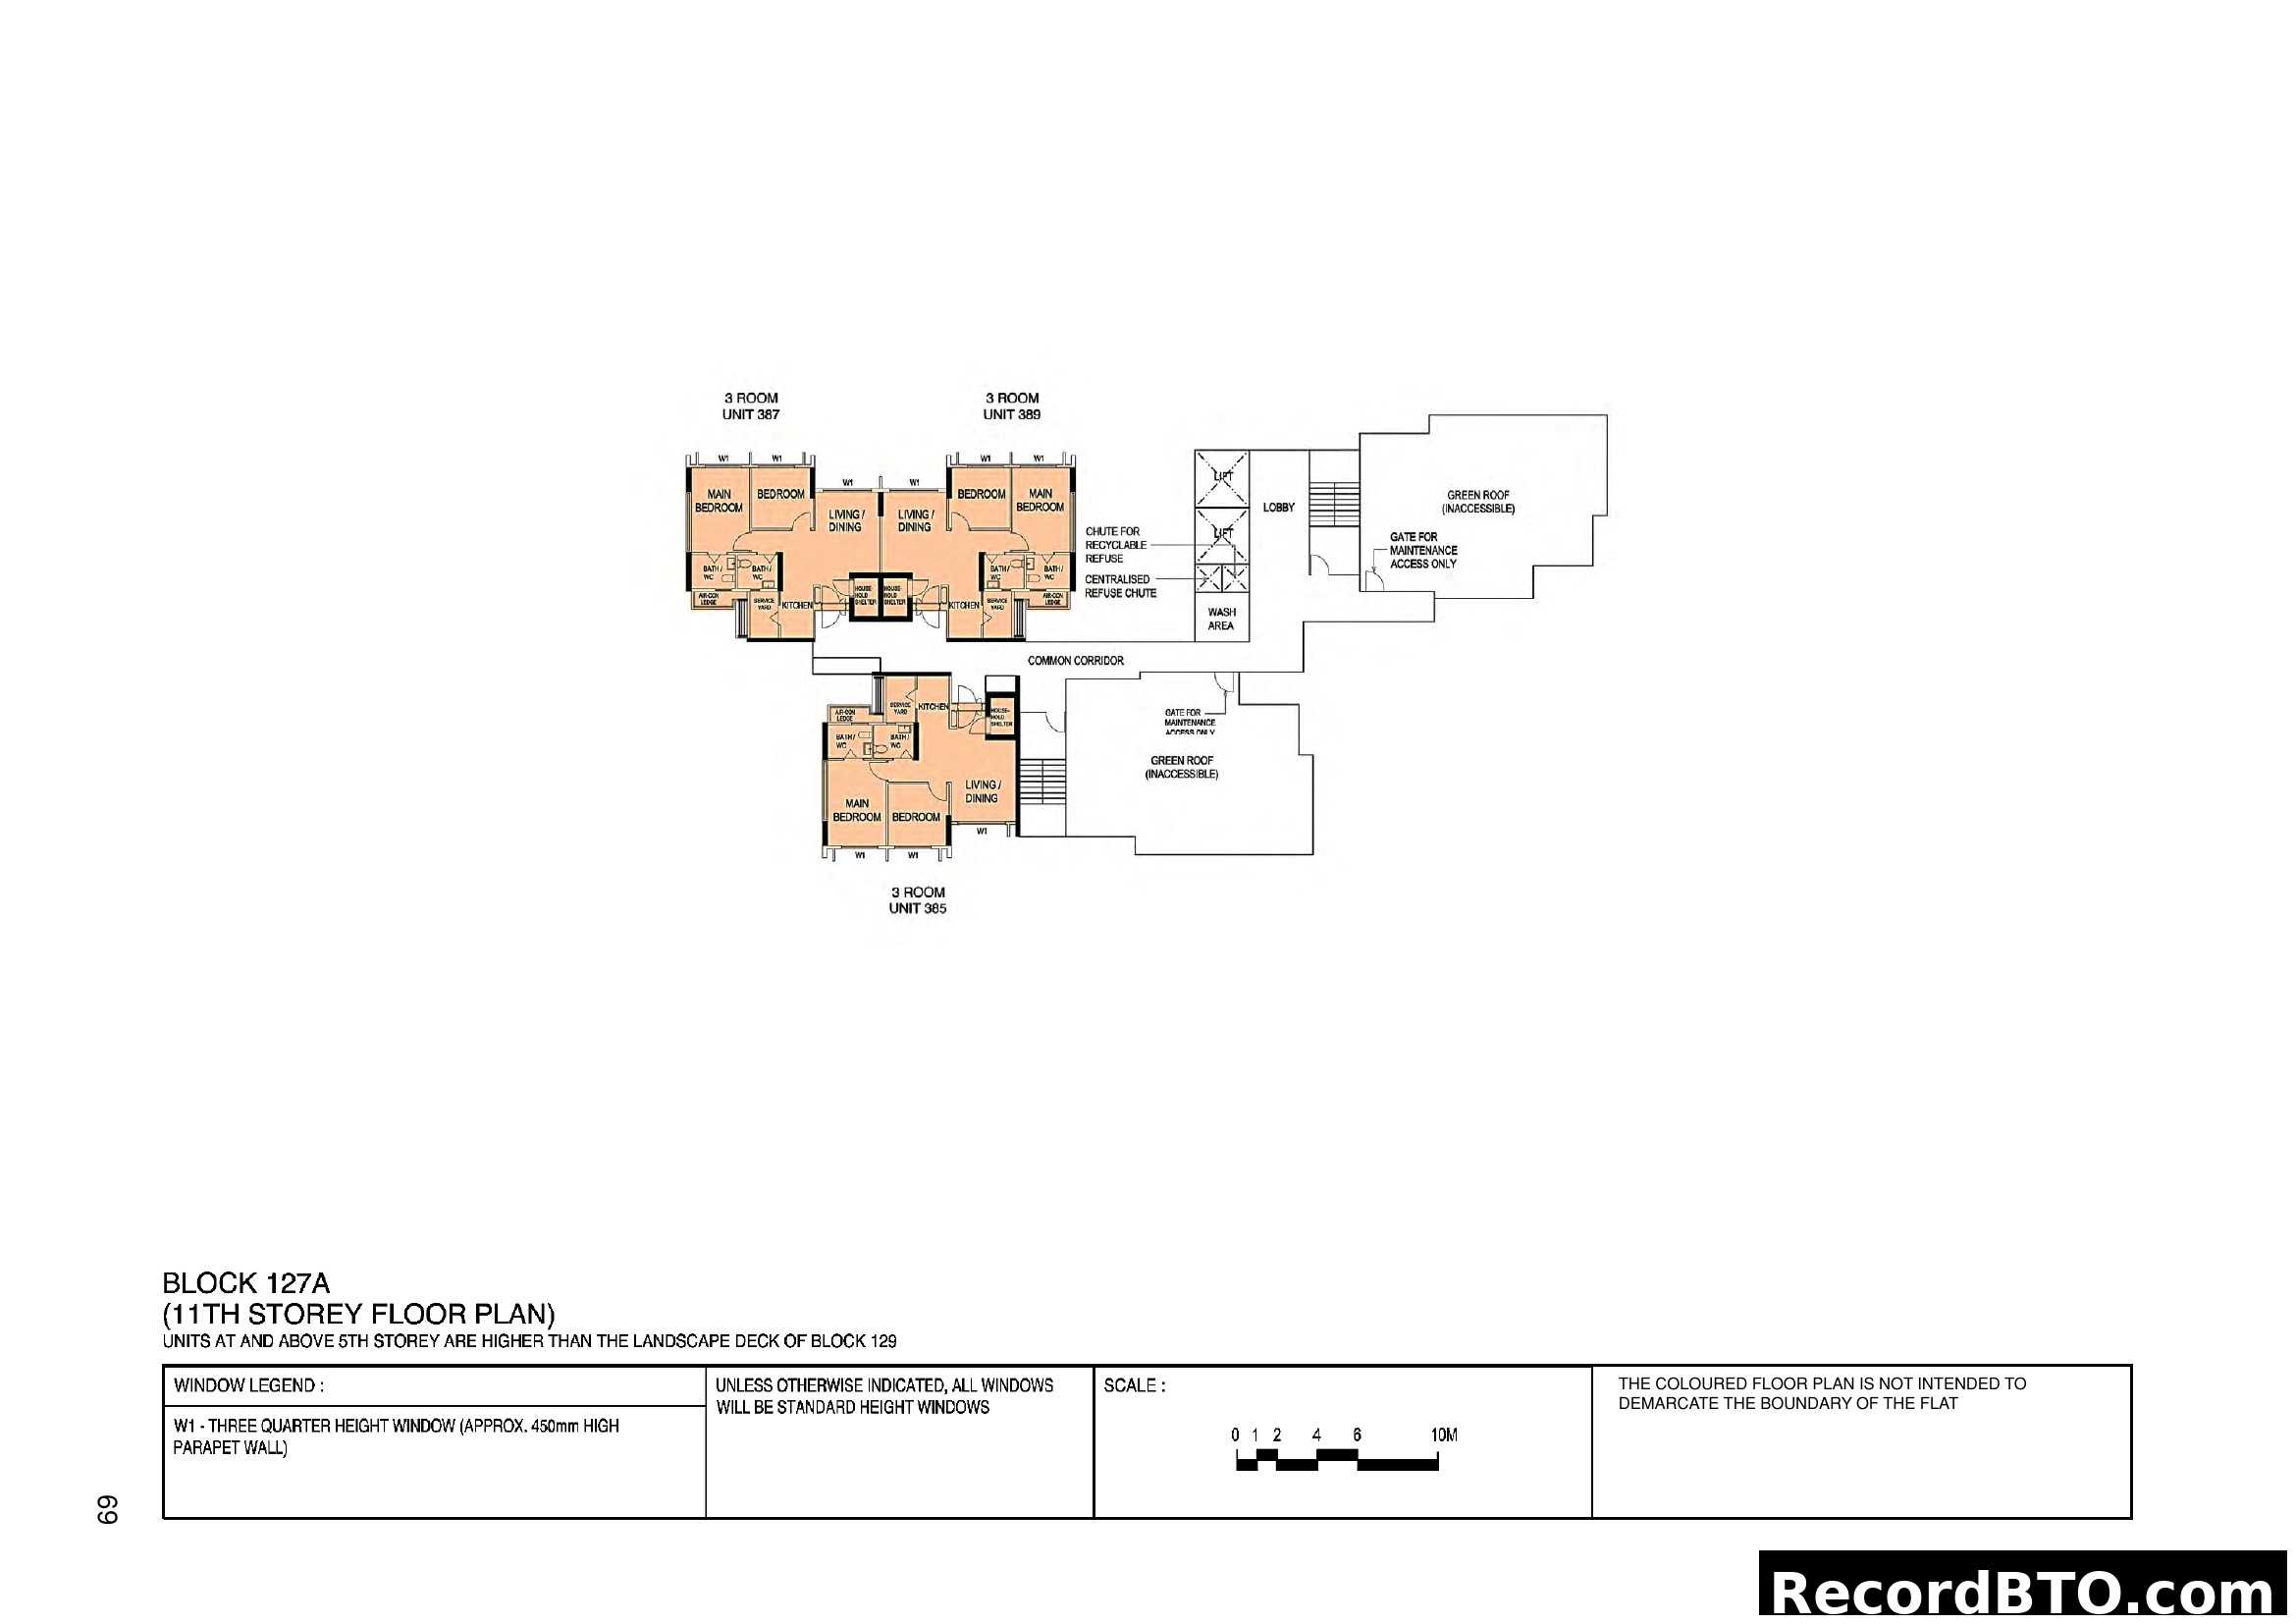
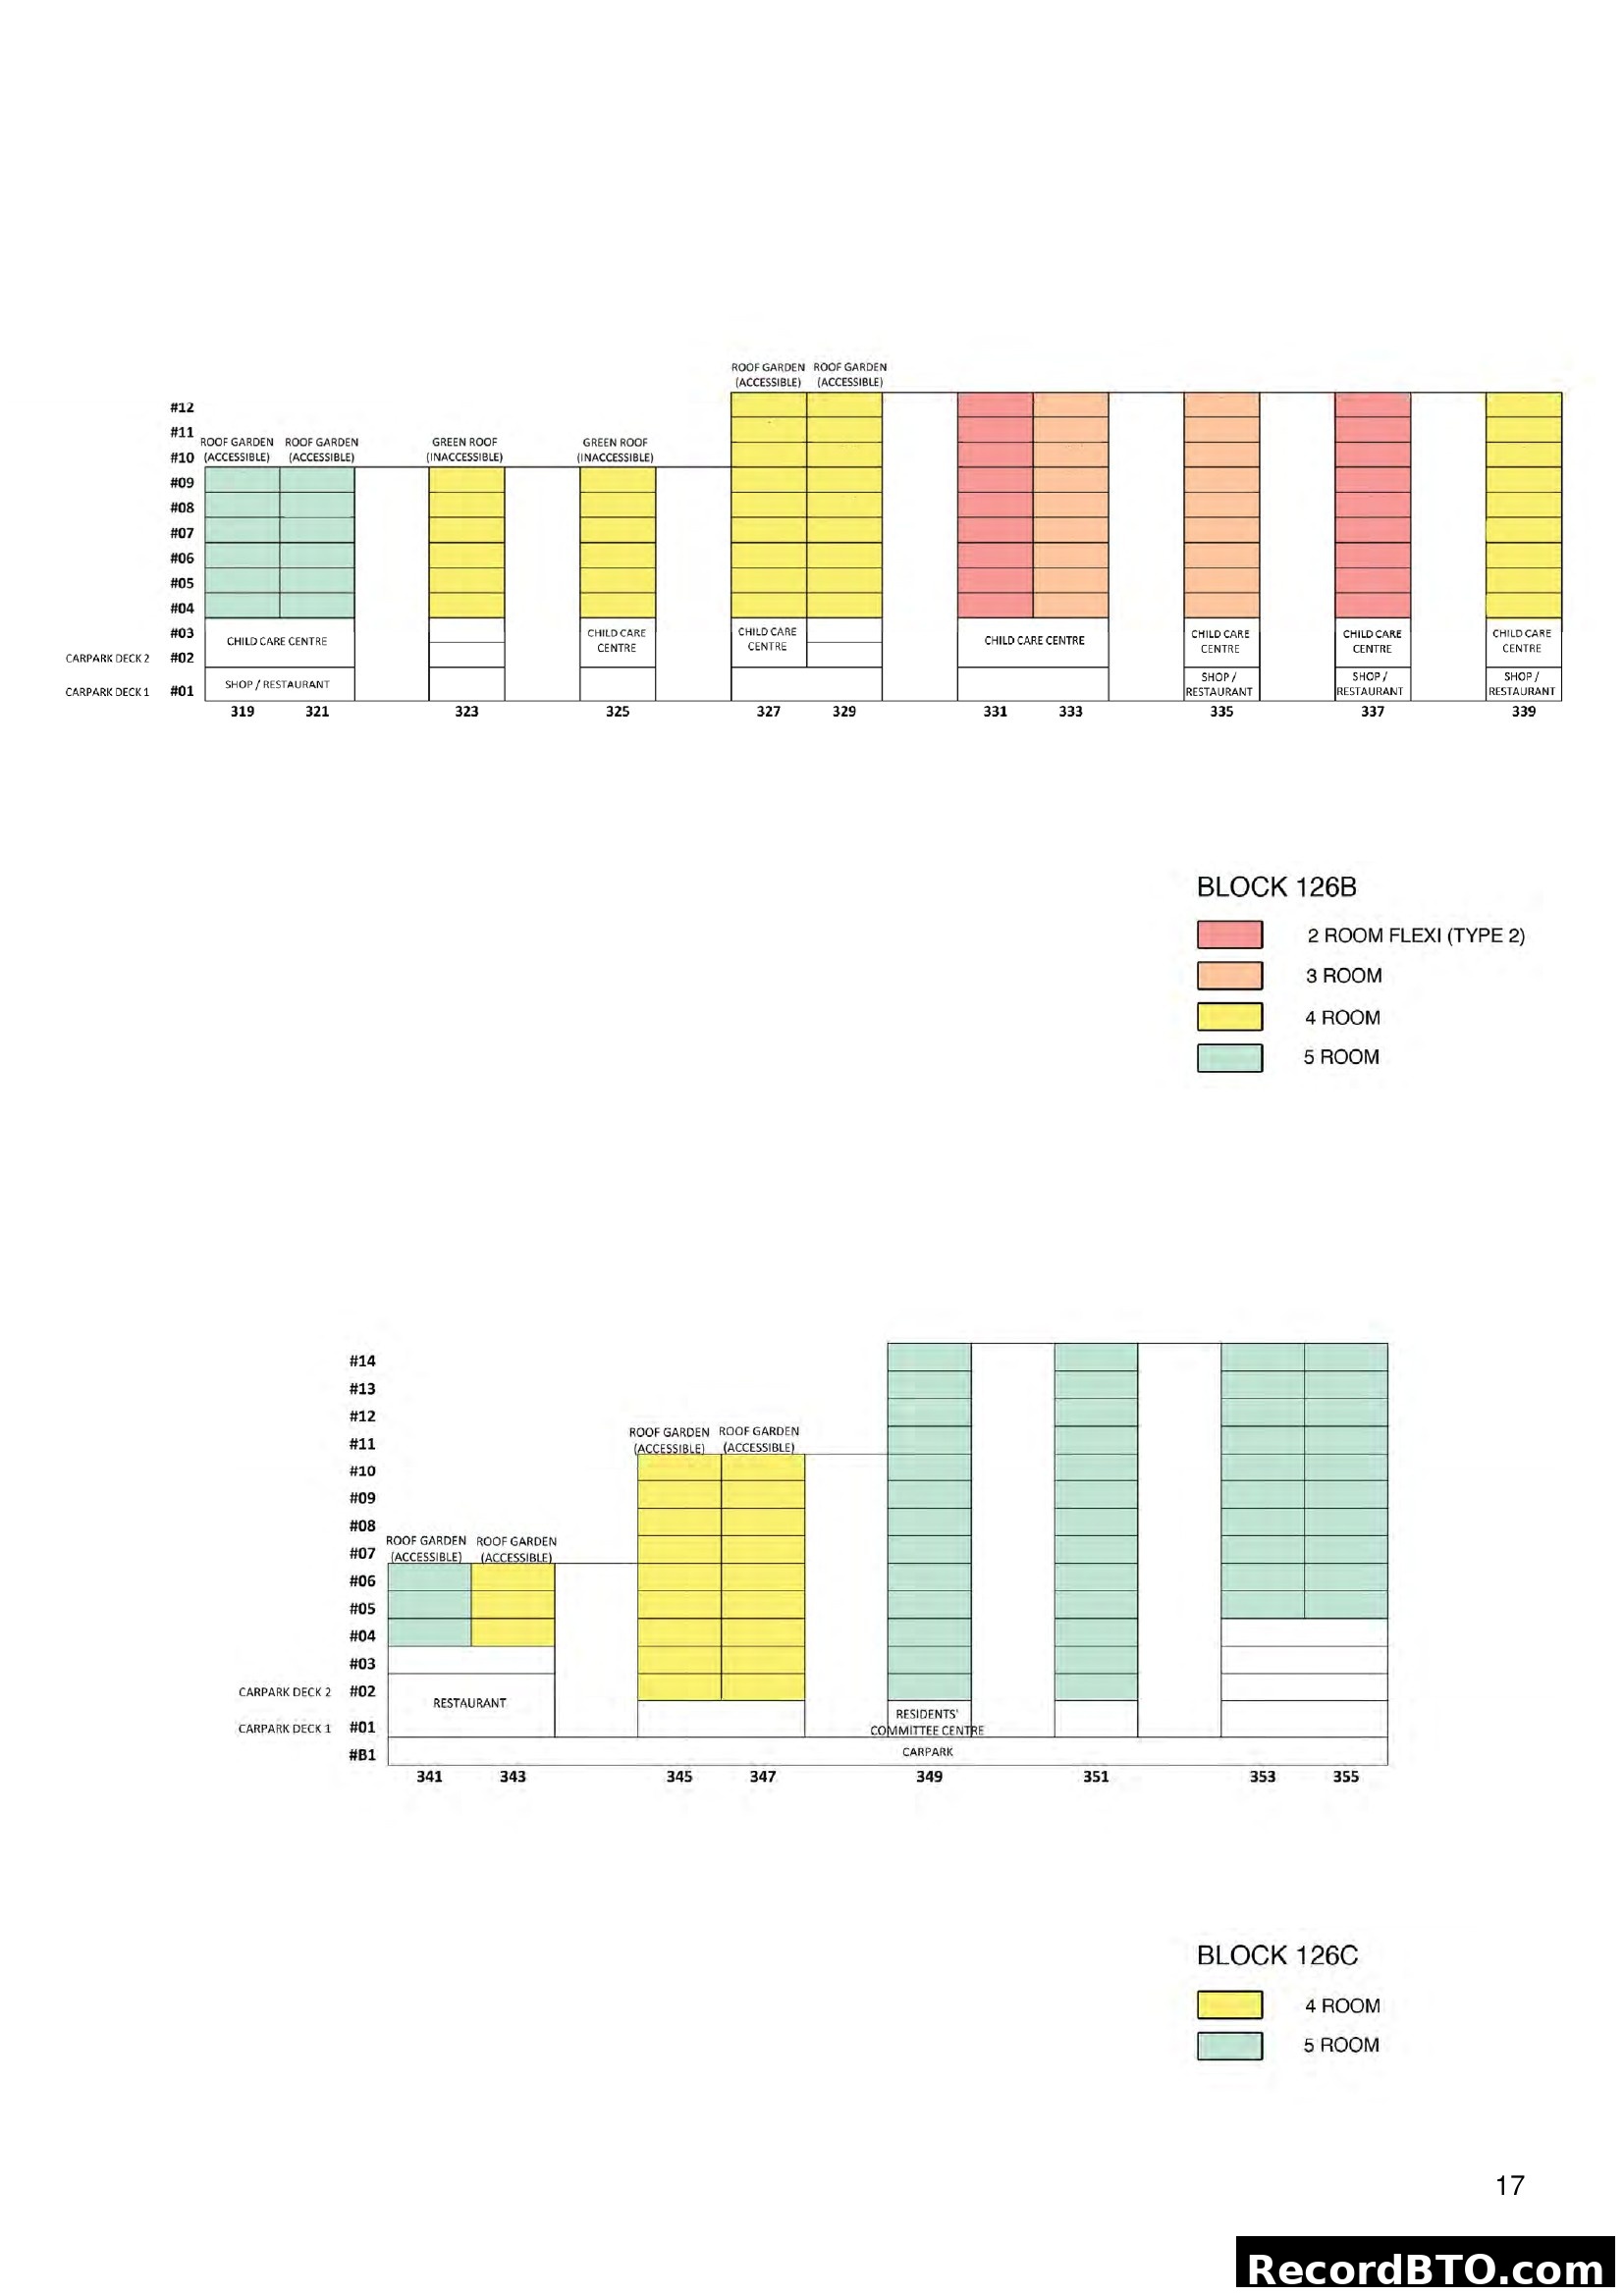
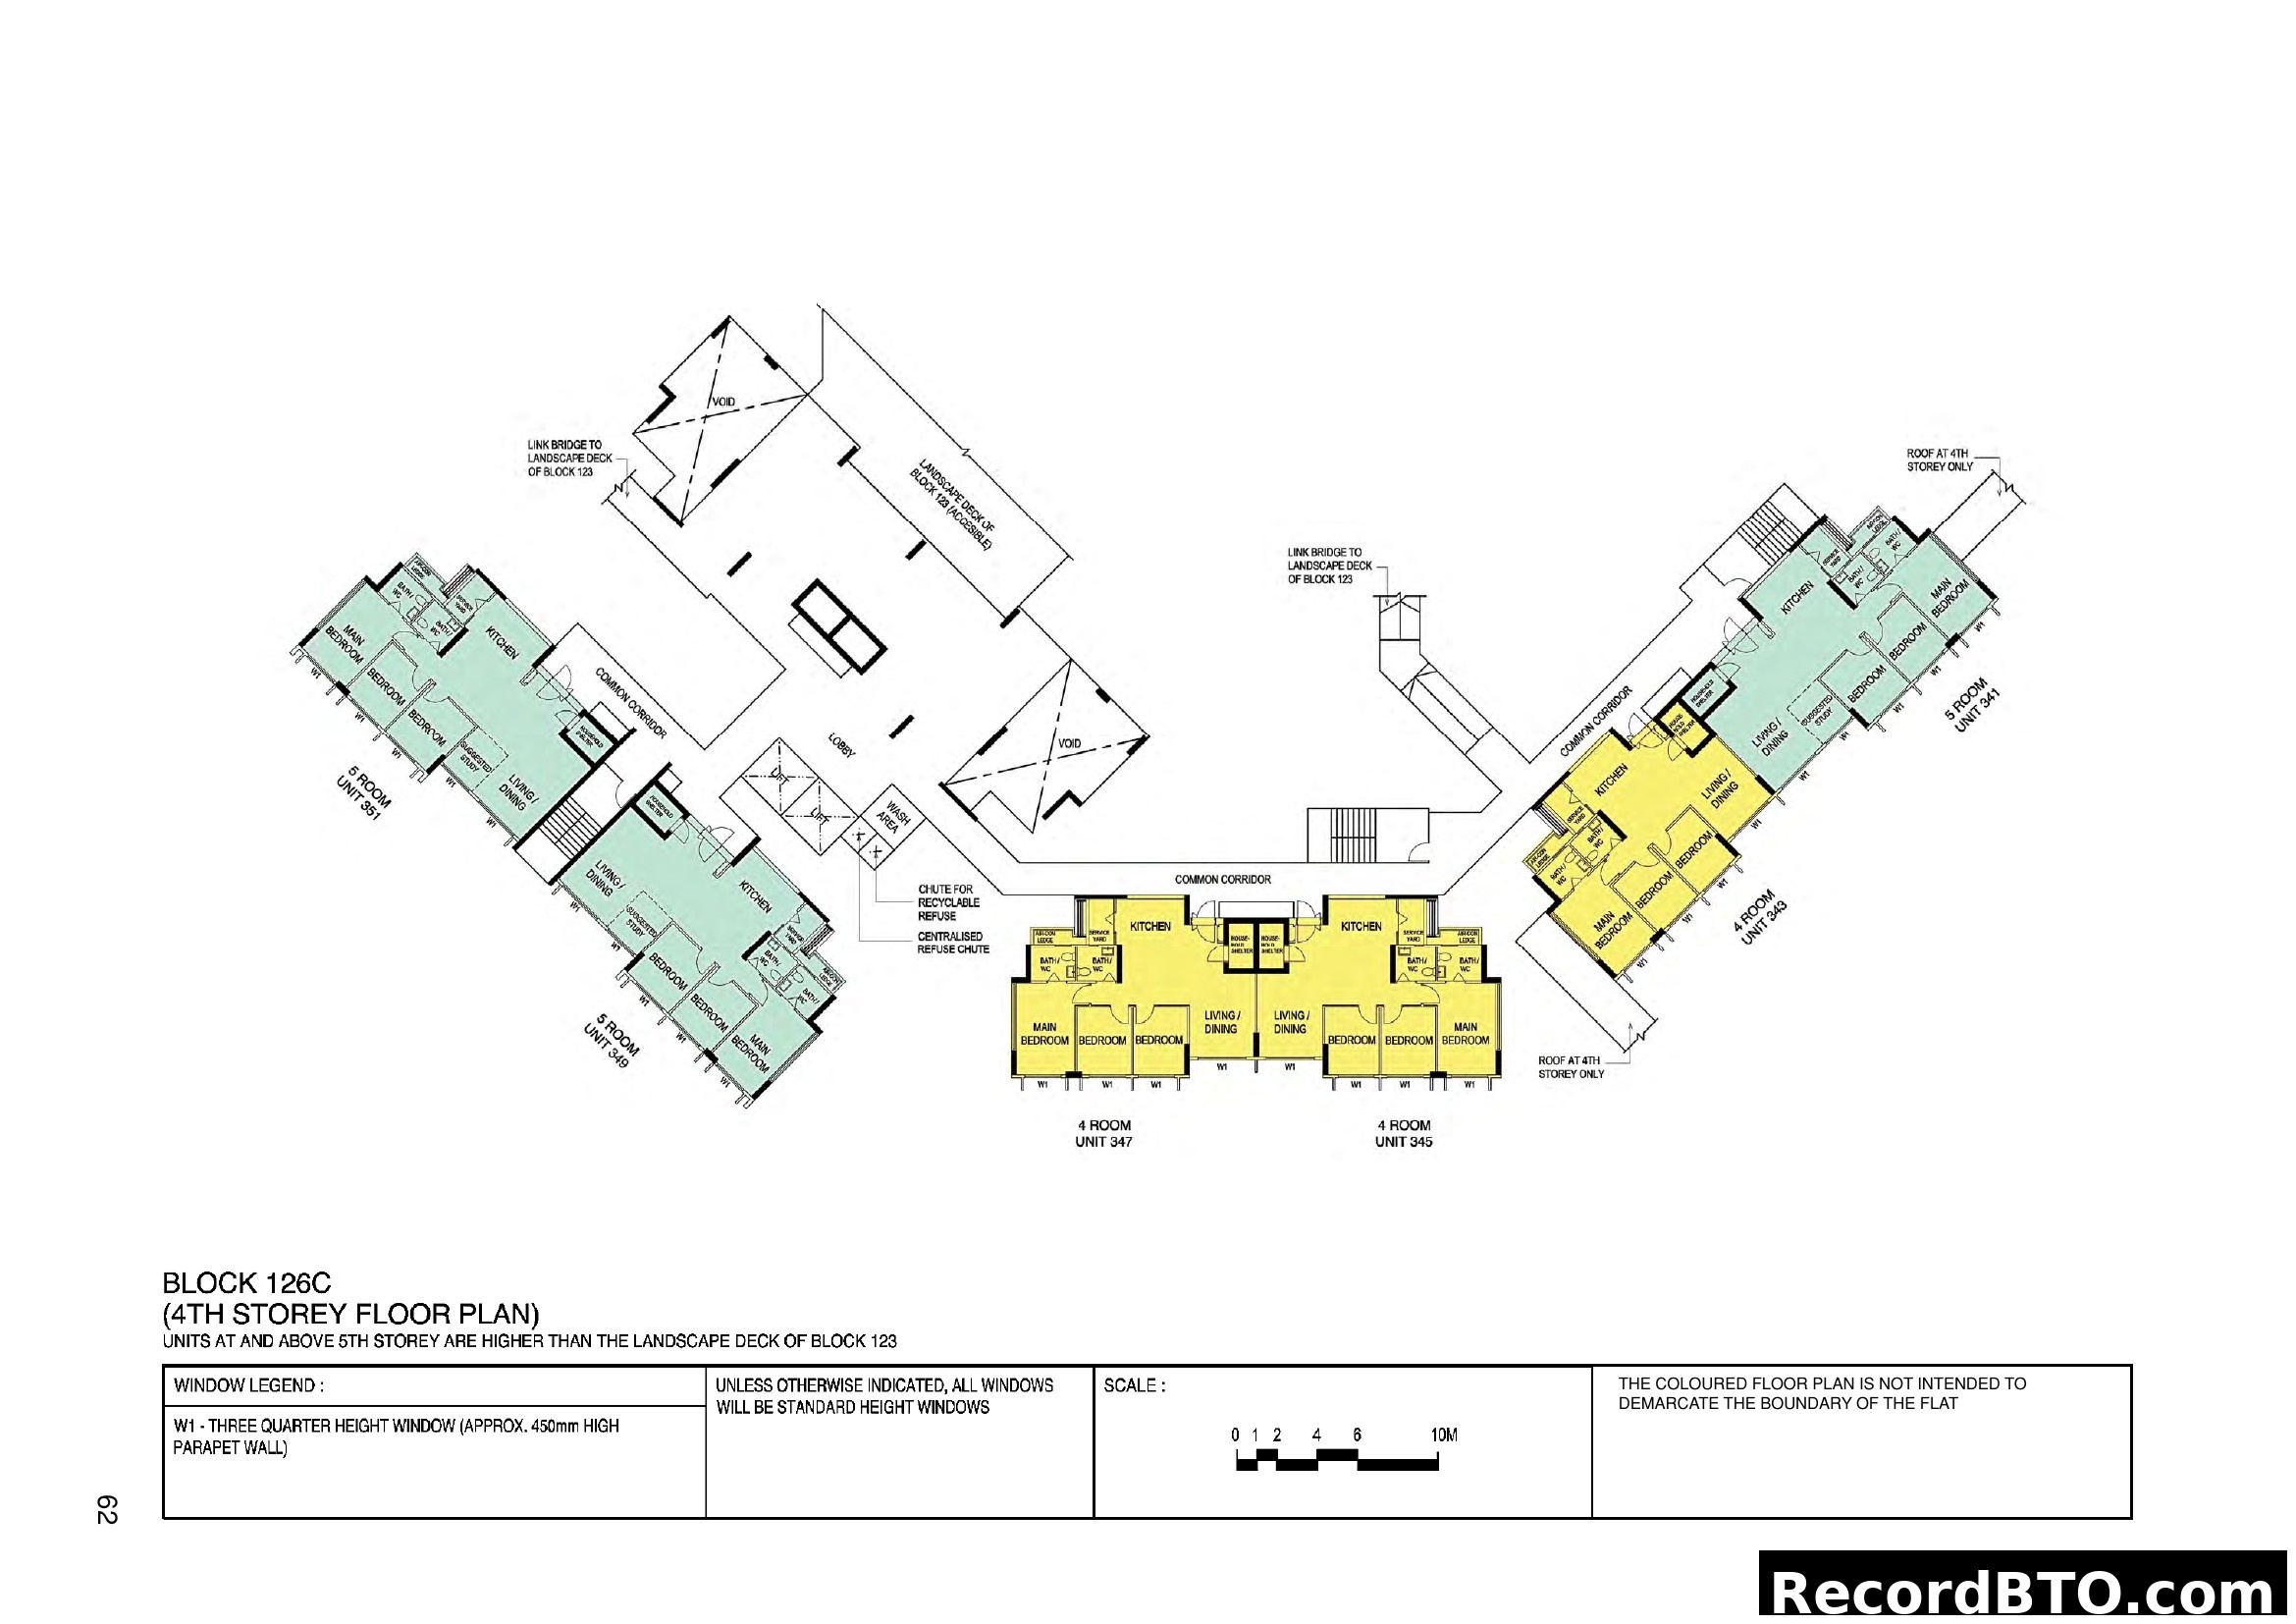
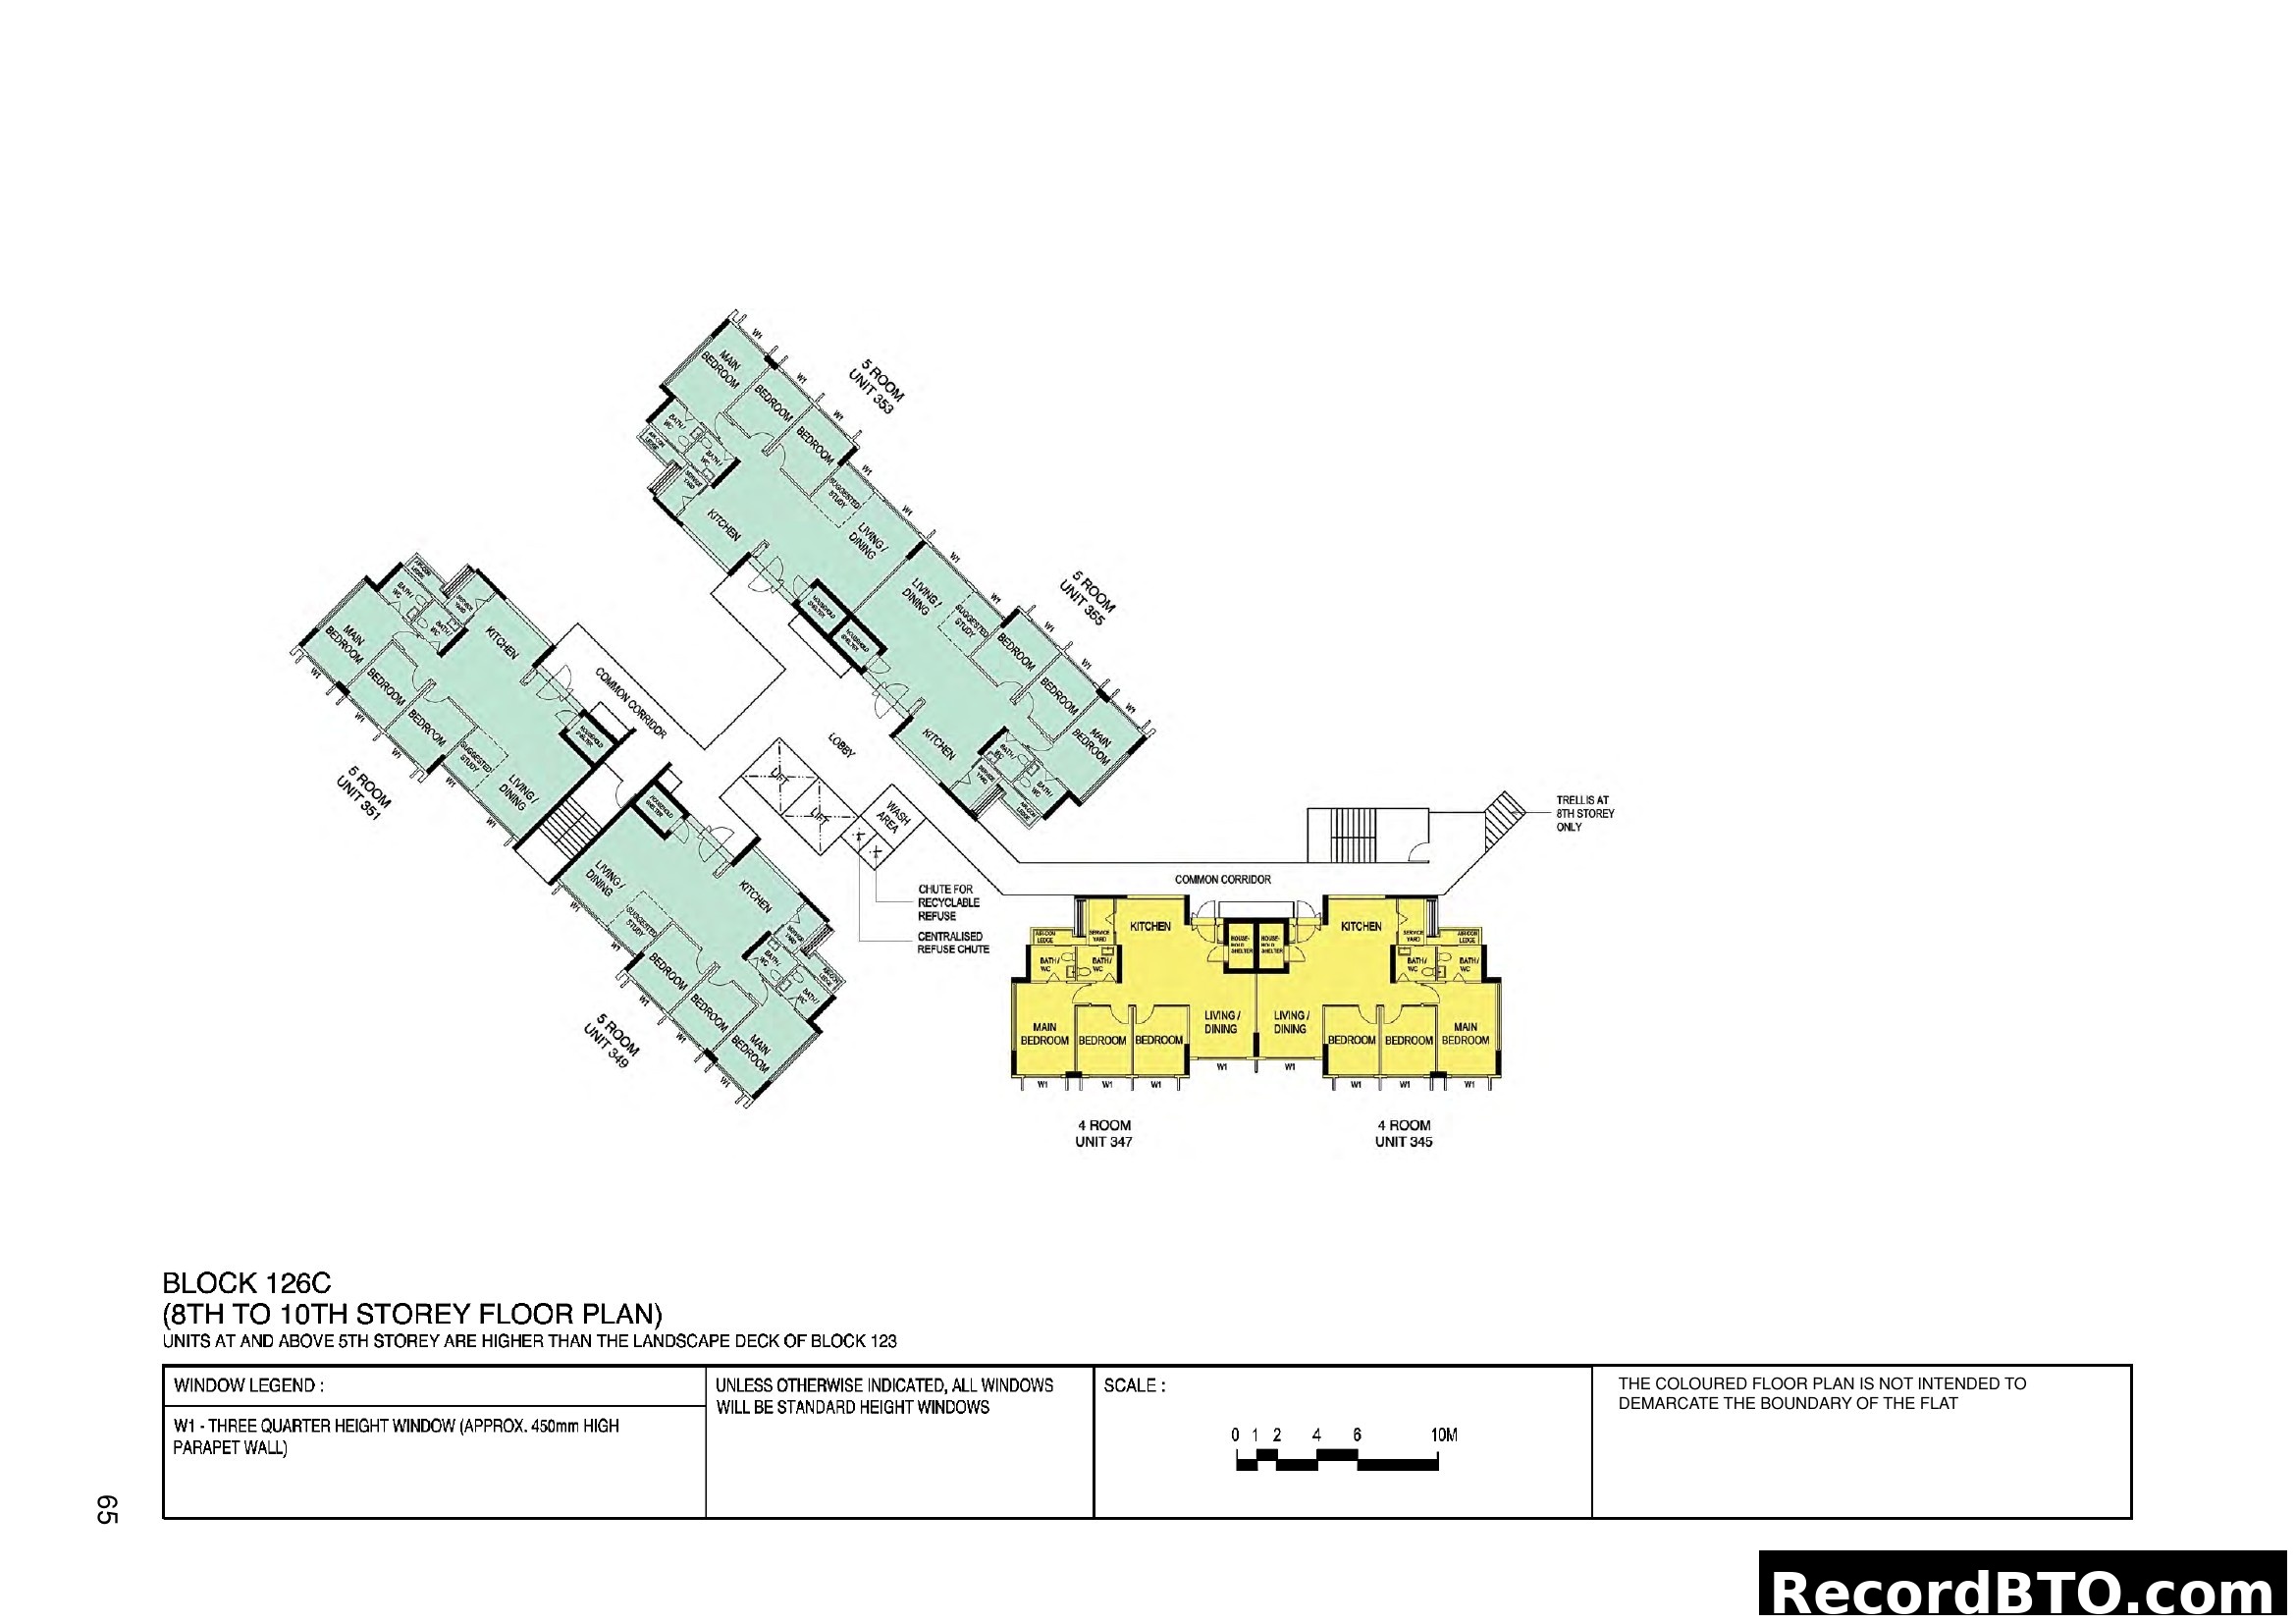
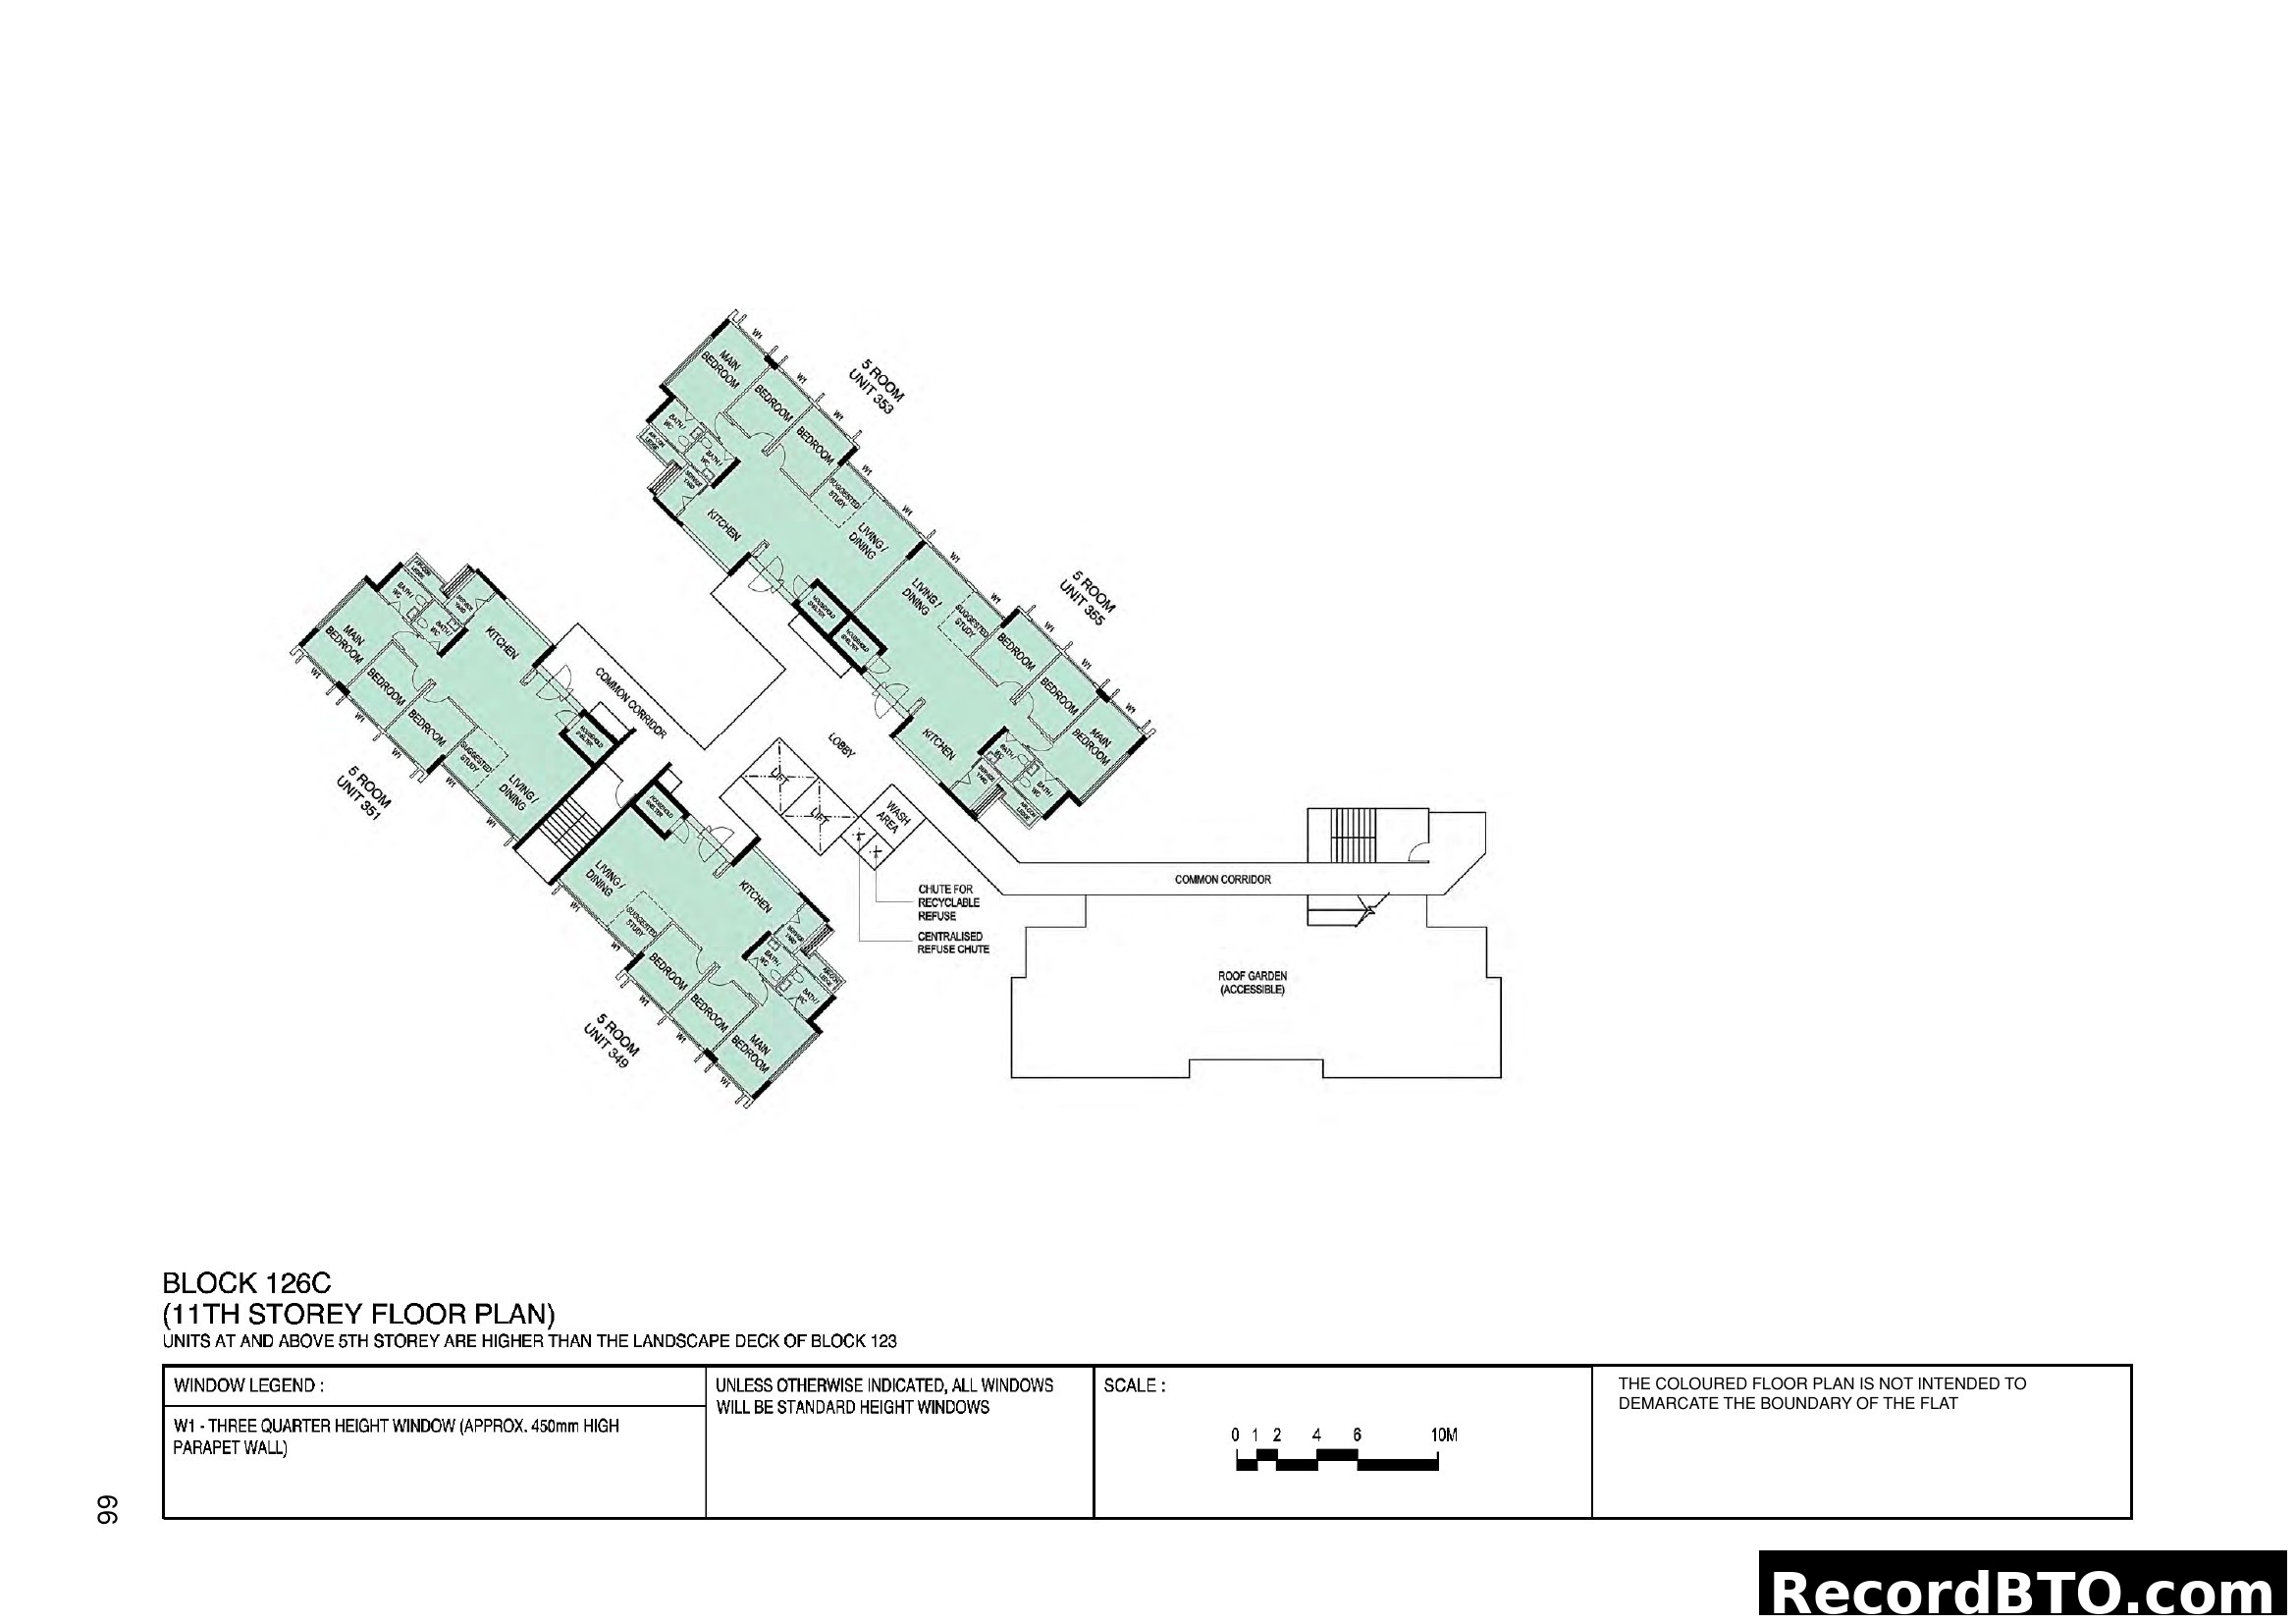
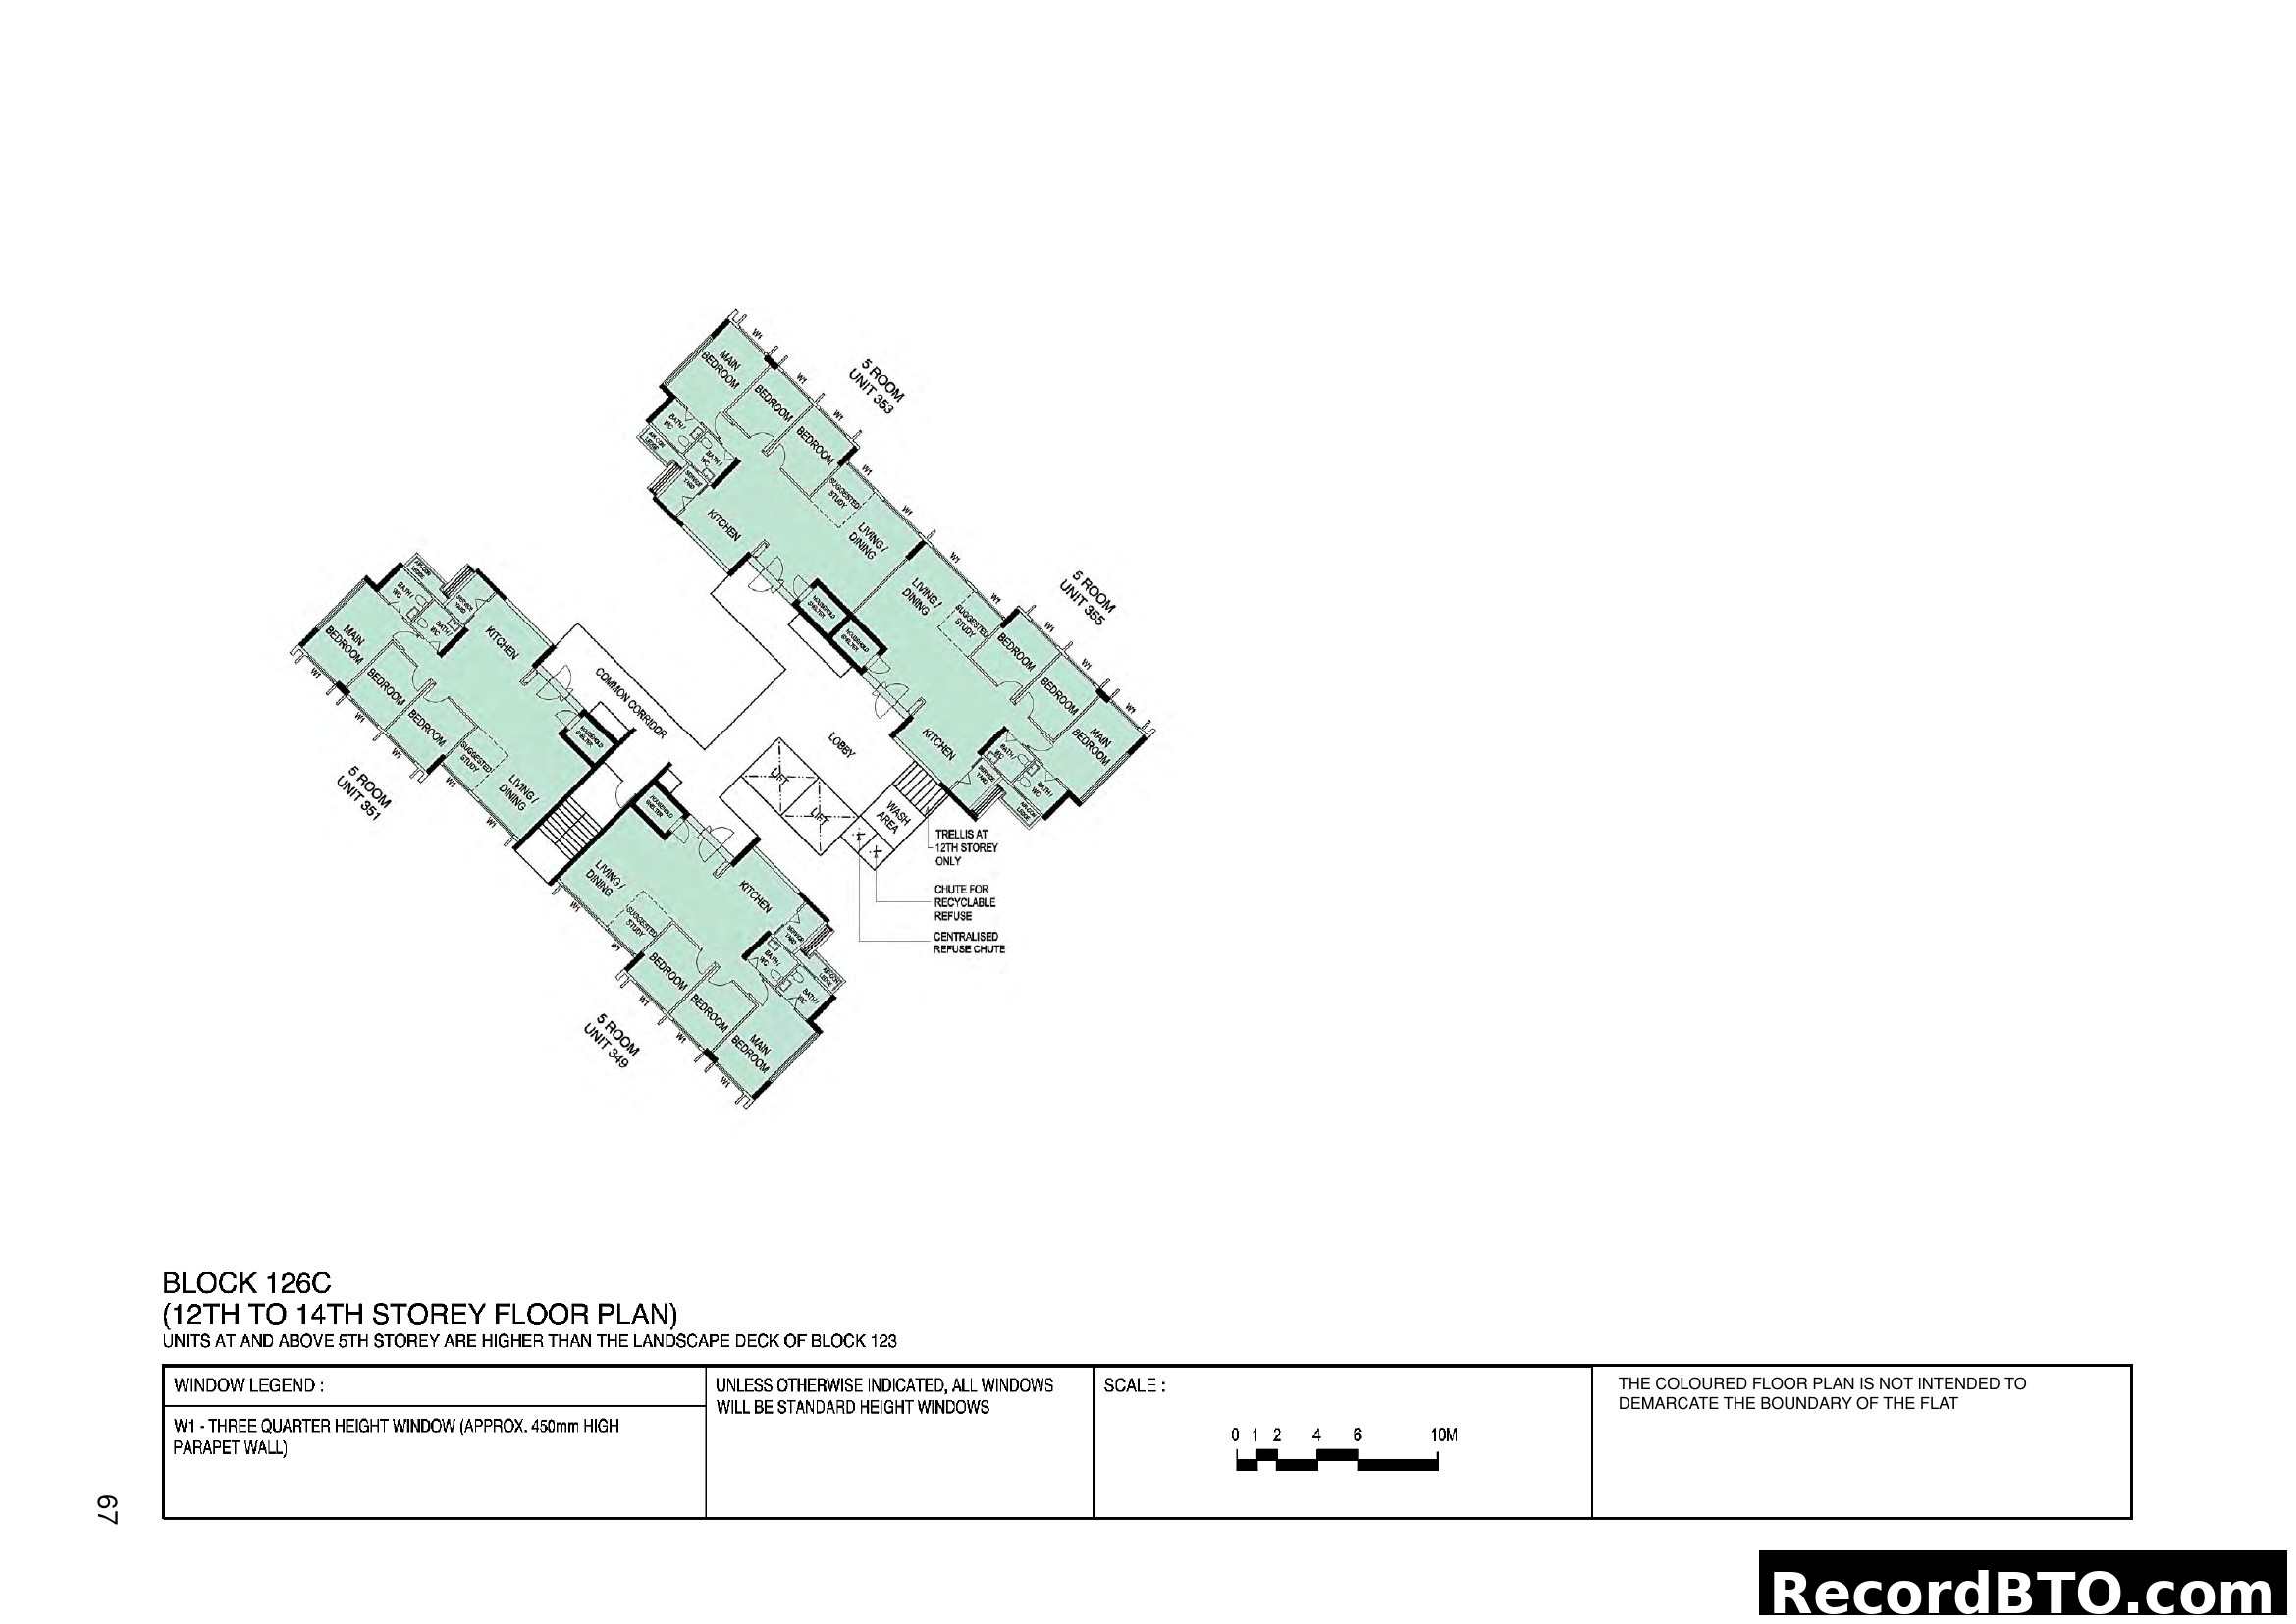
HDB Block 126B & 126C Residential Stacking Plan
Quick Info
Project Brochure
9 pages
Table of Contents
HDB Precincts: Evolving Community Needs, Amenity Planning, Flat Selection Information, and Disclaime
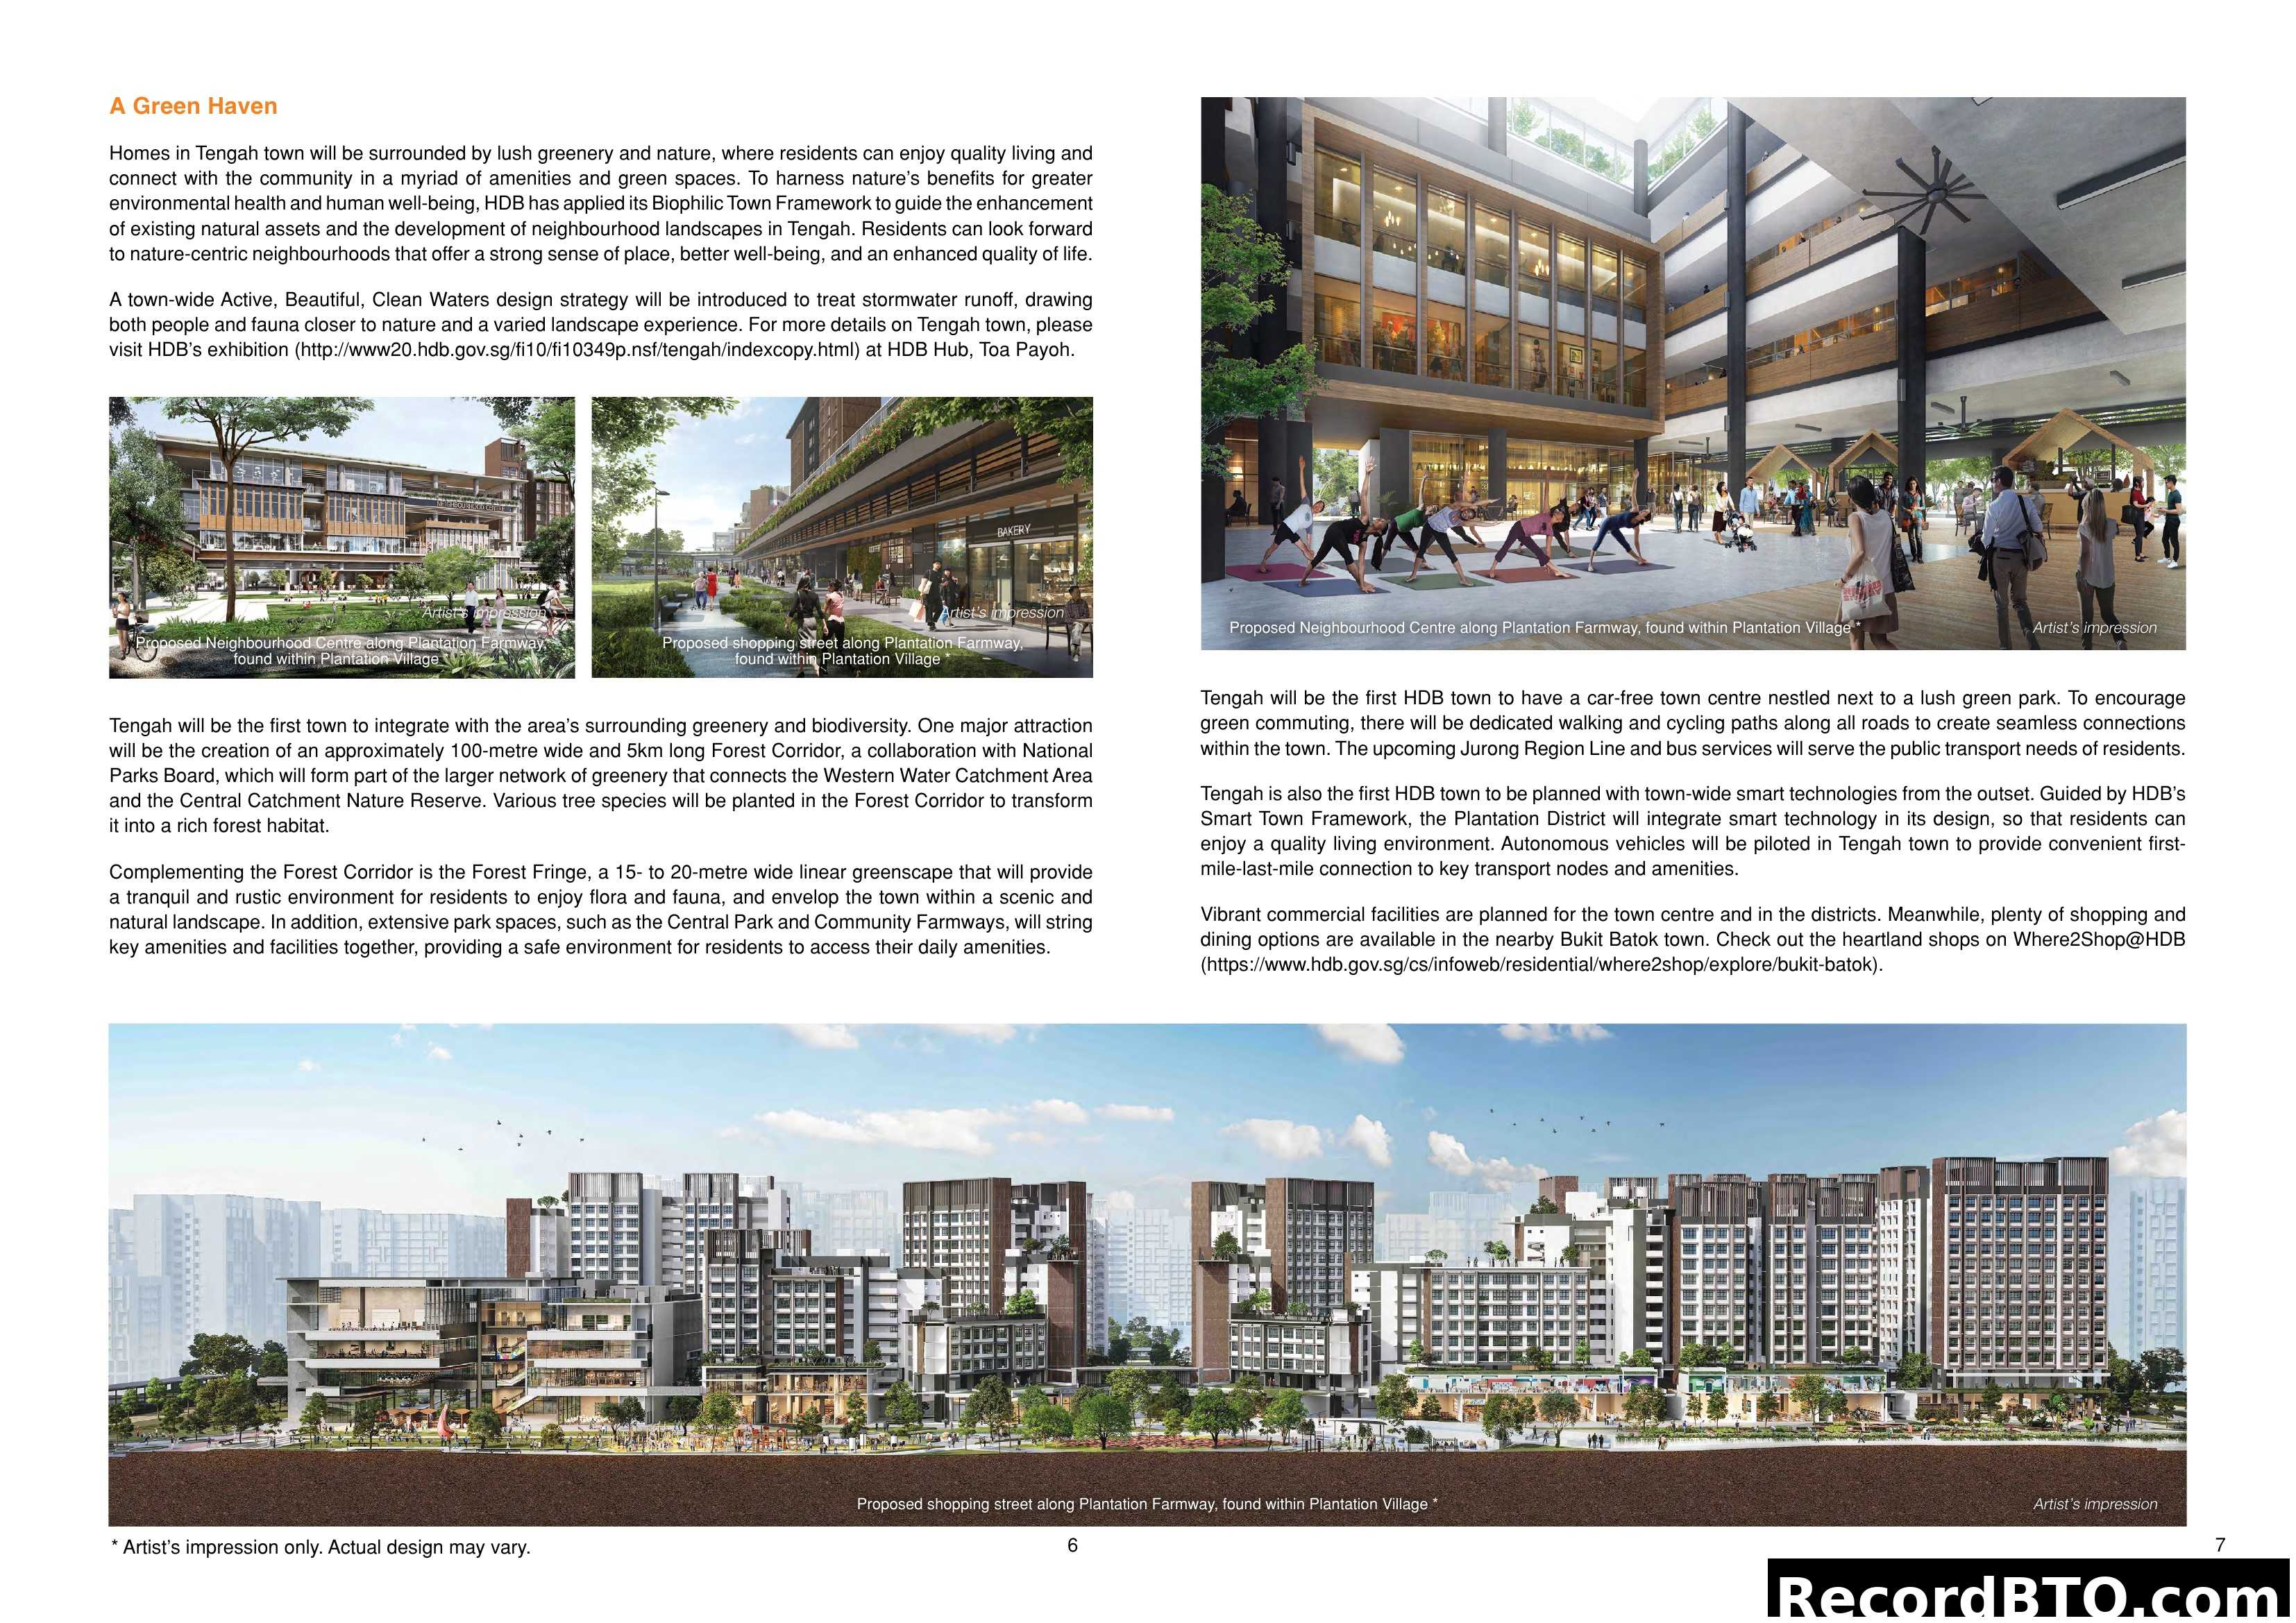
A Green Haven: Tengah Town's Green Features & Smart Living
This page details Tengah town's vision as 'A Green Haven', focusing on its integration with nature and sustainable living. It highlights the Biophilic Town Framework, the creation of a 5km Forest Corridor and Forest Fringe, and an Active, Beautiful, Clean Waters design strategy. The town will feature a car-free centre, smart technologies, and extensive green spaces, amenities, and transport options to ensure a high quality of life and a strong connection to nature for its residents.
Plantation Village Features & Amenities
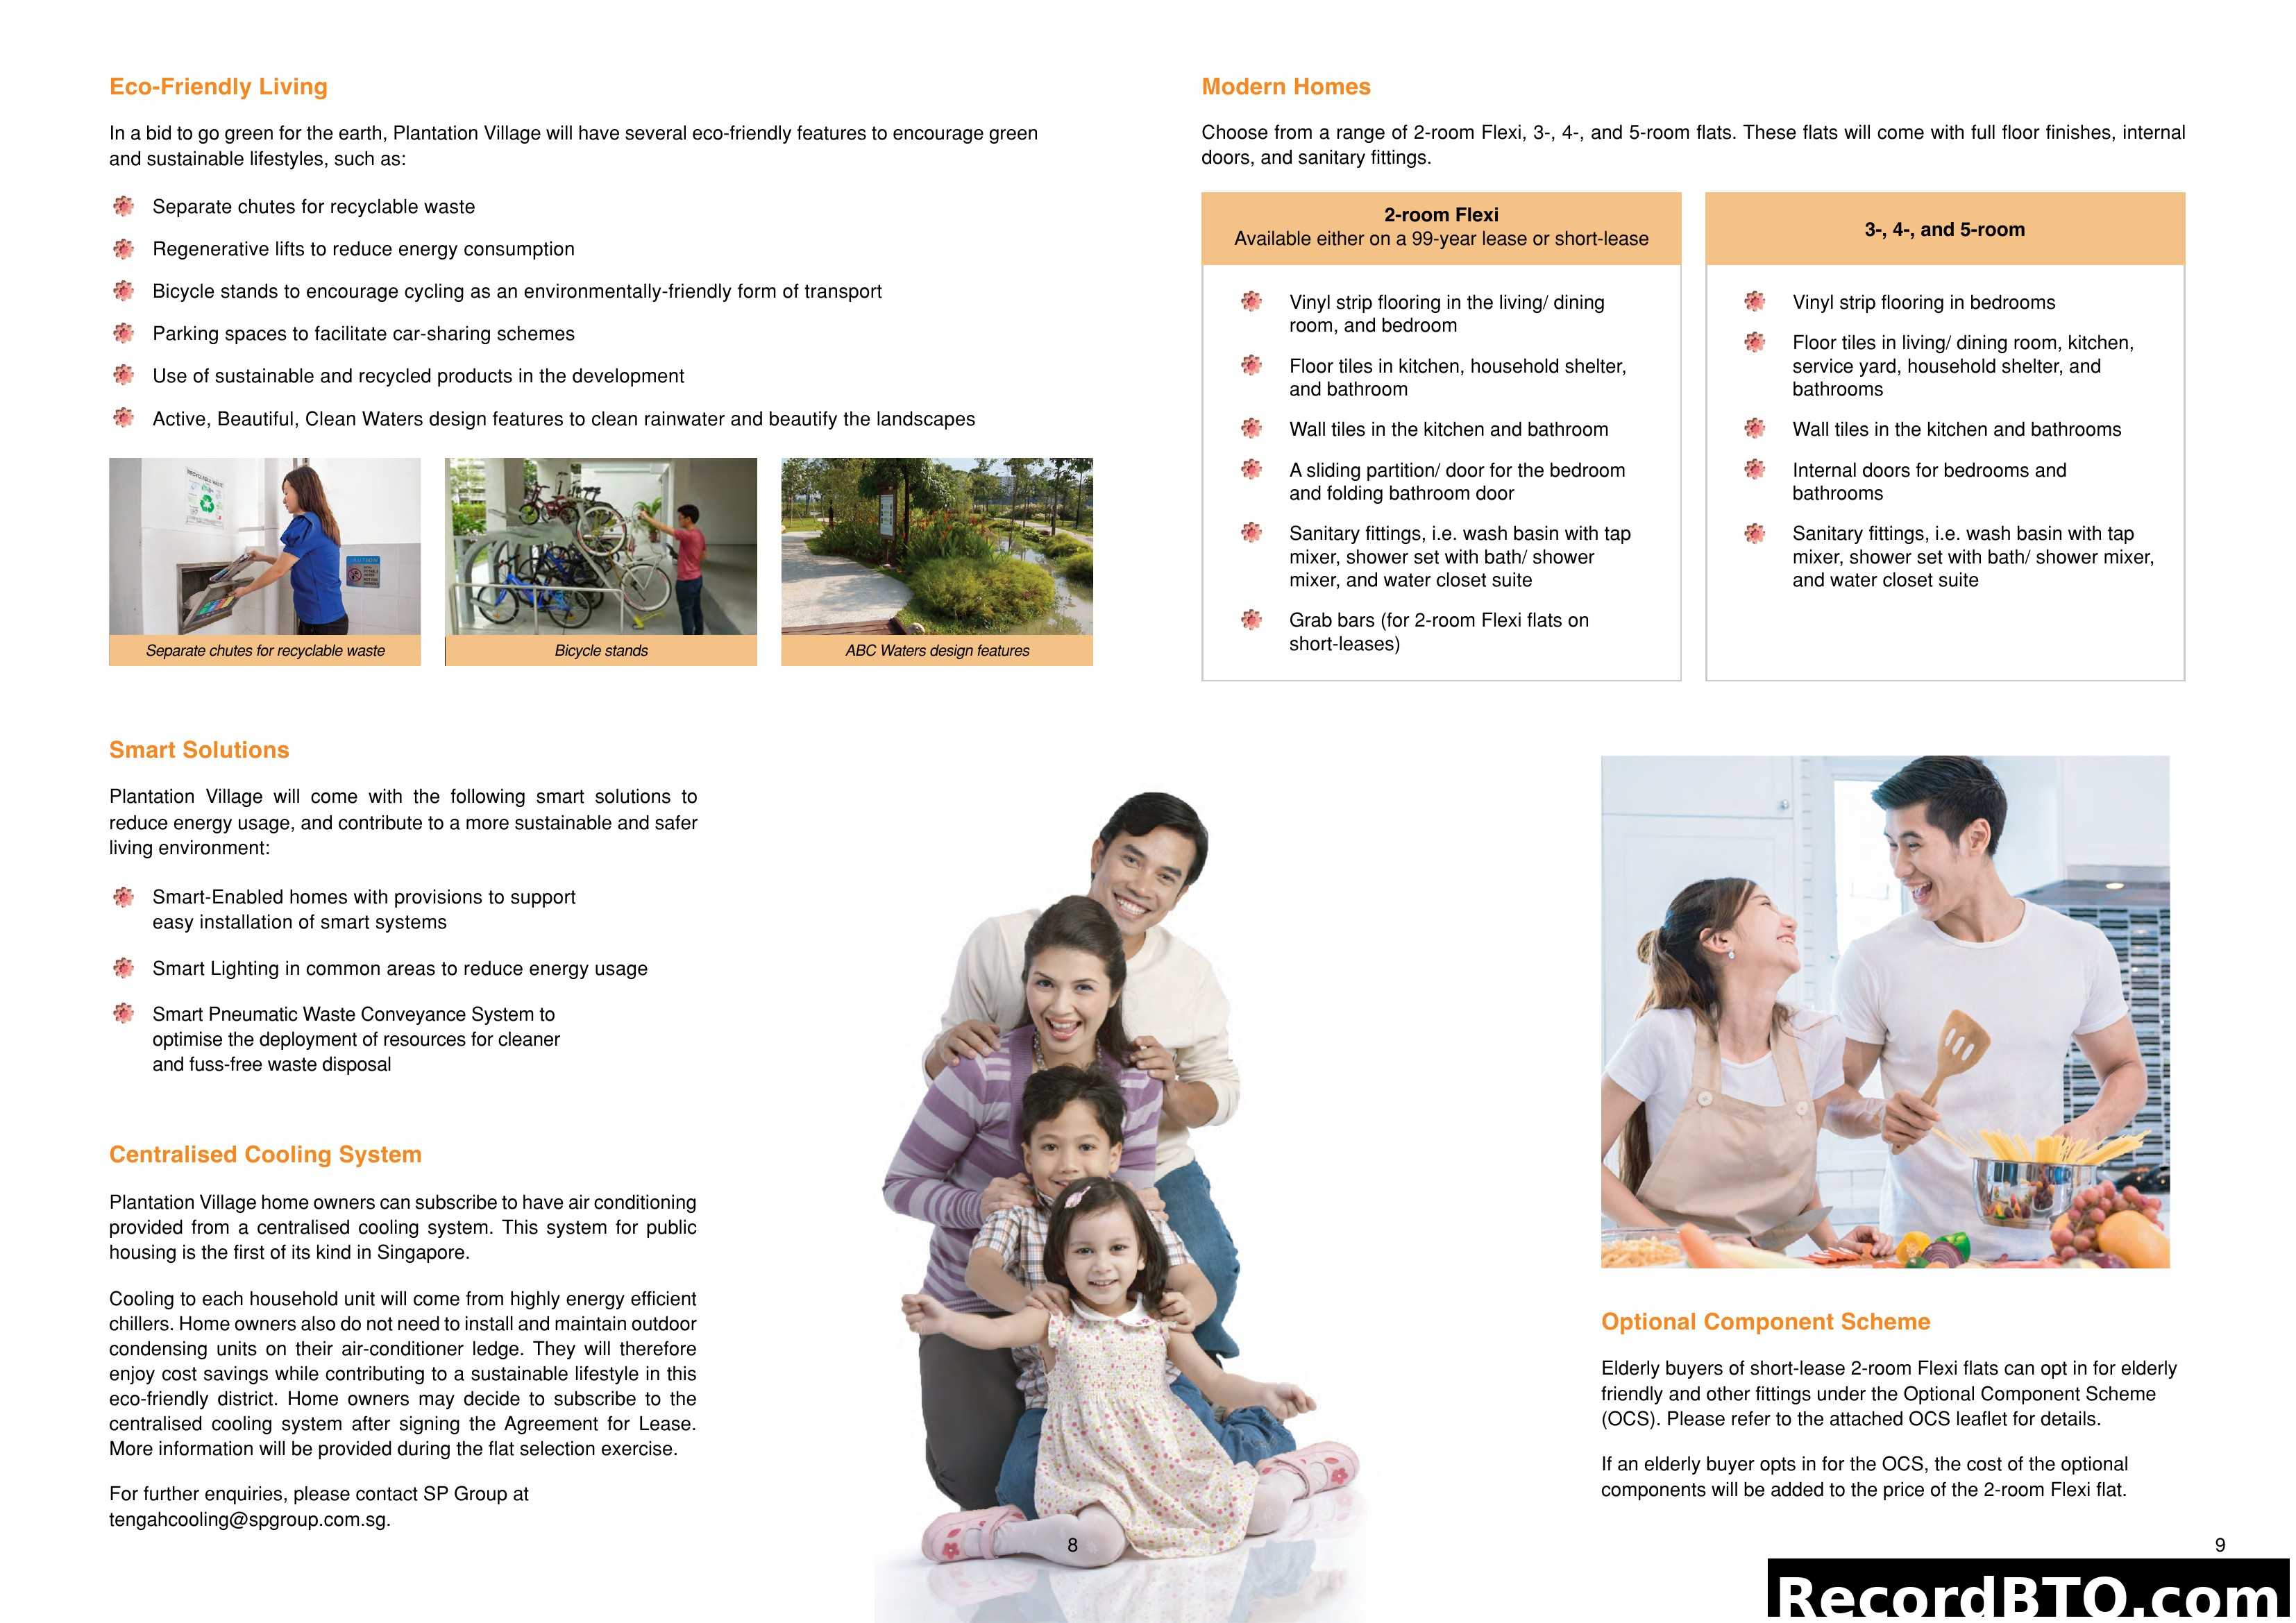
This page highlights the eco-friendly aspects of Plantation Village, such as separate recycling chutes and bicycle stands, alongside specifications for modern homes, including floor finishes and sanitary fittings for various flat types. It also details smart solutions, Singapore's first centralised cooling system for public housing, and an Optional Component Scheme catering to elderly buyers of 2-room Flexi flats, promoting sustainable and convenient living.
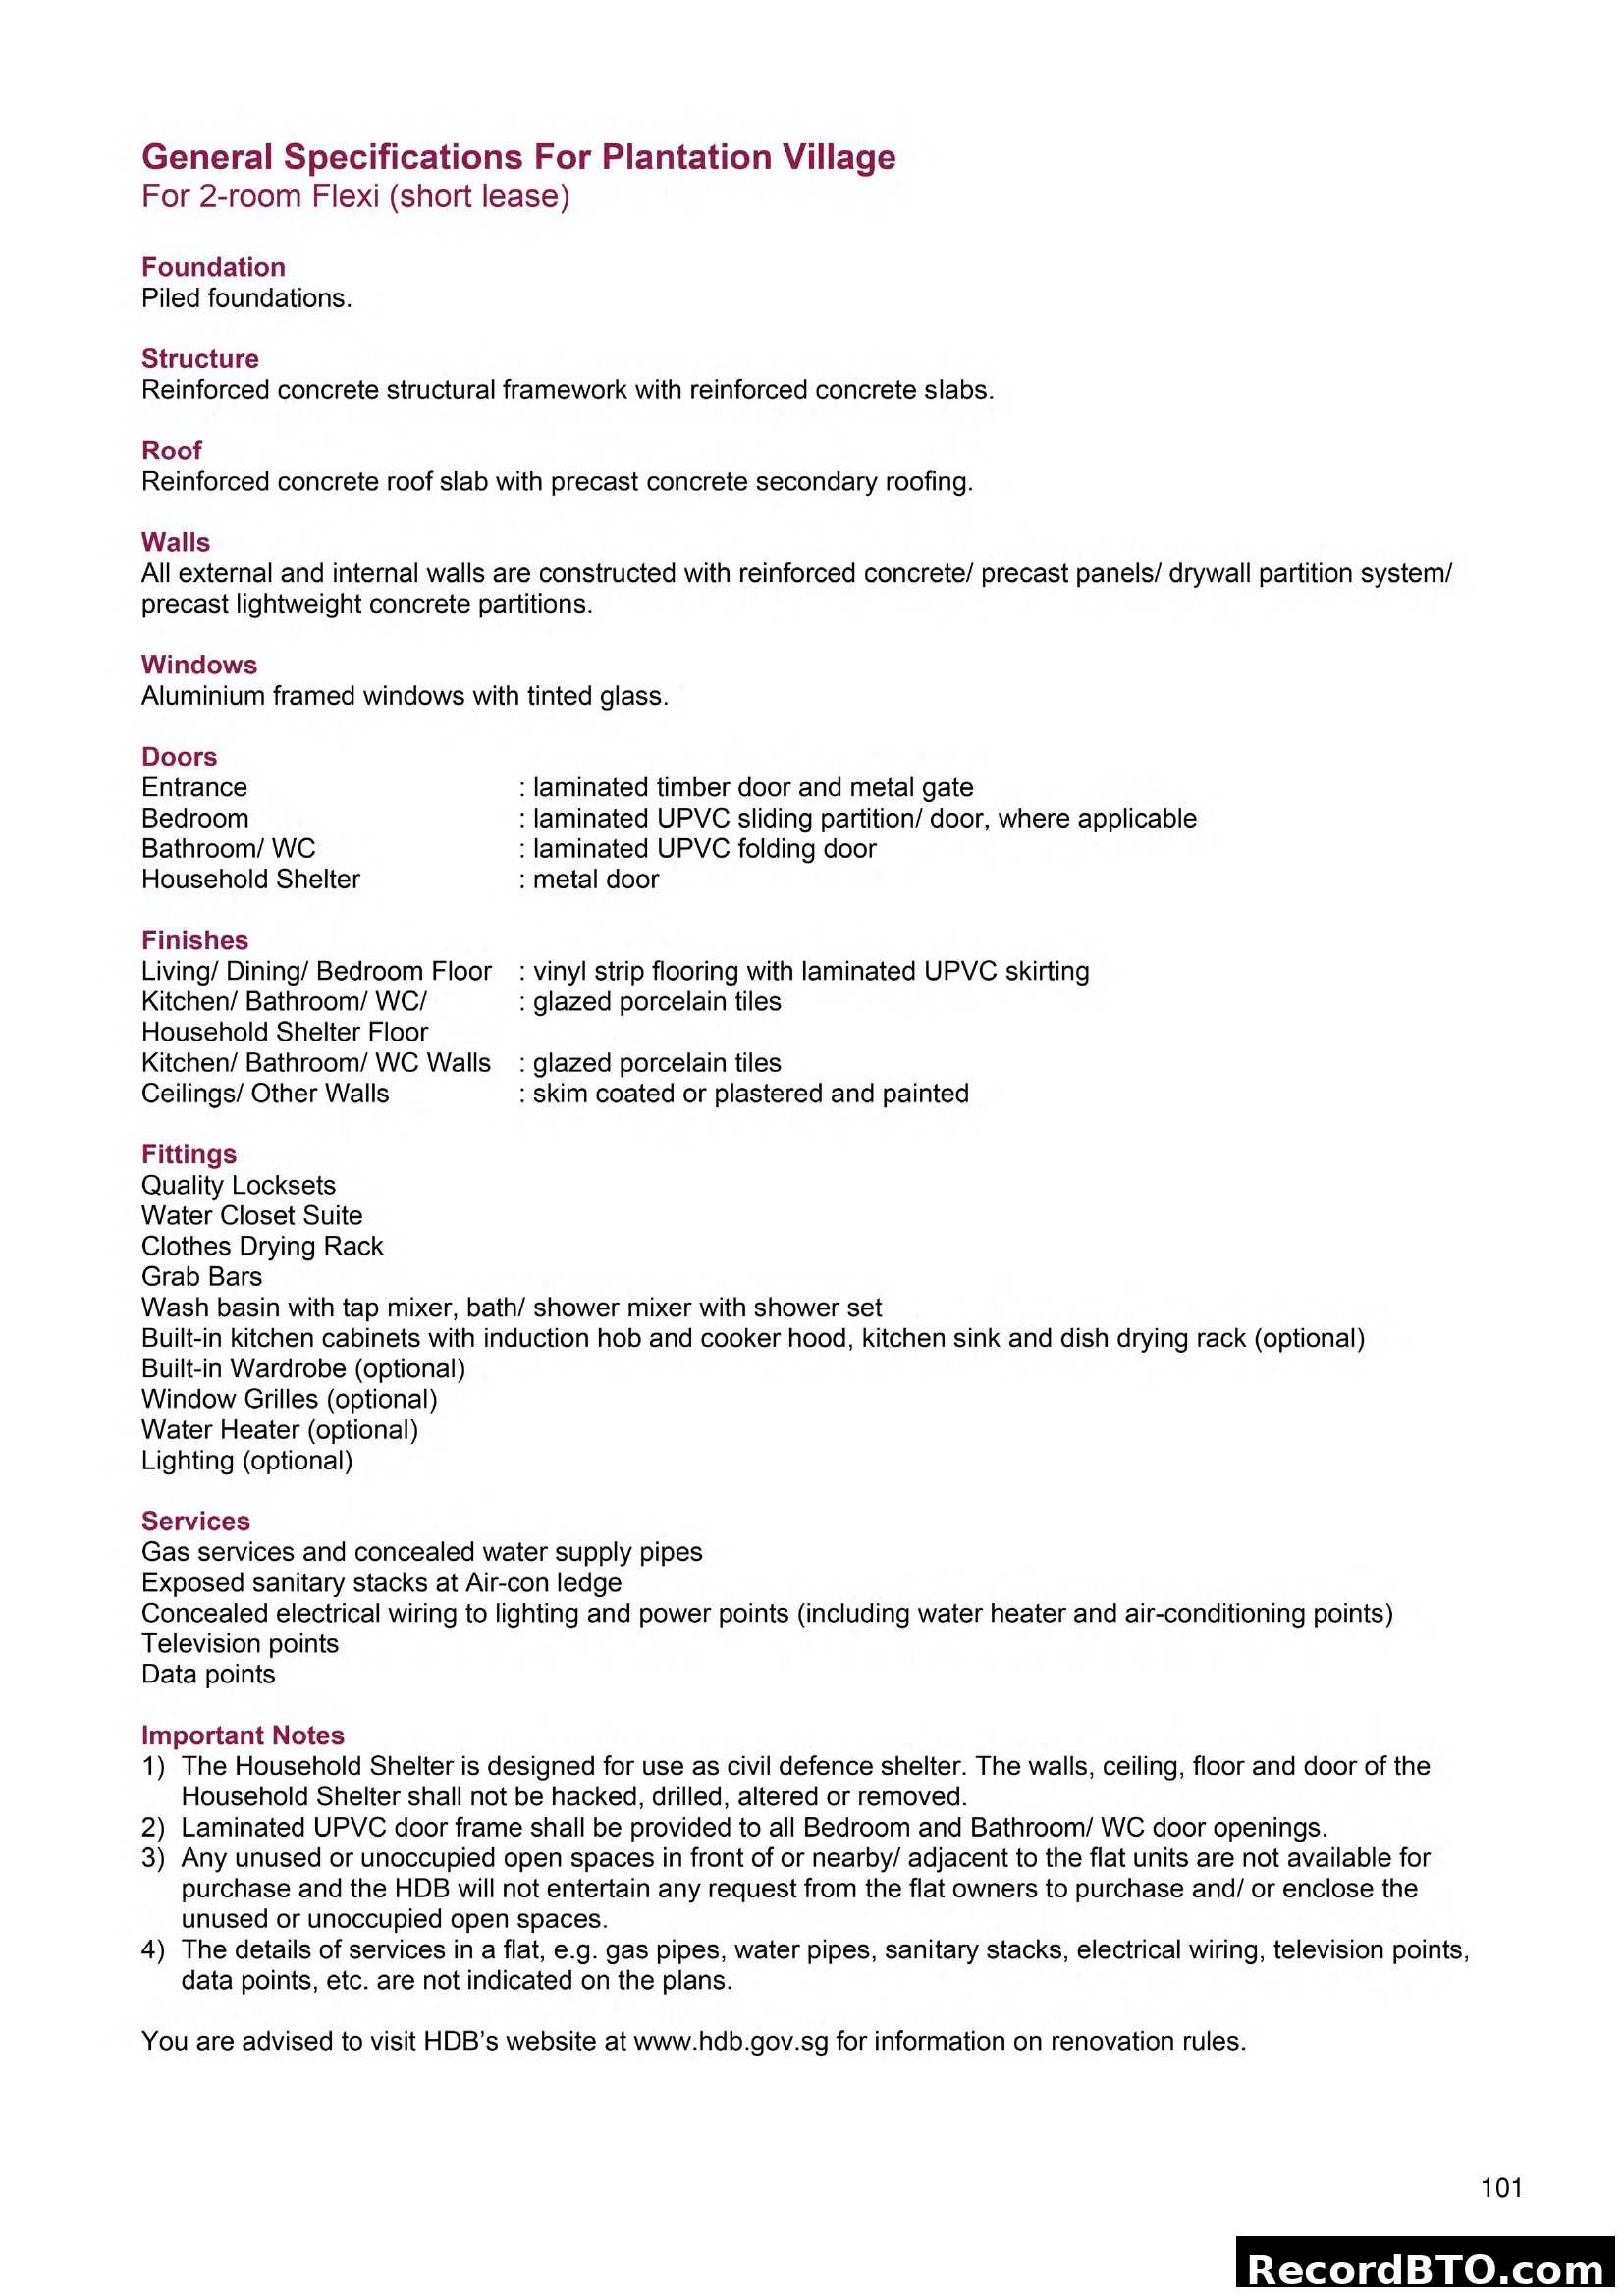
General Specifications: Plantation Village 2-room Flexi
This document outlines the general specifications for 2-room Flexi (short lease) units at Plantation Village. It covers foundation, structure, roof, walls, windows, doors, finishes, fittings, and services provided. Important notes regarding the Household Shelter, UPVC door frames, open spaces, and service details are also included. It's a textual list of building and unit features.
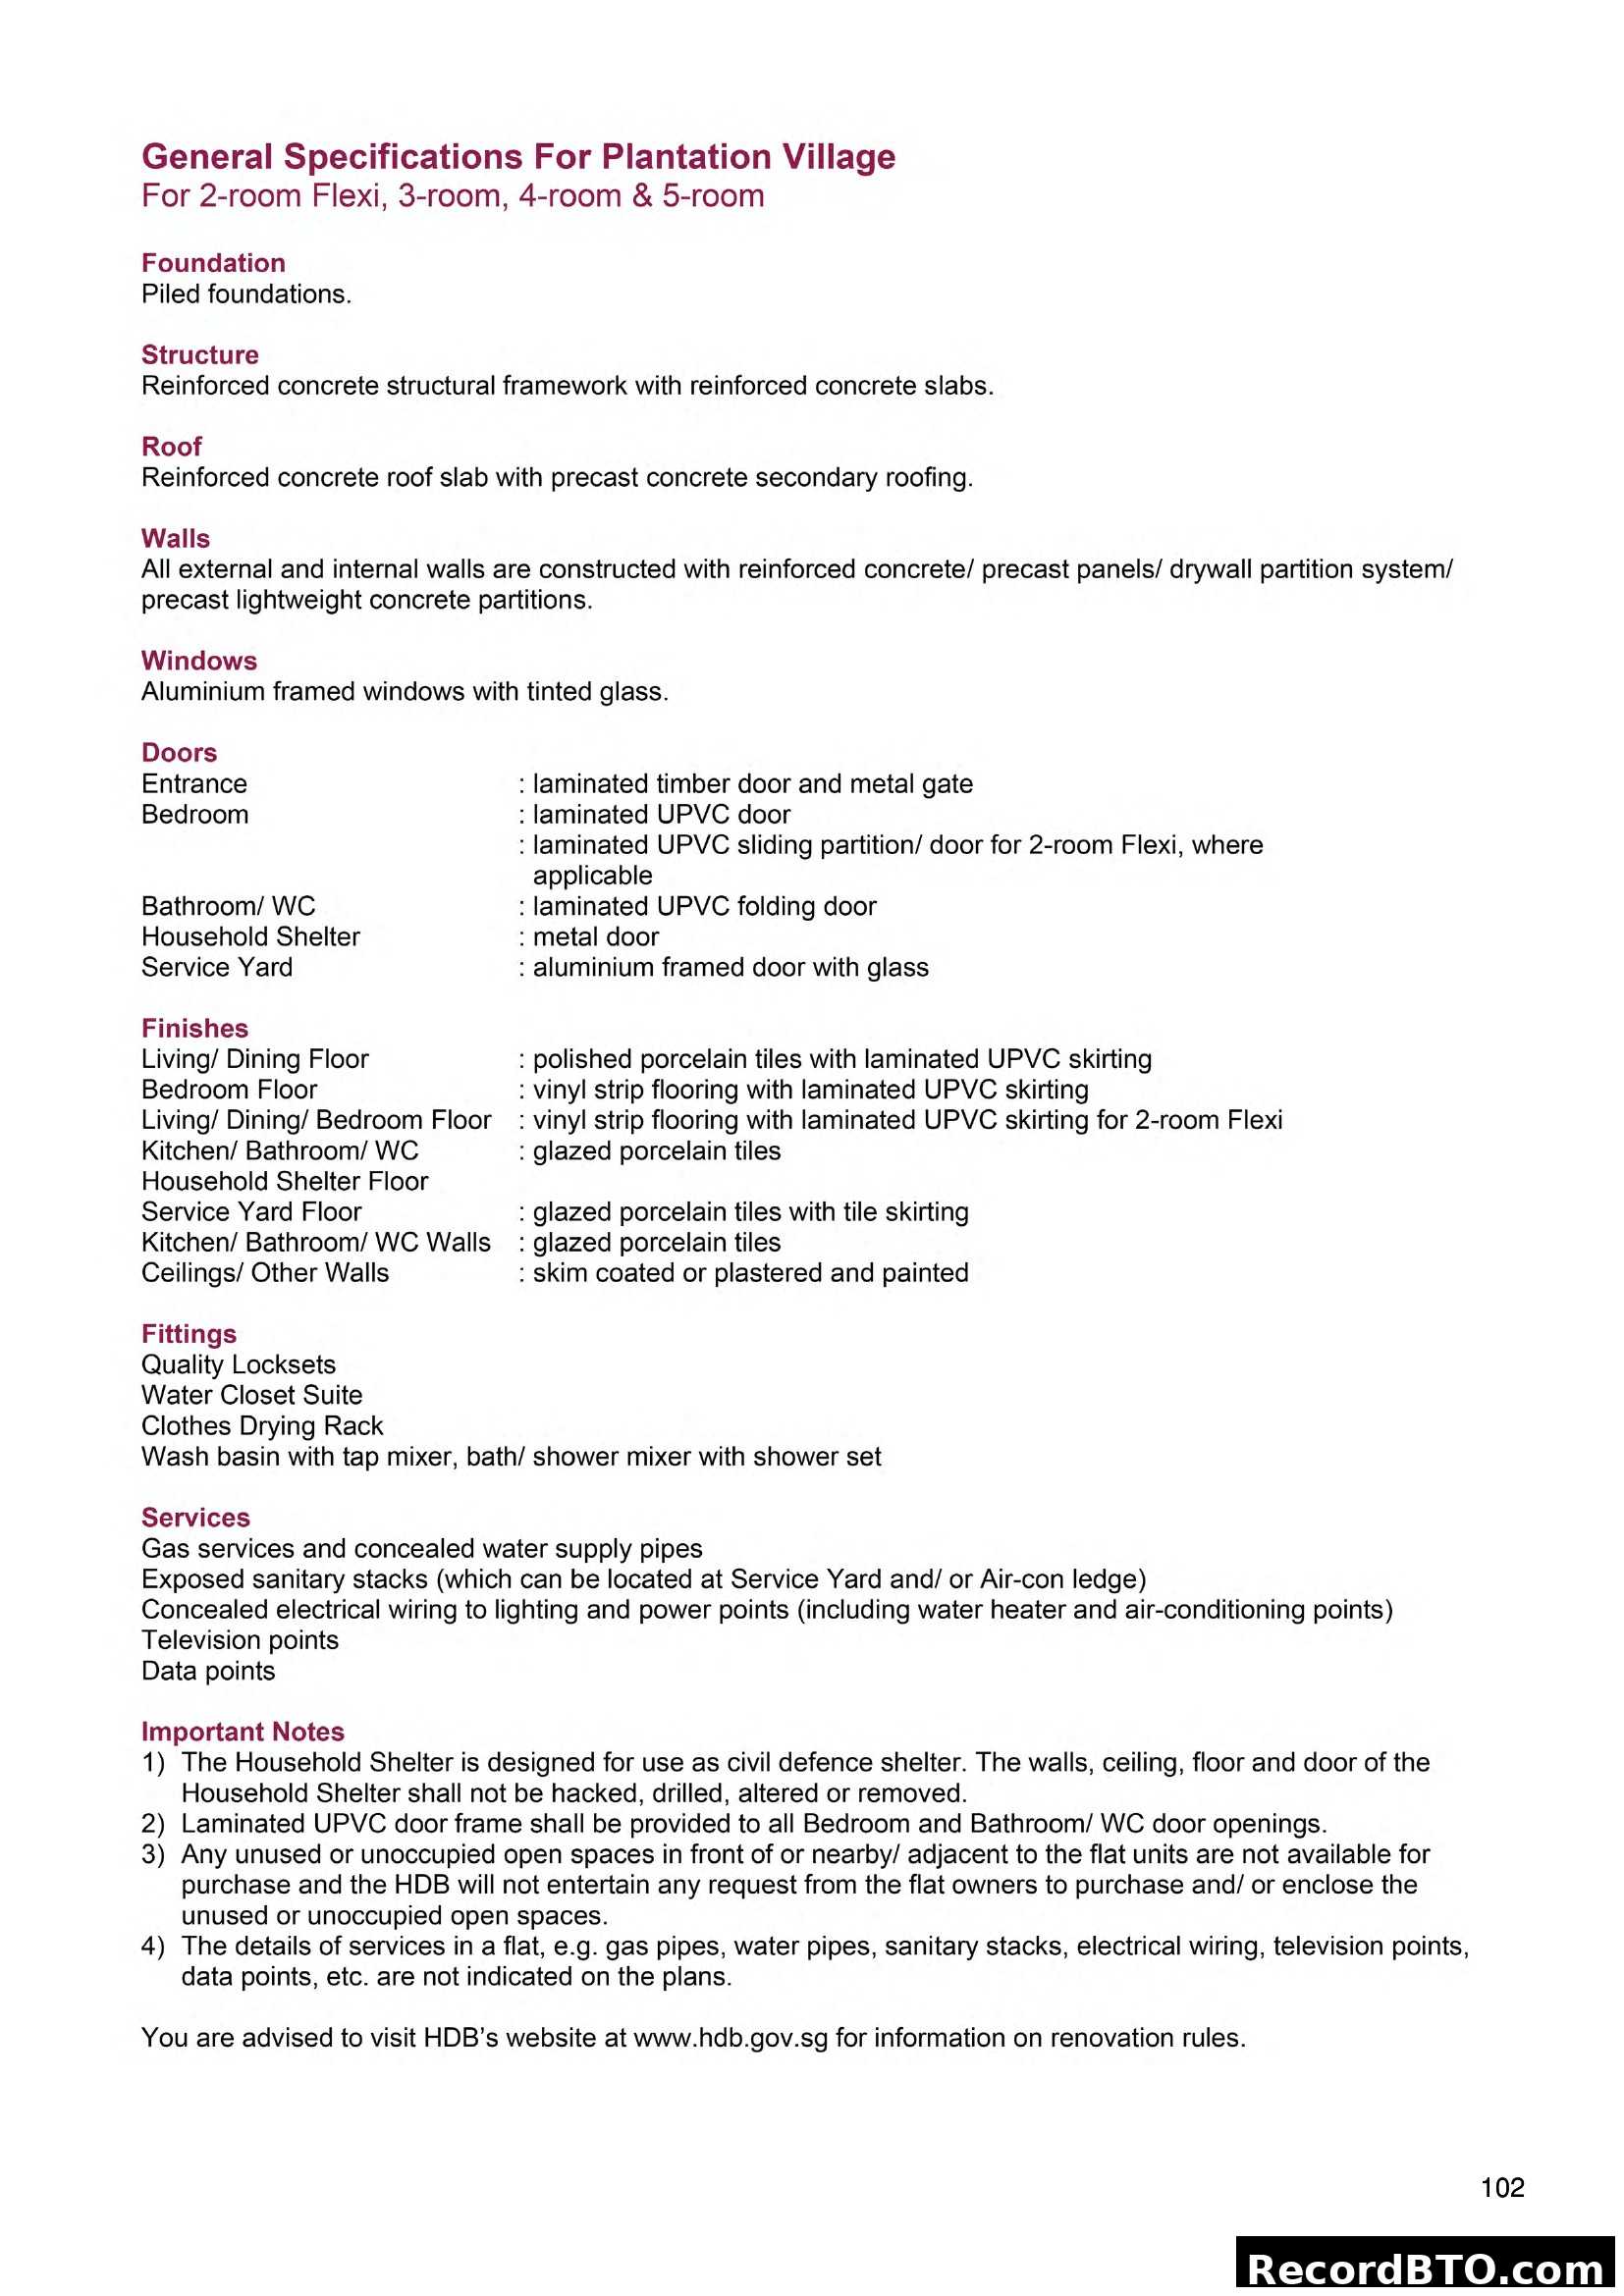
General Specifications - Plantation Village
This document outlines the general specifications for HDB flats in Plantation Village, covering 2-room Flexi, 3-room, 4-room, and 5-room units. It details aspects such as foundation, structure, roof, walls, windows, doors, various finishes (flooring, walls, ceilings), fittings, and services provided. Important notes regarding Household Shelters, door frames, open spaces, and service details are also included.
Disclaimer
This page outlines the disclaimer for the HDB BTO brochure. It clarifies that the information, maps, and visuals are for general guidance only and are not legally binding or factual representations. All project details, including dimensions, plans, amenities, and design features, are subject to change without prior notice or at HDB's sole discretion. HDB reserves the right to use common property for various facilities. The document also states that HDB does not warrant the accuracy of the information and advises readers to consult relevant authorities for complete details.
HDB Copyright and Logo Page
This page from an HDB BTO brochure features a plain pink background. At the bottom right, it displays the Housing & Development Board's logo, which includes an upward-pointing arrow within a house outline. Beneath the logo, copyright information is provided, stating 'Copyright © Housing & Development Board All rights reserved. December 2019'. This page serves as an introductory or concluding page, indicating publication details and ownership.
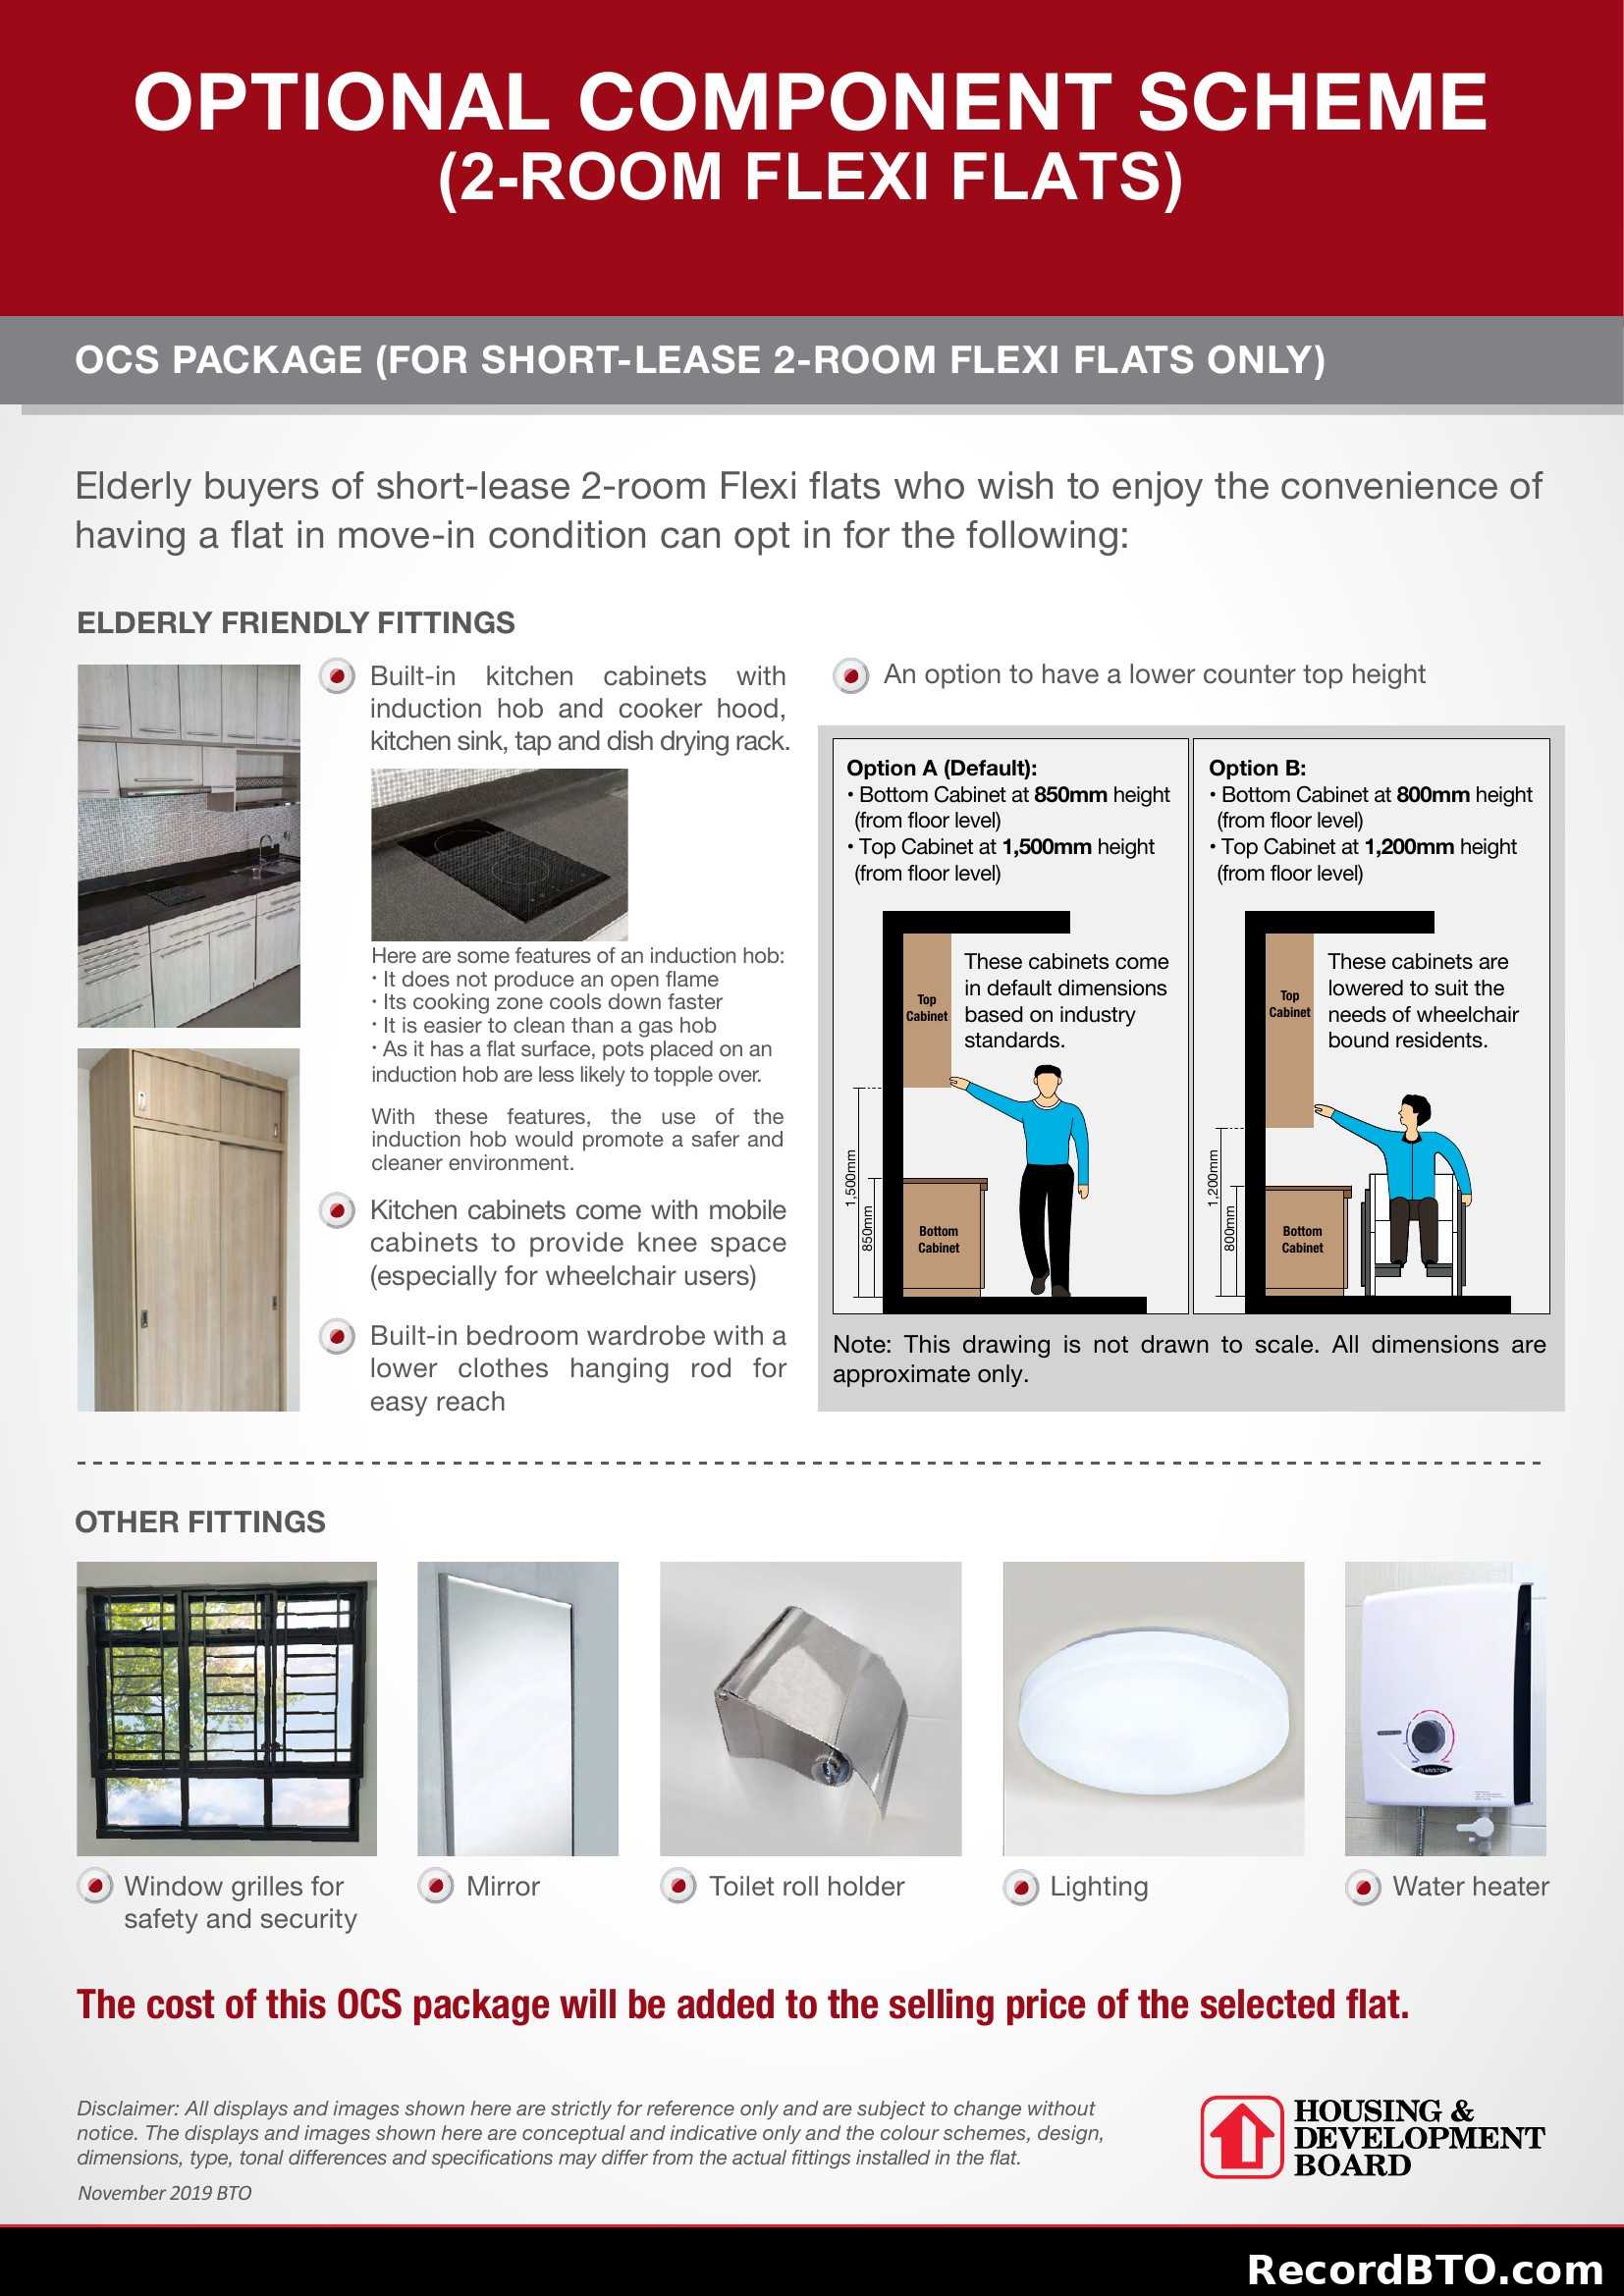
Optional Component Scheme for 2-Room Flexi Flats
This HDB BTO brochure page introduces the Optional Component Scheme (OCS) for 2-room Flexi flats. It explains that OCS provides convenience for buyers, with its cost added to the flat's selling price, and applies to specific Tengah projects. The page outlines standard inclusions for Flexi flats, such as floor finishes, wall tiles, internal doors, and sanitary fittings. It highlights that grab bars will be installed in short-lease flats for elderly residents. The page displays images of typical sanitary fittings and grab bars, and directs users to the next page for further OCS package details.
Optional Component Scheme (2-Room Flexi Flats)
This HDB BTO brochure page outlines an Optional Component Scheme (OCS) package for elderly buyers of short-lease 2-room Flexi flats. It details elderly-friendly fittings, including kitchen cabinets with adjustable heights (default and wheelchair-friendly options), an induction hob, mobile kitchen cabinets, and a low-rod wardrobe. Additional fittings like window grilles, a mirror, toilet roll holder, lighting, and a water heater are also included. The package cost is added to the flat's selling price.
Tip: Click on any page to jump directly to that brochure page
Photo Gallery
102 photos
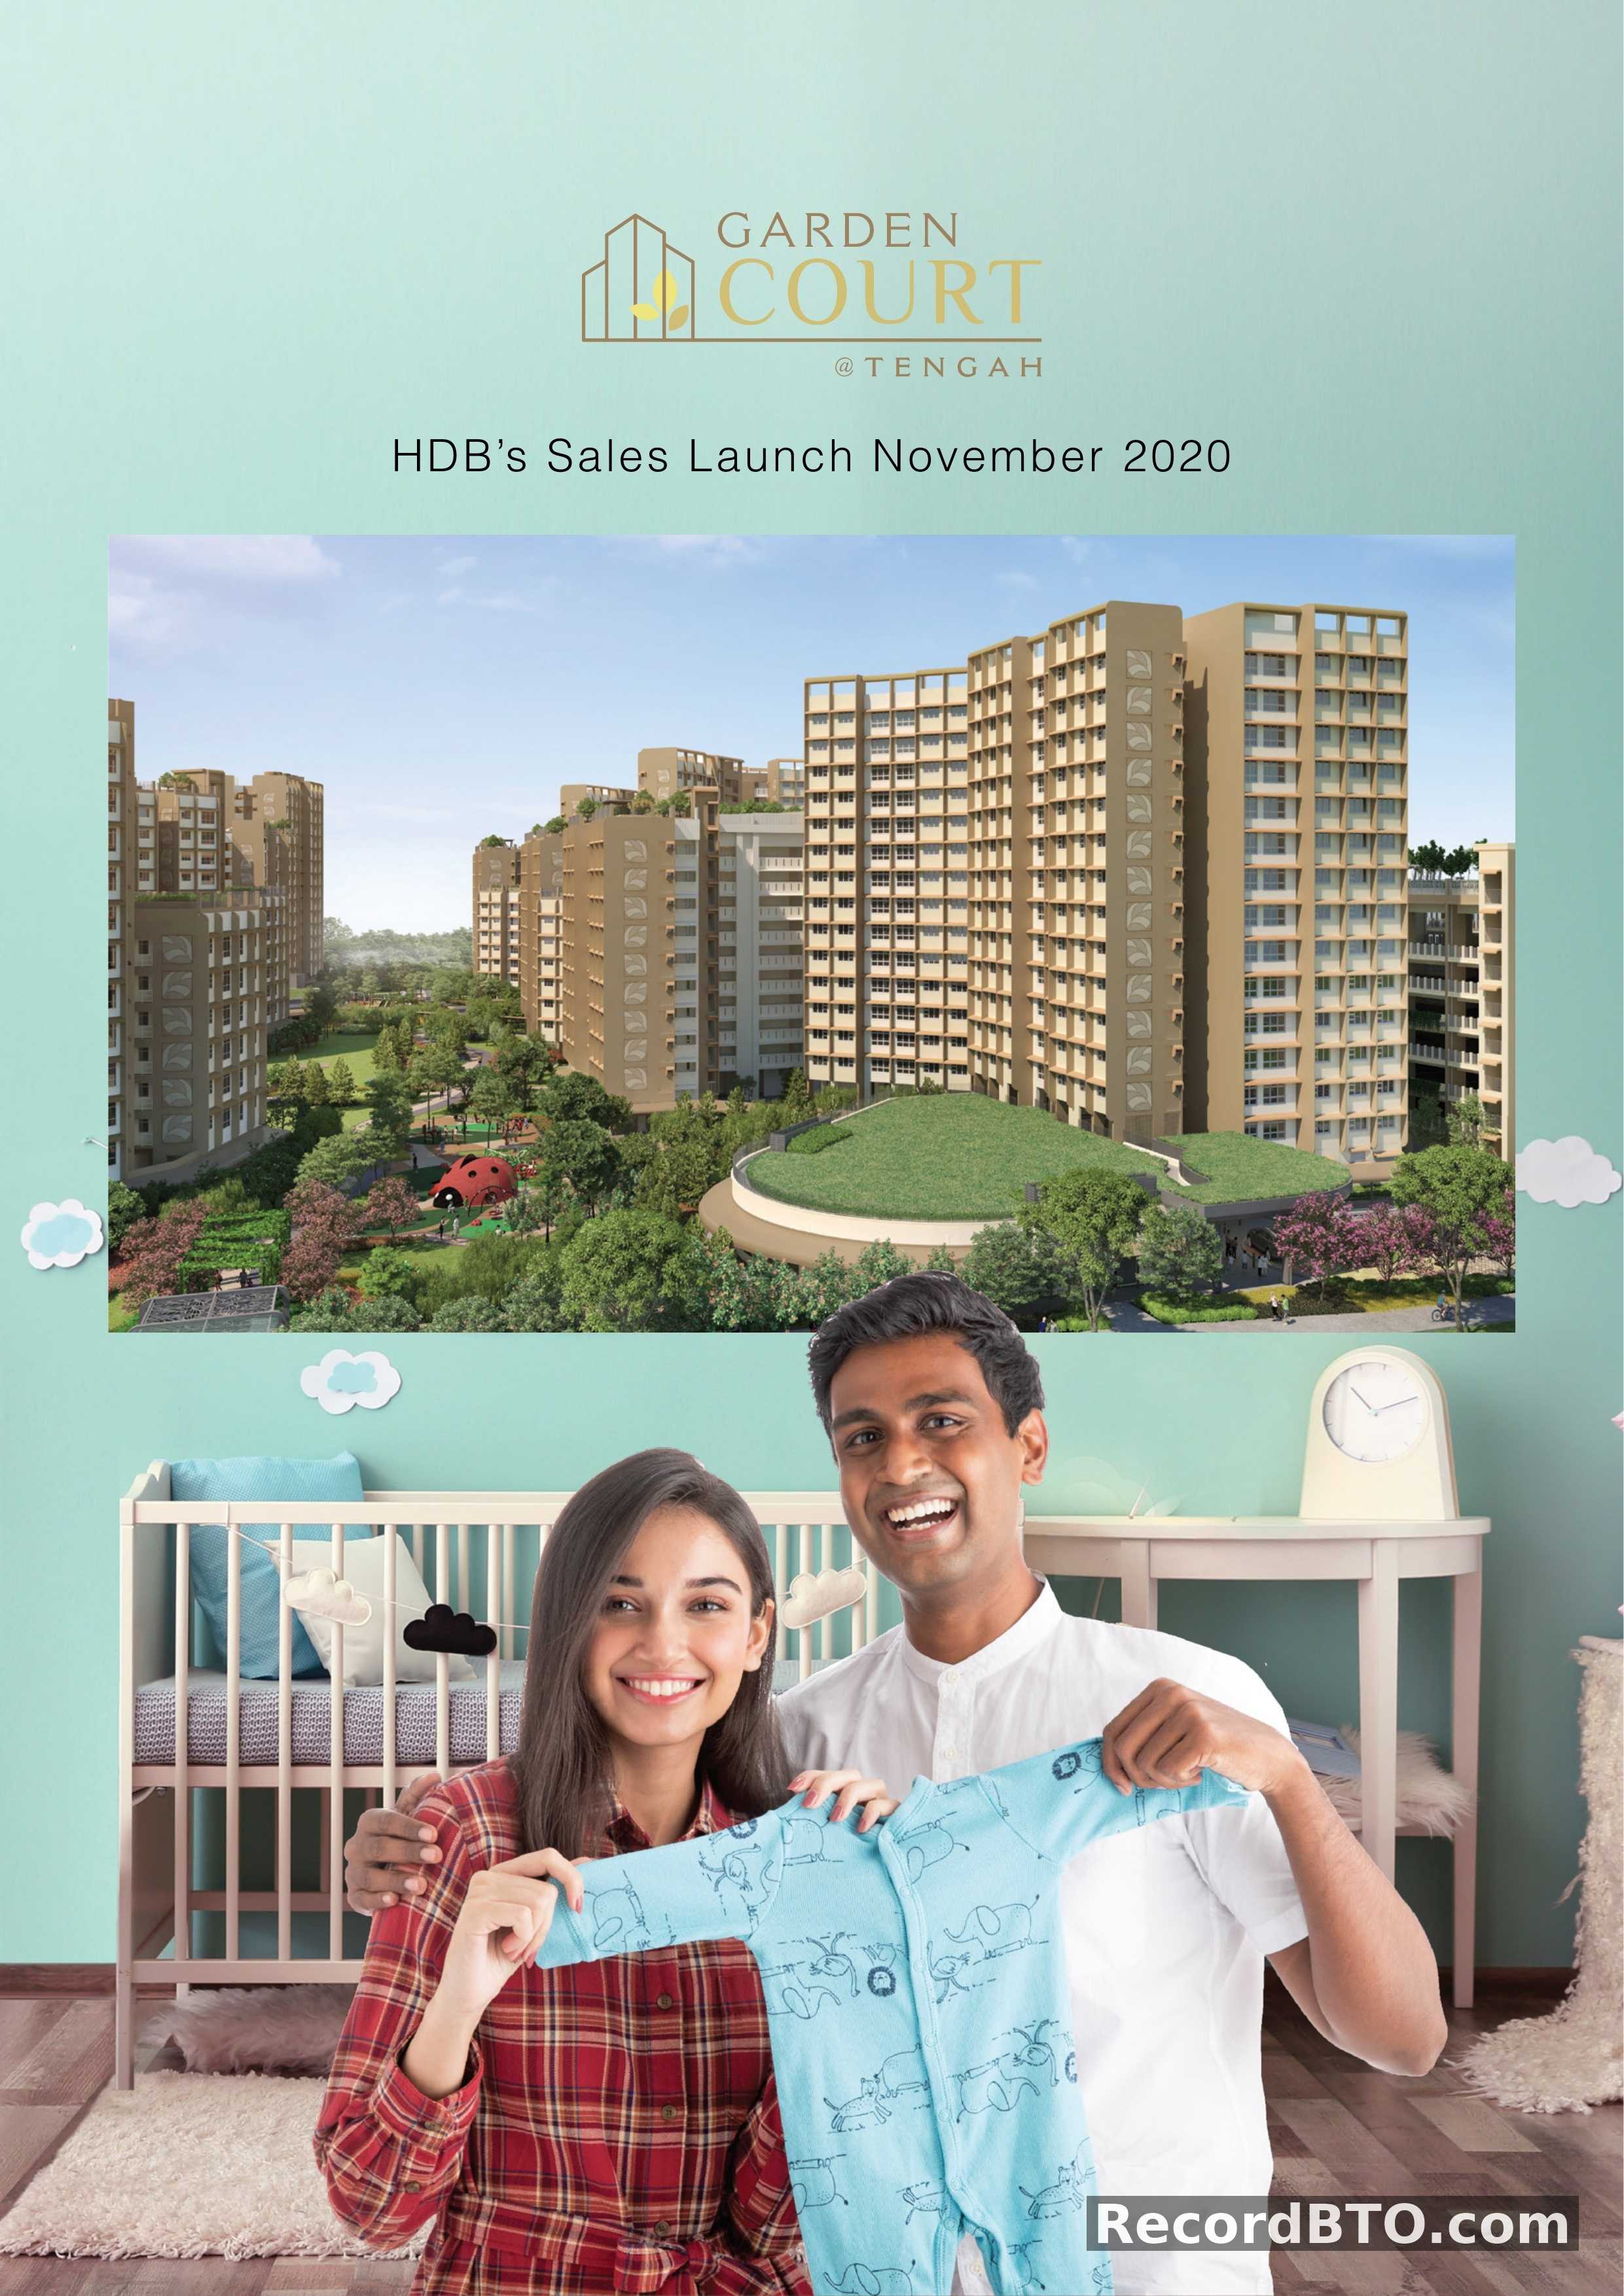
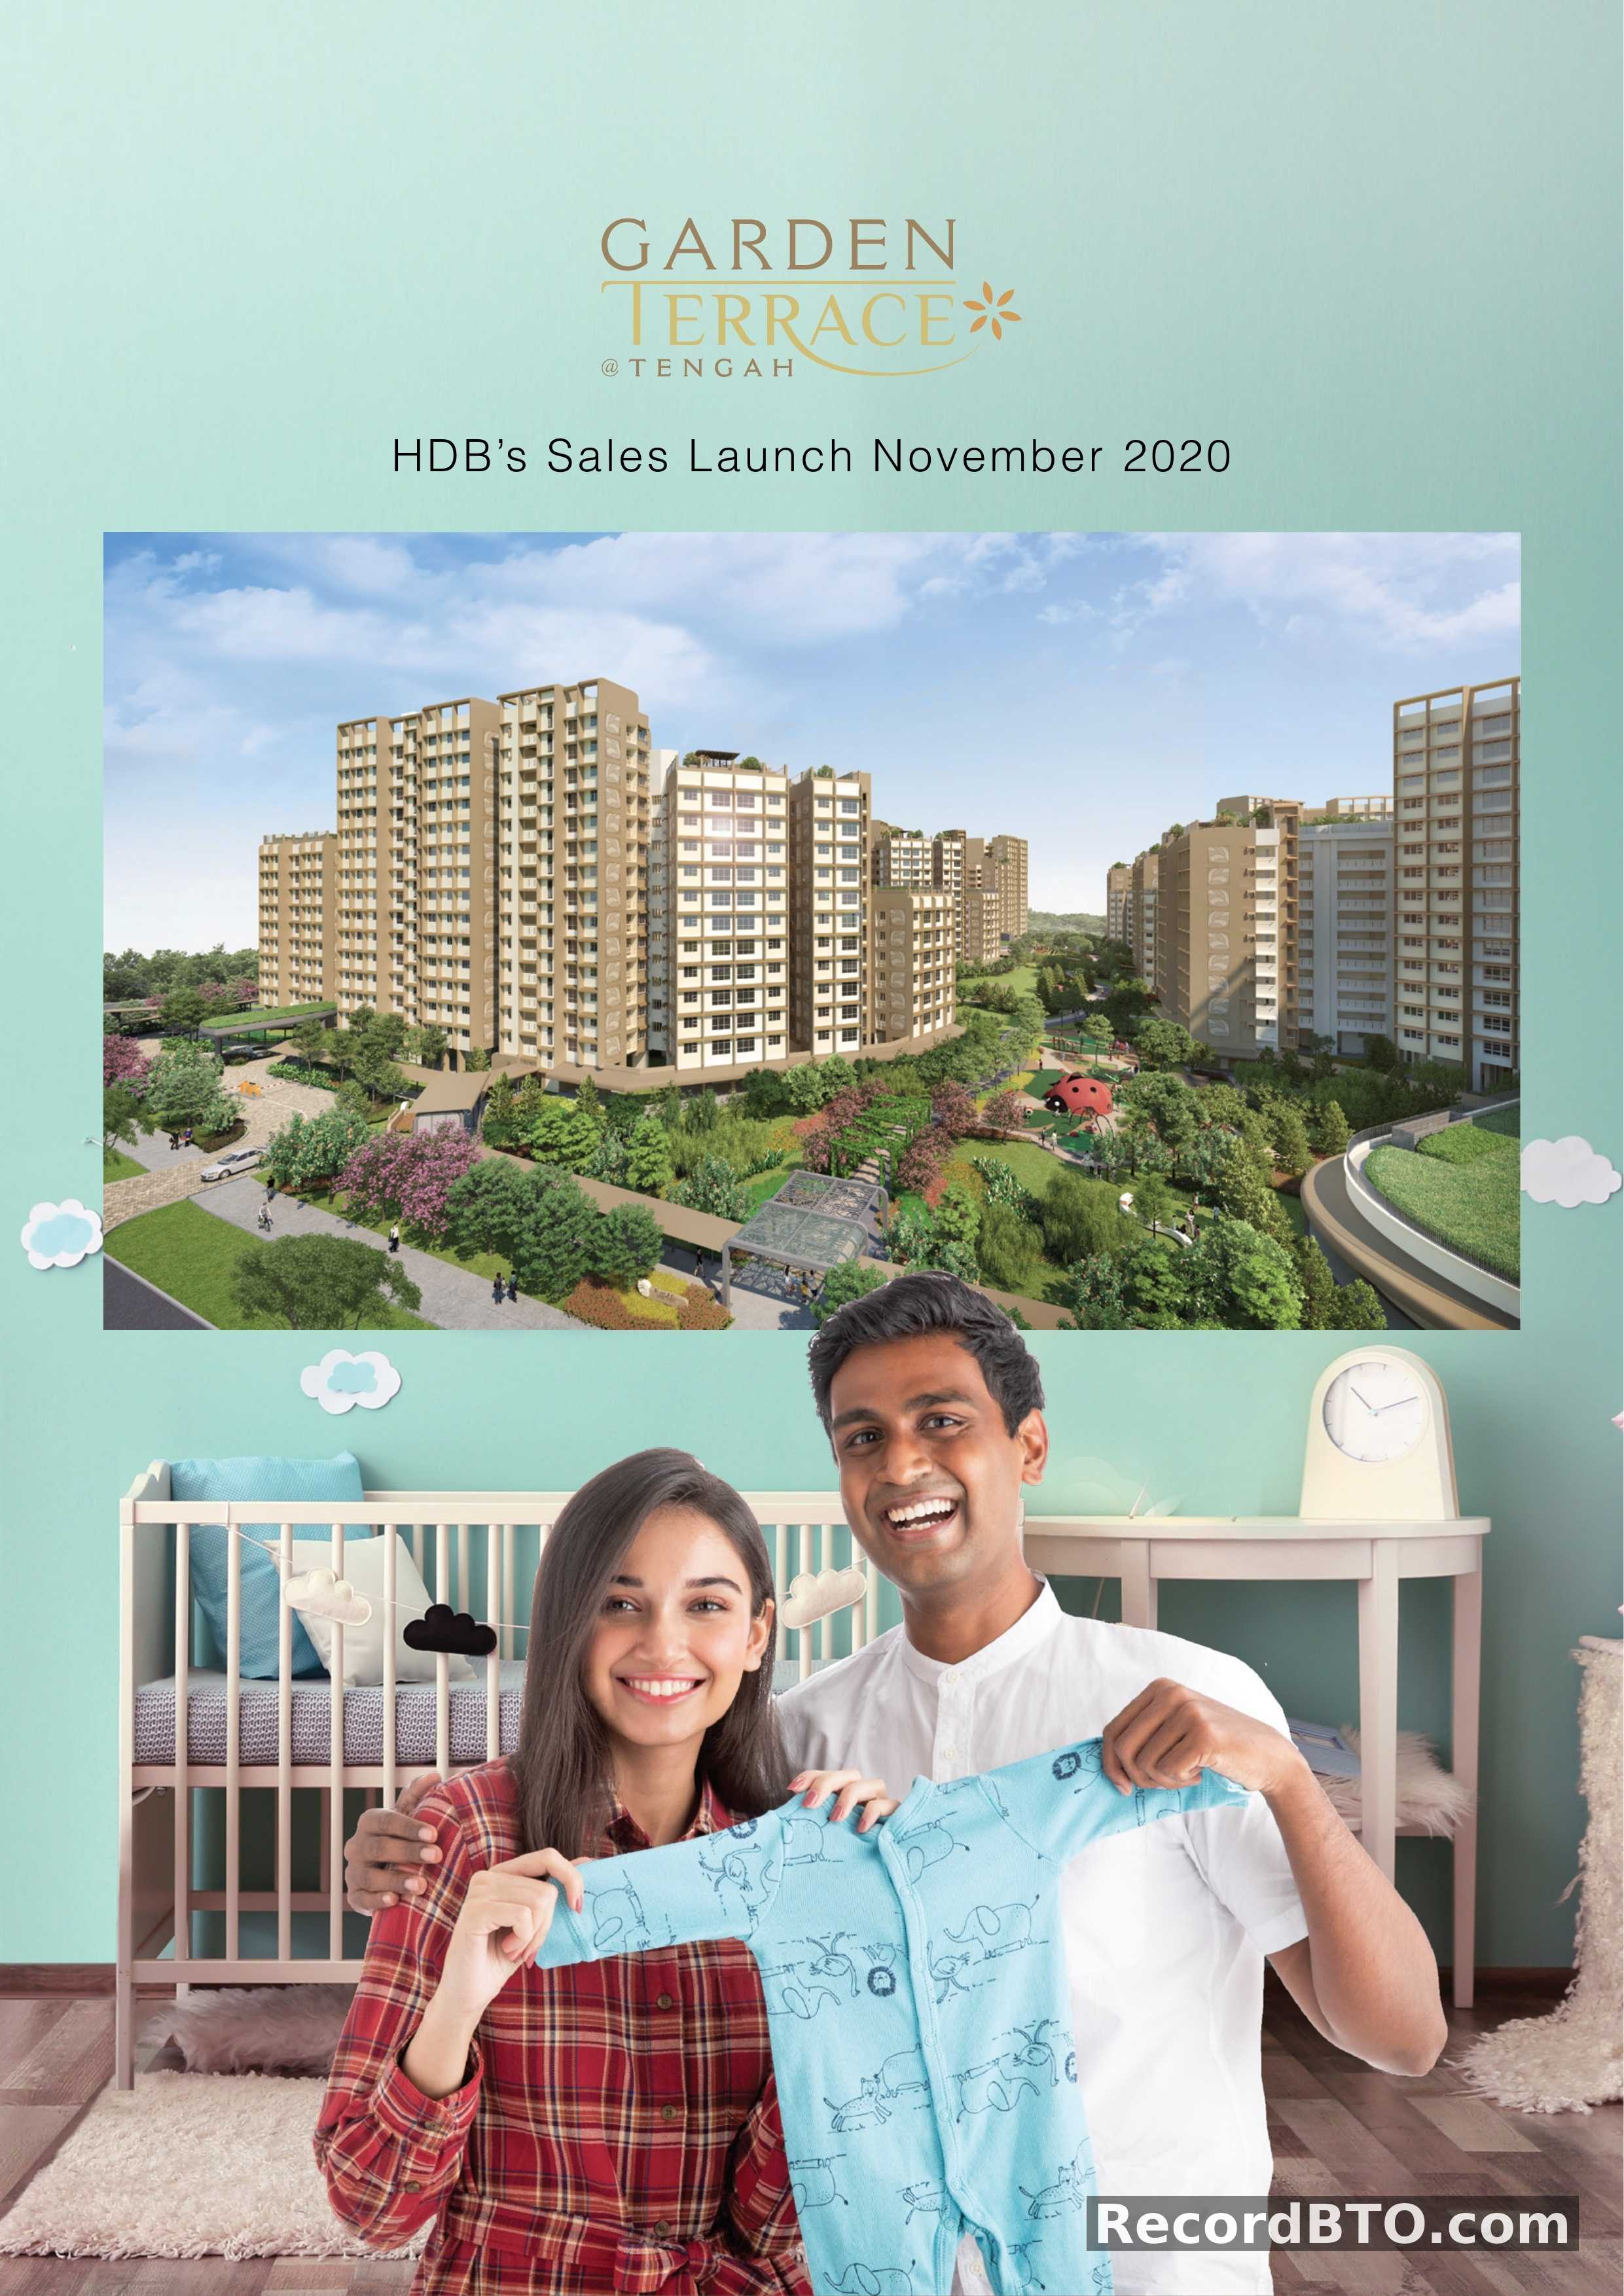
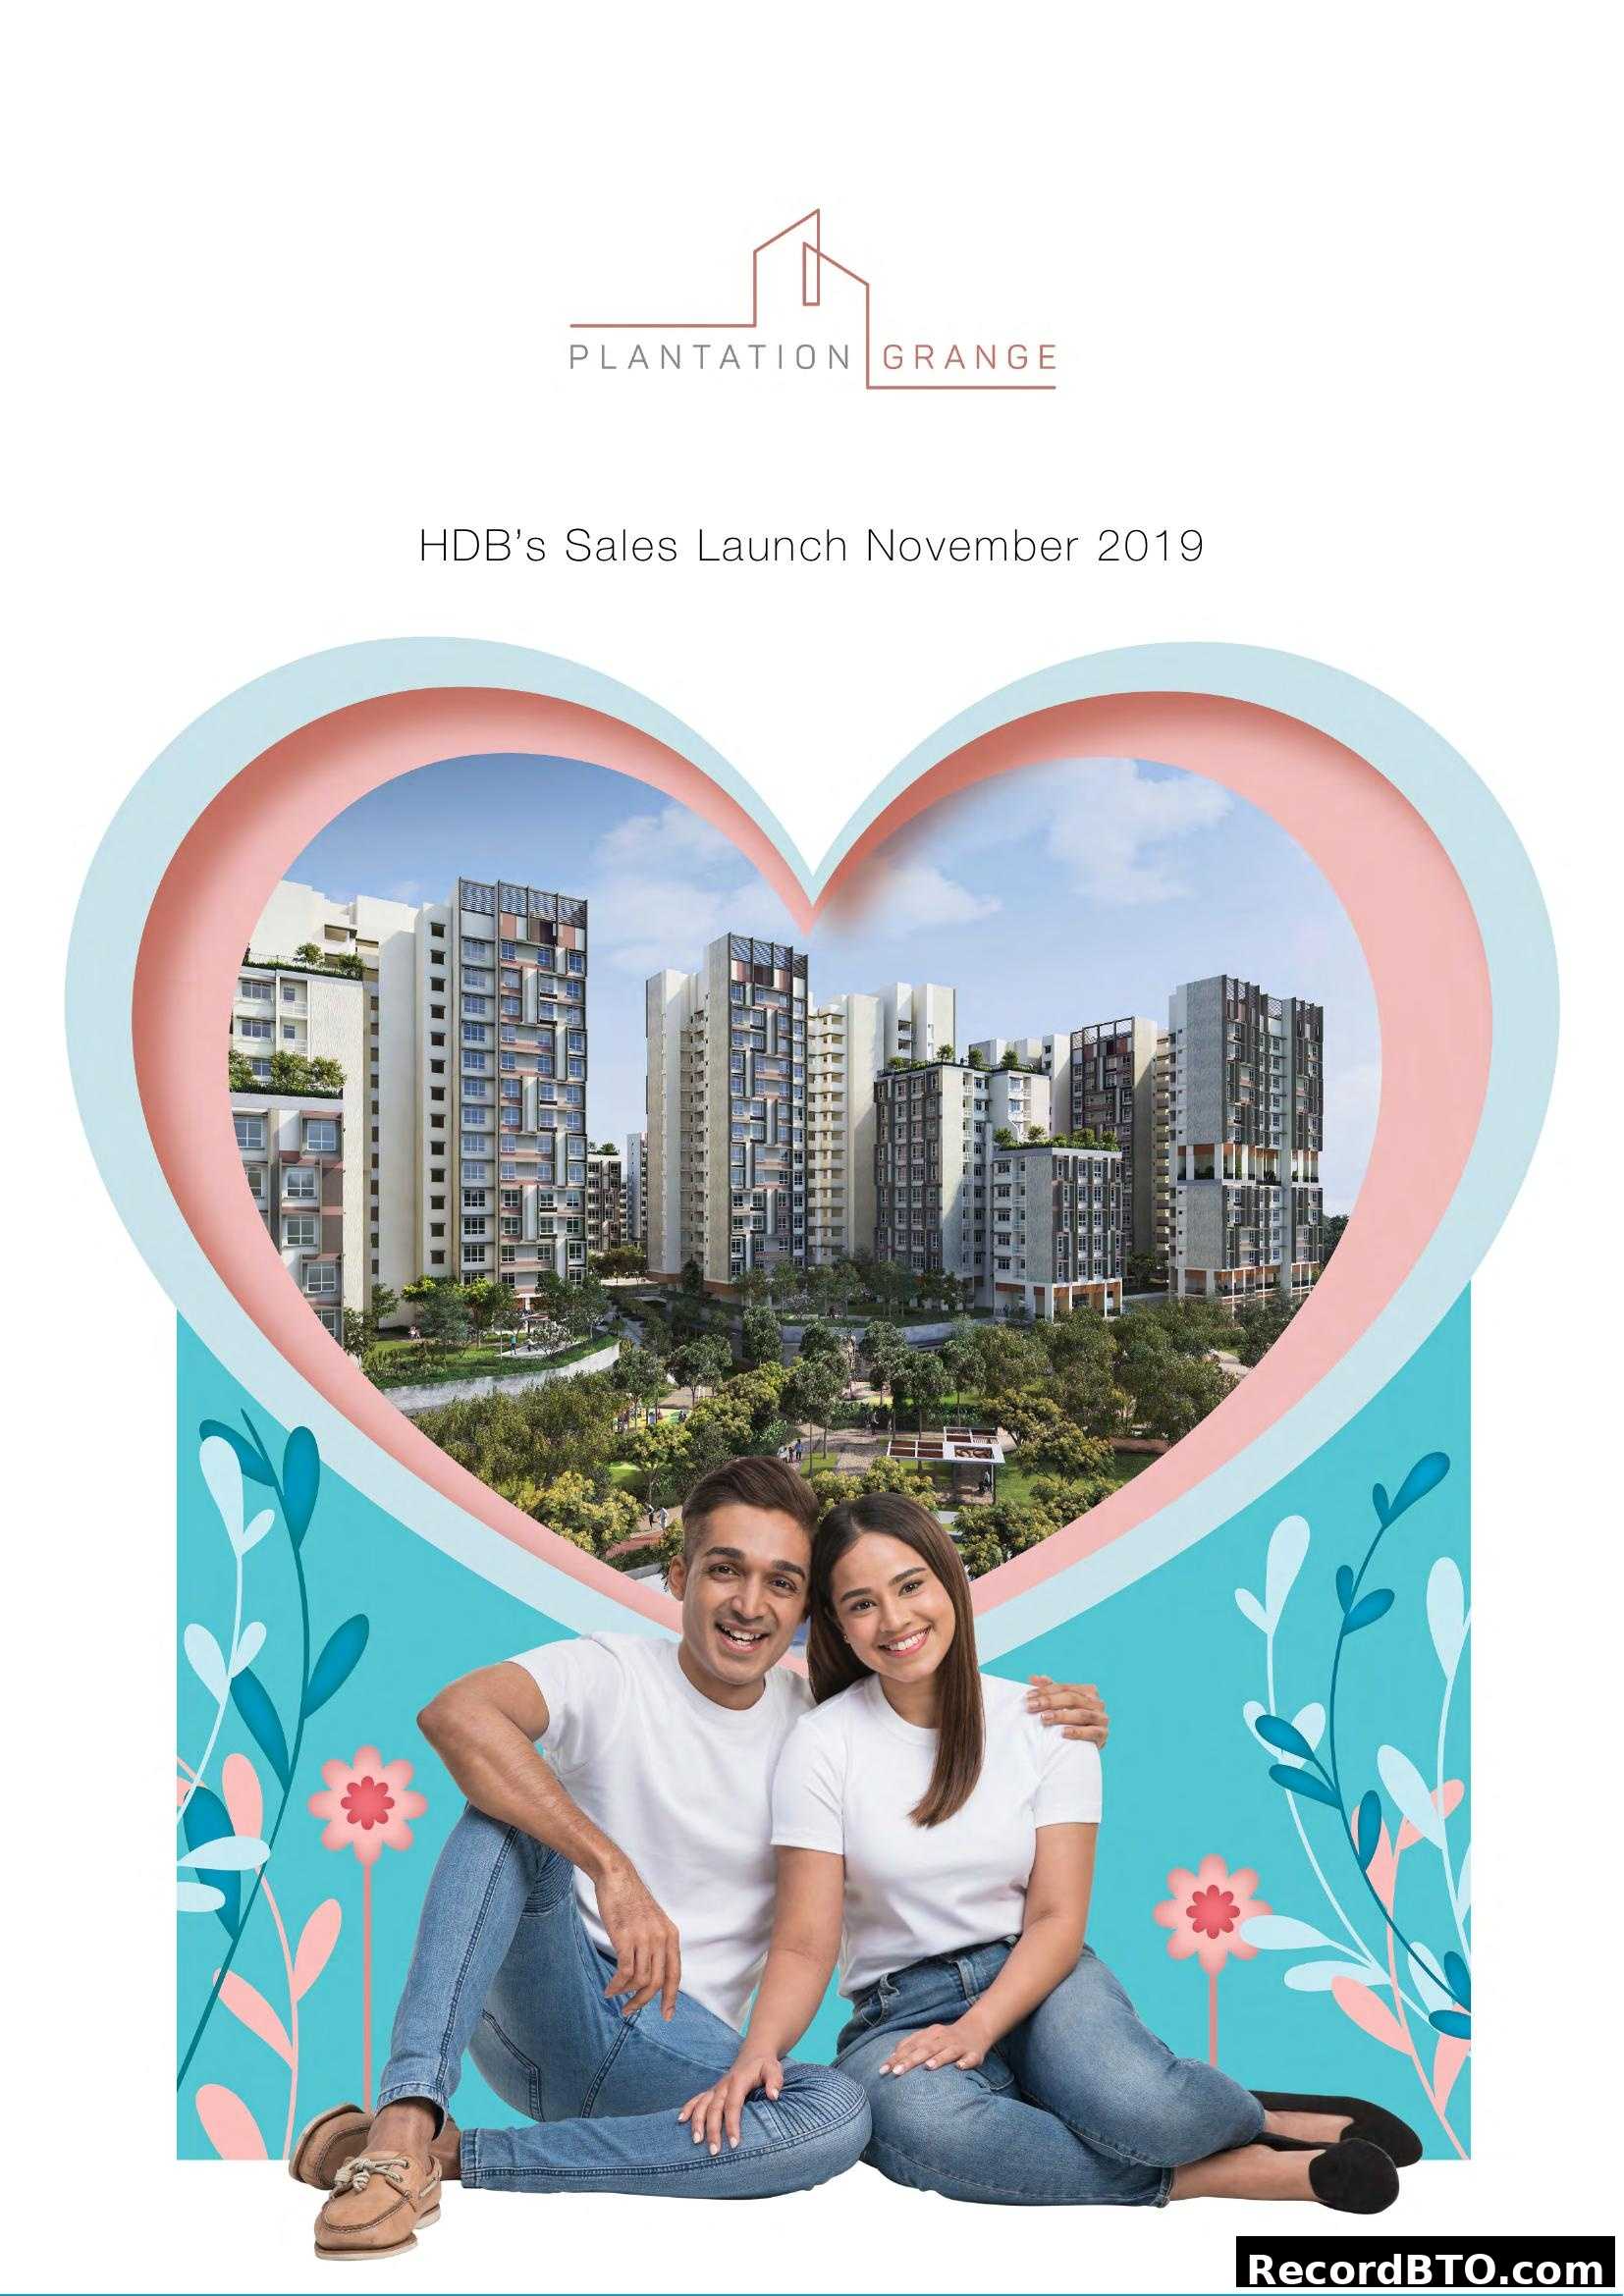
Plantation Village: HDB Sales Launch November 2019. Your Future Home in a Green, Happy Community.
Plantation Village, Tengah: Embrace nature-integrated living, fostering strong community spirit, urb
HDB Precincts: Evolving Community Needs, Amenity Planning, Flat Selection Information, and Disclaime
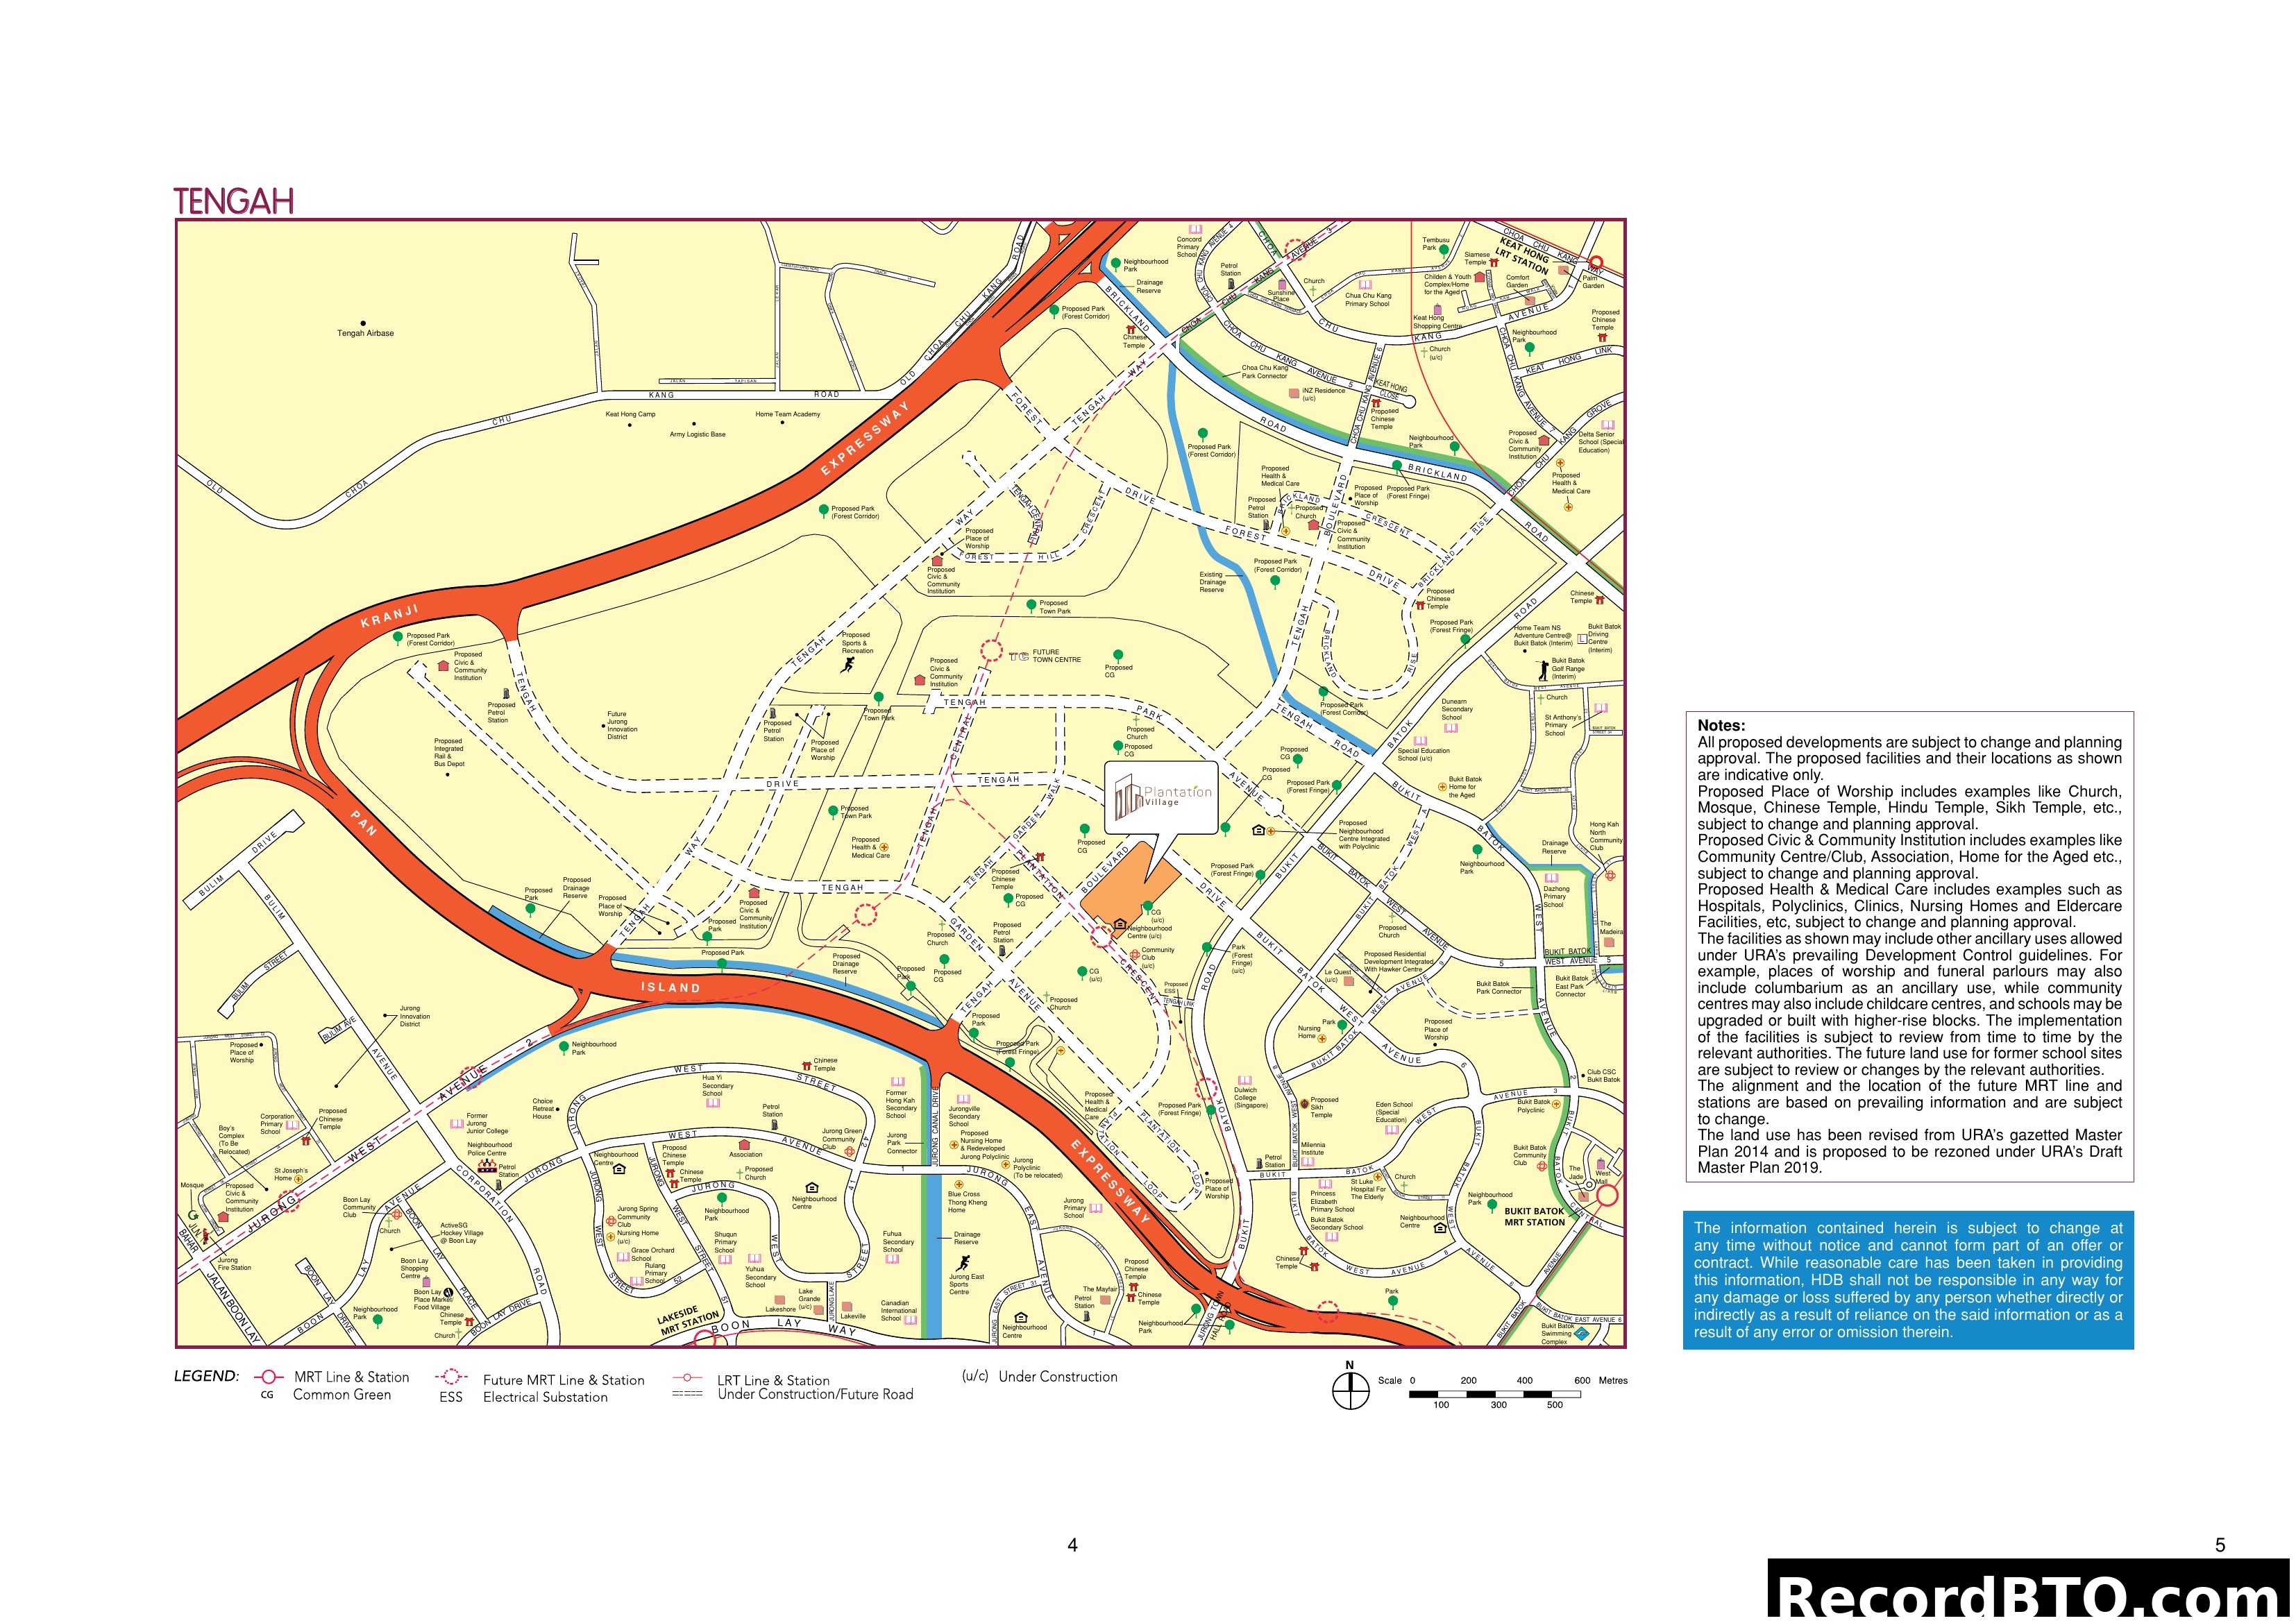
Tengah HDB Master Plan Map
A Green Haven: Tengah Town's Green Features & Smart Living